The Fresh Loaf

A Community of Amateur Bakers and Artisan Bread Enthusiasts.

Most bookmarked

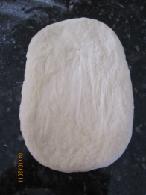
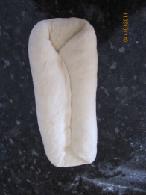
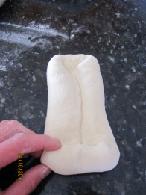
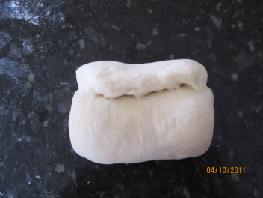
Community member Mebakes has created a few helpful diagrams showing how to shape loaves.

Bread can take just about any shape you desire, from sandwich loaves to mock turkeys. It’s hard to learn how to shape loaves from written descriptions, however. So, instead of writing up how to shape loaves, here are  links to YouTube videos that do a good job of showing how it’s done.

Before you shape the dough, you’ll want to pre-shape it first. There are two basic pre-shapes. The first, a basic oval or rectangle, is shown in the sandwich loaf video. The second, a round, is exactly the same as making a round loaf.

Sandwich loaf (Jeff, Aurora and Iris) - http://www.youtube.com/watch?v=Q_3zBaKkxMY

Oval loaf (batard) (Floyd Mann) - http://www.youtube.com/watch?v=pqzRprovXTU

Round loaf (boule) (Fourno Bravo) - http://www.youtube.com/watch?v=I5t-1sJwzFs

Baguette
http://www.youtube.com/watch?v=Idx4QJwcPHA

You’ll want a safe place for your shaped loaf to rise. Bannetons are wonderful for round loaves – you can buy these at King Arthur Flour (http://www.kingarthurflour.com). But you can also take a colander or a large bowl and line it with either baker’s linen (also at King Arthur Flour) or a linen napkin dusted liberally with either white flour or, even better, white rice flour (NOTHING sticks to this stuff – it’s great).

For an oval loaf, simply place the loaf on a dusted linen napkin or baker’s linen and bunch up the cloth on both sides. If you like, you can brace it with glasses on either side to keep it in place.

While it rises, make sure it’s covered so that the surface doesn’t dry out and form a crust.

Shaping

teketeke's picture
teketeke

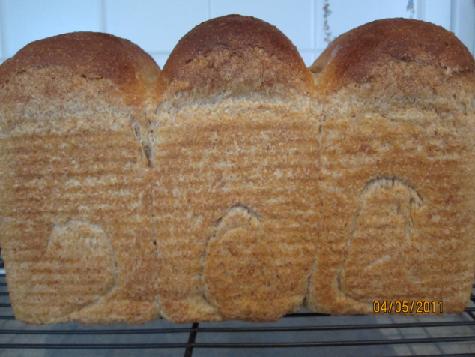
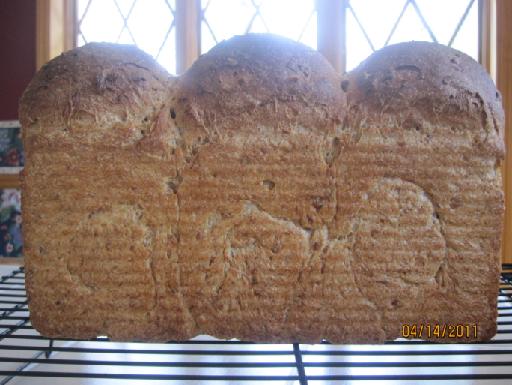
Whole wheat bread with raisin yeast water

I have tried whole wheat bread with raisin yeast water for a while. When I made a levain with 100% whole wheat flour / 100% raisin yeast water, the loaf came out quite sour.   My family disliked the loaf sadly..    Then I used dry yeast for poolish and final dough method with raisin yeast water, it came out quite good.

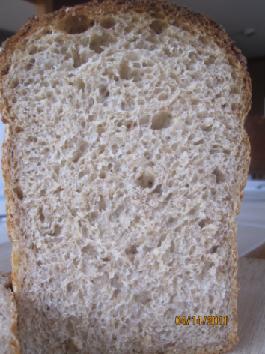
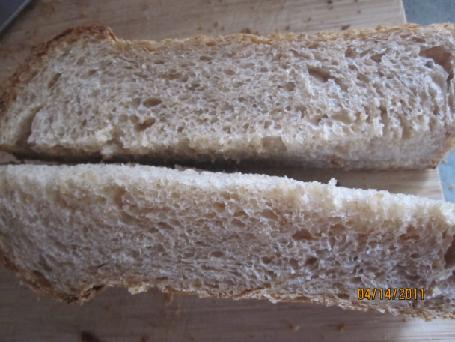
 But, I felt something was missing in the crumb.

When I saw David that used bulgur in the whole wheat bread, and read about bulgur in Andy's blog,  I thought that is it.  As I expected, It came out great.  My daughter who only likes soft white sandwich bread devoured 2 slices of the loaf.  Thank you, David and Andy.

Here is the pictues and the recipe:  I fixed the amount for this loaf on 14th April.  

My  pullman size:23cmx10.5cmx10cm After the height of baking : Around 15-16cm


Ingredients:

Poolish:

  • Whole wheat  195g
  • Water 164g
  • Dry yeast 1.8g ( I used Fleischman's bread machine yeast.  * Mix it with dry ingredients first, otherwise, it doesn't rise)

Soaker:

  • Rolled oats 59g
  • Bulgur 18g
  • Hot Water 78g

Finaldough:

  • Bread flour 189g
  • Wheat Germ 6g
  • Hoeny         7.4g
  • Molasses    5.5g
  • Raisin yeast water 122g 
  • Salt         6.4g
  • Shortening 18g

Method:

  1. Make the poolish : DDT90-95F  Mix and refrigerator for 12 hours. ( It should be risen double in bulk next morning→) 
  2. Make the soaker :  Mix and keep it at room temperature for 12 hours.
  3. Next morning: Put the soaker in a microwave for 1 minutes.
  4. Mix all the ingredients except the salt and the shortening.
  5. After the dough is well combine, Add the salt and the shortening and kead until you pass the window pane test. 
  6. Put some oil in the container, place the dough in the container.
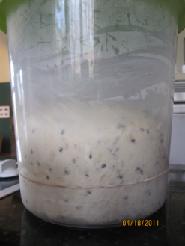
  7.  Bulk fermentation: 3-4 hours until tripled at 72-74F   
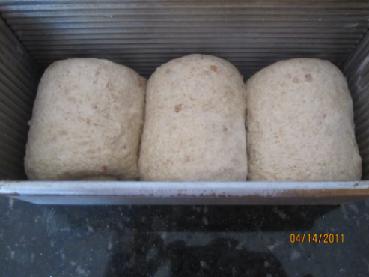
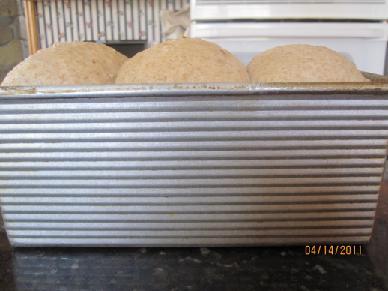
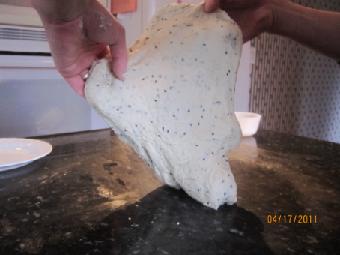
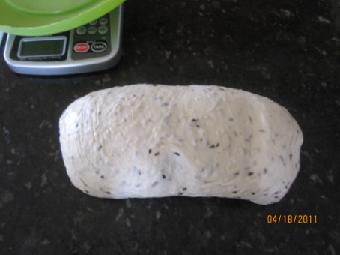
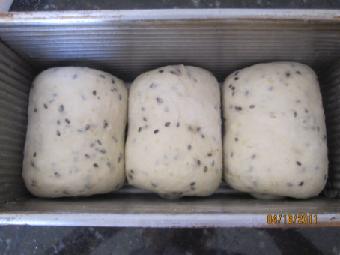
  8. Preshape and bench time 30 minutes and shape.See the shaping and molding method here: http://www.thefreshloaf.com/node/23006/goma-shokupan-sesami-loaf After I mold the dough in the pullman. Please be careful the width and the legth of the dough not to pass over your loaf pan's size.
  9. Proof : 2 hour at 82F around).The dough rose 2cm over the top of the pullman.  To make sure that your dough rises  tripled its original                                                                                                                                                                                          
  10. Bake  Use " Cold start" 

    For Electric oven:

    1.Spray water around the wall in the oven 4 times, then put the tin loaf in the oven.

    2. Set up 140℃/ 284F for 20 minutes and  bake.

    3. Increase the temperature at 200-210℃/410F for 25-30 minutes. ( I baked 20minutes at cold start  0-284F, increased 410F for 25 minutes and taking the loaf out of the pan to bake 10 more minutes. because the sides of the loaf looked little pale.)

    --------------------------------

    For Gas oven:  * Generally gas oven heats up faster than electric oven

    1. Spray water around the wall in the oven 4 times, then put the tin loaf in the oven.

    2. Set up 100℃/212F  for 10 minutes and bake.

    3. Increase the temperature at 150℃/302F for 10 minutes..

    * Note  You can ajust the time and the temperature because every home ovens are vary.

   You can see the detail here. http://www.thefreshloaf.com/node/23054/cold-start

-------------------------------------------

If I use straight method,  I will change the ingredients.   I don't have to put the soaker in a microwave to heat up the temperature to adjust the DDT. You can control it with the water.

Poolish: DDT90-95F

  • Whole wheat  195g
  • Water 164g
  • Dry yeast 1.5-2g 

Soaker:

  • Oats 59g
  • Bulgur 18g
  • Hot Water 78g

Finaldough:

  • Bread flour 189g
  • Wheat Germ 6g
  • Dry yeast    1.5-2g
  • Hoeny         11g
  • Molasses    8g
  •  water 122g 
  • Salt         6.4g
  • Shortening 18g

By the way, This formula is based on Franko's formula of "Richard Bertinet's Spelt Bread-adapted and halved    -- http://www.thefreshloaf.com/node/20057/loaf-my-wifefinally "   I have wanted to try his 100% spelt bread for a long time, again. Someday,, very soon...   Thank you, Franko.

Best wishes,

Akiko

txfarmer's picture
txfarmer

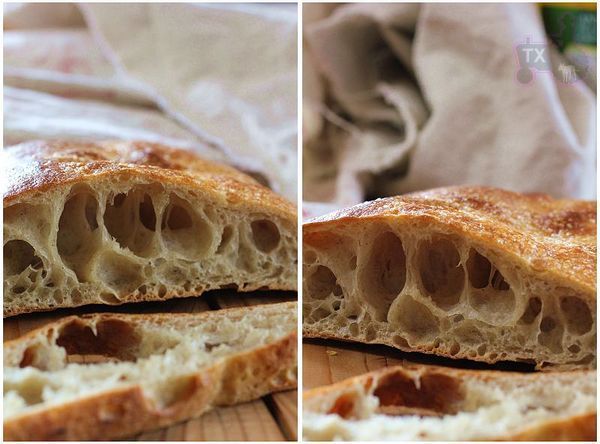
36 hours+ sourdough ciabatta - tasty but definitely not filling enough!


Dude, where's my bread?! Quite a few people have asked me whether my 36 hour soudough baguette dough can be used for other breads, of coure! The most natural vaiation is of course ciabatta, another hole-y bread. I again used a mixture of rye starter and white starter (something about this combo makes the flavor better), and raised the hydration to 85% (10% rye in the dough, so it's probably similar to a 82% hydration white dough).

AP flour, 425g

ice water, 350g

rye starter (100%), 100g

white starter (100%), 50g

salt, 10g

- to make the dough and do bulk rise follow the basic 36 hour sourdough baguette formula here

- at the end of bulk rise, dump the dough on counter, divide in half, and let rise on parchment paper for about 70 min(about 73F), until very bubbly. I actually used half of the dough to make this ciabatta, the other half to make two (insanely wet and hard to handle) baguettes. The baguette doughs got 40min rest, then 30min proof after shaping, which means they can be baked with the ciabatta dough at the same time.

- before baking, flip the ciabatta upside down and score baguettes if you are making them (nearly impossible since the dough is very wet and full of air bubbles)

- baguettes were baked for  25min at 460F, ciabatta got 30min, followed by 10min rest in a turned off oven (with the door slightly cracked)


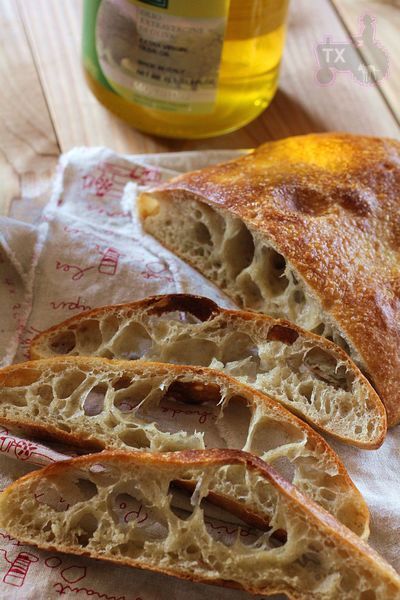
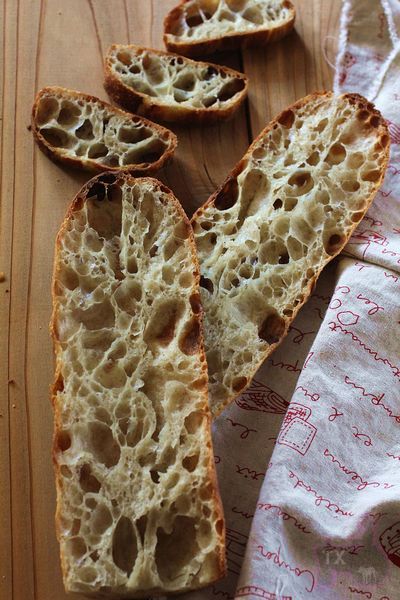
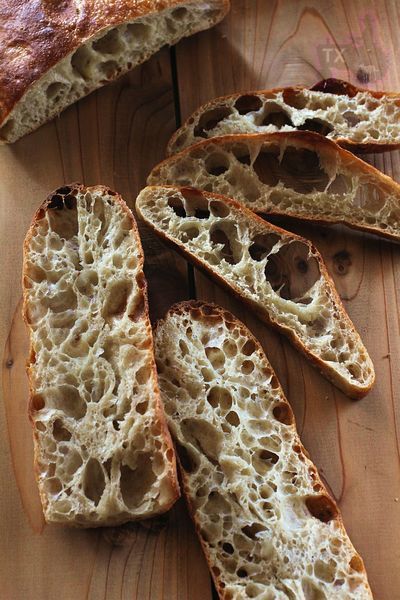
Deep dark big holes that one can get lost in


The baguettes were similiarly hole-y, however, I wouldn't recommend making baguette with such a wet dough, just a night mare to shape and score


I had some ciabatta after my weekly long run this morning. Very flavorful, but I had to eat a lot of pieces to get full!


Submitting to Yeastspotting.

teketeke's picture
teketeke

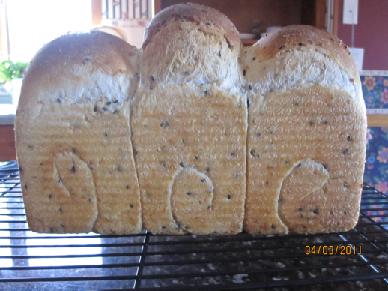
Goma shokupan ( Sesami loaf)

I have baked this loaf over and over to get my daughter who only likes white bread says " Yummy".   I finally heard some good words from her who said, " It is good! Can I have more?"  That made my day. 

This formula is adapted from the book " Coupe Junkies" which was published by 2 Japanese home bakers. 


I mentioned this book on my other post of " Amazing airly baguette" too.   There are a lot of good techniques in the book.

Here is what I used to bake the loaf that my daugther didn't eat.  My son and I enjoyed it though.  However, this loaf doesn't rise much. Especially it is in the oven. It is also little difficult to knead too that is what the book read.  To rise in the oven, they use " cold start" in the oven. I never have tried it yet. I am still afriad of using the method. I better try it very soon.

http://www.thefreshloaf.com/node/22851/20110320-akiko%E2%80%99s-japanese-white-bread#comment-163260

They don't use 2 times bulkfermentation for this loaf in the book, but I wanted to try to see how different between 1 time bulkfermentation and 2 times one.   The authors wrote that it rises more than 1 time bulkfermentation.   I didn't see the difference actually.. but I can taste the difference of the taste.  1 time bulkfermentation until tripled --- Very soft crumb     2 times bulkfermentation until tripled-- chewy crumb  /  When the dough rose only double in bulk on the second time, the crumb was really chewy.. I didn't like it at all.


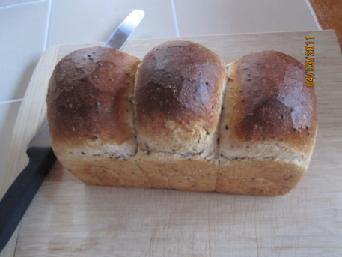
This is the loaf that my daughter is pleased with finally.

My  pullman size:23cmx10.5cmx10cm 

Ingredients:

Bread flour ( KA)  400g

Levain              120g  ( 60g KA AP/ 60g raisin yeast water )  mix and rest at 74-76F for 12 hours

Sugar        14g

Water      220g  DDT 76F

Salt     7g

Shortening   12g

Sesami   black  19g/ white 19g= 38g   ( Toasted  before adding into the dough)

----------------------

Method:

1. Mix all the ingredients except the salt and the shortening and the sesami.

2 Autolize  30 minutes

3. Add the rest of the ingredients.

4. Knead  until you pass a window pane test.

5. Bulkfermentation   6 hours at 80F ( The dough should rise triples in bulk)

6.  Divide and preshape * I made a letter fold ( degassing) taking out the dough from the container.

 * I divide the dough in 3 pieces without using any flour.

Example:

The total weight was 783g today. I divided it like this:

267g/249g/267g =Left/Center/Right

This is my way to divide the dough in 3 pieces:

The left and right dough weight: 783÷3+6=267g

The rest of the dough should be the center. 249g

7. Bench time  30 minutes

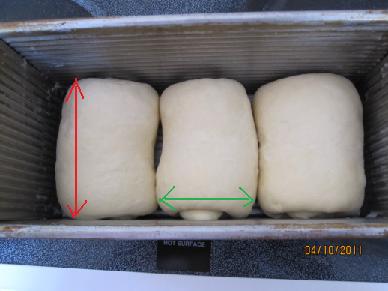
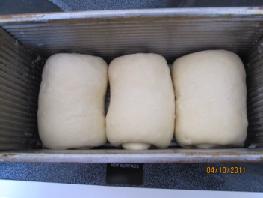
8. Shape and proof  2 hours at 82F

* After I panned the dough in my pullman.

 I waited until the dough rose over the top of the tin.

9. Bake ( Preheated 438F)    Spray water around the wall in the oven 4 times and bake at 410F for 35 minutes.  Brush some melted butter on the top of the loaf after baking.

When you use instant yeast for this loaf, I will use this straight method:

Bread flour 100%

Instant yeast 0.8-0.9%  ( I always use less amount yeast because I don't want to smell strong  brewer in bread.)

Sugar 5%

Salt 1.5-1.8% ( As you like)

Water 55%

Shortening or White sesami oil    3%  ( Using shortening will have a great result of rising  than using sesami oil)

White sesami  4.7%  Toasted before adding

Black sesami 4.7%  Toasted before adding

------------------------------------------------------------


* I tested " Cold start". You can see the result here. http://www.thefreshloaf.com/node/23054/cold-start

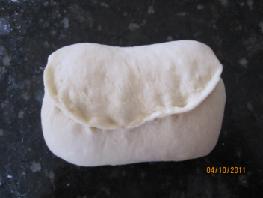
* How to shape and mold a mountain loaf:

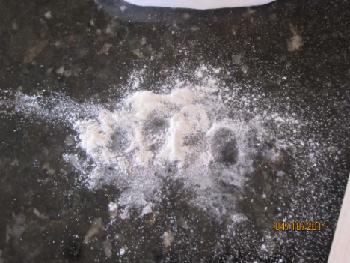
1   I use a little bit flour to shape the dough. * May be 1-2g blended flour -50% rice flour /50% KA AP flour for shaping.

 Before shaping ( I dumped less 3g AP/rice flour  on the surface)

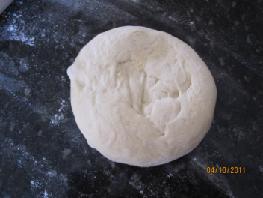
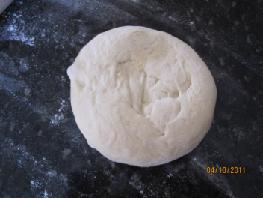
 After I panned the dough. ( I don't use much flour for shaping)

.

2

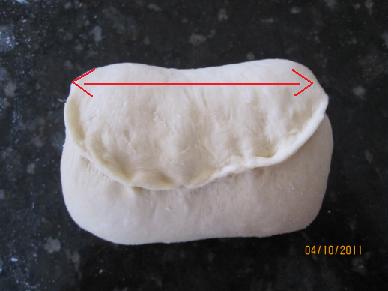
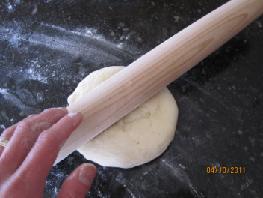
*Gently press down the preshaped ball shaped dough which is seamed up with your whole palm, and make a oval shape using a rolling pin. ( rolling from the center toward outer side to all the direction. * not only up and down )

3.

 Ready to fold.

4.

You can press the center gently after folding 1/3 from the outer side, then rolling it into a snail shell shape.

5.

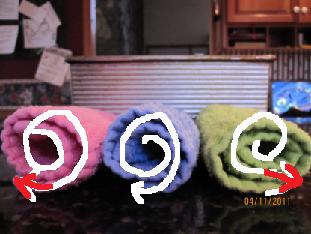
Roll it gently, but not too tight, not too loose.

6.

 Pinch the seam very well!

7.

 You should mold the dough of the direction as the picture above to rise well evenly.   * Don't forget to put the smallest dough in the center.

Note:

*If your final dough doesn't rise much enough to get cloese the top of your tin loaf pan, you don't have to wait if your final dough rises 1cm less from the top of the tin. Sometimes, my final dough didn't rise enough to the top of the tin, but I baked the dough that was under 1cm from the top of the tin. It rose quite well in the oven with " cold start".


Best wishes,

Akiko


txfarmer's picture
txfarmer

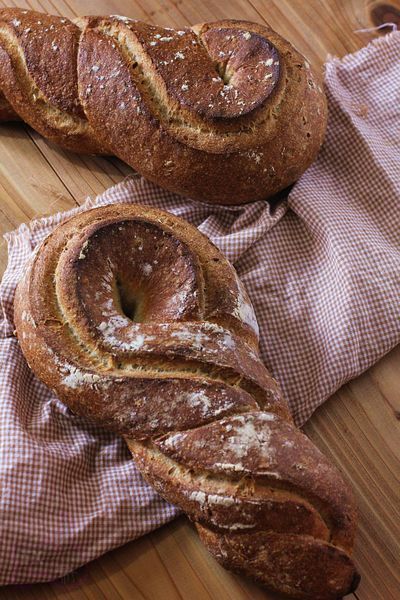
Pain Meunier - and having fun with shaping


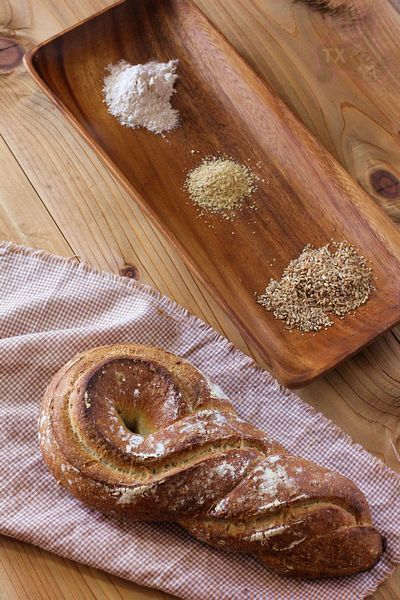
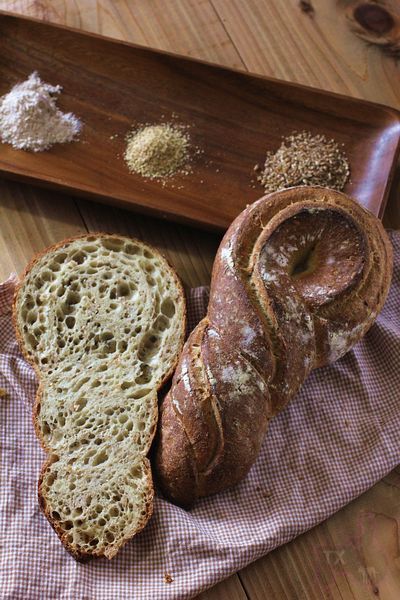
This recipe is from "Advanced Bread and Pastry". Using white and whole wheat flour, wheat germ, and cracked wheat (aka. bulgur, my new favorite bread ingredient), the bread is super fragrant and packful of flavors. I wanted to convert the formula to use sourdough, but was busy preparing for and running a half marathon last weekend, so stuck to the poolish version in the book.


In my last post, I tried some interesting shapes for baguette, this time, I tried another shaping method from the same site, you can find the video here.


Pain Meunier (adapted from "AB&P")

note: makes 2 lb loaves

-- poolish

bread flour, 241g

water, 156g

salt, 3.5g

yeast, 1/4tsp

1. mix and leave at room temp for one hour, put in fridge overnight

-- soaker

cracked wheat (bulgur), 57g

water, 57g

2. soak for at least 2 hours, I did overnight

-- final dough

bread flour, 202g

ww flour,21g

wheat germ, 11g

water, 153g

salt, 3.5g

all poolish

all soaker

3. mix together everything but soaker, autolyse for 30min, mix at low speed for 1 min, midium speed for 3min. Add soaker, mix at low speed until blended in.

4. bulk rise for 1.5hours (25C) until double, S&F at 40min.

5. divide into two parts, preshape into oval, rest for 20min, shape according to instruction here

6. proof seam down on parchment paper for 50min (25C)

7. flip the bread so it's seam side up, and bake @ 450F for 40min, with steam for the first 15min.


Really like how the shape turned out


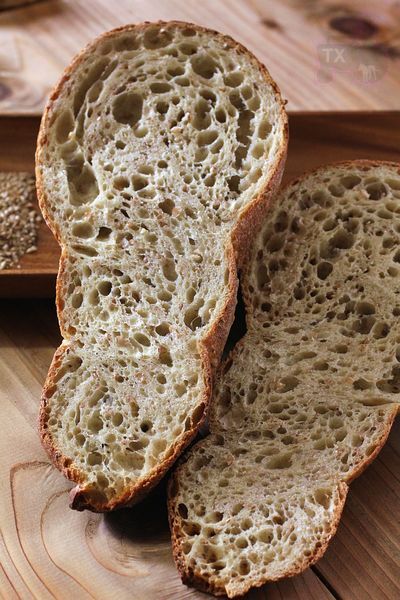
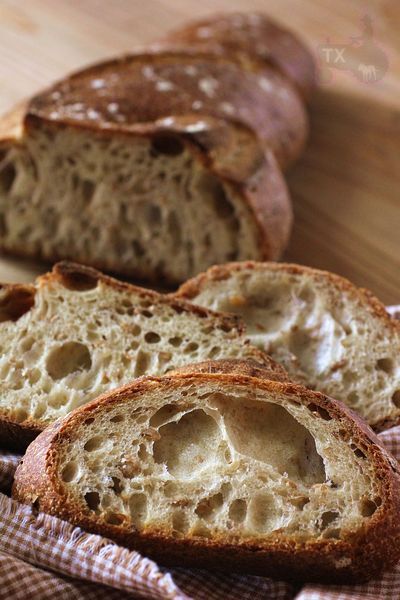
Thought all the rolling and twisting would affect the crumb, but what a pleasant surprise, full of holes and very open for a 66% hydration dough (not counting water in the soaker).


Flavor is out of this world, I REALLY like the combo of ww and cracked wheat. For my sandwich loaf, I soaked crack wheat in hot water(about 2 hours), this time in cold water (overnight), I can't really tell the difference. Both method soften the grain without turning them into mush.


Plan to make this one again very soon, probably a sourdough version. Oh yeah, the half marathon went well too. I finished in 1:45, crossing the finish line with my running partner, very good race.


Submitting to Yeastspotting.

txfarmer's picture
txfarmer

Kasutera (Castella) cake - thinking of Japan


Castella cake is a famouse Japanese dessert, it's essentially a sponge cake, raised solely by egg foam, with no butter or oil. It's soft yet slightly spongy texture, subtle sweet tastes appeals greatly to Chinese people, so this cake is very popular in China. Like everything in Japanese cooking, they have elevated this cake into an art form. The crumb is so even and delicate that it's pore-less, the bottom and top are flat with not a ripple, the taste is a delicate balance between honey, milk, and Aji Mirin(Japanese sweet rice wine, you can find it easily in any Asian market, if not, you can replace it with brandy or other liquor.). I make this cake often at home, using a traditional wood frame. Wood deducts heat slowly, which helps to bake the cake evenly, however, it can also be made in a metal or glass tin. Unlike most cakes, this cake is made with bread flour, not cake or AP flour, to obtain that "spongy" texture. For backgaround and a good recipe for this cake, please refer to this wonderful blog post, my recipe is different form hers, however, I did learn some critical techniques there.

The key to a successful castella cake is in the beating of the eggs, if you have made genoise before, the process is quite similar. If not, refer to this wonderful recipe, Rose has outlined exactly what needs to be done for a good genoise sponge cake, the same lesson can be applied here. Other than the egg beating, you might also need to experiment with tin size, and baking time to get the cake perfect, however, the effort is well worthwhile. I thought this is a fitting homeage to Japan and its people, given what they have been going through.


Castella (adapted from various sources)

Note: my wood frame is 14cm×24cm×8cm, it's made entirely with wood with no metal nails. A similar sized metal tin would work just fine, however the baking time will be MUCH shorter.


egg, 4

sugar, 110g

bread flour, 100g

honey, 2tbsp

milk, 2tbsp

Aji Mirin(Japanese sweet rice wine), 1tbsp


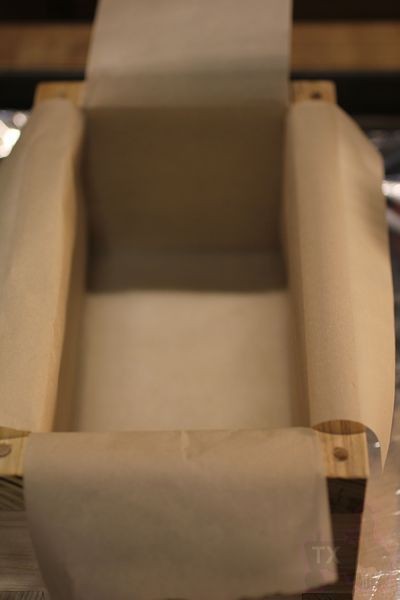
1. If you do use a wood frame, it needs to be pre-processed: wash then soak in water overnight, dry, bake in oven at 350F for 30min. This step would eliminate odor from the wood. To use the wood frame, put it on a baking sheet lined with aluminium sheet (the wood frame has no bottom), then line the inside with parchment paper. if using other tins, also line with parchment paper.
 

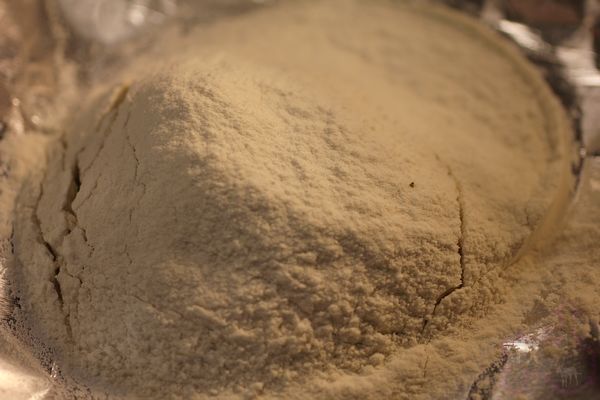
2. shift the flour 3 times. Yes, I know shifting is a lot of work, and do it 3 times is a hassel, but it makes a wold of difference in the crumb of the cake, so just do it! In fact the same thing can be said for pound cakes and sponge cakes, I didn't shift before, now I am a believer.
3.mix honey and milk, boil, mix until honey completely dissolves, set aside. (the bottle in the picture below shows the sweet rice wine)


4. Mix eggs and sugar, hold it over a pot of boiling water (bottom not touching the water), while mixing by hand, for one minute. This step is to warm up the eggs, to ensure a stable foam later on. Now remove from the boiling water pot, use wire attachment on a KA mixer, beat at high speed for 5 minutes, by the end, the mixture is thick, triple by volume, and very pale. Droplets should not disappear into the mixtured for at least 10 seconds when dropped from the beater. Yes, beat teh full 5 minutes, it may look ready and thick enough at the 3rd minutes, but it's infact not, you MUST mix at the highest setting for the full 5 minutes! Drop to medium speed and beat for another 2minutes, this is to stablize the foam structure. (note, if you don't have a stand mixer, you can beat the eggs with a handheld mixture for MUCH LONGER, something like 10min at the hightest speed. If you beat by hand, well, I hope you have good arm strength!)

5. Add the honey/milk mixture, beat at medium speed until blended in. Add sweet rice wine, beat at medium speed until blended.

6. Add flour in 3 batches, mix by hand to ensure no dry spots. Then mix at medium speed for about 3 minutes. This is unusual for caking making, usually we try not to overmix after adding flour, however, this cake requires a lightly spongy texture, that's why we use bread flour and mix quite a bit to develop some gluten. This is also why we really need a well developed and stable egg foam, otherwise after flour addition and mixing, a lot of foam would be destroyed.

7. Pour into tin, about 75% full, use a chopstick or toothpick to draw "Z" several time to eliminate any big bubbles.
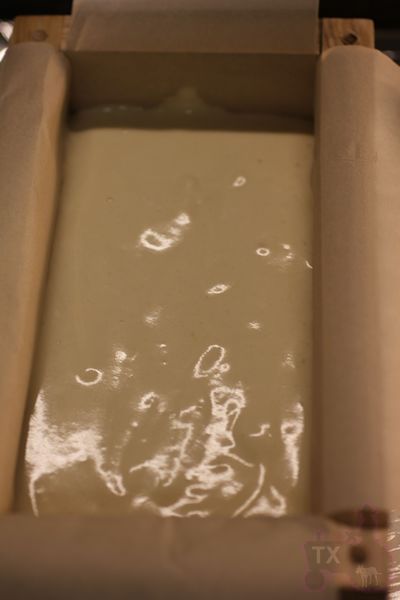
8. Bake at 340F for 70min, if the top gets too dark, cover with foil. Note that due to the wood frame, my cake bakes for a long time, if you use a metal tin, it will be ready at around 50 min. The cake would slowly rise to the top, then slightly dom over during the baking process. When the top feels firm and the cake just starts to shrink back, it's ready (this is exactly like a genoise cake). The cake MUST be fully baked, otherwise it will shrink and collapse out of the oven.

9. Take out, brush with some melted honey, cover the top with plastic, flip over (so it's upside down), slip the whole thing into a sealed bag, and fridge immediately. It needs to be sealed and fridge while warm to retain moisture. It needs to be cooled upside down to avoid uneven (denser) layer at the bottom.
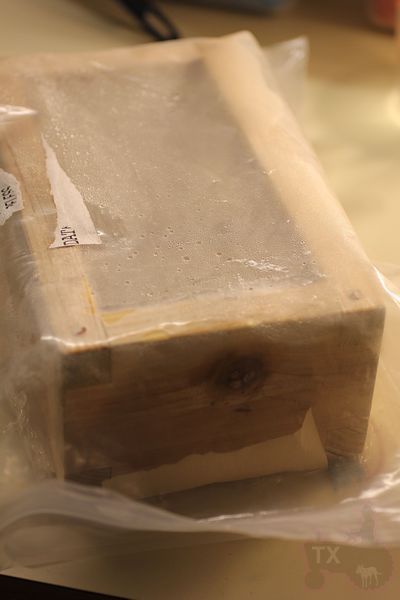
10. After 8 hours, take out, flip again so the top is up. The cake should be even height with the wood frame, no sinking, no shrinking. There will be some wrinkles on the side due to the parchmentpaper, this is normal.
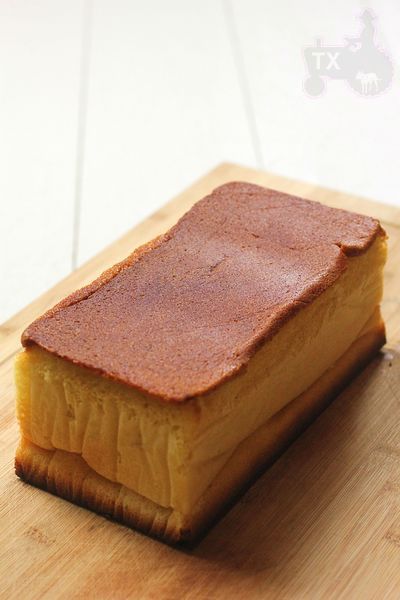
11. To server, use a sharp thin blade knife to cut off the sides, then cut into thick slices.
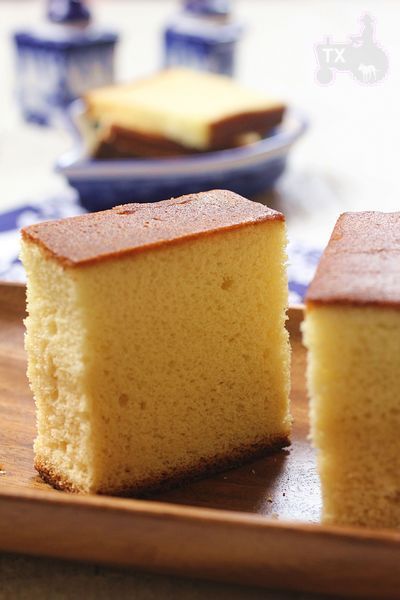
 

A good castella cake should be smooth, delicate, yet have a bit of bounce.
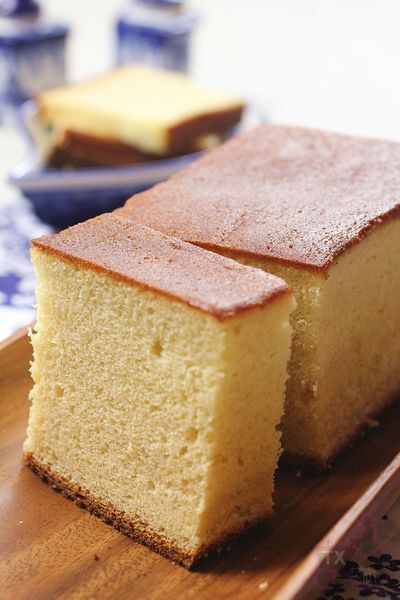
 

Sweet and subtle, perfect with some green tea.

mrmambo's picture
mrmambo

Help Needed: Increase height for Po-Boy Loaf recipe

Hi: I’m looking for a way to increase the lift in my home-baked po-boy loaves.

I’ve been using this recipe, from NOLA.com; it’s based on Lee Bailey’s great recipe:
http://www.nola.com/food/index.ssf/2011/03/alley_2.html

It works well, but is about twice as dense by weight as the real Leidenheimer loaves I brought back from New Orleans recently. Tuesday I went to their site and tried to construct a recipe based on the ingredient list and Nutrition Info:
http://www.leidenheimer.com/facts.htm
I based the technique on the one in Lee Bailey's recipe and by looking at some Peter Reinhart white bread recipes.

It worked okay, but is only about 1” high when the real stuff is closer to 1.5”. Plus, mine was only 11” long instead of 12”, so it really needs to be taller/fluffier.

My attempts at home-made dough enhancers Included adding (to the 65g of KA bread flour per 12” loaf):

  • skim milk instead of water
  • 5g (abt. 2 tsp) of Vital Wheat Gluten (Hodgson’s Mill)
  • ¼ tsp of vinegar (same amount of yeast, per advice)
  • high hydration rate: about 77%

Their ingredient list shows wheat gluten plus ammonium sulfate and calcium sulfate as “yeast nutrients”, hence my attempts at dough enhancing.

Part of my motivation, too, is to get the calories down; the NOLA.com recipe is about 360 calories per 6” loaf vs. only 150 calories for the same from Leidenheimer.

Any advice would be much welcomed; I can provide any details you seek.

Thanks!

-Mark-

p.s.: Here was Tuesday's attempt; list of ingredients and baking %:


  • KA Bread Flour 65.0g 100.0%
  • Water 8.0g 12.3%
  • Sugar 1.0g 1.5%
  • Soybean Oil 3.0g 4.6%
  • SAF Instant Yeast 1.0g 1.5%
  • Salt 1.3g 2.0%
  • Skim Milk 42.0g 64.6%
  • Vital Wheat Gluten 5.0g 7.7%
  • Vinegar 1.0g


Syd's picture
Syd

Soft, tender-crumbed, Sourdough


Glenn, inadvertently, threw down the gauntlet this week when he asked a question in his post: How to get a light and tender crumb in sourdough.  I took up the challenge (even though I know Glenn didn't mean it that way) and in the process got diverted from what I had originally itended to bake this weekend. 

Initially, I considered adding milk and some form of shortening, but on re-reading Glenn's thread I realised he didn't want the dough to be enriched in any way.  So flour salt and water it is.

I am pretty happy with the result and I think the following all contributed to its success:

  • a low protein bread flour (11.5%)
  • a higher hydration than usual
  • the water roux method
  • extensive kneading
  • lower bake temperature and shorter bake time

Water Roux

30g bread flour (11.5% protein)

150g water heated to 75 C

Dump flour into water.  Stir until smooth.  Cover tightly with cling film.  Allow to cool to room temp.  Refrigerate overnight.


Sourdough Starter

30g ripe sourdough starter @ 100% hydration

50g WW flour

10g rye flour

60g water

Mix until smooth and leave to ferment for about 8 hours or until just about to peak.


Main Dough

180g water roux (pass it through a sieve if there are any lumps)

150g sourdough starter @ 100% hydration

170g water

1 level tsp diastatic malt

Whisk the above until well incorporated.  Now add:

420g bread flour (11.5% protein)

Mix to shaggy mass.  Autolyse for 50 mins.  Now add:

9g salt

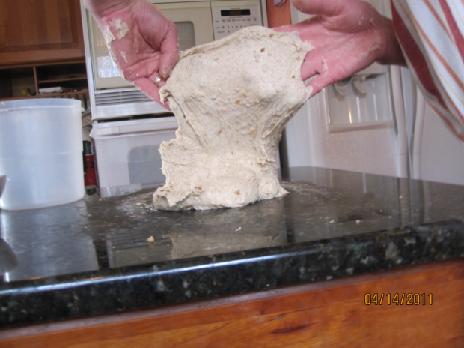
Now you have to knead until you get a really good windowpane.  I don't have a stand mixer, so that meant hand mixing for a long time.  I didn't time it exactly, but if I had to guess, I would say that I spent anywhere from 30 to 40 minutes kneading.  If I had a stand mixer I would have developed the dough even more, but I don't and I was getting tired, so I stopped. Unfortunately, there was no one on hand to help me take a pic of that windowpane. Pity, because I can't see myself doing that again in a hurry.  Of all the changes I made to my regular recipe, I think the additional kneading made the least difference.  Perhaps after all that time it still wasn't developed enough.  Maybe I would have noticed a bigger difference if I had used a mixer.

Bulk Ferment

2 hours with S&F at 50 and 100 mins respectively

Pre-shape.  Rest 20 mins.  Shape.  Retard overnight.  Usually, I three quarter prove before I retard, but it was getting late, so this one went straight into the fridge.

Bake

210 C with steam for 20 mins.  190 C without steam for 25 mins.  Usually, those temps would be 230 C for 20 and 200 C for 35 mins.  Then I would switch the oven off and let the bread dry out with the door cracked open for another 5 mins.  This time I didn't do that because I didn't want the crumb to get dry.  The internal temp was 209 F.

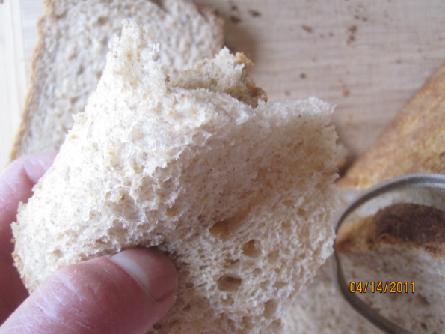
The crust was a bit thinner than usual due to the reduced baking time and lower temperatures.  The crumb is beautifully tender and moist.


This is a nice tasting bread with a mild, but surprisingly evident, wheaty flavour despite there only being 50g of WW in the recipe.

Syd


GSnyde's picture
GSnyde

Some Spice Breads – One Sweet and One Savory

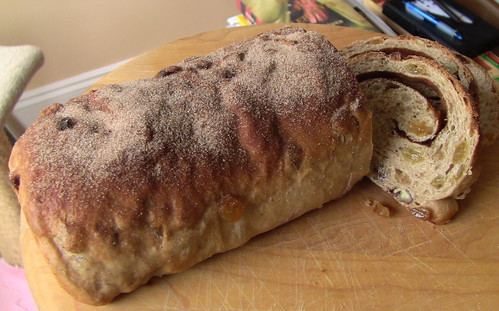
A drizzly weekend seemed like a good time to fill the house with the aroma of spices.   It started out with the need to replenish our supply of Cinnamon-Raisin-Walnut Bread, my Number One Bread Fan’s favorite.  Then, I wanted to bake something really special to take to our friends’ new house for a pre-dinner snack and cocktail.   I settled on making a second attempt at the Cheese-Curry-Onion Bread from The Cheese Board Collective’s cookbook.

Cinnamon

IMG_2222

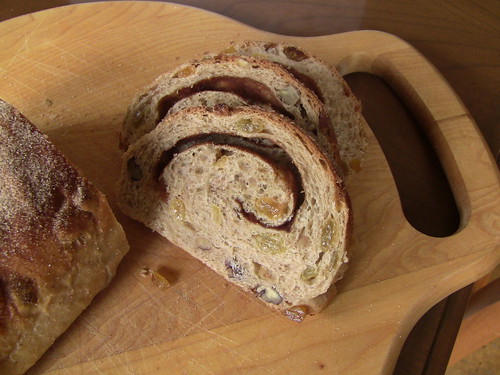
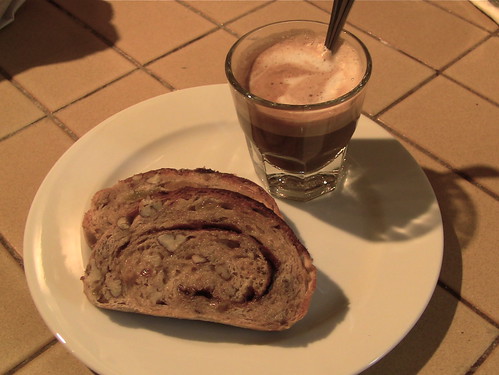
Peter Reinhart’s Cinnamon-Raisin-Walnut Bread may be the bread I’ve baked more times than any other.  It’s a real treat every time.  I usually use a mix of walnuts and pecans, and use butter in place of shortening.  And this time I decided to try it with 25% whole wheat flour, since we’ve been enjoying the flavor of whole grains lately.  Besides, we have declared that whole wheat makes this a health food, so we can eat it even more often without sugar-guilt.

IMG_2223

A well-balanced breakfast.

IMG_2232


Curry

IMG_2230

At the beginning of my baking education, I started on sourdough.  The first straight dough bread I made was the Cheese-Onion-Curry Bread from Berkeley’s Cheese Board Collective.  As I reported back in September, it is a bread with very special memories of my gradual school days in the ‘70s.  So when my wife--as if reading my mind-- gave me The Cheese Board Collective Works as a birthday present, I immediately tried to bake a batch of taste memory.  We loved it, and now six months later, I can’t believe I haven’t baked it since.  It was time.

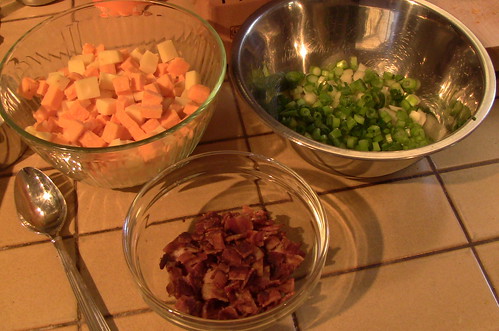
In the interim, I’ve read a lot of recipes here at TFL and elsewhere that use cheese, onions and bacon in various combinations.  They usually make me drool.  I decided to vary the Cheese Board’s recipe a bit.  I used a combination of yellow onions and scallions, and I added some fried bacon (in our house, we call it Vitamin B), since almost everything with cheese and onions is better with bacon.

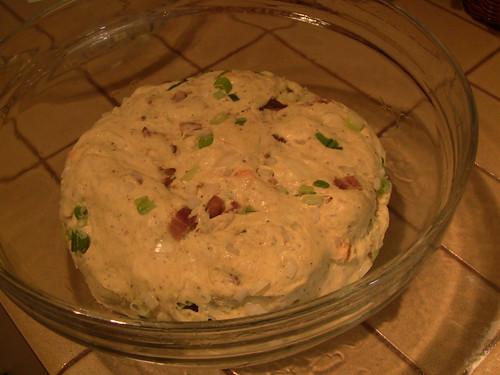
This bread is a complete meal.   You start with a simple yeast bread dough with curry powder and pepper.  Then add onions/scallions, chopped bacon and a full pound of cubed cheese.  I used a combination of Sharp Cheddar, Jarslberg and Gruyere. 

IMG_2214

IMG_2215

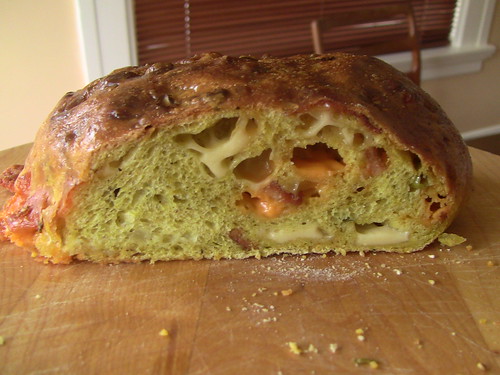
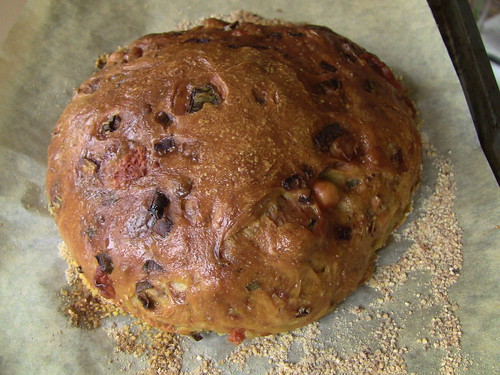
The amount of chunky stuff in the dough makes it impossible to form a smooth-skinned boule, so the loaf flattens out some in baking, but holds together with some luck.  It's not a real pretty bread, but my, my, what flavor!

IMG_2231

The best part is the pockets of molten cheese interspersed with the strongly cheese and curry flavored moist and tender crumb.  I think the bacon flavor is barely noticeable, but my wife tells me it's there and it's good.  She suggests dialing back the curry a bit so the bacon flavor comes through more.  I may try that.

This is a recipe worth trying if you’re looking for a hearty meal in a loaf.  I highly recommend The Cheese Board Collective Works (http://www.amazon.com/gp/search?index=books&linkCode=qs&keywords=1580084192). It's got lots of recipes for breads and morning baked goods, too.

Here’s my variation on the recipe:

Cheese Scallion Bacon Curry Bread

(adapted from Cheese Onion Curry Bread in The Cheese Board Collective Works)

Ingredients

4 cups  Bread Flour  570g

1 ½ tsp Instant Yeast 5g

1 ½ tsp Black Pepper 3g

1 ½ Tbsp Curry Powder 4g

2 tsp Kosher Salt 12g

1 ¾ cups Lukewarm Water 400 g

6-8 slices Bacon, cooked and chopped

½ yellow onion plus  6 Scallions, chopped

1 pound Mixed Cheeses*, cut into ½ inch cubes 

Medium yellow cornmeal (for sprinkling)

1 Egg, beaten (for glaze)

-------------------

* Any firm flavorful cheeses will do.  I used a combination of sharp cheddar, Jarslberg and Gruyere.  If you don’t want molten pockets of cheese in the bread, you could grate the cheese.


Procedure

In a mixing bowl, combine flour, yeast, pepper, curry powder and salt.  Add water and mix until ingredients well combined.

Transfer to lightly floured board and knead until smooth and silky (10-12 minutes)

In a small bowl, toss onions and scallions with 1/2 Tbsp of flour and mix.

Flatten the dough to a one-inch thick disk and add scallions and bacon to the center.  Gather the dough around the scallions and bacon and knead to incorporate (2-3 minutes).

Again flatten the dough and add cheese in center.  Gather up the dough around the cheese and knead to incorporate.

Form the dough into a ball and place in an oiled bowl large enough for dough to double.  Turn the dough to coat with oil.  Cover the bowl with plastic wrap or a damp cloth.  Let the dough rise until doubled (about 60-90 minutes at room temperature).

Sprinkle cornmeal on two baking pans.

When dough has doubled, place it on a lightly floured board and divide into three equal pieces.  Shape each as a loose boule, cover with a floured dish towel and let rest for 10 minutes. (Note: with the chunks of cheese, there’s no way to get a smooth taut sheath on the loaf.  Don’t sweat it).

Shape each ball into a boule and place on baking pans dusted with corn meal (I used parchment between the pan and the cornmeal).  Cover the loaves with a floured dish towel and let rise until increased in size about 50% (or use poke test).  This takes about 60-75 minutes at room temperature.

Pre-heat oven to 450F.

When loaves are proofed, brush with beaten egg and bake (Note: no need to slash and no need for steam).

After 10 minutes at 450F, lower temperature to 400F.  Rotate baking pans as necessary to achieve even browning.

Bake a total of 35 – 40 minutes or until crust is golden brown and loaf sounds hollow when tapped on the bottom.

Remove loaves to cooling rack.  Eat when not quite cool (45 minutes).

Enjoy!

Glenn


Submitting to Yeastspotting.

Syd's picture
Syd

Light Whole Wheat Batard

Light Whole Wheat Batard

150g starter at 100% hydration

275g water

80g whole wheat

20g rye

350g bread flour (11.4% protein)

10g salt


Autolyse (with starter) for 50mins.  Add salt. Knead by hand until salt is incorporated.  Bulk fement 2 and a half hours with folds at 50 and 100 mins.  Divide in two.  Preshape.  Rest 20 mins.  Shape into batards.  Allow to proof to about three quarters of final size. Retard overnight in fridge.  Remove from fridge and allow to complete final proof.  Bake at 230C with steam for 20 mins and at 200 without steam for 20. 


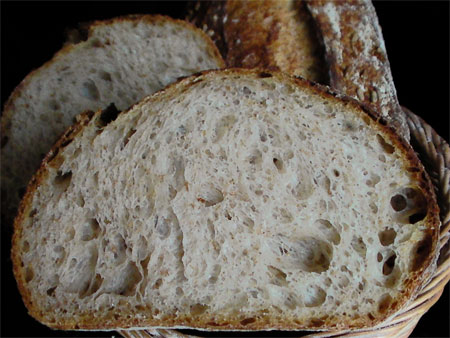
And the cross section.


I am becoming convinced of late that sourness has more to do with the acidity of the starter prior to mixing than it has to do with length of bulk ferment, hydration of starter or retardation of dough.  I have retarded loaves overnight that haven't had the slightest hint of sourness and I have made loaves where the entire process took no longer than eight hours that were mouth puckeringly sour.  The above batards were made with a starter that had definite acetic overtones and the tang is evident in the baked loaf.  When I opened the jar to use the starter the acetic tones were actually quite overpowering, but after I gave the starter a good stir the fruity notes took over so I would only classify this as slightly acid.  The baked bread has only a very mild tang.  But I have baked bread with starters that have very strong acetic smells and the final product is really very sour.  Invariably these breads can only handle a short bulk fermentation and final proof before gluten starts to break down. 

Syd

Pages