The Fresh Loaf

A Community of Amateur Bakers and Artisan Bread Enthusiasts.

Most bookmarked

hanseata's picture
hanseata

Sprouted Spelt Bread - a Variation of a WGB Recipe
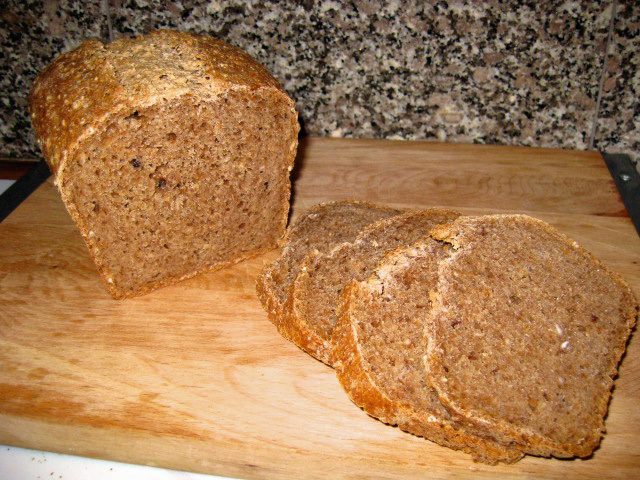
I made this variation of Peter Reinhart's "Whole Wheat and Sprouted Grain Bread" (from WGB) with spelt - I had just bought a 20 lb bag of spelt kernels, and generally like the taste of spelt better than of whole wheat. Instead of a biga I used a starter, added an overnight cold bulk fermentation, and coriander for a hint of spice. The bread rose quite nicely and tasted very good.

SPROUTED GRAINS
175 g spelt kernels
350 g water
 
STARTER
63 g whole wheat mother starter
191 g spelt flour
142 g water
 
FINAL DOUGH
283 g sprouted spelt kernels
all starter
57 g spelt flour
14 g vital wheat gluten, (optional)
8 g salt
7 g instant yeast
21 g honey
14 g butter, melted, or vegetable oil
⅛ - ¼ tsp. coriander, ground, (optional)
57 g water , (saved from soaking grains - add slowly, it might be too much)


DAY 1

Rinse spelt kernels and soak them with water for 12 - 24 hrs., at room temperature.


DAY 2

MORNING:
Drain grains over a bowl (save water for final dough). Rinse soaked grains, cover, and let sprout at room temperature. Little tails should appear within 3 - 6 hrs (if not, rinse and drain again). As soon as little tails show, sprouted grains are ready to use. Use or refrigerate immediately.

Prepare starter, and let sit at room temperature.

EVENING:
Grind sprouted grains to as fine a pulp as possible (food processor). Beware of overheating, if pulp begins to feel warm, stop and let it cool for 10 min. before continuing.

Combine sprouted pulp with starter, spelt flour, wheat gluten (if using), salt, yeast, honey, butter, coriander, and 1/4 cup/57 g of the soaking water. Mix at low speed for 1 min. with dough hook to bring ingredients into a ball, adding more water or flour as needed.

Continue mixing for 4 min at medium-low speed, scraping down walls of bowl occasionally (dough will be a sticky ball). Let dough rest for 5 min., then resume kneading for 1 min. Dough should be soft, supple and very tacky.

Transfer dough ball to oiled bowl or 1-quart plastic container, rolling it around to coat with oil. Cover and refrigerate overnight.


DAY 3

Remove dough from refrigerator 2 hrs. before using.

Preheat oven to 425 F/218 C, with steam pan. Shape dough into sandwich loaf (or bâtard) and place in greased 4 x 8.5" loaf pan. Cover, and let rise for 45 - 60 min. at room temperature, until it has ca. 1 1/2 times its original size.

Place bread in oven, pour 1 cup boiling water into steam pan, and bake at 350 F/177 C for 20 min. Rotate loaf 180 degrees and continue baking for another 25 - 30 min. (Internal temperature should be at least 200 F/93 C).

Remove bread from loaf pan and let cool on rack for at least 1 hr. before serving.

davidg618's picture
davidg618

Sourdough Biscuits: trying for the real thing, Take 2

I've been thinking about the Yukon Gold Rush miner. You'll recall, to preserve his sourdough mother--he called her Maude, after the first girl he'd ever kissed--and caught in a Yukon white-out, miles from camp, weak from having not eaten for four days--he'd boiled the last of his dogs, King, six weeks earlier--he'd kissed Maude one last time, placed her next to his heart, curled his emaciated body around her, and lay down in the lee of a a twelve foot drift. His last thought--really a final hallucination--he was lyin' in a tub, just like the one he'd had his last bath in, seven months past, in San Francisco, the night before he'd boarded the ship, Lily Longstockings, that brought him on the first leg of this, his final journey. The woman scrubbing his back was named Shirley. For a fleeting moment he'd considered changing Maude's name to Shirley, but in the next moment he'd berated himself for being so fickle. The tub, the one in his hallucination, was foaming with sourdough starter--only his knees poked above its writhing, bubbling surface. The  woman scrubbing his back this time, was...yep, Maude, but all growed up, an purty! He died a happy man. And, as we know, Maude survived --his starter, not the girl he'd kissed behind the one room school house they'd attended. She, was still in Kenosha, Wisconsin, the mother of seven children, four girls and three boys--and, rumor has it, Maude, the starter, is still alive today.

I fed my (unnamed) starter yesterday. I keep two versions. Once again I had about 200g of discard. My wife asked me to make biscuits with it. On my first attempt, http://www.thefreshloaf.com/node/21536/sourdough-biscuits-trying-real-thing ,  I felt the dough was a little dry, could stand more autolyse time, and would benefit from baking in a hotter oven. I tweaked my original recipe.

Here it is. The tweaks are in bold type.

Ingredients:

356g (12.5 oz.; 2 cups) sourdough starter; 100% hydration; refreshed 12 hours earlier, and left to develop in the refrigerator.

76g (2.7 oz.; 1/3 cup) 50/50 mixture butter and lard (yep, lard: probably Cookie's first (only?) choice). Cut in to 1/2" cubes and chilled in the freezer for 15 minutes

275g (9.7 oz; 2-1/4 cups) AP flour

14g (1 tbls) sugar

7g (1 tsp) salt

I mixed the flour, sugar, salt, and butter/lard cubes together with my hand, squeezing the fat cubes between my thumb and fingers until they were all flattened and well coated with flour. I added the sourdough starter, mixed it in, and kneaded the dough in the bowl, until it formed a ball. The dough felt a little dry, but I didn't add any additional liquid.

I rested the dough, covered and chilled in the refrigerator,  for 45 minutes.

I turned the ball out onto an unfloured dough board, and rolled it to about 1 inch thick, folded the dough in half, and rolled it out again. I repeated this three times more. Each time I rolled it out the dough got more flexible, and felt less dry. I was glad I hadn't added additonal liquid.

On the final roll-out I went to 1/2 inch thick, cut out 10, 2-5/8 in. biscuits, arranged them on a Silpat pad lined half-sheet pan, covered them with a dry tea towel, and put them into the proofing box (76°F).

They proofed for 2 and 1/2 hours. They had expanded, but not doubled.

Baked in a 425°F oven for 15 minutes (light golden brown). They more than doubled with oven spring. Lifting the first one to the cooling rack I knew, from its light feel, I had a success.
Reducing the flour amount slighty; caressing the dough, not mauling it; increasing the post-mix rest (autolyse?) three-fold, and baking at a hotter temperaure each contibuted to a lighter, tastier biscuit. I don't see a need to tweak further. I've named this recipe: Biscuts ala Cookie. Truth is however, with my  relience on chilled, shortening and dough, I've moved further away from "the real thing". That said, I'm sticking with this one. If Cookie had had a refrigerator/freezer he would have used them.

David G

An Update:

I've recently developed a new starter, and along with bread bakings decided to give it a try in Biscuits ala Cookie.

I followed my recipe to the letter with three exceptions in procedures.  I developed the levain and rested the dough (autolyse) at room temperature, and I hand-mixed the flour and butter/lard mixture into a finer mixture: sunflower-seed-sized bits. This resulted in less layering than in the earlier tries.

These are the best yet: light, and very flavorful

David

hanseata's picture
hanseata

Faye's Award Winning Nettle Bread

When Andy/ananda posted his student Faye's success at the "Young Baker of the Year" competition, he mentioned that Faye was inspired by my trials to re-create the taste of blue fenugreek (not available in the US) with nettle. In German that kind of flattery is called: "he brushed my tummy". I felt very much "tummy brushed" and admired the creativity of the young winner from Newcastle College. (By the way, Andy, how was the final competition in November?)

This week I looked at the recipe again, worked out how to make the 60% hydration white levain with my 75% whole wheat mother starter (Andy's recipes do not allow for Dummies), and adjusted the recipe to best fit my schedule. Nettles thrive - and burn - in abundance in Germany and Scotland, but don't grow in Maine  (maybe one should introduce some to annoy pesky neighbors). So, instead of picking and home drying fresh ones, I used dried nettles from A & B Naturals, the friendly store that sell my breads. I also stretched and folded the dough (as in P. R.'s "Artisan Bread Every Day") and retarded the portioned dough overnight - something Faye most likely couldn't do under competition circumstances, anyway.

While I was preparing the dough, the house was filled with the appetizing smells of steeped nettle and toasted cumin. And the dough looked very promising. It was very smooth and elastic (I had added more water than in the original recipe), and handled very well.
 Nettle Bread dough after final S & F

The next morning the dough portions had doubled in size and looked like well stuffed, bouncy pillows. The rising time of the shaped boules at room temperature was, of course, much longer than in a commercial proofer. Before the breads were fully proofed in the bannetons I noticed that their seams (on top) started opening far too wide, so I took them out and placed them, seam side down, on a parchment lined baking sheet. I didn't want gaping holes on the bottom of the loaves.

The total baking time was 35 minutes, then another 10 minutes in the switched off oven with the door slightly ajar.

This is the result:

Speckled crumb from the nettles

Faye really deserved her award - THIS BREAD IS A WINNER! It tastes quite unusual, but very delicious. We served it to out dinner guests yesterday night, and they were absolutely delighted. I think I'm going to bake this for my customers, too.

WHITE STARTER
76 g whole wheat mother starter, 75% hydration
232 g bread flour
146 g water
 
FINAL DOUGH
all g starter, 454 g
550 g bread flour
16 g salt
4 g instant yeast
385 g water, more as needed
3 g cumin seed, toasted
4 g coriander, ground
4 g nettle, dried


DAY 1

In the morning, prepare white starter.

In the evening, boil 200 g of the water with dried nettles, and allow to cool. Mix with rest of the water (185 g).

Mix all ingredients for final dough on low speed for 1 - 2 minute. Let dough rest for 5 minutes. Switch to medium-low speed and knead for 2 min., adjusting with more water as needed, dough should be sticky. Knead for 4 more minutes (dough should be still somewhat sticky).

Transfer dough to lightly oiled work surface. With wet or oiled hands, stretch and fold dough, gather dough into a ball, place into slightly oiled bowl, and let rest for 10 minutes. Repeat S & F another 3 x, at 10 minute intervals, misting the stretched dough before folding with more water, as needed, to keep it slightly sticky.

After the last S & F, divide dough into 2 equal portions (ca. 700 g), place in lightly oiled containers, and refrigerate overnight.


DAY 2

Remove dough from refrigerator 2 hours before using (or shape cold and let proof longer).

Shape dough into tight boules, and place, seam-side down, on parchment lined baking sheet. Sprinkle with a little flour. Cover, and let rise for 60 - 90 minutes, or until almost doubled in size (finger poke test!).

Preheat oven to 450 F/230 C, including steam pan.

Score breads. Bake them for 20 minutes (with steam), rotate pan with loaves 180 degrees, remove steam pan, and continue baking for another 25 minutes - if the sides brown faster, check after 10 minutes and turn the loaves a bit around (internal temperature 205 - 210 F/96 - 99 C).

Let breads cool on wire rack.

Post updated (some ingredient amounts and baking procedure) 6/13/16


wally's picture
wally

A little baguette fun...

One of the things I love about baguettes is that with just a little manipulation once they are proofed, you can take the "stick" and create an array of dinner rolls that are barely linked: the épi de blé is the obvious example.  But recently, after watching a video series called Formes de pains that a TFL member posted (and I can't recall who, so please shout out if you're reading this), I became fascinated with another forme using a baguette shape as the starting point: la margueritte.

So I decided to have a little fun, and instead of just creating my usual two or three baguettes, to play with them a bit.

The impetus was my attempt to arrive at a dough weight that I am happy with for the home baguette; something, in my case, that is maximum 16 - 17 inches long.  I've always made 10oz (283.5 g) baguettes, but I'm not altogether pleased.  Their girth is more appropriate to a sub roll than a classic baguette.  So I decided to go with 8oz (227.8 g) dough weight to see if that produced a slightly more lithe baguette - a ficelle, actually.
Because I wanted to play with the dough more than anything else, I decided to make a straight baguette, essentially using Hamelman's French Bread recipe, but decreasing the hydration to 69% and doing a hand, rather than machine, mix.  Bulk fermentation was a little over 3 hours, and folding was done in the container though sets of 8 folds at a time.  The initial fold was done 10 minutes after mixing, and then 2 additional folds were made at hour intervals.  The dough was divided and preshaped into 3 pieces with a 25 minute bench rest.

When it came time to roll out the baguettes, it was evident that the amount of folding had really increased the elasticity of the dough, even though I had done nothing more than a quick minute-and-a-half mix of the ingredients by hand.  So it was necessary to roll them out partially, let them stand another 5 minutes and then finish the shaping.

They were couched for 1 1/2 hours while I preheated the oven to 500 F.

I decided to place them on parchment paper on my peel to make loading more easy, and to construct la margueritte right on the parchment.

As you can see from the picture below, it is essentially a baguette with the tips of each end cut off (they are used to make the little dough ball in the middle which acts like a glue for the structure).  It is then cut diagonally into 6 more or less equal pieces, and they are place in a circle with the dough ball in the center.  The video for this can be found here.  It's quite easy to make and once formed the top is lightly dusted with flour and then each 'ear' is lightly slashed.


The epi, below, is of course simply the baguette shape cut diagonally with scissors with pieces then turned right and then left (or left and then right) and also dusted with flour.  


The oven was presteamed using SylviaH's method, and hot water was added to my lava rocks when I loaded the bread and then twice more in the initial 2 minutes.  The bake was at 475 F for 21 minutes, and I rotated the breads after 10 minutes to get even browning (made easier by the parchment paper they baked on).

Both la margueritte and the epi create, in effect, separate dinner rolls that are lightly conjoined.  It just seems such a unique and conversation-generating way to present rolls that otherwise would be placed in a basket and just passed around a table.  The videos present several other interesting ways of manipulating baguettes to create new formes de pains.

The ficelle turned out nicely as well, with its grignes opening up well.  Crumb shots below as well.


Methinks a tomato-basil bisque would be a wonderful sop for these!

Larry


fishers's picture
fishers

boulangerie videos

My sister, who is not a TFL member, and should be because she makes fabulous breads, happened upon the following website:

http://techno.boulangerie.free.fr/09-ReussirLeCAP/03-lesFormesEnVideo.html

should be shared - Sharon

breadsong's picture
breadsong

Noah Elbers' Maple-Oatmeal Bread (courtesy of farine-mc)

Hello, What a pleasure to discover farine-mc's post on her blog about Noah Elbers and his talented group of bakers, and this bread.
Thank you Farine!!! (Farine-mc's post is here: http://www.farine-mc.com/2011/01/noah-elbers-maple-oatmeal-bread.html - great information on how to make this bread, and video from Mr. Elbers' bakery, too!)

This oatmeal bread is made with cooked steel-cut oats, maple syrup, levain and a poolish. I had to try it!:


These are the weights I used (to make two loaves, 680g each)
(My baker's percentages may not correspond exactly to farine-mc's percentages;
I keep my starter at 100% hydration):

Noah Elbers' Maple-Oatmeal Bread       1360 Desired Dough Weight in grams       <----      
                 
  From farine-mc.com          
  Baker's Percentages Weights Baker's
Ingredients Dough Levain Poolish Dough Levain Poolish Total %
                 
Bread flour 0.75 0.2 0.9 438 23 53 514 76%
WW flour 0.25 0.05 0.1 146 6 6 158 24%
Steel-cut oats, cooked 0.2     117     117  
Water 0.54 0.25 1 316 29 58 403  
Maple Syrup 0.16     94     94 75.05%
Yeast instant     0.004     0.2 0.2 0.03%
Salt 0.0264     15.43     15.43 2.30%
Sourdough Starter   0.5     59   59  
Levain 0.2     117        
Poolish 0.2     117        
                 
Total 2.3264 1 2.004 1360 117 117 1361  

Here's the crumb shot (this bread has a gorgeous flavor, very moist crumb, and a slight sweetness, not definable as maple but still very good):

Happy baking everyone! from breadsong
ramat123's picture
ramat123

Autolyse - when is it done?

Hi There,

I've been baking for about a year and working with some recipes that include autolyse (mostly from Hamelman).

Now, Hamelman is saying use 20-60 minutes of autolyse. I choose to work with 30 minutes.

What's the indicaion of a successful autolyse? When do I know that the process is done?

Thanks,

David

louie brown's picture
louie brown

Italian Lard Bread


Anyplace you find a substantial Italian-American community, chances are you will find a bakery, and chances are that the bakery will offer something called "prosciutto bread" or "meat bread." It usually has nuggets of prosciutto, or pancetta, or even just cubed cold cuts. Sometimes, cheese is in there too, usually provolone. There might be semolina flour mixed in. Zito's in New York is an example of an Italian bakery with a good reputation for their prosciutto bread. There are others.


Let's be honest. If you mix some prosciutto or some pancetta or some mortadella into bread dough, the bread is going to taste good. Bacon on Wonder Bread tastes good. But the way in which the antecedent came into being back in the old country is at once more homely and more true.


The pig was slaughtered. Every last bit of it was put to use. When it came to the fatback, it was beaten with a stick to break it down. Then it was rendered, resulting in lard and cracklings. The lard was used in all sorts of cooking, including baking. The cracklings were thrown into the dough, along with some cracked black pepper. It was usually baked in the traditional ring shape.


It's somewhat dispiriting, how easy it is to flavor something with pig, especially smoked or cured, and sit back and wait for the praise. I am here to tell you that I have never had a "prosciutto bread" that was good bread. It has always just been hammy tasting bread.


So, some friends got to telling me how their mother made it for their father, in Lazio, north of Rome. Rendered pork fat, not smoked or cured; cracklings in tiny pieces; cracked black pepper. Rolled into a log, twisted, shaped as a ring.


I forgot to twist. Otherwise, this is it. 100% sourdough. The lard gives the crumb a smoothness and makes the crust crispy. I think it could use more cracklings and a rougher crack to the pepper. Readers here may be interested to know that I used a stainless bowl for a cover for ten minutes. I have been switching to convection after the covered portion of the bake, but I forgot this time. Nevertheless, you can see that there is a nice relatively thin crust. It is pretty flaky, almost like pastry. All I'm missing is the wood fired oven to get some smoke and char. 


txfarmer's picture
txfarmer

Sourdough Carrot Cake and Carrot Cake Sourdough Bread - no, I did NOT put cake in the bread dough

I had a big bag of carrots (I just should not go to Costco unsupervised), a 3lb block of cream cheese (did I mention I was at Costco?), and a life time supply of raisins and pecans (they seem so reasonablely portioned at the store!). No more costco trips for me! Well, until probably next week. :P

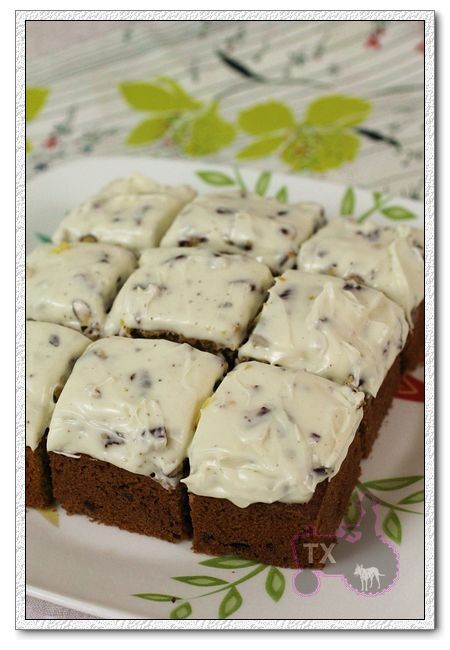
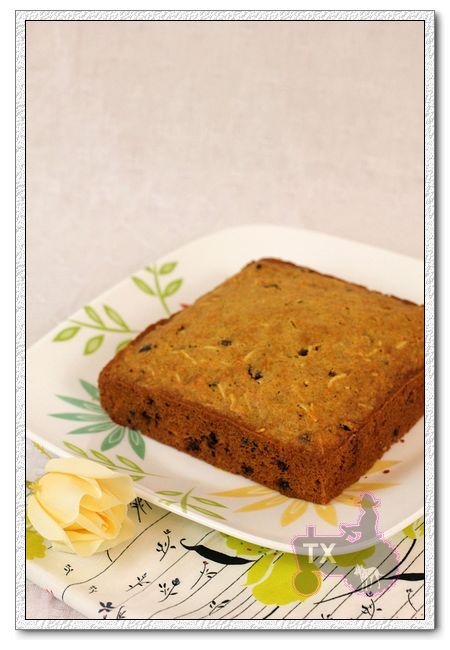
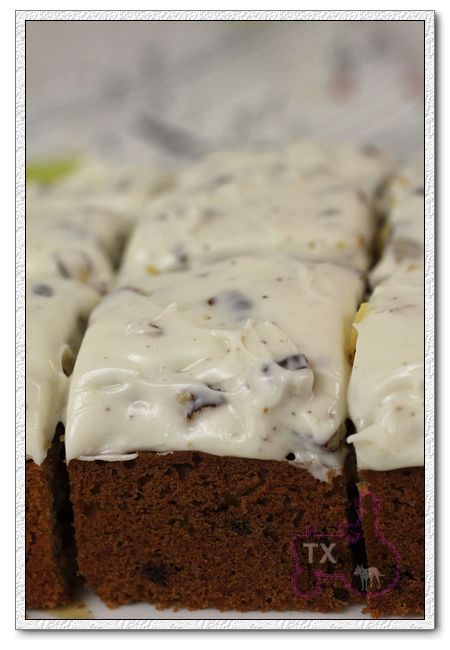
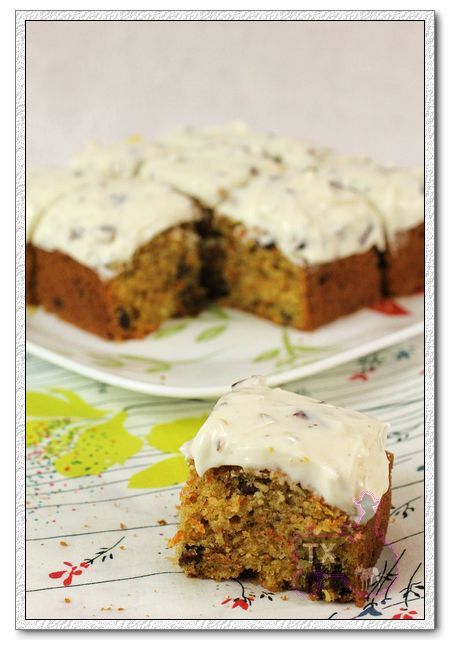
To consume all that ingredients, first, there's this sourdough carrot cake I have been wanting to make for a while. Recipe is from KAF.

When putting together the ingredients, I discovered that I only had one egg (of all things I bought at Costco, I forgot to buy eggs, ugh), so I only made one third of the recipe, in a 6X6 squre tin. Used raisins and pecans instead of pineapple and walnuts. Very moist and delicious cake.

The extra nuts in the icing was delicious. I did cut down the sugar, used only 1/2 of what's called in the recipe, I think I can use even less next time.

A good way to use up leftover starter, as well as any impulse buys at Costco. :P

---------------------Then there comes bread--------------------

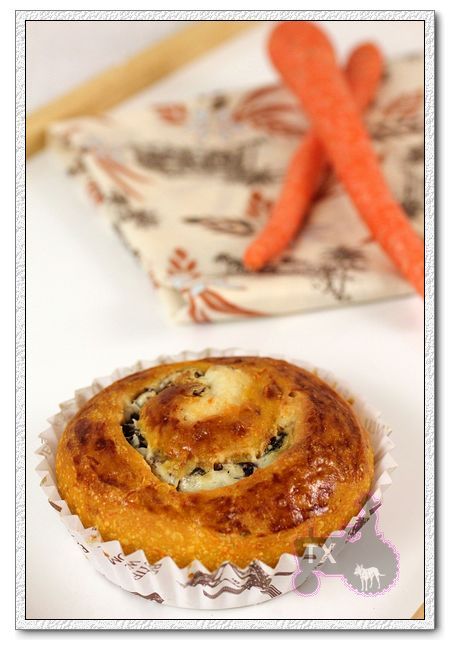
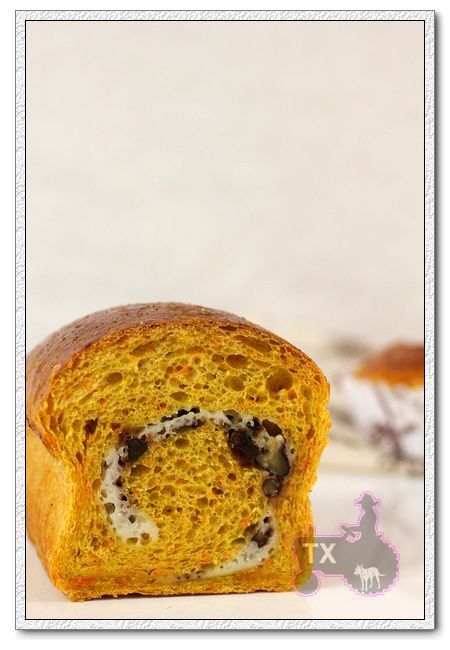
Having thoroughly enjoyed the carrot cake, I decided to make a sourdough bread, using the same ingredients as the cake. There will be LOTS of shredded carrots in the dough, with a cream cheese filling. I want the bread to be soft and airy, like a good roll, or an Asian style soft sandwich bread, so raisins and pecans would be added to the filling, not the dough, in order to keep the smooth soft texture. For a total out of no where experiment, they turned out great!

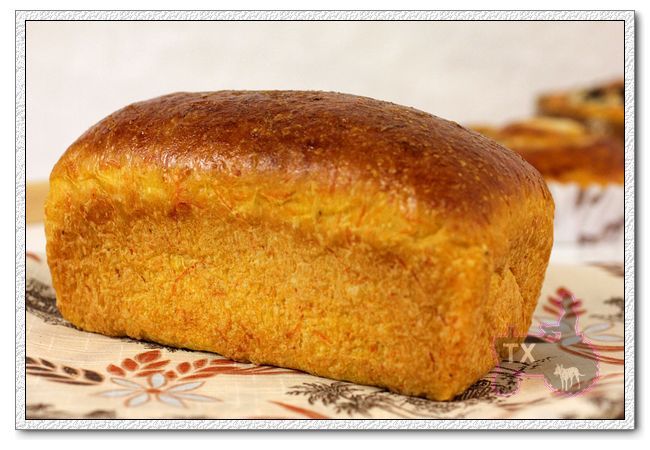
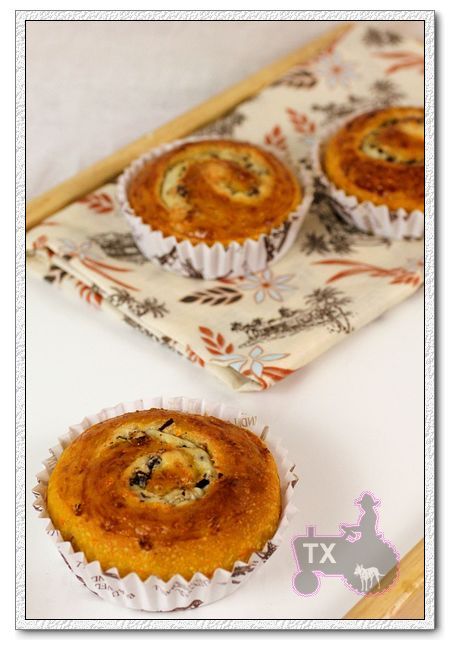
Made 7 rolls as above, as well as a mini sandwich bread

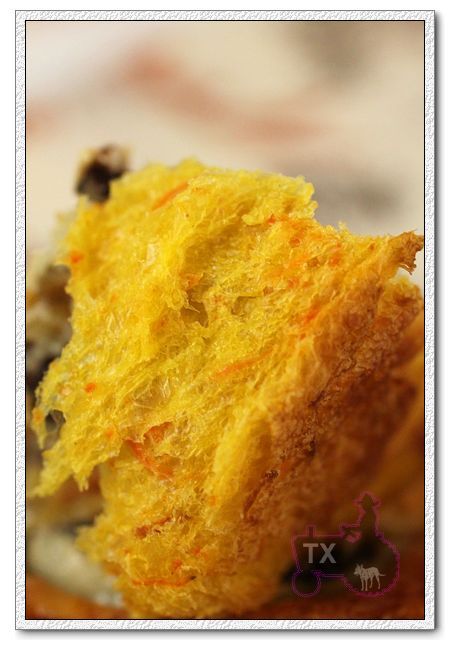
Both the sandwich bread and rolls had perfectly soft texture

The bread part is slightly sweet from LOTS OF shredded carrots, matched perfectly with the filling. Not too sweet, just enough to make this a nice breakfast roll or a snack. Sourdough brings a slight tanginess, which we love, especially in a sweet, relatively rich bread. The golden color is just lovely, and it's so "shreddy" soft.

Carrot Cake Sourdough (my crazy creation)

Note: The following recipe as written has 200g flour in total (including what's in the starter), enough for 6 to 7 3.5inch rolls. I actually made more dough than what the recipe specified, for the mini sandwich loaf, I used mini loaf pans (5-3/4" x 3-1/4" x 2-1/4"), each would need 90g of total flour(in addition to the 200g in the recipe). If you use a standard 8X4 sandwich loaf pan, I think you need about 270g of flour for each pan.

-levain

milk, 17g

bread flour, 33g

starter (100%), 11g

1. Mix everything into a dough, leave for 12 hours at room temp.

-final dough

levain, from above

bread flour, 162g

butter, 20g, softened

sugar, 20g

salt, 3g

milk, 77g

shredded carrots, 100g

-filling

cream cheese, 113g

corn starch, 19g

sugar, 40g

vanilla essence, 2g

chopped pecan

raisins


2. mix together every except for butter and salt, autolyse for 30min, add salt, knead until dough pull away from the mixer bowl, add butter, mix until passing window pane. Note that with all that carrots, the dough is VERY sticky and wet, so it took a while for it to come together, don't give up, keep kneading. I got  a very strong dough at the end: (Note that I am aiming for a very fine, soft, and even crumb here, which is why I did such intensive kneading. This is the same technique I use for soft Asian style sandwich breads, and enriched breads like brioche. However for lean hearth breads, i don't knead, I S&F. I think different style of breads requires different techniques, depending on what kind of crumb you are after.)

3. Round into a smooth ball and rise at room temp (22C) for 2 hours, S&F at the end, then immediately put in fridge for overnight. By the time I pulled it out of the fridge, it has doubled.Note: there were questions regarding why dough would always be stuck to the bowl during bulk rise, no matter how well the container is oiled. I think it has something to do with how well you round the dough before putting in in the container. if the surface is taunt and smooth, even for such a sticky and wet dough, it would not get stuck. Flipped right out.

4. Roll out into a 9X9inch squre, spread cream cheese filling(beat together cream cheese, corn starch, sugar, and vanilla until smooth), then spinkle raisins and pecans.

5. Rolled up like a jelly roll, but into 6 to 7 rolls, each about 1.5inch thick. Here I put them in some 3.5inch paper molds, but you can certainly bake them directly in a pan.

6. Leave to rise until double(when I lightly press it, it barely springs back), being pure sourdough, it took 6.5 hours at 22C. Which was perfect, since I needed to be away for that time, came back in time to bake them! Note that I usually proof rolls longer than sandwich breads since too much ovenspring would destroy the shape, if you make filled sandwich bread with this dough, you might want to proof less.

7. Bake at 350F for 25 to 30min until golden. The mini loaves took 35min. I am guessing a standard loaf would take 45 to 50min. It's a very moist dough, needs to be baked longer.

This truely a pretty and delicious bread, even if you don't have sourdough, you can easily convert the recipe to use dry yeast. The result would be slightly less flavorful than the sourdough version, but still yummy.

Still have a lot of carrots left, I am considering to make a German style rye bread with seeds and carrots, like this one. Anyone here have a favorite recipe to recommend?

Sending this to Yeastspotting.


txfarmer's picture
txfarmer

3 variations on 36 hour soudough baguette - when it's good to play with your food

I am so glad that some of you tried and liked the 36 hour sourdough baguette formula. I am still making it every week - it's our Friday "treat". Of course, I just can't help messing with a good thing, so I modify the original formula a little bit each time, some turned out really well, the following 3 are my recent favorites:

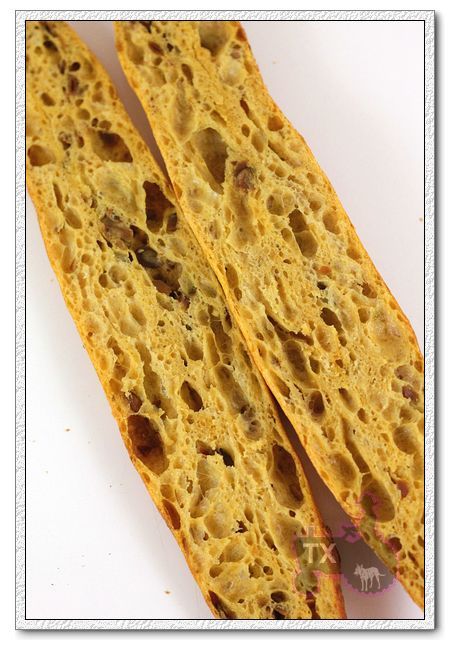
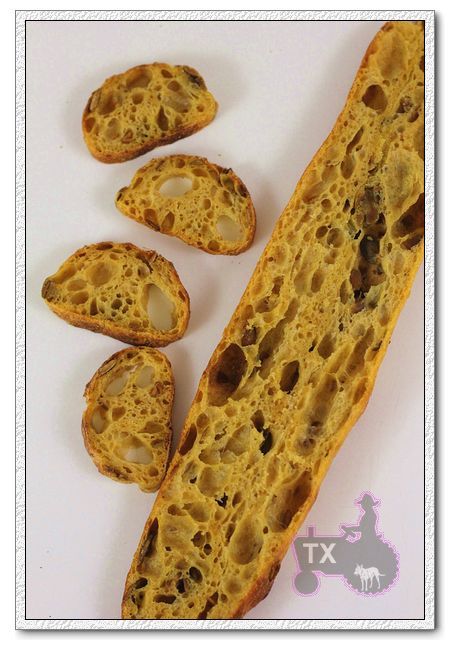
1) Pumpkin baguette - a.k.a. I don't care it's still nearly 90F out, it's FALL!

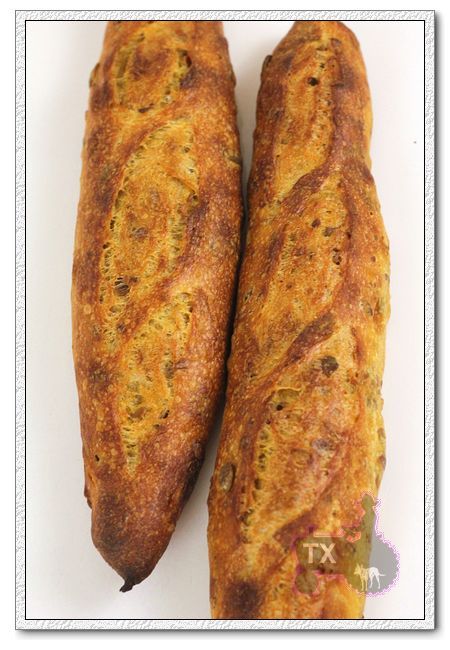
The idea came from this blog post, but I used pumpkin instead of butternut squash, toasted pumpkin seeds instead of sunflower seeds, and my basic 36 hour sourdough baguette formula.

AP Flour, 425g

pumpkin puree (I used canned), 165g

ice water, 223g

salt, 10g

starter (100%) 150g

pumpkin seeds, 50g, toasted and crushed a little

-Mix flour, pumpkin puree, ice water and autolyse for 12 hours.

-Mix in salt, starter, and seeds, then follow the basic 36 hour sourdough baguette formula here.


I find pumpkin puree generally makes bread moist but "sticky", which does make the crumb of these baguettes less open than the basic formula, but I think the brilliant golden color makes up for it, how very autumn-like.

Pumpkin seeds are bigger than sunflower seeds, so I crushed them a little before adding into the dough, they still "blocked" some holes, but the crunch and flavor they add to the bread was great.

I counted 50% of the pumpkin puree weight is water, which turned out to be a good assumption. The dough felt similar to my usual 75% baguette dough, and I think I am getting better at scoring this wet baby.

2) Wheatgerm baguette

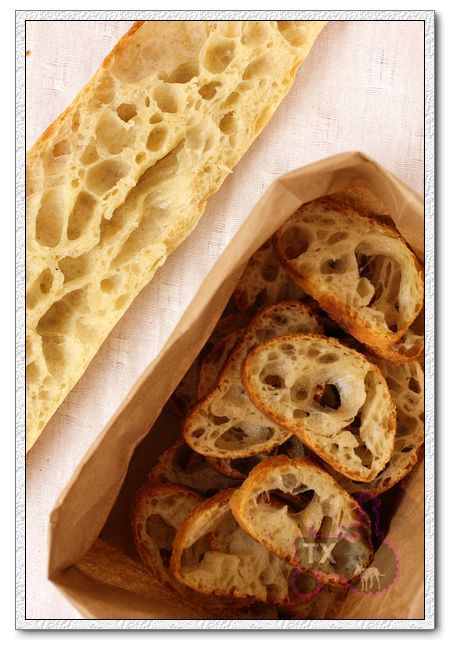
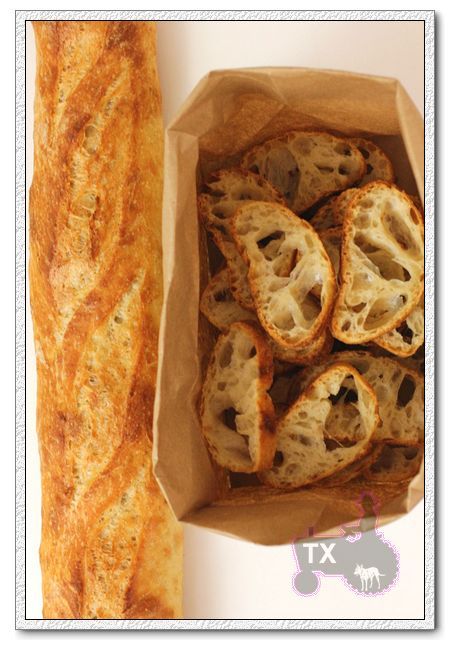
This is inspired by a formula we did at the SFBI baguette workshop. I love baking with wheatgerm, even my hands smell nice after touch the dough.I noticed at the workshop that wheatgerm tends to absorb extra water and make the dough a little dry, so I added extra water to compensate. The hydration ended up being 78%.

AP Flour, 425g

ice water, 315g

salt, 10g,

starter (100%), 150g

toasted wheat germ, 11g

- Mix water, flour and wheat germ, autolyse for 12 hours. Then follow the basic 36 hour sourdough baguette formula here.


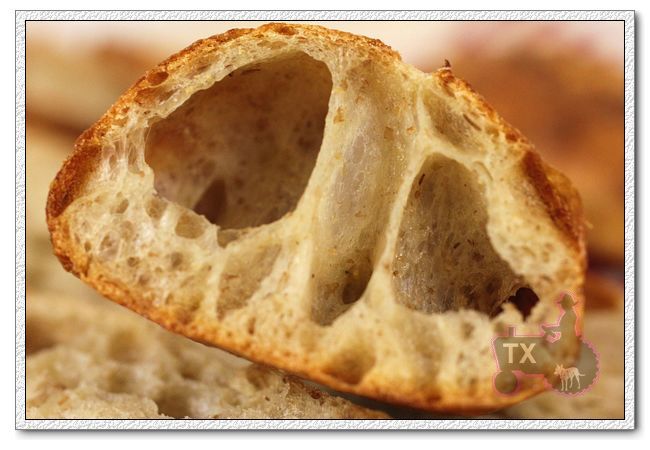
The increased hydration worked, I got very open crumb AND fragrant wheat germ flavor.


If you really look, you can see the wheat germ grains on the wall of those big holes

After making, and photographing so many baguettes, I was excited to find a new way to present it - in a paper bag!

I was in love with the flavor, and thought it ahs become my favorite variation, until I made the next one...

3) Rye starter baguette - MY FAVORITE SO FAR!

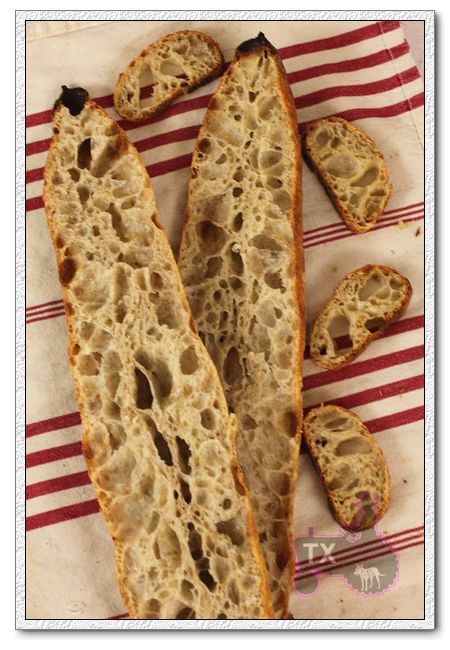
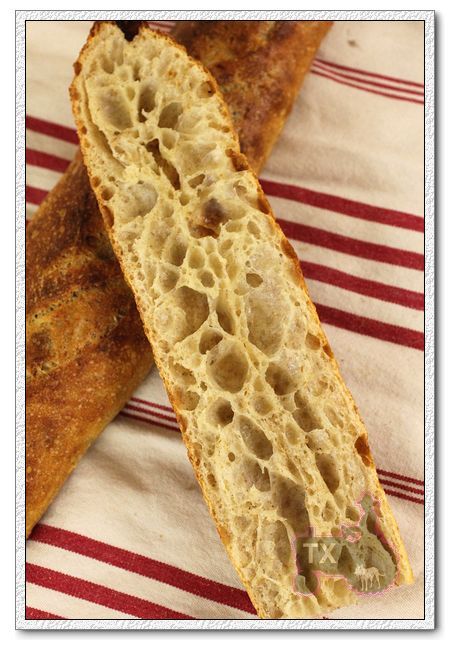
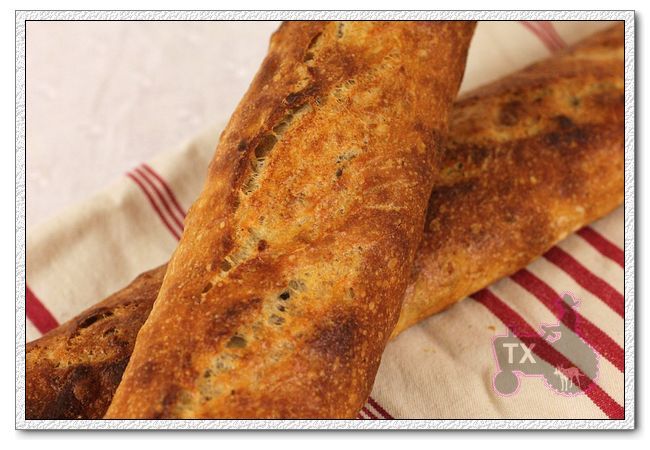
I have been wanting to add rye or other whole grain flour in the 36 hour baguette for a while now. In order to keep the open crumb, and the classic baguette mouth feel, I know I can't add too much. However, I do want to add enough to really taste the whole grain taste I love. This past weekend, I had a thought: instead of adding rye in the main dough, why don't I "add" it in the starter? Why not just use my rye starter instead of the white one? Since the formula has 30% of starter, which means the dough would have 15% of rye. The result is fantanstic, rye starter reallly adds noticable flavor even though rye ratio is low, at the same time, the crumb remains open, and crust is still thin and crisp.It's now my official favorite variation of 36 sourdough baguette, I am very happy that this experiment turned out so well!

Note that I did increase the hydration to 80%, mostly because I have been making breads from Tartine Bread Book, and its ww and semolina dough are both 80%+ hydration. Only that I forgot baguettes are a lot more tricky to shape than boules, oh, don't forget the minor details of scoring. I can now tell you first hand that scoring 80% wet baguettes is punishingly challenging. Crazy. Both I and the damn dough!:P


AP flour, 425g

ice water, 325g

rye starter (100%), 150g

salt, 10g

- follow the basic 36 hour sourdough baguette formula here.

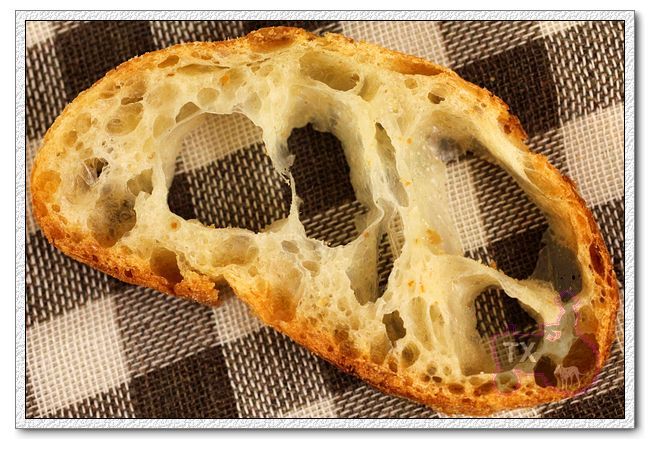
Such open crumb

One can get lost in these holes. Can't you just see the rye? YOu can taste it too! From the wall of the holes, yu can really see how moist the crumb is.

But the scoring left much to be desired, no matter, I know I will have plenty of opportunities to practice!

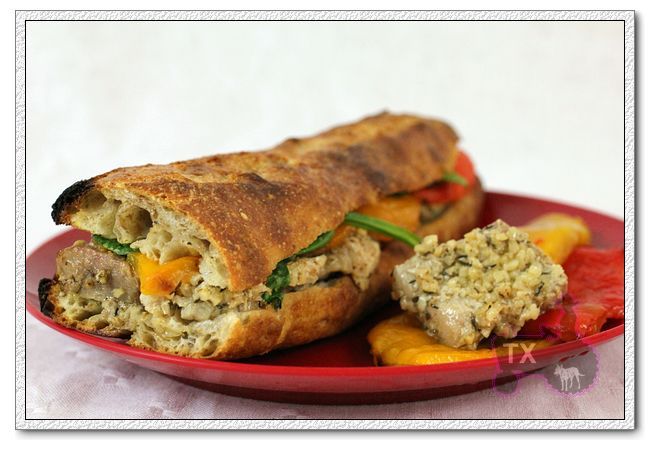
We usually eat these baguette as is, or simply with some butter or cheese, but I actually "loosely" followed a recipe from Tartine Bread Book and made a sandwich out of these rye baguettes. Tuna confit, roasted sweet pepper, fresh spinach, Yum!

Submitting to Yeastspotting.

Pages