The Fresh Loaf

A Community of Amateur Bakers and Artisan Bread Enthusiasts.

Most bookmarked

txfarmer's picture
txfarmer

Two ciabattas - one sourdough, one not

Sending this to Yeastspotting.

Click here for my blog index.

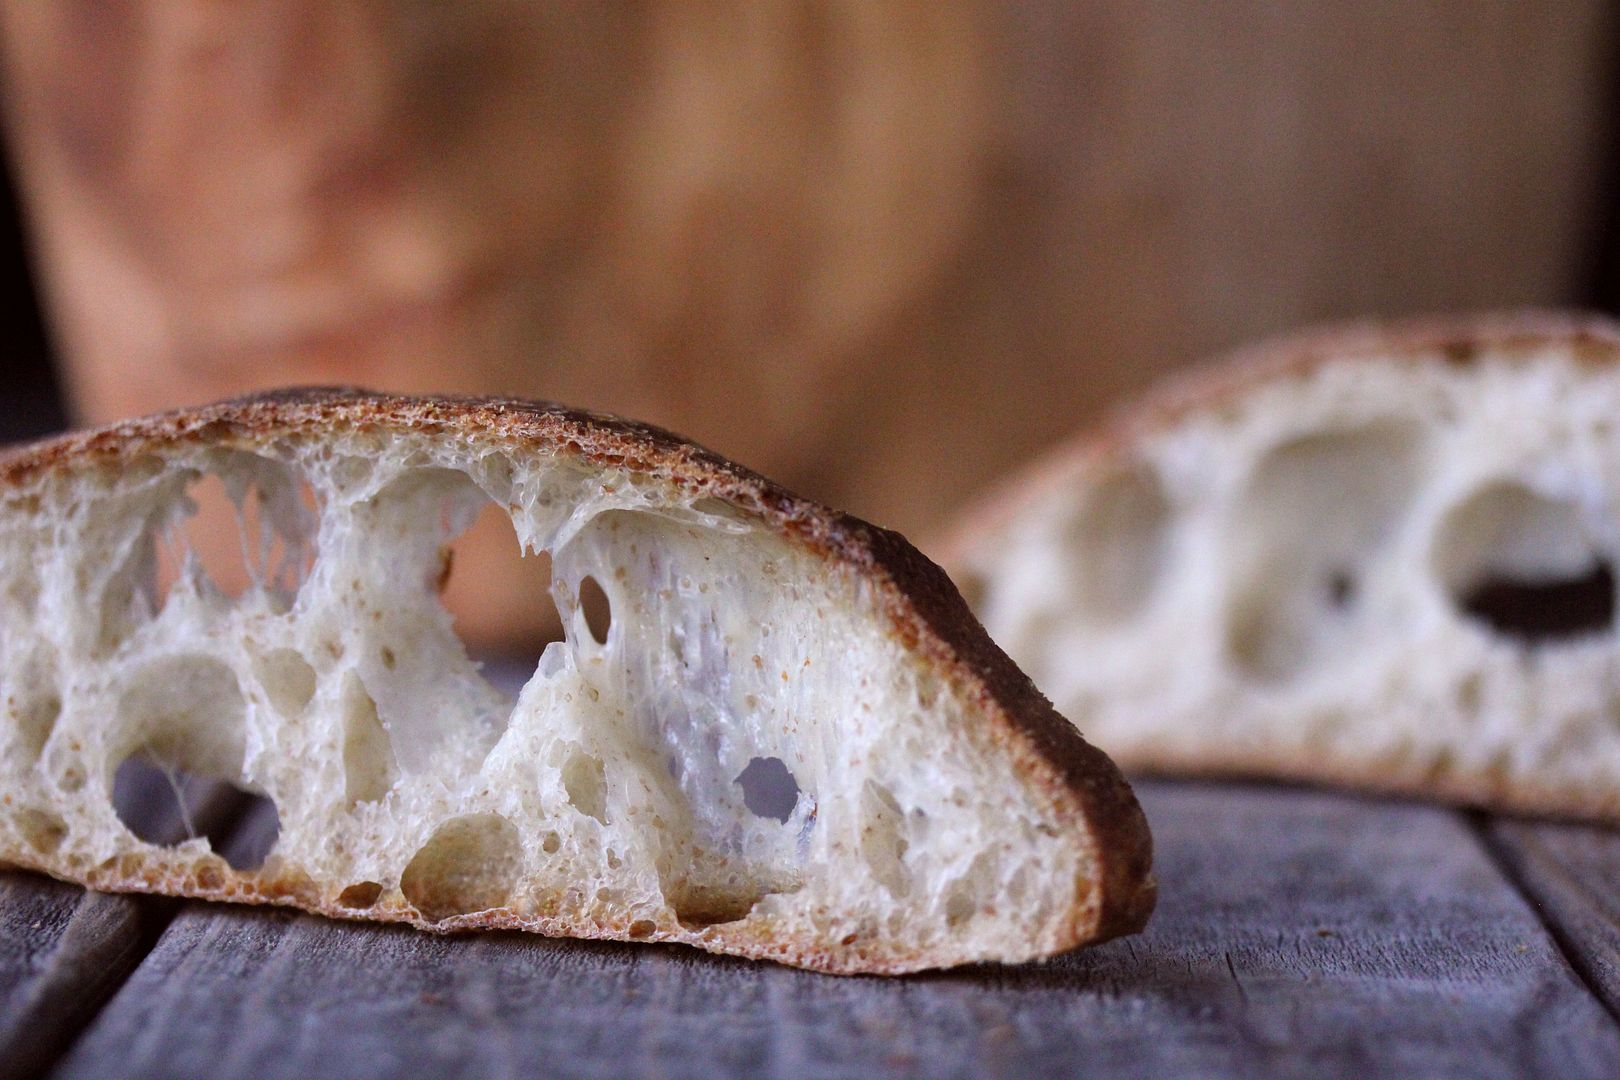
First, it's the ciabatta made with my usual 36 hour baguette dough (with higher hydration to be about 81%).
AP Flour, 425g
ice water, 330g
salt, 10g
white starter (100%) 150g


1. Mix flour and water into a lump of mass, cover and put in fridge for 12 hours. (let's say Thurs morning, takes <5 min)
2. Add starter and salt to the dough, use hand to mix until roughly evenly distributed. Note that the 100% starter here has two purpose: it's levaining power to raise the bread, AND it's extra water acts as the "2nd hydration" step.
3. Bulk rise at room temp (70 to 75F) for 2-3 hours until it grows about 1/3 in volume, S&F every half hour until enough strength has been developed. Put in fridge.
4. About 24 hours later, take out dough, if it has not doubled or nearly doubled, give it more time to rise at room temp. I usually have to give it about 1 to 2 hours, depending on temperature, which means the dough can probably be stored in the fridge for even longer than 24 hours.Do make sure it has a sufficient bulk rise, so the dough is strong enough; but don't let it go too long, the dough will be so bubbly that the shaping would be difficult - this is where you need to experiment with timing a lot.
5. Divide into 4 portions (which means these were 200g-ish ciabatta rolls), put on oiled parchment paper to proof. The beauty of ciabatta is that little shaping is required, however, I find that it still helps with crumb to lightly fold the edges over to make them into squares.
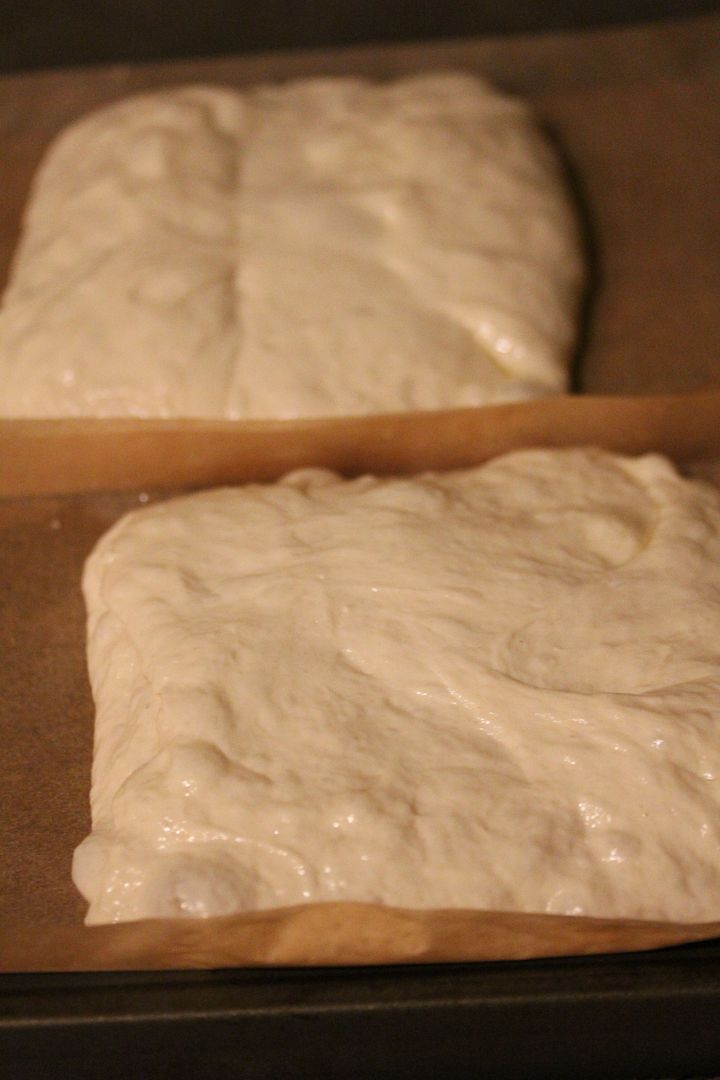
6. Proof until very puffy and expanded (about 1.5 hrs for me), take each one and flip over onto another parchment.
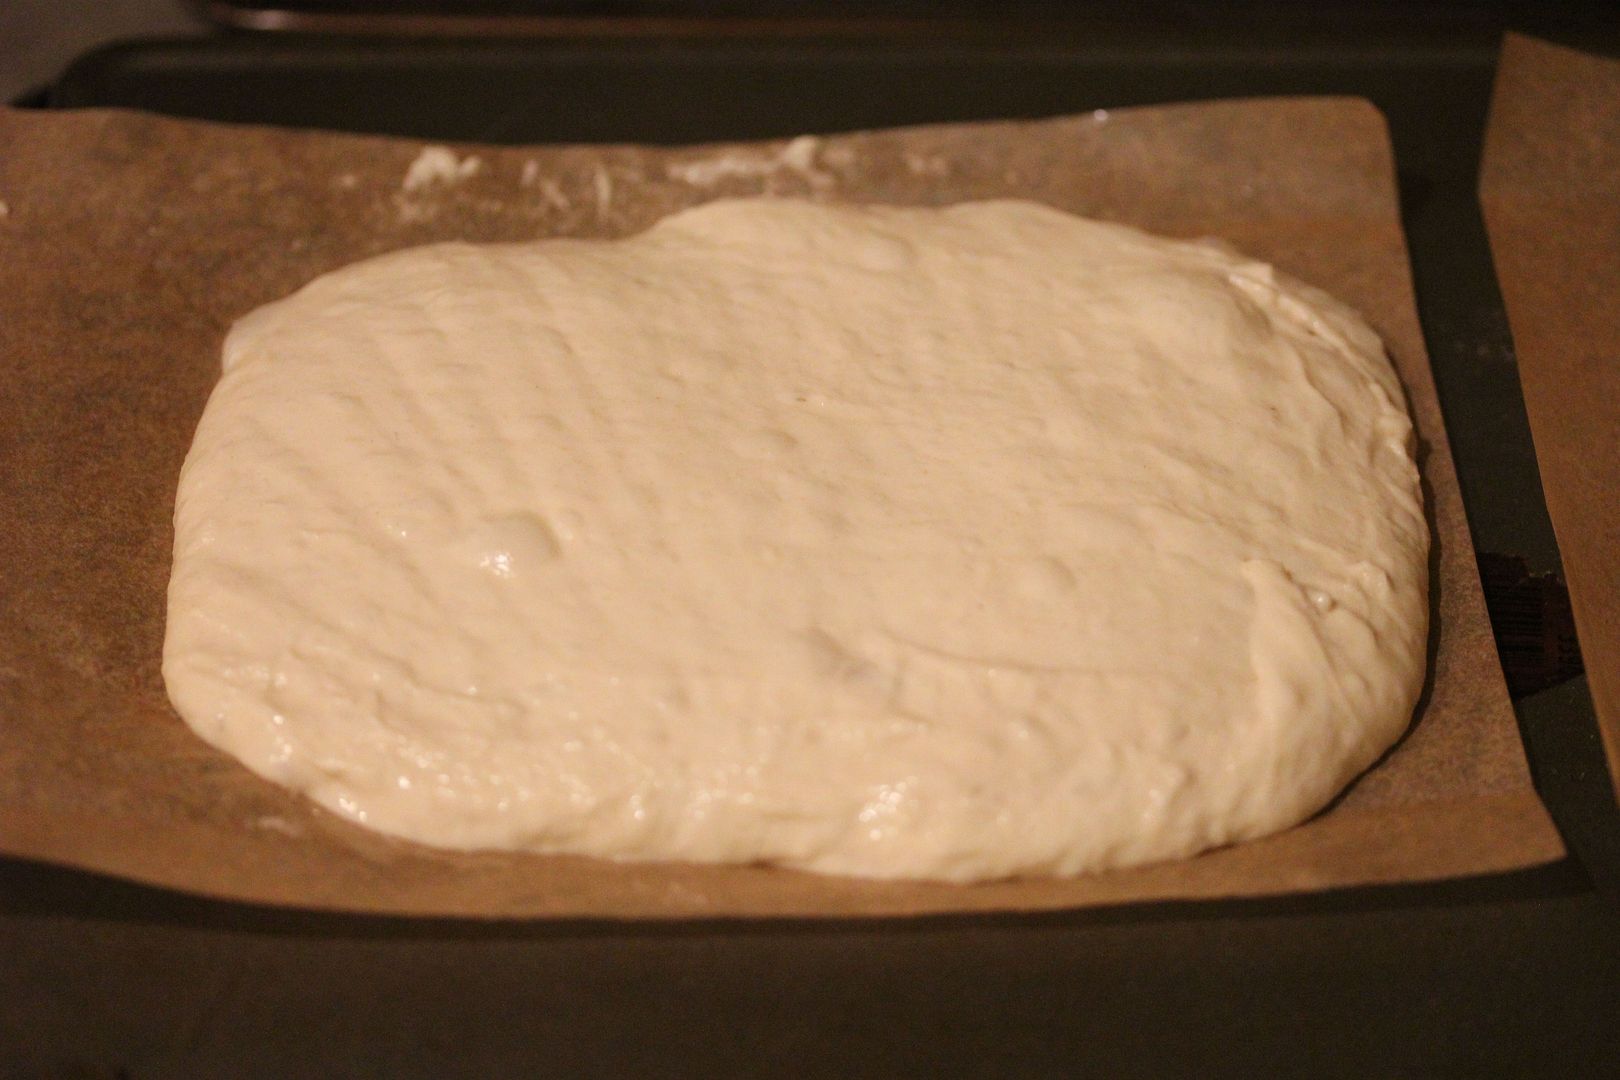
7. Bake each @460 for 18 min, the first 8 with steam.
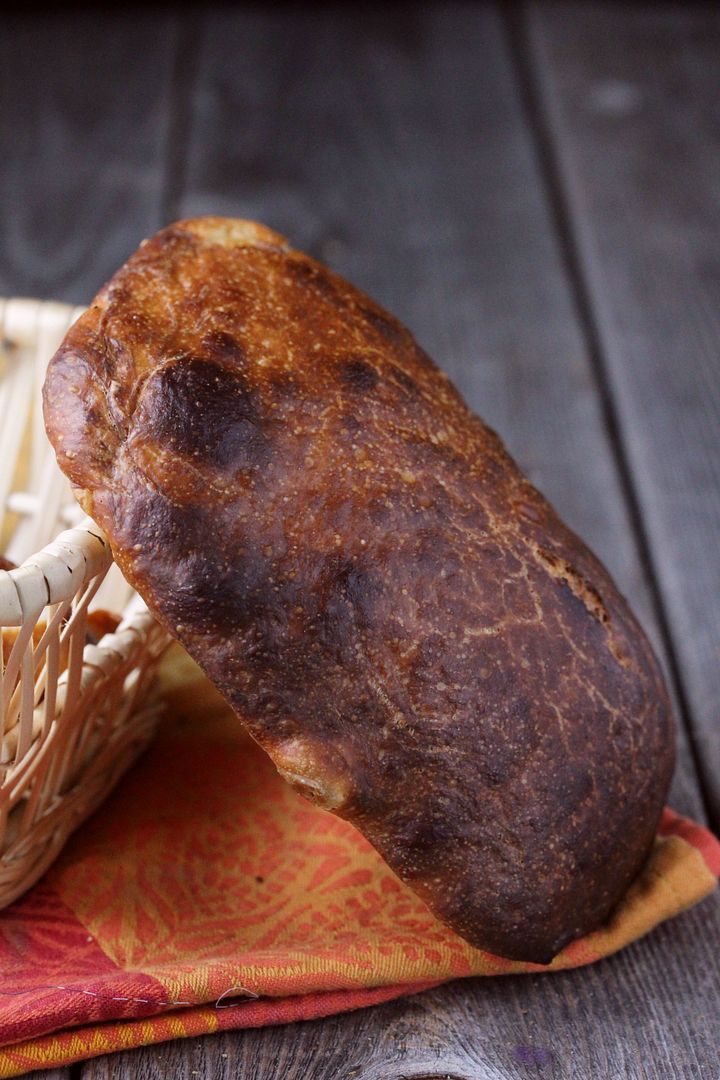
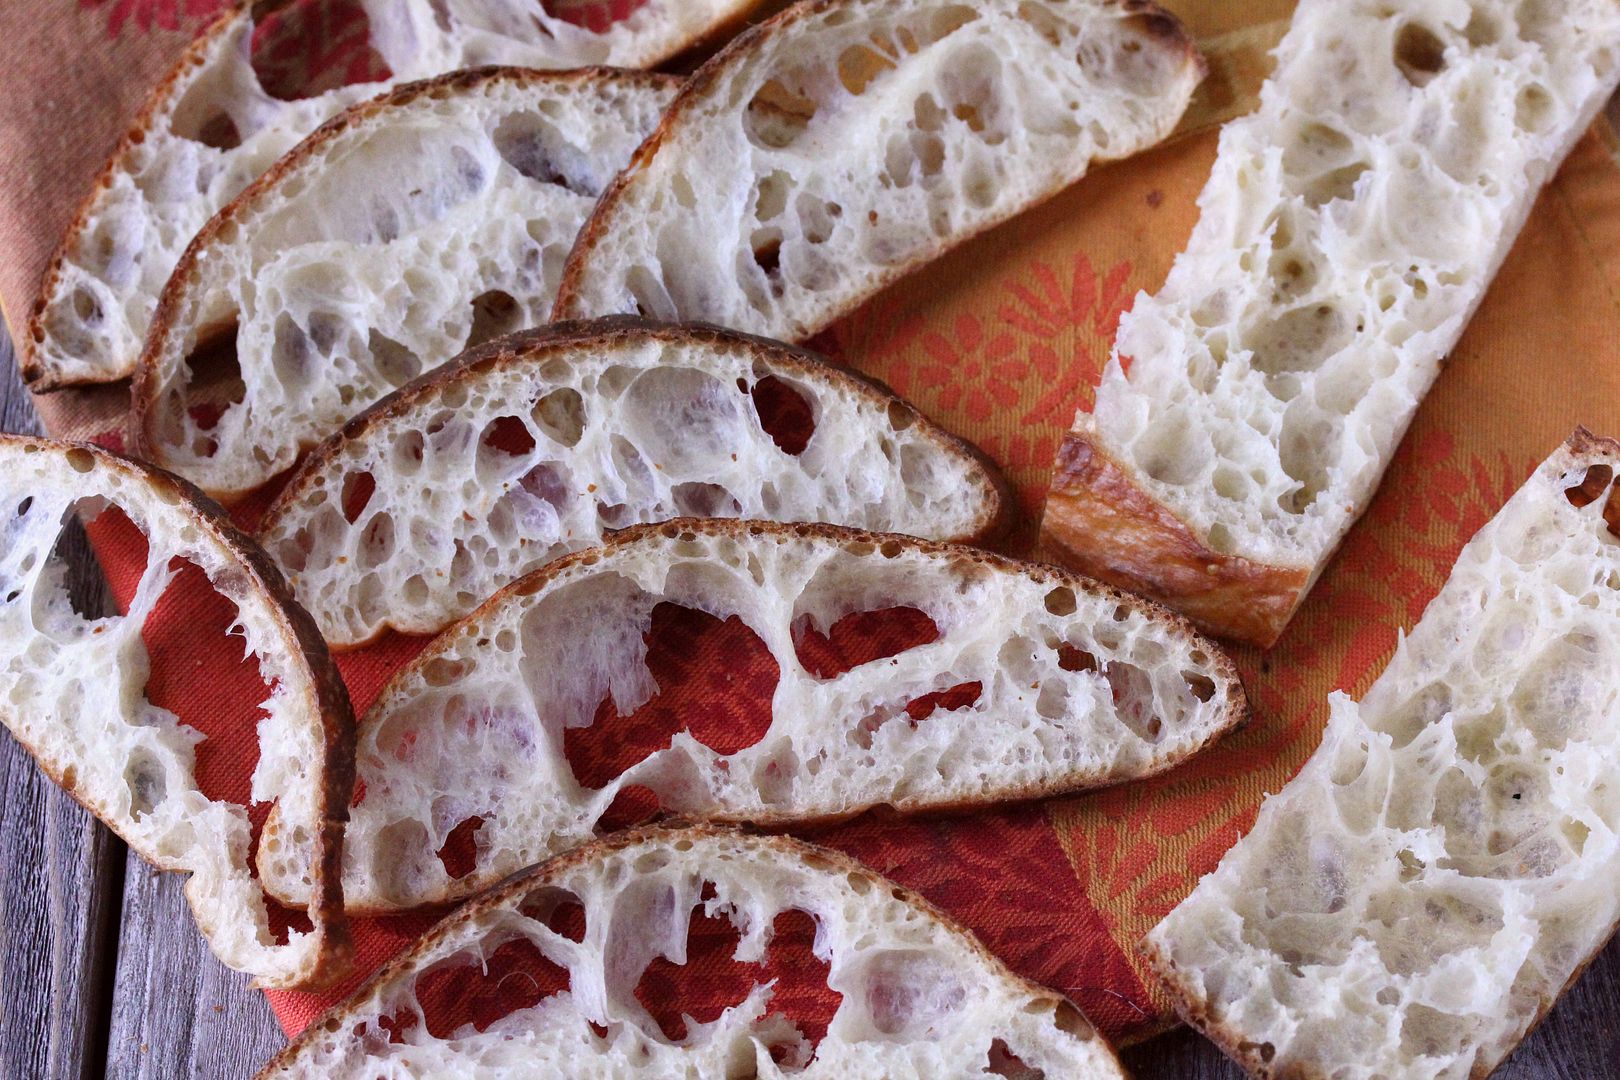
Cut them horizontally, and they were perfect for juicy fillings
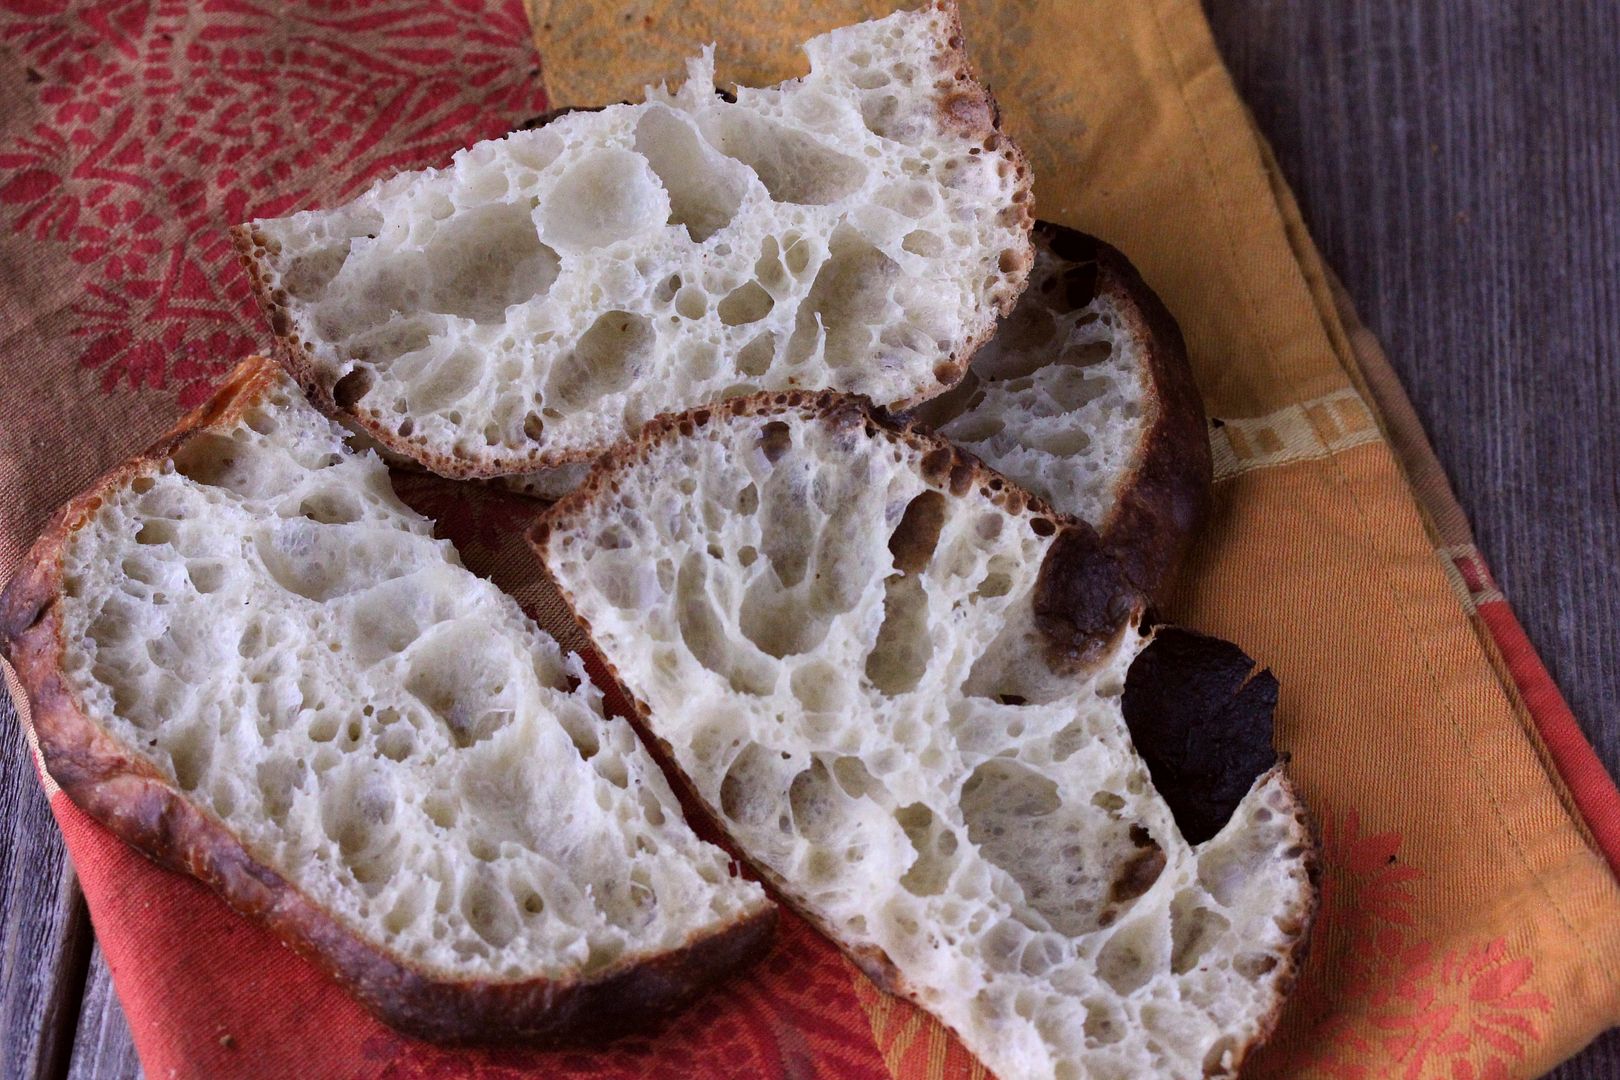
Cut it vertically, they were great for dipping into olive oil
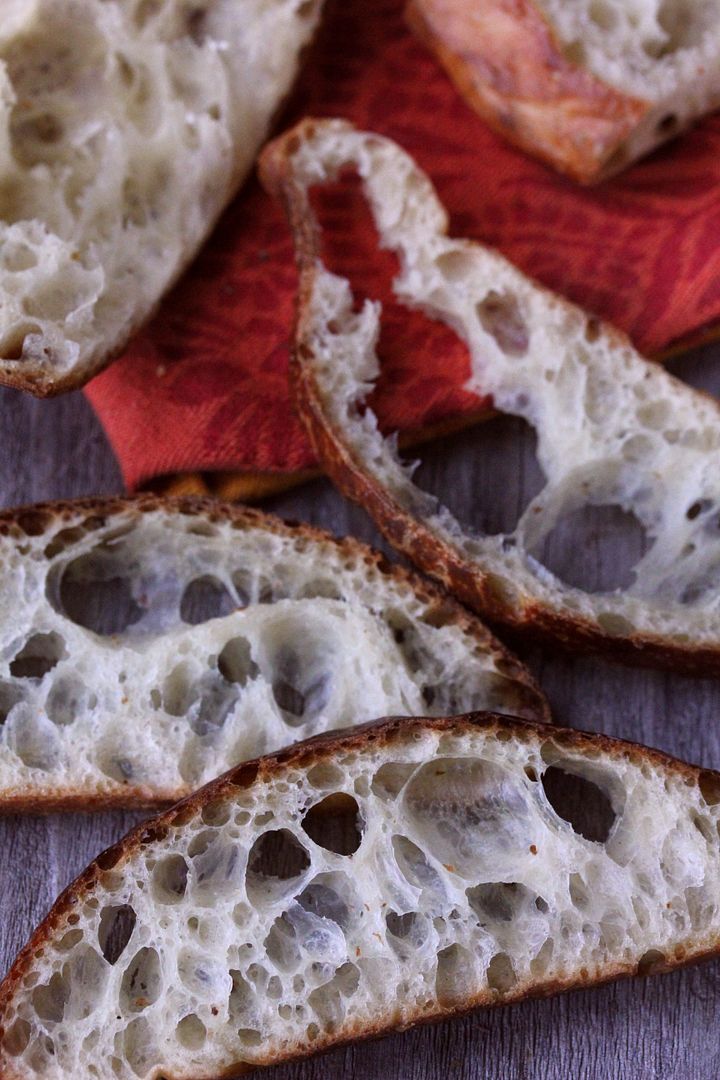
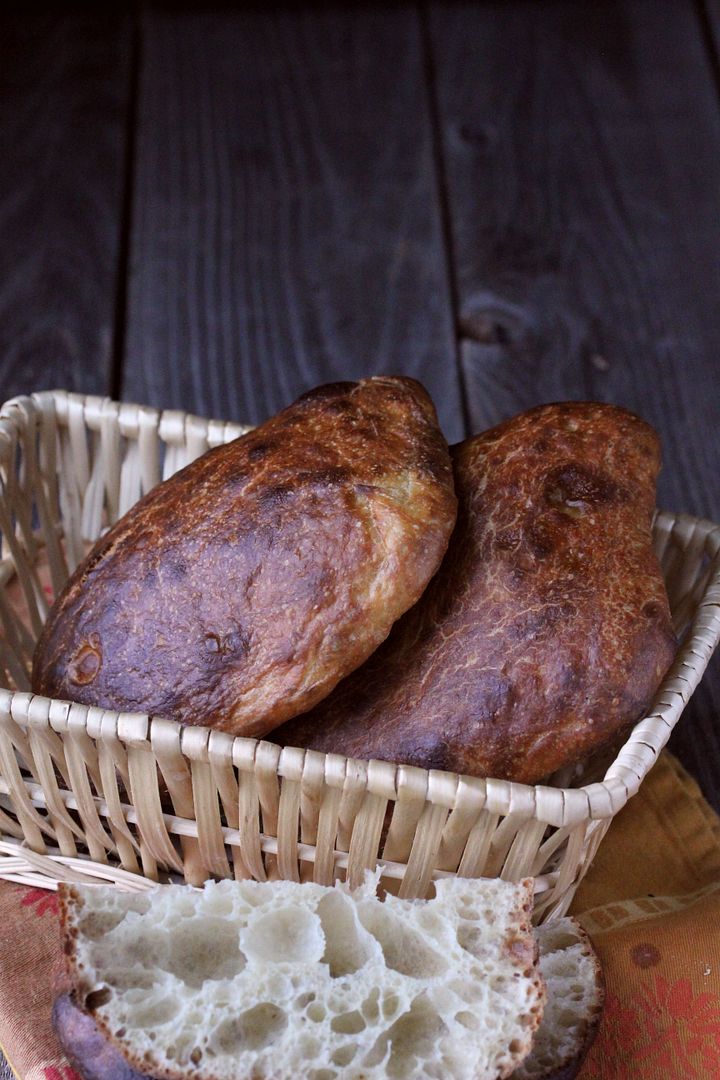
Second one was made with this recipe: http://www.wildyeastblog.com/2007/08/27/overnight-ciabatta/
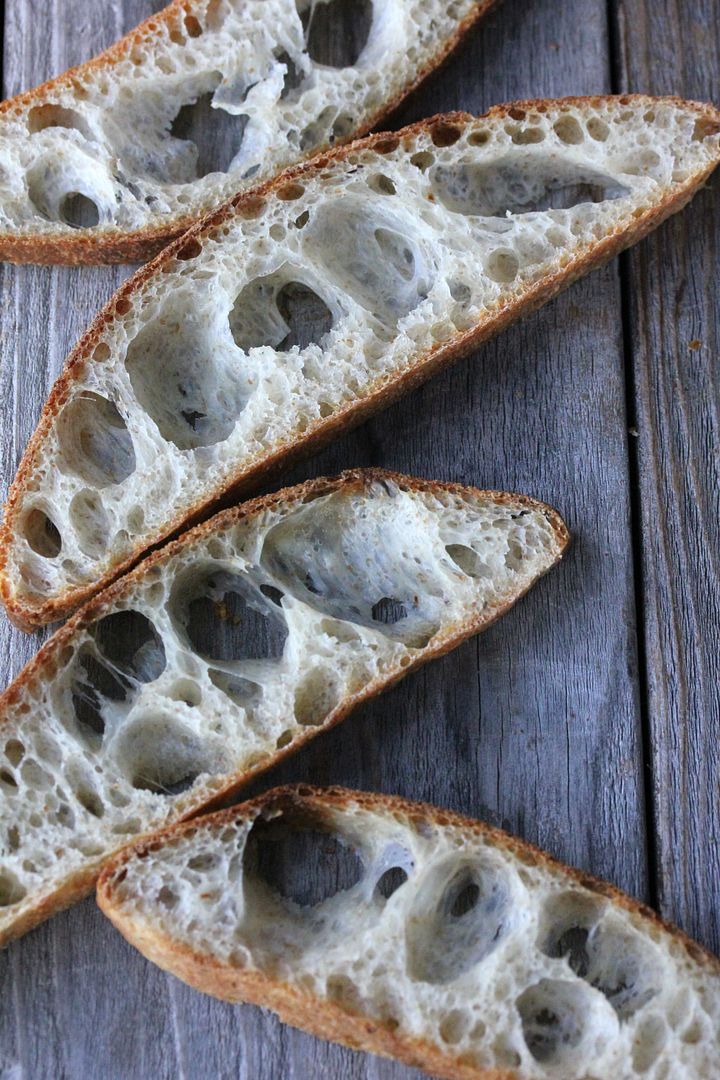
These are bigger than the 36 hour sourdough ones
breadsong's picture
breadsong

Swedish Seeded Barley Bread - Svenska frö bröd

Hello everyone,

I saw a beautiful post on stirthepots.com last February – 
Jeremy’s lovely take on a Swedish seed bread (Svenska frö bröd).
The ‘mosaic of a crumb’ Jeremy described; all those beautiful seeds! That bread looked so, so good.
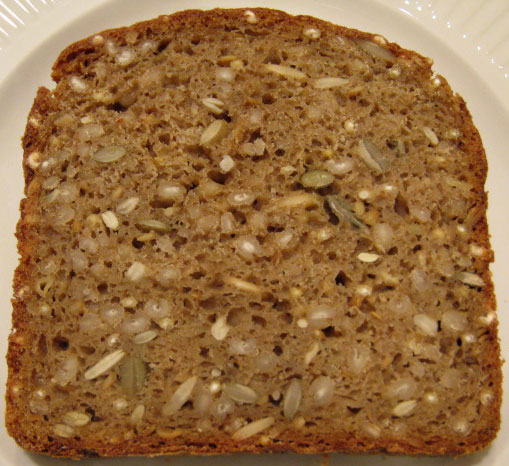
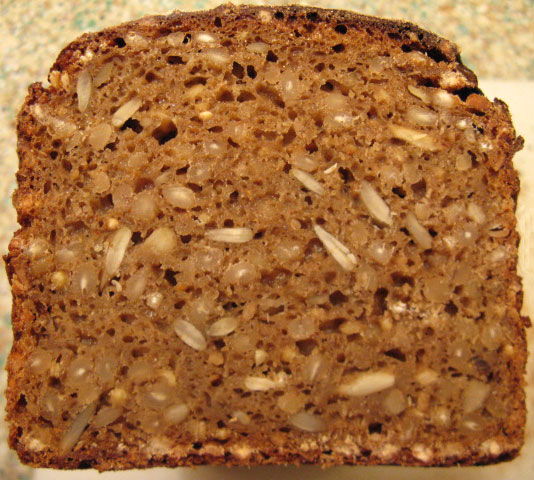
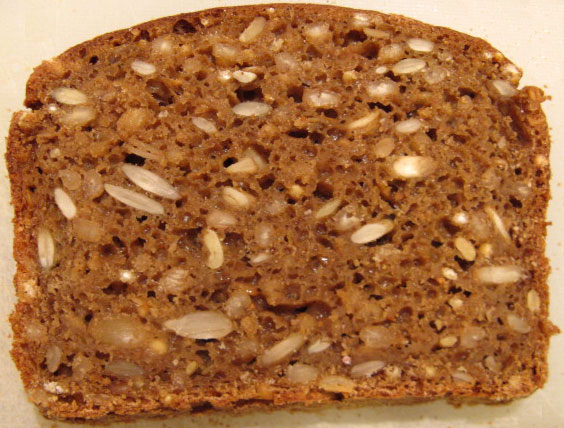
It took me awhile to look up his friend Martin’s blog, and bake this bread – I’m so glad I did! - here's a slice... :^)


There’s so much I like about this bread!

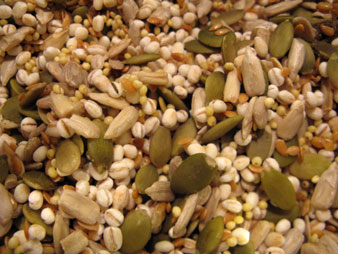
Tons of seeds (pearled barley too)  ;
rye sour and a decent proportion of whole grain flour; easy mixing and process;
the delicious flavor and keeping qualities.

There were some interesting things in Martin’s formula and process.
Martin recommended a cold soak for the seeds, to soften them but not so much that they disappear into the crumb after baking.
Bread syrup was one of the ingredients. I wasn’t sure what bread syrup was but Jan Hedh had a definition in his book Swedish Breads and Pastries (syrup is 25% sugar). I thought I’d try molasses, and for another try, barley malt syrup from the brewer’s, as a substitute.
The mixing was really quick; no dough development, just long enough to combine the ingredients, then the dough panned and retarded.
Reading through Martin's post, the timing for this bread seemed so convenient, the process easy; and they were! :^)

For this bread, I wanted to emphasize barley, since barley is one of ‘seeds’ in this bread.
Barley malt syrup (a dark, thick syrup found at a brewshop) was used in place of bread syrup, and barley flour in place of whole rye called for in the original formula, for the final dough.


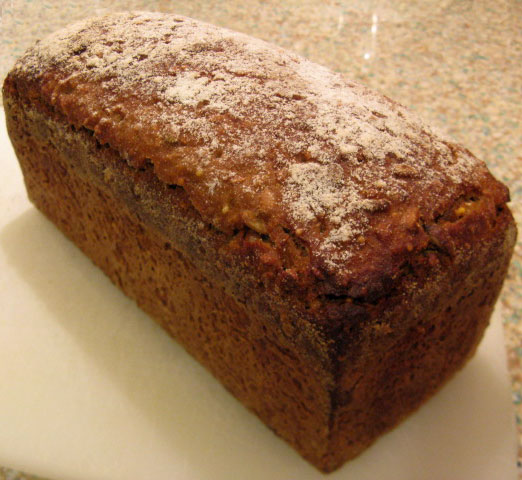
                                     The baked loaf

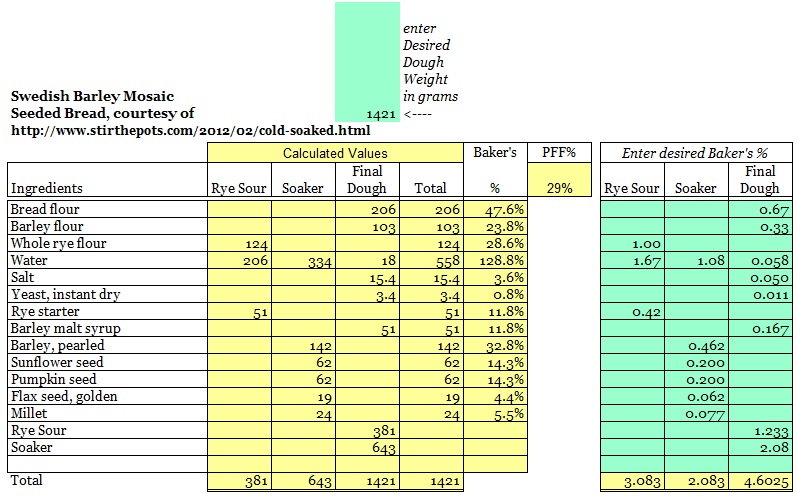
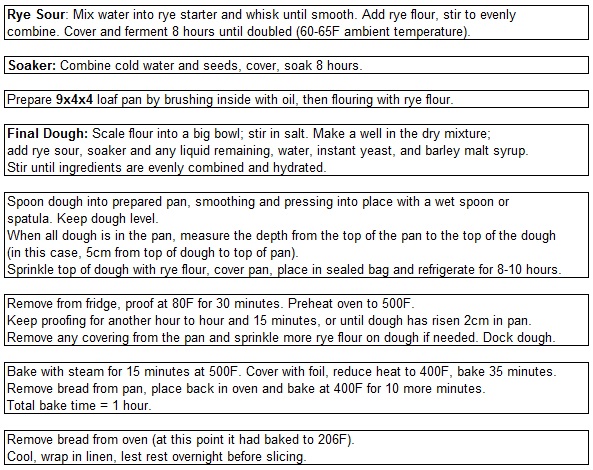
The formula for the bread picture above:

I liked this bread so much I experimented a little bit with the flour and syrup, making a couple of other versions -

whole barley flour, regular molasses at 24% of flour                         
(a bit of sweet carried through in the flavor - factoring in seeds, too, dough may have had about 10% sugar overall)
(scaled approximately 1400g dough for 9"x4"x4" pullman pan)

whole rye flour in final dough, blackstrap molasses at 12% of flour
(a bit of extra water added to compensate for the decreased amount of syrup)
(scaled 768g dough for 8.5"x4.5" bread pan)


In terms of flavor and texture, these breads were moist, chewy, hearty, rich and full of flavor.
Thank you so much to Martin in Sweden for this beautiful bread, and to Jeremy for his gorgeous version of it!

Happy baking everyone!
:^) breadsong

Submitted to YeastSpotting :^)

ars pistorica's picture
ars pistorica

Breaking Bread, an exploration of bread and its many facets.

City loaf

100% flour, stone-ground wheat, 80% extraction rate

89.9% water

24% starter

2.76% salt

Percentage of flour pre-fermented.  15%.

Final dough temperature.  23.5°C.

Autolyse.  2h.

Bulk ferment.  4h30m - 5h.

Divide & rest.  20m - 30m.

Proof.  12h - 18h, at 8°C.

Bake.  265°C, with steam, for 5m, and then 250°C for 35m.  Vent, 235°C for 10 - 20m more.

Starter, city loaf

100% flour, stone-ground whole wheat

60% water

16% starter, bakery

Final dough temperature.  23.5°C.

Fermentation time.  10 - 12h.

Starter, bakery

100% flour, stone-ground whole wheat

60% water

10% starter, bakery, 24h-old

Final dough temperature.  23.5°C.

Fermentation time.  24h.

txfarmer's picture
txfarmer

Pumpkin Laminated Sandwich Loaf - and other holiday goodies

Sending this toYeastspotting.
Click here for my blog index.

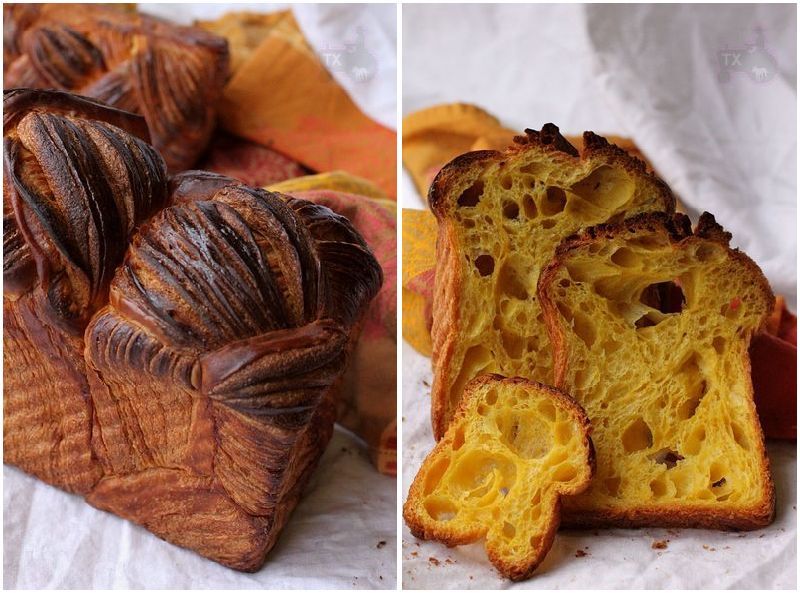
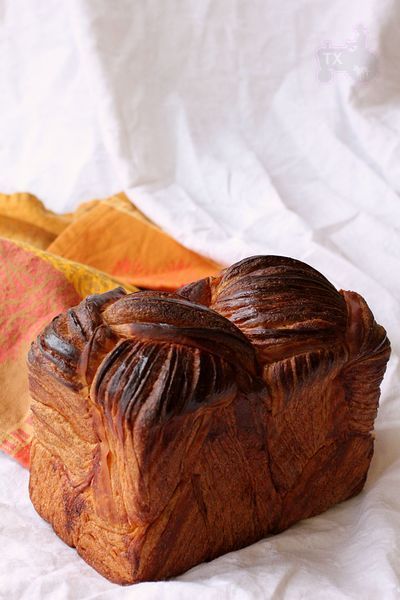
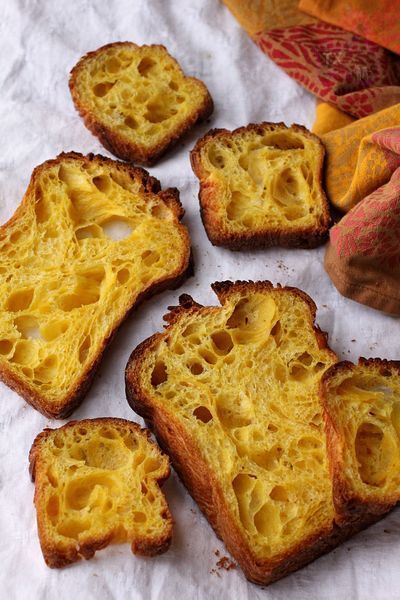
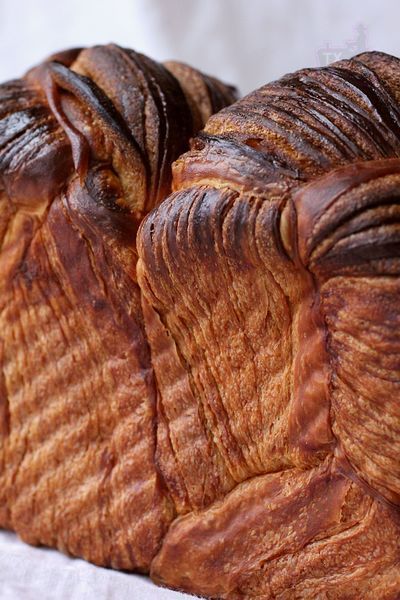
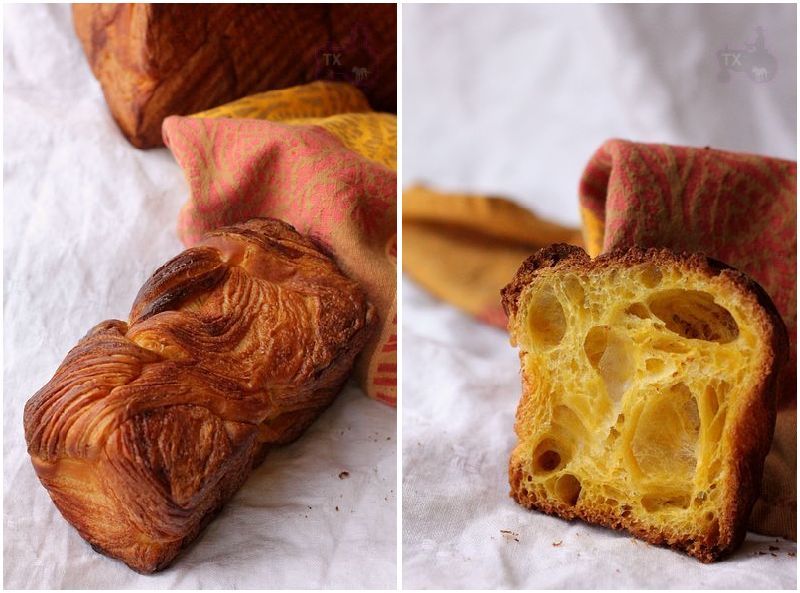
Golden, fragrant, delicious, pretty crust, holey crumb, what's better than these pumpkin laminated sandwich loaves as festive holiday gifts? Ok, maybe sourdough panettones are as good, but these come close.

Procedures are similar to what was posted before(here), but ingredient ratios are a bit different to accomodate pumpkin puree:

-levain
starter (100%), 44g
water, 75g
bread flour, 134g

1. mix and leave at room temp for 12 hours.

-final dough
bread flour, 361g
pumpkin puree, 155g
water, 60g
egg, 77g
sugar, 52g
salt, 10g
instant yeast, 7g
butter, 41g, softened
levain, all
roll-in butter, 245g

2. follow the instructions here: http://www.thefreshloaf.com/node/26357/laminated-sandwich-loaf-best-both-worlds

Another difference is that this time I folded twice, each was a 4-fold, less layers than one 4-fold then two 3-folds here, but more layers than one 4-fold then one 3-fold here.  The more layers the more holes, but they will be smaller, the less folds the less holes even though they are larger.

Peopel are as taken by the layers on the crust as the open crumb

The dough makes mroe than one sandwich loaf, here are some mini loaves. Nice stocking stuffers?

-------------

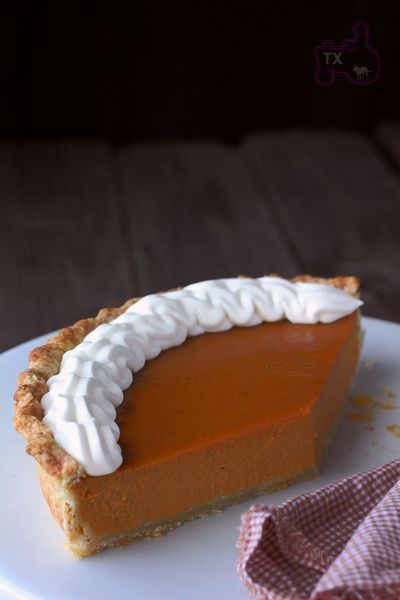
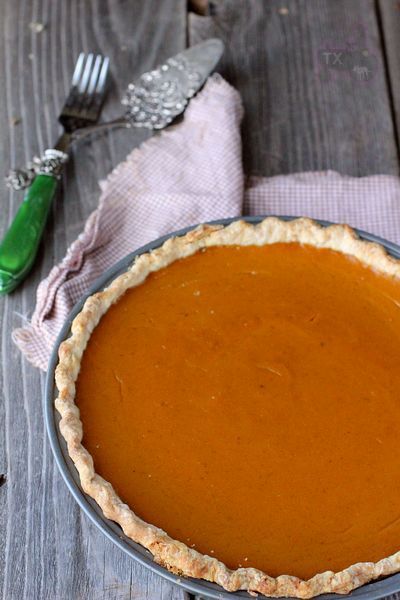
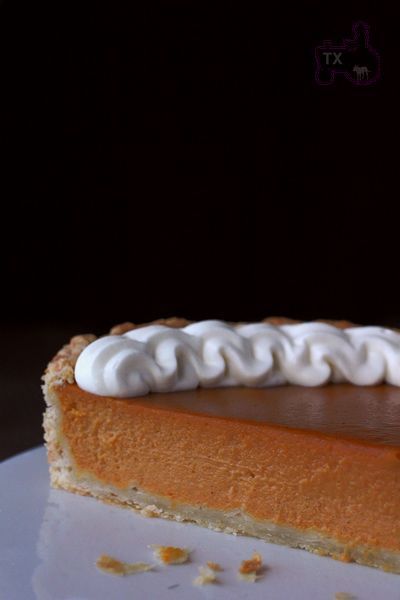
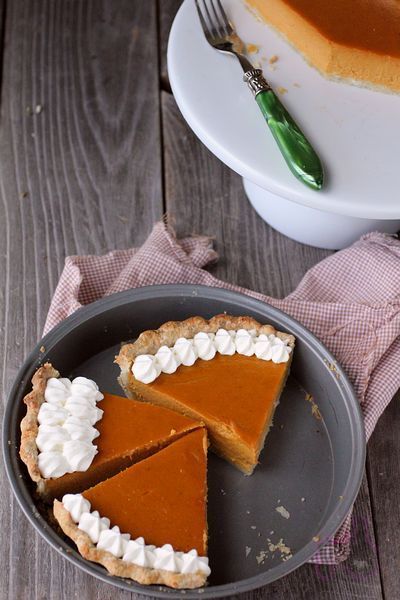
Going with the holiday pumpkin theme, fueled by my recent addiction to perfecting pie crust, here's a pumpkin pie. THE best pumpkin pie I have ever made/eaten.

Cooks Illustrated sometimes gets too nerdy and fussy, but this time they got it right. Recipe can be found here, I only use the filling recipe though.

The reason I love this pie is because it's not overloaded with spice. With the addition of sweet potato puree,natural pumpkin flavor shines through, and texture is silky indeed. Pumpkin spice ratio is controlled, and a full tsp of salt makes the flavor profile very sophiscated. However, if you eat pumpkin pie for the strong "spice" flavor, this is probably not for you.

----------------------------------------------

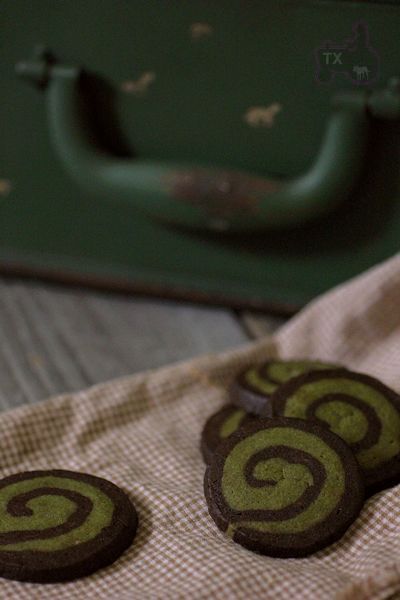
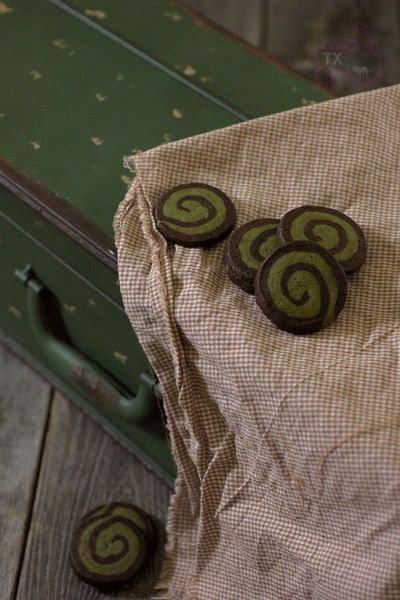
I modified this pinwheel cookie recipe to combine two of my favorite flavors: chocolate and matcha.

Not the easiest cookies to make, but the look and flavor combo made the extra effort worthwhile.

------------------

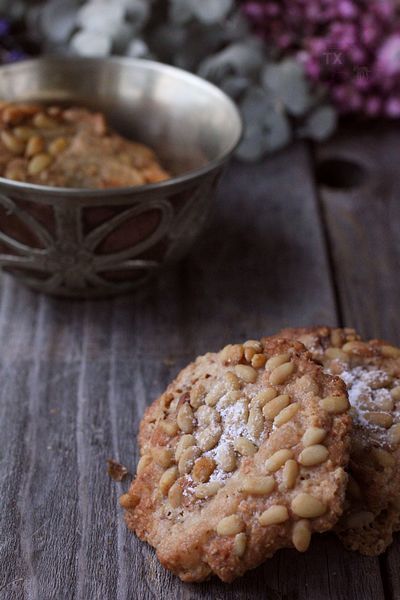
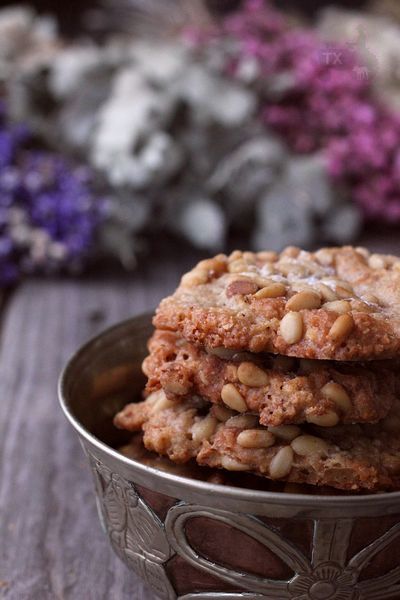
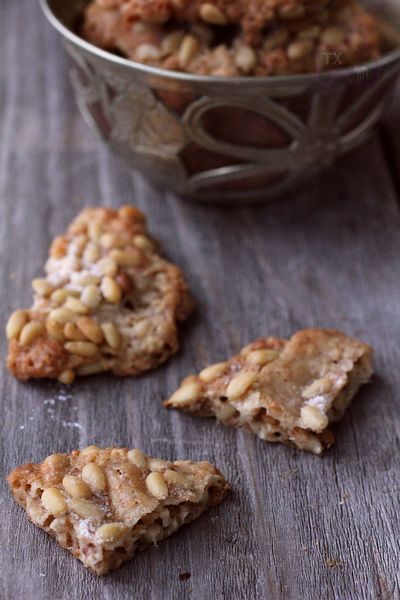
Pignoli cookies, recipe from The Italian Baker by Carole Field

Crispy and fragrant, it also uses only egg whites, which I have 60+ left over from panettone and pie making.

studiowi33's picture
studiowi33

King's Hawaiian Rolls

Hi all-

Last week, I wanted to practice making some rolls for Thanksgiving dinner. I wanted to duplicate King's Hawaiian Rolls, so I searched the site. Most of the pertinent results suggested that Hawaiian rolls were simply a straight Portuguese Sweet bread or a variation of that bread. I've previously made Portuguese Sweet Bread (from the Beard On Bread book) and I knew that that wasn't what I had in mind. So...I turned to our friend Google and made another search.

I came up with 2 very different recipes. The first (from the 350degreeoven.com) was a pineapple and tangzhong mixture that sounded intriguing, and the second (from recipelink.com) was a very simple white bread dough with the peculiar addition of yellow cake mix mixed into the dough. Since the second recipe was the easiest to accomplish, I made that recipe. And it sounded like something corporate America would do to make a 'different' product rather easily.

Due to head/neck cancer, I'm unable to swallow anything right now, so I'm unable to make my own determination as to whether or not this is what I was looking for. But, the first thing out of my brother's mouth after eating one was, "These taste just like those Hawaiian rolls that you buy." That's what my goal was, so I felt pretty successful.

Here are the two links:

http://www.the350degreeoven.com/2011/12/japanese-hawaiian/hawaiian-bread-rolls-kings-hawaiian-bread-copycat-recipe/

http://www.recipelink.com/msgbrd/board_31/2005/DEC/35407.html

Here is the recipe that I used, but I halved it.

CLONED KING'S HAWAIIAN SWEET BREAD ROLLS

1 (18 oz) package yellow cake mix
2 packages Fleischmann's active dry yeast
2 1/2 cups warm water (105-110 degrees F)
1/2 teaspoon salt
5 cups unbleached all-purpose flour
4 Tablespoons melted butter (for tops)

Combine cake mix and yeast. Next, combine water and salt. Add cake mixture to water and salt mixture. Add flour last. Mix well and knead lightly. Let rise 1 hour.

Knead lightly again, pat out and cut for rolls. Place on greased baking sheet or in greased cake pans. Let rise until double.

Bake at 375 degrees F. When brown, brush with melted butter and bake a little longer.

Makes 24 Rolls
Adapted from source: Marbalet

It just so happens that Jiffy makes a 9 ounce box of yellow cake mix, so I just used that.

Let me know if my brother doesn't know what he's talking about. I didn't tell him in advance what I was trying to accomplish, so I feel pretty certain that this might be 'it.'

varda's picture
varda

How to sift home milled wheat to get high extraction flour

Hi,   I recently got a home mill and would like to learn how to make a high extraction flour.    I see references to a bwraith blog post on the subject but can't seem to find it.    Does anyone either know where it is or could give me tips on how to go about milling and sifting to get say an 85% extraction flour?    I am starting with hard red winter wheat.   Thanks!   -Varda

Litebrite's picture
Litebrite

Poke test for cold dough?

Is the poke test as reliable for cold doughs as it is for room temperature doughs? Or maybe a better question to ask is whether the response you look for during the poke test is different for cold doughs vs. room temperature doughs?

Most of the time, I cold retard dough during the bulk fermentation stage, but if shaped loaves are cold retarded, what is a reliable indicator of proper proofing before baking?

Syd's picture
Syd

Josh's Super Sour SFSD

 I made this loaf using Josh's process which he outlined in my previous blog post on San Francisco style sourdough.  (You will need to scroll down to about the halfway mark to view the post).


Levain Build

  • 20g refrigerated starter @100% hydration
  • 100g water
  • 15g light rye flour
  • 85g all purpose

Allow to mature for 12 hours.

*  Josh uses 60% levain in the build, 100% water and 100% flour of which 5% is rye.  I can't use 60% starter in my levain build as it would ripen in three hours with our temperatures over here.  If you plan on following this recipe, you would need to adjust the amount of starter in the levain build so that it matures in 12 hours.  20% starter works out perfectly for me at temperatures of 27C.

 Main dough

  • 300g water
  • 500g bread flour @ 11.4% protein
  • 11g salt

Refrigerate the dough immediately.  Josh  divides into pieces that aren't super thick and retards in lightly greased tubs.  He retards at 40F.

Retard for 22 hours.

Remove dough and allow to come back to room temperature (one to two hours).  Now shape and Josh advises to proof for 3 -5 hours but once again that was not possible for me to do because it would have been overproofed with our warm temperatures over here.  I let it proof for 1 and a half hours.  It was just starting to show signs of activity.  

Retard for another 20 hours.  I retarded for a full 24 just because I only got home late Sunday afternoon.  

Bake loaves with steam for 15 minutes vented for 20+(200 deg internal).  Josh didn't mention the oven temperature but he did say:

 don't forget to bake it dark.  Deep red and a hint of black.  Yum.

Taste


This made for some of the tastiest all-white sourdough I have ever eaten.  It really was worth the wait and despite taking almost 3 days to make it was quite effortless.  There wasn't much to do except wait.  Fortunately I have been extremely busy lately and had no time to camp outside the refrigerator waiting anxiously.

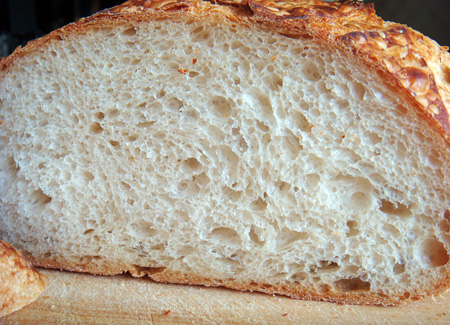
The crust is very chewy on the day after the bake.   It had the kind of flavour in it that I would normally only associate with a loaf that had some whole grain in it.  The crumb was light but consistent with the 11.4% protein flour that I  used.

My only quibble is that it only had the tiniest hint of sour.  I don't think this is a problem with the recipe, but rather with my flour.  I know if I used this process with only 15% wholegrain, I would get a very pronounced sour flavour. It just seems very difficult for me to get a really sour all-white loaf with the flour I use.  I know all flours are not created equally and could it be that my flour is lacking in something that will let it get really sour?  The only time I have got a really sour all-white sourdough with this flour was when I added sugar eggs and butter.  I could smell the sour while it was baking in the oven. Recently, I have been experimenting with adding maltose at a rate of 5% and getting very good results with that, too.  Not as sharp a sour as I got with sucrose but a very mellow sour which lingers in the mouth long after it has been swallowed. 

And a crumb shot.

 So now I still not finished with this one, yet. It seems I still have some experimenting to do.  If could marry the crust that I got with this to the sour I was getting with my previous recipe and then dial in a little more acetic acid flavour, I would be a happy camper and would file this recipe in the tried and tested tray.  For the time being, it is back to the drawing board. Happily, though.:)

Syd

dmsnyder's picture
dmsnyder

San Francisco-style Sourdough Bread two ways 3/25/2012

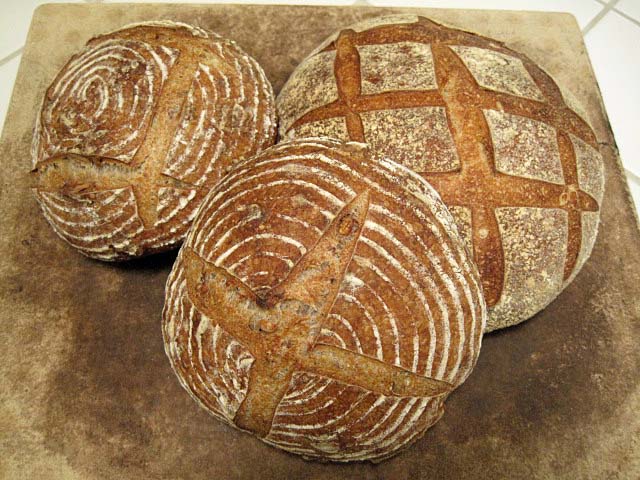
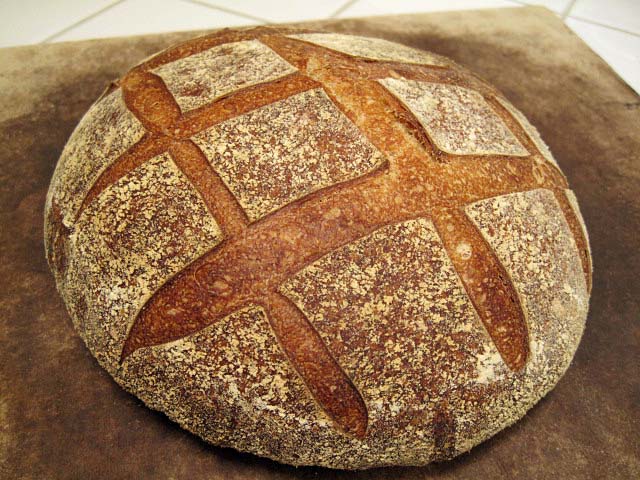
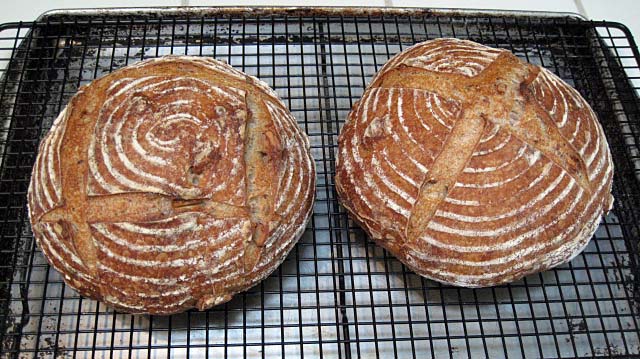
San Francisco-style Sourdough Bread with and without Walnuts

This weekend, I continued trying variations of my San Francisco-style Sourdough Bread. Those who have followed this little adventure will note changes in my starter fermentation, the length of the autolyse and the use of this dough for a Sourdough Walnut Bread.

I started with my stock refrigerated 50% starter that had been fed last weekend. This feeding consisted of 50 g active starter, 100 g water and 200 g starter feeding mix. My starter feeding mix is 70% AP, 20% WW and 10% whole rye flour.

I activated the starter with a feeding of 40 g stock starter, 100 g water and 100 g starter feeding mix. This was fermented at room temperature for 8 hours. The starter was very active. It had tripled in volume and was bubbling. I then mixed the stiff levain.


Stiff levain

Bakers' %

Wt (g)

for 1 kg

Wt (g)

for 2 kg

Bread flour

95

78

157

Medium rye flour

5

4

8

Water

50

41

82

Stiff starter

80

66

132

Total

230

189

379


  1. Dissolve the starter in the water. Add the flour and mix thoroughly until the flour has been completely incorporated and moistened.

  2. Ferment at room temperature for 12 hours, then refrigerated overnight.


Final dough

Bakers' %

Wt (g)

for 1 kg

Wt (g)

for 2 kg

AP flour

90

416

832

WW Flour

10

46

92

Water

73

337

675

Salt

2.4

11

22

Stiff levain

41

189

379

Total

216.4

953

2000

Note: For today's bake, I actually mixed two 1 kg batches of dough. For one, I added about 20% (baker's percentage), or 110 g of lightly toasted walnut pieces. This was mixed at slow speed for a couple minutes after Step 3., below.

Method

  1. In a stand mixer, mix the flour and water at low speed until it forms a shaggy mass.

  2. Cover and autolyse for 20 minutes

  3. Add the salt and levain and mix at low speed for 1-2 minutes, then increase the speed to medium (Speed 2 in a KitchenAid) and mix for 5 minutes. Add flour and water as needed. The dough should be rather slack. It should clean the sides of the bowl but not the bottom.

  4. Transfer to a lightly floured board and do a stretch and fold and form a ball.

  5. Place the dough in a lightly oiled bowl and cover tightly.

  6. Ferment at 76º F for 31/2 to 4 hours with a stretch and fold at 50 and 100 minutes.

  7. Divide the walnut bread dough into two equal pieces. Leave the other dough in one piece.

  8. Pre-shape as rounds and rest, covered, for 10 minutes.

  9. Shape as boules or bâtards and place in bannetons. Place bannetons in plastic bags.

  10. Proof at room temperature (68-70º F) for 1-2 hours.

  11. Cold retard the loaves overnight.

  12. The next morning, proof the loaves at 85º F for 3-4 hours. (If you can't create a moist, 85 degree F environment, at least try to create one warmer than “room temperature.” For this bake, I took two loaves out of the fridge and started proofing them. I took the third loaf out about an hour later and stacked it balanced on top of the other two. I did one bake with the two loaves of walnut bread and a second bake with the third loaf.)

  13. 45-60 minutes before baking, pre-heat the oven to 500º F with a baking stone and steaming apparatus in place.

  14. Transfer the loaves to a peel. Score the loaves as desired, turn down the oven to 460º F for the smaller loaves or 450ºF for the larger one, steam the oven, and transfer the loaves to the baking stone.

  15. After 15 minutes, remove the steaming apparatus, and turn down the oven to 430º F/Convection. (If you don't have a convection oven, leave the temperature at 460º F.)

  16. Bake for another 15 minutes for the smaller loaves or 25 minutes for the larger loaf.

  17. Turn off the oven, and leave the loaves on the stone, with the oven door ajar, for another 15 minutes.

  18. Transfer the loaves to a cooling rack, and cool thoroughly before slicing.

 One of my personal objectives in making this bread for so many weeks running has been, first of all, to develop a formula and procedures that produce a particular style of bread, and secondly to see if I could make small changes that accommodate to my other needs without changing the end product too much.


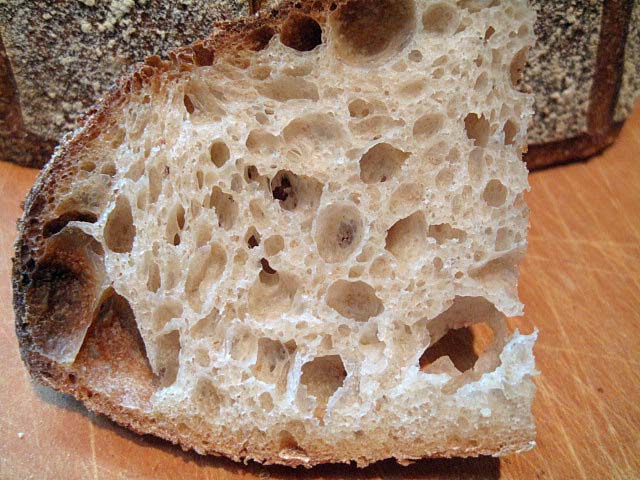
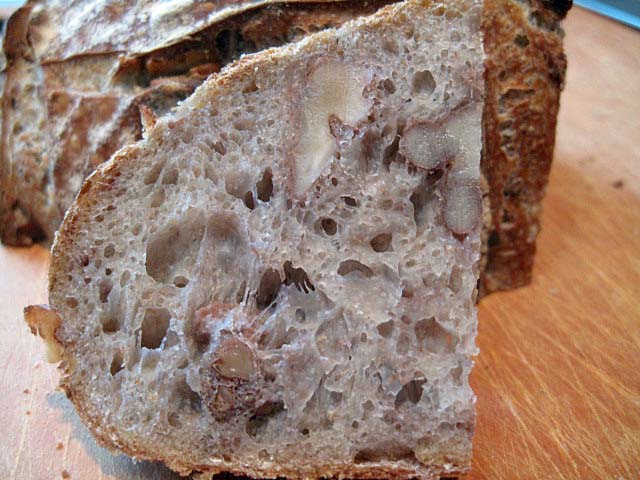
The bread without walnuts was very similar to the last San Francisco-style Sourdough Bread I had baked. The crust was crunchy and nutty-flavored. The crumb was chewy-tender with a moderate sourdough tang and excellent, balanced flavor.


The bread with walnuts was just delicious. I love the flavor of toasted walnuts in sourdough bread. I don't know why I had waited so long to make it again.

Tonight we'll have an appetizer of sourdough walnut bread with an interesting Spanish goat cheese followed by roasted herbed chicken/gruyere panini and a green salad.

David


txfarmer's picture
txfarmer

Sweet Potato Sourdough with Walnuts

Sending this to Yeastspotting.

Index for my blog entries

We live in downtown Seattle with lots of good restaurants, however very few of them have good bread.  The other day, I went to a pretty upscale bistro nearby for lunch, great food but the "baked on site sourdough bread" was below average. The baguette was tight crumbed and hard to chew, the walnut sourdough was also tough with little flavor. It's a shame that a place with such fresh and imaginitive menu doesn't pay more attention to their bread offering.

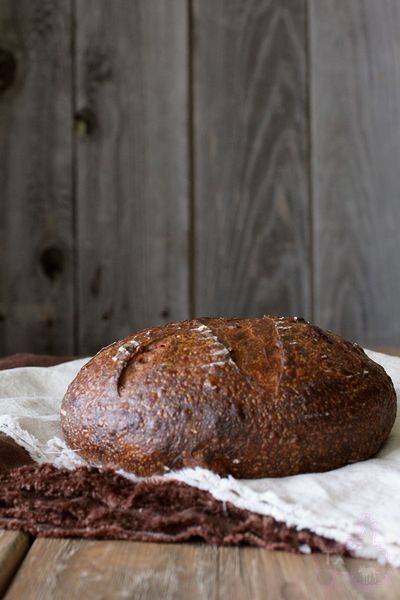
Came home and made this walnut soudough to satisfy my bread craving. Threw in some sweet potato puree, ww flour, and maple syrup for more flavor.

Bread Flour, 228g
WW Flour, 70g
Sweet Potato Puree, 105g
Starter(100%), 105g
Water, 152g
Salt, 5g
Maple Syrup, 18g
Walnuts, 77g, toasted

1. Mix everything but walnuts, autolyse for 20 to 60min,mix @ medium speed for 3-4 min until gluten starts to develope, mix in walnuts.
2. Bulk rise at room temp (~75F) for about 2.5hrs. S&F at 30, 60, 90min.
4. Shape, put in basketes smooth side down, put in fridge over night.
5. Next morning take the dough out to finish proofing, about 70min for me. Score.
6. Bake at 450F with steam for 15min, lower to 420, bake for another 25min.

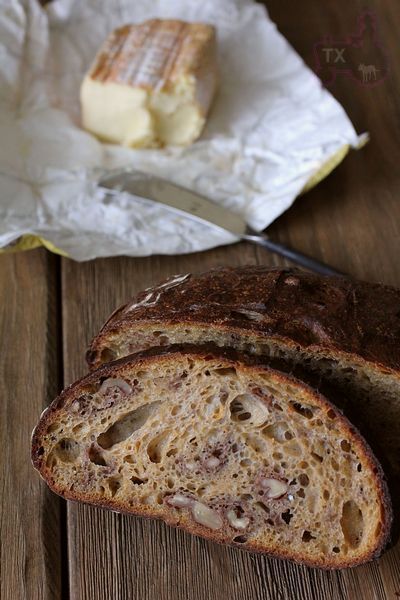
Sutle sweetness from sweet potato works great with sourdough, maple syrup, and ww flour. Walnuts adds fragrance and crunch.

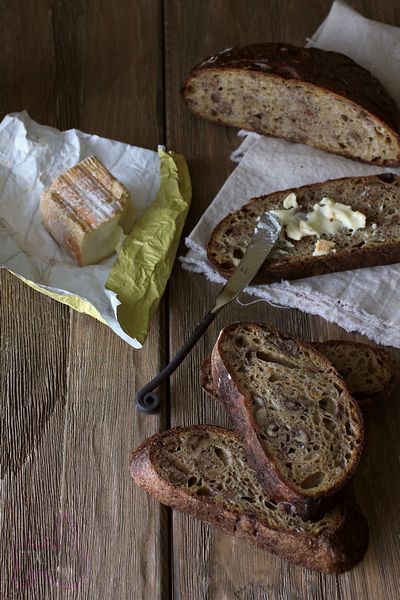
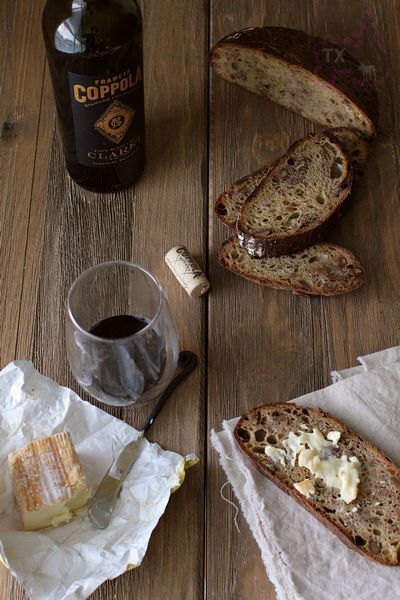
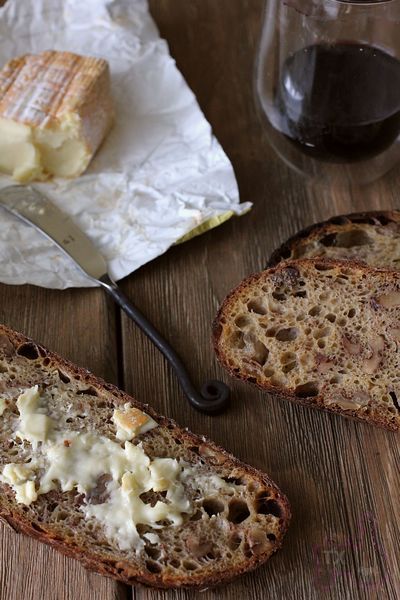
Cheese, red wine, good sourdough bread - my idea of a perfect meal.

I found a very good cheese shop nearby, this German limburger cheese is deliciously stinky (it was compared to "body odor", and I still bought it!).

----------------------

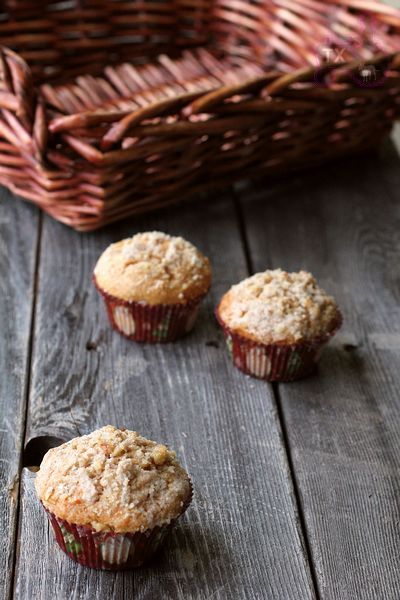
Using the same batch of sweet potato puree, I made some muffins

With topping and some cream cheese filling so they are extra yummy. Forgot exactly which recipe I used, but I do remember it's a good basic pumpkin muffin recipe I based these on. 

Pages