The Fresh Loaf

A Community of Amateur Bakers and Artisan Bread Enthusiasts.

Most bookmarked

jarkkolaine's picture
jarkkolaine

Finnish Pulla

My grandfather often tells the story of how during the war, when Helsinki was being bombed, his mother had to leave the pulla dough as the family fled to the nearby bomb shelter. After many hours, when they came back home, there was a surprise waiting for them: pulla dough all over the place -- apparently it had raised rather well!

Pulla, or Nisu as it's known in the United States (in old Finnish, nisu was the word for wheat, nowadays we call it vehnä) is the most common sweet bread in Finland and very popular with coffee -- so popular that it's also known as "kahvileipä", coffee bread.

In this recipe, which I wrote about a year ago, I have tried to combine some of the things I have learned about bread with the best of Finnish pulla.
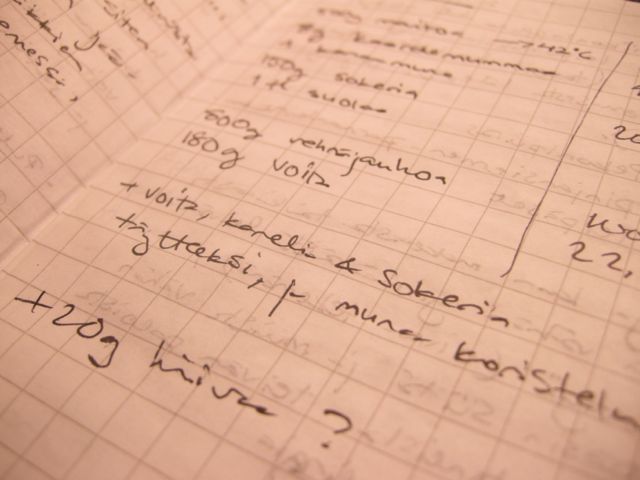
Most pulla recipes tell you to start from the milk and then slowly add flour until the dough feels right. Because of this, the recipes are not that exact. I go the opposite way and start from flour. I also use less yeast and allow the dough to rest a bit longer. Other than that, this is very traditional pulla.

--

  • 500 g full milk
  • 8 g cardamom
  • 1 egg (shelled weight about 60 g)
  • 150 g sugar
  • 10 g salt
  • 800 g all-purpose flour
  • 11 g instant yeast
  • 180 g butter
     
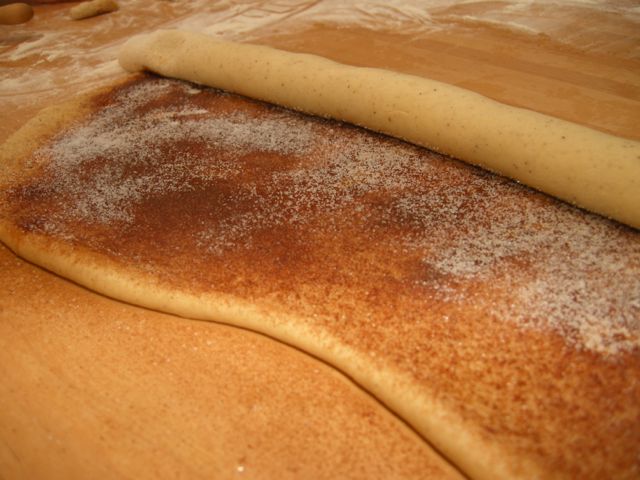
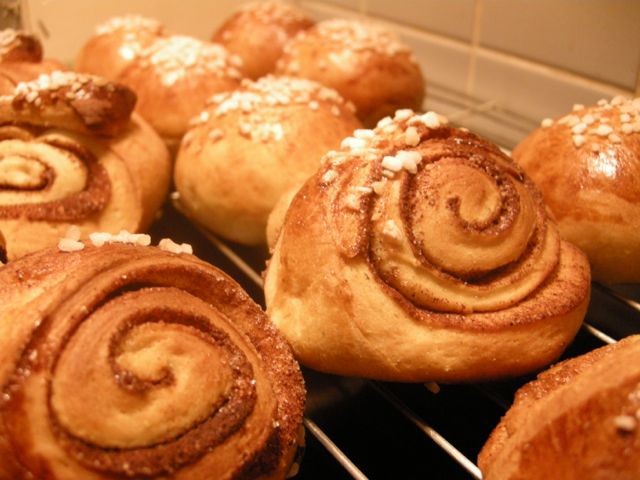
  • For cinnamon rolls, you will also need additional cinnamon and sugar as well as a little melted butter. I didn't measure these, but I hope you can get the amounts by looking at the photos below...

Instructions:

  1. Mix all dry ingredients together.
     
  2. Heat the milk to 42 degrees celcius to wake up the instant yeast and pour over the dry ingredients. Add the egg.
     
  3. Mix the dough. I worked the dough for about 10 minutes by hand, using the technique taught by Richard Bertinet.
     
  4. Add the butter, at room temperature, and continue working the dough until everything is smooth and nice.
     
  5. Let the dough rest until it's almost doubled in size. I did a stretch and fold sequence after 45 minutes of rest and then let the dough rest for a total of 1.5 hours, or maybe a little more.
     
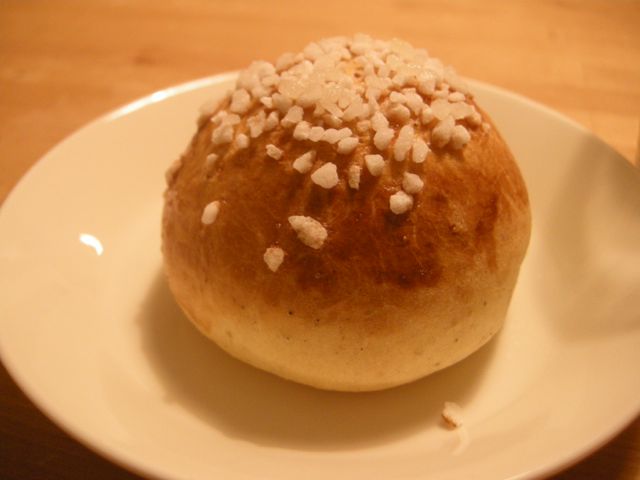
  6. To make buns, shape the dough into small balls and let them rest for about 45 minutes before baking. Just before putting them in the oven, coat with egg and some pearl sugar. Bake for 10-12 minutes in 225 degrees Celcius.
     
  7. To make cinnamon rolls, use a rolling pin to form the dough into a rectangle with roughly the shape of a wide-screen television screen and thickness of about 5 millimeters or so. Brush with melted butter and sprinkle with cinnamon and sugar.
     
  8. Starting from the further wide end, roll towards yourself until you have a nice, tight roll.
     
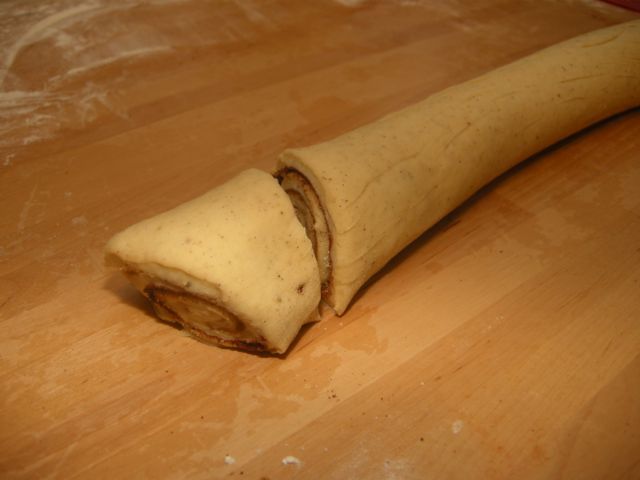
  9. Using a sharp knife, cut the left side of the roll so that you have a clean corner at about a 45 degree angle. I like to eat the dough that was cut away, and so do my kids.

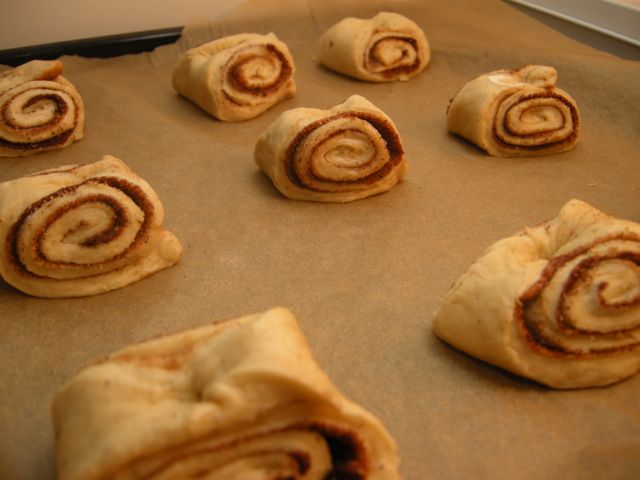
  10. Continue from there, cutting to the opposite direction at the same angle, until you reach the end of the roll and can eat some dough again. You should now have a bunch of nice triangles.
     
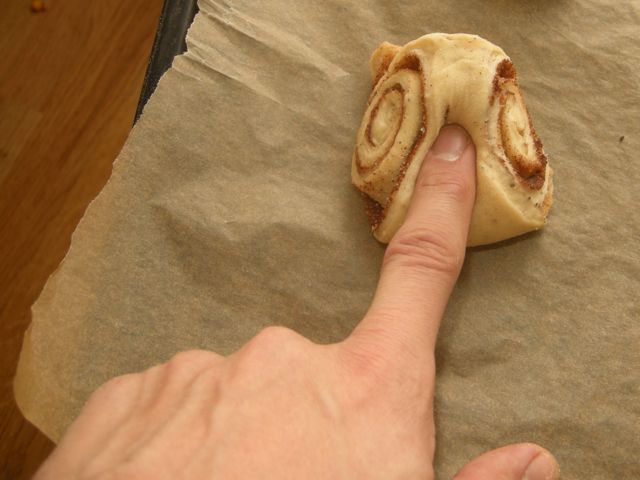
  11. Move your triangles on a baking sheet, the tip of the triangle pointing up. Gently press the top down with one finger and leave to rest for 45 minutes or so. 
     
  12. Bake the same way as the buns.

Fresh pulla is best enjoyed with a glass of cold milk.

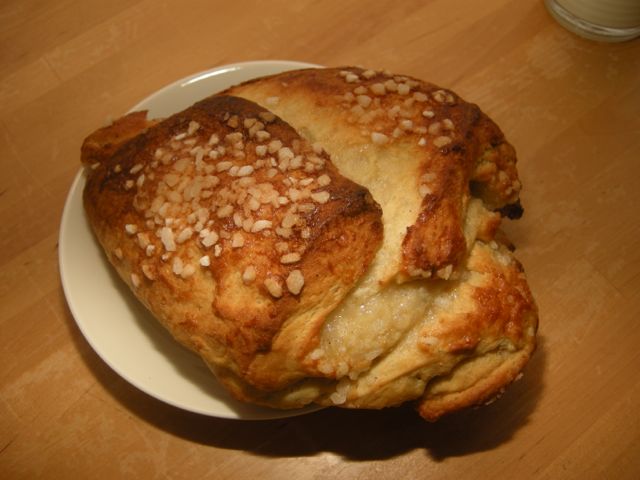
And finally, here's my four-year-old's work of art. It has a lot of added sugar and butter!
PiPs's picture
PiPs

Organic Wholegrains + 40% Rye with Caraway

My stocks have been running low. Grains, flour, salt and even the bread in the freezer have all taken a beating over a busy Christmas period.

With suppliers back on board after holidays I was more than a little relieved when a new shipment of biodynamic wheat and spelt grains finally arraived.

Along with the grain, I was also in need of white flour. The idea of leaving a gentler footprint to me means that if I have to use processed white flour then it should be from a local and organic producer. So for this reason I have switched to organic plain white flour from the Kialla Pure Foods mill only 150 km away. (90 miles) Kialla’s plain flour with a protein level of 12.5% is stronger than the bakers flour I been currently using but has a slightly creamier colour and chewier mouth feel. For this weekends bake though, I wanted wholegrains and organic. I hadn’t planned on baking any rye until a friend suggested she would like to try a lighter rye sourdough. Nat and I have a strong appreciation for caraway seeds with rye so this was suggested as well.


Organic 40% Rye Sourdough with caraway

Formula

Overview

Weight

%

Total dough weight

1800g


Total flour

1071g

100%

Total water

769g

72%

Total salt

19g

1.8%

Prefermented flour

428g

40%

Desired dough temperature 26-27°C


Rye sour build – 12-14 hrs 22-24°C


Starter (not included in final dough)

21g

5%

Freshly milled rye flour

428g

100%

Water

428g

100%


Final dough


Rye sour

856g

133%

Organic plain flour

643g

100%

Water

341g

53%

Salt

19g

1.8% of total flour

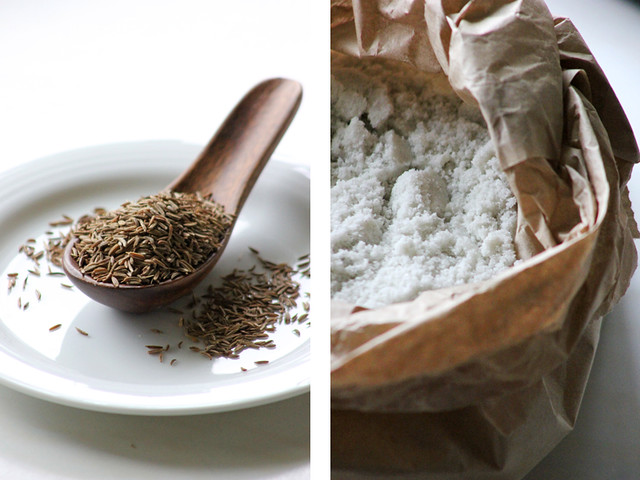
Caraway seeds

19g

3%

Method

  1. Mix rye sour and leave overnight to ferment
  2. Next day disperse rye sour in remaining water and add flour.
  3. Knead for 5 mins (this is sticky and uncomfortable)
  4. Add salt and knead for a further 10 mins until dough starts to show signs of smoothness.
  5. Gently mix in caraway seeds until combined.
  6. Bulk ferment one hour
  7. Gently preshape. Bench rest 20 mins. Gently shape into batards.
  8. Final proof was one hour at room temperature (27°C).
  9. Load into oven with steam at 230°C for 10 mins then reduce temperature to 200°C and bake a further 30 mins. 

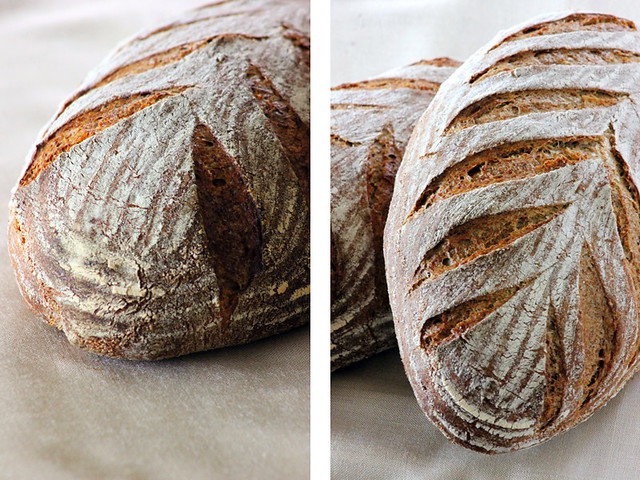
The rye sour had developed nicely and apart from the seemingly unending stickiness of kneading, the dough eventually bulk fermented into a smooth dough that shaped quite easily.

The final proof kept me only my toes as I was mowing the backyard and ducking inside every 15 minutes to check on it’s progress, as it has been quite hot and humid recently.

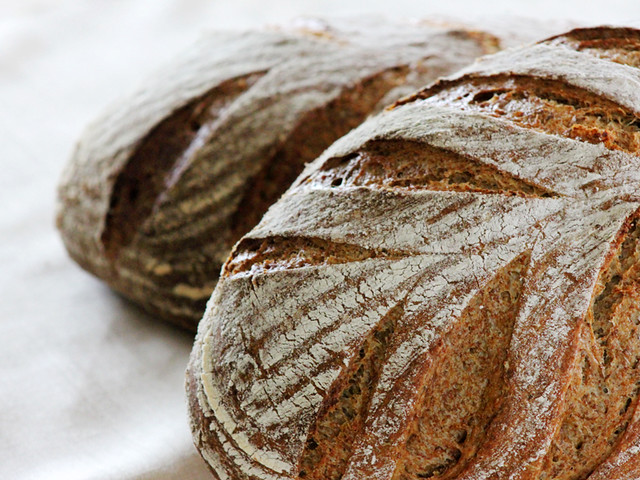
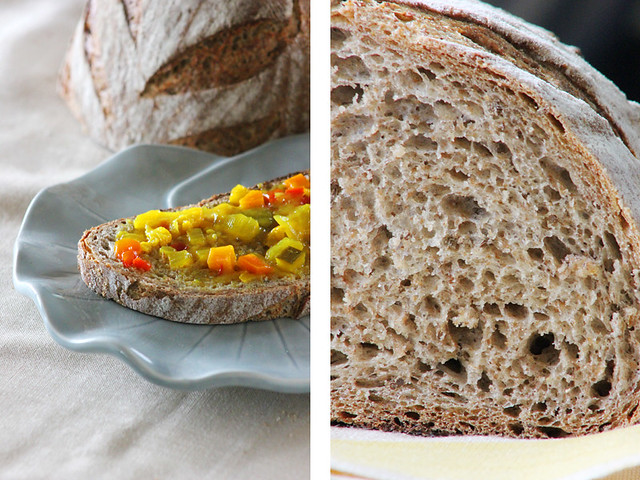
I am particularly fond of the crumb colour with the caraway seeds hidden amongst the rye bran. The flavour is a really nice balance of a subtle rye tang with a puff of caraway scent on some bites.


I also baked a pair of simple organic wholegrain sourdoughs - the first breads for our household this year. The levain contains a proportion of Kialla plain flour so approximately 90% of the flour is freshly milled wholegrains.

I tried a few new procedures with this bake. I milled the wheat grains in two passes. The first pass cracked the grains before passing them through the mill again at a finer setting. This didn’t produce much heat in the flour and I ended up with softer feeling flour than in the past.

The other change was the fold in the bulk ferment. I recently read a comment by proth5 on the timing of a stretch-and-fold in a two hour bulk ferment. (sorry Pat I can’t remember where you posted it) If the dough is already well developed before the bulk ferment, perhaps a stretch-and-fold could occur earlier in the bulk ferment allowing some larger gas pockets to develop in the 2nd half of the bulk ferment.


Organic Wholegrain Sourdough

Formula

Overview

Weight

%

Total dough weight

2000g


Total flour

1081g

100%

Total water

919g

85%

Total salt

21g

2%

Prefermented flour

270g

25%


Levain build – 4-5 hrs 26-27°C


Starter (60g not included in final dough)

100g

40%

Flour (I use a flour mix of 70% Organic plain flour, 18% fresh milled wheat, 9% fresh milled spelt and 3% fresh milled rye)

240g

100%

Water

120g

50%


Final dough


Levain

405g

50%

Freshly milled organic wheat flour

703g

86%

Freshly milled organic rye flour

108g

14%

Water

784g

96%

Salt

21g

2%


Method

  1. Mix levain and leave to ferment for 4-5 hours
  2. Mill flours and allow them to cool before mixing with cold water from fridge (hold back 50 grams of water) and autolyse four hours.
  3. Add levain to autolyse then knead (French fold) 5 mins. Return the dough to a bowl and add salt and remaining 50 grams of water and squeeze through bread to incorporate (dough will separate then come back together smoothly) then knead a further 10 mins.
  4. Bulk ferment two hours with one stretch-and-fold after 30 mins.
  5. Preshape. Bench rest 20 mins. Shape.
  6. Load into oven with steam at 230°C for 10 mins then reduce temperature to 200°C and bake a further 30 mins.


This has become familiar dough for me to mix. At 85% hydration doubts can creep into my thinking as the initial mix feels sticky and loose. Press on, add the salt and feel relief as the dough tightens up and releases cleanly from the bench.

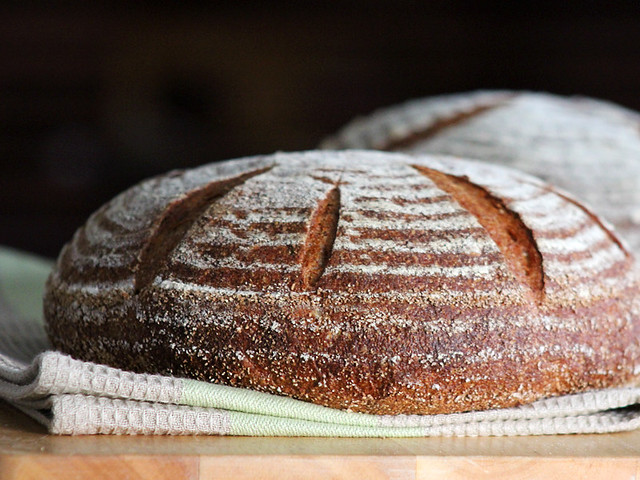
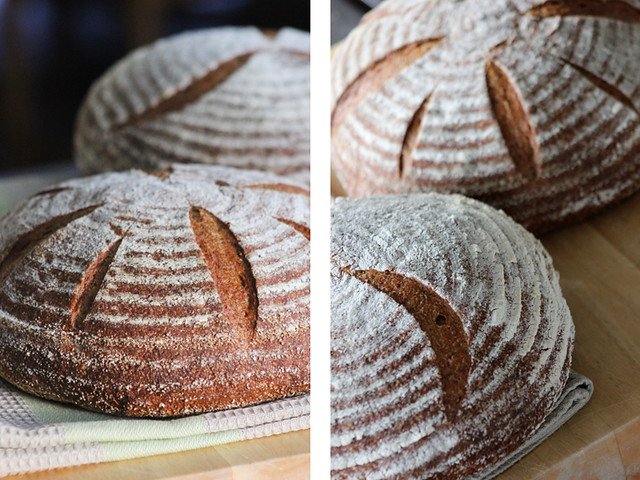
The dough felt strong even after shifting the stretch-and-fold forward 30 mins so I left it untouched for the remaining time and was rewarded with light bubbly dough ready for preshaping. I am quite pleased with the proofing on both of the loaves and find I am becoming braver at judging their readiness for the oven. They sprang beautifully on a hot stone.

Some rye bran is visible scattered throughout the moist crumb which contains no hint of sour. The change in bulk ferment procedure has possibly led to a slightly more irregular crumb, but this will need to be experimented with and expanded.


Another busy day in the kitchen which was balanced by an equally busy day doing yard work.  The sun is finally shining here after a day of humid grey skys. We plan to make the most of it.

Cheers,
Phil 


hanseata's picture
hanseata

Pain à la Bière - Alsatian Beer Bread

Last spring Breadsong posted about Alsatian Beer Bread, a formula developed by Chef Jacquy Pfeiffer, published in "Modern Baking", a professional bakers' website http://modern-baking.com/bread_pastry/mb_imp_16940/. I liked the looks of her buns, and was intrigued by the beer crunch crust  (if it's crunchy AND made with beer, it must be good!) so I copied the recipe from "Modern Baking" to my ever growing to-do list.

Alsatia is famous for its  happy marriage between French and German cuisine, as shown in Zwiebelkuchen - Onion Tarte (http://www.thefreshloaf.com/node/19698/time-onion-tarte-zeit-fuer-zwiebelkuchen), and Elsässer Apfeltorte - Alsatian Apple Torte. 

It's also home of one of my favorite authors, Tomi Ungerer, known for his quirky, illustrated books for children and adults, whose heroes are no mild mannered goodie-two-shoes, but usually just the opposite - like the stubborn cat boy in: "No Kiss for Mother". And even in his wonderful illustrations for a book of German folk songs ("Das grosse Liederbuch") he always manages to smuggle one little nasty detail in his otherwise idyllic scenes and landscapes.

Like me, Tomi Ungerer loves cats and good food, and is no tee-totaller. And as an Alsatian, he must love this bread, too.

PAIN À LA BIÈRE - ALSATIAN BEER BREAD (3 loaves)

PATE FERMENTEE
 95 g all-purpose flour
 95 g bread flour
   3 g salt
    1 g instant yeast (1/4 tsp.)
119 g water
 
FINAL DOUGH
 28 g potato flakes
 98 g water, (to soak potato flakes)
all pate fermentee
250 g bread flour
125 g rye flour (whole or medium)
    9 g salt
    4 g instant yeast
220 g water
 
BEER CRUNCH (enough for 6 breads)
50 g rye flour
90 g beer
2 g salt
1 g instant yeast
rye flour , for dustin

DAY 1:

1. Prepare pâte fermentée. Let ferment at least 3 hours at room temperature, stretch and fold, then refrigerate.

 DAY 2 :

2. Remove pâte fermentée from refrigerator 2 hours before using.

In a small bowl, mix potato flakes with water.

 3. Combine all dry dough ingredients with pâte fermentée. Add cautiously 220 g water (not all might be needed). Mix on low speed for 3 minutes, add potato flakes and knead for another 3-4 minutes. Reduce speed to medium-low and continue kneading another for 2-3 minutes.

 4. Let rise for 1 hour. Divide dough into 3 pieces (350 g), pre-shape into rounds, let rest for 10-15 minutes. In the meantime, combine ingredients for beer crunch in small bowl.

 5. Fold 3 sides of rounds into center to make triangles. Place on parchment lined baking sheet, seam side down. Spread beer crunch over loaves, then dust with rye flour.

 6. Preheat oven to 470 F/245 C. Let breads proof for 1 hour at 81 F/27 C. (If rye flour is absorbed, dust again before baking).

 7. Bake for 20 minutes, (no steam,) rotate, and continue baking for another 20 minutes.


Comments: The original recipe lists only an unspecified pre-ferment. I used a pâte fermentée, but I'm sure a levain would work as well.

It also has 240 g water for the final dough, but cautions that might be too much. It was! The dough looked at first drier than it really was, and I had to adjust with more flour to keep it from being wet like Pain à l'Ancienne dough, and totally unshapable. Therefore I suggest using 220 g water.
The original formula's baking temperature (470 F) and time (40 minutes) reflects conditions in a commercial oven, after 20 minutes baking time the breads were already getting rather dark, and after 25 minutes the internal temperature had already reached 208 F, so I took them out. Thinking of David Snyder's San Joaquin Sourdough, I would next time bake the breads at 460 F, for about 27 - 29 minutes, plus leaving them longer in the switched-off oven to prevent the crust from softening.

All in all, a really nice bread, with a hearty note from the rye, a great crust, and an attractive look. I will add it to my repertoire.

Updated 2/11/12 to include some information Kim gave me (who had made this bread at a baking class with Chef Pierre Zimmermann).

PiPs's picture
PiPs

PiP’s Hybrid Ciabatta … mkI

I have baked the ciabatta formula from Maggie Glezer’s Artisan Baking many times. For me it’s a reference point of what an ideal ciabatta should taste, look and feel like … oh and the aroma of the fermented biga is pretty special too. 

In contrast, I have eaten naturally leavened ciabattas and find I am a little disappointed with the texture. I enjoy the taste … but the chewiness and tougher crust feel out of place. For me a ciabatta should be almost weightless, brittle and singling loudly when removed from the oven. Its crumb translucent and fine … and yes holes … lots of holes  :)

I decided it was time to try and get the best of both worlds in a ciabatta – the delicate crust and crumb from the commercial yeast and the flavour and strength from a stiff levain - a hybrid ciabatta.

I expanded my levain with the standard mix of AP flour and freshly milled grains with the plan of using it fairly young thus keeping the acidity reasonably low.

Next the hydration … now this is something that I think I can push further very easily.

I set the hydration for 85%, but with a twist in the mix. Instead of building strength with plenty of stretch and folds as per Craig Ponsford’s ciabatta formula I planned to use a double hydration method.

The double hydration method I used was this … add enough water in the autolyse and initial mixing to bring the hydration to 75% while holding back the remaining water and salt. After a thorough kneading (15 min) add the remaining water and salt then mix until dough combines again. The mixed dough felt strong even before the bulk ferment and even stronger after two stretch and folds. In hindsight I think only one stretch-and-fold would have been necessary (if at all)

It bulk fermented for 2.5 hrs before I divided and shaped the puffy dough. By this time the dough had gained so much strength that I probably could have shaped into batards if I was feeling game.

After proofing I baked them in a very hot oven and managed to get a nice little steam burn on my thumb from cracking a bubble as I turned the loaves half way through the bake.


Pip’s Hybrid Ciabatta mkI

Formula (makes 4 x 500g ciabattas)

Overview

Weight

%

Total dough weight

2000g


Total flour

1081g

100%

Total water

919g

85%

Total salt

26g

2.4%

Prefermented flour

162g

15%

Desired dough temperature 24°C


Levain build – 4-5 hrs 24°C


Starter (not included in final dough)

81g

50%

Flour (I use a flour mix of 70% AP flour, 18% fresh milled wheat, 9% fresh milled spelt and 3% fresh milled rye)

162g

100%

Water

81g

50%


Final dough 24°C


Levain

243g

26%

AP Flour

919g

70%

Instant Yeast

3g

.3%

Water

838g

91%

Salt

26g

2.8%


Method

  1. Autolyse flour and water 45 mins (hold back 100 grams of water)
  2. Add levain, instant yeast and knead until well developed, roughly 15-20  mins. Return the dough to a bowl and add salt and 100 grams of water and squeeze through bread to incorporate (dough will separate then come back together smoothly)
  3. Bulk ferment 2.5 hours with two stretch-and-folds in the first hour. This could be taken back to one stretch-and-fold as the dough had gained considerable strength by 2nd set of folds.
  4. Divide and shape. I did a letterfold and placed seam side down.  With less stretch-and-folds this may work better. Dough was a little to tense. Maybe even just cut and prove with no shaping.
  5. Flip the dough off the couche and transfer to peel. Dimple by pressing fingers into dough. Peel into a very hot oven with steam and bake for 35 mins at 250°C until very well browned.


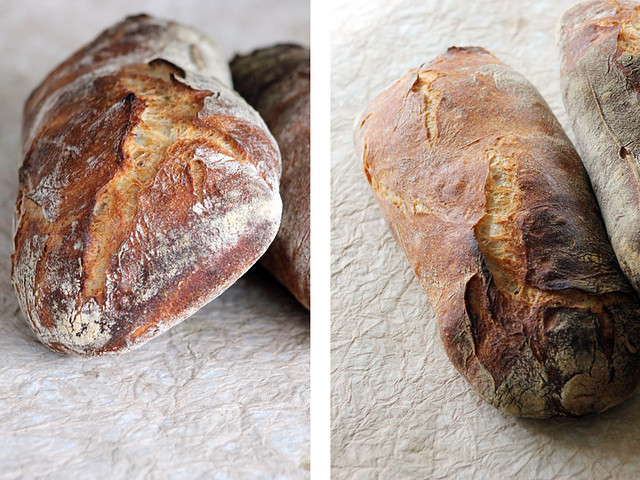
They had amazing ovenspring and sang proudly when removed from the oven to cool. The crust is a dark red with expansion cracks running along the top from the letter fold seam. I then summoned all my self control and allowed it to cool before slicing into it. Whew … exhausting!

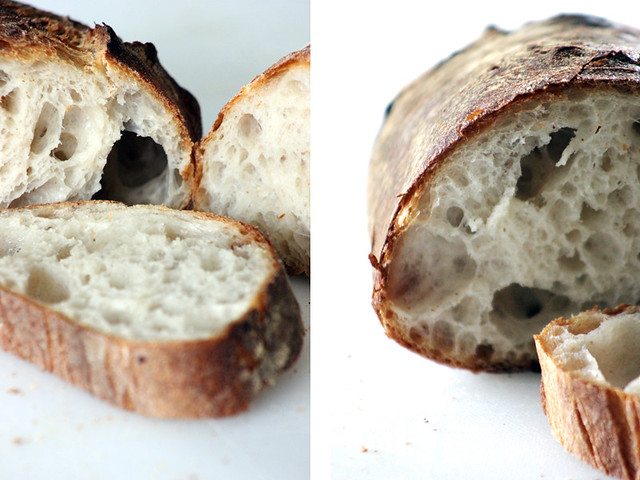
The crust cracked and shattered as the knife descended through it before revealing a open and opaque crumb. The kind of crumb I love in a ciabatta. Delicate! The flavour of the levain brought a much cleaner and lighter taste to the bread than the biga … a taste I think I prefer.

Were there holes? … well yes, but not quite as large and random as the glezer formula, but I think that has more to do with the extra handling I gave the dough during the bulk ferment.

But will I bake these again? Yep, very happy, but I will change a few things. I like the double hydration method and will use it again but I think I can increase the hydration to 90% easily while doing away with one of the stretch-and-folds. Perhaps even a tad more whole grains next time … I do like to see flecks in the crumb.

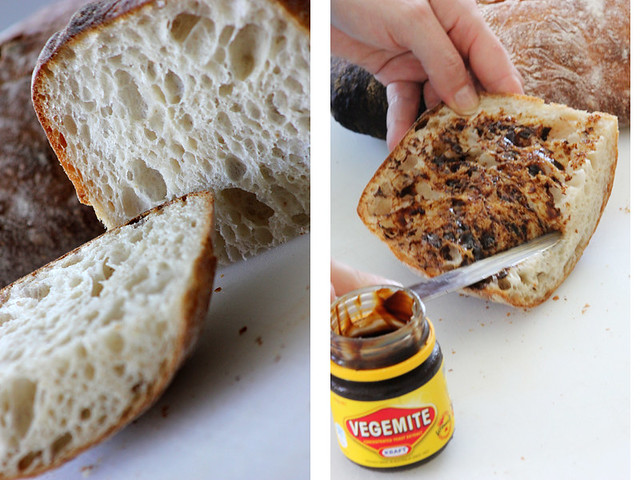
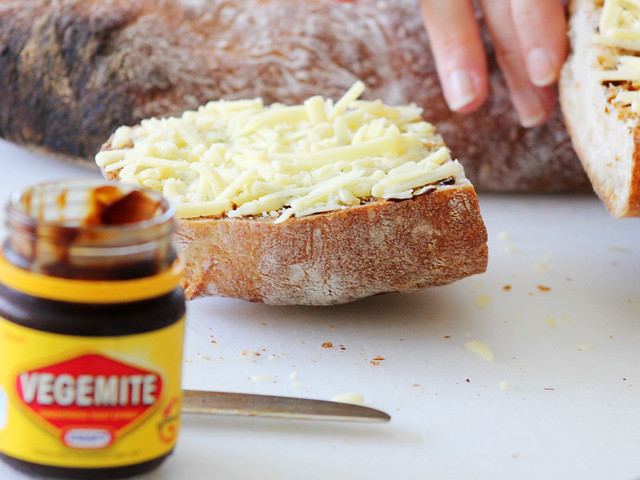
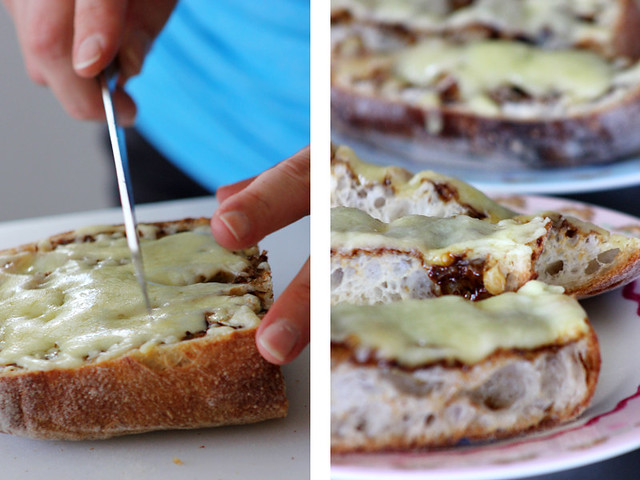
I would love to say we built gourmet sandwiches with fresh basil, plump sun ripened tomatoes and the finest olive oil … but in reality we made toasted cheese soldiers for the kids.

…and what do Aussie kids have on there toasted cheese soldiers?

vegemite!

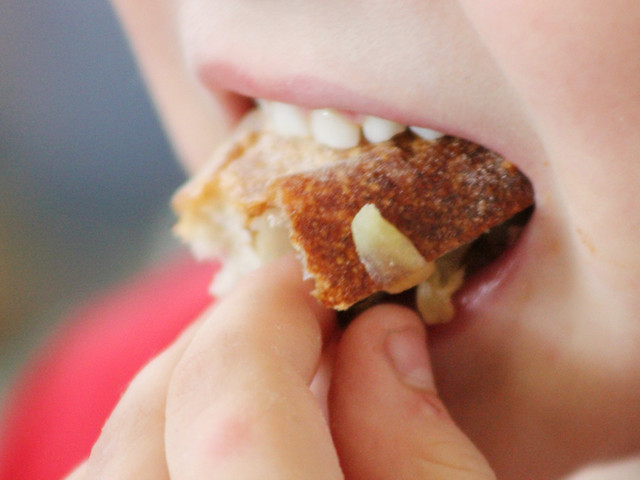
… and do you know what?… they tasted awesome!

All the best,
Phil

PiPs's picture
PiPs

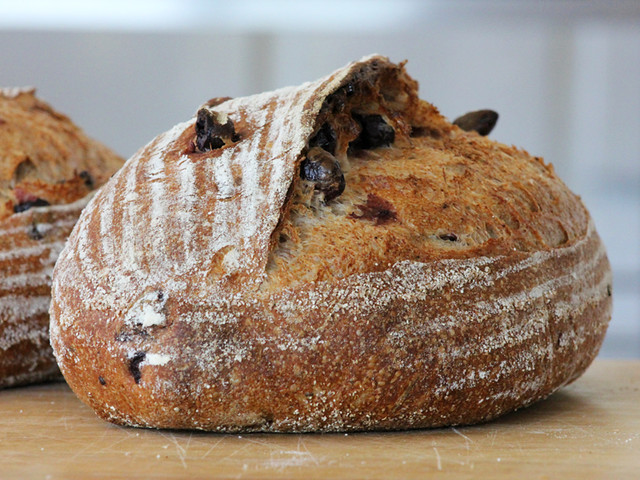
Olive and Herb Levain

To be honest, I hadn’t a clue what I felt like baking this weekend. My mind wandered over many possibilities. In the end my inspiration for this bake came from Nat. Though she is an avid admirer of all things bread, when I put the question to her about this weekend's bake, the answer came swiftly …

Olive bread!

Of course…

…  how could I have forgotten Nat the Rat’s most favoured of all loaves.

The strange thing is, I can’t remember the last time I made an olive bread …

I do however, remember the last time I ate olive bread. While we were on holidays in New South Wales, we took a day trip to a small town called Bellingen. In this beautiful little hideaway I tasted my first EVER woodfired sourdough. It was an olive bread, baked by a small organic bakery called Hearthfire …. It was the  most amazing olive bread I have ever tasted. A crumb that melted in your mouth, flecks of herbs throughout and large chunks of olives. We almost finished half of it with a spicy pumpkin hummos whilst picnicking by a small creek. On my return to Brisbane I even called the owner of the bakery to thank them for the amazing bread …

I think that delicious experience has scared me off making my own olive bread … until now.

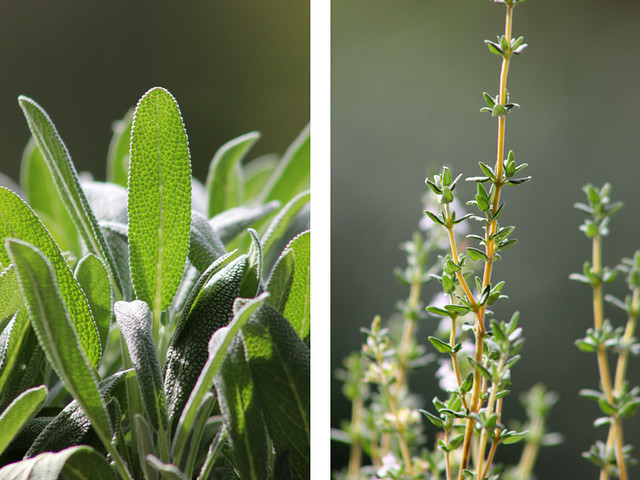
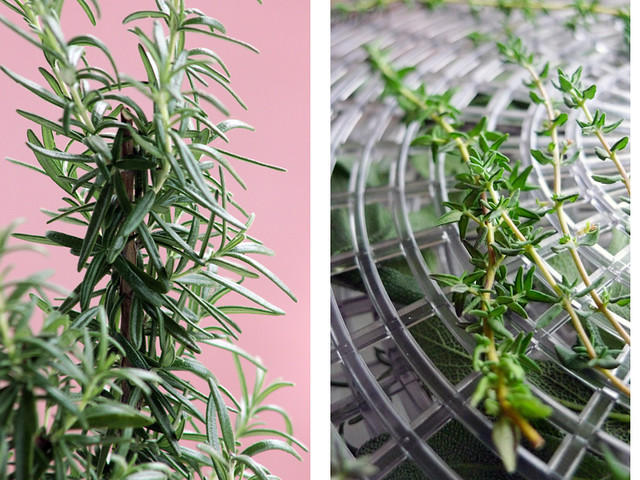
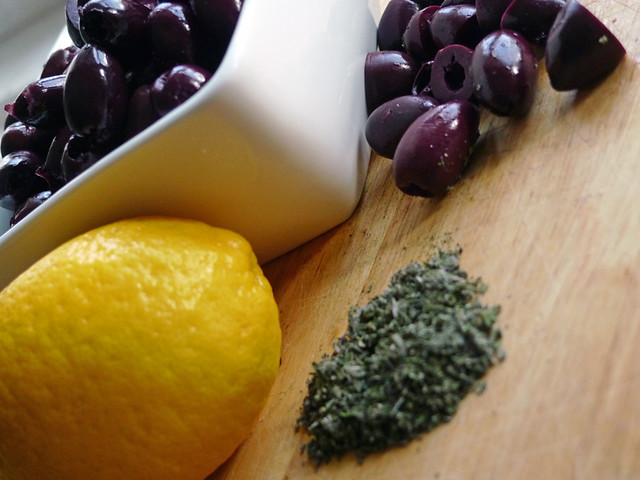
When it came time to start prepping and sourcing ingredients to compliment the kalamata olives in my own bread, I needed to look no further than our front porch to find inspiration. Growing in small pots we have sage, rosemary, basil and thyme. Only a few hours later the dehydrator filled the kitchen with the aromas of drying herbs. Some lemon zest, (courtesy of the Tartine olive bread formula) and I had everything I needed.

Olive and Herb Levain

Formula

Overview

Weight

%

Total dough weight

1600g


Total flour

958g

100%

Total water

648g

67%

Total salt

12g

1.5%

Prefermented flour

163g

17%

Desired dough temperature 26°C


Levain build – 5 hrs 26°C


Starter (not included in final dough)

81g

50%

Flour (I used 70% AP flour, 18% Sifted fresh milled wheat, 9% sifted fresh milled spelt and 3% sifted fresh milled rye)

163g

100%

Water

81g

50%

Salt

1g

1%


Final dough 26°C


Levain

244g

30%

AP Flour

556g

70%

Freshly milled whole wheat flour

200g

25%

Freshly milled rye flour

40g

5%

Water

567g

71%

Salt

11g

1.4%

Kalamata olives halved

287g

36%

Finely chopped dried herbs

1tsp


Zest on 1 lemon


Method

   1. Autolyse flour and water 45 mins

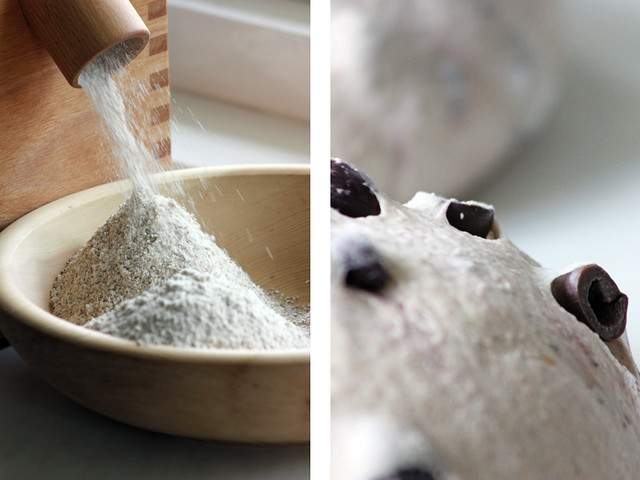
   2. Add levain and knead 5-10 mins. Add salt and knead a further 5-10 mins. Gently mix in olives, herbs and lemon zest.

   3. Bulk ferment 2.5 hours with two stretch and folds at 30 mins in the first hour.

   4. Preshape and bench rest for 20 mins

   5. Shape and proof for 2.5 hours

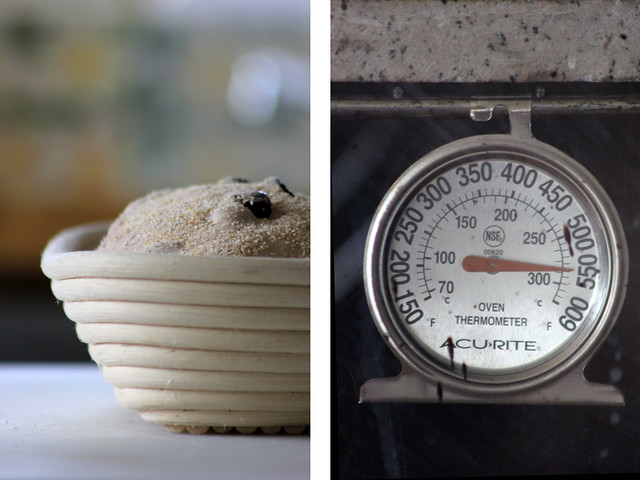
   6. Bake in steamed oven for 10 mins at 250°C then 30 mins at 200°C

As you can imagine our kitchen smells heavenly this afternoon.

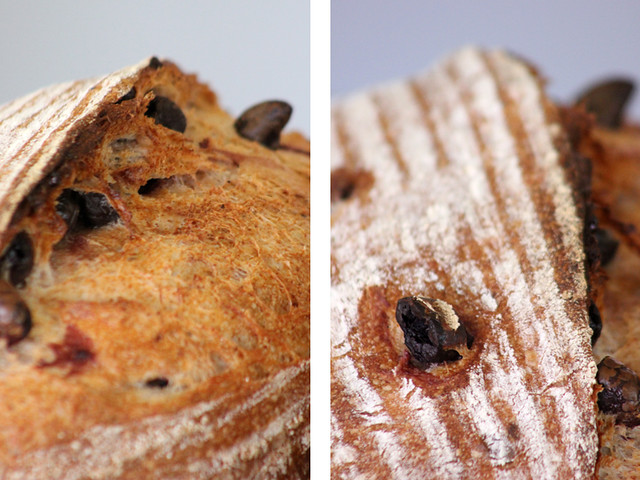
The crusts chorused loudly when they were removed from the oven while I fought the growing temptation to pick at protruding olives.

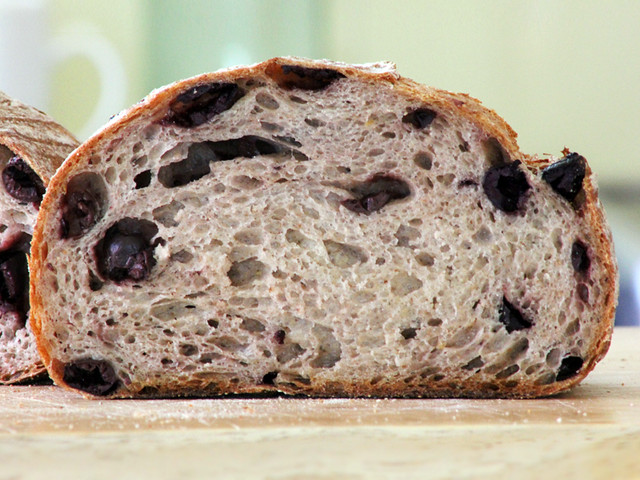
The crumb is soft and anything but chewy with olives nestled and peering out of every slice.

For me it won’t surpass the olive bread from our holidays but I am pretty sure I have made Nat’s weekend.

All the best,

Phil

Juergen Krauss's picture
Juergen Krauss

Russian And German 100% Ryes - 4 Recipes

Hi,

A little while ago Varda posted about her experiences with the Russian Rye from Andrew Whitley's Bread Matters, and there was a longish discussion of the formula.

I posted some photos of the process of making Russian Rye

Andy suggested to use the formula he remembers from his time with Andrew Whitley at the Village Bakery, and I had a closer look at a couple of German standard formulas.

At the end I baked 4 variations -

Russian Rye, Bread Matters version (100% Hydration, preferment 200% hydration, 31% flour from preferment)

Russian Rye, Andy's version (85% Hydration, preferment 167% hydration, 35% flour from preferment)

Single Step Detmolder (78% Hydration, preferment 80% hydration, 35% flour from preferment)

Berliner Kurz-Sauer (79% Hydration, preferment 100% hydration (fermented at 35C for 3.5 hours) , 50% flour from preferment)

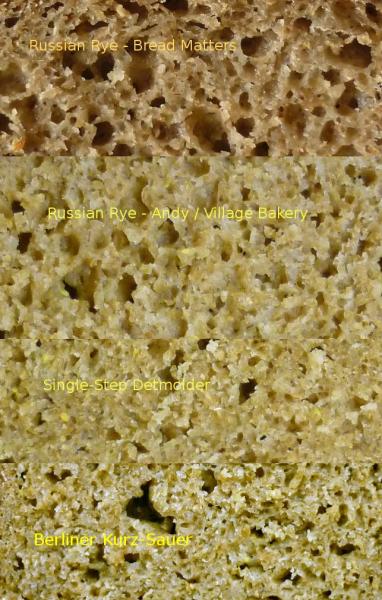
Here a comparison of the crumb (pictures of the loaves can be found in the blogs referenced avove):

Formulas:

1. Russian Rye, Bread Matters Version

Sourdough  
Rye31% 166g
Water62% 333g
Mature Starter10% 54g
   
Paste  
Rye69% 370g
Water42% 225g
Salt1.50% 8g
Sourdough93% 499g
Yield206% 1106g

The surdough fermented for 14 hours at 24C, the paste is mixed and shaped with wet hands and is put directly into a buttered tin. (2X500g tins in my case)

After 2 hours the loaves were risen by about 25% and bubbles started to show, they were ready for the oven.

The bake: 10 minutes at 240C with steam, then 10 minutes at 225C, then 20 more minutes at 200C.

This bread neads a long rest before cutting, at least 24 hours. In my experience the taste is fully there after 3 days.

The crumb is moist and airy, and the bread has a light tang that gets stronger in time.

2. Russian Rye, Andy's Village Bakery version

Sourdough  
Rye35%206g
Water58%341g
Mature Starter10%58g
   
Paste  
Rye65%382g
Water27%159g
Salt2.00%11.7g
Sourdough93%547g
Yield187%1100g

The process is pretty much the same as above.

The surdough fermented for 14 hours at 24C, the paste is mixed and shaped with wet hands and is put directly into a buttered tin. (2X500g tins in my case) This dough is much easier to handle than (1)

After 2 hours the loaves were risen by about 25% and bubbles started to show, they were ready for the oven.

The bake: 10 minutes at 240C with steam, then 10 minutes at 225C, then 20 more minutes at 200C.

This bread neads less rest before cutting than (1), but at least 24 hours.

The crumb is moist and still light, and the bread has a more rye-y taste than (1).

It is difficult to say which one I prefer, but the handling qualities make this one a better candidate for a production environment.

3. Single-Step Detmolder

This method uses a rye starter with typically 80% hydration which is kept at 24C to 28C for 12 hours. The mature starter can then be used in production for up to 6 hours, it doesn't starve quickly and is very robust.

I followed the formula from an earlier post of mine, using 100% rye.

Sourdough  
Rye35%213g
Water28%170g
Mature Starter6%36g
   
Paste  
Rye65%395g
Water50%304g
Salt2.00%12.1g
Yeast (fresh)1.00%6g
Sourdough63%383g
Yield181%1100g

After mixing the paste ferments for 40min (80min without yeast), is shaped with wet hands and put in tins, and rests for another hour.

Baking as above.

The crumb is quite dense as compared with the othe two breads, and there is a distinctive tang.

4. Berliner Kurz-Sauer

This one is a bit unusual: The sourdough matures at high temperature (35C) inb a very short (kurz) time: 3.5 hours.

At this stage the sourdough is almost frothy, very light and fragile, and tastes fruity mild-sour. The aim is to have a lot of LAB producing lactic acid. Therefore this one relyes a bit more on added yeast for the lift.

Sourdough  
Rye50%275g
Water50%275g
Mature Starter10%55g
   
Paste  
Rye50%275g
Water29%159g
Salt2.00%11g
Yeast (fresh)1.00%5g
Sourdough100%550g
Yield182%1100g

 After mixing the paste proofed for about 1 hour, is  then shaped with wet hands and put in tins.

At my ambient temperature (24C) the bread was ready for the oven after 2 hours of rest.

The crumb is clearly dryer than the other three breads, and after 24 hours the taste is quite bland.

But I like how this bread developed over time - I had the last bits yesterday - 7 days after the bake. The taste was still mild, with a well developed rye note.

Conclusion:

These four breads are a bit like four different characters. And it's hard for me to say which one I would prefer.

Each of them change their character considerably over time.

If I would need some bread tomorrow I'd go with Andy's Russian or the Detmolder, they have a lot of complexity early on.

The Detmolder was the most sour of the four, and developed even more sourness over time.

The Berliner Kurz-Sour might be a good way to introduce people to this kind of bread due to its mildness, and it also goes well with more delicate toppings.

And the "Bread Matters" Russian has this amazing open texture.

The choice is really up to you.

Juergen


hanseata's picture
hanseata

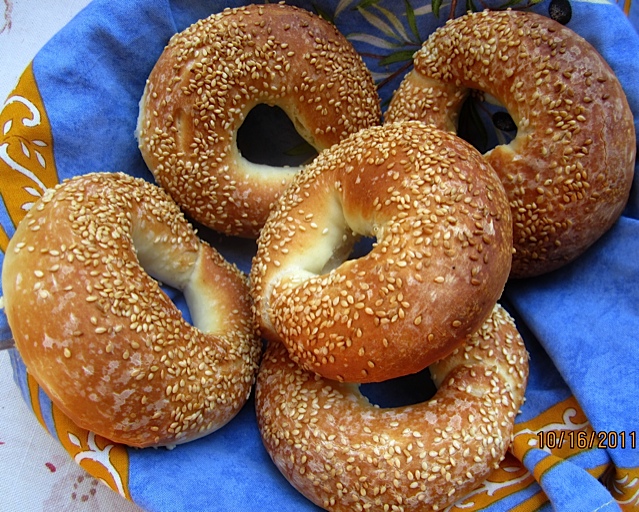
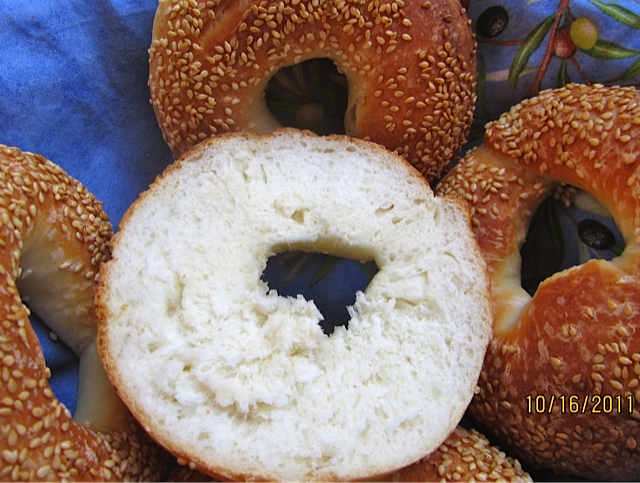
SIMIT - TURKISH SESAME BREAD


Ring shaped sesame simit is very common in Turkey, as well as in other Middle Eastern countries and the Balkans. It comes in larger and smaller sizes, and, also varies in crunchiness and chewiness, depending on the region. Some are softer, made with apple syrup and olive oil, and some are crisp and lean.

After having my first simit from a fabulous Turkish bakery in Delmenhorst/Germany (http://www.thefreshloaf.com/node/25706/turkish-delight), I was eager to try my hand in it.

I studied a lot of recipes - fortunately many Turkish women post in German cooking websites. Some of those descriptions were a bit too vague for a newbie (like Grandmother's: "Take a handful of flour, some olive oil, and then put in some eggs"), and others more specific. They varied greatly, so I decided on a lean version, like the simit I had in Delmenhorst, but I made it a little smaller, bagel size. 

The result was really nice - my husband and I loved the sesame crunch!

Dough:
500 g Italian 00 flour (or unbleached pastry flour)
4 g instant yeast
165-190 g water, lukewarm

19 g olive oil (optional)

125 g yogurt, lukewarm

7 g salt

Topping:
1 egg white, mixed with 1 tbsp. water, for brushing
sesame seeds, for sprinkling

DAY 1:
Mix together yogurt and water, and stir in instant yeast, until dissolved. Add all other dough ingredients, and mix at low speed (or with wooden spoon) until all flour is hydrated. Let dough rest for 5 minutes.

Knead at medium-low speed (or with hands) for 2 more minutes, adjusting with a little more water or flour, if needed. Dough should be supple and very tacky, bordering on sticky. Resume kneading for another 4 minutes. Dough should still be quite tacky.

Transfer to a lightly floured work surface. With wet or oiled hands, gently extend into a rough square. Stretch and fold back and front side like a business envelope, then, also left and right side.

Pick up dough package, tuck sides under to form a ball, and place, seam-side down, into an oiled bowl. Cover, and let rest for 10 minutes.

Repeat these stretches and folds 3 more times, at 10 minute intervals. After last fold, place dough into oiled container with lid, and refrigerate overnight.


DAY 2:
Remove dough from refrigerator 2 hours before using.

Divide dough into 8 equal pieces. First shape into rolls, then, with your hands, roll into 12"-14/30-35 cm strands. Or divide into 16 pieces to make braids. If dough resists, let rest for 5 minutes, before continuing. Shape strands (or braids) into rings, pressing ends together well to seal. Place rings on parchment lined baking sheet.

Preheat oven to 490 F/255 C, including steam pan. Brush dough rings with egg white, and sprinkle with sesame seeds. Spray with oil spray, cover with plastic wrap. Let rise for ca. 1 hour, or until they have grown to almost double in size.

Bake simits for 7 minutes, steaming with 1 cup boiling water. Rotate baking sheet 180 degrees, remove steam pan, and continue baking for another 8 minutes, until breads are golden brown.

Let cool on wire rack.


It is necessary to use a low protein flour, like the German type 450 or Italian 00. Unbleached pastry flour is a good substitute - all-purpose flour has too much gluten. Even though this bread can be made in one day, the taste definitely improves with overnight cold fermentation.

(Recipe adapted from Merosh's recipe in www.kochbar.de)

Updated 1/24/2015

Breuer's picture
Breuer

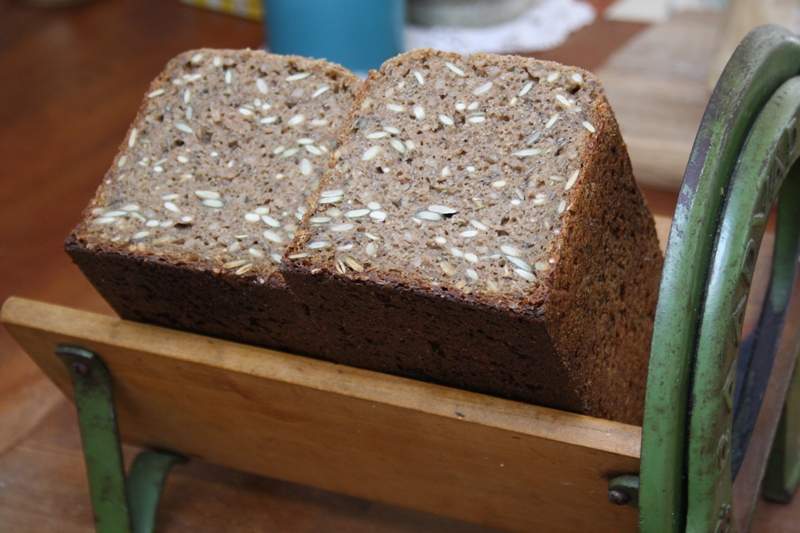
My version of the healthiest Danish organic rye bread, EVER :)

Pre-dough:

600gr. Cold water

200gr.  Cracked rye

100gr. Cracked barley

100gr. Cracked spelt

200gr. Flour mixture

2 table spoons. Sourdough (from wild yeast)

Final-dough:

500gr. Cold water

650gr. Flour mixture

22g. Salt

2 table spoons. Malted barley syrup

2-3 table spoons. Nettle (Urtica dioica)

Seeds: I use, pumpkin, sunflower and linseeds.

The flour mixture consists of:

550gr. Fresh grounded rye

150gr. Fresh grounded barley

150gr. Fresh grounded spelt.

Start mixing the pre-dough before you going to bed, its quit easy you just have to mix everything to a nice, soft and airy dough.

Next morning, just add everything from the final dough into the pre-dough and mix by hand or machine to a very sticky dough, it will take about 10 minutes by machine.

Then add all of the seeds (as much as you like), and mix short.

Oil and butter a form, fill it with the sticky dough.

Now let it proof about 2cm. and bake it in a 200 degrees Celsius  pre-heated oven for 2 hours.

Remember to let it cool down 100%, before slicing.


Anonymous baker's picture
Anonymous baker (not verified)

Dan Lepard's Sour Cream Sandwich Loaf

I was skimming The Guardian's website and found Dan Lepard's Sour Cream Sandwich Loaf.

Knowing I had a huge Costco container of sour cream, I decided to make it.

Result: Very pleased! So simple (a total of about 5 minutes of actual "work") and the "dough feel" was a revelation, especially after so little kneading.

Here's the Americanized recipe (+ an added retardation stage (overnight rise)): I wanted a fresh loaf that could go from fridge to oven to toast w. marmalade in ~1 hour.

 (recipe removed at publisher's request)

Thomaschacon: UPDATE (4/26/2012): Recipe can be found here. http://www.guardian.co.uk/lifeandstyle/2010/oct/02/sour-cream-sandwich-bread-recipe

codruta's picture
codruta

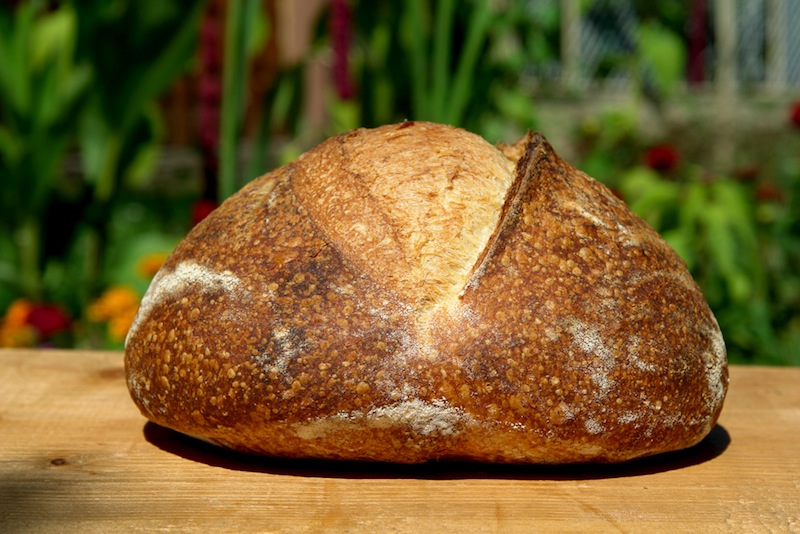
Apple Yeast Water Bread

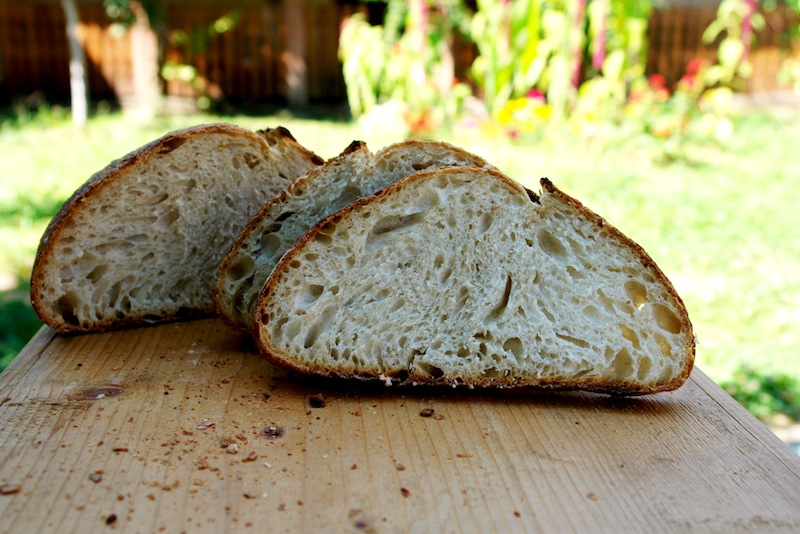
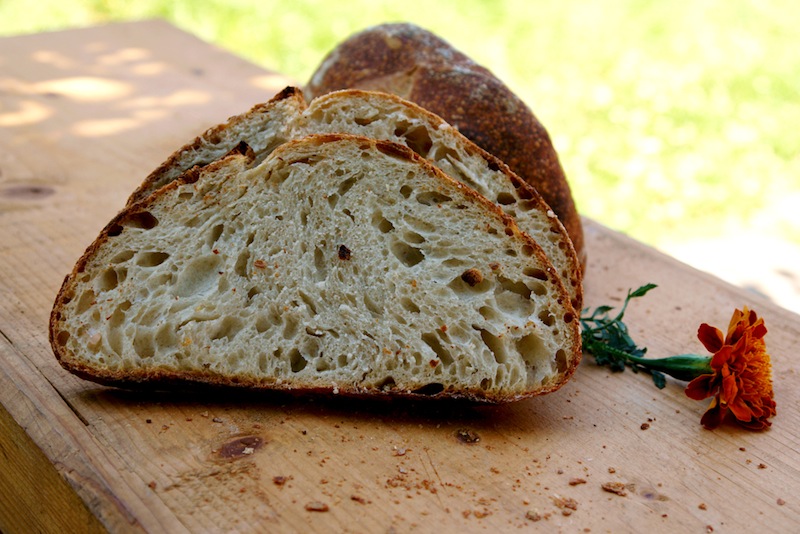
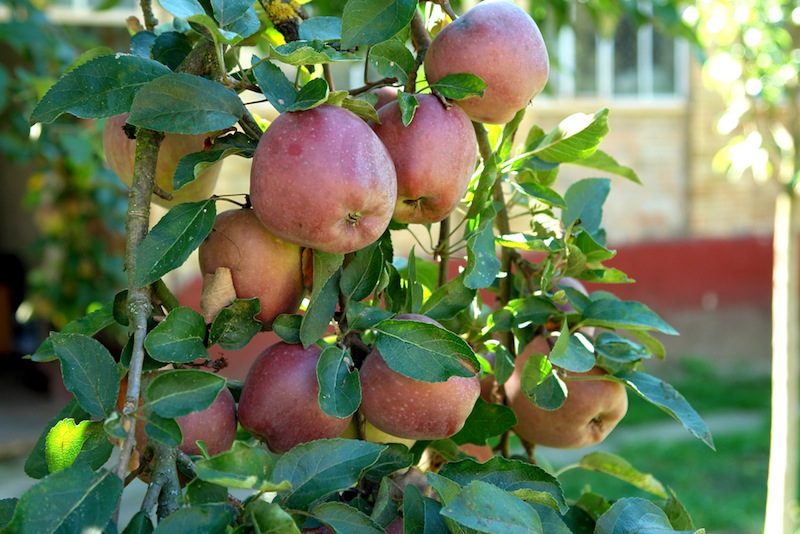
Hi! I just want to share these photos with you. I baked this bread a few weeks ago, soon after I made my AYW. The water was fresh, sweet, mild. The formula was very simple, and the bread was delicious. I'm not sure I used YeastWater properly (all the liquid was YW, and I did not made a preferment), but I take it as an experiment with a good result.

The formula was:

- Bread Flour (type 000): 198 g ……………… 50 %
- AP Flour (type 550): 158 g …………………… 39.9%
- Whole-Wheat Flour: 40 g …………………… 10.1%
- AYW: 266 g ……………………….................... 67.1%
- Salt: 8 g ……………………………………………… 2%
Dough: 670 g ……………………………………….. 169.1%

I made the dough in the evening, with autolyse for 30 min, bulk fermentation 2h:30min with 2 S-F at 50 min. interval. Pre-shape, rest 20 min, shape, proof 1 hour at room temperature, then retard in the fridge for 7 hours, and bake it in the morning.

The taste was somehow sweet, no sour at all (which surprised me, given all the YW I used), the crumb was moist and silky.

I like the idea of working with sourdough more than working with YW, but I must admit this loaf was one to remember. The pictures were taken at my grandparents house, in the countryside.

More pictures and details can be found at my romanian blog Apa.Faina.Sare.

Have a nice weekend,

Codruta

Pages