The Fresh Loaf

A Community of Amateur Bakers and Artisan Bread Enthusiasts.

Most bookmarked

sentur's picture
sentur

How to adapt stretch and fold technique to work with traditional kneading?

In quite a lot of sourdough recipes they say stretch and fold (usually with 30 min intervals) instead of kneading the bread vigorously for 10-15 mins.  I love doing it this was and find it far easier and that I get better results than traditional kneading.  Is there any formula or technique for adapting traditional kneading technique recipes to work with the stretch and fold technique. I have a lot of my favourite bread recipes which call for the dough to be kneaded for 10 mins. 

breadsong's picture
breadsong

Baking for the winter solstice

I discovered this poem on TFL (in a comment posted by LindyD – thank you, Lindy, for sharing it);
I am re-posting the poem here - I thought it so beautiful, and so fitting, for the winter solstice.

I heard a bird sing
In the dark of December
A magical thing
And sweet to remember.

'We are nearer to Spring
Than we were in September,'
I heard a bird sing
In the dark of December.

  • Oliver Herford


This baking is inspired by the winter solstice and all of the stars, the moon and beauty lighting up the night sky.

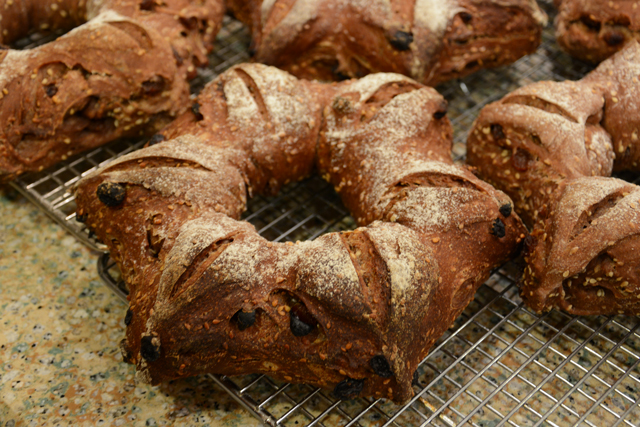
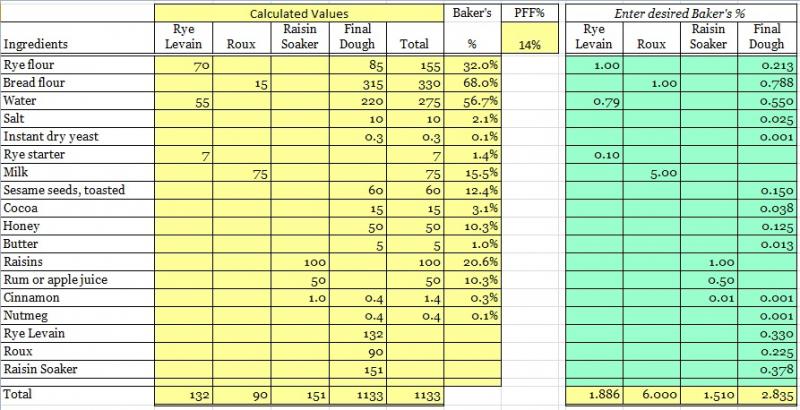
Last year about this time, I saw a breathtaking Christmas Bread, made with rye levain, spiced raisins and roasted sesame - in a beautiful star shape, baked by Lutz of Plotzblog. The star shape and dark color of this bread made me think of the season’s dark skies, the sesame seeds like tiny 'lights' in the crumb.

The Plotzblog site is undergoing some maintenance so his formula isn't available at the moment; this is my interpretation of the formula Lutz posted:


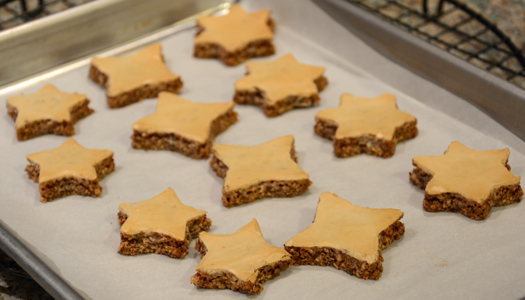
This Christmas bread reminded me of an article a friend sent me a couple of years ago (written by Martha Rose Shulman, and so interesting!), about the French Pastry School’s Jacquy Pfeiffer and the baking traditions he grew up with in Alsace, France. One of the traditional holiday cookies Mr. Pfeiffer made was Zimtsterne, a cinnamon star-shaped cookie. These seemed like the perfect thing to bake, to go along with the bread. I'm so glad I tried making these - they are a most delicious cinnamon cookie! :^)

...royal icing glaze lightly caramelized, after a gentle bake
(baked at 335F convection for 15 minutes)


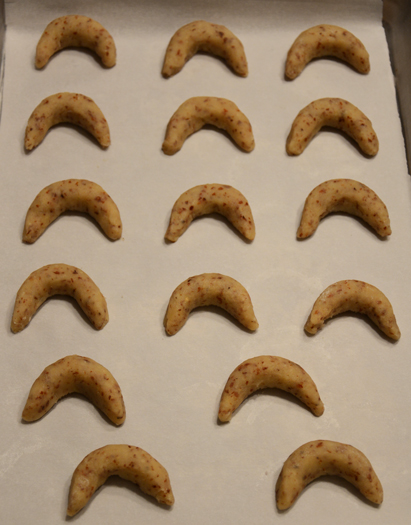
These cookies are called Vanillekipferl, a Viennese almond shortbread cookie, shaped like a crescent and rolled in vanilla sugar after baking. The shape of the cookie, and the vanilla sugar adding a silvery, glittery sheen made these cookies seem moon-like to me :^)

               Before baking...

...and after baking, dusted with vanilla sugar...beautiful flavor!

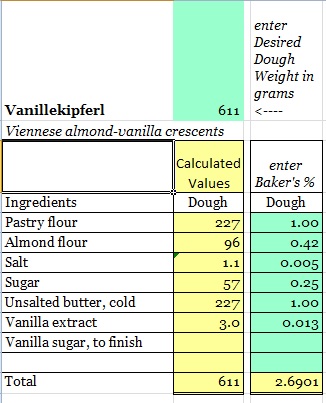
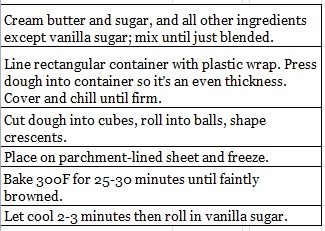
Here is the recipe, from something I saved from a magazine years and years ago.


I hope you like these stars and moons, and the poem for the winter solstice...wishing everyone at TFL a very happy holiday season!
:^) breadsong

Submitted to YeastSpotting

hanseata's picture
hanseata

CHALLENGE FOR ALL MULTIGRAIN BREADS FANS

Dear fellow TFL bakers, I have a challenge for you!

During our recent trip to Germany we spent a few days in Potsdam, to visit Frederick the Great's Sanssouci. We stayed at Schlosshotel Cecilienhof, a wonderful hotel right inside another historic site, Cecilienhof Palace.

Cecilienhof Palace

Named after a crown princess, this palace was also the place where those three jolly old guys met:

Churchill, Truman and Stalin at the Potsdam Conference

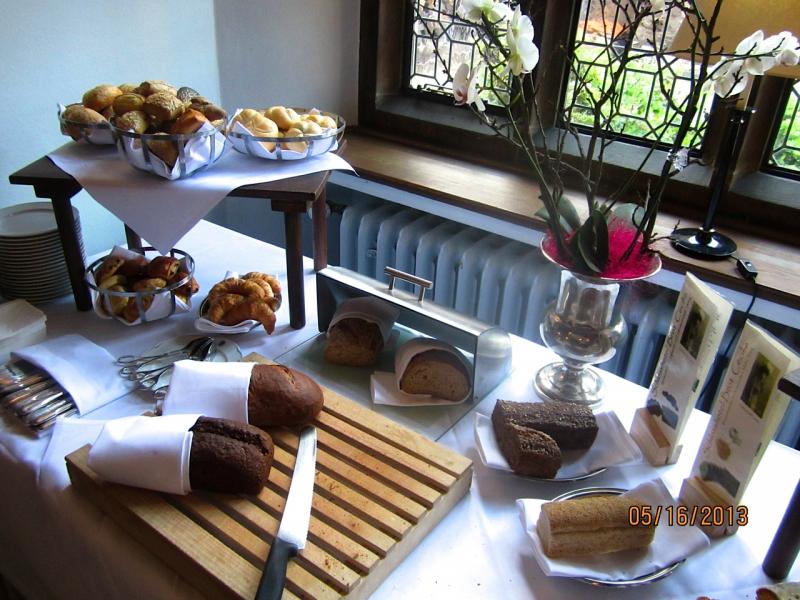
To honor the history and importance of this heritage, the hotel's pastry chef came up with the idea to create a special bread for the guests' breakfast buffet:

Bread buffet at Schlosshotel Cecilienhof

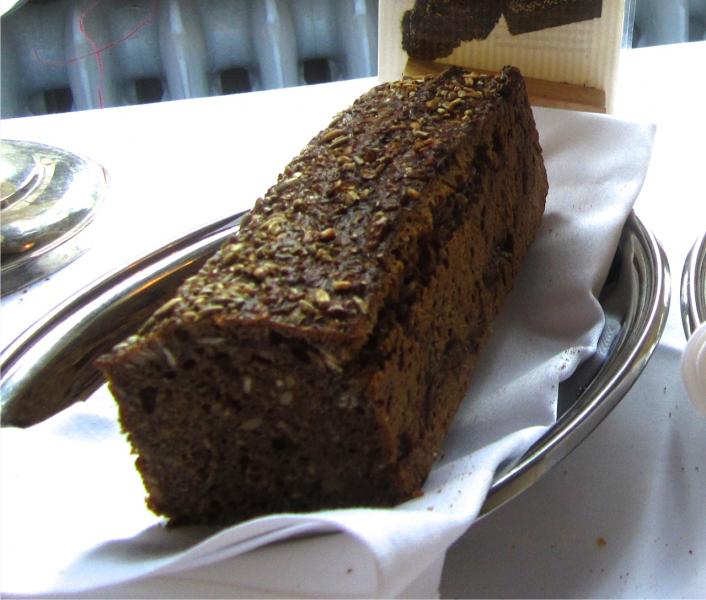
An ancient grain bread, "Urbrot", a rye sourdough with a lot of different grains and seeds. To educate their guests, the hotel had placed a little brochure on the table, with informations about the bread: "Taste meets Tradition", including a list of the ingredients:

Ingredients of the Cecilienhof Ancient Grain Rye Bread

Rye meal

Water

Sunflower seeds

Ancient wheat meal: emmer and einkorn

Wheat flour (white or medium, not whole wheat)

Rolled spelt

Chestnut flour

Rolled oats

Barley meal

Barley malt extract

Vital wheat gluten

Rolled barley

Flaxseed

Steel cut oats

Spelt flour

Potato flakes

Sea salt

Vegetable fat (shortening)

Whole spelt sourdough

Table salt

Yeast

Unfortunately they didn't supply the bakers' percentage!

We really enjoyed the bread, and I think it would be wonderful to have another bread in my repertoire, associated with an important historic event (like the wonderful Wild Rice Sourdough - The Bread That Ended The Cold War.)

A moist, very flavorful loaf - created to honor the history of Cecilienhof Palace

I couldn't stop thinking about it, and see this as a challenge worthy of my talented fellow bakers at TFL. Certainly not all ingredients will be available for us, and we have to come up with a formula, but that is the fun part of it.

WHO WANTS TO JOIN ME AND TAKE UP THE CHALLENGE?

Happy Baking

Karin

dmsnyder's picture
dmsnyder

Pizza Bliss Redux

Pizza Bliss Redux

August 26, 2013

 My first batch of Ken Forkish's “Pizza Dough with Levain” (See Pizza Bliss) produced the best pizza crust and, after freezing, some of the worst I've had. But I did learn a tremendous amount from the comments and the information generously shared by other TFL members, and my second batch will exploit what I have learned.

One thing I've learned is that Forkish's Flour Water Salt Yeast has some great ideas about how to approach baking, but you shouldn't take his times and temperatures too literally. They are “sample schedules.” My experience with, I think, five or six bakes from this book book strongly supports the “Watch the Dough, Not the Clock” dictum.

So, using the same formula as last time but scaled back to half of what's in the book, here are my timelines for a second mix of this formula:


Aug 27, 2013

11:00 AM


Mix levain

04:30 PM

Levain is ripe. Refrigerate it. (Had a conference call scheduled.)

05:30 PM

Take levain out of fridge.

06:00 PM

Mix flour and water for autolyse.

06:40 PM

Mix salt and levain into final dough.

07:10 PM

Stretch and fold dough.

09:30 PM

Dough has expanded by 50% and has lots of bubbles. Divide dough into 3 balls. Freeze one. Refrigerate two.

Aug 28, 2013

06:00 PM


Remove dough balls from fridge. Allow to come to room temperature and continue fermentation.

07:00 PM

Turn on oven to pre-heat the baking stone.

08:00 PM

Bake pizze!


MENU

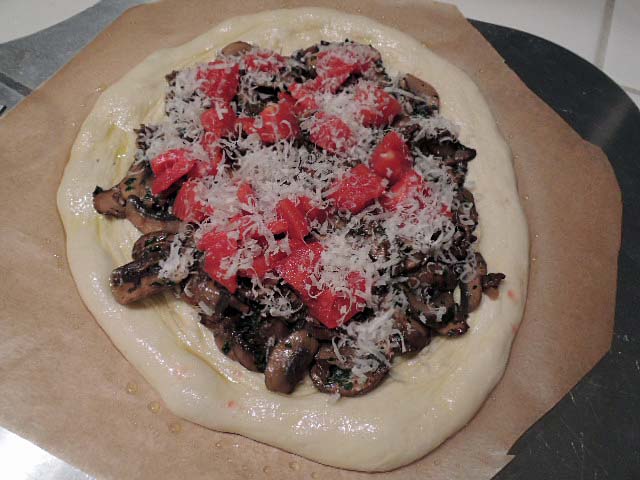
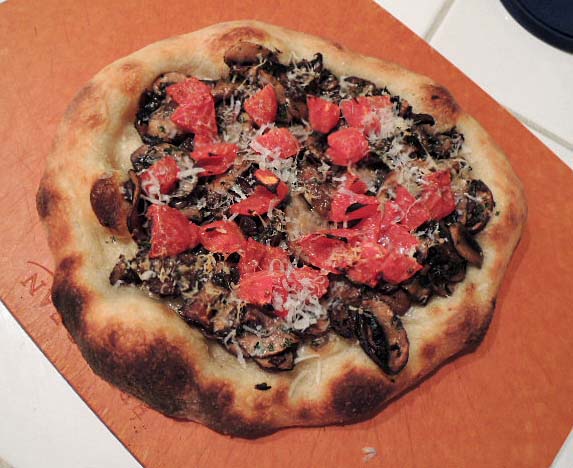
Pizza with wild and domestic mushrooms sautéed with garlic and parsley, deglazed with Pinot Grigio. San Marzano tomatoes. Freshly grated Parmesan cheese.

Assembled, ready to bake

Baked and ready to enjoy

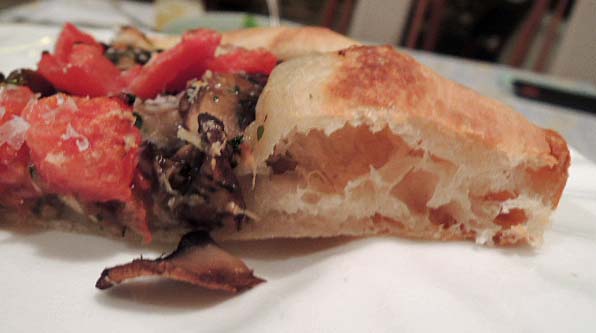
Slice of pizza

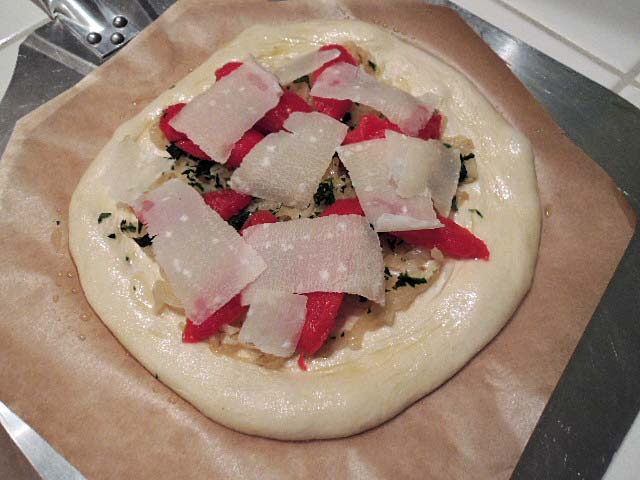
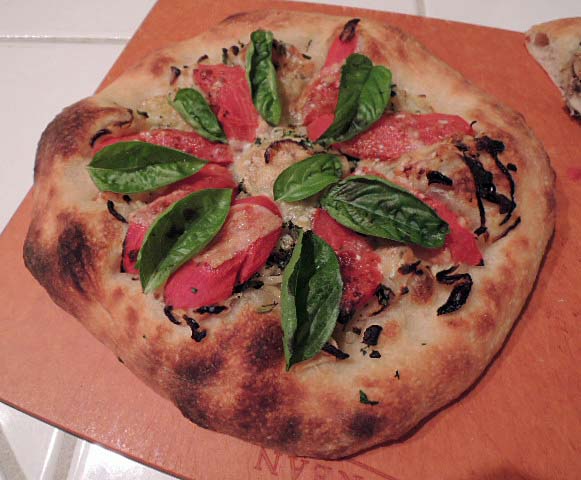
Pizza with caramelized onions and garlic. Mixed fresh herbs. San Marzano tomatoes. Shaved Parmesan cheese. Fresh basel.

Assembled, ready to bake

Baked, ready to slice and enjoy

Green salad with mustard vinaigrette.

 The dough was lovely to handle. It was a bit less elastic than the first mix. In the oven, there was dramatic oven spring (Yay!). The crust was delicious. It was significantly less sour than the first mix but had a wonderful sweet, complex flavor and was thin and crisp. The joy is back!

We will see how the third ball bakes up, after 2 or 3 days in the freezer.

I so appreciate all the great problem-solving advice I received after my disappointing post-freeze pizza dough bake.

 David


trailrunner's picture
trailrunner

sourdough pasta...

In my other post I showed the lasagna that I made from sourdough pasta. My husband is the pasta maker and I turn it into dinner...so it is a joint effort. It makes the most remarkably tender and flavorful pasta. I use what ever white starter I have  . Mine is usually at 100% hydration. One very nice thing about the SD pasta is its keeping quality in the fridge after you let it dry on the counter. It will last easily for a week if you wrap it well. We make extra and then dry on the counter on cloth towels and then store in fridge to be eaten with various toppings. Do cut to desired shape though before you dry it. 

286 g  "00" flour ( if you only have AP that works also) or use 1/2 and 1/2 semolina-AP 

3 large eggs

1T EVOO

1/4 c starter 

4g  kosher salt

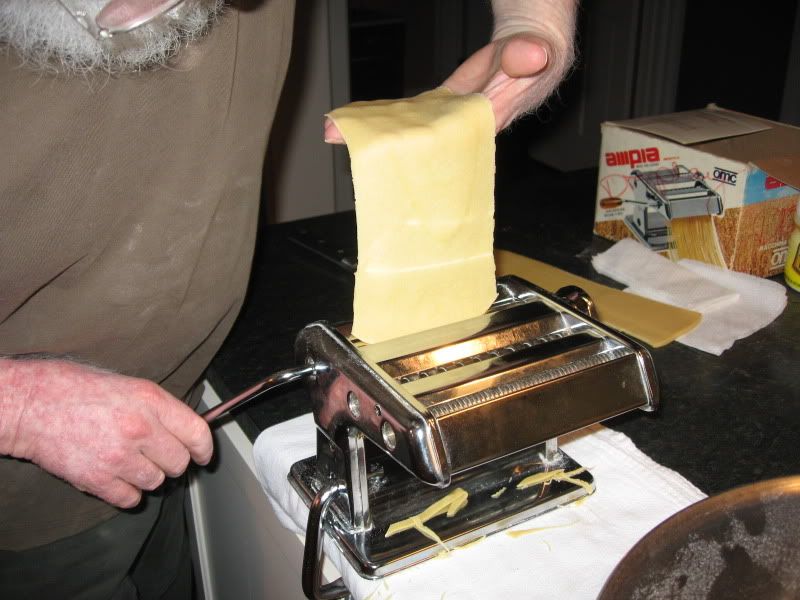
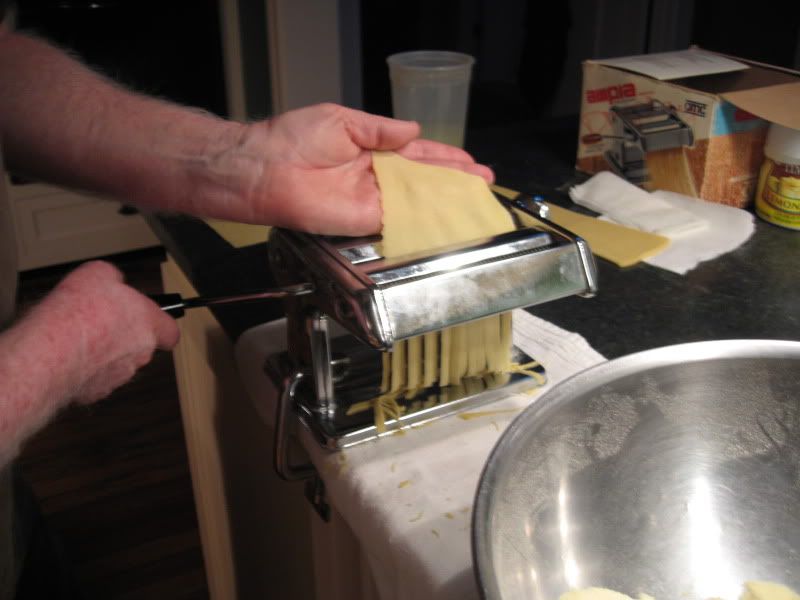
this made 17 1/2 oz pasta. Depending on starter hydration you made need a few drops of water but you don't want the dough too wet. Should just hold together. R puts the flour on the cutting board and stirs all the liquid into a well in the center. He then uses our pasta machine to knead and roll it out and to cut the spaghetti..he cuts the lasagna by hand. Next time he makes it ...which will be this week as we have company coming I will get more detailed pics..the ones I had are  in a different computer iphoto that is with my daughter who is out of town. c,

Here are some pics : 

 photo IMG_3816.jpg  photo IMG_3818.jpg

dmsnyder's picture
dmsnyder

Overnight Country Blonde from "Flour Water Salt Yeast"

My first bakes from Flour Water Salt Yeast, by Ken Forkish

David M. Snyder

July 20, 2013


I've been aware of Ken's Artisan Bakery in Portland, Oregon since shortly after it opened. I've driven by it a few times on my way to somewhere else, but, if I've ever had Ken's bread, it has been in Portland restaurants. And I'm pretty sure I have.

On our last visit to Portland, I browsed Ken Forkish's baking book, Flour Water Salt Yeast, at Powell's bookstore. I liked it immediately, and I ordered it as soon as I got home. Flour Water Salt Yeast won both the James Beard Award this year and also the very prestigious IACP award. It is certainly a great addition to my bread book library.

Forkish is clearly writing for the home baker who wants to bake the highest quality bread of a particular type: Crusty, open-crumbed, mixed flour hearth loaves. The book is short on bread science and focused rather than comprehensive. But it does a superb job of demystifying bread making. Forkish presents a set of techniques and very manageable equipment requirements that apply to essentially every formula in the book. The breads and pizza doughs vary in leavening (levain only, levain plus commercial yeast or commercial yeast only), flours used and their proportions and fermentation schedules. Forkish, encourages his readers to experiment with these variables but based on sound principles. The breads presented are ones produced in Ken's Artisan Bakery, with the formulas and procedures are modified somewhat to better fit the typical time demands of the working and/or parenting home baker. I really think this book will encourage its readers to want to make bread and feel confident that they can and will make great bread.

After reading Flour Water Salt Yeast pretty much from cover to cover, I decided to make the “Overnight Country Blonde” for my first bake from the book. This is a 90% white flour, 5% each whole rye and whole wheat, 78% hydration bread. It is a pure levain-raised bread. The prescribed schedule is to refresh the levain in the morning, mix the dough in the mid-afternoon and ferment it at room temperature until the next morning, when it is divided, shaped, proofed and baked by noon. That's a nice schedule. However, my dough was clearly fully fermented after 6 or 7 hours, rather than the 12 to 15 hours called for. This was not really a great surprise, given that my kitchen was at least 80ºF. So, I retarded the dough in the fridge overnight and proceeded from there the next morning. I decided to make one 1.8 Kg miche rather than two boules. This meant that I baked on a baking stone rather than cast iron dutch ovens. The loaf was pretty slack going into the oven, but there was great oven spring.


The resulting loaf had a thin, crisp crust that got chewy as the loaf cooled. The crumb was very open. In fact, there were huge holes, especially under the top crust, suggesting the dough had been over-fermented.

The crumb texture was otherwise marvelous. It was somewhat chewy but very tender. It had a quality for which I don't have a name, but it is very close to the sourdough bread I had in San Francisco as a child. I suspect it is partly the result of gentle mixing and partly of long, slow fermentation. The flavor was sweet, complex and moderately sour.

My wife and I both enjoyed this bread a lot, but I wanted to do it again without over-fermenting the dough, and I wanted a thicker, crunchier crust. For a second bake, I used the same levain which had been refrigerated for 2 days. I did not refresh it. I fermented the dough about 5 hours at which point it had expanded by 2.25 times. I divided into two 904 g pieces, shaped boules and retarded them overnight. The next morning, I let them proof another 90 minutes or so at room temperature and then baked in cast-iron dutch ovens. (At 475ºF, 30 minutes covered then 15 minutes uncovered.)

These loaves looked much more like those in the book. They had a thick, shiny crust that looked marvelous.


When sliced, the bread had a thinner crust than I expected. The bottom was crunchy but the rest of the crust was pretty chewy. The crumb was more evenly aerated, but there still were some pretty big holes near the top of the loaf. The crumb was chewier than that of the first bake. The flavor of the bread was pretty much the same - maybe a little less sour - but we will see how it develops over the next couple of days. Overall, this is a really nice, mostly white sourdough bread. I'm looking forward to fiddling with the flour mix and trying to slow down the fermentation.

There are many other breads in this book I really want to bake, not to mention the pizzas and focaccias. I very much like Forkish's approach to mixing and fermentation. He really emphasizes the value of a long, slow fermentation for flavor development. With the high Summer temperatures in my kitchen, to really slow things down, I need to try his formulas with a smaller amount of levain (or yeast) than he calls for.

David

Tzitzle Rye - West Seattle Style

littlejay's picture
littlejay

Description

A recreation of a St. Louis favorite sized for 6 - 2.5 lb loaves

Summary

Yield
Loaves 2.5 lb
SourceInspired by Pratzels in St. Louis circa 1965
Prep time5 hours
Cooking time50 minutes
Total time5 hours, 50 minutes

Ingredients

1 c
Rye Starter - active (if starter has been refridgerated, activate it before proceeding)
6 lb
water (I use bottled spring water)
6 c
rye flour (add rye flour, starter and 3 lb water to ferment 24 to 48 hours)
6 T
instant yeast
6 T
salt
1 c
dark malt syrup
1 c
caraway seeds - optional (toast in medium pan for 3 minutes before adding to mixture)
8 lb
hi gluten flour (8 pounds 4 ounces is actual measurement)
3 c
polenta grind corn meal (approximate amount)
1 cn
baking spray
1
egg white (1 egg white)
1 T
water

Instructions

make your own rye ferment (see how-to elsewhere)

add active ferment to 3 pounds spring water and 6 cups rye flour

let this mixture ferment for 24 to 48 hours, the longer the stronger the sour taste

measure out 4 1/2 pounds of this mixture and reserve the rest for your starter

add 4 1/2 pounds ferment to 3 pounds spring water, salt, yeast, malt syrup, caraway seeds and mix well until malt syrup is disolved.

add hi gluten flour and mix for 3 minutes

rest 20 minutes

knead 8 minutes, dough will clear sides of bowl while kneading

1st rise for 2 hours at room temp

divide and portion into 6 loaves

spread cornmeal onto board and roll the loaves into until cornmeal is inbedded in the surface

spray low topped bread pans, I use stainless steel low sided steamer table pans measuring 6 wide x 12 long x 2 1/2 inches high

preheat oven to 425 degrees

let rise in pans covered with plastic wrap for 30 minutes or less if temp is over 70 degrees - don't overproof!

uncover and brush with egg white/water mixture, heavily sprinkle cornmeal on top of loaves

bake for 50 minutes

Notes: I use a 20 quart mixer and bake in my electric kitchen oven, because of baking characteristics of this oven I move the pans from top rack to bottom rack and vice versa halfway through the baking and finish for 5 minutes with convection. Either slash the loaves or let them crack naturally prior to baking. Let cool thoroughly before slicing. Flavor improves for a few days and bread becomes more firm. If it lasts a week you'll want to toast.

This bread was inspired by Pratzels tzitzle rye of my childhood in St. Louis. I'd love to bring them some and get their opinion!

Notes

caraway is optional

dark malt syrup is available from beer making supply stores

pans are available from restaurant supply stores


JDYangachi's picture
JDYangachi

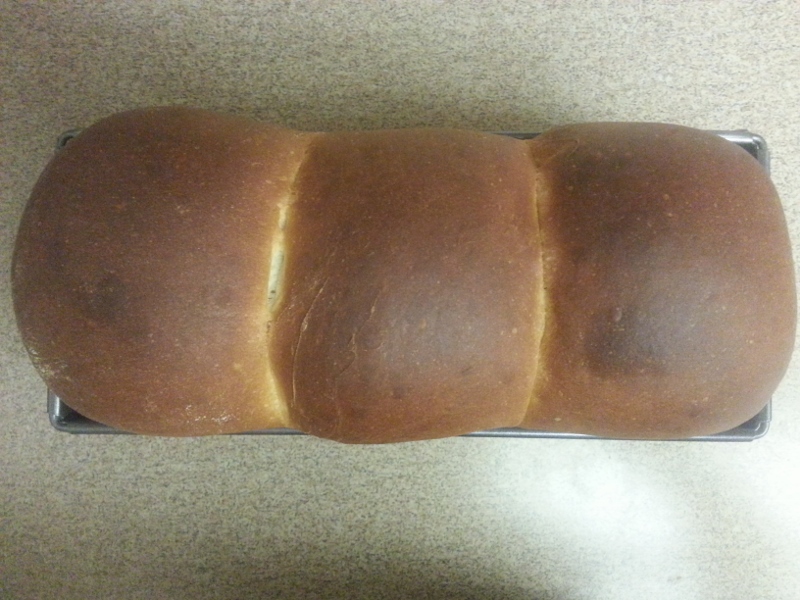
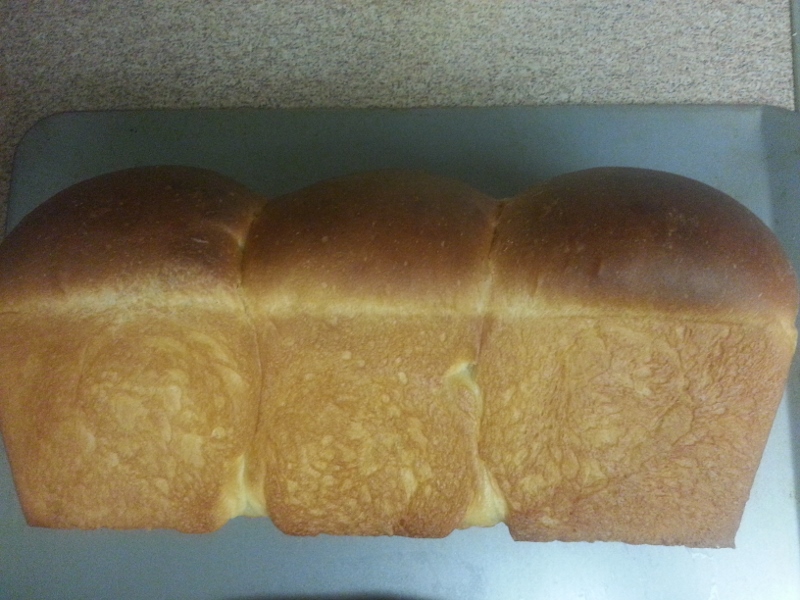
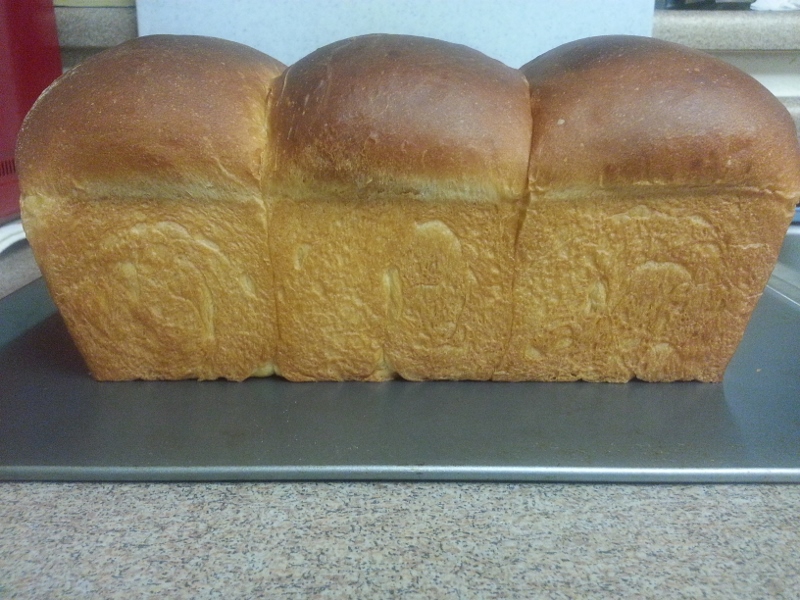
Fluffy Milk Bread

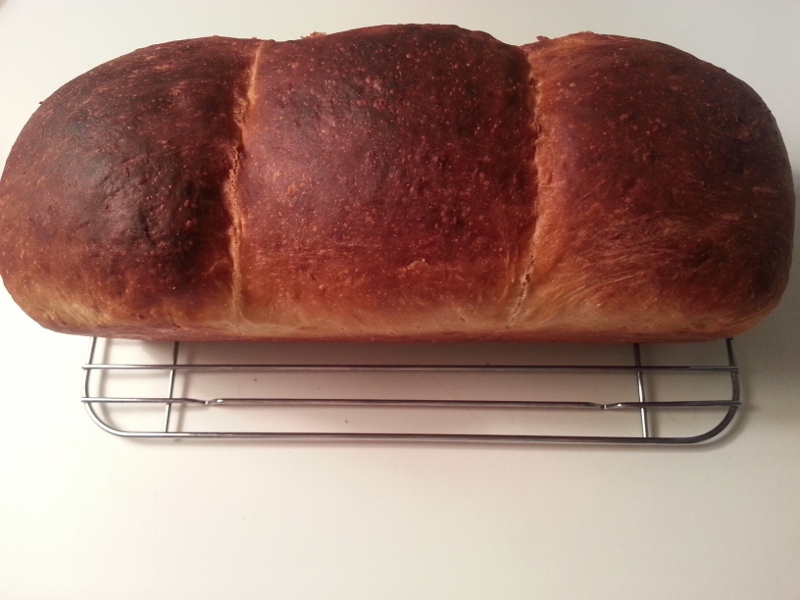
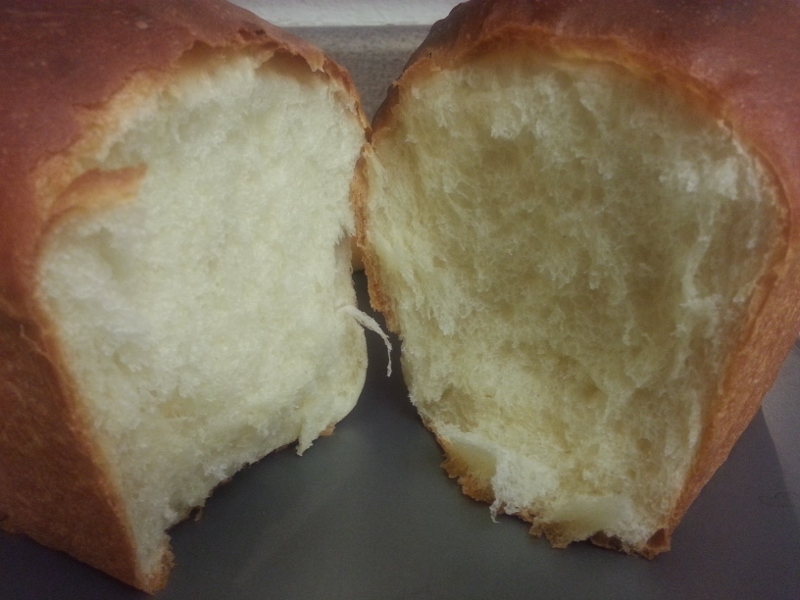
I've been playing around with enriched dough lately.  I modified my sweet dough formula from here, basically replacing 1 egg with milk and decreasing the amount of butter slightly.  I should note that I have been Inspired by many recipes and photos for Hokkaido Milk Bread using tangzhong (including Floydm's).


Tangzhong

20g AP flour (I use King Arthur unbleached)

100mL whole milk


Final dough

380g AP flour (about 3 cups)

200mL whole milk

75g granulated sugar (about 6 TBSP.)

50g egg (1 large)

5g instant yeast

5g salt

28.5g butter (2 TBSP.)

all of the tangzhong


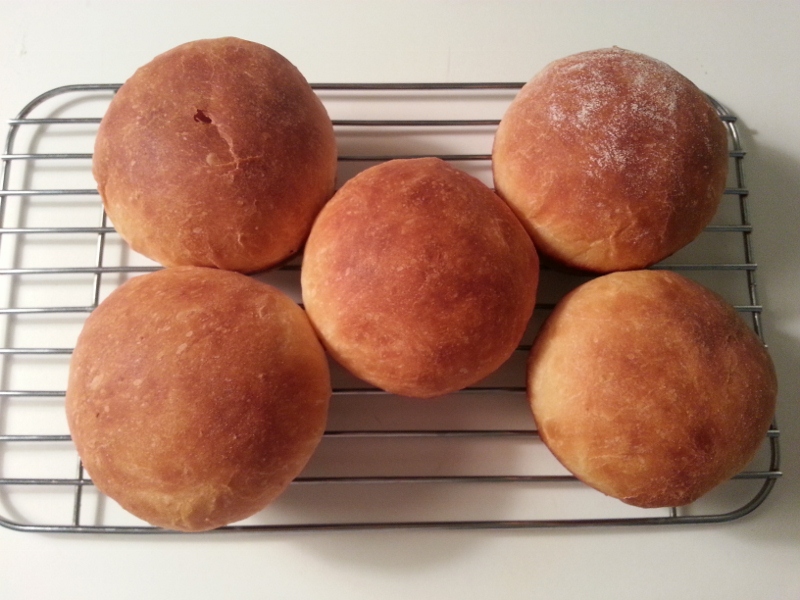
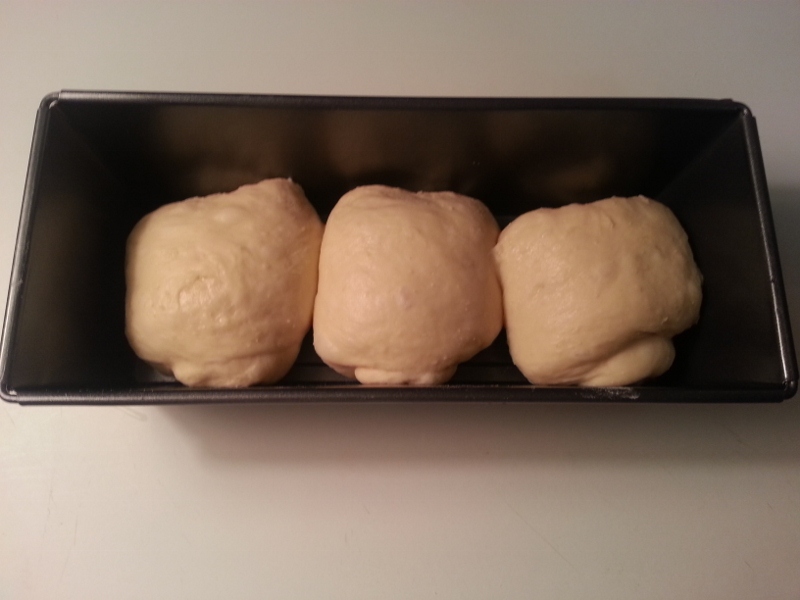
This yielded around 850g of dough for me.  I cut off and shaped 3 x 200g* portions and arranged in a small loaf pan (25.4cm x 11cm x 7cm).

No egg or milk wash this time because I was feeling lazy. Yes, I realize the irony of that statement given that I was making homemade bread.

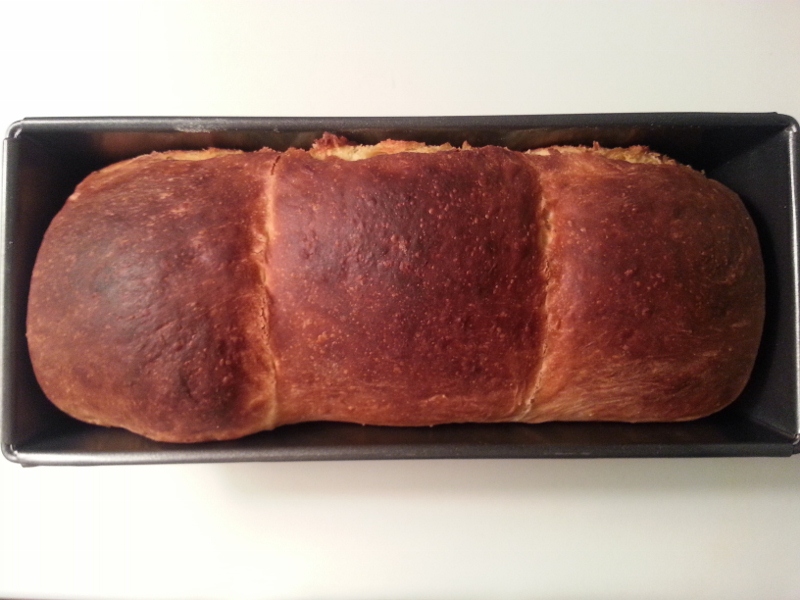
I baked at 325F for 30 minutes.

NOTE: I had long suspsected that my oven was running hot, so I finally picked up an oven thermometer.  With the oven dial set to 325F, the temperature reading on the deck near the heating element was indeed 325F. But when I hung the thermometer from a rack so that it was roughly around the top of a baking loaf, the temperature reading was 350F.  I don't know if this means my oven is at the right temperature or if it's running hot, but I think this bread should probably be baked at 350F.  In any case, when I say I baked at 325F, I mean that the oven dial was set to 325F with the intention to achieve an oven temperature of 350F.


* The astute reader will note that I had 250g of dough left.  This I formed into 50g balls and baked in muffin tins at 325F for 15 minutes.  The top left one was sacrificed for a temperature check. I realized later that I could have just as easily poked the side or bottom of the roll.

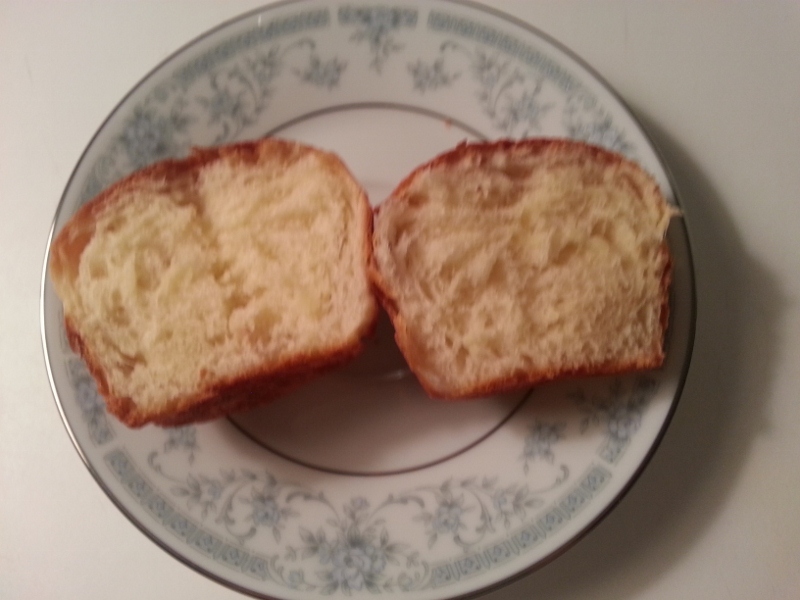
(Whoops, a little bit out of focus)


EDIT: June 30, 2013

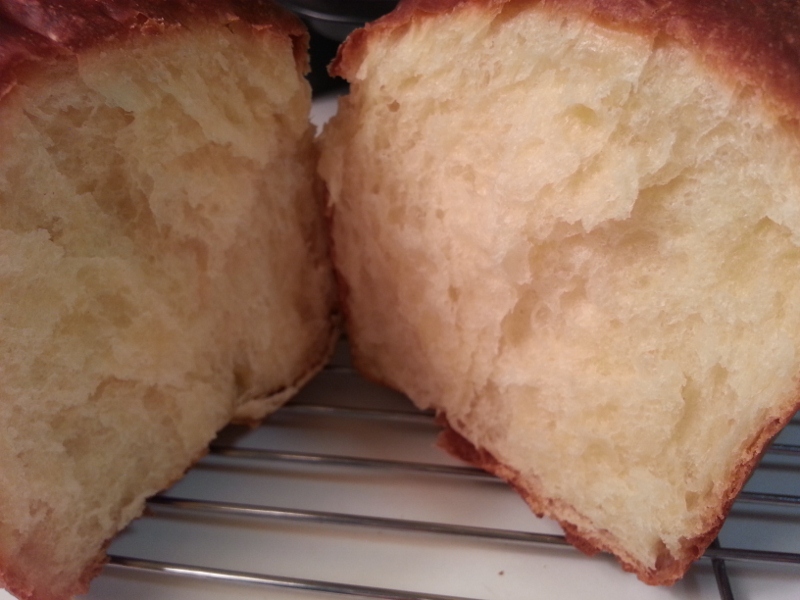
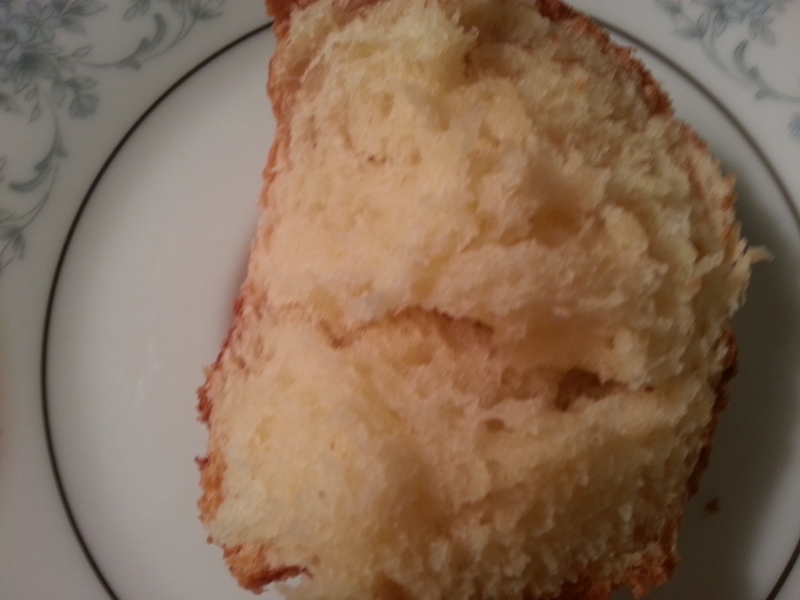
I made this again, and got some better results (taller, fluffier loaf) in my mom's kitchen where it's warmer.


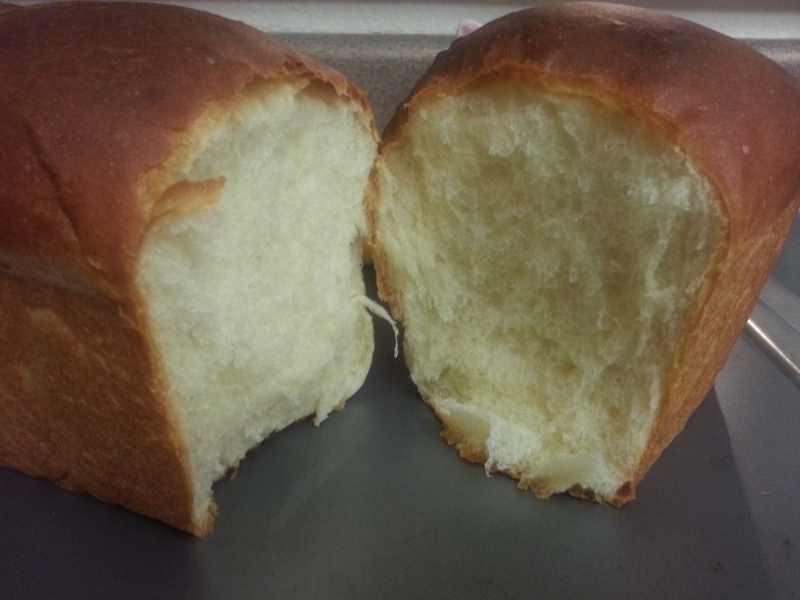
EDIT July 4, 2013

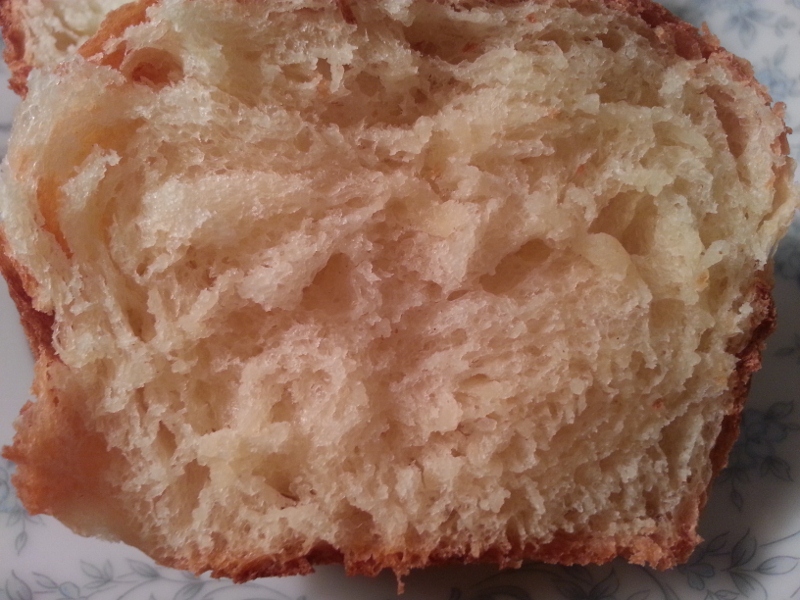
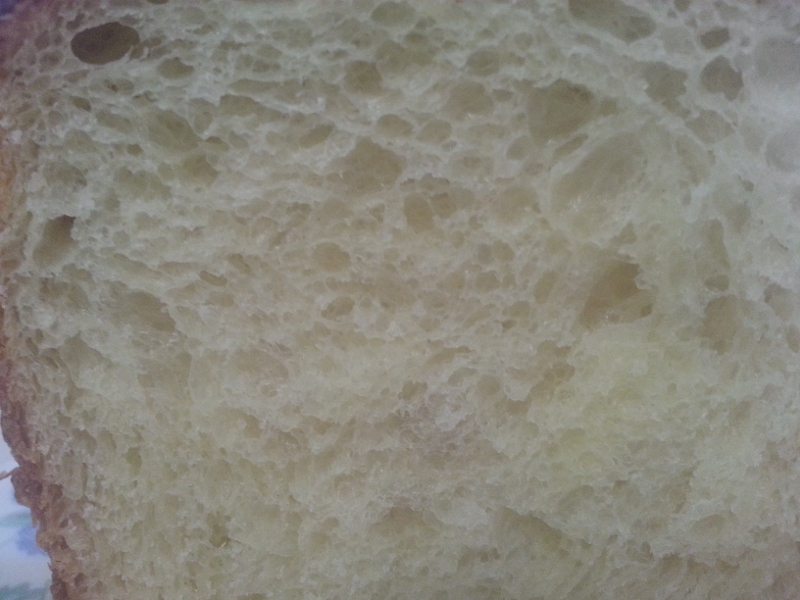
Additional crumb shot of sliced bread.


JacquelineColussi's picture
JacquelineColussi

Cardamom Butter Buns for a Picnic + Brief Introduction

Hello! I've been a Fresh Loaf reader since 2008, when my husband, Dado, introduced it to me. Together we're the team (TFL handle bagel_and_rye) who post about the activities of Chicago Amateur Bread Bakers from time to time. This weekend I finally got around to creating a TFL blog all my own.

It helped that I was motivated to share some news: Dado and I have been in the process of developing bread formula software (BreadStorm™) for some time. We're now at the point that we're ready to mention it here on The Fresh Loaf. And to invite bread bakers who would like to test the software to reach out to us. The software is in beta, which means that a small group of bread bakers are currently using the software and giving us their feedback.

But to get to today's formulating and bread baking... I like working out a bread formula from a taste memory, and then tasting the results and seeing how close I've come. Some years ago when we lived in Sweden, perhaps my first taste memory of the Swedish food culture was cardamom, gently scenting small buns, sliced in half and spread with butter for breakfast; or topped with butter and mild, hard präst ost (that is, priest's cheese) and a slice of cucumber to make an open-face, slider-style, between-meal snack. There was something magical about the scent of cardamom, so unexpected, earthy, and hovering between sweet and savory. It seems I've been craving that scent ever since, and have occasionally attempted to develop my own cardamom-infused buns. Here's the results of this weekend's experimentation.

I wanted a soft, buttery dough, with a tight yet tender crumb, so I began with a basic Pullman dough (also known as Pain de Mie):

Basic Pullman Dough

With an enriched dough such as this, I prefer to keep the salt at no more than 1%. Personal preference, as I'm rather sensitive to the taste of salt, which seems to be further amplified on my palate by the sugar and butter.

Because the 18% butter will soften the dough, and because the 5% sugar may challenge the yeast to do its work, I decided to include a sponge pre-ferment. The sponge--containing only flour, milk, and all of the formula's yeast--will both develop the gluten network (without interference from the butter) and kickstart fermentation (without interference from the sugar). The sponge will also bring a subtle complexity of flavor to the bread:

Pullman Dough with Sponge

To infuse the dough with cardamom flavor, I use green cardamom pods, available at our local Middle Eastern Bakery.

Green cardamom pods, available in Chicago from the Middle Eastern Bakery.

I'm after the dark, pulpy seeds contained within the rough green shells. I find a mortar and pestle is an easy way to break the shells open.

Broken green cardamom pods, revealing dark seeds.

Once the pods are split, by hand I pick out the dark seeds and discard the rough shells. This takes a few minutes but is worth it for the rich and earthy cardamom flavor we'll taste in the finished bread. Approximately 1/3 of the cardamom pods' weight is shell, so, for example, 6 grams of pods will yield 4 grams of aromatic seeds. The last step here is to grind the seeds with the mortar and pestle. Not too fine, as I like to see rustic flecks of cardamom in my bread.

The night before baking, I mix the ground cardamom into the milk used in the final mix, and refrigerate the mixture overnight. The cardamom intensely perfumes the milk, which will perfume the bread. A bit of pure vanilla extract added to the mixture further brings out the cardamom flavor.

The last thing I added to the formula is some extra butter, which I'll melt and brush over the buns, both before and after baking. Here's the formula in its final form:

Cardamom Butter Buns (%)

When ready to start baking, I scaled the formula to use 1,000 grams of flour, to yield 18 buns of approximately 100 grams each:

Cardamom Butter Buns (g)

Process:

1. Night before: Mix together the ingredients for the sponge. Cover the sponge and allow it to sit at room temperature for about an hour, or until you begin to see it expand. Then refrigerate the sponge overnight, where it will ferment slowly.

2. Using a mortar and pestle, crack open the green cardamom pods, then take out the dark seeds by hand. Grind the seeds with the mortar and pestle.

3. Measure the milk to be used in the final mix. To this milk, add the ground cardamom and the vanilla extract. Cover the mixture and refrigerate overnight.

4. Next morning: Set out the milk, butter, and cardamom mixture to warm to room temperature.

5. Once all ingredients are at room temperature, mix together all final mix ingredients except the butter. Knead the dough by hand until you feel the gluten coming together. (For me, this is around 5 minutes.) Add the butter and knead until it's thoroughly incorporated into the dough.

6. Ferment the dough at 25C/77F until doubled in size.

7. Pre-heat the oven to 205C/400F. Divide the dough into 18 pieces of around 100 grams each. Roll each piece into a strand of about 20cm (8in). Coil each strand to form a spiral or snail-shell shape. My sloppy spirals, proofing:

My sloppy spirals.

8. Proof until a fingertip poked into the dough creates an impression that stays, i.e., that doesn't pop back out.

9. Just before baking, brush the tops of the buns with melted butter. Reduce oven temperature to 190C/375F. Bake for 15-25 minutes, or until a hint of golden color begins to appear on the crust. These buns are meant to be creamy and soft, with the barest hint of crust.

10. As soon as the buns come out of the oven, brush again with melted butter. Allow to cool before serving.

Cardamom butter buns, ready for a summer picnic.

Two buns are missing from the basket (above); they went straight down our hatches while still hot from the oven ;-) They're a close approximation of my Swedish taste memory, but next time I'll experiment with doubling the percentage of cardamom.

We like the buns spread thickly with butter and bitter orange preserves. The crumb is tight and uniform, soft and smooth, but structured enough to support the weight of toppings.

 crust, crumb.

I'll be bringing the buns along to tomorrow's "Taste-and-Tell" picnic with the Chicago Amateur Bread Bakers.

Barbara Krauss's picture
Barbara Krauss

Home video

I have a niece who has been working in China for the past 3 years. Because it was difficult for her to find the kind of bread she wanted, she recently decided to try baking it herself.  With the help of one of the forum's most experienced levain doctors, my niece was able to cultivate an active starter. (Thanks again, Mini!) Next we had to help her with the process. To that end, I made a very informal video for her on the process of making a Tartine-style bread. Someone who viewed it suggested that it might come in handy for anyone here who is trying to learn more about this style of baking.  I hope someone finds it useful, but please keep in mind this video was made as a labor of love :) Here is the link, but you may have to cut and paste it into your search engine: http://www.youtube.com/watch?v=K4ZTQmo2igo
A.B.'s naturally leavened (sourdough) bread.


Best,

Barbara

Pages