The Fresh Loaf

A Community of Amateur Bakers and Artisan Bread Enthusiasts.

Most bookmarked

dmsnyder's picture
dmsnyder

Oven steaming using the SFBI method.

When I took the Artisan I workshop at the San Francisco Baking Institute last August, Miyuki demonstrated the method of oven steaming they recommend for home bakers.

The oven is not pre-steamed (before loading the loaves). A cast iron skillet filled with steel pieces (nuts and bolts, rebar pieces) is pre-heated in the oven along with two baking stones. One stone is placed on a rack above the stone and rack on which the loaves will be loaded.

When the loaves are loaded, a perforated pie tin filled with ice cubes is set atop the skillet. As the ice melts, water drips through the perforations and turns to steam when it hits the metal pieces.

I had a hard time finding the perforated pie tins, so I hadn't been able to try this method until today. I did two bakes: One was two loaves of a very familiar bread – Hamelman's “Vermont Sourdough with Increased Whole Grain” from “Bread.” The other was a new bread to me - Chad Robertson's “Basic Country Bread” from “Tartine.” I made two large boules of the Country Bread. One was baked using the “Magic Bowl” technique and the other with the SFBI steaming method, minus the second baking stone and using lava rocks in place of metal pieces.

My current baking method is to pre-heat the oven to 500ºF with the baking stone and skillet in place. When I load my loaves, I turn down the oven to whatever temperature the recipe specifies, using the conventional bake setting. After 10-15 minutes (depending on the total length of the bake), I change the oven setting to convection bake but 25ºF lower. I find, in my oven, conventional baking retains steam well, but convection dries the crust better.

Using the SFBI steaming method, the Vermont Sourdoughs came out substantially similar to how they come out with my previous method – pouring boiling water over the lava rocks. I could not detect any difference in oven spring, bloom, crust color or the texture of either the crust or crumb.

Vermont Sourdough with Increased Whole Grain

Crust Crackles
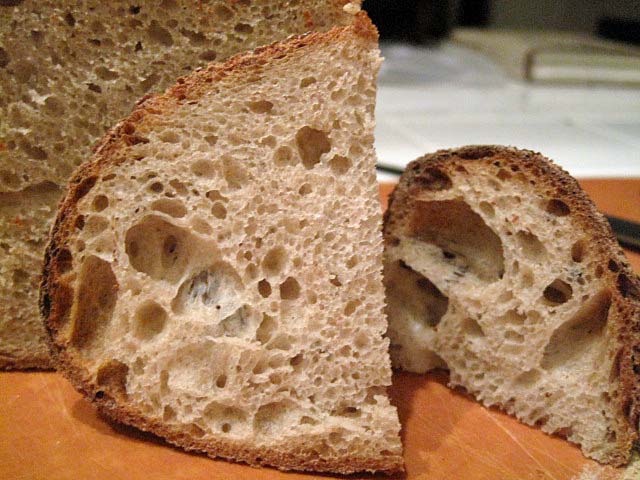
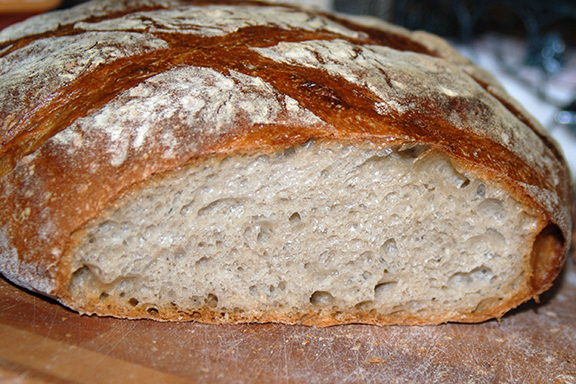
Vermont SD with Increased Whole Grain crumb

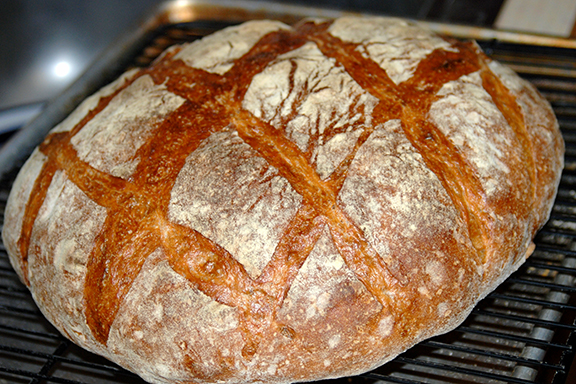
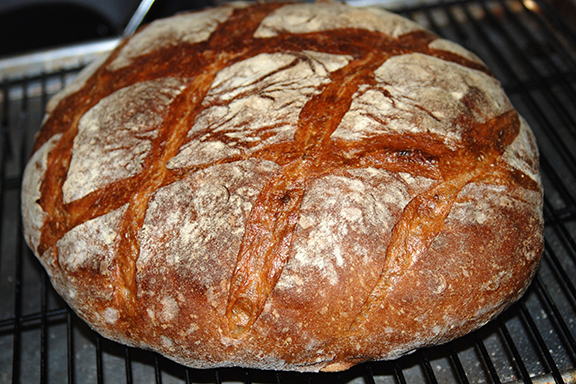
The Basic Country Breads were different from each other. The one baked in under a stainless steel bowl was a bit shinier. The crust softened quicker with cooling. It did not sing when cooling. I don't think there was any real difference in oven spring or bloom.
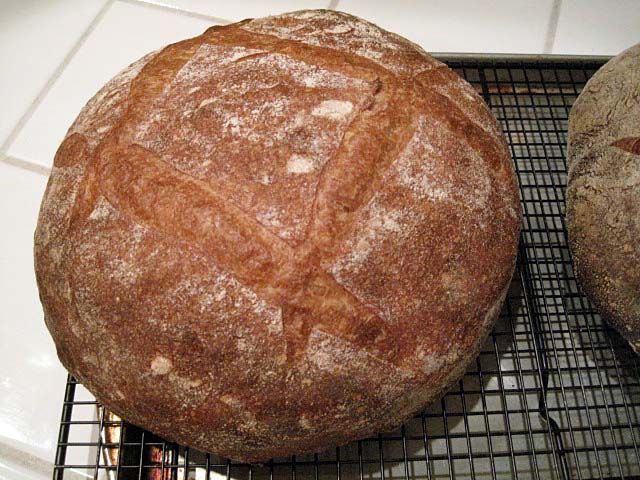
Basic Country Bread baked with the "Magic Bowl" method

Basic Country Bread baked with the SFBI steaming method
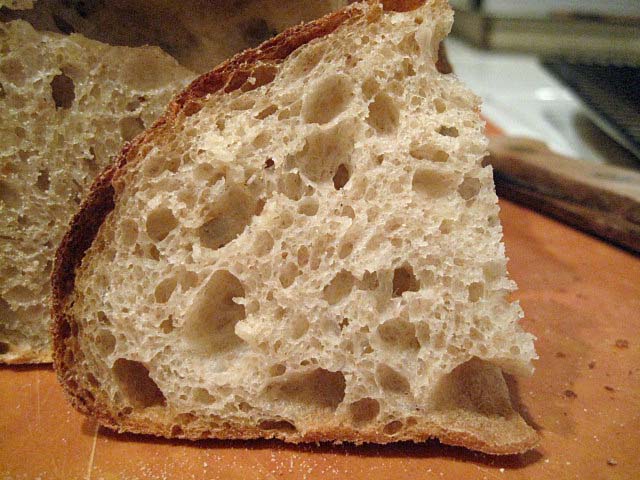
Basic Country Bread crumb

My conclusion is that the SFBI method is effective. It does not require that water be boiled and poured into the hot skillet. To me, it seems a bit easier than the method I've been using. That said, the breads baked using the SFBI method for steaming the oven seem pretty much identical to those I get using my previous technique.

I don't have the kind of covered cast iron skillet/shallow dutch oven that Chad Robertson recommends be used to bake his Basic Country Bread. I do have enameled cast iron ovens that should perform similarly. Perhaps I should try one of them, although my expectation would be that they perform similarly to the "Magic Bowl" method.

David


hanseata's picture
hanseata

Lübecker - Whole Grain Yeasted Sandwich Bread

This bread is an easy to make, tasty, whole grain sandwich bread that I bake regularly for my little bakery. It doesn't require sourdough - but can be made with it.

German breads are typically not - or very little sweetened. If you like it sweeter, you can add more honey.


SOAKER
80 g rye flour
136 g whole wheat flour
3 g salt
92 g buttermilk (or 36 g buttermilk powder and 92 g water)
83 g water
 
BIGA
216 g whole wheat flour
1 g instant yeast
160 g water
 
FINAL DOUGH
all soaker and biga
48 g whole wheat flour
9 g salt
5 g instant yeast
15 g honey
45 g sunflower seed oil (or other vegetable oil)
1 tsp. caraway seeds, ground
¾ tsp. fennel seeds, ground
1 tsp. coriander, ground
1 tsp. coriander, whole, for topping


DAY 1

In the morning:

Mix together all soaker ingredients until well hydrated. Cover and let sit at room temperature.

Knead together all biga ingredients at low speed for 1 - 2 min., until they form a coarse ball. Knead at medium-low speed for 2 min. Let dough rest for 5 min., then resume kneading for another 1 min. Place in lightly oiled bowl, cover, and refrigerate.

In the evening:

Remove biga refrigerator 1 - 2 hrs. before using.

Mix together all final dough ingredients at low speed for 1 - 2 min., until they form a coarse ball. Switch to medium-low speed and knead for 4 min. (dough should be tacky bordering on - but not - sticky, adjust with water or flour if needed), let dough rest for 5 min., then resume kneading for another 1 min. Place dough in lightly oiled plastic container and refrigerate overnight.


DAY 2

Remove dough from refrigerator 2 hrs. before using.

Shape sandwich loaf, place in lightly oiled loaf pan, mist with water and sprinkle with coriander seeds, pressing them gently a bit into dough. Score. Spray with oil spray, cover, and let rise for ca. 45 - 60 min., or until it has grown to 1 1/2 times its original size.

Preheat oven to 425 F, including steam pan.

Bake at 400 F for 20 min., steaming with 1 cup boiling water. Rotate, remove steam pan, and continue baking for another 20 - 30 min. (Internal temperature at least 195 F).

Remove from pan and let cool on wire rack.

Lübecker Bread

Lübecker crumb

tabasco's picture
tabasco

Do you know how to make Excellent Croissants with minimum effort???


If you do, please tell us!?!

Well, I know it seems like 'easy croissants' is an oxymoron, but I know there must be a modernized and updated and excellent recipe around that some talented 'myth buster' baker has developed!

I have tried Julia Child's Recipes, Zojirushi Bread Machine Recipe, looked at REinhardt's, and You-tube, etc., and have reached the conclusion that there are a million different ways to make croissants, so I wonder if anyone has done a real analysis of what exactly you have to do to make a delicious croissant, and what steps you can minimize or leave out completely.

Any comments would be appreciated.

Thanks.  J.

ehanner's picture
ehanner

Super Hydrated Heaven

This past year has been very interesting for me. I made learning rye breads a goal at the years end, and while I now know enough to understand it's going to take a lot longer, I'm making progress. Recently I did an experiment with scalding rye that worked out well. We have had some great threads here on the benefits of autolyse and mixing patterns. I was reminded of a post from Shiao-Ping where she  made a Gerard Rubaud bread and another one from James Macguire that utilized long cool ferment at high hydration.

One thing that these breads have in common is hydration in the area of 80% and small amounts of yeast. This combination requires longer fermenting times and allows the development of flavorful acids. When handled gently, the bread that develops is airy and moist with great color and nutty after tastes.

I decided to make a single 900 gram loaf at 80% hydration. My plan was to start with a 90/10 ratio of AP/Dark Rye so it would darken well and hold moisture better than a straight white loaf. This is a plan for a small miche (if there is such a thing). Only the basic ingredients of flour, water, salt and yeast.This was a hand mixed dough. Just a plastic scraper, wire whisk, larger bowl and my hands were used. A key element to making this dough behave like I wanted was to control the water temperature so as to end up at a desired dough temperature of 70 degrees F. The natural reaction of the water being absorbed by the flour raises the temp by around 4 degrees F. So it's important to start near 70 at the warmest. My ambient room measures at 75F along with the flour.

The formula for adjusting the variable (water) follows. 215F - room temp - flour temp -5F = Water temp. For me this looks like 215F-75 -75 -5= 60F. When everything is mixed together the dough will be at or near 70F. Prof. Calvel and James Macguire both have made a point to stress that correct dough temp is the MOST important and critical aspect of making the dough you want. You just can't treat that as idle chatter form the masters and expect greatness in your oven. I like this bread because it can be made in a single day. In fact if you start at 11 AM, you should be done by 4ish, in time for dinner. The methods employed are from the old European school. My next batch will be with only 5% dark rye

Ingredients:
450g AP flour
50g Dark Rye flour
1/2 teaspoon Instant Dry Yeast (IDY)
10g Sea Salt
400g Water (cool)

Method:
Start by measuring the room and flour temperature and doing the calculation for the water temp. If you need to use ice to cool the water to arrive at a DDT of 70F, so be it.

Combine all dry ingredients in a large bowl and make sure the flours are well combined. Add water all at one time and stir with a spoon, switching to a scraper. This should involve no more than 2 minutes and should result in a rough mass with no dry flours in the bowl. Cover and rest for 20 minutes.

After 20 minutes, fold in the bowl for 8-10 repetitions rotating as you go. Alternatively, pour on the counter and fold with a scraper using double letter folds.Return to the bowl and cover.

Repeat the folding process every hour for a total of FOUR folds. That means 4 more folds after the first. When it is time for the last fold, don't fold, dust flour around the seam between the dough and the bowl and using the scraper, loosen the dough ball up so you can pour it out on a floured counter.

Brush any loose flour off the top of the dough and cover it with the bowl for about 20 minutes. Removing the bowl, pull the edges up to the center around the dough to tighten the lower surface and roll the ball over to the seamed side down. Prepare a linen lined basket with flour rubbed into the fabric and lightly dust the top of the dough. Roll the dough into your hands and place it into the basket seems up. Cover with a towel and proof for around 45 minutes. The dough will have become light and puffy and will test with the finger poke test.

Pre heat the oven to 450F when the dough goes into the basket using a stone and steam producer.

Load dough when it is ready and steam normally for 15 minutes. LOWER oven temp to 350F after the 15 minutes and start checking for done around 45 minutes total bake time. The idea is to bake the interior more slowly and not to over do it with color.

I left the loaf in the oven with the heat off and door ajar for another 5 minutes to help draw the moisture out. Remember it was an 80% hydrated mix. Cool and enjoy.

Eric

odinraider's picture
odinraider

Superb sandwich bread, perfected honey wheat sourdough, luscious brownies, and...PIZZA PIZZA PIZZA!

Here is the white sandwich bread from Julia Child's Baking with Master Chefs. I made one pan loaf and one small round. It is a great white bread that my girls love. It does not have the integrity of the Jamaican hard do, but it is rich in flavor and texture.

Next up is the honey wheat sourdough I have been working on. It is still too warm to slice, so I can't be sure of the crumb, but it is nice and firm, has good lift, and a great smell.

Once I am sure of the crumb and taste, I will post the recipe.


Here are some moist, rich, and chewy double chocolate brownies.


And finally, one of my family's favorites: Pizza! Pizza in all its simplicity: sauce, cheese, fresh basil and oregano, and pepperoni on one of them.


Tomorrow will bring baguettes and focaccia.

MIchael_O's picture
MIchael_O

An all round baking calculator

Hello guys and girls,

    I am a bit new on this forum, but I wanted to save ya'll some future trouble, by letting you know I just wrote a unique online calculator that calculates hydration, converts between almost anything - for example 4.63 ounces of 125% starter equals how many cups of starter, and has some other functionalities. It is hosted at:

http://www.whatsthesequency.com/cakey.php

The "other functionalities" is a pretty neat chart that maps every kind of baked good and is able to read in any recipe for baked goods and correctly place it on the chart. I like to think it's something special. Anyway, I would love any feedback ya'll have on what I wrote, corrections, etc.

Thanks,

Michael O.

wally's picture
wally

English muffins and warm Washington, DC evenings


I love English muffins, not only for breakfast but as a sometime lunch mate (ok, so I like tuna melts). But they pose a quandary for me: my usual recipe is easy to work with and handle, but produces muffins with a rather tight crumb. And let's face it, English muffins are all about nooks and crannies, so this won't do.

There are, of course, lots of recipes for English muffins that are based on dough with a batter consistency that produces wonderful open crumb. But these necessitate using either muffin rings or accumulated empty tins of canned tuna. Frankly, my kitchen already has too much stuff and I'm not about to begin assigning a shelf to empty StarKist cans. Plus, I want a formula that can be used in a bakery where production might involve a hundred or more on a daily basis. For that, EM rings (or empty tuna cans) aren't the answer.

So after a lot of playing with the hydration in this recipe I think it's reached a point where the dough is both hydrated enough to produce those wonderful nooks and crannies we all love, yet still amenable to shaping. (Hydration is 70%.)

One of the nice things about this particular recipe is that the levain constitutes over 30% of the dough weight, so it brings a tremendous amount of flavor to the muffins.

This will produce six, 3.5 oz/99 g English muffins, and a smidge of leftover dough.

Levain: Mixed 12 - 14 hours prior to final dough
Flour   .15 lbs/67 g
Water  .15 lbs
Levain .15 lbs

Final dough:
Flour   .59 lbs/266 g
Water  .34 lbs/155 g
Salt      .02 lbs/7 g
Instant dry yeast ¼ tsp/1 g
Levain .45 lb/202 g

Mix: DDT = 76° F
Add levain to water, then add dry ingredients and mix on speed 1 for approximately 3 - 4 minutes. Mix an additional 3 - 4 minutes on speed 2 until moderate gluten development. (With my fairly weak Hamilton Beach I'll sometimes go to speed 3 for a minute if the dough insists on climbing up the dough hook).

Place dough in a lightly oiled bowl, cover and allow to ferment for 1 ½ hours.

On a well-floured surface, divide dough into 3.5oz/99 g pieces. I roll these by turning the floured side up, and using the stickiness of the non-floured dough which is now side-down to let me create apricot-sized pieces.

Place rounded dough balls on a well-semolina-dusted pan with ½" sides. (They don't need to be ½", but for purposes of shape, you don't want to use either a flat sheet pan or one with, say, 1" sides). Leave sufficient space between them so that they can spread out without touching. Spray tops of dough with Pam and then tightly wrap the pan with plastic crap (dmsnyder's most apt description). The tight wrap with plastic will allow the dough to rise out versus up during its final proof, thus creating nicely shaped rounds of the appropriate size. (Also the reason for a pan with sides!)

Proof for 1 hour.

Heat electric skillet to 400° F and very lightly oil. Place muffins, semolina side down, in the pan, being careful not to overcrowd. (The dough will be very sticky, so the method I've adopted which allows me to handle without misshaping them in the process is to lightly wet my finger tips and then pick them up and place them in the skillet.)


Cook (I'm so used to saying bake this seems unnatural) 8 minutes - 6 minutes at 400° F and 2 minutes at 350°F. Turn and cook another 7 minutes at 350° F. Place on wire racks to cool.  (Below on left, a cut muffin, on the right, a 'forked' one.)


I'm pleased with the openness of the crumb that this recipe achieves - and without the hassle (to me at least) of having to use molds to keep the muffin shape.

And now, on a very warm Washington, DC evening, salade niçoise à la English muffin.


Larry


venkitac's picture
venkitac

Rules of thumb for retarding

Due to various schedules at work, it turns out that the best bet for me to bake bread during weekdays is to retard (preferably) the proofing. I've been trying to piece together from various books rules of thumb to convert yeasted bread recipes that are not retarded, to a retarded proof. So far, I've more questions than answers:)

- Most every book I've seen says that retarding bulk fermentation adds flavor, but do not say that about retarded proofing. I don't understand why this is - the organic acids should be produced just as well in a retarded proof, right? (Particularly in home environments where you bake 1-2 loaves. Maybe for bakeries there's added effects due to the mass effect,) Does someone know whether proofing overnight produces the same results as bulking overnight?

- The only rule of thumb regarding yeast changes that I could find was in Dan DiMuzio's book, where he says that you might want to cut yeast from 0.7% to 0.2-04% if you're retarding the proof. It wasn't clear to me whether that's the only adjustment needed in terms of time/temparature/yeast/hydration. That is, let's say a recipe says that "add 0.6% yeast, improved mix, bulk for 2 hours, proof for 2", would the change be "add 0.3% yeast, improved mix (with an added 1/2 folds because of the overnight proof), bulk for 2, retard for 12"? Or would I need to change more that one factor in time/temp/yeast/hydration at the same time?

- Any other general tips/rules of thumb for recipe conversion to a retarded proof?


Thanks!

undermind's picture
undermind

Artichoke Garlic Bread - Looking for a clone of Pescadero's Arcangeli Market's signature bread

South of Half Moon Bay on the California coast there's a market in Pescadero called Arcangeli's (Norm's) which is famous for it's artichoke bread.  It's pretty much amazing..

Now that I've been making all our bread from scratch, I'd love to try to make something similar to it..  I was wondering if anyone out there has given it a try..  It's a round moist garlic loaf which is studded with artichokes..  I'd even love to hear about a good garlic bread recipe..   I would say that this loaf is more moist than typical garlic bread I think of, probably because most are just french bread with garlic spread..   But it had a bit of an olive oil taste..  And the bag would actually have oily spots when you'd grab a hot loaf off their shelf.

Anyways, if anybody has a clone recipe or suggestions for a moist garlic bread I could do in a clay baker (LaCloche) that would be great!

Here's a link to the loaf..

http://www.normsmarket.com/store/artichoke-garlic-herb-p-846.html

hansjoakim's picture
hansjoakim

When life gives you too much ripe sourdough

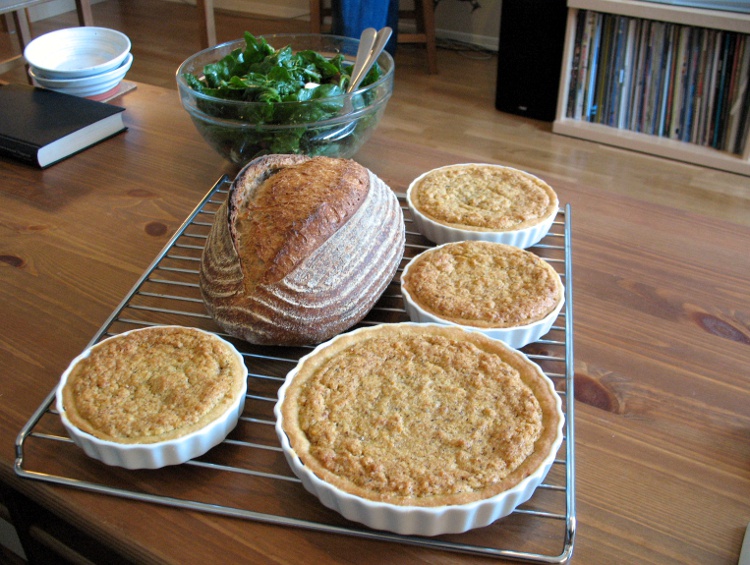
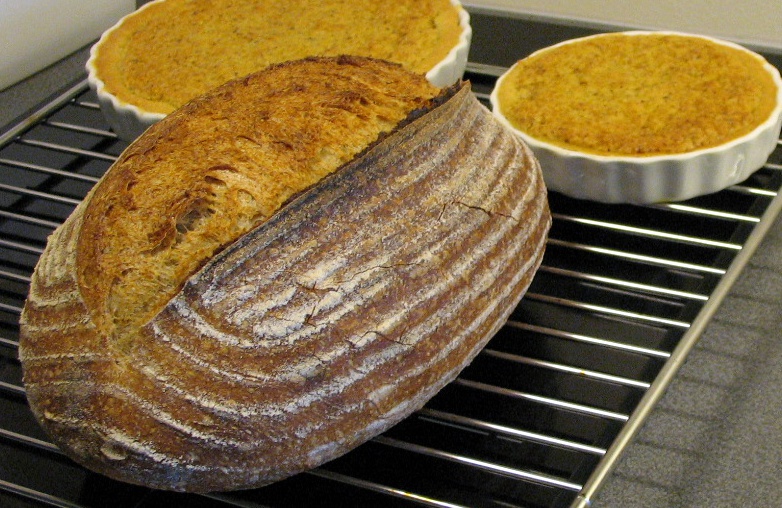
Sometime last week, I built up my rye starter for a run-through of some rye loaves. For some reason or other I ended up with quite a bit more mature rye sourdough than I needed for the loaves I had planned. Too bad to throw it all away I thought, so I put the left-over starter to good use in a pain au levain-style formula. The result was more than I could've hoped for, so darn tasty as a matter of fact, that I worked a bit more on the formula, and baked a few of those rye-sourdough-pain-au-levain breads this weekend. Here's the loaf (and some Swedish hazelnut tarts) from Sunday afternoon:

Pain au Levain with rye starter

I enjoyed slices of the loaf with a salad (spinach, bacon, hard-cooked eggs, mushrooms, in the background), a smear of blue cheese and a glass of red wine. Doesn't get much better than that.

Here's the mandatory crumb shot:

 Pain au Levain with rye starter


I was surprised by how drastically the taste of the bread changes when it is leavened by a rye starter. I tend to bake breads like these with a firm white starter, but now I'm more and more leaning towards using the rye starter instead. There's a distinct sour note to the breads, and a wonderfully tangy bite to every piece of the crust. I was also taken by how crackly the crust became when I baked the bread with a rye starter instead of a white starter; just have a look:

 Pain au Levain with rye starter


All in all, I'm really happy that I mixed up too much rye starter in the first place :)

Edit: Here's a link to the formula.

Pages