The Fresh Loaf

A Community of Amateur Bakers and Artisan Bread Enthusiasts.

Most bookmarked

dmsnyder's picture
dmsnyder

Gosselin-Bouabsa Hybrid Baguettes à la DonD

A few days ago, DonD blogged about some gorgeous baguettes he baked using a combination of unconventional mixing and fermentation techniques adapted from formulas developed by Pierre Gosselin and Anis Bouabsa, both very highly regarded Parisian boulangers. His description can be found here: Baguettes a l'Ancienne with Cold Retardation

Don used both the long autolyse under refrigeration of Gosselin and the cold retarded bulk fermentation of the complete dough employed by Bouabsa. He got such wonderful results, I had to try his hybrid technique.

I had been concerned that the double cold retardation would result in a dough that had so much proteolysis as to be unmanageable. However, Don described his dough as "silky smooth." Well, my dough was sticky slack. It was all extensibility and no elasticity. Fortunately, i have worked often enough with doughs like this to know they can make the most wonderful breads, so I shaped (best I could), proofed, slashed and baked. Voilà!


Since I was already afraid I'd over-fermented the dough, I erred on the side of under-proofing. The baguettes had almost explosive oven-spring. They about doubled in volume during the bake.

The crust was crunchy. The crumb was .... Oh, my!

The flavor was very good, but not as sweet as I recall the "pure" Gosselin Pain à l'Anciènne being.

These baguettes are worth baking again with some adjustments. I would endorse Don's decrease in the amount of yeast. I'll do so next time. And I will try a slightly lower hydration level. These were 73% hydration.

Thanks, Don, for sharing this very interesting twist in baguette techniques.

David

SylviaH's picture
SylviaH

Sourdough Waffles

These are the most delicious tasting waffles and a keeper recipe for me.  They are crispy and light with a wonderful flavor.  Very easy to make and were perfect to feed my hungry husband Mike after his very early morning bike race.  He had stayed up after working his swing shift and went directly to the race.  9 AM he was home and hungry.  I had prepared my batter that night and only had to heat the waffle iron add eggs and baking soda to the batter and wisk.  I made some poached eggs while the waffles baked.  This recipe comes from the popular BreadTopia site.  They are perfect for freezing and so easy.   I would suggest doubling the recipe if you are feeding more than 2. 


The night before:

Heat to melted and cool

4 oz. (1/2 cup - 115Gm) Unsalted Butter

8 oz. ( 1 cup - 225Gm) Milk

Add To:

9 oz. (1 cup - 225Gm) Starter - my starter was 100% hydration

1 tsp. sea salt

1 TBsp. Brown sugar

6 oz (1 1/2 cup - 170 All Purpose Flour

Mix - Thick Batter - Cover - 8 - 14 Hours

Pre-heat waffle iron 10 - 15 minutes

Uncover batter whisk in 2 large eggs and 1/4 tsp. baking soda

3- 5 minutes in iron or longer for darker waffles.  While my waffle iron pre-heated I put a large stainless steel fry pan with lid and about 2 - 3 inches of water on to come to just boiling point.

We love poached eggs..

When the waffles went into the iron I cracked my egg directly onto the counter.. ' not on edge of bowl ' no shells this way.. put it into a very small bowl with a lip and very gently slide it into the simmering hot water ' no bubbles boiling '.  I use a handled round skimmer to take them out of the water and drain..using a paper towel so absorb any extra water.  Served with poached eggs and strawberries.


            Sylvia


davidg618's picture
davidg618

Overnight Baguettes

I finally invested in a new baking stone, one that fills an oven shelf with only a couple of inches to spare. Now I can make baguettes that approach 18" to 20" in place of the stubby ones I baked before. Consequently, along with sourdough, sticky buns, foccacia, and getting familiar with spelt, I've been baking my own baguette formula that has borrowed heavily from Anis Bouabsa's formula and especially his process, and, in the most recent batch, Peter Reinhart's pain a' l'ancienne procedures. I've made this formula three times, tweaking a little each time, not the ingredients, the procedures. I've nicknamed them "Overnight Baguettes.

Formula for 1000 g finished dough

              All purpose flour    575g    100%

              Water                   414g      72%

              Salt                        12g        2%

              Instant Yeast         1/4 tsp.   ???

I mix all the dry ingredients together in a wide bowl, and add the water. Using a plastic dough scraper I incorporate the water into the dry mix, cover and rest it for one-half hour.I turn the dough out onto a very lightly dusted board and French fold until dough passes the window pane test. Chill (details follow: I tweaked here.). Remove from chiller. Bring to room temperature (details follow: tweak #2). Preshape, rest, shape, and final proof. Preheat oven to 500°F. Pre-steam oven. Load slashed loaves reduce temperature to 450°F immediately. After ten minutes remove steam source (if you can do it safely), vent oven and finish baking.

I did all my mixing with ingredients at room temperature (low seventies-ish) for the first two batches. For the first batch, ala Bouabsa, I left the dough in the refrigerator 21 hours @ 38°F. For the second batch I placed it in our wine closet @ 55°F for seventeen hours. For both batches I did two stretch-and-folds after the first 50 and 100 minutes. These two S&F's leave the dough very elastic and smooth (I think it feels "silky").

In both cases, after I turned out the chilled dough (again, following Bouabsa) I immediately divided the dough into three equal amounts, preshaped, and let the dough rest for one hour.

The first batch's dough increased about one-and-a-half its original volume in the refrigerator. Despite dividing and resting the dough was still chilled when I final-shaped it, and final proofing took two hours and fifeteen minutes.

The second batch's volume tripled in the wine closet (I worried about losing any chance of oven-spring). The dough was particulary puffy after resting an hour (more oven-spring worry). Final proofing took 90 mins. My worries were dispelled in the first ten minutes in the oven. Both batches exhibited good oven-spring, but the flavor of batch #1 was distinctly more bland then batch #2. The crumb of both batches was open, light, and slighty chewy.

I was generally happy with both batches, but the second batch's flavor won out. Whatever flavoring chemistry goes on in retarded dough appeared to work harder at the wine closet's elevated temperature.

Despite the oven-spring experienced in batch #2, I was still worried I was setting myself up for future failures letting the dough triple in volume during its retarded proof at 55°F. I recently broke down and bought Peter Reinhart's  "The Bread Baker's Apprentice". His anecdote about capturing the hearts and minds of his more reluctant students when they are first introduced to pain a' l'acienne dough pushed me to skip to its formula. I was intrigued by his "shock retardation" using ice water to mix the dough.

I mixed the third batch's dough with ice water, and also placed it in the wine closet during its autolyse rest. I checked the dough a couple of times after performing the two S&F, and was a little worried by almost no apparent action. Encouraged by the few little bubbles I could see through the bottom of the plastic container I went to bed, but set the alarm to remove the dough after fifeteen hours chilling. The dough was just short of doubled when removed.  Following Reinhart's directions I let the dough sit, undivided at room temperature (high sixties-ish) for two hours. When I got out of bed the second time the dough was well doubled and the top of the dough was stretched in a couple of places by large gas bubbles. I liked what I saw, and felt.

I divided the dough, preshaped, and let it rest twenty minutes. Following, I shaped, and final-proofed for ninety minutes (I use a poke test to decide proofing status, but I keep track of time too.) Baking proceeded as described above.

The results:

We are delighted with the flavor, and crumb! This is going to be our "go to" baguettes: no more tweaking. 

David G


ZD's picture
ZD

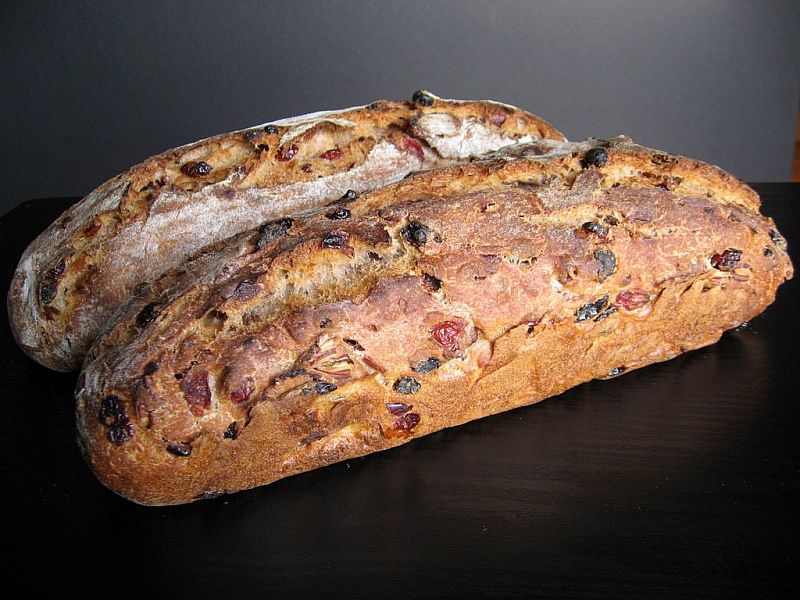
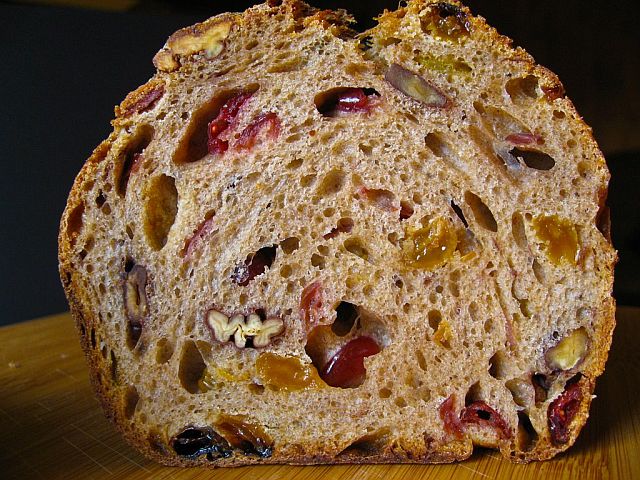
Raisin, Craisin, Pecan Sourdough

Raisin, Craisin, Pecan Sourdough bread.

Getting back into bread making.

ananda's picture
ananda

Caraway Rye Bread with Black Strap Molasses.


Caraway Rye Bread.

This is a favourite with my wife, and one I want to truly perfect in the next few months, for "Competition Bread" purposes.   It works as follows: 75% Strong White flour, and 25% Dark Rye in the form of a 15 hour sourdough culture.   Black strap molasses and caraway seeds for flavour; overall, just shy of 65% hydration.

Formulae, method and photographs shown below:

Rye Sourdough Refreshment and Final Dough for 2 large "Miche-style" loaves

Materials, etc.

Formula [% of flour] 

Recipes in Grams

1.First Refreshment: 11.02.2010. 20:30


Ferment, ambient for 24 hours [approx 18 - 20°C]

Leaven from stock [wheat: 100 flour, 60 water]

Flour: 7

Water:4.4

50

Flour31, water19

Dark Rye

23

100

Water

34.8

150

TOTAL@ 31°C

69.2

300g

2.Second Refreshment: 12.02.2010. 20:30


Ferment, ambient for 15 hours [approx 22°C]

Leaven from above

69.2

300

Dark Rye

70

300

Water

116

500

TOTAL @ 31°C

255.2

1100


[Flour 100, Water 155.2]

[Flour 431, Water 669]

3.Final Dough: 13.02.2010. start mixing 11:30, finish 12:20


Rye Sour [from above]

64 [flour 25, water 39]

855 [flour 333, water 522]

Strong White Flour

75

1000

Salt

1.8

24

Caraway Seeds

1.8

24

Black Strap Molasses

8

107

Water @ 40°C

25.8

344

TOTAL

176.4

2354

Notes:

Pre-fermented flour [all rye] 25%


Overall hydration 64.8%


Method:

  • Follow the refreshment timetable to create an active culture
  • My kitchen was cool this morning [13°C], and flour and sour very similar [sour actually 18] Addition of cold syrupy molasses, so the water I used was bath temperature; even then the final dough was only 21°C. This is fine, although I would have liked 25; end result 2 hour bulk instead of 1½ hours. Anyway, you end up with a very sticky mass, so here is how to combine materials relatively pain-free. Weigh the hot water, and dissolve the molasses into this. Add this to the sour, and add the salt and caraway seeds. Mix together til blended. Add the white flour and loosely mix. Autolyse 30 minutes. Mix on the bench top, and between the hands in front of you [Andrew Whitley's "Air Kneading"; Breadmatters, 2006]. The Rye and Molasses make it sticky, but the strong flour means it will mix into a strong and developed dough, so persevere. Do not add any flour; that goes without saying, of course!
  • Brush the bowl sparingly with olive oil, and store the dough, covered with plastic sheet for bulk proof in a warm environment. I do this on the hearth, just below and in front of our trusty wood-burning stove.
  • Stretch and fold twice, after 40 minute intervals; see photos.
  • After 2 hours bulk proof, scale and divide and mould. Set to final proof in bannetons, in similar conditions to bulk time.
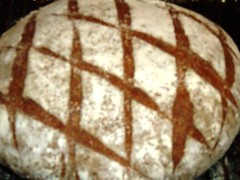
  • Pre-heat the oven for up to 2 hours to store heat in the bricks. Add boiling water to the roasting pan of hot stones at the oven base, to create steam. Tip the first dough piece onto a pre-heated tray, cut diamond-shapes across the whole crust surface, and place on top of the hot bricks to bake.
  • Turn down the heat on the oven to 200°C after 15 minutes, and slide the dough directly onto the bricks. Use the hot tray to cover the roasting dish and thus prevent further steam formation in the oven chamber. I baked the first loaf [1290g weight] for 45 minutes, and the second loaf took 35 minutes [just over 1050g]
  • Cool on wires.

Photographs , in sequence, are attached below, but no video, as these were made at home.

I also made some Ciabatta with "00" flour, a wheat levain and super-hydration of 85%.   More details to follow; apologies for not quite capturing the full quality of this finished bread.   It is quite superb in terms of flavour.

Best wishes

Andy


dmsnyder's picture
dmsnyder

Crackly Crust & Shiny Crumb: San Francisco Sourdough from AB&P

Today's bake:

I was asked by a TFL member who had already packed his copy of Advanced Bread & Pastry in preparation for a move for the formula for this bread. I have added it, below. Happy baking!

Boules

Levain


Ingredient

Amount (Lbs & Oz)

Bakers' %

Bread flour

2 1/2

95

Medium rye flour

1/8

5

Water

1 1/4

50

Starter (stiff)

2 1/8

80

Total

5.75

230

  1. Mix all the ingredients with a DDT of 70ºF.

  2. Ferment 12 hours at room temperature (65-70ºF).


Final dough


Ingredient

Amount (Lbs & Oz)

Bakers' %

Bread flour

14 7/8

100.00

Water

10 7/8

72.80

Salt

3/8

2.53

Levain

5 3/4

40.00

Total

2 lb

215.33

Method

  1. Mix to medium consistency.

  2. Ferment 3 hours with 1 fold. (I did 2 folds at 45 minute intervals.)

  3. Divide into 1 lb pieces.

  4. Preshape as light balls.

  5. Rest 20-30 minutes.

  6. Shape as boule or bâtard.

  7. Proof 12-16 hours at 48ºF, 65% relative humidity.

  8. Score as desired.

  9. Bake 35 minutes at 450ºF with steam.


Crackly Crust

Crumb 

David

dmsnyder's picture
dmsnyder

Sourdough Multigrain Bread from "Advanced Bread and Pastry"


Multigrain sourdoughs have a delightful complexity of flavor, wonderful texture and phenomenal keeping quality because of the moisture retained in the soaker, as well as the effect of the levain. They are delicious fresh-baked, but their flavor only fully develops after a day or two when the distinctive flavors of the grains and seeds have had a chance to meld.

I had made Jeffrey Hamelman's 5-grain Levain from “Bread” a number of times. Hamelman describes the flavor as “delectable,” which is not an over-statement. So, although my original intent was to make the Sourdough Whole Wheat Bread from Michel Suas' “Advanced Bread and Pastry” this weekend, when I saw his formula for “Sourdough Multigrain Bread” a few pages later, I couldn't resist it.


Levain


Ingredient

Amount (Lbs & Oz)

Bakers' %

Bread flour

2 5/8

95

Medium rye flour

1/8

5

Water

1 3/8

50

Starter (stiff)

2 1/8

80

Total

6 1/4

230

  1. Mix all ingredients well with a DDT of 70ºF. (Tip: First mix the water and starter completely. I find a dough whisk is great for this. Then add the flours and mix thoroughly.)

  2. Ferment 12 hours at room temperature.


Soaker


Ingredient

Amount (Lbs & Oz)

Bakers' %

Flax seeds

1 1/2

39.13

Sunflower seeds

1 1/2

39.13

Rolled oats

1 1/2

39.13

Sesame seeds

1 1/2

39.13

Water

3 7/8

100

Total

9 7/8

256.52

  1. Toast the Sunflower and Sesame seeds for 4-6 minutes at 350ºF to bring out their flavor.

  2. Suas says to soak the seeds and oats for at least two hours. I soaked them overnight.


Final Dough


Ingredient

Amount (Lbs & Oz)

Bakers' %

Bread flour

10 1/8

65

Whole wheat flour

3 7/8

25

Medium rye flour

1 1/2

10

Water

11 3/8

72.8

Yeast (instant)

1/8

0.16

Salt

3/8

2.53

Soaker

9 7/8

59

Levain

6 1/4

40

Total

2 lb

274.49


Method

  1. Make the levain the night before baking and ferment it overnight, as above.

  2. Mix the flours, water, yeast and salt.

  3. Add the levain and mix thoroughly.

  4. Mix to medium gluten development, then add the soaker and mix only until incorporated. DDT is 75-78ºF (24-25ºC).

  5. Ferment for 2 hours.

  6. Divide into two equal pieces and pre-shape into loose balls.

  7. Rest the pieces, covered, for 20-30 minutes.

  8. Shape as bâtards. (Gently pat each ball of dough into a disc. Fold the right and left sides to meet in the middle. Then, roll the pieces up, away from you. Make sure the seam is sealed as you roll the loaves into bâtards and place in well-floured bannetons or on a floured couche.)

  9. Cover tightly and proof f

    or 60-90 minutes at 80ºF.


  10. One hour before baking, pre-heat the oven to 500ºF with a baking stone and your preferred steaming method in place.


  11. When the loaves are expanded by 75%, transfer them to a peel and to the baking stone.


  12. Immediately steam the oven and turn the temperature down to 460ºF.


  13. Bake for 30-40 minutes or until the internal temperature is at least 205ºF and the bottom sounds hollow when thumped.


  14. When the loaves are fully baked, turn off the oven, but leave the loaves on the stone with the oven door ajar for 5-10 minutes to dry the crust.


  15. Transfer the loaves to a cooling rack, and cool thoroughly before slicing.


This bread has a crunchy crust and chewy crumb. There is a distinct but mild sourdough tang, and the flavor of the oats and seeds is very present. Compared to Hamelman's 5-grain Levain, Suas' bread has a higher proportion of seeds, and I toasted the sesame and sunflower seeds darker than I had for Hamelman's bread. Suas also uses a firm starter while Hamelman uses a liquid starter, which accounts for the relative sourness of Suas' bread.


While the comparisons are interesting, I can't say either is “better.” Both are outstanding breads and highly recommended.  


David


Submitted to YeastSpotting

hansjoakim's picture
hansjoakim

Schrotbrot

It's the time of the year where blistering cold winds sweep the city and the surrounding mountainside. Rest assured, no matter how many layers you put on, the cold will penetrate them and get to you eventually. I'm certain that the freezing temperatures are partly to blame for me baking a dense Schrotbrot this week... I had a careful look over my kitchen shelves, pencil in hand, and jotted down potential ingredients for a solid log. I had a vague idea of what I wanted, but this turned out quite good I think.

This week's Schrotbrot:

Schrotbrot

I've snapped a screenshot of the spreadsheet I used to make up the formula; you'll find that at the bottom of the post!

The base formula is pretty simple, and you can put any kinds of grains and seeds in it - flavour it either way you like. I love toasted sunflower seeds in these rye breads, as they give a nutty chew that goes well with soaked rye berries. I used a tad malt syrup to bring out a subtle sweetness in the final loaf. It's not very pronounced, but rather lingers somewhere in the background. I bet either honey or another syrup would work equally well. You might want to alter the overall hydration if you exchange other seeds in the soaker(s), but keep in mind that you want to keep the final dough very wet. Wet your hands with water, give the dough a rough cylindrical shape, and carefully place in a tin. The recipe below is scaled to fill a 1 liter tin approx. 2/3 way up. After about 1 hour final proof, the dough should have risen noticeably, and the top should start to look a bit fragile.

Let cool at least 24 hours. Slice as thin as possible and enjoy at 5 AM with a cheese platter and a glass of cold milk. Then go run the New York marathon.


Recipe Schrotbrot

Shiao-Ping's picture
Shiao-Ping

House Miche

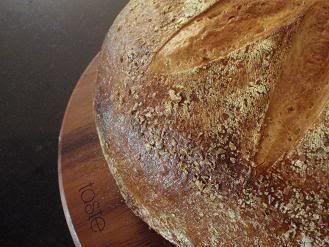
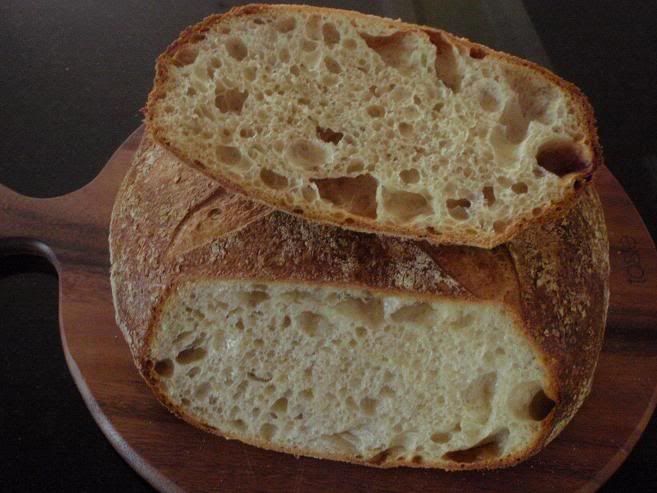
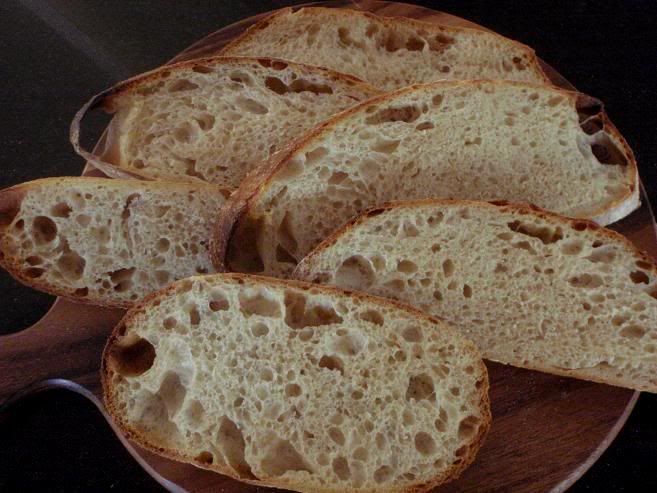
My daughter left today for Belgium to start a six week (French speaking) holiday and visiting our family friends over there.  A couple of days ago I asked if there's anything she'd like me to make before she goes.  She said, "Something familiar."  I can take the hint.  Recently, I have been experimenting with rye flour and my family are not very impressed with the result.  One rye bread came out really dense and as I was mumbling why this bread is so dense, my husband said, "Don't throw it out."  "What made you think I would?" I asked.  He said, "History."  I have had a bad track record in littering. 

Anyway, as I said, I can take the hint from my daughter.  I made this good old House Miche, or Daily Bread, for our lunch yesterday.  "House Miche" - doesn't it sound glamorous?  It sounds really lovely, I might add.  I took the term from a post by Jeremy of Stir The Pots in the Australian Sourdough Companion, back in 2005!  Jeremy's sourdough making history certainly goes a long way back (or, put another way, Sourdough Companion goes a long way back). 

Well, here it is, our House Miche, a simple formula with a simple procedure:


My Formula

  • 230 g starter at 60% hydration * Note
  • 100 g whole wheat flour (20% of final dough flour, or 15% of total dough flour)
  • 400 g white bread flour (sometimes I do 50 g rye flour and 350 g white bread flour)
  • 378 g water * Note
  • 12 g salt

Total dough weight 1120 g; overall dough hydration 72%.

* Note: If your starter is at 75% or 100% hydration, you can reduce your water to 355 g or 328 g, respectively, and still keep the same overall dough hydration.


  1. Mix all ingredients.  Autolyse 30 to 45 minutes.  
  2. Depending on your room temperature, over the next 2 - 3 hours, stretch and folds 3 - 4 times with 20 - 30 strokes each time. 
  3. Pre-shape, rest for 15 - 20 minutes, and shape.  (If the dough does not appear to have enough dough strength, pre-shape twice with 15 - 20 minutes rest in between, but be mindful of the time elapsed as it all counts towards the total fermentation time.)
  4. Depending on your room temperature, proof for no more than 1/2 - 1 hour.  (As my room temperature was 28 C, from the time my ingredients were mixed, to the time the shaped dough was placed into the fridge, it was no more than 3 1/2 to 4 hours.  Alternatively, if you want to bake it on the day the dough was made with no overnight retardation, proofing can be up to 2 1/2 hours.) 
  5. Place the shaped dough in the fridge for a minimum of 8 -12 hours.  (Note: an 8 - 12 hours overnight retardation in the fridge is equivalent to an extra two hours of proofing in the room temperature!)  Bake with steam at 240C for the first 15 minutes, then reduce the heat to 220C and bake for a further 20 minutes.


My daughter loved it.  When she returns in mid February, she will start a new phase in her life - say goodbye to school and start university.  She will be ready for more independence and responsibility. 

Until then, our son gets the full attention of both his mummy and daddy.  How good is that, he says.


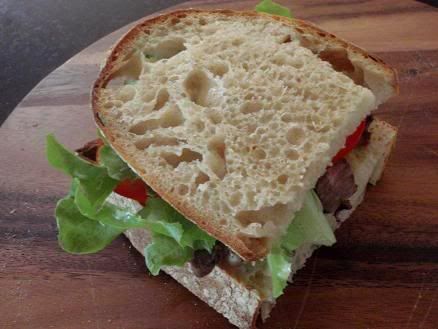
                            Roast beef and salad sourdough sandwich for our boy - a mid-morning snack


Shiao-Ping

JeremyCherfas's picture
JeremyCherfas

Dan Lepard's Black Pepper Rye

Dan Lepard had a great recipe in The Guardian magazine back on 19 September 2009. I don't recall anyone here posting about it, but when I tried it I encountered a problem. Nothing insurmountable, though, thanks to Dan's forum.

Anyway, I wrote about it in detail at my blog. I'm putting this here in case anyone else comes looking.

And here's the warning: be very careful not to overheat the initial mixture of rye and coffee.

Happy baking

Jeremy

Pages