The Fresh Loaf

A Community of Amateur Bakers and Artisan Bread Enthusiasts.

Most bookmarked

JMonkey's picture
JMonkey

Desem -- I take it all back


Laurel Robertson, I owe you an apology. I pulled a loaf of Desem bread out of my oven about an hour ago, and, unable to wait any longer, just cut a slice to eat. Without doubt, it is the most delectable, fully flavored whole wheat loaf I have ever eaten. Why it took me this long to get it right, I don't know. But I'm glad I did. When I'm making dinner bread from now on, I'll be making this.

First of all, folks should know that I didn't use a starter made according to the methods described in The Laurel's Kitchen Bread Book, which requires 10 lbs of freshly ground flour. I'm sure you can make it that way, but there's an easier method. I just took some of my regular whole wheat sourdough starter, created a dough ball at about 60% hydration when I fed it, and left it in my chilly (55 degrees F) basement to ripen. I fed it once a day for three days, building it up each time, until I had about 200 grams or roughly 7 ounces of dough. On the final build, I increased its size by a factor of 3, and let it ripen for about 16 hours at 55 degrees, more out of convenience and necessity than calculation. If you don't have a whole wheat starter, it's simple to convert. Just take some of your regular ripe starter, and feed it in the following weight ratio of 1:4:4 -- starter: water: whole wheat flour. Refresh it two or three times like this, and you'll have your 99.99% whole wheat starter. (I won't tell anyone if you don't that it's not absolutely pure).

I screwed up my math in preparing the dough, so I ended up with about 38% of the flour as starter rather than the 30% I'd hoped for, but I'm not sure it would make that much difference. You do want a fairly large amount of starter, if I'm reading Laurel's recipe right -- somewhere in the range of about 30%. I also went for the customary 2% salt and aimed at a hydration of 75%.

Here's my formula:

  • Whole wheat flour: 100%
  • Water: 75%
  • Salt: 2%
  • 30% of the flour was pre-fermented at 60% hydration.
That worked out to roughly:
  • 220 grams starter
  • 260 grams water
  • 320 grams flour
  • 8 grams salt
I mixed it up and kneaded for about 300-400 strokes, until I could stretch a small piece of it into a translucent film (i.e. the "windowpane" test). As for consistency, I was aiming for dough that felt very tacky, but not exactly sticky. Then I formed it into a ball and let it ferment for four hours at about 64 degrees F (the temperature of my kitchen). It more than doubled in size and when I poked a wet finger into the dough, it didn't readily spring back.

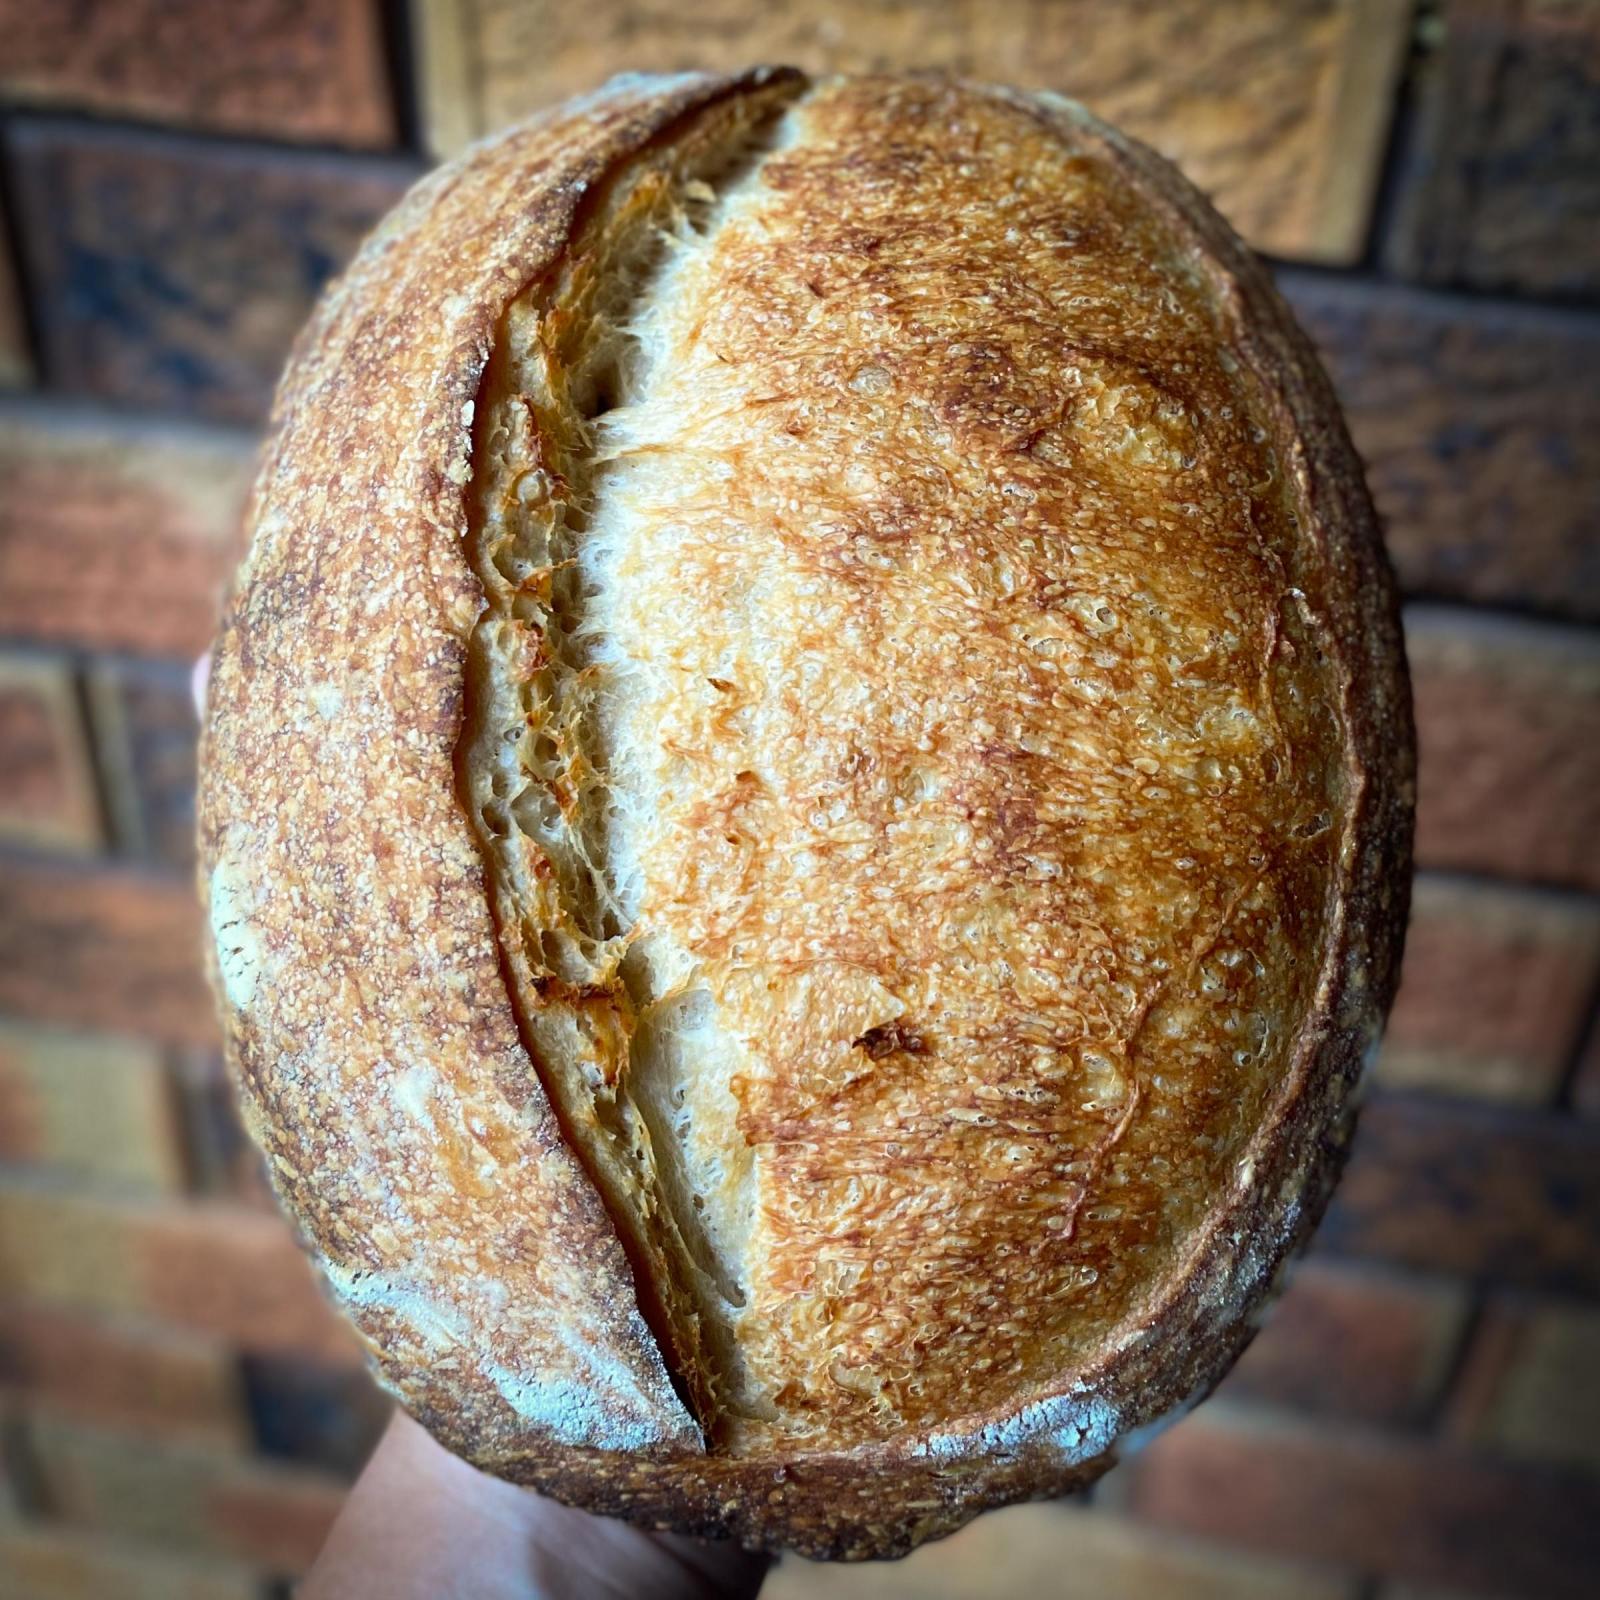
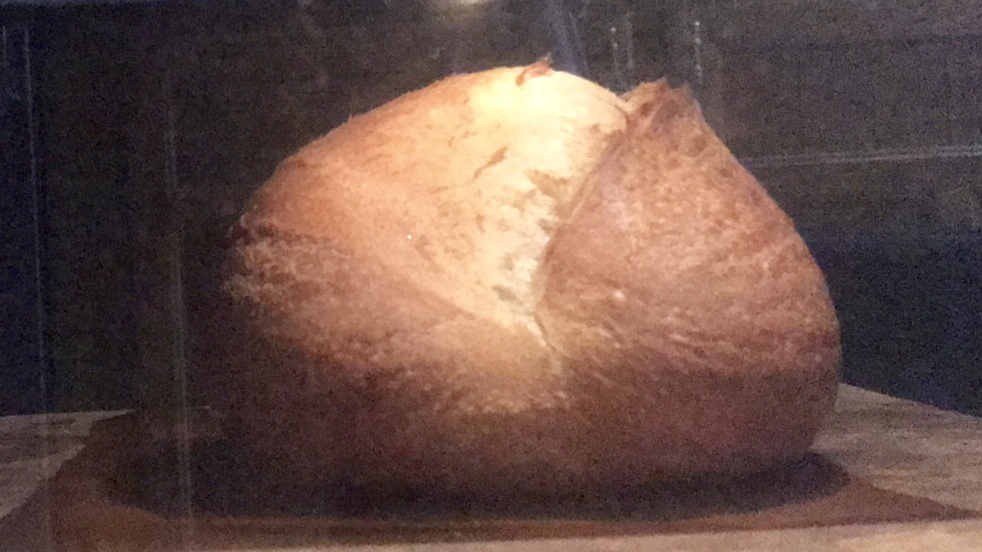
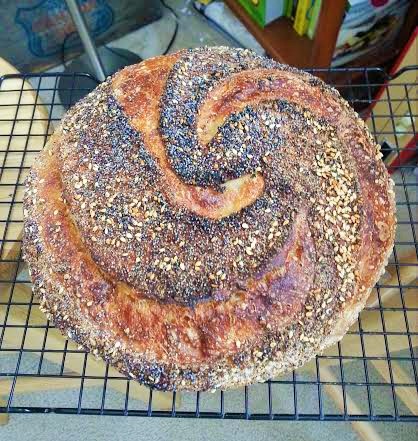
Next, I gave the dough a stretch and fold, let it rest 15 minutes, and then shaped it into a ball. I placed it in a banneton (well-floured) and then used my makeshift proof-box to keep it at roughly 85 degrees for 2.5 hours. At that point, the dough had inreased about 75% in size -- perhaps it even doubled. In any case, I slashed it and put it into my cloche, which had been warming in a preheated, 500 degree F oven for about an hour. I had a slight mishap getting it into the cloche (I was a bit too forceful with the peel, and slammed the loaf into the side of the cloche, turning it over on its side. It mushed it a bit, but nothing serious -- the bake took care of it, mostly. You can see the dent on the bottom right of the loaf above.). I repositioned the bread and covered it. The bake was 30 minutes covered at 500, then 15-17 minutes uncovered at 450. I let it cool for one hour.


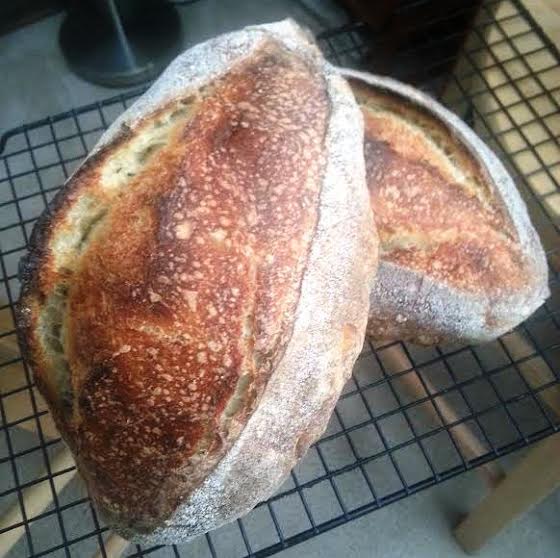
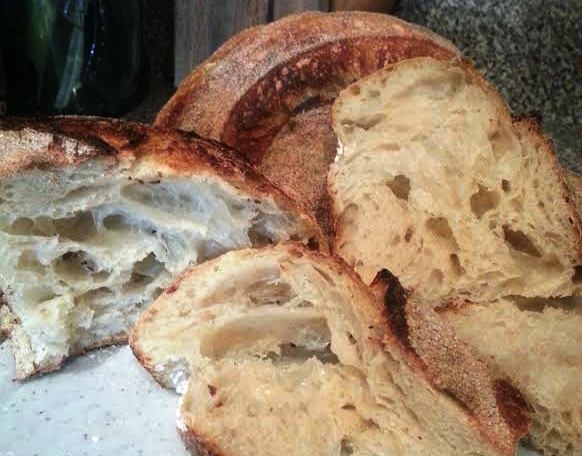
As you can see, the crumb does not have the huge holes one expects in white bread (I'm just about convinced that any "whole wheat bread" that has sports huge holes probably consists of at least 50% white flour), but, even so, the bread is not at all heavy or dense. The crumb is light and chewy, with a wonderful crispy crust. The flavor? It's tangy, but not overpoweringly so. There's a buttery undertone, maybe? The flavor lingers long in the mouth after eating. Really, the flavor is tough to describe aside from being complex and delicious.

Like I said, when I have company in the future, this is the bread I'll serve. Utterly delicious.

Well done, Laurel Robertson. And thank you.
Carlo_Panadero's picture
Carlo_Panadero

20% Whole Wheat Sourdough

This maybe the simplest recipe and something that always works for me. I’m posting probably almost the same recipe but different approach or methods every week, but this is the only way I can achieve consistency upon my bakes..


Recipe:

70g Whole  wheat

280g Premium Bakers Flour

260g Water ?

70g Starter(100% hydration)

7g Salt ? 


Method:

Mixer is used

-1 hour Autolyse

-30 minutes rest after mixing starter

-1 hour rest after adding salt b4 doing 1 S & F

-5 hours Bulk Fermentation @ 24c deg

-2 sets of coil folds

-no pre-shape, rested on banneton for 30 minutes 

-16 hours cold retard


Baked on steel plate covered with stainless steel bowl for 20 minutes @ 250c Deg, another 25 minutes @ 230c Deg uncovered.

DanAyo's picture
DanAyo

Tip - Have Faith in the Oven Spring

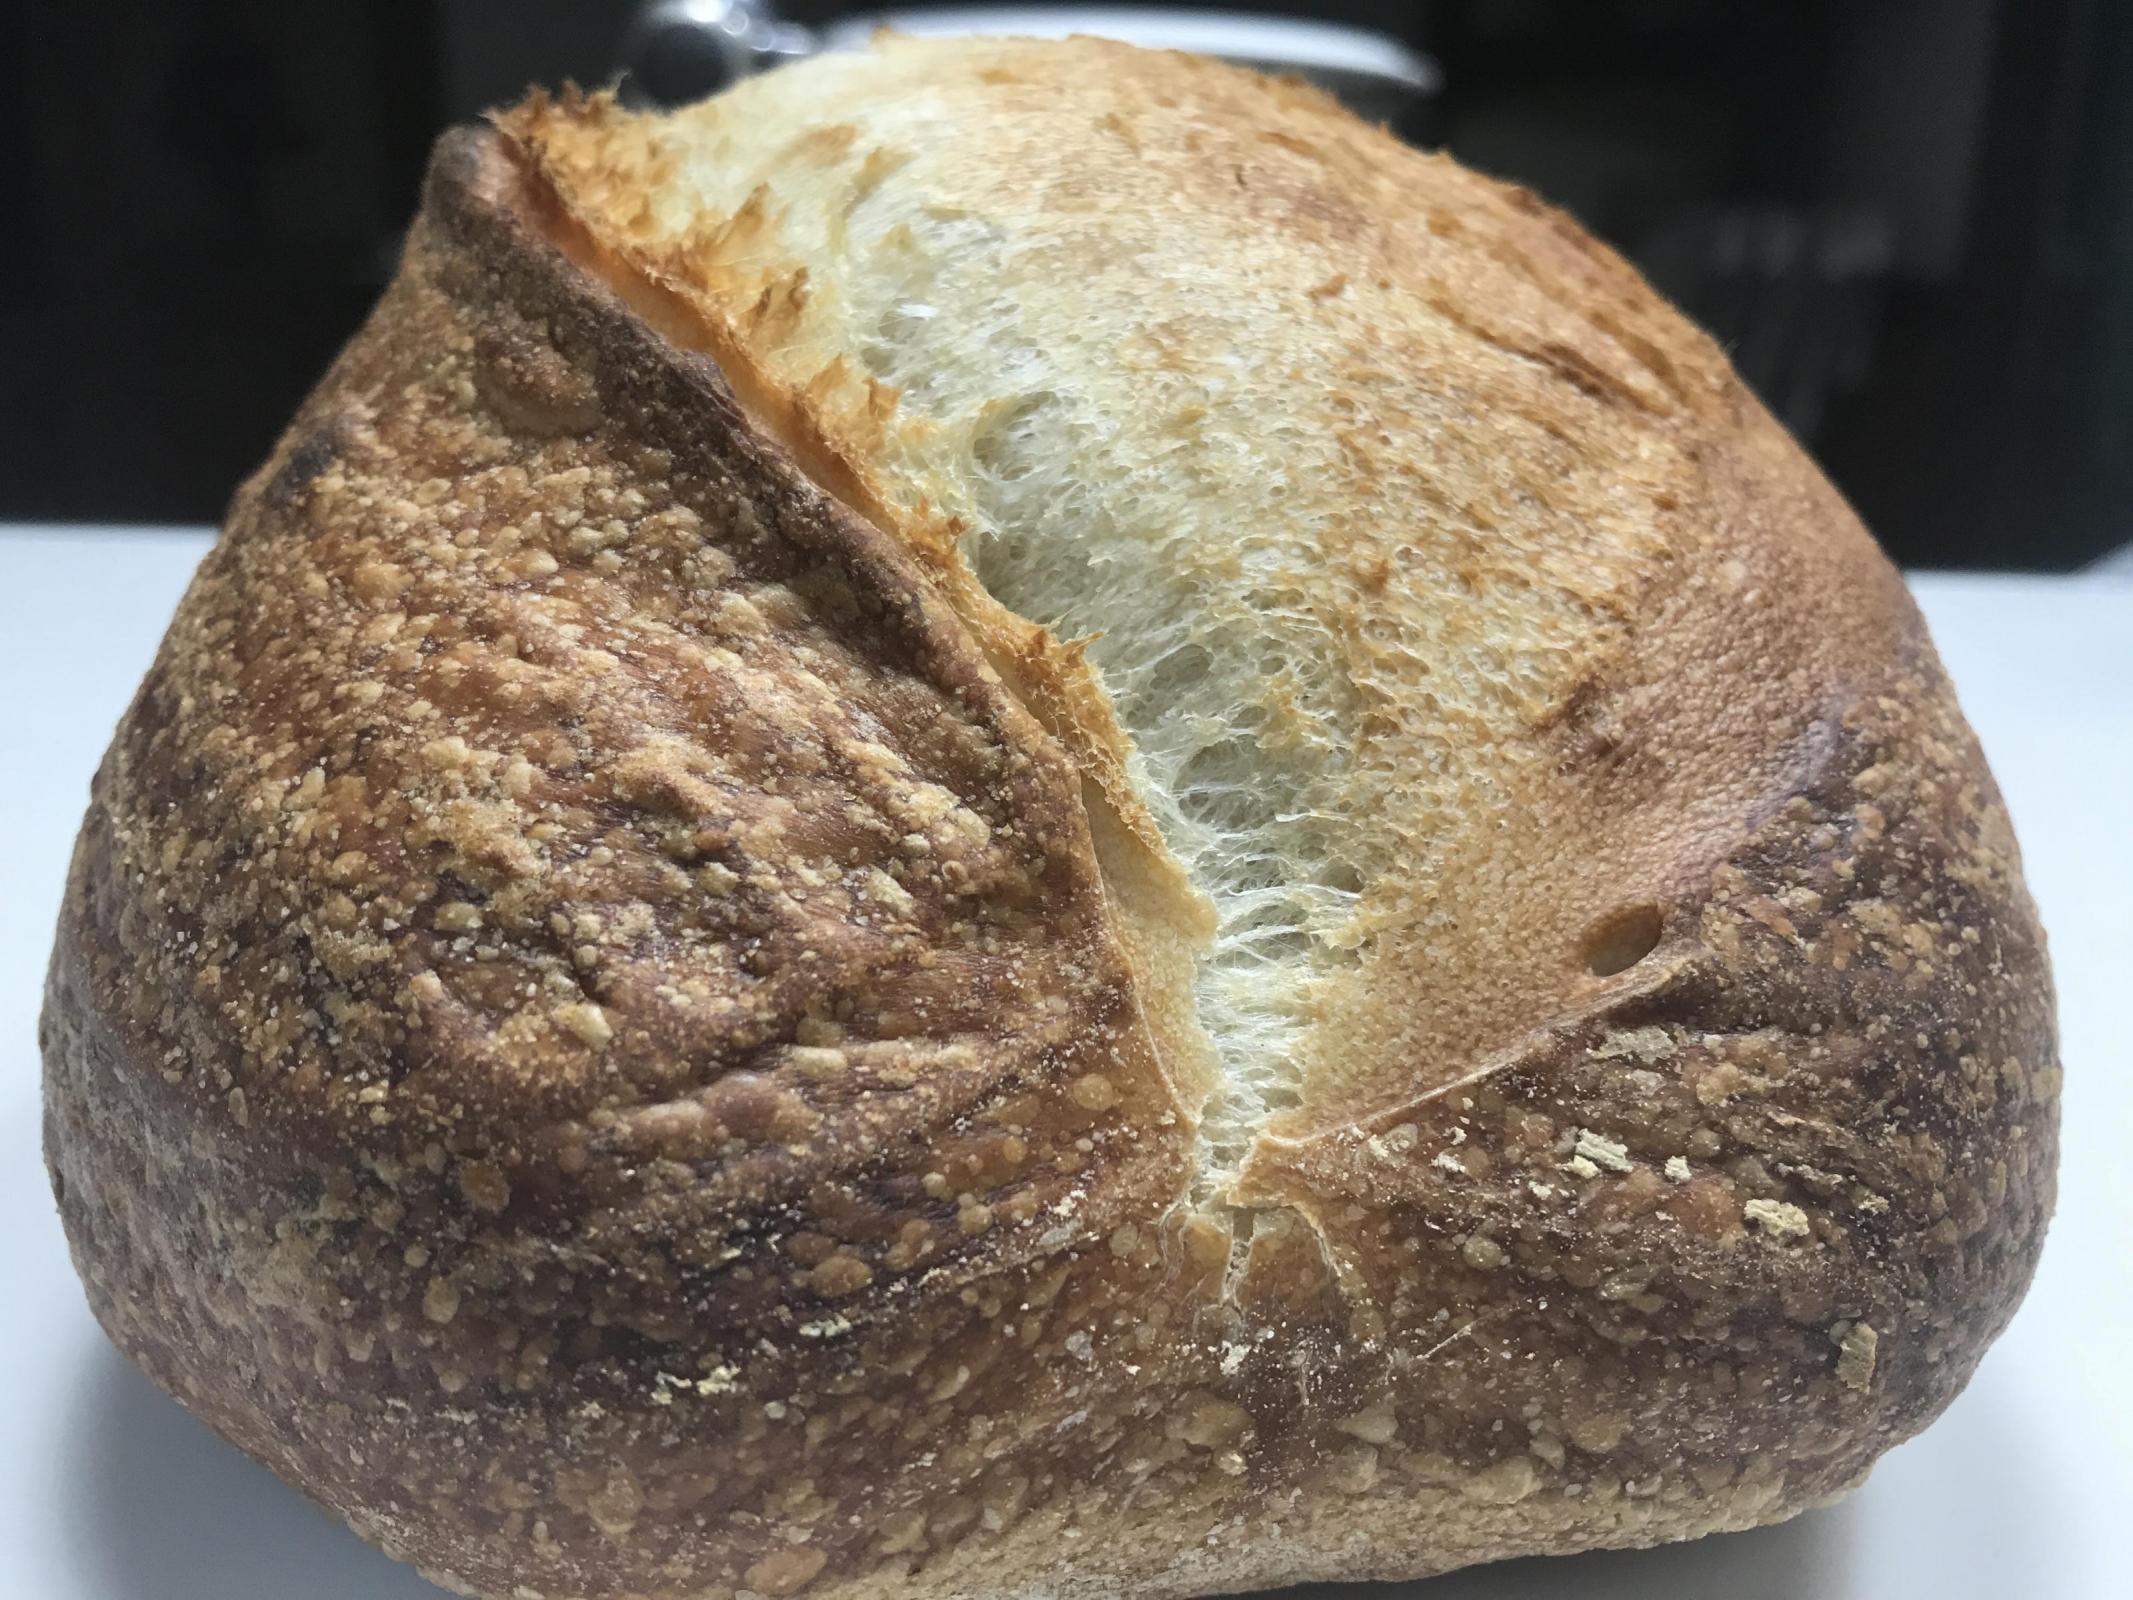
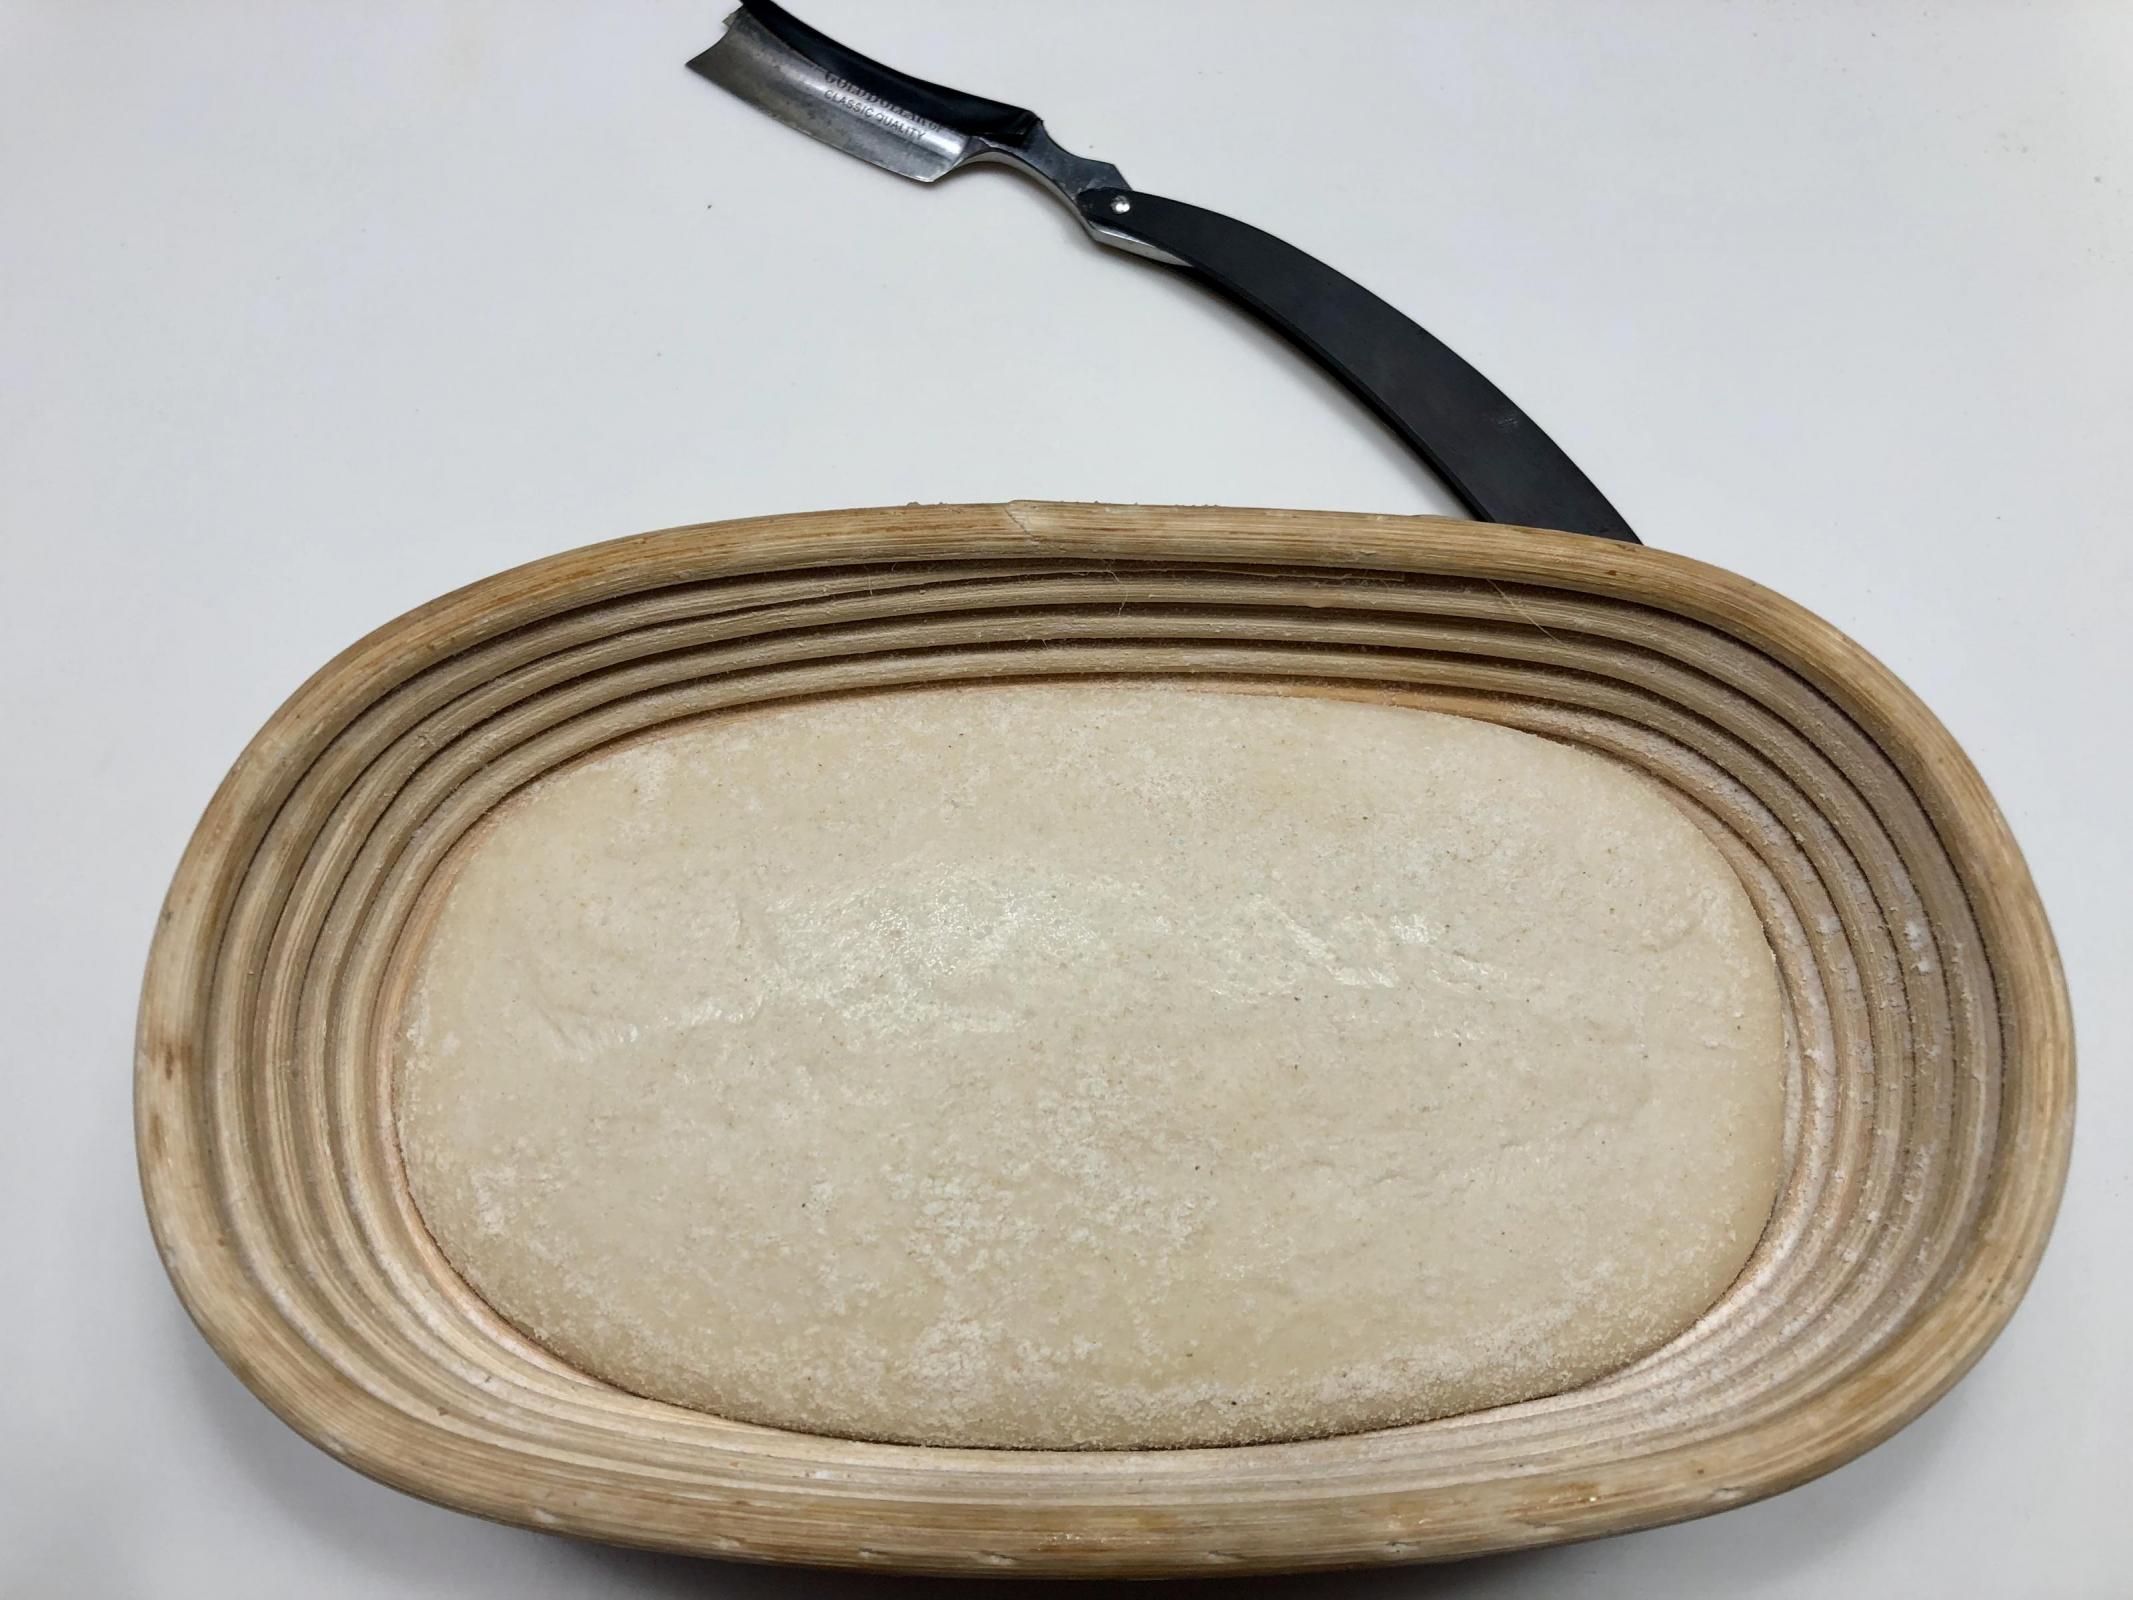
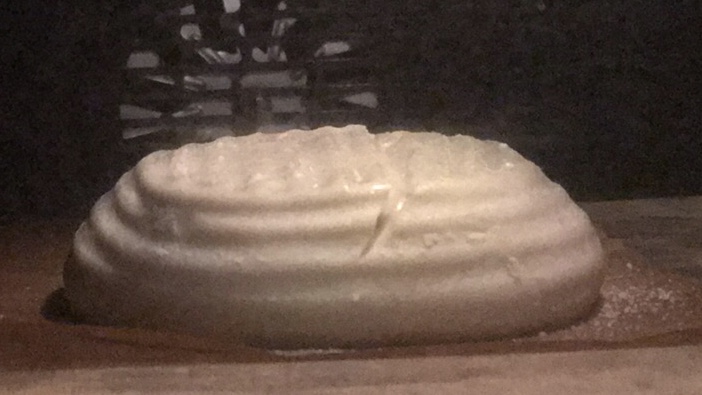
Notice how non impressive this dough looks in the banneton just before taking out to score. It hit the stone looking like a pan cake. It looked disappointing. I now know, my biggest deterrent to oven spring, bloom, and ears was over fermenting. I believe the reason I consistently over fermented the dough was because I thought the dough needed huge amounts of gas to rise high and produce that illustrious open crumb. That idea is wrong...

Take a look at the dough before and after being baked.


All great bakers know this. It only took me ~25 years to learn. “Have faith in OVEN SPRING”

For the best viewing experience, use  THIS LINK.

Let’s take another look at another bread. 

For the best viewing experience, use THIS LINK.

Update - I recently wrote the following in another post and thought it would be of value here.

Just recently I started doing in-oven slo-mo video. It has taught me some valuable lessons. After bread baking for over 2 decades I came to the realization that my dough is constantly over proofed. I believe I fermented it too long because I wanted that precious gas. But, slo-mo taught me different. 

In order to produce the phenomenal loaves that some baker constantly produce, it is necessary to get tremendous oven spring. If the dough is allowed to exhaust its gas producing ability BEFORE the oven, the massive oven spring can’t happen. The energy was expended during the ferment.

I encourage you to try (what most people consider) under bulk fermenting. Once the BF dough shows a slight dome and the upper sides are curved upwards slightly, shape it and retard overnight. Not longer than 12 hours or so. Spritz, slash and bake it cold in a preheated hot oven.

Retardation - a fact that many bakers don’t take into account or are not aware of. A dough at room temp or warmer takes about 4 hours of refrigeration before it normalizes to 38F. During this time fermentation continues until it reaches 38F and then slows considerably. When the dough is cold the gas is absorbed into the dough because cold temperatures reduce the volume of the gas. In other words, the dough is not plump from the gas, but none the less the gas is still very much there waiting to explode when it hits the heat. Heat makes gas increase in volume.

Study the videos on this page, paying special attention to the second one. If you watch closely, you’ll notice that the skin near the slash MUST RUPTURE before an ear is form. This takes a lot of gas!

Most of us are grossly over proofing/over fermenting our dough.

Danny

a_warming_trend's picture
a_warming_trend

Finding the Levain % Sweet Spot (Formula Included!)

One of the most intriguing questions in my (admittedly short!) sourdough adventure thus far has been: How do I create a loaf that I can consistently proof in the refrigerator and bake straight from that cold environment, without it under or over-proofing? While the length of bulk fermentation is important in this calculus, it’s not the only part.

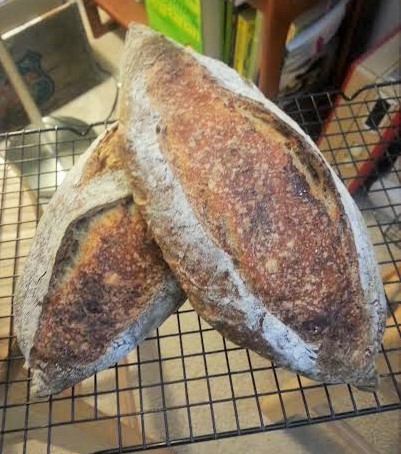
The following is the formula I've developed for one large loaf that is created specifically for a long proof in the refrigerator. The instructions are for a boule, but it could easily be shaped as a batard. Roughly 20% levain (by total weight, 40% by baker's percentage) seems to be my sweet spot for a long, cold-proofed loaf that can be baked straight from the fridge (i.e., proofs fully in the fridge at about 45 degrees F, but doesn’t over-proof!).  I’ve baked this formula five times with great results...it can be modified to include more mix-ins, and even a significant percentage of whole grains.

The 78% hydration, long autolyse, chill during bulk fermentation, and long, cold proof yield a custardy, open crumb! The long autolyse also contributes to gluten formation, which make the final dough much easier to handle.

Ingredients:

200 g active 100% hydration white starter (however you want to create that levain)
400 g all-purpose flour (I love King Arthur)
290 g cool water
11 g (sea) salt
15 g sugar
5 g malt powder

Method:

1) Mix together flour and cool water, and set aside to autolyse at room temperature for anywhere from 6-12 hours. Make sure to mix the water and flour very well before this long autolyse; don't be afraid to really mash the dough down with a wet hand. You don't want any dry bits lingering, because they will be difficult to incorporate later. If you mix it well, it will be such smooth sailing when you mix in the levain, I promise!


2) Combine autolysed flour and water with the starter, salt, sugar, and malt powder. Squeeze the dough through your fingers to fully combine for the first two minutes or so, then stretch and fold for 2-3 minutes more. 


3) Fold the dough every 30 minutes for the next 2 hours. When I stretch-and-fold, I like to give it as many turns as I feel the dough “needs.” To perform a fold, I reach under the dough and pull it over itself, rotating 90 degrees every time. At every 30-minute interval, I stop when the whole mass of dough begins to pull up out of the container. This is anywhere between 4 and 20 folds (that is, between 1 and 5 full stretch-and-fold turns). 


4) Allow the dough to rest at room temperature between 2 and 4 hours, or until 70-80% increased in size. I realize that this is a bit more increase than is called for in some formulas, but it is my preference in this case!


5) Place the container of dough in the refrigerator for at least one hour, and up to 6 hours.* 


6) Remove the container from the refrigerator. Sprinkle flour over the top of the dough and spread it. Loosen the dough from the sides of the container, allowing the flour to fall around the edges of the dough. This will create a nice floured gluten cloak at the bottom of your dough. 


7) Pour the dough onto a work surface so that the floured surface is on the bottom. Pull the edges of the dough towards the middle to form a very loose boule -- this is the pre-shape. Rest for ten minutes. 


8) After ten minutes, pull the edges towards the center and pick the ball up, twisting in your hand to create tension. Form a tight boule, however you’re most comfortable doing that. 


9) Place the boule seam-side up in a floured banneton or brotform of some kind, and cover in plastic. 


10) Allow it to rest at room temperature for 30 minutes. 


11) Place in the refrigerator to proof for at least 8 hours, and up to 22 hours. The longer it proofs in the refrigerator, the more open and gelated the crumb will become. 


12) Remove the banneton/brotform and release it onto a piece of parchment paper. 


13) Score the boule, and bake at 475 F for 20 minutes with steam, then 20-25 minutes without steam.

*Alternatively, you could place the dough in the refrigerator directly after the two hours of stretch-and-fold, and then remove it later to sit at room temperature until increased 70-80%. Either way works great; I do stand by having a chill on the dough at some point during bulk fermentation.

Some loaves for which I've used this formula:

The Basic Formula (As Torpedoes and Boules):


80% Whole Wheat with Toasted Seeds and Cranberries:


Brown Ale and Spent Grain Torpedoes:

Everything Bagel Seasoning-Topped (Crowd Favorite!):

Thanks to all for your wonderful photos, formulas, and advice. TFL has just been the greatest resource as I navigate my first year of baking!

--Hannah

wassisname's picture
wassisname

Rosemary Arkatena Twist


This is the Arkatena bread from Bread Matters by Andrew Whitley, except with rosemary instead of fennel, more salt, more heat, steam, an autolyse, some stretching and folding, and a shortcut using my own starter to create a chickpea starter.  The chickpea, aka garbanzo, aka gram flour is the unique feature of this bread.


I feel like I stuck to the spirit of this bread even if I didn’t stick to the letter of the formula.  The only really substantive change was the switch from fennel to rosemary.  I meant to use fennel up until the last minute.  I have nothing against fennel, it’s just not something I get really excited about.  When I remembered the bit in the book that says fennel probably isn’t used in the original bread on which this one is based, well, out went the fennel.  I really do like rosemary and it seemed like a good fit for this loaf so, in went the rosemary.

The dough was strong and not particularly wet so I couldn’t resist shaping it with a twist.  I might add more water in future tinkering. 

The rest of the changes were made for the sake of habit and convenience.  Reworking the formula took some wrangling because the book has you make a chickpea starter from scratch and then make loads of extra leaven during the builds.  I’ve included the numbers I came up with. I left out the nitty-gritty details of the process – best to check the book for that and then modify as you will.

If you don’t have this book it is worth taking a look at.  Mr. Whitley is refreshingly blunt, even if you don’t agree with every last thing he has to say.  “Constructive neglect” – brilliant!  Steaming “a fruitless exercise” – you underestimate me, sir!  One nice takeaway from this book is to worry less and go with what works.  It is good to be reminded of that once in a while.  It is, after all, your bread. 


This is one tangy bread.  Maybe it was the long, cool leaven builds.  Quick, warm fermentation might yield a different result.  Right out of the oven it reminded me of hummus with lots of lemon juice.  Good stuff.  The chickpea flavor faded over time but still lends its unique tang to the bread.  The rosemary flavor comes through nicely.  I think I'll be baking this one again!

Marcus

dmsnyder's picture
dmsnyder

Baker's Math: A tutorial

In October, 2008 I posted a formula for Greenstein's Jewish Sour Rye which converted his recipe, which was written in volume measurements, to ingredient weights. I have made this bread many times since, but I've never bothered to calculate the baker's percentages for the formula. I decided to do so today and thought I would post the procedures as a tutorial on “baker's math” for new baker's and others who have just never gotten comfortable with this very valuable tool.

Here is the formula I wrote in 2008.

Ingredients

Wt (g)

First Clear flour

500

Water (80-199ºF)

240

Sea salt

12

Ripe rye sour (100% hydration)

750

Instant yeast

7

Altus (optional)

1/2 cup

Caraway seeds

1 T

Cornmeal for dusting parchment


Cornstarch glaze


Converting the formula to baker's math

Baker's math is a method of expressing the quantity of all ingredients, always expressed as weights, as a proportion of the total flour in the formula. This provides a way of comparing formulas and of easily converting them to make a larger or smaller batch of dough. By convention, the total flour is always 100%. If your formula uses more than one type of flour, their total is 100%. So, to use a simple baguette-type dough as an example, the formula might be:

Ingredients

Baker's %

AP flour

100

Water

65

Salt

2

Instant yeast

1

Total

168

Note that the total is over 100%. This is confusing to many initially. Get used to it. This total baker's percentage is an important number, as you will soon see. Again, this formula does not tell you how much of any ingredient to use, so far, only their proportionate amounts. In fact, knowing these proportions gives you all the information you need to make any amount of dough you need for a bake, whether its 500 g or 100 kg.

We have the ingredient amounts for a “batch” of Greenstein's rye bread, and we want to calculate the baker's percentages, so we can make a bigger (or smaller) batch of dough than the original recipe produces.

This bread uses a rye sour – a rye sourdough starter. When working with a pre-ferment like a poolish or a rye sour, there are two ways of representing it in baker's math. One is to treat it a distinct ingredient, like water or salt. The other is to break the pre-ferment down into its flour and water content and add the flour to the total flour and the water to the total water in the formula. These two approaches are equally accurate, but the second approach provides the more accurate representation of the dough characteristics, especially in regard to hydration. In the following table, I have used the second approach.

The rye sour is 100% hydration. That means that the amount of water in it is exactly equal to the amount of water (water = 100% of total flour.) So, 750 g of rye sour consists of 375 g of rye flour and 375 g of water. Therefore, for example, the total water in the dough consists of the 375 g from the rye sour plus the 240 g added to the final dough.

Total Ingredients

Wt (g)

Calculations

Baker's %

First Clear flour

500

Total flour =500+375=875. 500/875=57.

57

Rye flour

375

Total flour =500+375=875. 375/875=43.

43

Water (80-100ºF)

615

Water/Total flour=615/875=70

70

Sea salt

12

Salt/Total flour=12/875=1.4

1.4

Instant yeast

7

Yeast/Total flour=7/875=0.8

0.8

Total

1509


172.2

Now we can see that the original recipe makes 1509 g of dough. (Well, it is actually more because the weight of the caraway seeds and altus, if used, is not included in these calculations.) Adding up the Baker's percentages, you have 172.2. Think of this as meaning that the dough consists of 172.2 “parts,” 100 of which is flour, 70 of which is water, etc. Recall that these numbers represent the relative amounts of each ingredient.

Scaling the recipe

Now, let us assume you want to make Greenstein's Jewish Sour Rye, but you want to make 600 g loaves, and you want to make two of them. So you will need 1200 g of dough. 

Since you know your formula consists of 172.2 parts, to determine the weight of each ingredient needed to make 1200 g of dough, what you need for your calculations is the weight of each part. If the total is 1200 g, you get this by dividing 1200 g by 172.2 parts. This equals 6.97, rounded off. This number is called “the conversion factor.” Now we can calculate the amounts of each ingredient in 1200 g of dough. Weights are rounded to the nearest gram.

Total Ingredients

Baker's %

Calculations

Wt (g)

First Clear flour

57

57x6.97=397

397

Rye flour

43

43x6.97=300

300

Water (80-100ºF)

70

70.6.97=488

488

Sea salt

1.4

1.4x6.97=10

10

Instant yeast

0.8

0.8x6.97=6

6

Total

172.2


1201


What this way of representing the formula does not show is how much rye sour you have to build. However, we know from the original recipe that the weight of the rye sour is 1.5 times the weight of the First Clear flour (See the first table, above.) So, for the 1200 g of dough, we will need 1.5x397=595 g of Rye Sour. In the bread books written for professionals, for example, Hamelman's Bread and Suas' Advanced Bread and Pastry, the formulas have separate tables for “Total Dough” which takes the second approach described above and another for “Final Dough” which takes the first approach. You get the best of both worlds. The “Final Dough” would be as follows:

Final dough ingredients

Wt (g)

Baker's %

First Clear flour

397

100

Water (80-199ºF)

191

48

Sea salt

10

2.4

Ripe rye sour (100% hydration)

596

150

Instant yeast

6

1.4

Total

1200


Altus (optional)

1/2 cup


Caraway seeds

1 T


Cornmeal for dusting parchment


Cornstarch glaze


You can see that, while this representation of the formula is more helpful for making the final dough, the Baker's Percentages distort the ingredient proportions. They make the dough look like it has a lower hydration than it really does, and it makes the amounts of salt and yeast seem very high.

Baker's math is an invaluable tool. Once you understand the basic approach and scale a few of your favorite recipes, it becomes easy to use. After a while, if you use it regularly, it becomes intuitive. You will find yourself doing it in your head as you look at new recipes. You can use it for modifying recipes you want to tweak. It will make you a better baker. It is not yet known if it prevents senile dementia, but I bet it helps. I'll let you know, if I remember to.

Addendum 5/1/16: I just found a very good Baker's Math reference on the King Arthur Flour web site. Here is a link to it: Baker's percentage

Enjoy!

David

yy's picture
yy

New England Style Hot Dog Buns

After having delicious lobster rolls with New England style buns at RM seafood in Las Vegas, I became obsessed with soft, toasty rolls with just the right amount of crunch. I decided to buy a New England hot dog bun pan (of course, the buns can be made with an ordinary sheet pan, but I just felt like purchasing a unique piece of equipment).

I used a 3/4 recipe of the  golden pull-apart butter buns on King Arthur Flour's online blog, replaced all the liquid with milk for flavor, and increased the hydration to about 70%:

314 g ap flour
16 g potato starch
15 g dry milk
18 g sugar
43 g soft butter
220 g milk (scalded and cooled)
1 tsp salt
1 tsp instant yeast

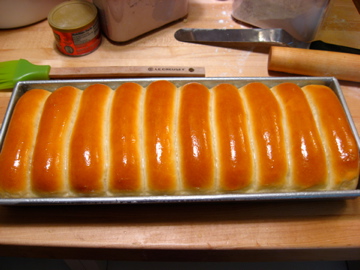
I followed the instructions on KAF's blog, but I divided the dough into 10 equal pieces, and in the shaping step, I rolled each piece out to a thin sheet and rolled them up into logs. Each log was placed into a groove in the pan:

Here they are, fully risen and just placed into the oven. A 3/4 recipe makes a pretty good amount of dough for the size of pan. The proper amount of kneading will allow this dough to triple, almost quadruple in size.

Immediately after taking them out of the oven, they were brushed generously with butter to soften the crust:

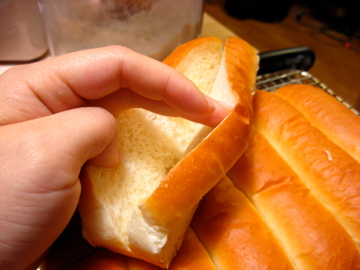
Just before eating, they were sliced apart and then slit in the middle, like so:

Toasted them on each side with a little butter

The crunchiness of the toasted surface went perfectly with the snap of the natural casing hot dog. The king arthur recipe is very rich, buttery, and sweet.

I love how these buns stand up so straight:-). I'm pleased with how this pan makes a bun that's not too big and not too small. One of my pet peeves is a hot dog that's drowning in a mountain of bread. Personally, I'm addicted to the toastiness of the New England style roll. I don't think I'll go back to regular soft hot dog buns. Was it worth the $25 to buy this special "unitasker?" I would say yes, but I just wanted a new toy. I'm thinking of it as a pre-moving gift to myself, before I make the great schlep from San Francisco to New Haven, CT.  Maybe there are other uses for it, too. Enchiladas?

There are 2 of us in this household, so the 10 buns give us enough for dinner and plenty for leftovers tomorrow. I'll probably use the remaining 6 buns to use up the leftover chicken meatballs in marinara and the leftover Italian sausage.

hanseata's picture
hanseata

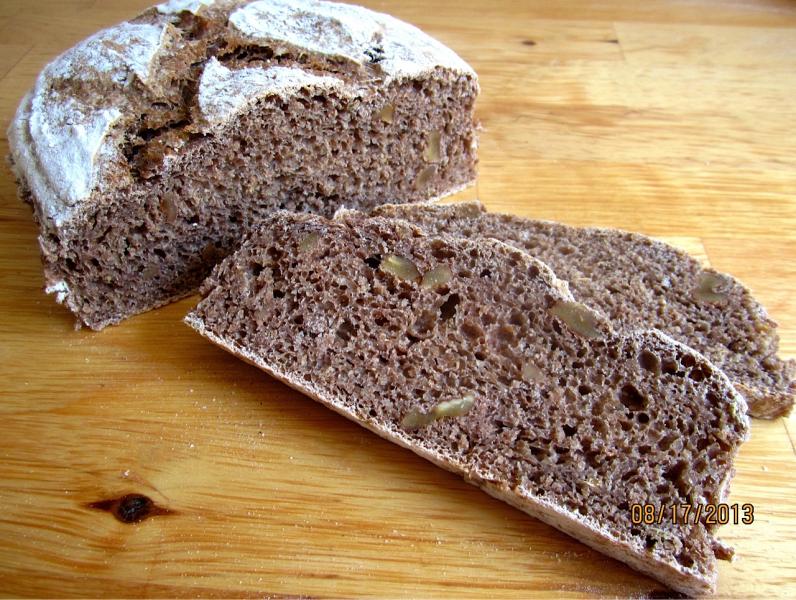
Dinkel-Walnussbrot - Spelt Walnut Bread

This German 100% spelt bread is one of my most favorite loaves. When I bake it to sell to our natural food store, I always make one extra loaf for us.

This is made with a biga, but a sourdough would certainly be good, too. And, of course, you can also work just with the soaker and S & F.

I know many American find the idea of using bread spice quite outlandish, or even repulsive (thinking, perhaps, of the caraway overdoses in some Jewish ryes) - but PLEASE don't follow the old German adage "Was der Bauer nicht kennt, dass frisst er nicht" (= what the farmer doesn't know he won't eat") - at least TRY it with the anise and fennel. These spices are not predominant, but add a subtle very nice flavor to the bread.


DINKEL-WALNUSSBROT - SPELT WALNUT BREAD

SOAKER
47 g spelt chops                     (1.66 oz)
180 g spelt flour                     (6.35 oz)
4 g salt    (1/2 tsp.)                (0.14 oz)     
210 g buttermilk                     (7.41 oz)
 
BIGA
227 g spelt flour                      (8 oz)
1 g instant yeast  (1/4 tsp)       (0.04 oz)
170 g water                             (6 oz)
 
FINAL DOUGH
57 g spelt flour                         (2 oz)
12 g agave nectar or honey       (0.42 oz)
7 g salt                                    (0.25 oz)
3 g instant yeast                       (0.18 oz)
2 g anise seeds                         (0.07 oz)
2 g fennel seeds                        (0.07 oz)
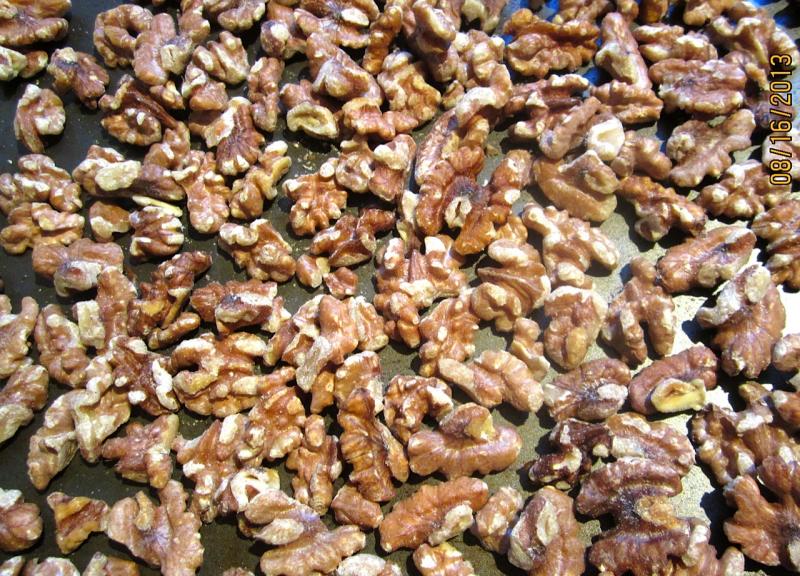
70 g walnuts, toasted and coarsely chopped  (2.47 oz)

The walnuts taste better when slightly toasted

DAY 1
In the morning, prepare soaker and biga. Refrigerate biga.

In the evening, prepare final dough: mix all ingedients (except for the walnuts) at low speed for 1 - 2 min., until coarse ball forms. Then knead at medium-low speed for 4 min., feeding the nuts slowly to the dough. Let dough rest for 5 min., resume kneading for 1 more min. (or work just with a soaker and S & F). Transfer to lightly oiled container, and place in refrigerator overnight.

DAY 2

Remove dough from refrigerator 2 hrs. before using.

Preheat oven to 425 F/220 C. Prepare for hearth baking with stone and steam pan.
Shape batard, place in banneton, and let rise to 1 1/2 times its original size. Turn out onto peel or parchment lined baking sheet. Slash.

Bake bread at 350 for 20 minutes, steaming with 1 cup of boiling water. Rotate 180 degrees, remove steam pan and continue baking for another 30 minutes (internal temperature should be at least 195 F, and loaf should sound hollow when thumped on the bottom)

Let cool on wire rack.

Walnuts dye the crumb to a dark, reddish brown

8/19/13 updated with new photos and some adjustments to the formula.


RonRay's picture
RonRay

Culturing, Growing and Baking with a Range of Wild Yeasts


This Forum Topic will hopefully provide a location for those interested in all forms of Wild Yeast. While certainly most of us are well aware of the sourdough type of wild yeast, many may be unaware that there are countless other useful wild yeast. I was recently introduced to a impressively large group of other wild yeast - As Akiko explained "In Japanese, we call it " MIZU SHU" -水種 (水ーWater 種ーYeast)".

With the help, translations, and veteran comments of RobynNZ and Mini Oven I had captured, grown, and baked bread from an Apple Water Yeast in 4 (four) days.

My first introduction came when Daisy_A suggested I might find a 2 year old TFL thread of interest, and I did find it fascinating. Wao started the thread here on TFL, but also has a very informative website devoted to original yeast water. Whether you call it Yeast Water, or Water Yeast is unimportant, but the process is rich with possibilities for those interested in expanding their choices in home bread baking with a variety of wild yeast levain.

If any of this sounds interesting, you might wish to look at these links, for starters (no pun intended):
http://www.thefreshloaf.com/node/6012/baking-natural-wild-yeast-water-not-sourdough
http://originalyeast.blogspot.com/
and most recently, where I got pulled into this interest area:
http://www.thefreshloaf.com/node/20460/banana-saga-%E9%95%B7%E7%AF%87%E6%95%85%E4%BA%8B#comment-141821

It was thus that Yeasty 雛菊 Yeasty 亜希子 Yeasty 雷朗書家
..........that is Daisy, Akiko, and I, considered starting this Forum Topic.

Ron 雷朗

************ Update Warning ********** 101122

Akiko (teketeke) mentioned to me something that I thought I should warn anyone trying to make yeast waters levains about. Certain fruits should not be used for yeast waters intended for leavening bread. They are those fruits (or vegetables) that contain Actinidain (or actinidin) kiwi, pineapple, mango and papaya. This protease enzyme breaks down protein. If you make a yeast water from these fruits, you can still use it as a meat tenderize, but NOT in your bread dough.

************ Update For Details on methods READ postings below ********** 110222

Or, start here:

   http://www.thefreshloaf.com/node/20693/culturing-growing-and-baking-range-wild-yeasts#comment-143857


dwcoleman's picture
dwcoleman

Gordon Family Cinnabon Cinnamon Rolls Clone Recipe

I found several postings mentioning their recipe, but their website is down(for good?).

Hopefully we can preserve it here at TFL.


Cinnabon Cinnamon Rolls Clone Recipe

Cinnabon's® World Famous Cinnamon Roll

Recipe By: Ron and Shallen Gordon
Serving Size: 15 Rolls
Preparation Time: 3 to 4 Hours
Categories: Baking, Bread, Muffins, Rolls, Sticky-buns

We've worked very hard over the past several years to develop an accurate clone or copy-cat recipe that you can prepare at home for Cinnabon®Cinnamon Rolls. The recipe below is not their recipe, but one we've engineered through extensive research, careful tests and much experimentation.We've improved upon our earlier recipe and after many test batches, we're convinced that this revised copy-cat recipe will enable you to recreate that wonderful taste!

You may wish to visit their Web site, The Cinnabon Experience, and review their wonderful presentation, The Cinnabon Story. There's some interesting information at their site, but alas, no recipe since the actual recipe is proprietary. Although several other Web sites claim to have the real recipe, we hope that you'll find that the one presented here provides the most accurate taste and appearance. We've made every effort to closely reproduce their results and clone that great cinnamon roll flavor!Judging from the many letters we've received from readers around the world who have used our recipe and achieved great results, we've evidently succeeded!

This recipe has been sized so that the dough may be prepared using a large capacity (2 pound) bread machine.


Dough

Amount Measure Ingredient and Preparation Method
1/4 Cup Water (2 oz)
1 Cup Whole Milk (8 oz)
1/2 Cup Butter, unsalted sweet cream, melted (0.25 lb, i.e. 1 stick)
1 1/4 ea Egg, Large Grade AA, well beaten
1 tsp Vanilla Flavor (preferably alcohol free)
1/2 tsp Salt (0.0075 lb)
1/2 Cup Sugar, preferably Superfine Granulated (0.224 lb)
4 1/2 Cup Unbleached White Bread Flour (1 1/4 lb)
1 Tbsp Vital Wheat Gluten (0.021 lb)
1/4 oz SAF Perfect Rise® Gourmet Yeast (1 envelope, 7 g)

Remove a large egg from the refrigerator and permit it to reach room temperature. Gently melt the butter. Add the Water and Whole Milk. The resulting liquid mixture should be permitted to cool so that it is between 75°F (24°C) and 85°F (30°C) before proceeding further. Then add the remaining ingredients, in the order listed above, to the bread machine and prepare using the dough setting. (Follow your bread machine instructions for dough preparation.)

To help you achieve the very best results, see also our additional notes on ingredients and preparation.


Filling

Amount Measure Ingredient and Preparation Method
1 Cup Light Brown Sugar, firmly packed (0.4255 lb)
5 Tbsp Cinnamon, Korintje Grade AA (0.0745 lb)
1/2 Cup Margarine (0.25 lb, i.e. 1 stick)

Remove the margarine from the refrigerator once you've started the dough cycle and allow it to reach room temperature. In a small bowl, mix the brown sugar and cinnamon.

After the dough cycle has completed, roll and stretch the dough out on a lightly floured surface into a 15" by 24" (38 cm by 61 cm) rectangle.

Cinnabon Rolls, ready to slice!Mark off 1" along the 24" edge of the dough, closest to you. You will not spread any Margarine or Sugar-Cinnamon mixture on this edge so that you can seal the roll. Spread the softened Margarine over the dough with a rubber spatula and then evenly distribute the Sugar and Cinnamon mixture.  Be careful to leave your 1" edge clean. As a final step, use your rolling pin to lightly roll the Sugar and Cinnamon mixture.
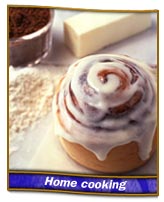
Starting at the far edge of the dough, roll it up tightly.  Begin at the far edge and roll up the dough toward the 1" clean edge. The clean 1" edge is used to seal the finished roll. Trim the left and right ends of the roll. The result will be a 24" roll. Trim off the left and right ends of the roll so that you have a flush end at each end of the roll. Then mark the roll every 1 1/2 inches (3.8 cm).  Cut the roll into 1 1/2" long portions. This may be done with a knife, as they do at the store. However we've found it easier to use dental floss. (We use cinnamon flavored dental floss just for dramatic effect!) Cutthe roll by placing the thread under the roll at your mark, crisscross over and pull it to cut. You should get 15 rolls.

Line your baking pans with parchment paper. Place 5 rolls into 8" square baking pans 1" apart. (One roll in each corner, and one in the center.) Cover with a lint free cloth and let rise in a warm, draft free place until almost double, approximately 1 hour. After rising, rolls should be touching each other and the sides of the pan. This is important for best results. This gives the resulting rolls the soft, moist outer edge that most people prefer.

After rising, bake in a convection oven at 310°F for 15 minutes. If you are using a conventional oven, bake at 335°F for 20 minutes. The resulting rolls should be only lightly browned. We bake only one 8 inch square pan of rolls at a time to obtain uniform results.


Cream Cheese Frosting

Amount Measure Ingredient and Preparation Method
4 oz Cream Cheese (0.25 lb)
1/2 Cup Margarine (0.25 lb, i.e. 1 stick)
1 3/4 Cup 10x Powdered Sugar (or Sugar Fondant) (1/2 lb)
1 tsp Vanilla Flavor (preferably Alcohol Free)
1/8 tsp Lemon Flavor (preferably Alcohol Free)

There are several steps involved in the preparation of the frosting. But it is not difficult, and you'll be surprised at the wonderful results you achieve. For the fluffiest frosting, use Vanilla and Lemon flavors that do not contain alcohol. A total of 50 minutes is required to prepare the frosting, from start to finish. We normally prepare the frosting while the rolls are rising.

Generally, we use 10x Powdered Sugar. However, Sugar Fondant yields a smoother frosting. Please refer to our notes.

Remove the cream cheese and margarine from the refrigerator and place it into the mixing bowl. Leave it for about half an hour so that it will not be too cold.

Use the Flat Beater (or Paddle) to blend the cream cheese and margarine for 6 minutes. Use a speed of 65 RPM, or the "slow mixing" speed on your machine. We use setting #2 on our KitchenAid Mixer.

Switch to the Stainless Steel Whip and whip the cream cheese and margarine mixture for 10 minutes. Use a speed of 150 RPM, or the "medium fast whipping" speed on your machine. We use setting #6 on our KitchenAid Mixer.

Add 1 cup of the powdered sugar and mix for 1 minute using the Stainless Steel Whip at 65 RPM. Add the remaining 3/4 cup of powdered sugar and mix for an additional minute.

Lastly, add the Vanilla Flavor and Lemon Flavor and whip for 1 minute using the Stainless Steel Whip at 150 RPM.

Here's an easy to follow table for the preparation of the frosting:

Add Cream Cheese and Margarine to mixing bowl and let stand for 30 minutes.
Mix using Paddle at 65 RPM for 6 minutes
Use Stainless Steel Whip at 150 RPM for 10 minutes
Add 1 Cup Powdered Sugar.
Use Stainless Steel Whip at 65 RPM for 1 minute
Add 3/4 Cup Powdered Sugar.
Use Stainless Steel Whip at 65 RPM for 1 minute
Add Vanilla and Lemon flavors.
Use Stainless Steel Whip at 150 RPM for 1 minute

Transfer the finished frosting to a convenient covered container and refrigerate it. Once the rolls are finished baking, frost them while they're still very warm and serve them immediately. Yum, yum!


Pages