The Fresh Loaf

A Community of Amateur Bakers and Artisan Bread Enthusiasts.

Most bookmarked

Isand66's picture
Isand66

Sunday Gravy Italian Style Sourdough

My Father-in-law is staying with us for a couple of weeks so my Wife made him some Sunday Gravy with meatballs, sausage, and pork and beef braciole.  So of course I needed to make a good dipping sauce bread to go with it.

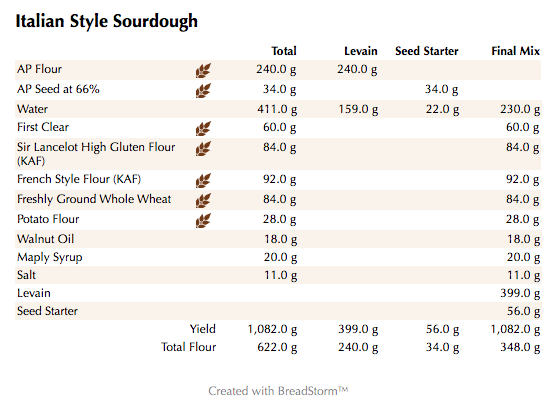
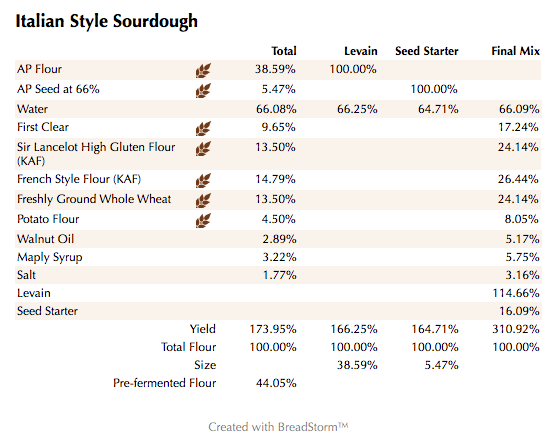
I decided to make a version of a bread I modified from Peter Reinhart's Italian Bread from "The Bread Bakers Apprentice".  He uses a Biga in his formula but I used a AP levain at 66% in mine.  The starter is a pretty high percentage of the overall formal at 44% but in the end it all worked out great.

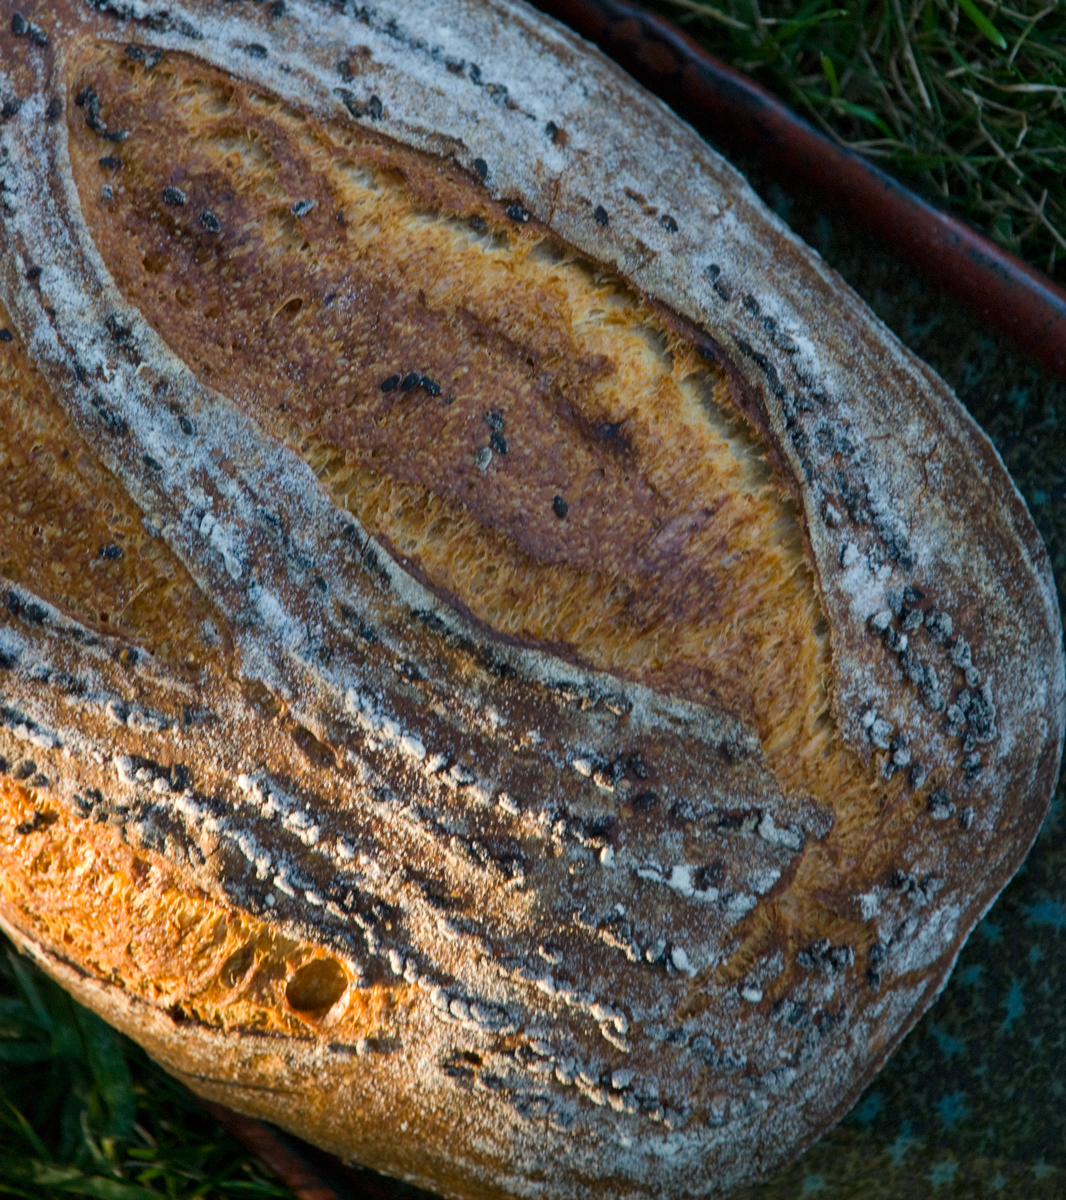
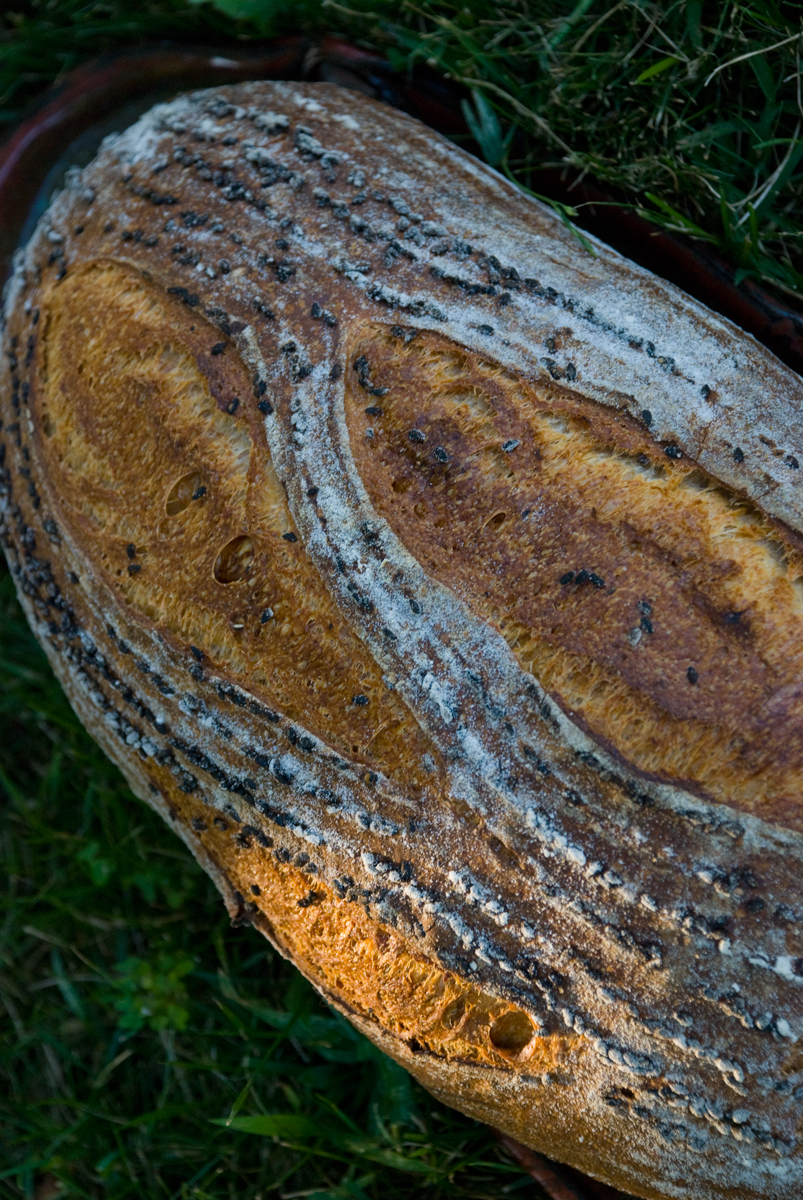
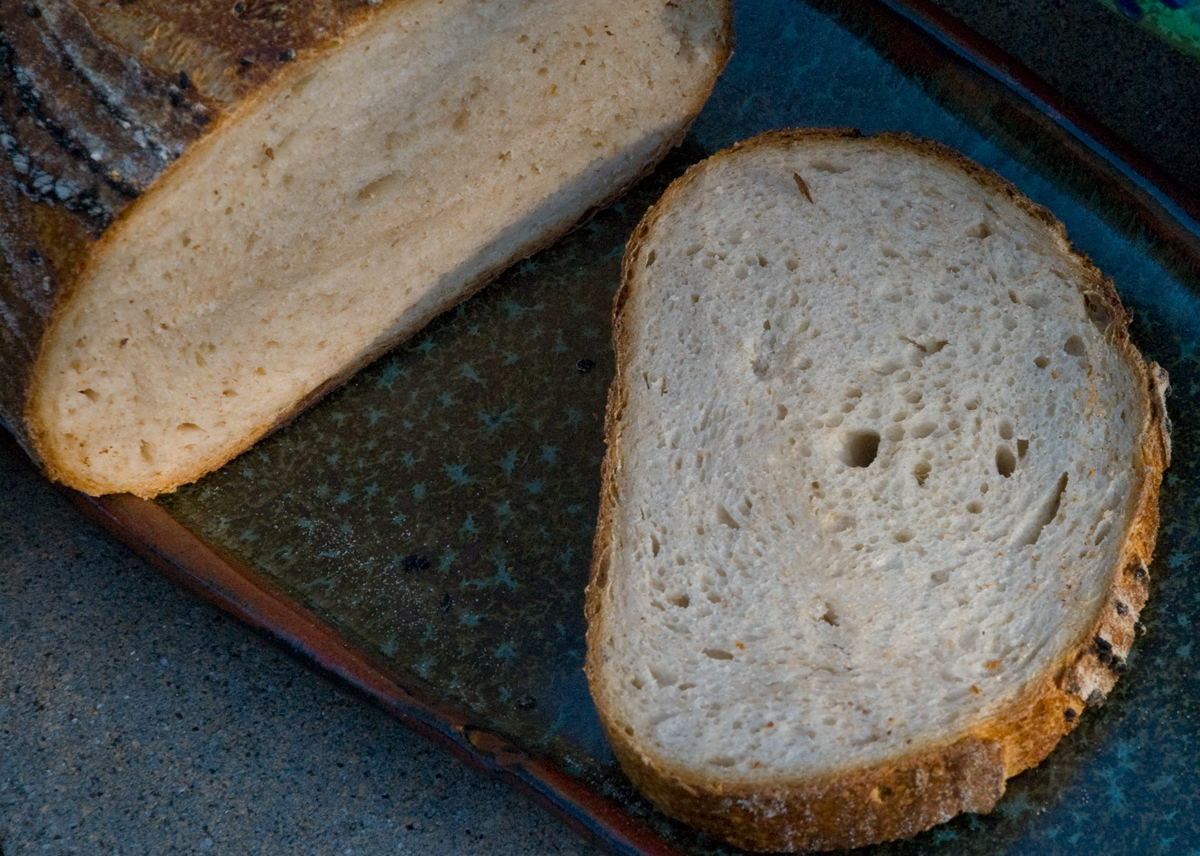
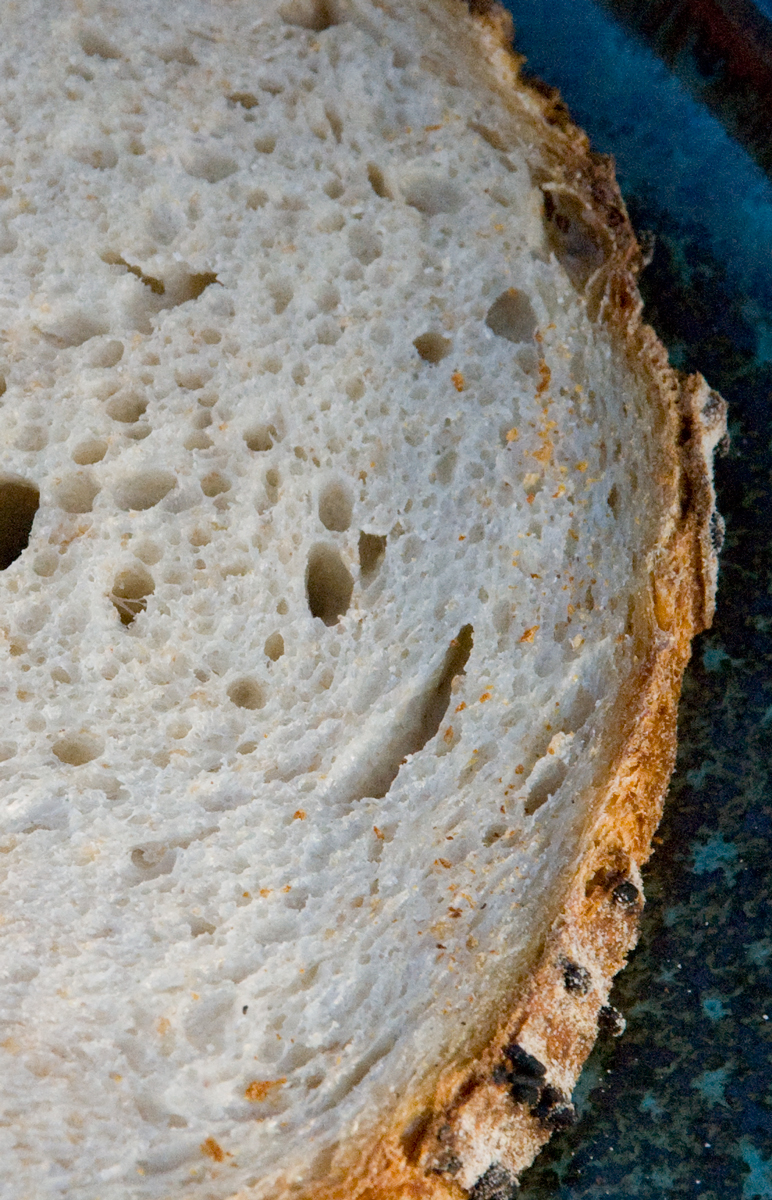
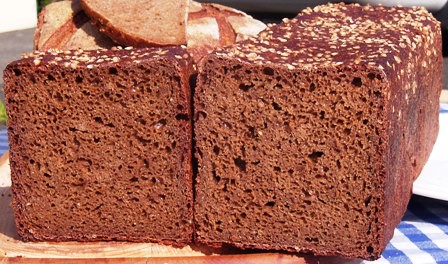
This is not a high hydration dough either, but the final result is a nice soft crumb with a slight sweet taste from the maple syrup with a chewy crust.  The crumb is moderate which is great for mopping up the home made tomato sauce.

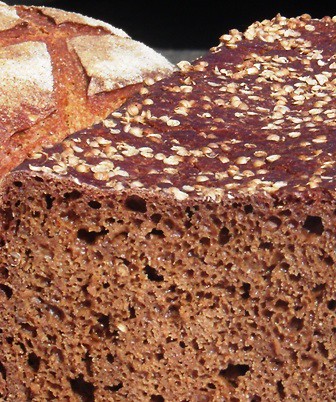
closeup1

Formula

Italian Style Sourdough (weights)

Italian Style Sourdough (%)

Download the BreadStorm File Here.

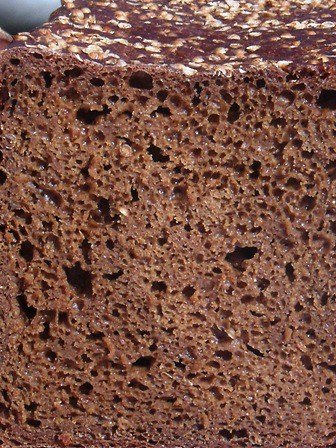
closeup2

Levain Directions

Mix all the Levain ingredients together for about 1 minute and cover with plastic wrap.  Let it sit at room temperature for around 7-8 hours or until the starter has doubled.  I usually do this the night before.

Either use in the main dough immediately or refrigerate for up to 1 day before using.

 Main Dough Procedure

Mix the flours,  and  the water together in your mixer or by hand until it just starts to come together, maybe about 1 minute.  Let it rest in your work bowl covered for 20-30 minutes.  Next add the salt, starter (cut into about 7-8 pieces),  oil, maple syrup and mix on low for 6 minutes.  Remove the dough from your bowl and place it in a lightly oiled bowl or work surface and do several stretch and folds.  Let it rest covered for 10-15 minutes and then do another stretch and fold.  Let it rest another 10-15 minutes and do one additional stretch and fold.  After a total of 2 hours place your covered bowl in the refrigerator and let it rest for 12 to 24 hours.  (If you have a proofer you can set it to 80 degrees and follow above steps but you should be finished in 1 hour to 1.5 hours).

When you are ready to bake remove the bowl from the refrigerator and let it set out at room temperature still covered for 1.5 to 2 hours.  Remove the dough and shape as desired.   Place your dough into your proofing basket(s) and cover with a moist tea towel or plastic wrap sprayed with cooking spray.  The dough will take 1.5 to 2 hours depending on your room temperature.  Let the dough dictate when it is read to bake not the clock.

Around 45 minutes before ready to bake, pre-heat your oven to 550 degrees F. and prepare it for steam.  I have a heavy-duty baking pan on the bottom rack of my oven with 1 baking stone on above the pan and one on the top shelf.  I pour 1 cup of boiling water in the pan right after I place the dough in the oven.

Right before you are ready to put them in the oven, score as desired and then add 1 cup of boiling water to your steam pan or follow your own steam procedure.

After 1 minute lower the temperature to 500 degrees and after another 3 minutes lower it to 450 degrees.  Bake for 25-35 minutes until the crust is nice and brown and the internal temperature of the bread is 210 degrees.

Take the bread out of the oven when done and let it cool on a bakers rack before for at least 2 hours before eating.
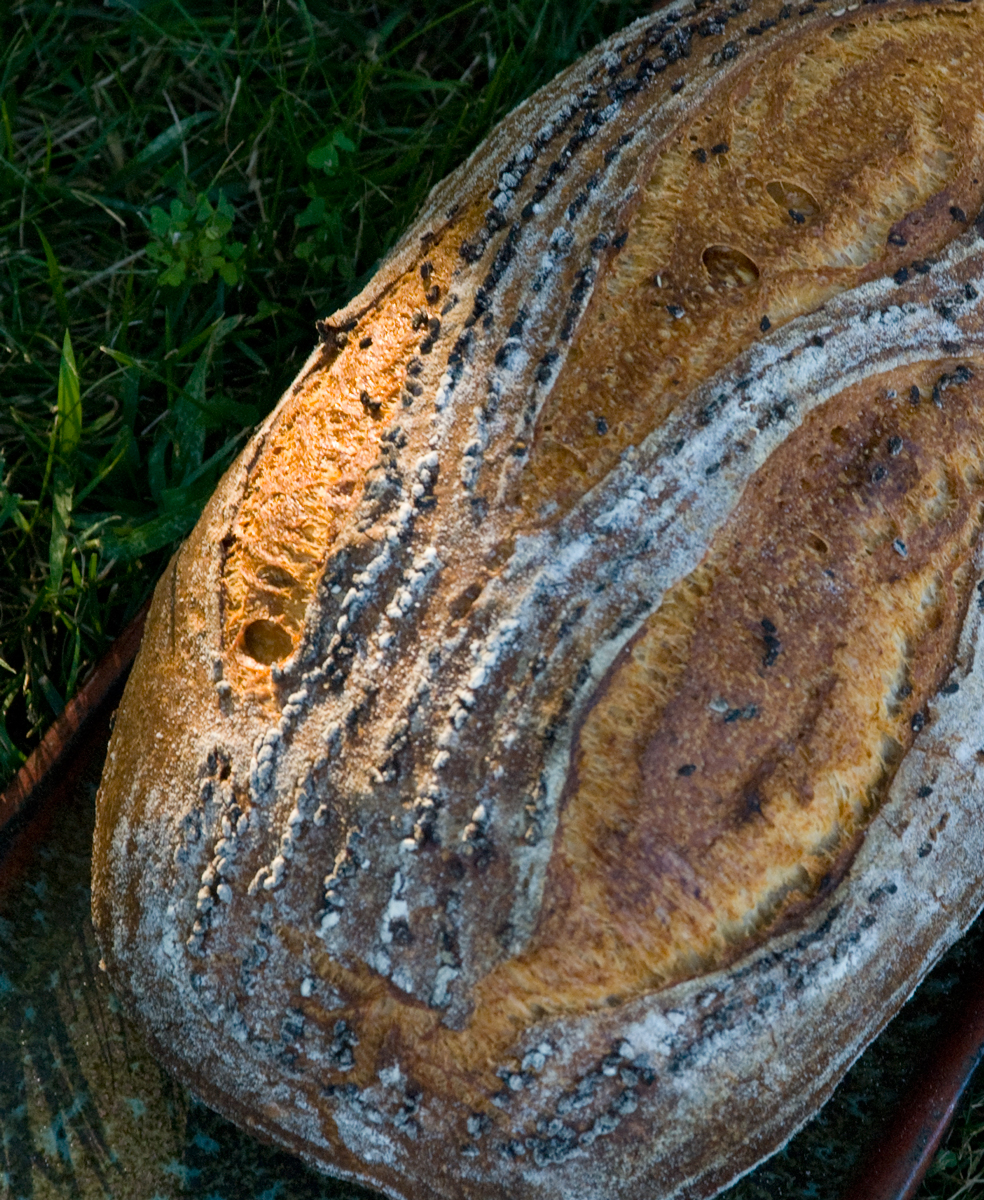
closeup3

crumb

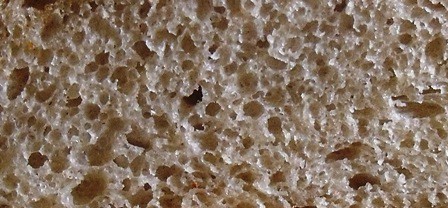
crumbcloseup


WoodenSpoon's picture
WoodenSpoon

Rustic Chanterelle Levain

  • 325g bf (78%)
  • 25g rye (7%)
  • 122g levain (15% flour, 15%water)
  • 83g fresh chanterelles (20%)
  • 316g warm water (77%)
  • 8g salt (2%)

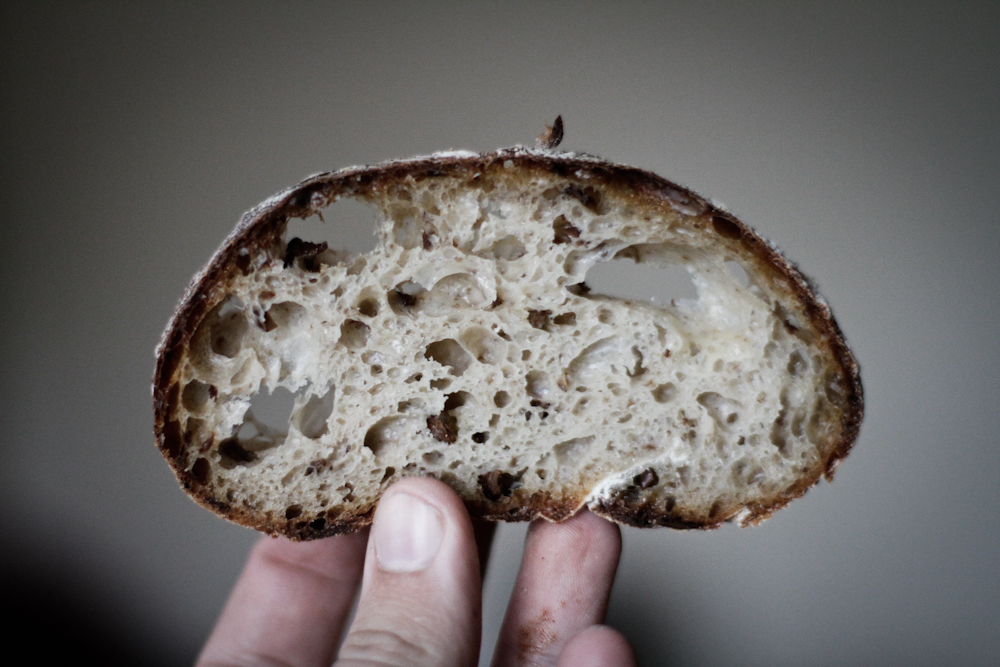
I have been baking quite a bit in my pullman pan lately and I figured I should change it up, also the pan was otherwise occupied so a rustic loaf was in the cards. Chanterelles are my favorite mushrooms and pretty much made to go in bread, all buttery and fragrant and whatnot and though I had never baked with them I figured it could only be a good thing. This loaf went fast so I only had it alone but I think it would of really been the best eaten with other food, or at least some good cheese. Also at around 92% total hydration this is probably the wettest non high whole grain bread I have made to date. 

First I lightly sauté's the chanterelles with a little olive oil then roughly patted them dry with a paper towel, both to absorb the excess oil and to break them up into smaller pieces, then I combined all the ingredients but the salt and let it sit for an hour.

After the hour I gave it a brisk two minutes of slap and folds followed by a two minute rest and two more minutes of slapping and folding, 45 minutes later I gave it another two minutes of slapping and folding and forty minutes later I gave it a minute of slap and fold and then another forty minutes later I gave it a stretch and fold in the bowl, let it rest for 45 minutes then scraped it out and proofed it on a very heavily floured couche for thee and a hagfish hours.

once it was done proofing I rolled it over, using the roll to build some tension on the otherwise very very slack loaf. Then i peeled it onto my preheated stone, poured water on my lava rocks and baked it at 500 for five minutes and continued baking at 450 for another 55 minutes rotating periodically .

wassisname's picture
wassisname

Pumpkin Sourdough


First off, many thanks to Karin (hanseata) for posting her bake of Dan Lepard’s pumpkin whey bread.  What a great idea, and not just for autumn bakes.  This is a sourdough, whey-less take on that lovely bread. 


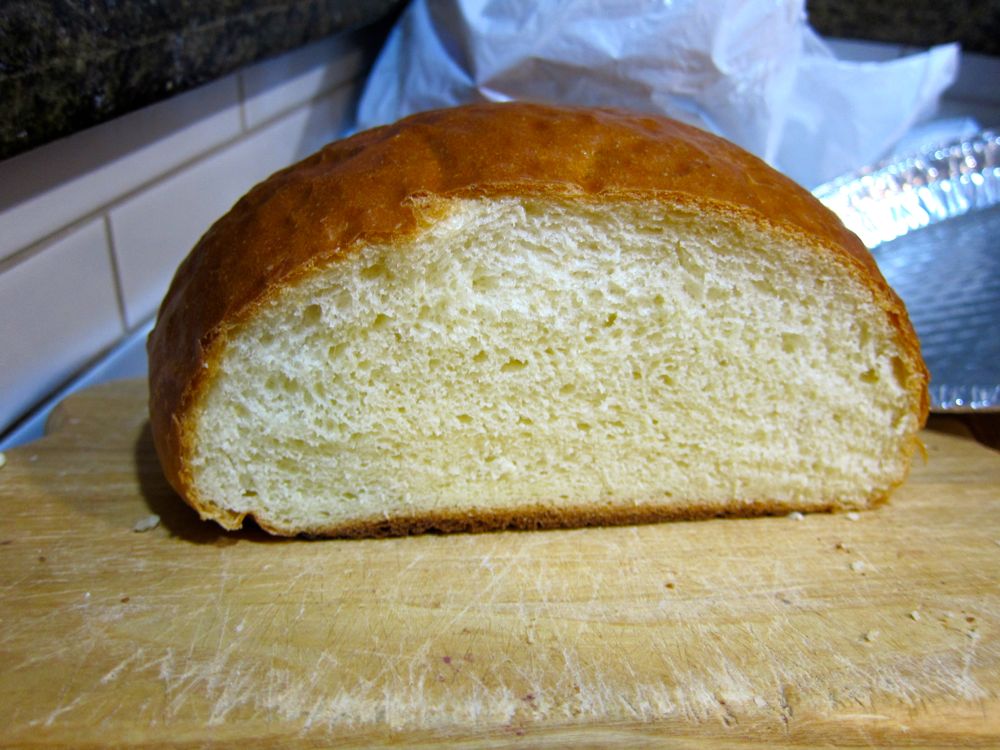
I love what the pumpkin does for this bread!  The colors are striking, the crumb is exceptionally moist, and the flavor is wonderfully complex.  The amount of pumpkin added to the dough will affect the flavor of the finished loaf pretty dramatically.  The flavor using this formula is subtle – there, but not up front – and fades over time.  The flavor is much more pronounced with the addition of even 25g more pumpkin (reduce water by 15g to keep the hydration about the same).

I really do recommend an autolyse for this dough because it starts out very sticky.  I tried mixing the first attempt straight off without an autolyse and it was a mess.  I was convinced the dough was far too wet, but it eventually worked itself out and ended up being a little tight if anything.  The loaves pictured here are the second attempt.  They were handled much more gently and turned out much better for it.


Another idea I tried was to mix a bit of cinnamon and allspice with flour and use that to dust the bottom of the loaves.  I kept it very light and the flavor didn’t come through in the finished bread, but it is something I will play with in future bakes. 

And, there will certainly be future bakes of this one, because… YUM!

Marcus

Oh, and the type 85 flour could just as well be whole wheat, but it's what I have on hand at the moment.


Floydm's picture
Floydm

Hawaiian Sweet Bread with Tangzhong

I only recently discovered that one thing that doesn't appear to be available in Canada is Hawaiian Sweet Bread.  At least on the West Coast in the US, King's Hawaiian bread is easy to find at most any grocery store.  It's something I grew up with and that I associate with being a kid and snacking on in the car.  We certainly fed it to our kids a number of times on road trips.

I've tried making Hawaiian sweet bread a couple of times in the past.  While the flavour was right, I've never been able to get close on texture. 

The other day it dawned on me that the Hokkaido Milk Bread with Tangzhong was quite similar to Hawaiian Sweet Bread, both in flavour and texture.  With a few tweaks to that recipe, I got as close to Hawaiian Sweet Bread as I've ever come in the past.


Hawaiian Sweet Bread


makes 3 loaves

Tangzhong

2/3 cup pineapple juice

1/3 cup water

1/3 cup all purpose flour

Final dough

800g (around 5 C) all purpose flour

1/2 C sugar

50g (1/2 C) milk powder

1/2 C half and half

3/4 C milk

2 eggs

4 T butter

4 t instant yeast

1 t salt

1 t vanilla extract (optional)

1 t lemon extract or some lemon zest (optional)

1 t orange extract or some orange zest (optional)

all of the tangzhong

1 more egg, beaten, for the eggwash

 The tangzhong I made the same as the previous time: 1 cup of liquid (milk or water or juice) to 1/3 cup flour, or a 5 to 1 liquid to solid ratio (so 250g liquid to 50g flour) and mix it together in a pan.  Heat the pan while stirring constantly.  Initially it will remain a liquid, but as you approach 65C it will undergo a change and thicken to an almost pudding like consistency.  Here is a video I made of it undergoing that change.

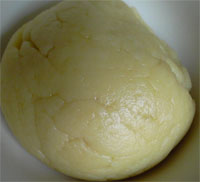
Let the tangzhong cool for at least a half an hour, then combine it and the rest of the ingredients.  Mix it very well, for 10-15 minutes with a standmixer.  Cover and let rise until doubled in size, approximately an hour.

Hawaiian Sweet Bread

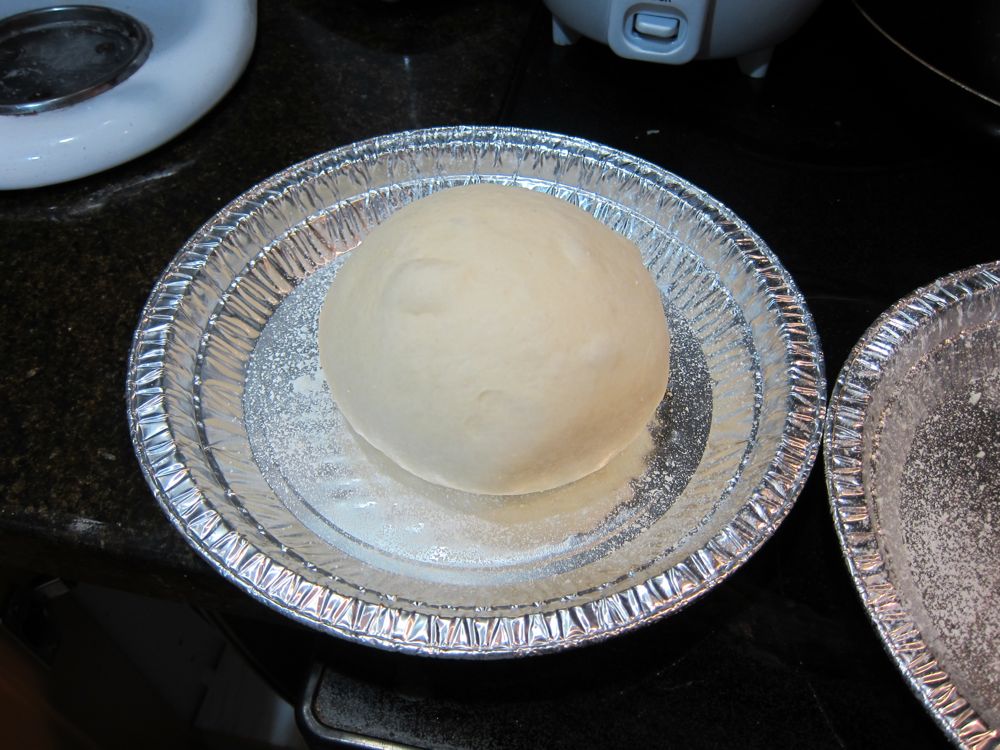
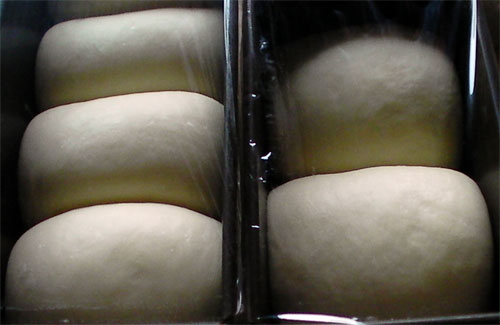
Divide the dough into three even pieces.  Place them in greased pans, cover loosely, and let them rise for 45 minutes to an hour until they are approaching twice their original size.  Glaze them with eggwash before putting them in the oven.

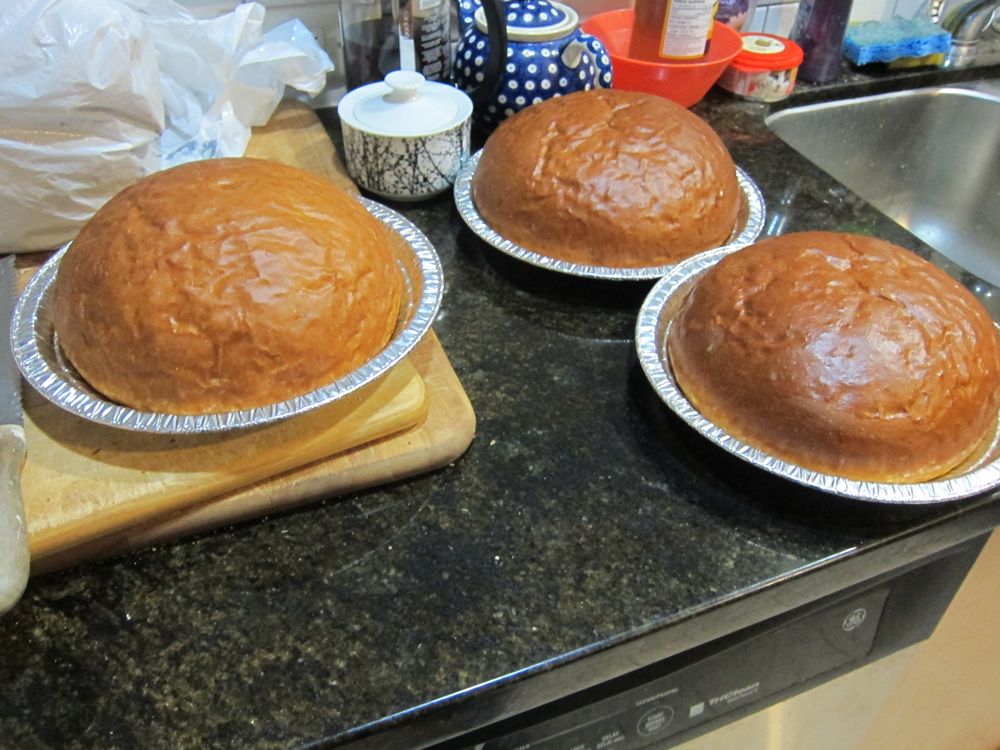
Bake at 350 for approximately 45 minutes.  If you can, cover the loaves with a pan or foil for the first ten minutes to trap some of the steam in with the loaf and to keep them from browning too quickly.  I acually used a large metal mixing bowl which I inverted over each loaf when placing them in the oven.

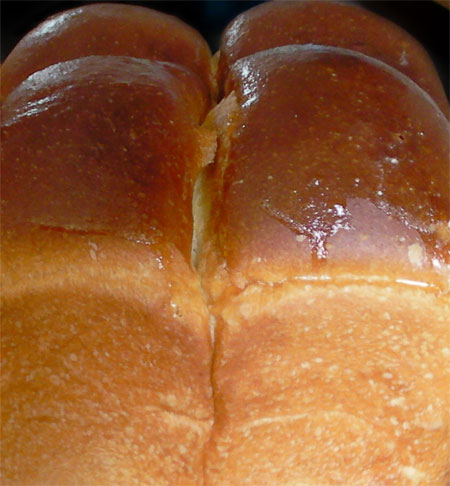
Hawaiian Sweet Bread

I like the way the loaves puckered as they cooled (compare this photo with the top most photo), just like King's Hawaiian Sweet Bread. This is definitely the closest I've gotten to making Hawaiian Sweet Bread at home.

txfarmer's picture
txfarmer

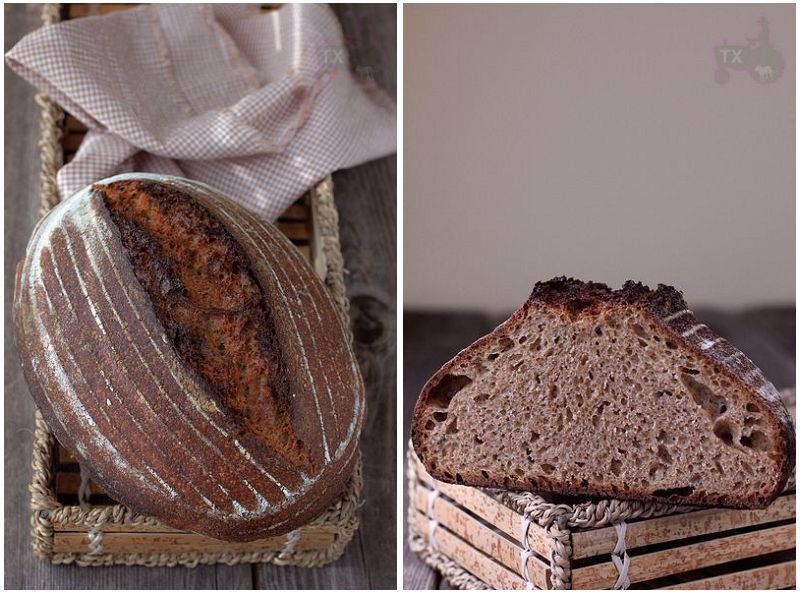
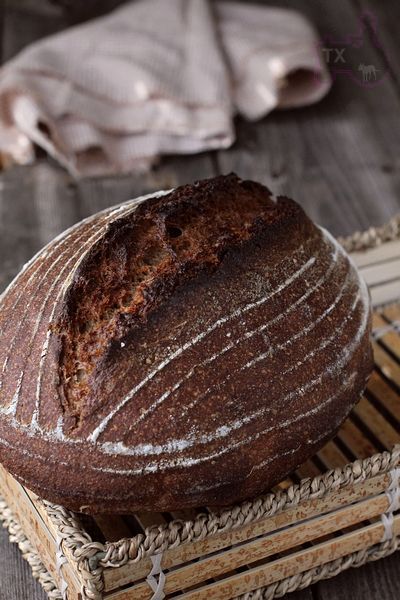
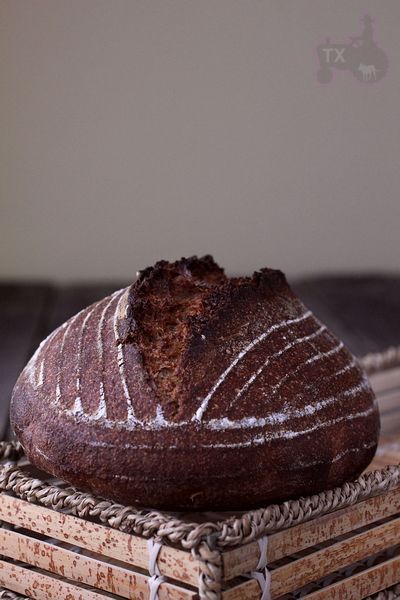
100% Spelt Sourdough - trying spelt for the first time

Sending this to Yeastspotting.

Index for my blog entries

Can't believe that I have never baked with spelt yet, well until last weekend that is. I finally got some spelt flour and went to town with it. In my typical "jump in with both feet" way, I make a 100% spelt souroudgh. Two sources were helpful with my research:
http://www.breadtopia.com/spelt-bread-recipe/
http://www.thefreshloaf.com/node/13934/100-spelt-levain-bread (Shiao-Ping)
However, my ratio and fermentation schedule ended up being quite different form both of them, but the thing I learned from their posts held true: spelt has quite a bit of gluten, but not as much as wheat, and more delicate, which means it's the best to handle it gently and try hard not to over rise/proof.

Spelt Flour, 298g
Spelt Starter(100%), 105g (I started with my white starter, and fed it with spelt (1:2:2) 3 times to convert it "mostly" to spelt)
Agave, 28g (if use honey, might need more since agave is sweeter)
Water, 193g
Salt, 7g

1. Mix everything autolyse for 20 to 60min, mix by hand until even.
2. Bulk rise at room temp (~75F) for about 2.5hrs. S&F at 30, 60, 90, 120min.
4. Shape, put in basketes smooth side down, put in fridge over night.
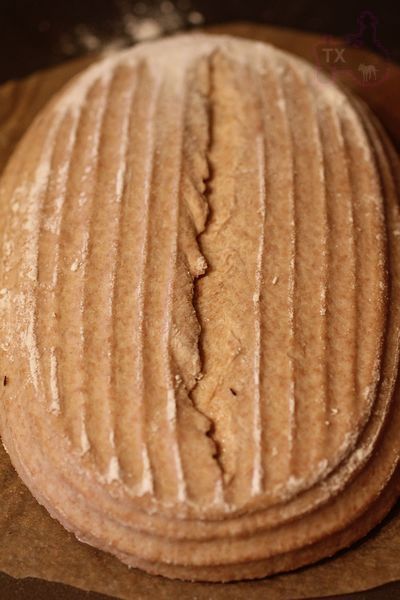
5. Next morning take the dough out to finish proofing, about 45min for me. Score.

6. Bake in cast iron pot at 460F with lid on for 20min, lower to 430F, take away lid, bake for another 25min.

The dough is fairly wet & loose, so I chose to bake in cast iron pot to keep the height better.

I like the addition of Agave in the formula, which complements with the spelt flavor well. Honey or other sweeteners would do as well.

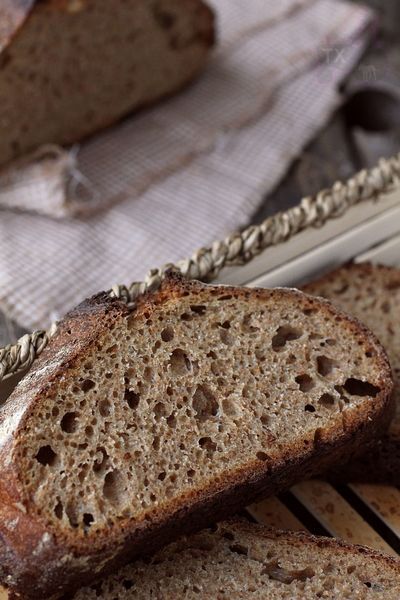
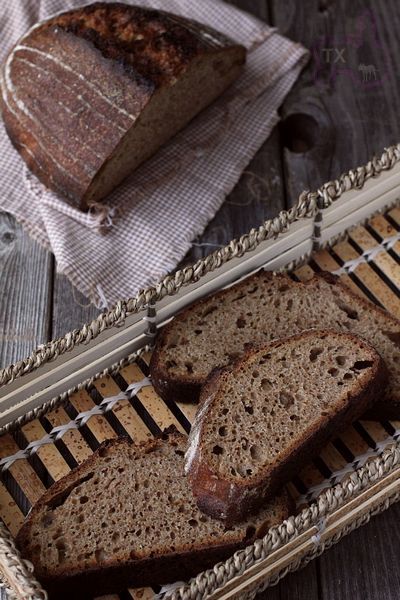
Crumb is quite open, and I really like the slightly "bitter"/earthy taste of spelt, no wonder it's used so often by other bakers.

ananda's picture
ananda

Celebrating Rye Breads

Celebrating Rye Breads


This weekend has involved multiple home bakes as I feed up my leavens in preparation for the 2 day “UK Fresh Loaf” course which I will be running at the College on 19th and 20th July.   Many thanks, in particular to ruralidle for suggesting this in the first place, and for his work to make it happen.   It will be my swansong at Newcastle College, as I am leaving at the end of this month in search of more exciting professional adventures in the wake of the savage cuts currently being inflicted across the board by the ruthless and deeply unimaginative Government currently in power over here.   The result is that the College has re-structured to continue to attract sources of funding without being brave enough to find ways to continue to fulfil a key aspect of its traditional role in UK education.   I am not short of ideas and leads, so am optimistic that a far more exciting future lies on the horizon.   The only definite part of the plan is to make sure I complete my MSc in Food Policy between January and August of next year.

So, the show, very much, goes on.   Here are the breads I made at home over Friday, Saturday and Sunday [8th – 10th July], having started refreshing the 2 leavens on Thursday evening, 7th July 2011.

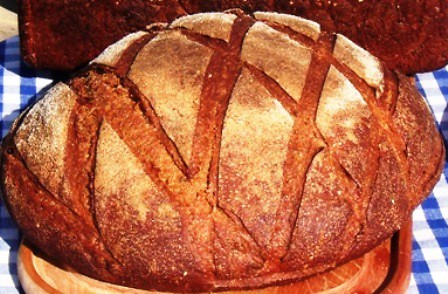
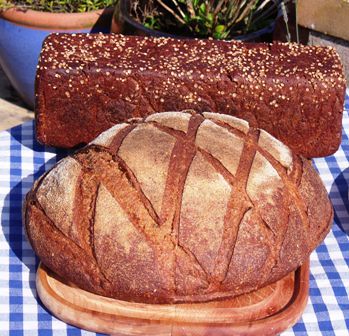
1.    Caraway Rye with Blackstrap Molasses

This is a bread I first developed and made some time ago, not long after joining the TFL community and beginning this Blog.   You can read about it here: http://www.thefreshloaf.com/node/16273/carawy-rye-bread-black-strap-molasses-superwet-ciabatta-too  This version is, however, quite different in that the leaven is wheat-based, with Dark Rye being added at the dough stage.   The original used a Rye Sourdough with only wheat flour added to the final dough.   There is half the amount of caraway in this formula, as this is all the stock I currently had in.   More detail on taste is given below.   I made 2 large miche type loaves from this dough; the recipe/formula and method detail are shown below:

Material

Formula [% of Flour]

Recipe [grams]

1. Wheat Leaven Refreshment One

18:15, Thursday 07.07.2011


From Stock


40 [25 flour, 15 water]

Marriage’s Strong Organic White Flour


100

Water


60

TOTAL


200

2. Refreshment Two

13:30, Friday 08.07.2011


Wheat Leaven

[from above]


200

Marriage’s Strong Organic White Flour


300

Water


180

TOTAL


680 [40 retained as stock]

TOTAL used


640 [400 flour, 240 water]

3. Final Dough

19:00, Friday 08.07.2011


Wheat Leaven

[from above]

40

[25 flour, 15 water]

640

[400 flour, 240 water]

Carrs Special CC Flour

50

800

Bacheldre Organic Dark Rye

25

400

Organic Blackstrap Molasses

6.25

100

Salt

1.75

28

Caraway Seeds

0.9

14

Water

50

800

TOTAL

173.9

2782

% pre-fermented flour

25

-

% overall hydration

65

-


Method:

  • Weigh the dough water, and dissolve molasses and salt into that.   Add the flours and caraway seeds and mix until clear.   Autolyse for one hour.
  • Combine the leaven and autolyse and develop the dough.   As Shiao-Ping originally noted, the empirical feel of the dough is akin to much higher hydration than that actually used.   This is the effect of using molasses and 25% rye flour making the dough very sticky indeed.   Persevere with slow and gentle mixing, avoiding adding any flour at all to the dough.   I used Bertinet’s slap and fold here, mixing for almost an hour, but with lots of resting phases along the way.
  • Bulk ferment for 2 hours
  • Retard for 7 hours, overnight.
  • Scale, divide and mould the dough pieces.   I scaled one at 1550g and the other at 1200g and placed each piece upside down in prepared bannetons.   The large loaf stayed out for proof, and the other went back in the chiller for a further 2 hours to give a manageable production schedule, with the second bread following, then another bread after that.   Final proof time for loaf one was just short of 4 hours, and for loaf two exactly 5 hours.
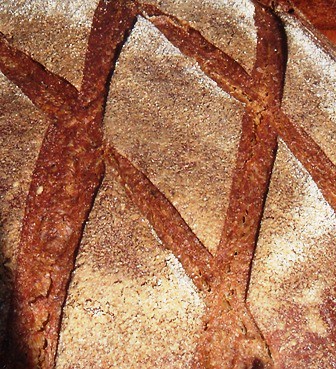
  • I cut the tops of each loaf with a diamond pattern and set them to bake at 220°C using plenty of steam.   For the bigger loaf, I baked it for 15 minutes at 220°C, then 20 minutes at 200°C, then a further 15 minutes at 180°C.   The smaller loaf baked the same, but for 40 minutes instead of 50 minutes.
  • Finished loaves cooled on wires, as always.   The baked loaves had a finished weight which showed moisture loss of just under 10%.   I achieved a core temperature of 96°C for both loaves.

Some photographs of the finished loaf are shown below.   Regarding analysis of the finished bread, this is one of Alison’s absolute favourite loaves.   There is sourness and bitterness coming from the rye and molasses.   There is sweetness too, and plenty of aroma from the caraway.   The crumb colour is particularly lovely, and the moistness brings great pleasure to the final eating quality.   We took one of these loaves along as a gift to some friends’ house last night, as we had been invited round for dinner.   That was the first chance we had to sample the bread, but we had a slice each for breakfast this morning, with just a thin coating of butter.


2.    Borodinsky – The Auerman Formula [or thereabouts anyway]

I have now tracked down a supply of Red Malt, and managed to find a way to fit the more complex 3-stage build used for this bread into my home schedule for the last couple of days.   It’s something I have long wanted to do, have been slightly taken to task for previously on TFL, and am really happy with the finished result; subject to tasting and crumb analysis which I have yet to carry out.

I made one large loaf, in a Pullman Pan, weighing just over 1660g

Material

Formula [% of flour]

Recipe [grams]

1. Rye Sour Refreshment

18:15, Thursday 07.07.2011


From Stock


70 [26 flour, 44 water]

Bacheldre Organic Dark Rye Flour


60

Water


100

TOTAL


230


2. Full Sour

13:00, Friday 08.07.2011


Rye Sour from above


230

Bacheldre Organic Dark Rye Flour


180

Water


300

TOTAL


710 [38 retained as stock]

TOTAL used

80 [30 flour, 50 water]

672 [252 flour, 400 water]


3. “Scald”

22:30, Friday 08.07.2011


Bacheldre Organic Dark Rye Flour

20

168

Red Malt

5

42

Organic Blackstrap Molasses

6

50

Coriander, freshly ground

1

8

Salt

1

8

Boiling Water

35

294

TOTAL

68

570


4. “Sponge”

23:30, Friday 08.07.2011


Rye Sourdough [from 2]

80 [30 flour, 50 water]

672 [252 flour, 400 water]

Scald [from 3]

68

570

TOTAL

148

1242


5. Final Paste

07:30 Saturday 09.07.2011


Sponge [from 4]

148

1242

Bacheldre Organic Dark Rye Flour

23.5

197

Carrs Special CC Flour

26.5

223

TOTAL

198

1662

% pre-fermented flour

50

30 from sour + 20 from scald to make “sponge”

% overall hydration

85

-


Method:

  • Refresh the rye sour as directed in the table above.
  • Make the “scald” as follows: Weigh the red malt and dark rye flour into a bowl, add the salt, and coriander, which should be freshly ground using a mortar and pestle.   Weight the molasses into a pan, and pour boiling water onto this to the specified weight.   Bring this to a rolling boil on the cooker hob top.   Pour onto the dry ingredients and combine well with a stout plastic or wooden spatula.   Add any extra boiling water required first by checking the weight of the contents to allow for any evaporation.   Cool the scald as rapidly as possible down to a maximum temperature of 45°C.   This took an hour.
  • Combine the scald and the full sour to form the sponge.   Leave this to ferment for 5½ hours.   I then retarded it a further 2 hours, as it was 05:00 and I needed a bit more sleep!
  • Add the 2 remaining portions of flour to the sponge to form the final paste
  • Prove in bulk for 1½ hours, and meanwhile prepare a large Pullman Pan by lining it with silicone paper.
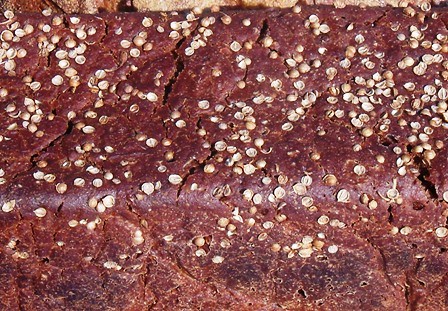
  • Pan the paste, smooth it off and dust the top with a sprinkling of freshly ground coriander.   Put the lid on the Pan and set for final proof for 2 hours.
  • Use a pan of water in the oven and set to bake at 160°Cfor 2 hours, with a gentle supply of steam, topped up as needed.
  • De-pan and cool on wires.   The finished weight of the cooled bread was 1400g, indicating a weight loss of 15.8%.   This means that the moisture retained within the bread remains at just under 70% of the flour, and equates to 35% of the total weight of the finished bread!

Notes:

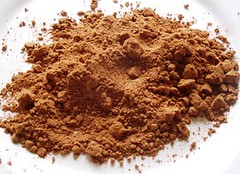
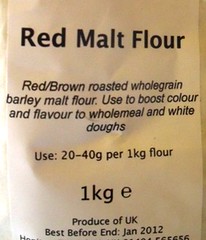
  • Red Malt: this is derived from malted barley, ground to a fine powder.   I believe it has been lightly roasted to the levels which would be known in the brewing industry as “Crystal Malt”.   In terms of amylase, it makes no contribution, as the grain has been roasted at too high a temperature for the enzymes to survive.   I suspect the Russian version would use rye as the source, rather than barley, but this is as close as I can get at the moment.   It looks like this:

  • Constructing the Scald:   I did this exactly the same as I have done it in the past, except for using the red malt instead of the barley malt syrup which I have previously had to use as an alternative.   The formula does not use molasses or salt in the scald.   The reason I added the molasses at this stage is because I did not want to use sugar in the formula, as the “official” recipe directs.   Adding molasses to the final paste would be a difficult mixing process, as there is no liquid added at this stage to use to dissolve the molasses into.
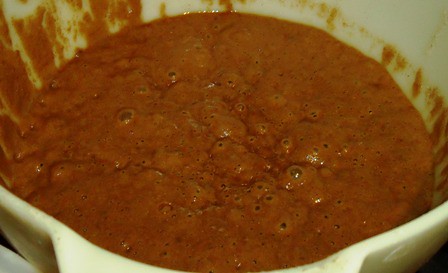
  • Additionally, the sponge process had to be left for longer than the 4 hours directed in the formula, on account of me requiring a bit more sleep.   So I added the salt in the hope it would retard the ferment.   I also hoped that the level of molasses in the formula would be sufficiently high to have a slight retarding effect too.   In the event, I woke up 5 hours into the final fermenting phase, and stored the sponge in the fridge to retard it for just over 2 hours before getting up to make the final paste.   This worked very well; some pictures of the dark and rich “sponge” are attached here.

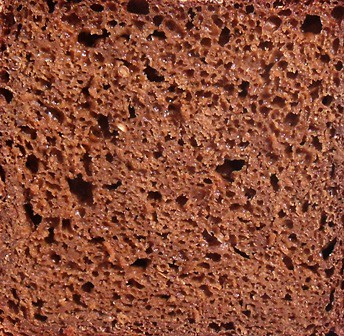
  • Undoubtedly this is the best version of this bread I have made.   You can reach your own conclusions about the origins of the term “Borodinsky” from the various stories uncovered in the research posted above.   I’ve never been to Russia, and have no idea what the “official” Borodinsky produced in Soviet times, or, the older, traditional loaf of its type tasted or looked like.   This version is stunning.   The bitter/sweet flavours are intense, the crumb is DARK, and very moist.   For all that, it is very easy to eat, and intensely “moreish”!
  • References: there is more information about the Borodinsky formula given below.   Some of these are taken from previous discussion threads of interest on TFL.   This one http://www.thefreshloaf.com/node/11812/rye-amylase is of interest in that discussion is given over to the part played by the scald in the formula, and the extent to which the water should be heated before it is poured onto the flour.   Here, I am left wondering if the key purpose of the scald is to fully gelatinise the starches in order to encourage maximum liquid take up in the final formula?   Or, have I still not got this part right, and missed that the scald is actually a “mash” and not a “boil up”?   Informative further discussion on mash chemistry and its potential impact here would be much appreciated.
  • I did then go on to complete the process as outlined originally by Borodin, by combining the sour and scald.   However, I wonder if, because my scald was a “boil-up”, and not a “mash”, whether that meant the sponge would not work exactly as intended, and as outlined here in an earlier post on the referenced thread: http://www.thefreshloaf.com/node/11812/rye-amylase#comment-66360
  • Two clear derivations are offered for Borodinsky bread, and this topic seems to spark off heated debate about what is the “true” Borodinsky.   Is it a black bread created in the immediate aftermath of the Battle of Borodino, to celebrate the Russian army success in 1812?   Or, is it the heavily prescribed Soviet bread of the GOST standards, as referenced here:  http://www.borodinsky.com/recipe/index-r.html  on this thread: http://www.thefreshloaf.com/node/20370/russian-sourdough-no-more   My attempt here was to re-produce the latter style, and I acknowledge I have not been entirely successful.   Some of this is deliberate…avoiding sugar, and replacing it with molasses.   The story on the zavarkha is another matter.   Can anyone provide further detail on whether the process is carried out primarily to mash, or, to gelatinise?   That would be much appreciated; if we can avoid derogatory comments this time, that would be all the better.
  • For further information, I highly recommend reading the various discussion posts here: http://www.foodbanter.com/baking To do this, you will have to register.   Then use the “Search” tab in the top menu, and type “Borodinsky” into the search box when it comes up.   Select the threads you want to see from there.

For information on the very precise rye bread recipes from the Soviet era, see this table here: http://www.indiana.edu/~pollang/Russian_bread_table.pdf

I would like to dedicate this bread and post to my friend and TFL colleague Daisy_A, and pass on all good wishes for a speedy recovery, as I know you are having an operation on one of your eyes round about now.   Your intellect shines through in some of the passages referenced above and these typify the enormous cultural contribution you make to the pages of TFL.   “Get well soon!”


3.    Pain de Campagne with mixed levains

Just a quick one, to give me an excuse to feed up the rye sour and wheat levain one more time.   Recipe/formula and method below for one large loaf in a banneton.   The refreshment programme for the 2 leavens is not given, however, I used the cultures leftover from the previous 2 doughs, fed them each once more, and used these to make this bread, returning small amounts of each to stock for re-generation.

Material

Formula [% of flour]

Recipe [grams]

Wheat Levain

36.1 [22.5 flour, 13.6 water]

256 [160 flour, 96 water]

Rye Sourdough

36.6 [14.1 flour, 22.5 water]

260 [100 flour, 160 water

White Bread Flour

63.4

450

Salt

1.7

12

Water

31.8

226

TOTAL

169.6

1204

% pre-fermented flour

36.6

-

% overall hydration

67.9

-


Method:

  • Combine all the items in the table in a bowl to form a dough.   Mix by hand on the bench for 15 minutes.
  • Retard overnight in the fridge.
  • Mould round and place upside down in a prepared banneton.
  • Prove for 5 hours
  • Score the top of the loaf, and bake in a pre-heated oven with steam, for 45 minutes.
  • Cool on wires.

A somewhat less detailed formula to finish with.   Photographs of the crust and crumb are here.   The loaf has gentle flavours in comparison to the full-on tastes of the other 2 breads.

Happy Baking!

Andy

Syd's picture
Syd

Asian-Style Pain de Mie

This is a super soft, highly enriched, labour intensive, Asian-Style Pain de Mie. It involves the 湯種 (tang zhong or water roux) method and took 3 days from beginning to completion.  The original recipe and instructions can be found here.  The recipe makes 2kg of dough.  It filled one, 1kg pullman pan and two 500g pans.  I baked without the lids on because I prefer the rounded tops and I also like a bit of colour on my loaves.  They always look slightly anemic when they come out of those pullman pans. 

Day 1

Water Roux

milk 70g

butter 30g

sugar 3g

salt 1/8 tsp

bread flour 70g

Heat milk, butter, salt and sugar in a saucepan.  Bring to the boil.  Remove from heat.  Dump in flour and stir to a smooth paste.  (A bit like making choux pastry). Cover tightly, allow to cool to room temp and refrigerate for 16 hours.

16 hours later

Tear into small pieces and add:

bread flour 700g

instant yeast 2g

milk 430g

sugar 20g

Knead until it comes together, cover tightly and refrigerate for at least 36 hours but not more than 72 hours.  (I retarded for 48 hours).


Baking Day

Tear it into pieces again and add:


bread flour 300g

Salt 12g

sugar 120g

nstant yeast 5g

milk 100g

whole egg 140g

It will turn into a sloppy mess and if you have a stand mixer it will be better.  I don't, so I just have to make do with slap and fold (a la Bertinet).  It actually comes together pretty quickly. When it has come together add:

butter 100g

Now knead it until your arms cramp up or until you get a windowpane as clear as a gossamer wing (whichever comes first).  Again, a stand mixer would be of great benefit here.  Bench rest 15 - 20 mins.  Shape and place into pans. 

Allow to rise until about 8/10ths full then cover (if you want) and bake.  I baked at 180 C (convection) for 40 mins.  The original author gives temps for an oven that can control both top and bottom thermostats.  My oven isn't that fancy so I just went somewhere in the middle and it worked.  Next time I will bake for 35 mins.  I think my crust was a little on the thick side this time.


Heavenly with marmalade and a cup of Earl Grey.  It tastes good on its own, too.

Syd


Floydm's picture
Floydm

Peter Reinhart's Wild Rice and Onion Bread

Many of us have just gotten our hands on copies of Peter Reinhart’s Artisan Breads Every Day and are furiously trying out Peter's new recipes.  One well-tested recipe that he revived for this book is his Wild Rice and Onion Bread.  I couldn't be happier about this because my memory is the same as Peter's: that after Struan Bread, Wild Rice & Onion Bread was Brother Juniper's most popular bread and is a bread I adore.  It makes incredible rolls that are a perfect accompaniment to a Thanksgiving feast, so rediscovering this recipe now couldn't be more timely. 

Peter and his publisher have been kind enough to allow me to reprint the Wild Rice & Onion Bread recipe from Peter Reinhart’s Artisan Breads Every Day in full.

Peter Reinhart's Artisan Breads Every Day


Wild Rice and Onion Bread
Makes 2 large loaves or many rolls

After struan, wild rice and onion bread was the most popular bread at Brother Juniper’s Bakery, and a version of this recipe appears in my first book, Brother Juniper’s Bread Book. The recipe calls for wild rice, but it can also be made with brown rice or a combination of wild and brown rice, or any other cooked grain. At Brother Juniper’s, during the holiday season we even added parsley, sage, rosemary, thyme, garlic powder, and black pepper, which made for a wonderful bread for stuffing turkey. Note that it only takes about 1/4 cup of uncooked wild rice to make 1 cup (6 oz, by weight) of cooked wild rice; still, if you’re going to cook wild rice especially for this recipe, you might as well make a bigger batch and freeze 1-cup packets for future use—or have it with dinner!

This new version uses the overnight fermentation method. The yeast is added directly to the bowl, not rehydrated with the warm water and buttermilk. You can use either dried or fresh onions, and you can form the loaves into any size or shape. Dried onions are about one-tenth the weight of fresh onions and will absorb water from the dough, while fresh onions will leach moisture back into the dough. If you use dried onions, don’t rehydrate them before adding them to the dough, but do be aware that you may have to add an extra 2 to 4 tablespoons (1 to 2 oz) of water while mixing.

6 cups (27 oz / 765 g) unbleached bread flour
2 1/4 teaspoons (0.6 oz / 17 g) salt, or 3 1/2 teaspoons coarse kosher salt
2 tablespoons (0.66 oz / 19 g) instant yeast
1 cup (6 oz / 170 g) cooked wild rice or another cooked grain
1/4 cup (2 oz / 56.5 g) brown sugar
11/2 cups (12 oz / 340 g) lukewarm water (about 95°F or 35°C)
1/2 cup (4 oz / 113 g) lukewarm buttermilk or any other milk (about 95°F or 35°C)
1/4 cup (1 oz / 28.5 g) minced or chopped dried onions, or 2 cups (8 oz / 227 g) diced fresh onion (about 1 large onion)
1 egg white, for egg wash (optional)
1 tablespoon water, for egg wash (optional)


Do Ahead

Combine all of the ingredients, except the egg wash, in a mixing bowl. If using a mixer, use the paddle attachment and mix on the lowest speed for 1 minute. If mixing by hand, use a large spoon and stir for 1 minute. The dough should be sticky, coarse, and shaggy. Let the dough rest for 5 minutes. 

Switch to the dough hook and mix on medium-low speed, or continue mixing by hand, for 4 minutes, adjusting with flour or water as needed to keep the dough ball together. The dough should be soft, supple, and slightly sticky. 

Transfer the dough to a lightly floured work surface. Knead the dough for 2 to 3 minutes, adding more flour as needed to prevent sticking. The dough will still be soft and slightly sticky but will hold together to form a soft, supple ball. Place the dough in a clean, lightly oiled bowl, cover the bowl tightly with plastic wrap, and immediately refrigerate overnight or for up to 4 days. (If you plan to bake the dough in batches over different days, you can portion the dough and place it into two or more oiled bowls at this stage.)

On Baking Day
Onion loafRemove the dough from the refrigerator about 2 hours before you plan to bake. Shape the dough into one or more sandwich loaves (see page 23), using 28 ounces (794 g) of dough for 4 1/2 by 8-inch loaf pans and 36 ounces (1.02 kg) of dough for 5 by 9-inch pans; into freestanding loaves of any size, which you can shape as bâtards (see page 21), baguettes (see page 22), or boules (see page 20); or into rolls (see page 25), using 2 ounces (56.5 g) of dough per roll. When shaping, use only as much flour as necessary to keep the dough from sticking. For sandwich loaves, proof the dough in greased loaf pans. For freestanding loaves and rolls, line a sheet pan with parchment paper or a silicone mat and proof the dough on the pan. 

Mist the top of the dough with spray oil and cover loosely with plastic wrap. Let the dough rise at room temperature for 1 1/2 to 2 hours, until increased to about 1 1/2 times its original size. In loaf pans, the dough should dome at least 1 inch above the rim. If you’d like to make the rolls more shiny, whisk the egg white and water together, brush the tops of the rolls with the egg wash (see page 135) just before they’re ready to bake.  

About 15 minutes before baking, preheat the oven to 350°F (177°C), or 300°F (149°C) for a convection oven. 

Bake the loaves for 10 to 15 minutes, then rotate the pan; rotate rolls after 8 minutes. The total baking time is 45 to 55 minutes for loaves, and only 20 to 25 minutes for rolls. The bread is done when it has a rich golden color, the loaf sounds hollow when thumped on the bottom, and the internal temperature is above 185°F (85°C) in the center. 

Cool on a wire rack for at least 20 minutes for rolls or 1 hour for loaves before slicing.


Reprinted with permission from Peter Reinhart’s Artisan Breads Every Day: Fast and Easy Recipes for World-Class Breads by Peter Reinhart, copyright © 2009. Published by Ten Speed Press, a division of Random House, Inc

dmsnyder's picture
dmsnyder

Sourdough Italian Bread and Sandwich Rolls


This bread is based on the Italian Bread formula in Peter Reinhart's “Bread Baker's Apprentice.” I substituted a biga naturale (sourdough starter) for the biga made with instant yeast in Reinhart's formula. I still added the instant yeast to the final dough to provide more predictable fermentation and proofing times.

Reinhart recommends this formula for hoagie rolls. I divided the dough to make 4 rolls scaled to 4 ounces each and shaped the remainder of the dough into one large bâtard.

I also employed the “stretch and knead in the bowl” technique during bulk fermentation, even though I used a KitchenAid mixer for mixing beforehand.


Intermediate starter (Biga naturale)

Active starter

3 oz.

Water

9 oz.

KAF Bread flour

12 oz.


Final Dough

Biga naturale (Note: save the remaining 6 oz. for another bread.)

18 oz.

KAF Bread flour

11.25 oz.

Salt

0.41 oz. (1-2/3 tsp)

Sugar

0.5 oz. (1 T)

Instant yeast

0.11 oz (1 tsp)

Diastatic barley malt powder

0.17 oz. (1 tsp)

Olive oil

0.5 oz (1 T)

Water at 80F

7 oz (¾ cup)

Sesame seeds for coating.
Semolina to dust the parchment paper.


Mix and ferment the biga.

Mix the biga naturale the evening before baking. Dissolve the starter in the water in a medium sized bowl, then add the flour and mix thoroughly to hydrate the flour and distribute the starter. Cover the bowl tightly and allow to ferment for 3-6 hours, until it doubles in volume. Refrigerate overnight.
The next day, remove the biga from the refrigerator and allow it to warm up for an hour or so. Alternately, mix the biga late at night and ferment at room temperature overnight.


Mix the dough

Mix the flour, salt, sugar, yeast and malt powder in a large bowl or the bowl of your mixer. Add the biga in pieces, olive oil and ¾ cups of tepid water and mix thoroughly. Adjust the dough consistency by adding small amounts of water or flour as necessary. The dough should be very slack at this point.

I mixed the dough with the dough hook in the KA mixer for 10 minutes then transferred it to an 8 cup/2 liter glass pitcher that had been lightly oiled.


Fermentation

I stretched and folded the dough in the pitcher with a rubber spatula then covered it tightly. I repeated the stretch and fold again 20 and 40 minutes later. I then left the dough to ferment until it was double the original volume (45-60 minutes more).


Divide and form

Divide into 2 pieces and pre-form as logs. Allow the dough to rest 5 minutes or more, then form into bâtards. To make rolls, divide into 4 ounce pieces and pre-shape into rounds, then shape into torpedos. If desired, spray or brush the loaves with water and sprinkle with sesame seeds.

Prepare a couche – either a floured piece of baker's linen or parchment paper sprinkled with semolina.

Pre-heat the oven to 500F with a baking stone on the middle shelf. Make preparations for steaming the oven.

Place the loaves in the couche, cover with plastic or a towel and allow to proof until 1-1/2 times their original size (about 40 minutes).


Baking

Score the loaves and transfer them to the baking stone. Bake with steam, using your favorite method. After loading the loaves and steaming, turn the over down to 450F and bake until done (about 20 minutes for a bâtard, 15 mnutes for rolls.). If you want a thicker crust, use a lower temperature and bake for longer.


Cooling

Allow to cool before slicing, if you can.

Sourdough Italian Roll

Sourdough Italian Roll crumb

We had a couple of the rolls for lunch. They were very nice. The crust is chewy, not crunchy, and the crumb is also chewy. This is not your fluffy, cottony roll that seems standard in most sub shops and, unfortunately, most Italian delis.

I am pretty sure this is the roll I would choose for a meatball sandwich, oozing mozzarella and dripping marinara sauce. I don't think this roll would be the usual soggy mess after the first 20 seconds. However, in the interest of Science, I will volunteer to test this hypothesis. Of course, if additional volunteers were to pool their data with mine, we can be more confident of our conclusions.

David

Submitted to Yeast Spotting on Susan FNP's marvelous Wild Yeast blog


Overnight Whole Grain Sourdough with Wheat, Spelt & Rye

JMonkey

This may be my favorite hearth bread. When made well, it has an open crumb, which is unusual for 100% whole grain breads, and a deliciously sour and nutty flavor.

Overall Formula
Whole wheat flour: 60%
Whole spelt flour: 30%
Whole rye flour: 10%
Water: 75%
Salt: 2%

5% of the flour is in the starter, which could be whole wheat, whole rye or whole spelt, and can be  60% hydration or 100% hydration.

Ingredients
Whole wheat flour: 300 grams or 2 generous cups
Whole spelt flour: 150 grams or 1 generous cup
Whole rye flour: 50 grams or a generous 1/3 cup
Whole grain starter: 40 grams if stiff (a dough ball about the size of a golf ball); 50 grams if wet (about 3-4 Tbs)
Water: 375 grams  or 1.5 cups + 1 Tbs
Salt: 10 grams or 1 and 3/8 tsp

Mixing
Dissolve the starter into the water, and then add the salt. Mix the flours together well, and add to the water. Mix until everything is hydrated.

Dough development and the first rise

However you develop the dough, it’ll need to rise at room temperature for 8-10 hours. Use the wet finger test to see whether it’s fully risen in the morning.
Shaping
Be gentle. You want to retain as many of those air bubbles as possible. Rounds and batards are the traditional shapes.
Second rise

You can let it rise for another 2 to 3 hours at room temperature. You can also speed things up (and increase sourness) by placing the dough on an upturned bowl in the bottom of a picnic cooler, throwing a cup of boiling water in the bottom and covering it quickly. After an hour, throw another cup of hot water in. The rise should only take a couple of hours this way.

Baking
Score the bread as you like. Hash marks are traditional for rounds, and batards usually take a single, bold stroke down the center or a couple of baguette-style slashes.

While you can certainly bake this bread on a cookie sheet, it benefits from a stone and some steam, or a covered baker. However you do it, bake at 450 degrees for about 40 minutes.

Pages