The Fresh Loaf

A Community of Amateur Bakers and Artisan Bread Enthusiasts.

Sourdough

baybakin's picture
baybakin

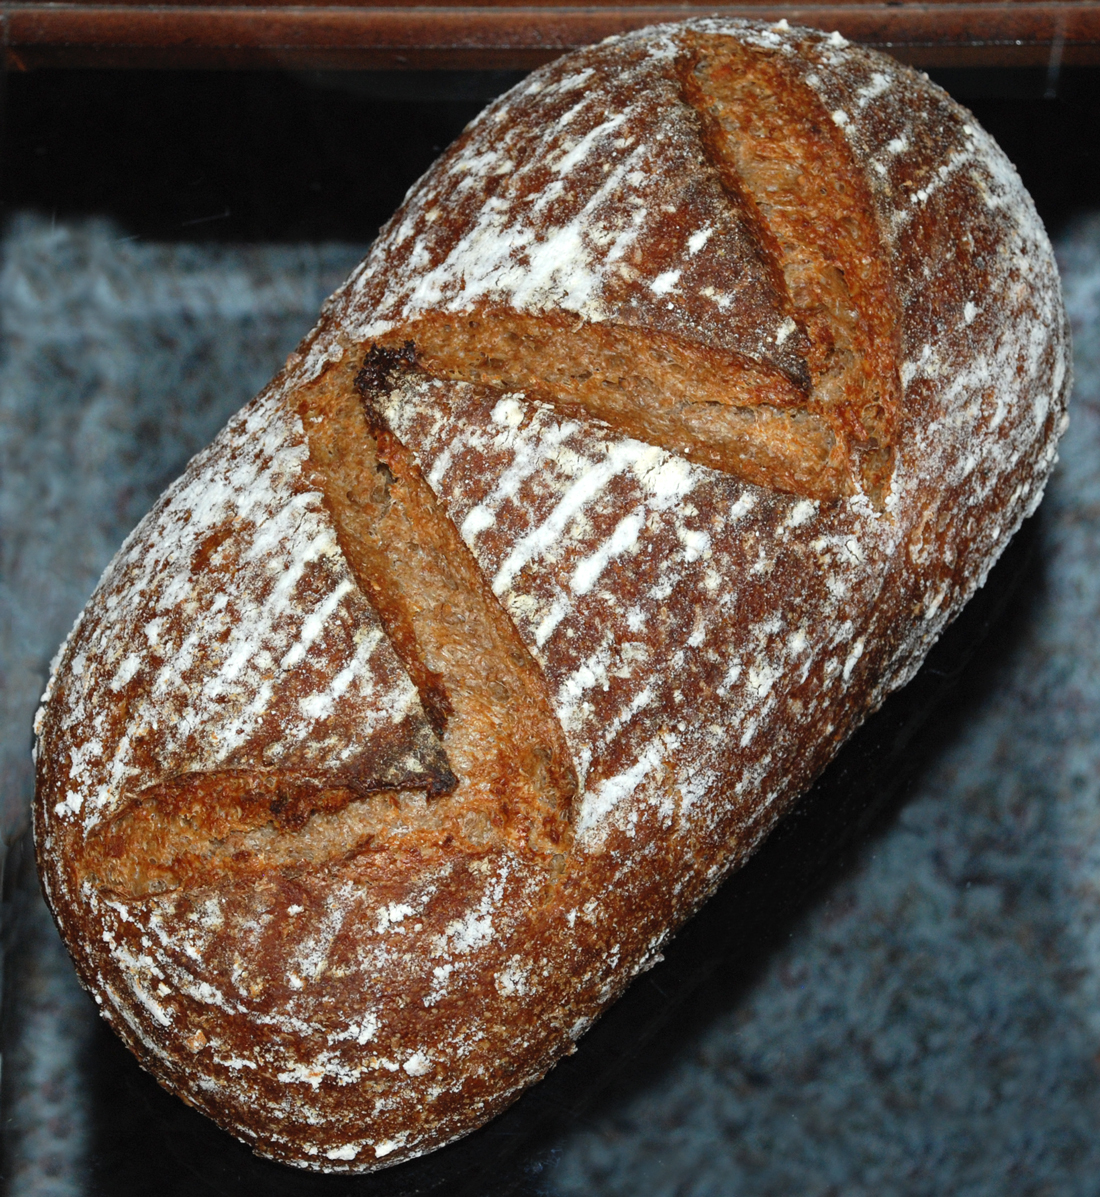
Oakland sourdough:

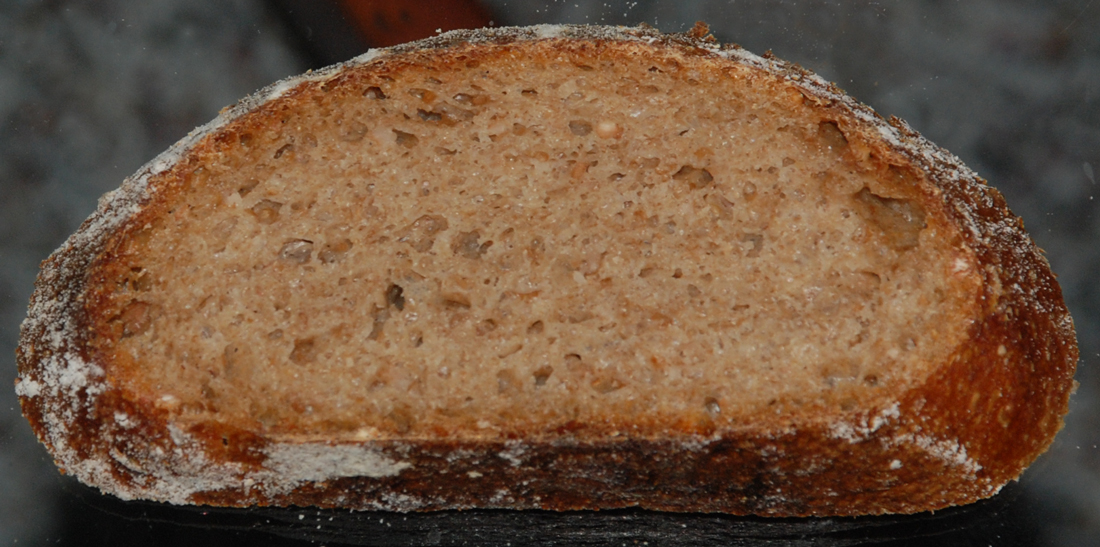
This is the basic sourdough that I keep around the house. Nearly every sourdough bread that I do is an edit on this basic recipe, which is sort of a combination of Daniel Leader's Pain de campagne and Chad Robertson's Country Bread.

Ingredients:

310g Sourdough Starter (130% hydration)
250g Water
440g Good quality unbleached AP/Bread Flour
60g Whole Grain Flour (I use whatever I have, WW/Rye/Spelt, etc)
12g salt (I use course grey sea salt)
(50g boiling water)

Method:

In a large bowl, mix sourdough with water and flours until a shaggy dough forms. Let autolysis.

Measure out salt into a small bowl, pour boiling water over the salt to dissolve it. let the salt water come to room temp.

After 45 mins mix the salt water into the dough. (I do this all by hand within the bowl, ala tartine)

S&F the dough a few more times over the course of the rising time (about 2-4 hours, depending on the temp of the house). At this time I either retard the dough in the fridge (on a weekday, so I can go to work), or proceed to pre-shape.

Pre-shape the dough into a round (If removing from fridge, let dough reach room temp before pre-shape).  Let pre-shaped dough bench rest for 15 mins, then shape into a round and place in a cast-iron dutch oven to rise.

30 mins before bread is proofed pre-heat oven to 500F.  Place lid on DO and put into pre-heated oven.  Bake for 20 mins covered.  Remove lid, turn down to 450F and bake for 15 mins.

Take bread out of DO (carefully) and let cool on a rack. Enjoy!


The pictured bread is cracked wheat/White Whole Wheat as the whole grain part.

Breadhead's picture

Spiking dough - whats the point?

June 13, 2012 - 6:19pm -- Breadhead

What is the point of using both a wild yeast starter AND a commercial yeast in the same dough? If the commercial yeast is the primary means of fermenting and raising the bread, what is the benefit of the wild yeast starter addition? The same benefit as using any other pre-ferment? Any benefits specific to the wild yeast culture? 

TastefulLee's picture

Can Bagels from Reinhart Be Made With Sourdough?

June 13, 2012 - 6:09am -- TastefulLee

So.....I've been making the bagels from Peter Reinhart's ABED for about 6 months now with great success. My entire family is ruined for any storebought bagels (including the crisp, chewy ones we adored from the authentic NY bagel store in town, which have now been declared ''flavorless") and everyone is happily munching away singing my praises.

Isand66's picture
Isand66

I figured it was time to make some Rye bread so I converted my whole wheat Desem starter to a Rye sour starter using a 3 step build.  I ended up making way more starter than I needed, but I rather have some extra than run out like I did the last time I made a rye sourdough bread.

I also wanted to use some fresh coffee in place of the water as I have done in the past with some good success so I decided to use some Kahlua flavored coffee. I don't even like to drink coffee unless it is iced coffee, but I do have to say this variety of coffee smelled awesome.

I like the taste spelt flour adds to bread and I thought it would make a good addition to a rye bread so I used a small amount in this bake and also use First Clear flour which is a standard ingredient in Jewish style rye.  You can use bread flour if you don't have any First Clear and it will come out fine.

This bread includes a simple soaker using cracked wheat and bulgur which makes for an interesting flavor profile.

I have to say the final bread came out excellent with a nice fairly open crumb, dark crisp crust and fairly moist and flavorful crumb.  If you decide to try this one I don't think you will be disappointed.

Starter Build 1 (Note: this makes a lot of extra starter so you can reduce the quantities if  desired)

79 grams Whole Wheat Starter (Mine is 65% Hydration Starter)

113 grams White Rye Flour

143 grams Medium Rye Flour

258 grams Water (85 - 90 degrees F.)

Mix seed with water to break up for a few seconds and then mix in flour until the starter form a smooth dough consistency.  Put it in a lightly oiled bowl and loosely cover and leave at room temperature for at least 10 hours.  The starter should double in volume.  Put the starter in the refrigerator for up to 1 day or go to step 2 immediately.

Build 2

Add ingredients below to starter from above and mix until incorporated.  Cover with plastic wrap and let sit at room temperature for 10 hours and either go to step 3 or put in refrigerator for up to 1 day.

143 grams Medium Rye Flour

84 grams Water

Build 3

Add ingredients below and mix.  The starter will now be much firmer and should be pretty dry since it is now a 65% hydration starter.  Let it sit at room temperature covered for at least 10 hours and then refrigerate or use immediately.

143 grams Medium Rye Flour

28 grams Water

Soaker

50 grams Bulgur Wheat

50 grams Cracked Wheat

200 grams Boiling water

Mix ingredients with water and let sit for 30 minutes to an hour or overnight if preferred covered with plastic wrap.  Before using in final dough, drain water and reserve for use in final dough.

Final Dough

425 grams Rye Starter from above (If you already have your own rye starter refreshed you can skip building process above)

400 grams First Clear  Flour

130 grams Spelt Flour

35 grams Wheat Germ

125 grams Water (80 - 90 degrees F.)

255 grams Kahlua coffee (80 - 90 degrees)

18 grams Sea Salt (or table salt)

8 grams Walnut Oil

Procedure

Mix the starter with the coffee and stir to break it up.  Next mix in the soaker and the flours together with the water and mix for 1 minute.    Let the dough autolyse for 30 minutes to an hour in your bowl covered with a cloth or plastic wrap.  Next add in the salt and oil and mix on speed #2 for 4 minutes.  The dough should have come together in a ball and be tacky but not too sticky.

Next take the dough out of the bowl and place it on your work surface.  Do a stretch and fold and rest the dough uncovered for 10 minutes.  After the rest do another stretch and fold and cover the dough and let it rest for 10 minutes.  Do one more stretch and fold and put the dough into a lightly oiled bowl and let it sit at room temperature covered for 2 hours.  After 2 hours you can put the dough into the refrigerator for 24 hours or up to 2 days before baking.

The next day (or when ready to bake) let the dough sit out at room temperature for 2 hours.  After 2 hours form the dough into your desired shape and put them in floured bannetons, bowls or on a baking sheet and let them rise covered for 2 hours.  Score the loaves as desired and prepare your oven for baking with steam.
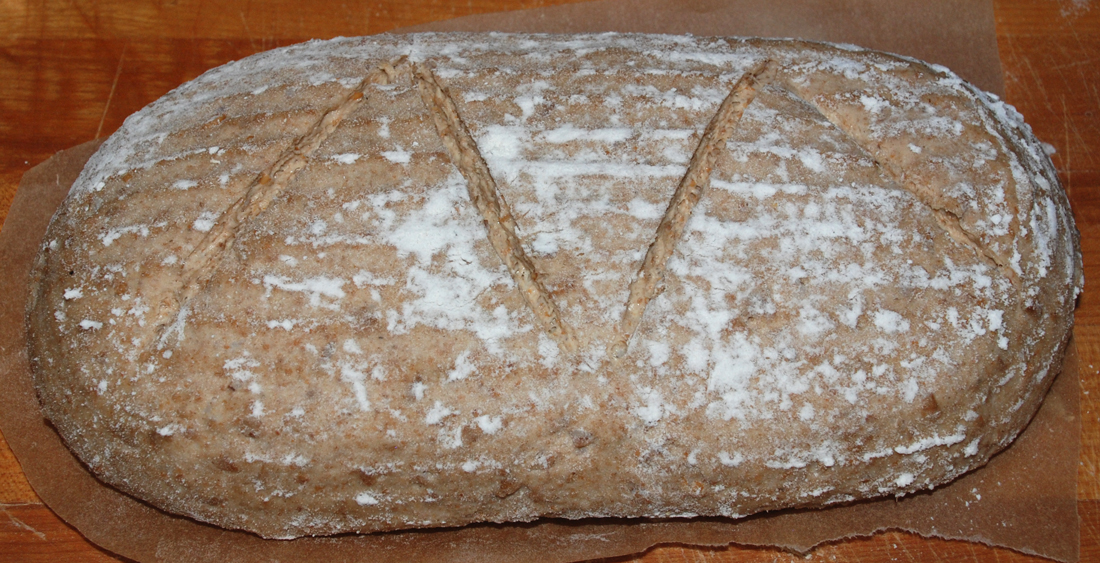
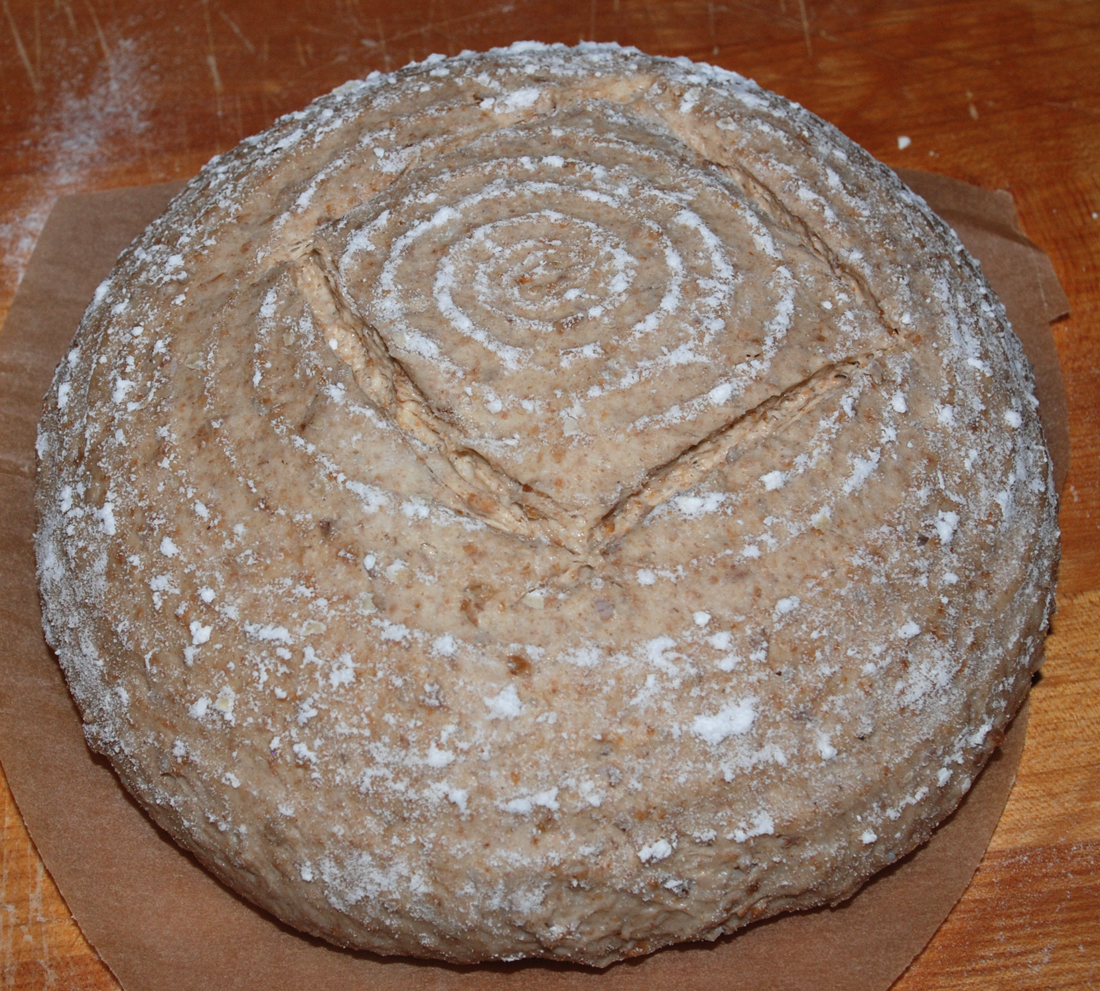
Set your oven for 500 degrees F. at least 30 minutes before ready to bake.  When ready to bake place the loaves into your on  your oven stone with steam and lower the temperature immediately to 450 degrees.  It should take around 20 - 30 minutes to bake  until both loaves are golden brown and reached an internal temperature of 200 - 210 degrees F.

Let the loaves cool down for at least an hour or so before eating as desired.
dabrownman's picture
dabrownman

After having such a nice loaf turn out from the last Chacon bake, we thought we would do everything we could to mess it up – and we did mess up more than half of it without much difficulty at all.  These things happen when you try new things.  Not to worry when we can learn from near disasters.

 We took a more difficult but very nice 90% whole grain formula and decided to try it out in the Cuisinart mini convection oven  we want to use for summer baking.   The problem is that space is limited, steaming is harder and keeping the steam in difficult.

 So we decided to try baking this loaf 2 different ways with steam and see which one performed better.

One was using the broiling pan that came with the oven, putting water below and baking the bread on the perforated cover.  The other way was to bake the bread on the broiler pan bottom and put a stainless steel mixing bowl over the top.

The spare tire.

 We also wanted to try out some different patterns for the Chacon as well as try out a new shaping method that would help in spring.   We did two folds and crimps (like shaping baguette) for the outside ring instead of one.

The loaf steamed with the full broiler pan and the water below, we decorated with flax seeds and bran stuck to the loaf with egg white.  One the other round loaf we used 3 smaller knotted rolls instead of one in the middle and left it undecorated under its steel steaming lid that acted like a cloche.


The winner was unmistakable.  The cloche, steel lidded loaf, performed much better as far as spring goes.   But, after removing the steaming lid my apprentice forgot to move the loaf up a rack level and burned the bottom of it.  OOPPPSSS!   The other loaf didn’t have any spring at all - but was not burnt.  Between the two, we got zero decent bread but would if you could cut the good bottom one of them and switch it to the other better sprung and looking top.

 Now we know that the mini oven will work fine in the summer to make bread when plugged in outside by using the cloche and the apprentice has learned her lesson.

The method for this bread was the 3 day process and similar to this bake:   http://www.thefreshloaf.com/node/28806/hanseata%E2%80%99s-wild-rice-sd-w-yeast-water-multi-seeds-prunes-beer-and-sprouts#comments

3 stage levain YW and SD combo starter, overnight retard of the starter, 24 hour autolyse for the flour and the liquid using whey water from yogurt making this time, 1 1/2 hour ferment/development followed by overnight retard for the dough with final proof the next day in rice floured baskets in a trash bag.

We also used walnut oil and crushed walnuts for a separate paste like Phil did for his Walnut and Sage bread and put walnuts and pumpkin seeds in the bread too with the sprouts.  – Thanks Phil!  We preheated to 500 F regular bake and then did a regressive temperature baking profile.  After 2 minutes 450 F.  After 15 minutes, remove steam or cloche and turn oven down to 400 F convection.  Turn loaf 180 degrees every 5 minutes until done about more 20 minutes or 35 minutes total until temp hits 205   the center of the loaf.   Leave in oven to crisp for 10 minutes with oven off and door ajar.

See how the purple color comes out under inside artificial lighting - The walnut oil paste finally shows itself. 


As you can see the crumb is nice and airy even with 90% whole grains in this loaf.  The power of YW shows.  The crumb was moist.  The crust stayed crisp and crunchy even hours later.  Tuns out the dark crust came from reusing the parchment paper from the Croissant bake - butter transferring to the crust and turning dark. It didn't taste bad nor was it tough or hard to cut - just dark - and extra tasty.  The Chacon curse was partially lifted.  This is one great tasting bread too.  We love all the whole grains, add ins, nuts and sprouts.   The whey water makes this breadhave a deep SD flavor that builds over time.  The Chacon has it's new formula now too. 

As a final note we did pinch of 100 g of fermented dough right before it went into the fridge to use as a starter for a pizza and pide for tonight’s dinner - turned out very well.  We will make that a separate post though.

The formula follows the pix and we won’t have crumb shots for 24 hours.

90% Whole Grain SD, YW Combo w/ Sprouts, Walnuts, Seeds and Whey      
      
Mixed StarterBuild 1Build 2 Build 3Total   %
SD Starter25100354.65%
Yeast Water050257512.82%
Rye2500254.27%
      
      
Dark Rye0250254.27%
Soft White W0050508.55%
WW25250508.55%
Water5000508.55%
Total Starter1251107531052.99%
      
Starter     
Hydration85.07%    
Levain % of Total18.89%    
      
Dough Flour    %   
Whole Rye508.55%   
Whole Soft White Wheat20034.19%   
Whole Spelt254.27%   
Semolina7512.82%   
Oats254.27%   
Whole Millet254.27%   
Whole Quinoa254.27%   
White WW508.55%   
Whole Farro203.42%   
Whole Barley203.42%   
Whole Bulgar254.27%   
Potato Flakes101.71%   
Ground Flax Seed101.71%   
Whole 6 Grain Cereal254.27%   
Dough Flour585100.00%   
Salt111.88%   
Whey 450, Water 7552589.74%   
Dough Hydration89.74%    
      
Total Flour752.5    
Whey 450, Water 75667.5    
T. Dough Hydrat.88.70%    
Whole Grain %89.24%    
      
Hydration w/ Adds89.04%    
Total Weight1,641    
      
Multigrain Sprouts     %   
WW254.27%   
Spelt254.27%   
Rye254.27%   
Total Sprouts7512.82%   
      
Add - Ins      %   
Red Rye Malt20.34%   
White Rye Malt20.34%   
Walnut Oil 50.85%   
Dried Sage10.17%   
Barley Malt203.42%   
Molasses101.71%   
Wheat Germ101.71%   
VW Gluten101.71%   
Sunflower Seeds 25, Walnuts 507512.82%   
Total13523.08%   
jamesjr54's picture
jamesjr54

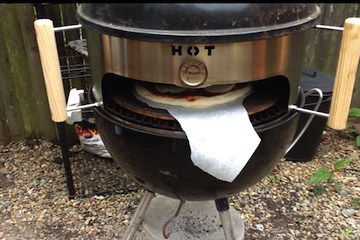
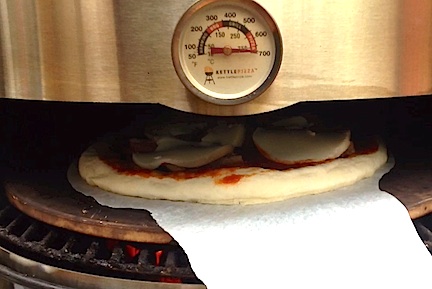
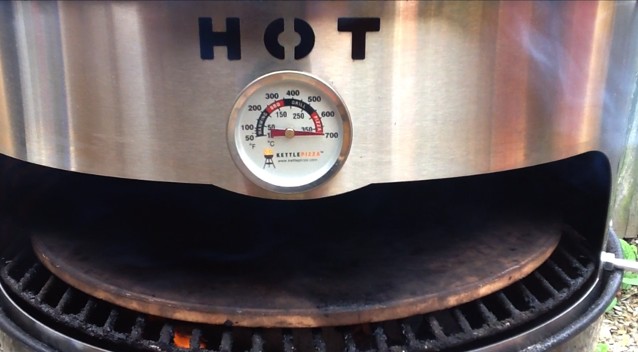
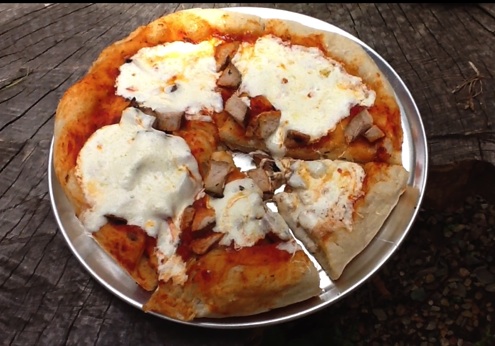
My wife got me the Kettle Pizza cooker for my BD (discussed in this thread here). This is the 18.5" model, MSRP $129.95. This is my first try. Not bad, but need to tweak techniques: the timing - how long to heat the stone for ideal crust; how to spin it around; when to yank parchment paper; ideal temp to start cooking, etc. The trick is to balance cooking the crust with the top. I missed it by that much on this go-round. 

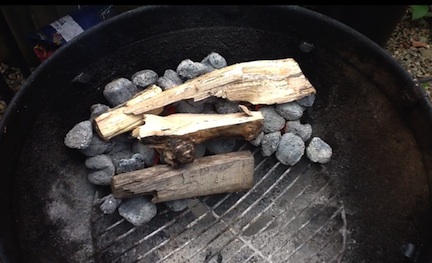
I used parchment paper to ease the transfer off the peel. Hardwood added was maple - in abundant supply in my woodpile. (Tried it subsequently with cherry, and it was slower to burn, but reached a much higher temp. In fact, I left the top on after cooking batch #2, and 2 hours later the temp was 400F with the cherry wood.)

The crust was underdone. You can see the thing heats the Weber to 700 easily - took about 12 minutes once the hardwood started burning. Total cooking time was about 6 minutes. Using it again tonight and will report back. Very happy with this, and don't see why this can't be used for loaves of bread.

And call me parochial, but I like it that this is made by a guy about 15 miles from me (in MA). 

Crust was sourdough from KAF's website, minus the yeast. I also did not use the starter straight from the fridge; instead I refreshed it to make a cup, let it ferment 8 hours, made the recipe, and it rose just fine in about 2 hours.


Isand66's picture
Isand66

I was reading someone elses post the other day and they commented that they were using a smoked flour for their next bake.  I love just about anything smoked...ribs, brisket, chicken...you name it as far as I'm concerned it tastes better after smoking with some wood.  Unfortunately the flour in question is only available in England and Amazon UK will not ship to the USA, so I figured the next best thing would be to add some smoked cheese to my next bake.  I did not know when I bought this smoked cheddar at the local Shoprite that it would be so good.  I could have eaten the whole block just by itself!  Anyway, I managed to save enough to add to the bread dough along with some Queso mexican cheese I had used in my last corn sourdough (unfortunately this one ended up as bird food due to its refusal to rise properly and my changing of its schedule).

I had a request from someone at work to add some carmelized onions and if you have read my blog you know you don't need to ask me twice to use onions in a bread.  I used my new shipment of flour from KAF including my favorite European Flour, Durum Flour and for some nutty flavor I added some wheat germ and cracked wheat.  I also added some potato flour for good measure along with my AP 65% hydration starter.

Starter

71 grams Seed (Mine is 65% AP Flour Starter)

227 grams AP Flour

151 grams Water (85 - 90 degrees F.)

Mix seed with water to break up for a few seconds and then mix in flour until the starter form a smooth dough consistency.  Put it in a lightly oiled bowl and loosely cover and leave at room temperature for at least 10 hours.  The starter should double in volume.  Put the starter in the refrigerator for up to 1-2 days or use it immediately.

Main Dough

Ingredients

425 grams Starter from above (all of the starter)

290 grams European Style Flour (KAF...you can substitute bread or AP flour or a combination of the two)

150 grams Durum Flour (make sure not to use Fancy Semolina as it is too gritty)

25 grams Potato Flour

40 grams Wheat Germ

40 grams Cracked Wheat

78 grams Carmelized Onions

60 grams Queso Cheese

40 grams Smoked Cheddar

8 grams Olive Oil

400 grams Water (85 - 90 degrees F.)

18 grams Sea Salt (or table salt)

Total Hydration (I included Wheat Germ and Cracked Wheat as flour which is not necessarily correct, but that's what I like to do): 71%

Procedure

On baking day, cut a medium size sweet onion into thin rings and sweat the onion in a frying pan with a couple of teaspoons of olive oil for 5 minutes or so until they are nice and soft and you have drawn most of the moisture out.  Set them aside in a bowl to cool to room temperature.

Next, mix  the flours, wheat germ and cracked wheat together with all the water except for 50 grams and let them autolyes for 30 minutes up to an hour.    Next add the levain, oil and the water with the salt and mixed on speed #1 for 2 minutes.  Now add the onions and mix for another 2 minutes until they are well incorporated.  Lastly add the cheese and mix for an additional  minute.  Remove the dough from your mixing bowl to your work surface.  If necessary you can lightly oil or flour your surface, but I didn't need to do this.  I then did a stretch and fold, rested the dough uncovered for 10 minutes.  I then did another stretch and fold, covered the dough and let it rest for 10 minutes.  Repeat this S & F procedure one more time and let it rest another 10 minutes.  Do one last S & F  and put the dough in a lightly oiled bowl for 2 hours.  I then put it in the fridge overnight.

The next day when I returned from work I removed the dough from the refrigerator and  I let the dough sit out at room temperature for 2 hours.  After 2 hours I formed it into loaves and put them in floured bannetons and let them rise covered for 2 hours.  Score the loaves as desired and prepare your oven for baking with steam.

I then baked on my oven stone with steam at 450 degrees until both loaves were golden brown and reached an internal temperature of 200 - 210 degrees F.

The loaves were oozing cheese and the whole house smelled like a grilled cheese sandwich....that's not a bad thing by the way!

The crust was perfect with a nice bloom and oozing cheese and the crumb wasn't too shabby either.  I think the combination of onions, cheese, and flours make this one a keeper.

This bread has been submitted to Yeast Spotting here at http://www.wildyeastblog.com/

baybakin's picture

Hello from oakland

June 4, 2012 - 6:33pm -- baybakin

Hello from the Oakland hills!


Long time follower, first time poster.  Though it's about time that I made an introduction post on here before I start making blog entries.

 I started this bread hobby (obsession?) after being fed-up with paying $4 for a good loaf of crusty bread at the market.  I'm a bit of a fermentation enthusiast, making beer, wine, mead, sauerkraut, pickles, sodas, along with syrups, bitters and general "make everyone from scratch" mentality. Bread baking was a logical step. 

Anomalous's picture
Anomalous

This is a bit unusual. I saw smoked flour on the shelf of Waitrose in Kensington so had togive it a go. The flour is from Bacheldre watermill in Wales and is described as organic smoked stoneground malted blend flour. Their website says that malted wheat flakes are cold smoked over oak chippings for 18 hours in the smokehouse then mixed with organic stoneground malted blend flour. There's a gentle smoky aroma from the dry flour which becomes more assertive when it's wet.

I baked it as a sourdough made with a sponge (60g starter, 200g flour, 200g water) refrigerated overnight and left out for a couple of hours in the morning. Then I added 300g flour, 150g water, 12g salt (total 71% hydration), did a bit of stretching and folding, shaped it and let it prove at room temperature for a couple of hours or so then baked at 230°C for 20 minutes then 20 minutes at 185°C.

The result is less smoky than I expected, and the predominant flavour is still that of a malted loaf, but with a subtle, smoky background which adds interest and a distinctive character to the bread. It's certainly worth a try if you can get it, but apparently it's difficult to get it across the atlantic. I'll try it with a higher hydration next time.


dabrownman's picture
dabrownman

This 40% whole grain bread is a combination YW and SD starter, seeded, multi-grain that does not have sprouts or a scald.  The hydration of 79% is not too much for a bread with so much whole Rye, WW, spelt and WWW.  There is also semolina in the starter and the dough as well.  There is a little potato flake, red and white rye malt, wheat germ and 6 kinds of seeds.  Sunflower-25 g, anise-3g, hemp-10g, coriander-2g and fennel-3g with only the flax seeds ground into a flour.  Since the bread was not retarded to bring out additional SD flavor it had a slight tang but the aromatic seeds really came through nicely.

Marking the fold lines.

Folded with knot roll added.

It’s not often we get to work on a new bread shape but one was needed for the 6 sided basket requiring the new shape.  Thomas Chacon came up with the unique way to fold the 6 flaps to the center so the bread could be loaded into the basket and this bread is named after him - he deserves it.  I added the knotted roll in the center to complete the loaf.  The hard part was flipping the whole thing into the basket after the shaping.  Instead of flipping I should have folded the bread on the peel with parchment under the dough, added the knotted roll, placed the same shaped basket on top and turned the whole thing over causing no damage to the Chacon shape.- Next time!

Flipped into teh basket.

Risen nicely. Can you find the poke test?

Since the skin couldn't be tightened like a normal loaf, and was just folded like an Altamura ‘Priests Hat’, we didn't know how the loaf would perform in holding in the gas and generating spring.  It proofed up nicely though and was amazing how well it filled in all the space from the end of the fold to the knot.  Spring wasn't what we had hoped but a different folding method could possibly cure some of that problem.  All in all it was a fun experiment that resulted in a nice looking loaf of bread.  It smelled great when it finished baking and was crisping on the stone with the oven off and door ajar.

The Chacon is nice looker even before baked.

The crust was deeply cracked (since there was no scoring) brown, and crisp - and it stayed crisp after cooling.  The basket left some nice flour marks too.  The Chacon was very nice looking overall on the outside but the spring would have been better if the loaf wasn't over proofed by an estimated 30 - 40 minutes.  When it passed the first poke test the oven was still cold – not a good thing and shows you need to be testing earlier than 2 hours after start of proof.  It is summer time and every bit of 112 F outside today.  A/C keeps it 80 F inside though.

Nicely cracked and we like what the knot roll did for the baked looks.

The crumb was nicely open for the amount of whole grains and the manhandling it took.  I'm still impressed with what the YW   can bring to a loaf of bread when it comes to moist and soft crumb - amazing really.  The bread tasted like a seeded rye loaf that had more rye than this did.  Maybe this was because of the seeds though.  I would be tempted to put some caraway in the seed mix next time.  This Chacon is hearty, tasty and visually stimulating.  Method and formula follow the Pix’s

The Chacon made a very nice taasting grilled chicken, queso fresco sandwich witha plate full of fruits and veggies. 

The Chacon Method

 The SD and YW levains were built over 3 stages of 4 hours each. The next stage is added to the previous one and all of the eventual 320g of levain is used in the final dough. After the 3rd stage was built, the levain went into the fridge for a 6 hour retard.  In the morning when the levain came out of the fridge to warm up the flours, malts, VWG and slalt were autolysed with the water for 2 hours on the counter.  The seeds and levain were the only things held out of the autolyse.

After 2 hours on the counter, the autolyse and Levin were mixed on KA 2 for 4 minutes and KA 3 for 2 minutes.  The dough was transferred to a well oiled bowl and allowed to rest covered with plastic wrap for 15 minutes

4 S&F’s were performed at 15 minute intervals in the bowl.  The 5th S& F was performed on a floured counter where the seeds were incorporated.  After the 6 S&F the dough was allowed to ferment and develop in the bowl for 1 ½ hours.   

The dough was then placed on a floured work surface, a small ball removed for the eventual knotted center. The remainder of the dough was gently jostled  into a1”thick circle that was 12 “ across –2”wider than the widest part of the Chacon 6 sided basket.   The basket was used to mark the dough to establish the 6 fold lines.  The dough was then folded to the center at the lines, leaving a 4” diameter open circle in the center.   The knotted roll is placed in the center of the Chacon to complete the loaf.  The entire loaf was then flipped over into the well rice floured 6 sided Chacon basket and allowed to final proof on the counter for 2 hours in a plastic bag where it doubled and passed the poke test.  Don't do this flip into the basket though.  Put some parchment on a peel, press out the circle of dough 1" past each of the points of the basket, mark the fold lines with the inverted basket, make the six folds, add the knotted roll and place the basket over the dough. Then just turn the whole assembly over removing the peel and parchment.

At 2 hours the oven was preheated at 500 F for 45 minutes with stone steam in place. Overturn basket onto parchment on a peel. No slashing is required for the Chacon.

Slide bread into the oven.  After 2 minutes, turn oven down to 450 F.  After 13 more minutes, remove steam and turn down oven to 4oo F convection this time. Turn Chacon 90 degrees every 5 minutes and bake until temperature in the middle of the bread is 205 F. Turn off oven and crack the door to allow the crust to crisp for 12 more minutes. Remove bread from the oven and let cool on a wire rack.

The Chacon     
      
Mixed StarterBuild 1Build 2 Build 3Total%
SD Starter20100305.31%
Yeast Water402006015.79%
Rye20100307.89%
WWW20100307.89%
Semolina0030307.89%
Dark Rye10200307.89%
AP0020205.26%
WW20100307.89%
Water2030106015.79%
Total Starter1501106032084.21%
      
Starter     
Hydration72.97%    
Levain % of Total28.67%    
      
Dough Flour %   
Rye205.26%   
Soft White Wheat5013.16%   
Spelt205.26%   
Semolina5013.16%   
Oats102.63%   
White WW205.26%   
Potato Flakes102.63%   
White WW205.26%   
AP20052.63%   
Dough Flour380100.00%   
Salt82.11%   
Water 32585.53%   
Dough Hydration85.53%    
      
Total Flour565    
Water460    
T. Dough Hydrat.81.42%    
Whole Grain %39.82%    
      
Hydration w/ Adds78.63%    
Total Weight1,116    
      
Add - Ins %   
Red Rye Malt51.32%   
White Rye Malt51.32%   
Wheat Germ102.63%   
VW Gluten102.63%   
S.flower 25, Flax 10, A,C,F,H 185313.95%   
Total8321.84%  


Pages

Subscribe to RSS - Sourdough