The Fresh Loaf

A Community of Amateur Bakers and Artisan Bread Enthusiasts.

Sourdough

Juergen's picture

Is this considered good rise?

April 8, 2012 - 2:33am -- Juergen

First off, happy Easter to all of you!

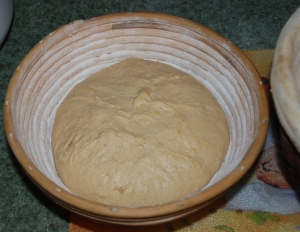
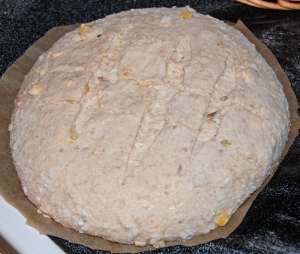
Yesterday evening I baked my 2nd sourdough bread ever and even though it came at better than the first, I'm still not pleased. When you look at the pics below, you can see that the loaf was still pretty flat after proofing. It did have some oven spring but somehow I feel this is not a good rise. What do you think? Is this considered a good rise when it comes to sourdough baking? The dough was 65% hydration and 100% white wheat flour and bulk-fermented for two hours and then proofed for another hour, all at 21C/70F.

Chausiubao's picture
Chausiubao

Last month was SFBI's Artisan 2 class, and I was there! I have no idea if there were any other TFL people in attendance, but there was one group who decided to name themselves, "the loafers" so I did wonder. Then again, nobody mentioned anything about an internet forum, so who knows.

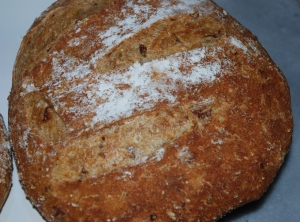
At any rate, I came out of the class and made this,


 72% hydration, 25% pre-fermented flour, and 0.08% yeast, with a retarded final proof.

I was motivated to make it partly because I wanted to put my starter back to good use after spending so many days away from it as well as to try some different feeding schedules and feeding percentages for said starter. I'd always stuck to a 10% seed for feedings with a once daily feeding schedule, but armed with a few new perspectives I played around a little. 

Starter:

100% Flour

100% Water

40% Seed

Total

100% Flour

72% Water

2% Salt

50% Starter 

The starter was ready, at 8 hours compared to my previous feedings, so it got a 6 hour retardation until I was ready for it; as far as I can tell, that worked out fine. I must say though, it smelled amazing during the mixing and folds, it had plenty of aroma. Even at 72% hydration, the dough was a bit dry, this is perceptible in the crumb as well.


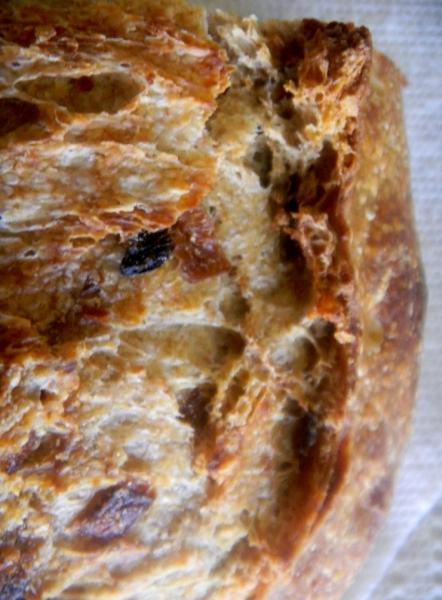
While nice, the crumb is just ever so slightly dry and crumbly, though that might be due in part to a lack of strength in the mix 

 While not a particularly dramatically beautiful bread, the crust, flavor, and aroma are all pleasant and appealing. Yet the texture of the crumb is somewhat lacking, and that is one of the things to love about bread.


jdchurchill's picture
jdchurchill

ayo tfl-ers

dig my bread this week.  twas a good week:

is this photo too big?  i changed the dimensions to (800X535) what size do you guys make your pictures for this type of stuff?

and i know all you bread-nerds dig the crumb shots so here you go:

and even closer up:

omg its so nice and soft.  i am so pleased.  i think lately i have not been letting the final proof go long enough so this one went about 8hrs, but i probably could've gone even longer.   maybe this week i will try the same recipe, but do final proof for closer to 12 hrs.  anybody has an opinion about this?  ok guys thanks for looking and reading, take care.  -jdc

dabrownman's picture
dabrownman

Had to make a couple of changes to Sweetbird’s hugely fantastic, far better than magnificent, Buckwheat Bread recipe that can be found here:

 http://www.thefreshloaf.com/node/27784/buckwheatpear-sourdough-pear-hard-cider#comments

 First off we, my apprentice and I, used aWashingtonstate hard apple cider called Spire.  It was their mountain apple draft variety and used 245 g in the dough instead of 230.  We also; did not use any cider in the SD levain and used the excess apple water squeezed from the re-hydrated dried apples and frozen fermented apples from the YW plus some water.  Also used Whole Rye and WW with the Buckwheat in the first SD levain build since our starter had them and we think these grains make better bread when used in levains.   I wanted to taste the cider so I drank 90 g just to make sure it wasn’t spoiled or otherwise not up to the task at hand.

 My apprentice, bless her heart, substituted an Apple / Orange Yeast Water levain instead of SAF instant yeast since we don’t stock any commercial yeasts in the pantry, autolysed 1 hour instead of 30 minutes, sprouted the buckwheat groats instead of scalding them (after making red and 2 white malts she’s into sprouting it seems) and then put them all inside since she reasoned enough stuff would be hanging out in the end anyway.

Because the mix – ins were so wet (compared to sweetbird’s), I added 30 g of BW and 30 g of BF to them and let it autolyse while the dough was doing the same thing, added chopped pistachio nuts and chopped cooked buckwheat soba noodles, added fermented apple pieces saved when refreshing the YW that were previously frozen, re-hydrated the dried apples in apple juice.

 My apprentice also cut the salt to 10 g from 11 since the pistachios seemed salty to her when tasted for poison and she was a little bloaty this morning, added 15 g home made white diastatic malt to the vital wheat gluten, and finally, subbed bread flour for the AP which birdsong recommended doing after her bake.

 So, not much at all really major changed in the scheme of things we call bread.  We agree with sweetbrird that the dough needs 2 S & F sessions at 40 and 80 minutes and another to pre-shape at 2 hours.  Do a quick S & F to form into a ball.  Drag the skin tight and put into your large floured benetton.  Place into a plastic bag and let it final proof for at least an hour or so.  You can get your oven ready at 500 F with your steaming method in place while it proofs.  My final proof was 1 ½ hours about twice as long as sweetbird’s and it was not over proofed.

 The bread was turned out onto parchment on a peel and slashed with my patented ‘angry face with really nasty eyes design,’ steamed for 20 minutes at 430 F, then the steam was removed.  The bread then baked on the stone for about another 45 minutes until it reached 203 F and then left in oven for 12 minutes with the door ajar and oven off.

Will post the recipe later if somone wants it.  This boule finished weight was 1,305 g.

dabrownman's picture
dabrownman

Was getting ready for tomorrow's Sweetbird Buckwheat and Apple SD Bread bake and for once was organized enough to pinch off some of the buckwheat starter and make some lovely SD pancakes for breakfast.  I took 30 g of refreshed buckwheat starter and added;  60 G of bread flour, 60 g of buckwheat flour and 120 g of milk.  After mixing I let it stand on the counter for 1 hour and then in the fridge overnight for 8 hours.  This morning I took it out of the fridge and let it stand on the counter for 1 hour before mixing in 1 tsp of honey, a large pinch of salt,  1/2 of a large beaten egg, 1/16 tsp each baking powder and baking soda.  You forget how much you like SD buckwheat pancakes when you don't have them for years and years.  This recipe made 2 nice sized pancakes.


dabrownman's picture
dabrownman

Ian is well known for his interesting and delicious bread combinations.   I had taken his BPOC SD and made it into an even stranger bread by replacing his Semolina with 5% each; WW, Whole Rye and Whole Spelt.  For his bacon, cheese onion and potato I used; home made apple smoked pork jowl, ancient white vapor cheddar, caramelized onions and potato flakes.  The bread came out beautiful inside and out and was just plain delicious.  Definitely one of the 10 breads in my top 5 (actually it is one of the top 3).

I have been eating up all of the half a loaf, boule and batards that I froze after each bake over the last 3 months to see which ones I liked most and how best to rate and present them.  Being a sandwich king, I thought each might be presented as a nice lunch.  I was going to wait till I had finished them all (and have nearly done so), photo with the new old Nikon camera to do them justice this time, but, I had to break this one out separately since it is by far, far and away the best sandwich and lunch I have had these past few weeks.
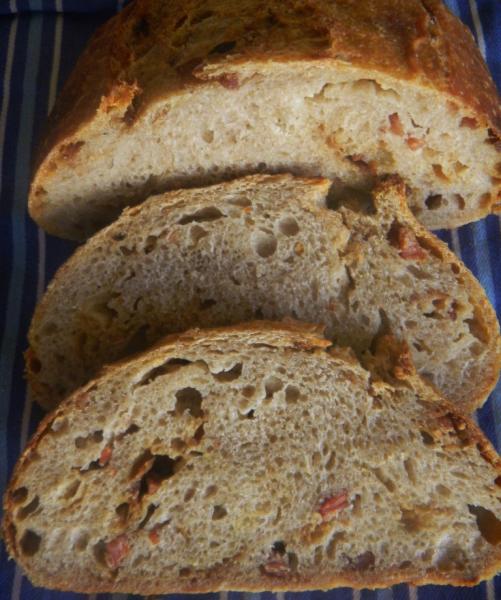
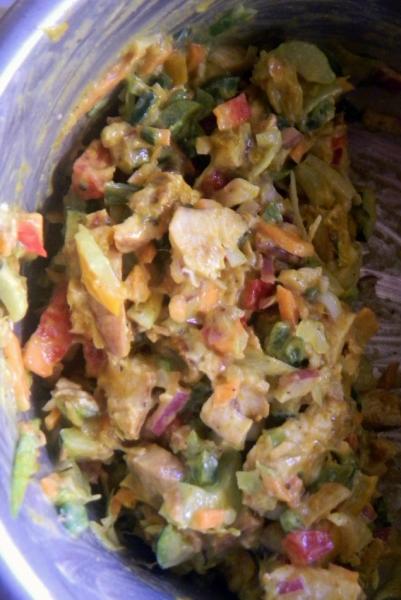
Since this bread only deserves the best, the sandwich was a Dabrownman Super Special - Curried Grilled Chicken with Mango Chutney.  The sides were cold Rosemary, Pecorino, Parmesan,White Polenta, home grown Field Greens, Meculin and Lettuce Salad, home made Kosher Dill, Bread and Butter with Serrano Pepper pickles and a home grown navel orange.  The curry, chutney and polenta recipes follow the pix's as a bonus for all lunch lovers on TFL.

The first pix is a mis en place recipe for the Grilled Chicken Curry.  It has about 2 T each starting from the far right diced small; celery, green onion, red onion, grilled Italian squash and eggplant, carrot, red pepper, poblano pepper,  each orange mango chutney and mayo,  1/2 tsp Madras Curry powder, 1/2 grilled chicken breast,  1 T each; dried apricot, cranberry and raisin (reconstituted with hot water.) Mix it all up and you are finally done with this fine sandwich's filling.

Rosemary White Polenta with Parmesan and Pecorino

1/4 C medium grain white corn meal

1/4 C white corn flour (ground from WCM above)

1 C milk - any kind

1 C chicken stock - I use home made

1 T butter

1 T fresh rosemary chopped fine

1/2 C Pecorino and Parmesan grated cheese blend

pepper

Bring milk and stock to a simmer and slowly add the corn meal and corn flour while whisking constantly.  When the mixture thickens to a thick porridge, stir in butter, rosemary.  Turn off the heat and add the cheese.  Pepper to taste.  Serve warm for dinner but it is much better the next day cold for lunch.

Orange Mango Chutney

 In large fry pan sauté:

 1 T oil

½ T fresh ginger and 2 cloves minced garlic

 Sauté until fragrant about 1 min and add:

1 C brown, white or red onion, Sauté until soft about 3-5 min Add:

 1 C red bell pepper

1 T minced hot chili (jalapeno, Serrano, Thai)

1 ½ tsp Madras curry powder, curry powder or hot curry powder

½ tsp Gharam Masala

¼ tsp salt

¼ tsp each cayenne powder and red pepper flakes

1/8 tsp each; allspice, nutmeg, clove, cinnamon

 Sauté for 1 minute until spices are fragrant then add:

 2 C diced mangos

½ C apple cider vinegar

½ C brown sugar

Zest of 1 orange - Supreme the orange and add the segments with the juice of membrane

1 diced pealed and cored small apple (can use pineapple and juice instead)

¼ C raisins

½ cups Macadamia nuts (optional)

 Simmer until the chutney thickens to jam about 20-30 min.  Place hot in sterilized jar and put into refrigerator when cooled.  It also freezes well in small portions which is what I do.

 You can chutney just about anything but you may want to use lemon zest, segments and juice depending on your choice of fruit or vegetable being made into chutney.


dabrownman's picture
dabrownman

A blend of Seigle d’Auvergne and Borodinski where diastatic malt is used in the dough on the French side and non diastatic malt with scalded rye berries is used on the Russian side.  Thank goodness no retardation is required, no matter how nice it would be, to produce a nearly classic clash of multicultural bread with different colored malts and multi grain flours that ends up being slightly unique in the end - in a peaceful and united way.   The loaf rose well during final proof but the spring was more of a sprawl.  The crust is chewy the crumb is moist, soft and quite airy.   It tastes like your eating really good Russian Rye bread while walking down the Champ de Elysee in the springtime.  Recipe follows the pix's. 

Pink Himilayan Salt, the scald, dough and levain

Red Non D and White D Malts

Rye berries being scalded with the Red ND Malt

White D Malt on white flour

Before final rise

 French / Russian 57% Rye, 11% WW Rustic Bread

Starter - 10 g


rye

1.68


WW

1.66


AP

1.66


water

5


Starter

10


Levain- 220g


Total

BP

1st build

2nd build

3rd build

Starter

10

1.51%

10


Rye

40

6.02%

10

20

10

WW

40

6.02%

10

20

10

B. Flour

40

6.02%

10

20

10

Water

90

13.55%

30

60


Total

220

33.13%

70

120

30


Scald – 53 g after scald and

soak


RyeBerry

25

3.77%


Water

23

3.46%


ND Malt

5

0.75%


Scald

53

7.98%


Bread –391 g


DarkRye

67

10.09%


Rye

66

9.94%


B. Flour

73

10.99%


D. Malt

5

0.75%


Salt

5

0.75%


Water

175

26.36%


Bread

391

58.89%


T. Weight

664

100.00%


Grains& Flour

366

Including scald and starter


Water

293

Including scald and starter


Hydration

80.05%


Levain is

33.13%

of the total weight.


 Directions

 Take 10 g of 100% hydration starter and add10 Geach; Rye, WW and AP flour along with 30 g of water.  Mix well, cover with plastic and let sit for 6 hours on the counter.  Then add 20 g each of the same flours and 60 g water.  Let sit on counter for 6 hours.  Refrigerate overnight.  In the morning add10 geach of the flours but no water and let sit on the counter covered in plastic wrap.

 Scald the rye berries and red non-diastatic malt in50 gof water.  Boil until the water barely disappears.  Turn off heat and reserve covered with plastic wrap on counter with the levain. Let sit 2 hours then start autolyse.

 Mix the bread flours, white distatic malt and water well, cover and autolyse for 1 hour after the scald and the levain have rested 2 hours on the counter.

 Mix in the levain and let autolyse for 1 hour.  Then add the scald and the salt and mix well.  Do 5 S&F’s on an oiled surface and place in an oiled bowl.  Then do 5 S&F’s every 20 minutes 2 more times.  Pre-form into ball using the final S & F’s at the 1 hour mark and let sit in an oiled bowl for 20 minutes.

 Shape as desired, I did an oval, dust with rye bran or other bran, flour or rice flour and place in prepared basket.  Place basket in plastic bag and let proof until dough has risen 70% - 80%.  You can also proof in a DO.

 Pre heat oven to 500 F for 45 minutes, with your stone and steaming apparatus in place.  No steam needed if using a DO.  Take dough out of benetton by overturning onto a piece of parchment on a peel.  Slide bread and parchment paper into oven onto the baking stone.  Turn oven down to 450 F and bake for 15 minutes.  Remove steaming apparatus and turn down oven to 425 F with convection on now.  Bake about 20 minutes more until bread reaches 205 F in the middle.   Let sit on stone, in off oven, with the door ajar for 10 minutes.  Cool on rack.

 If using DO, bake at 500 F for 20 minutes with lid on, then remove lid and turn down temperature to 450 F.  Bake about 20 minutes more until middle of bread is 205 F. 

Isand66's picture
Isand66

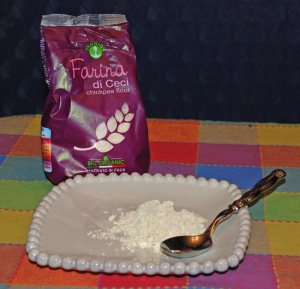
I am always on the lookout for something new and different to try in a bread recipe.  I was visiting my home town of Massapequa, NY this weekend and stopped by a specialty supermarket to pick up some cookies and came across a bag of chickpea flour.  I have never used this in baking anything before and didn't know exactly what to expect.  I had some left over roasted sweet potatoes from the other night and decided to add some as well as a high percentage of a higher gluten flour to make up for the lack of protein in the chickpea flour.  I did some extra stretch and folds to make up for the higher hydration in this dough and the chickpea flour definitely caused me to add some extra flour to compensate.

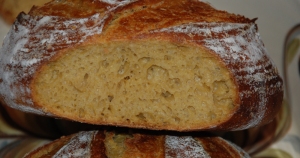
The final bread had a nice chewy dark crust and a yellow color with a moist open crumb.  You could taste the nutty flavor of the chickpeas with a mild sourdough tanginess.

Ingredients

15 ounces 65% Hydration Starter AP Flour)  Refreshed

7.5 ounces Roasted Sweet Potatoes Mashed

16.7 ounces Bread Flour (KAF)

4 ounces Chickpea Flour

3 ounces White Rye Flour (KAF)

14 ounces Luke warm water, 90 - 95 degrees Fahrenheit

2 1/2 Teaspoons Sea Salt

Directions

Using your stand mixer or by hand, mix the water with the starter to break up the starter.

Add the flours and mix on the lowest speed for 2 minutes.  Let rest for 10 minutes.

Add the salt and mix for 4 minutes more on medium speed, adding more flour if necessary to produce a slightly sticky ball of dough.

Remove dough to your lightly floured work surface and do a stretch and fold and form into a ball.

Leave uncovered for 20 minutes.

Do a stretch and fold and form into a ball again and cover with a clean moist cloth or oiled plastic wrap.

Do at least 3 more additional stretch and folds letting the dough rest for 15-20 minutes each time. After the last stretch and fold, put the dough into a lightly oiled bowl that has enough room so the dough can double overnight.

Put in your refrigerator immediately for at least 12 hours or up to 3 days.

On the day you are ready to bake, take the dough out of the refrigerator and let it rest at room temperature for 2 hours.  After 2 hours shape the dough as desired being careful not to handle the dough too roughly so you don't de-gas it.

Place it in your bowl, banneton or shape into baguettes.

Let the formed loaves sit at room temperature for 2 hours covered with oiled plastic wrap or a wet cloth.

Pre-heat oven with baking stone (I use one on bottom and one on top shelf of my oven), to 500 degrees F.

Slash loaves as desired and place empty pan in bottom shelf of oven.

Pour 1 cup of very hot water into pan and place loaves into oven.

Lower oven to 450 Degrees and bake for 25 - 35 minutes until bread is golden brown and internal temperature reaches 200 degrees.

Let cool on cooling rack and enjoy!

This post has been submitted to the Yeast Spotting Site here: http://www.wildyeastblog.com/category/yeastspotting/.

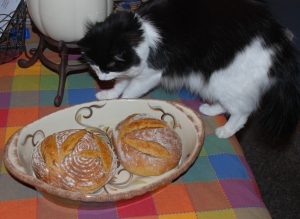
A little help from my friend Cosmo...
Isand66's picture
Isand66

The other night I cranked up the charcoal grill and smoked some nice juicy pork chops with some red beans for dinner.  I didn't want to waste what was left of the nice smokey fire so I roasted a bunch of yellow potatoes and what better use for them but in a bread.  I had some left over roasted corn so I figured I might as well make use of that as well.

I decided at the last-minute to add some organic cracked wheat.  The best way to add this ingredient is to soak it for about 10 minutes in boiling water so it becomes soft.  It ends up soaking up a lot of the water so it's important to include that in the overall hydration of the dough.  I ended up adding too much liquid to this dough and it was extremely wet at 77%.  The final result was bread with an excellent crust and open moist crumb but the bread ended ups little flat.

Ingredients

15 ounces 65% Hydration Starter Refreshed

5 ounces Whole Wheat (I use King Arthur Flour)

12 ounces French Style Flour from KAF (or All Purpose Flour)

2 ounces Spelt Flour

2 ounces Organic Cracked Wheat

5 ounces Roasted Potatoes (I smashed them up and left most of the skin on for some added flavor)

3.5 ounces Cheddar Cheese (I shredded the cheese)

1 Tablespoon Freeze dried chives, but feel free to use fresh ones

2.2 ounces Roasted Corn

19 ounces Luke warm water, 90 degrees Fahrenheit

2 1/2 Teaspoons Sea Salt

Directions

From the total 19 ounces of water, bring 8 ounces to a boil and add the cracked wheat.  Let that sit for 10 minutes while you prepare the rest of the ingredients.  Using your stand mixer or by hand, mix the remaining water with the starter to break up the starter.

Add the flours and potatoes and mix on the lowest speed for 1 minute.  Now add the cracked wheat with the remainder of the water and mix for 1 minute.  Let rest for 5 minutes.

Add the salt and mix for 3 minutes on medium speed.  Now add the chives and the cheese and mix for 1 minute more.  The dough will be very wet.  If you prefer to work with a firmer dough you can add some additional flour, but I left this one very wet.

Remove dough to your lightly floured work surface and do about 10 stretch and folds with a dough scraper or your hands but keep them oiled or wet.  Form the dough into a ball and let it rest uncovered for 10 minutes.

Do a stretch and fold and form into a ball again and cover with a clean moist cloth or oiled plastic wrap.  Let it rest for another 10 - 15 minutes and then do another stretch and fold.  The dough should start to develop some gluten at this point.  Let it rest covered again.

After another 10 minutes do another stretch and fold and put into a lightly oiled bowl that has enough room so the dough can double overnight.

Let the dough sit at room temperature for 1 1/2 hours and then put in your refrigerator  for at least 12 hours or up to 3 days.

When ready to bake the bread, take it out of the refrigerator and let it sit at room temperature for 1  1/2 to 2 hours.  Now shape the dough as desired on a floured work surface being careful not to handle the dough too roughly so you don't de-gas it.

Place it in your bowl, banneton or shape into baguettes.

Let it sit at room temperature for 2 hours covered with oiled plastic wrap or a wet cloth.

Pre-heat oven with baking stone (I use one on bottom and one on top shelf of my oven), to 500 degrees F.

Slash loaves as desired and place empty pan in bottom shelf of oven.

Pour 1 cup of very hot water into pan and place loaves into oven.

Lower oven to 450 Degrees and bake for 25 - 35 minutes until bread is golden brown and internal temperature reaches 200 degrees.  Leave the loaves in your oven with the door cracked for 5 minutes longer with the oven off.  After 5 minutes remove them from the oven and place on  your cooling rack.  Try to resist the temptation to cut into the bread until they have cooled sufficiently

.

This post has been submitted to the Yeast Spotting Site here: http://www.wildyeastblog.com/category/yeastspotting/.

Pages

Subscribe to RSS - Sourdough