The Fresh Loaf

A Community of Amateur Bakers and Artisan Bread Enthusiasts.

Sourdough

jarkkolaine's picture
jarkkolaine

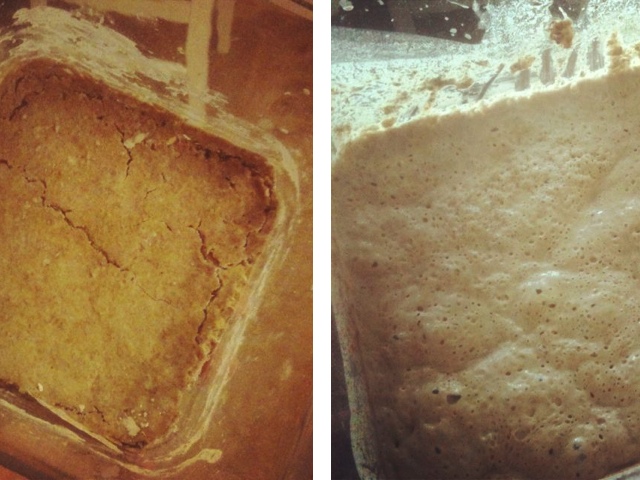
For about two months, I had had my sourdough starter sitting on the kitchen counter covered with a kitchen towel. Last week, when I finally found time to look at it again, it looked like a dry cracker cookie. 

I had no idea if I could still restore the starter or not, but I decided to give it a try.

I added some water to dilute the dried starter. When most of the starter had turned into a milk-like fluid, I removed the remaining pieces of dry dough and added just enough flour to get it back to the normal consistency of my starter (at 100% hydration, 50/50 full grain and all purpose flour). I then left the starter on the kitchen counter and waited. The next morning, the starter was full of life!

Just look at this before and after photo:

After a couple of days of daily feeding cycles, I finally had the time to try to bake something with the starter.

--

About two weeks ago, I visited Viipurilainen kotileipomo, a family run bakery in Lahti, about 100 kilometers from Vantaa where I live to meet with the bakers and see how they work on their full-grain rye bread (among other things). The four baking brothers I met that night where some of the friendliest people I have ever met, and their rye "limppu" is delicious! So, inspired by seeing them at work, although I didn't ask for their recipe, I decided to try my luck with creating my own version of this Finnish tradition called "ruislimppu." 

At about the same time as I started reviving my old wheat starter, I created a 100% rye starter by mixing a handful of dark rye flour and some water. I didn't write down the exact measurements but it resulted in a rather wet and sticky dough to start with. I fed the starter daily, slowly increasing the mass of the dough, until it felt really sour and light. Ready for use. That was the night before the bake. Last week's Saturday. 

On that night, I made the rye "limppu" dough by mixing the starter with about 1.5 kilograms of rye flour and 1 kilograms of water. As I don't know the amount of flour and water in the starter, I can't give exact figures. I will try to be more exact the next time I make this bread... I didn't knead the dough at this point, just mixed the ingredients to a consistent mass. 

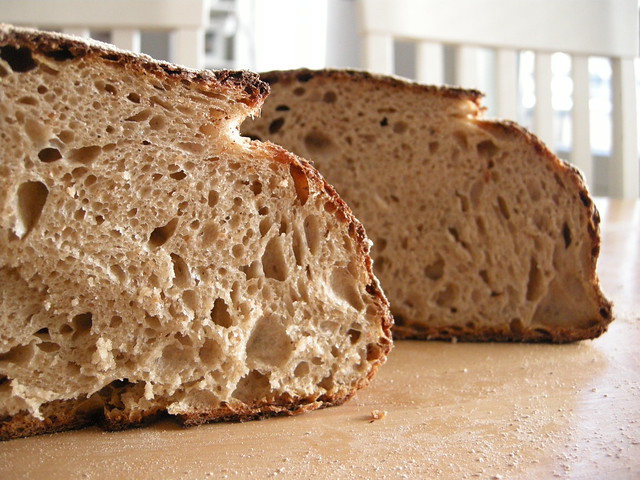
On Sunday morning, I mixed in the salt and did a very brief kneading for the dough. The dough was quite wet and it was practically impossible to knead, so I didn't spend much time on it. At the same time, I also prepared a batch of my favorite dough for two loaves of Basic Country Bread from Tartine Bread. 

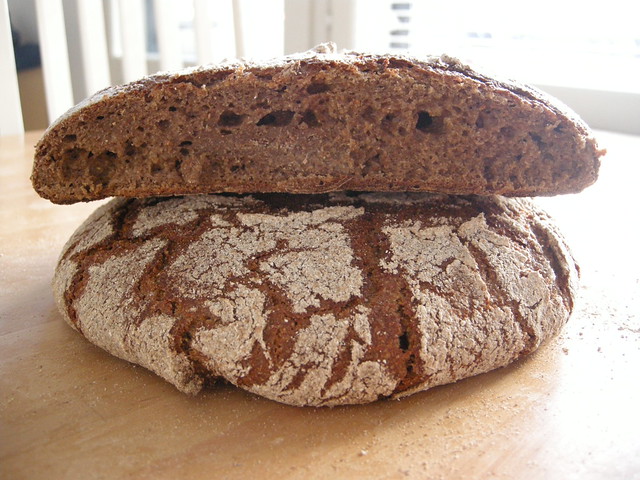
I was baking for most of the day, and here are the results. I'm pretty happy with them: even the rye limppu tastes right. The rye loaves could be a bit lighter (it's definitely denser and flatter than the one from Viipurilainen kotileipomo), but that's not necessarily a requirement: most of the time they look just like this when you buy them from Finnish grocery stores: dense and dark, but full of flavor (especially with a thick layer of real, creamy butter on top!).

Basic Country Bread:


Rye Limppu:

Juergen's picture

Correct me if I'm wrong - bakers formula

May 12, 2012 - 3:14am -- Juergen
Forums: 

I've never been good at math but decided to make a bakers formula spreadsheet based on the Bread Bakers Guild format. This in order to make it easier for me to work with bakers formulas. 

Now that I'm ready for baking with it, I'm just looking for a confirmation that what I'm doing is right. Below is the formula with which I want to bake this weekend. It's a basic 2-stage levain/sourdough formula using white wheat flour only. The goal is 1,5 kg of dough (1501 grams to be exact) with 25% levain/sourdough starter at 100% hydration.

Isand66's picture
Isand66


I've made similar bread with cheese and potatoes before, but this time I added  some Durum Semolina flour to the starter and I smoked a sweet Vidalia onion and some baby red potatoes as well.

I like to work with fairly high hydration doughs and this was no exception coming in at 75% hydration.

The resulting bread was an irresistible bread good enough to eat by itself.  I believe the corresponding photos speak for themselves.  If you like a nice moist bread oozing with a slightly spicy cheese and smoked onions then I highly recommend you give this one a try!

Starter

142 gms Bread Flour (KAF)

85 gms Durum Semolina (KAF)

71 gms Seed Starter (65% White Starter recently refreshed)

151.5 gms Water (90 degrees F.)

Final Dough Ingredients

425 gms Starter from above (Should be all of the starter)

113 gms Whole Wheat (I use King Arthur Flour)

226 gms Bread Flour from KAF

58 gms Organic Cracked Wheat

152 gms roasted or barbecued  Potatoes (I smashed them up and left the skin on for some added flavor)

80 gms Chipolte Cheddar Cheese (I cut the cheese into small cubes)

80 gms Smoked Sweet Style Onions (I smoked them on my barbecue, but feel free to roast them with some olive oil in a pan or your oven)

425 gms Luke warm water, 90 degrees Fahrenheit

18 gms Sea Salt

Directions

The night before, mix the starter ingredients together in a small bowl and let sit loosely covered for 9-10 hours at room temperature.  The starter should be nice and bubbly and should have at least doubled in volume.  Cover and place in refrigerator until ready to use for up to 2 days or use right away.

When ready for the main event, take the starter out of the refrigerator and let it rest for an hour to come up to room temperature.  In the bowl of your mixer break the starter up into 6-10 pieces and add the water.  Mix on low for a minute or less to break up the starter.  You may want to use your hand to make sure it is nice and foamy.  Next add the cracked wheat and then all of the flours.  Mix on low for 2 minutes and then let the dough rest for 15 to 25 minutes covered.

After the autolyse add the potatoes and salt mix on speed number 2 for 3 minutes.  Now add the onions which should be chopped up into small pieces and mix for 1 minute more until they are incorporated into the dough.

Remove dough to your lightly floured work surface and do about 10 stretch and folds with a dough scraper or your hands but keep them oiled or wet.  Form the dough into a ball and let it rest uncovered for 10 minutes.

Do a stretch and fold and form into a ball again and cover with a clean moist cloth or oiled plastic wrap.  Let it rest for another 10 - 15 minutes and then do another stretch and fold.  The dough should start to develop some gluten at this point.  Let it rest covered again.

Now flatten the dough out into a rough rectangle and add the cheese and form the dough into a ball.   Cover the dough ball again and let it rest.  After another 10 minutes do another stretch and fold and put into a lightly oiled bowl that has enough room so the dough can double overnight.

Let the dough sit at room temperature for 2 hours and then put in your refrigerator  for at least 12 hours or up to 3 days.

When ready to bake the bread, take it out of the refrigerator and let it sit at room temperature for 2 hours.  Now shape the dough as desired on a floured work surface being careful not to handle the dough too roughly so you don't de-gas it.

Place it in your bowl, banneton or shape into baguettes

.

Let it sit at room temperature for 2 hours covered with oiled plastic wrap or a wet cloth.

Pre-heat oven with baking stone (I use one on bottom and one on top shelf of my oven), to 500 degrees F.

Slash loaves as desired and place empty pan in bottom shelf of oven.

Pour 1 cup of boiling water into pan and place loaves into oven.

Lower oven to 450 Degrees and bake for 25 - 35 minutes until bread is golden brown and internal temperature reaches 200 degrees.  Leave the loaves in your oven with the door cracked for 5 minutes longer with the oven off.  After 5

minutes remove them from the oven and place on  your cooling rack.  Try to resist the temptation to cut into the bread until they have cooled sufficiently.


mwilson's picture
mwilson

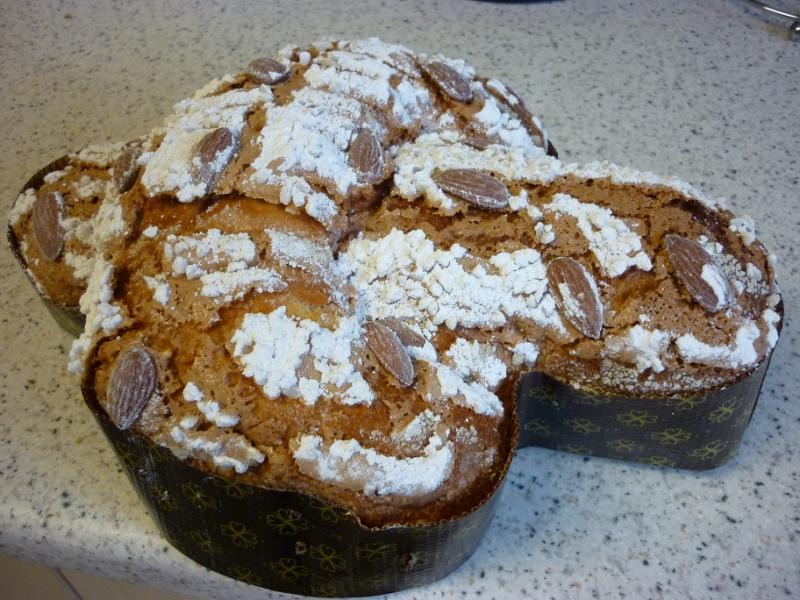
I know Easter has passed but I needed yet another challenge...

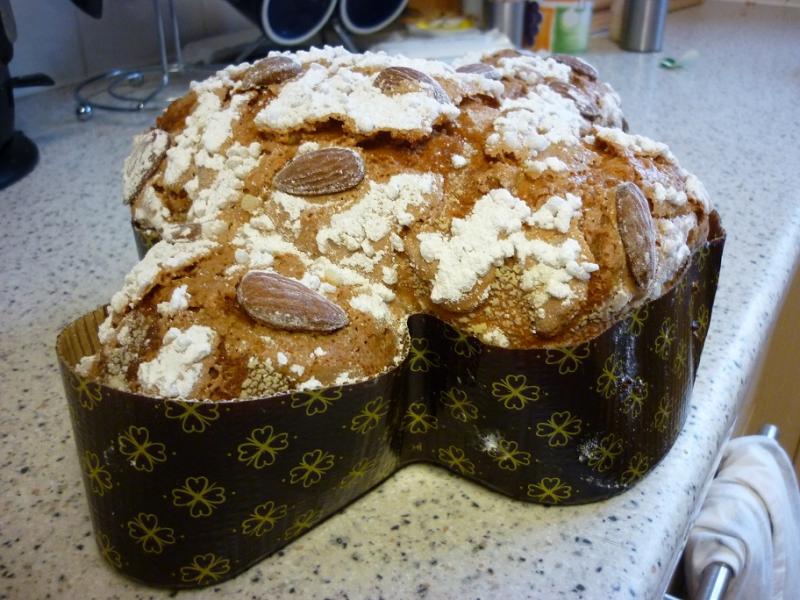
Here I have made the richest Colomba Pasquale of all. One which comes from Italian master baker and Cresci co-author Achille Zoia.

This was even more challenging than the Iginio Massari Panettone I made recently as this has more fat, more sugar and less water!

I only just managed to pull this off! I had some technical problems along the way but it worked out in the end...

Original recipe calls for a pinch of added yeast but I left this out because my sourdough is so very powerful! As a result, the first dough rose bang on schedule at 12hrs. I also felt there wasn't enough salt, so I doubled it to 4grams instead of the 2grams originally called for.

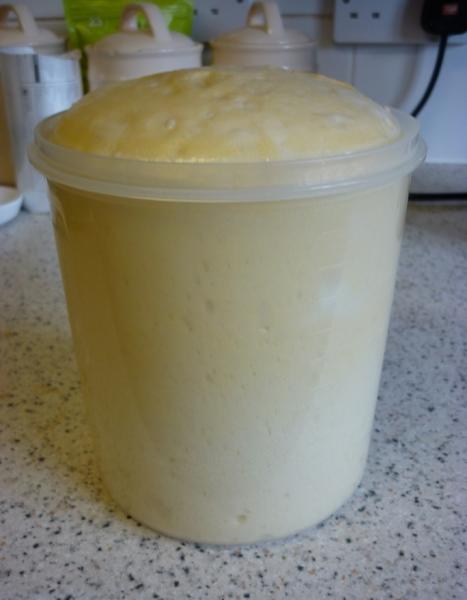
First dough tripled:


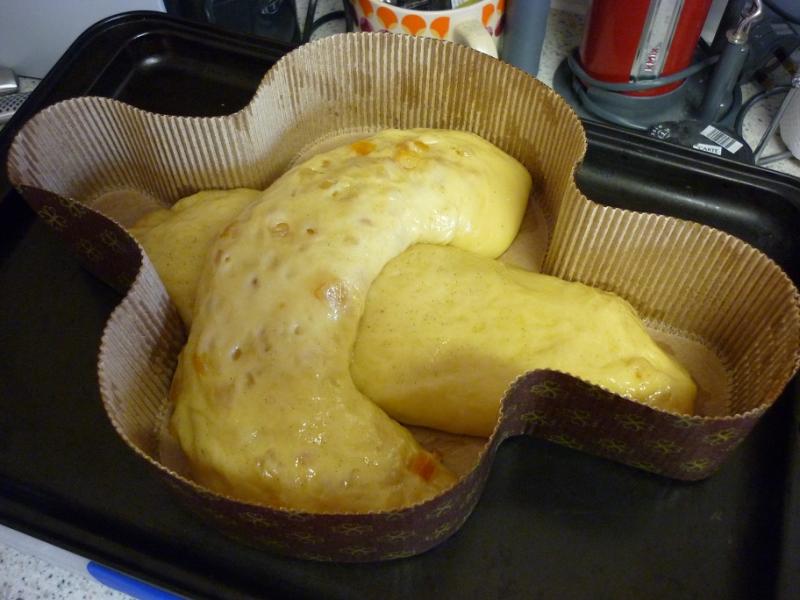
Mixing the second dough was problematic. I think I developed too much strength too early which made incorporating all the butter very tricky and I ended up with a slightly greasy dough that lacked extensibility which made shaping a night-mare as you can see...


Shoddy shaping!

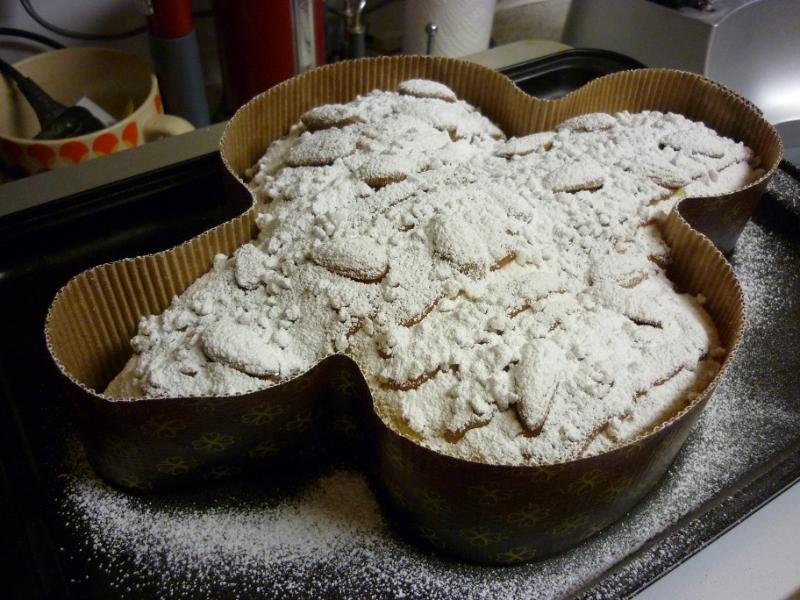
Glazed:
 

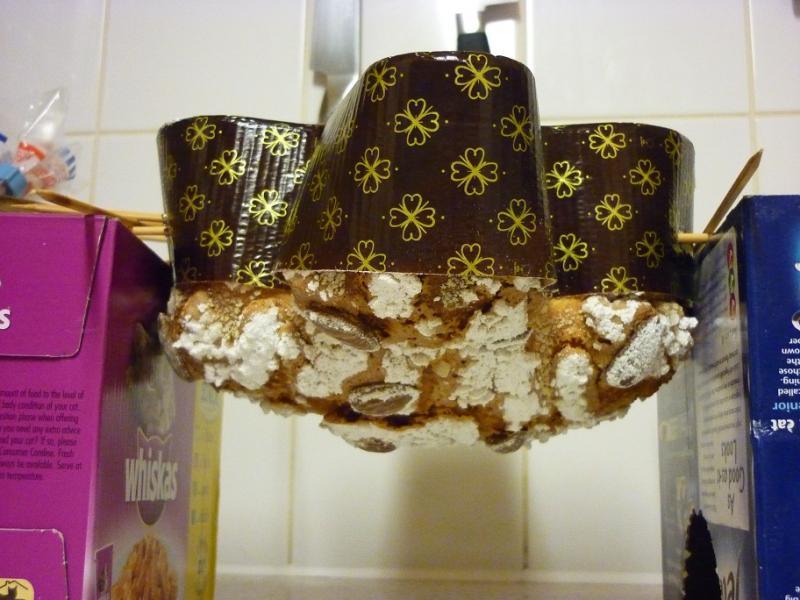
Inverted overnight:
 

Finished and ready for wrapping. This will mature for a few days to develop its flavours.
 

Adapted recipe:

First dough:

  • 63g Lievito Naturale (Italian sourdough)
  • 200g '00' Flour
  • 80g Water
  • 75g Sugar
  • 50g Egg Yolks
  • 75g Butter

Second dough:

  • 50g '00' Flour
  • 50g Egg Yolks
  • 38g Sugar
  • 25g Honey
  • 75g Butter
  • 5g Cocoa Butter
  • 4g Salt
  • Aroma Veneziana
  • Seeds from half a Vanilla pod
  • 125g Candied Orange Peel

Total Ingredients:

Flour 100.0% 292
Water 34.6% 101
Sugar 38.7% 113
Honey 8.6% 25
Yolks 34.2% 100
Fats 53.1% 155
Fruit 42.8% 125
Salt 1.4% 4


breadforfun's picture
breadforfun

Every once in a while, things don't go exactly as planned, but the result is really good anyway.  This is one of those times - a happy accident.

I promised to bring some bread to a dinner party with friends.  I made a delicious loaf of David's San Francisco sourdough, and I wanted to make a durum flour loaf, like Leader's Pane di Altamura.  I also wanted to try a loaf shaping technique that I saw in this video.  [I think the original reference to the video was posted recently on TFL, but I can't find it, so my thanks to the poster and my humble apologies for not being able to give credit.]  Having never tried either the recipe or the technique, and reading some posts on TFL about some problems with Leader's formula, at the last minute I decided to bail and modify the recipe to one I felt a little more comfortable with. 

I had already built the levain in three stages and was ready to mix the dough.  I started with my stock 100% hydration starter, and converted part of it to an 81% H using whole wheat durum as the first refreshment (formula below in the "Method" section).  A second refreshment was done after fermenting overnight, and the final build was mixed after 13 hours and left to ferment again overnight.  I found the whole wheat durum peaked too quickly (6-7 hours), so for the final build I switched to Extra Fancy durum.  This was beautifully peaked and full of gas bubbles the next morning (sorry, no pics).

After looking at some past Altamura-type loaves that I had baked in the past, I decided on a 40% AP flour/60% Durum blend for the final dough.  It turned out to be fairly easy to work with, even though the final hydration was in excess of 70%.  The dough had excellent structure, but when it came time to score the loaves, I found that it was too wet a dough to score like in the video and the result is the top loaf in the photo below. It was scored with the baker's knife, but the dough was too wet to coax up the corners into the desired peaks.  The second loaf was scored with a lame.

The oven spring was so huge you can barely see the score in the bottom loaf.  It was also underproofed, but overall look didn't suffer too badly.  The crumb was extremely moist and chewy with lots of irregular sized holes.  The crust was also chewy, perhaps a bit too soft for my tastes, but the overall flavor was very good. 

Here's the formula and method. [Note: this formula is revised based on discussion below.]

I think that in order to be able to shape as in the video, the hydration needs to be in the 60-65% range.  I will definitely try this again.

-Brad

TastefulLee's picture

Suddenly No Oven Spring

April 27, 2012 - 7:25am -- TastefulLee

Hi. I am having a bit of a dilemma and wanted to see if anyone has the same problem or if one of the experienced bakers here that I respect so much might be able to diagnose the difficulty.
I have a sourdough starter that I began about 3 months ago. It is 100% hydration. I have been keeping it refrigerated and feeding about weekly according to the instructions I found here – basically discard all but about ¼ cup, feed 1:2:2, allow to rise and then begin to descend, then feed again and use or just refrigerate after the 1st feeding if no use is intended.

jaywillie's picture

KA's Baking Sheet newsletter features TFL!

April 24, 2012 - 4:55pm -- jaywillie
Forums: 

King Arthur Flour puts out a quarterly baking newsletter named "The Baking Sheet." (It's a subscription thing, not a freebie.) The spring 2012 issue, which just arrived, has a recipe for sourdough potato bread (looks interesting), with a two-thirds-page sidebar featuring The Fresh Loaf and especially JMonkey's tips for "more sour-tasting" sourdough starter. It notes the specific URL for JMonkey's post, with quite complimentary comments. Congrats to Floyd and JMonkey!

Pages

Subscribe to RSS - Sourdough