The Fresh Loaf

A Community of Amateur Bakers and Artisan Bread Enthusiasts.

Sourdough

Isand66's picture
Isand66

Every time I venture to Whole Foods I manage to find something interesting to add to my bread baking and last weekend was no exception.  I was already planning on making bread with some fresh chopped cherries so when I saw some 100% Cherry Juice on the shelf I couldn't resist buying it and using it in place of most of the water.

I recently also bought some Red Quinoa so I decided  to make a soaker by using the Quinoa and also adding some Organic Oat Bran.  I used around 2 cups of boiling water (sorry but I forgot to measure) and added that to the soaker ingredients and let it sit for about 1 hour.  Beware that this combination of grains will absorb most of the liquid and it caused me to up the amount of flour in the recipe to compensate.  Even with the added flour this is a very wet dough.  If you don't count the soaker ingredients it is 69.5% hydration which doesn't take into consideration the amount of liquid absorbed by the soaker.  If you include the soaker ingredients as flour it comes in at 59% but trust me this is a wet dough.

I also used some White Whole Wheat Flour, French Style Flour (low protein flour good for baguettes) and some Spelt.

The cherries were fresh cherries with the pits removed and chopped into small pieces.  If you like bigger pieces please feel free to follow your hearts or stomach's desires.

The addition of the Cherry Juice and chopped cherries I thought would give the final bread a very distinctive cherry flavor but in actuality you don't really taste the cherry juice at all.  You definitely see it in the reddish color and the Red Quinoa also adds a nice nutty flavor and red tint to the bread.

The dough may have over-risen slightly since it was warmer in my kitchen than usual and I was zonked after cooking a pork butt and brisket since 7:00AM in the morning and I didn't pay attention as closely as I usually do.  The bread flattened out a bit when putting it in the oven but had some excellent oven spring.

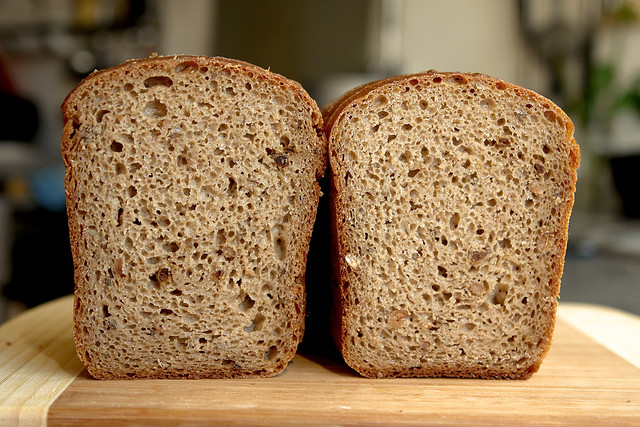
The crust is nice and crispy and the crumb is incredibly moist and open.  The final product tastes amazing for a multi-grain bread and is nutty and sweet and earthy tasting.  The cherries are not overpowering at all but add along with the cherry juice a nice depth to this bake.

Procedure

For the starter, I refreshed my standard AP white starter the night before and used most of it in this bake.  I have also included the ingredients to make the exact amount of starter needed from your seed starter.  Mine is kept at 65% hydration so adjust yours accordingly.

Soaker

100 grams Red Quinoa

50 grams Organic Oat Bran

335 grams Boiling Water  (It may have been less so use your judgment and adjust accordingly)

Mix boiling water in a bowl with other ingredients and let sit covered at room temperature for 1 hour or longer.

Starter

71 grams Seed (Mine is 65% AP Flour Starter)

227 grams AP Flour

151 grams Water (85 - 90 degrees F.)

Mix seed with water to break up for a few seconds and then mix in flour until the starter form a smooth dough consistency.  Put it in a lightly oiled bowl and loosely cover and leave at room temperature for at least 10 hours.  The starter should double in volume.  Put the starter in the refrigerator for up to 1-2 days or use it immediately.

Main Dough

Ingredients

425 grams Starter from above (all of the starter)

300 grams French Style Flour (KAF)

195 grams White Whole Wheat Flour (KAF)

70 grams Spelt Flour

40 grams Chopped, Pitted Fresh Cherries (frozen would work fine if not in season)

200 grams Cherry Juice at room temperature (100% Juice with no sugar added)

200 grams Water (85 - 90 degrees F.)

18 grams Sea Salt (or table salt)

Procedure

Mix the liquids with the levain and break it up with your hands or a spoon.    Next add the flours and mix on low for 2 minutes.  Let the dough rest for 25 minutes and then add the soaker and the salt and mix on low for 3 minutes.  Add the chopped cherries and mix on low for 1 additional minute.  Transfer the dough to your work surface.  Resist the urge to add too much bench flour (I didn't add any) and use a bench scraper to do about 5-6 stretch and folds.  Put the dough into a lightly oiled container/bowl and let it sit for 15 minutes.  Do another stretch and fold in the bowl.  Cover the bowl and let it sit for another 15-20 minutes.  Do this 2 additional times waiting about 15 minutes between S&F's.  By the last S&F the dough should start developing some gluten strength.  Let the dough sit out at room temperature for around 1.5 to 2 hours.  Do one last stretch and fold and put in your refrigerator overnight for 12-24 hours.

The next day take the dough out of the refrigerator and let it sit out at room temperature for 1.5 hours.  After 1.5 hours you can form it into loaves and put them in floured bannetons and let them rise covered for 2 hours (note: make sure to watch the dough and depending on the temperature of your kitchen and the refrigerator adjust your timing as needed).

Score the loaves as desired and prepare your oven for baking with steam.  I use a heavy-duty baking sheet on the bottom rung of my oven and I pour 1 cup of boiling water into the pan as soon as I load the loaves in the oven.  Pre-heat your oven to 500 degrees F. before placing the loaves in the oven.

Once the loaves are loaded onto your baking stone and you add your steam turn the oven down to 450 degrees and bake until both loaves are golden brown and reach an internal temperature of 200 - 210 degrees F.  For an extra crispy crust once done baking turn the oven off and crack the door and leave the loaves in the oven for another 10-15 minutes.  Once done place on a wire cooling rack and resist the temptation to cut the bread until they are sufficiently cooled.

I hope you give this recipe a try and be sure to let me know how it turns out if you do.

dabrownman's picture
dabrownman

After the last white bread bake using the Pharaoh’s Mastaba, we went back to a 67% whole grain; rye and wheat bread with rye and wheat sprouts and a variety of add-ins and seeds including wheat germ, flax, coriander, pumpkin, hemp, rosemary, chia, cumin and red rye malt baked in another variation of the Chacon.

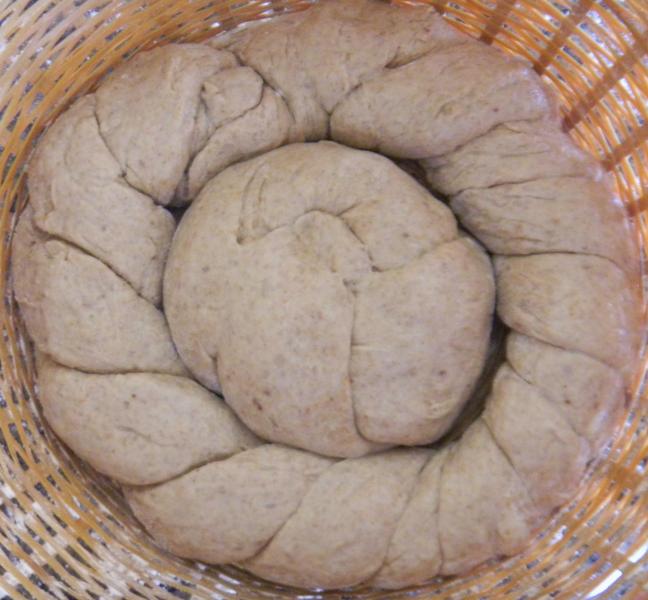
 The Chacon is quickly becoming a favorite bread shaping method.  It is a fun way to make bread with as many variations as one can conjure up and imagine.  This time we used a plain knotted roll in the middle of the basket and surrounded it with a plain two strand braid that was twisted (Twisted Sisters).  Then we added the remainder of the dough which contained all the add ins and sprouts as a disk to the top – which will become the bottom when tipped put of the basket.

This gave us a new but handsome boule shape that had no add-ins in the finish top and all the add-ins on the bottom.  It will be like having two different breads in each slice.

The Chacon came out of the basket easily and it slid into the mini oven, without slashing, just as well and onto my new ceramic tile / stone - which quickly broke when we threw water onit by accident before closing the door to steam.  No worries, the tile only cost 88 cents and I have 11 more of them.  In the back of the mini, we used Sylvia’s steaming method with a Pyrex 1 cup measure half full of water with dish rag in it.

 The stone worked well and the Chacon was very brown and crunchy when it came out of the oven and it smelled wonderful too.  The boule cracked at each twist of the sister and at the knot seams.  We just love the way the Chacon cracks almost exactly where we want it to and think it should instead of willy nilly.  

 The crumb shots and tasting will follow after the Chaon cools.  The formula and method follow the pix’s. 

 Method

The method was similar to our recent bakes with (3) - 4 hours each, 12 hour SD levain build.  This time it was not retarded overnight because we used some sliced onion in the build that made it smell more sour than normal.  The flours were autolysed with the wet and salt for 12 hours in the fridge too.  We have been adding the salt in with the autolyse recently and cannot tell any difference when we do it this way.  Forgetting to add the salt days are now over.

After soaking in water for 4 hours, we placed the seeds to be sprouted on 2 damp paper towels covered with another and wrapped in plastic on a plastic cutting board.  Half way through the 24 hour sprouting period, we re-dampened the top towel and covered it back up.  The seeds were sprouted in 24 hours. 

 We mixed the dough with the autolyse with the KA for 8 minutes on 2 and  2 minutes more on KA3.  The dough was then moved to an oiled, plastic covered bowl to rest for 15 minutes before doing 5 sets of S&F’s every 15 minutes on a floured work surface.  When the S&F’s were complete the dough was left to develop and ferment for 1 ½ hours before going into the fridge overnight for 8 hours.  In the morning the dough was allowed to come to room temperature over 1 ½ hours on the counter.

 The dough was then portioned into (3) 150 g pieces for the knotted roll and the 2 strand, ‘twisted sister’ braid.  In a rice floured basket the knotted roll went in first in the center, then the twisted sister went in around the knotted roll.  The remainder of the dough was flattened out gently and all the sprouts and add ins were incorporated.  Once the add ins were incorporated evenly, the remaining dough was shaped into a boule and allowed to rest for about 5 minutes until it had relaxed.

 It was then flattened into a disk the width of the basket and placed on top of the roll and braid to make the finished Chacon in 3 distinct sections.

 After a 2 hour proof it had passed the poke test and was ready for the mini oven stone and 12 minutes of steaming at 450 F regular bake.  The steam was then removed and the mini oven turned down to 425 F convection this time.  The Chacon was rotated 90 degrees every 5 minutes.

 After the 2nd rotation the oven was turned down to 400  F convection.  20 minutes after the steam was removed, the bread was done – 32 minutes total.  It was allowed to cool with the oven off and the door ajar for 10 more minutes before being moved to the cooling rack.

67% Whole Rye and Whole Wheat with Sprouts, Wheat Germ, Flax and Red Rye Malt.     
      
StarterBuild 1Build 2 Build 3Total%
SD Starter15100254.57%
Rye304007017.50%
WW00707017.50%
Water 40 4010.00%
Milk 3000307.50%
Total Starter75907023558.75%
      
Starter     
Hydration93.22%    
Levain % of Total25.59%    
      
Dough Flour %   
Dark Rye107.526.88%   
Potato Flakes102.50%   
Ground Flax Seed102.50%   
AP16541.25%   
WW107.526.88%   
Dough Flour400100.00%   
      
Salt82.00%   
Water33583.75%   
Dough Hydration83.75%    
      
Total Flour547.5    
Milk 30, Water 432.5472.5    
T. Dough Hydration86.30%    
Whole Grain %69.50%    
      
Hydration w/ Adds82.53%    
Total Weight1,153    
      
Add - Ins %   
Wheat Germ102.50%   
Red Rye Malt30.75%   
Hemp 20, Chia 10, Pumpkin 306015.00%   
VW Gluten123.00%   
Total8521.25%   
      
Multigrain Sprouts %   
WW205.00%   
Rye205.00%   
Total Sprouts4010.00%   
      
Coriander, Cumin & Rosemary30.75%   
dabrownman's picture
dabrownman

Found some Canadian durum attta in the Indian aisle at the Lee Lee’s Chinese grocery- real globalization at work.  The brand was Golden Temple.  The ‘atta’ makes this flour different than regular durum or semolina since it still has the bran in it.


We love the way the yellow durum flour softly colors the inside of white breads and gives the outside a rich brown hue.   This was more of a basic white bread with just a hint of rye and WW in the starter, levain build and dough at a total of 10%.  The durum makes up 47% of this bread with AP flour comes in at 43%.  The hydration was 73%.

 For some reason, probably because I froze it the week before,  the 33% each AP, rye and WW starter that we keep 80 grams of in the fridge, was weaker than normal so it was slow to build strength over the normal 12 hour, 3 stage, levain build.   Usually it is ready to go in 8 hours in the summer heat but it took a full 12 hours to double this time.  Maybe it didn’t like the white flour diet it hardly ever sees too.

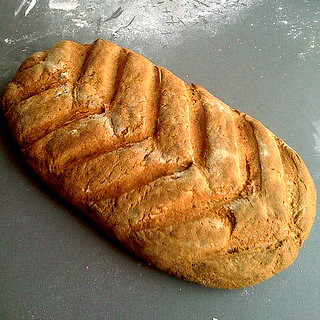
Preheating and Sylvia’s steaming method went well but the dough stuck to the wooden articulating form and deflated as it released but it sprang back very nicely in the oven like a ciabatta.   I’m guessing poor forming and slashing caused the batard to split along the length of both of the long sides of the bottom - so the bloom at the slashes was pretty weak.


The crust browned nicely and came out of the oven slightly blistered and cracked.  The crust was very crispy when it came out of the heat and then softened as it cooled like a ciabatta. 

The crumb was a pale yellow shade due to the durum and it had some nice holes, was airy, soft and moist.

This is tangy SD bread that tastes good.  It will make some kind of fine sandwich for lunch.  Method and formula follow the pictures. 

Method

This was a 2 day build where the levain was built and the flours autolysed with the salt  in the fridge for 10 hours waiting for the 12 hour levain build to finish .  At the 10 hour mark the autolyse was removed from the fridge so it could come to room temperature over the next 2 hours.

When the levain was ready it was mixed with the autolyse by hand with a spoon, kneaded on a floured surface for 1 minute.  The dough was then placed in a covered oiled bowl to rest for 15 minutes.  

5 S&F’s  were done on an oiled work surface every 15 minutes and the dough allowed to rest in the covered oiled bowl between each one.  The dough was then allowed to ferment and develop for 1 ½ hours on the counter before being refrigerated overnight.

The dough was removed from the fridge in the morning and allowed to come to room temperature for 1 ½ hours.    It was then pre-shaped into a batard and allowed to rest for 10 minutes before final shaping.  The batard was placed into a rice floured wooden contraption and allowed to double in a plastic trash sack until it passed the poke test – about 3 hours – about an hour longer than normal due to the levain not being as active as normal.

The batard was removed from the wooden contraption by folding it flat and upturning the batard on to parchment and a peel.  We liked the Egyptian stepped mastaba shape (it almost nearly left) on the bread so much, we will call this forming articulating appliance  the ‘Pharaoh’s Mastaba.’

Sylvia’s steaming method was used in the 500 F mini oven using a 1 cup Pyrex measure, half full of water, with a face towel.  This apparatus was micro waved for 1 ½ minutes to get the water boiling before putting it onto the cold broiler top as batard was load on it and placed with the steaming cup into the oven.

4 minutes into the bake the temperature was turned down to 450 F and steaming continued to the 12 minute mark when the steam and parchment was removed and the temperature tuned down to 400 F convection this time.  The batard was rotated 180 degrees ever 5 minutes until the batard was done, 205 F inside temperature  – about 20 more minutes – 32 minutes total.

 The batard was left in the mini oven for 10 minutes with the oven turned off and door ajar to further crisp the skin before removing it to a cooling rack.

Sourdough Durum Atta Bread      
      
SD LevainBuild 1Build 2 Build 3Total%
SD Starter1000102.00%
Rye50051.30%
AP1020104010.39%
Durum Atta030306015.58%
WW50051.30%
Water20504011028.57%
Total Starter501008023059.74%
      
Levain     
Hydration100.00%    
Levain % of Total26.38%    
      
Dough Flour %   
Durum Atta17545.45%   
AP17545.45%   
Oats153.90%   
Rye51.30%   
WW51.30%   
Potato Flakes102.60%   
Dough Flour385100.00%   
Salt71.82%   
water25064.94%   
Dough Hydration64.94%    
      
Total Flour500    
Total Water365    
T. Dough Hydration73.00%    
Whole Grain %4.00%    
      
Hydration w/ Adds73.00%    
Total Unbaked Weight872    
Baked Weight 77388.65%   
chykcha's picture

Dough Mixer

June 20, 2012 - 5:46pm -- chykcha

Hello everyone, it's been a while since I have posted here. I saw many questions here about dough mixers, some of them unanswered. So when I was presented with the same challenge, I decided to post my experience, in case anyone finds it helpful.

Isand66's picture
Isand66

Now that I have taken the dive bait and started baking with my Yeast Water Starter, it was time to try something a little more complicated.  Following the lead of my friend DA Brownman, I decided to try a combo yeast water levain and AP sourdough levain.  To make it interesting I made the yeast water levain using 100% durum flour in a 2 build process and combined this with my existing refreshed AP sourdough starter.

For the final dough I mixed in some Oat flour and some Wheat Germ for nuttiness along with a majority of Durum flour, some mashed potatoes with the skins and some walnut oil.

I have to say that this ended up being a great tasting bread with a wonderful crust and crumb.  I'm going to grill some for dinner tonight with some olive oil and grated cheese mixture which I anticipate will be mouth-watering.

The final bake had some excellent oven spring and like I said, the crust is nice and crispy with a perfect buttery and open crumb.

Yeast Water Starter Build 1

50 grams Durum Flour (KAF)

50 grams Yeast Water Starter

Mix the flour and Yeast Water in a bowl until thoroughly combined.  Cover the bowl and let it sit at room temperature for around 4 hours.  The starter should almost double when ready to proceed to build 2.

Build 2

Add ingredients below to starter from above and mix until incorporated.  Cover with plastic wrap and let sit at room temperature for 4 hours.

100 grams Durum Flour

50 grams Yeast Water

Main Dough Ingredients

125 grams Refreshed AP Starter (65% hydration)

250 grams Durum Yeast Water Starter (all of starter from above)

40 grams Roasted Wheat Germ

50 grams Oat Flour

455 grams Durum Flour

161 grams Mashed Potatoes (I like to mash them with the skins on and used red potatoes)

8 grams Walnut Oil

18 grams Salt (Sea Salt or Table Salt)

400 grams Water (80 to 90 degrees F.)

Procedure

Mix the starters with the water and stir to break it up.  Next mix in the flours into the starter mixture and mix for 2 minutes with your mixer or by hand.    Let the dough autolyse for 30 minutes to an hour in your bowl covered with a cloth or plastic wrap.  Next add in the salt, mashed potatoes and oil and mix on speed #2 for 4 minutes or by hand.  The dough should have come together in a ball and be tacky but not too sticky.

Next take the dough out of the bowl and place it on your work surface.  Do a stretch and fold and rest the dough uncovered for 10 minutes.  After the rest do another stretch and fold and cover the dough and let it rest for 10 minutes.  Do one more stretch and fold and put the dough into a lightly oiled bowl and let it sit at room temperature covered for 2 hours.  After 2 hours you can put the dough into the refrigerator for 24 hours or up to 2 days before baking.  Feel free to do some additional S & F's if you feel it is necessary.

The next day (or when ready to bake) let the dough sit out at room temperature for 2 hours.  After 2 hours form the dough into your desired shape and put them in floured bannetons, bowls or on a baking sheet and let them rise covered for 2 hours.  Score the loaves as desired and prepare your oven for baking with steam.

Set your oven for 500 degrees F. at least 30 minutes before ready to bake.  When ready to bake place the loaves into your on  your oven stone with steam and lower the temperature immediately to 450 degrees.  It should take around 20 - 30 minutes to bake  until both loaves are golden brown and reached an internal temperature of 200 - 210 degrees F.

Let the loaves cool down for at least an hour or so before eating as desired.

.

dabrownman's picture
dabrownman

After baking my first variation of sweetbird’s Buckwheat SD and Apple Bread here:

http://www.thefreshloaf.com/node/28081/dabrownman-butchers-sweetbird%E2%80%99s-lovely-buckwheat-apple-and-apple-cider-buckwheat-groat-br

I thought we would give it another go, since we butchered her lovely bread and also made an evil face with the boule,  by removing the hard cider and replacing it with the juice used to re-hydrate the dried apples and prunes and combining it with Phil's Sage and Walnut Rye.

 We added prunes, walnuts, a walnut oil paste, sage, chia, flax seed and wheat germ.  The buckwheat groats remained and were used with the apples and prunes as decoration for the loaf and well as add ins.

 The bread is 60% whole grain consisting of buckwheat, durum atta, rye, soft white wheat, WW, WWW, semolina and AP.   The hydration was 75%

 We made this bread 2 ways; in a loaf and as the ever popular Chacon.  The top of the loaf was decorated with buckwheat groats and the apple prune filling and the Chacon was left nakedly unadorned.

Both baked up nicely in the mini oven.  The crust was dark brown and crunchy going to chewy when cooled.   The exterior of both was appealing.  The crumb was ope, light, airy, moist and soft - just like the YW and SD combo bakes tend to be every time. 


This bread tastes great with the buckwheat, fruit and walnuts coming though  well with the hint of sage.  The SD tang is muted because of the YW and hanging out in the background.  We really like this bread and glad that we did another variation of it - without the ugly face!

Method and formula follow the pix's.


Chacon wedge shot of the ctrumb.

Made a great salami sandwich with veggies and fruits for lunch.

Method

Instead of our usual 3 day method we shortened it down to 24 hours.  The mixed YW and SD levain was built over two 4 hour builds and one 2 hour build and then it was added to the 2 hour autolyse of; flours, apple /prune re-hydration juice liquid and salt.

The dried apples and prunes were reconstituted in water overnight in the fridge and the excess water was squeezed out and used for the dough liquid.  The groats were micro waved in water for 1 minute and allowed to sit for 30 minutes.  The walnut and walnut oil paste was made.

Once the autolyse was complete the levain was added and hand kneaded to mix before being allowed to rest in an plastic covered oiled bowl for 15 minutes.  6 S&F’s were done every 12 minutes.  The first 2 were performed on a floured surface and the next 4 on a lightly oiled surface.  Before the 5th S&F the dough was rolled pout into large circle about ½” thick and the walnut and sage paste, buckwheat groats, walnuts and apple / prune add ins placed on top. ¼ C of AP flour was added to the apple / prune mixture to help dry it out some more and not affect the overall hydration of the dough..

The dough was placed back into the oiled bowl and allowed to ferment and develop for 1 ½ hours before refrigerating for 6 hours.  In the morning the dough was removed from the fridge and divided in half with the Chacon half going back in the fridge for another hour while the other half of the dough was formed into a loaf and placed into a PAM sprayed Pyrex loaf pan and allowed to rise in a plastic trash bag until doubled and passing the poke test about 2 hours.

After the additional hour in the fridge, the remainder of the dough was formed into a Chacon by making a knotted roll and placing it in the center of the folded round edges of the circular Chacon.  The Chacon was formed on a cutting board so it could be inverted into the rice floured basket placed on top.  Rice flour was also used to dust the top before being inverted into the basket.

The Chacon was placed into the plastic trash bag with the loaf and allowed to rise until doubled and passing the poke test.

 The mini oven was heated to 500 F regular bake and Sylvia’s steaming method using a wash cloth and 1 C Pyrex measure ½ full of water installed on the back of the oven after being micro waved until the water boils.  We decided to slash this loaf at the last minute and then steamed it in the mini oven for 12 minutes with the temperature turned down to 450 F at the 4 minute mark.  At the 12 minute mark the steam was removed and the temperature turned down to 425 F – convection this time.

The loaf was rotated 180 degrees every 5 minutes and it was removed from the pan at the first 5 minute rotation.  At the 32 minute mark the loaf was done, reading 205 F on the inside and allowed to dry in the off oven with door ajar for 10 minutes.  The loaf was them allowed to cool on a wire rack while the mini oven was steam prepared and preheated for the Chacon in the same way as the loaf.

The Chacon was removed from the basket by inverting it onto parchment paper with the perforated top of the broiler used as a baking tray.  The decoration of buckwheat groats, apple and prune fruits was added.  The same baking method was used for the Chacon as the loaf.

Buckwheat 60% Multi-grain YW / SD Bread with Walnuts, Sage, Flax, Wheat Germ, Apples, Prunes and Groats     
      
Mixed StarterBuild 1Build 2 Build 3Total   %
SD Starter20150355.71%
Yeast Water4025107516.30%
Rye2000204.35%
AP03510459.78%
Buckwheat203005010.87%
WWW0020204.35%
Water02510357.61%
Total Starter1001305028060.87%
      
Starter     
Hydration83.61%    
Levain % of Total21.44%    
      
Dough Flour    %   
Durum Atta255.43%   
Soft White Wheat11525.00%   
Rye204.35%   
White WW204.35%   
Buckwheat 11525.00%   
AP11525.00%   
Semolina306.52%   
Potato Flakes102.17%   
Ground Flax Seed102.17%   
Dough Flour460100.00%   
Salt91.96%   
Apple/ Prune Water - Water37581.52%   
Dough Hydration81.52%    
      
Total Flour612.5    
Apple/ Prune Water - Water502.5    
T. Dough Hydration82.04%    
Whole Grain %61.63%    
      
Hydration w/ Adds75.28%    
Total Weight1,306    
      
Add - Ins    %   
Wheat Germ102.17%   
Walnut Oil 51.09%   
Prunes347.39%   
Dried Apples337.17%   
VW Gluten153.26%   
 Walnuts 25, chia 10, flax 10, 459.78%   
Total18239.57%   
      
1 tsp Dried Sage Added to Walnuit Oil and Walnut Paste  


John K.'s picture

Best Mill for Milling Soft Wheat

June 19, 2012 - 9:18am -- John K.

I am interested in purchasing a home mill for milling wheat, but I am particularly interested in purchasing a mill that will mill not only hard wheat but also soft wheat. From looking around on the internet, it appears that hand-cranked mills, even the Diamant, are not really suited to milling soft wheat, which apparently tends to clog them. I suppose that leaves me with electric mills? If so, will some electric mills mill soft wheat and some won't? Any recommendations?

jarkkolaine's picture
jarkkolaine

Every year, in the beginning of summer, my three brothers and I gather for a weekend at our parents' summer cottage to eat, relax, and create something together. As we all love to create things and try out new ideas, we usually end up creating something out of the ordinary.

This year, I suggested creating an oven using materials found in the nature and bake some bread in the oven. Although I have been reading The Bread Builders by Alan Scott and Dan Wing, I can't say I know much about ovens. Just that we need to collect heat in it and then try to keep that heat as well as the steam from the breads inside. That didn't stop us.

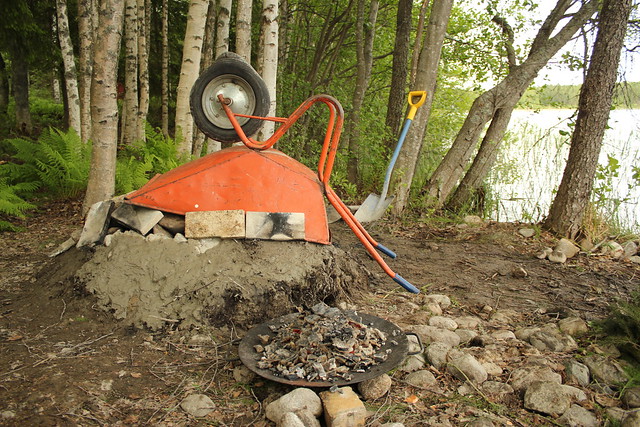
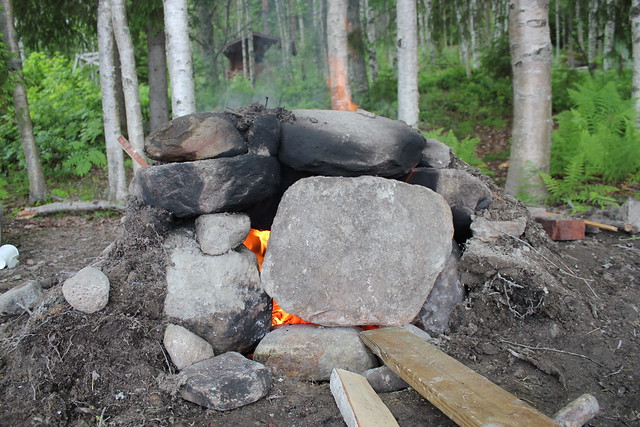
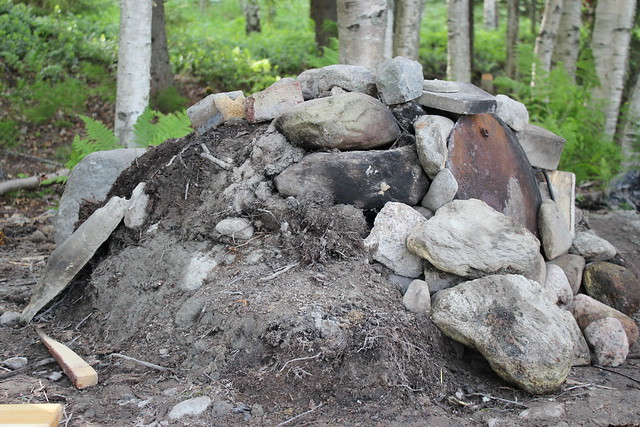
We dug a hole in the ground (had to stop when it started filling with water—we were too close to the lake). Then, we used small rocks  to build a small oven inside. Then we heated the oven.

As we were ready to put the bread in, we realized we hadn't planned for an oven door. There was an old wheelbarrow standing next to our oven, so we put it on top of the oven door to keep the heat inside. Not the best of choices, but it does look fun in the photo!

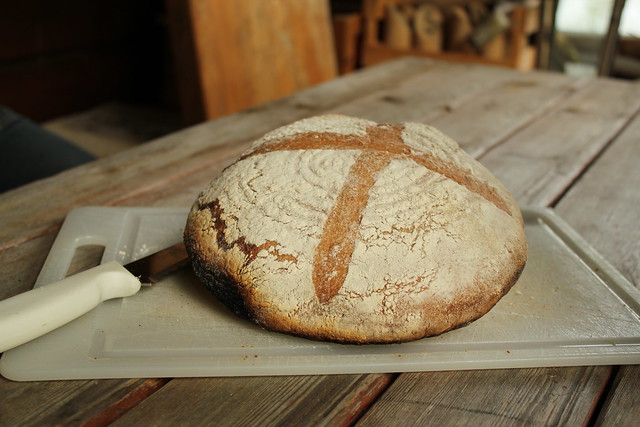
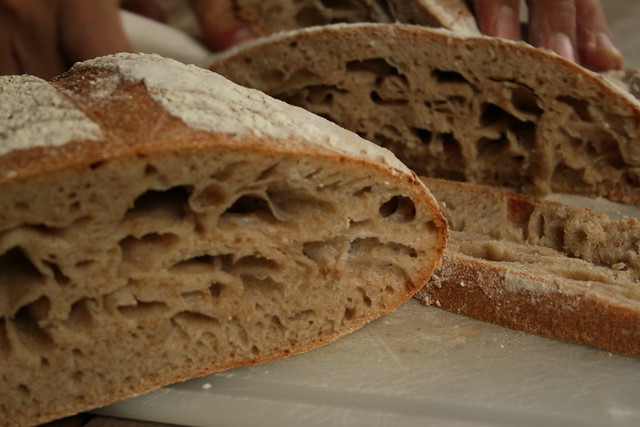
The first version lead to a loaf of bread that baked a bit unevenly, but rose nonetheless and tasted very good. 

I wasn't very happy with the big holes in the crumb, but I suspect this didn't have anything to do with the oven but rather the fact that I was a bit sloppy with the dough as most of my attention was in creating the oven. My 

Last weekend, we went back to the summer cottage, this time taking all of our families with us.

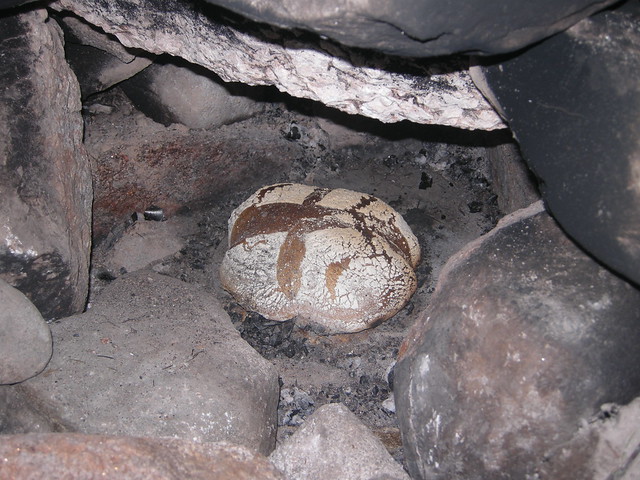
My son, Oiva, was excited about the oven and wanted to bake some bread in the oven, so we heated it up again. But before that, we did some improvements based on the previous weekend's results: we added another big rock on top of the oven to distribute more heat on every side of the bread being baked and changed the structure to be more oven-like with a door and all. After three loads of wood, we baked the first loaf.

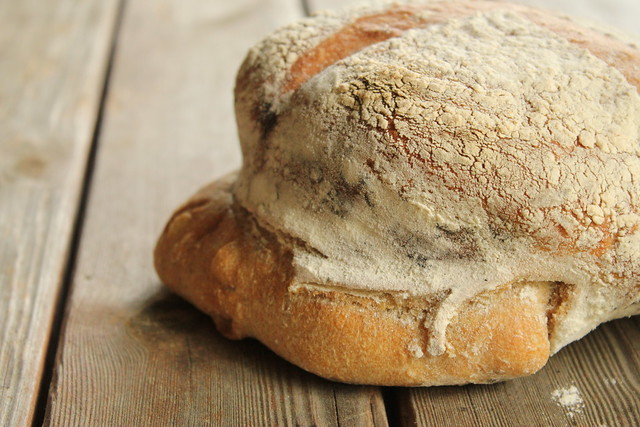
This time, the results were very good, and the loaf of bread disappeared from the kitchen table in less than five minutes! The oven was really hot at the beginning, as you can see from the bottom of the loaf.

Right after taking the loaf out of the oven, I put in another. The heat left in the oven wasn't very strong, but after baking the second loaf for about two hours, out came a loaf that was well worth the effort. It didn't have much crust and it didn't rise quite as much as the first loaf, but tasted good, and everyone liked it too.

What more can a baker ask for? ...except, maybe, a real masonry oven...

codruta's picture
codruta

A while ago I made my first succesfull 100% rye bread (click to open the post). Since then I kept on baking, different sorts of bread, but never 100% rye again. Afraid of failure? NO. But I'm easily distracted and the list of must-try breads is getting longer and longer everyday and there are too many new formulas that I want to try, so I rarely decide to repeat a recipe. Or at least not very soon after I made it.

It was not the case with today's subject.

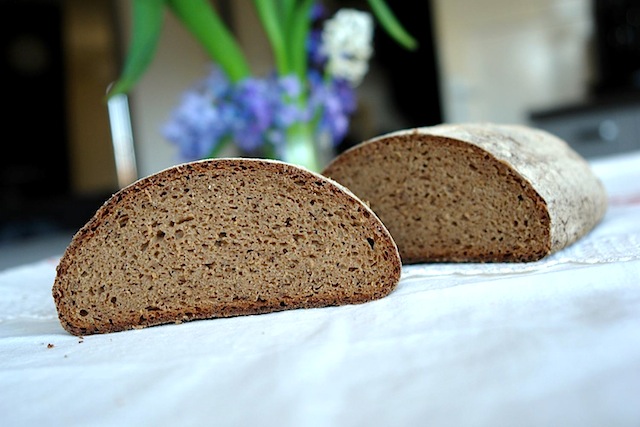
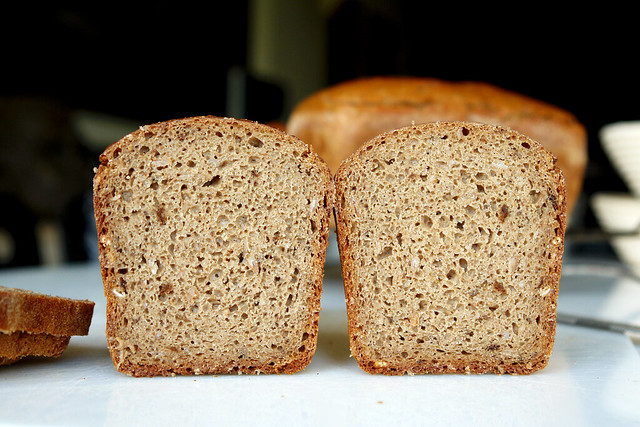
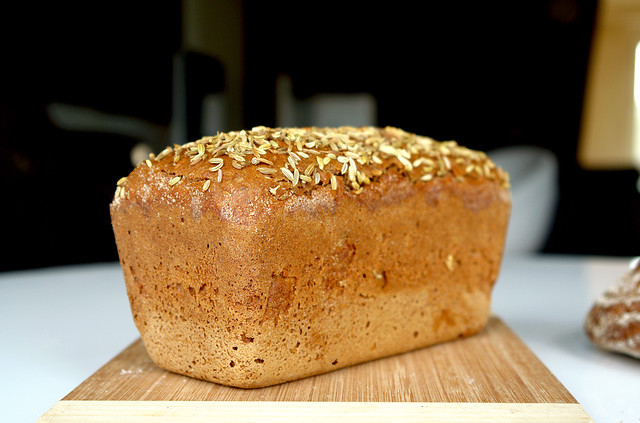
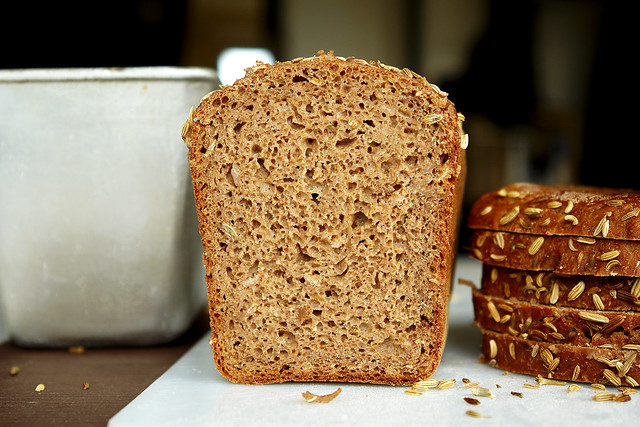
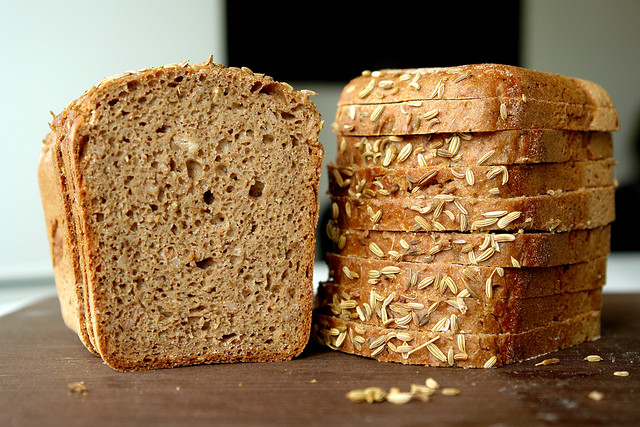
In march, Andy (Ananda) posted a formula for seigle d'auvergne. I then modified the formula and made the best 60% rye-40% einkorn ever. Time flew and I forgot about it, till I recently found the photos on my computer. Here is one photo with the crumb (you can see it was early in the spring, as I had some blue and white Hyacinth on the table):

I decided to make it again, using his formula as a starting point, but this time with a higher rye percentage. In 4 weeks, I baked it 4-5 times, with the following changes:

1'st: I replaced the white flour from his formula with einkorn flour and I added altus, rye flakes and caraway. I increased the water percent and I baked it on a tin.


2'nd: 100% rye bread, with dark rye flour instead of his white flour (also, altus, rye flakes and fennel seeds this time)


3'rd: I replaced the white flour for Malthouse Bread Flour from Doves Farm (no altus or rye flakes, but some caraway seeds cause I like the flavor)


You can see more photos on my flickr page, link HERE, or on my Romanian blog post, link HERE.

All the combinations mentioned above have as result some great breads. A friend from Bucharest who received for tasting a rye-malthouse loaf said that was the best rye bread he ever had. My sister in law from Paris got 2 loaves of rye-einkorn when she flew back home and she was very happy as long as they lasted :)

I finally can say that I'm not afraid of rye anymore. I wish I can go further and try pumpernickel or some dark russian breads, but the rye flours I find here are usually light or medium. When I'll find the proper flours, pumpernickel will be the first to try.


With this post I want to encourage everyone who, like me a while ago, is scared of rye paste to give a try to this formula. I find it to be very easy to work with and very friendly and rewarding. Andy, thank you for the inspiration and for being such a great friend and baker.


Codruta ♥

www.codrudepaine.ro


After 3 and half years of home baking, I decided that have to follow my passion and to go on on the bread path. Things are going in the right direction and I will soon share some exciting news with you.

ps. another rye bread I discovered on my computer few days ago is dated from april 2009. I'm glad to see that my skills improved :)

Isand66's picture
Isand66

I wanted to try using one of my wife's bundt pans to shape a loaf, and see if I could get some nice intricate patterns.  Unfortunately I did not use enough dough to fill the pan adequately so I ended up with a nice ring loaf and not what I intended.

I was digging through my flour bin and found some Grapeseed flour that I purchased a while ago from KAF so I decided to add that to some European style flour, Barley, flour White Rye, and Whole Wheat.

I also found some raspberry maple syrup in my refrigerator that was yelling at me to use in a bread, so into the mix it went.  I don't think you really taste the raspberry flavor in the final bread at all, just a little sweetness and coloring from the syrup.

To use the bundt pan I made a boule out of little more than 1/2 of the dough and formed it into a boule.  I then poked a hole in the middle with my knife set's sharpening rod and placed the dough over the middle piece in the bundt pan.  I made sure to spray the bundt pan heavily with cooking/baking spray first.  As I said above it did not end up rising enough to fill the pan so I didn't get any of the nice intricate patterns in the bundt pan.  Next time hopefully I will learn my lesson.

The final bread had a nice chewy dark crust and an interesting semi sour flavor.

Ingredients

425 grams (65% Hydration Starter AP Flour)  Refreshed

200 grams European Style Flour (KAF) (You can use Bread Flour)

75 grams White Rye (KAF)

100 grams Organic Whole Wheat Flour (KAF)

75 grams  White Rye Flour (KAF)

100 grams Barley Flour (KAF)

35 grams Grapeseed Flour (KAF)

19 grams Raspberry Maple Syrup

18 grams Sea Salt (Table Salt is okay)

425 grams Luke warm water, 90 - 95 degrees Fahrenheit

Directions

Using your stand mixer or by hand, mix the water with the starter to break up the starter.

Add the flours and mix on the lowest speed for 2 minutes.  Let rest for 10 minutes.

Add the salt and maple syrup and mix for 4 minutes more on medium speed, adding more flour if necessary to produce a slightly sticky ball of dough.

Remove dough to your lightly floured work surface and do a stretch and fold and form into a ball.

Leave uncovered for 20 minutes.

Do a stretch and fold and form into a ball again and cover with a clean moist cloth or oiled plastic wrap.

Do at least 3 more additional stretch and folds letting the dough rest for 15-20 minutes each time. After the last stretch and fold, put the dough into a lightly oiled bowl that has enough room so the dough can double overnight.

Put in your refrigerator immediately for at least 12 hours or up to 3 days.

On the day you are ready to bake, take the dough out of the refrigerator and let it rest at room temperature for 2 hours.  After 2 hours shape the dough as desired being careful not to handle the dough too roughly so you don't de-gas it.

Place it in your bowl, banneton or shape into baguettes.

Let the formed loaves sit at room temperature for 2 hours covered with oiled plastic wrap or a wet cloth.

Pre-heat oven with baking stone (I use one on bottom and one on top shelf of my oven), to 500 degrees F.

Slash loaves as desired and place empty pan in bottom shelf of oven.

Pour 1 cup of very hot water into pan and place loaves into oven.

Lower oven to 450 Degrees and bake for 25 - 35 minutes until bread is golden brown and internal temperature reaches 200 degrees.

Let cool on cooling rack and enjoy!

This post has been submitted to the Yeast Spotting Site here: http://www.wildyeastblog.com/category/yeastspotting/.

Pages

Subscribe to RSS - Sourdough