The Fresh Loaf

A Community of Amateur Bakers and Artisan Bread Enthusiasts.

Sourdough

dabrownman's picture
dabrownman

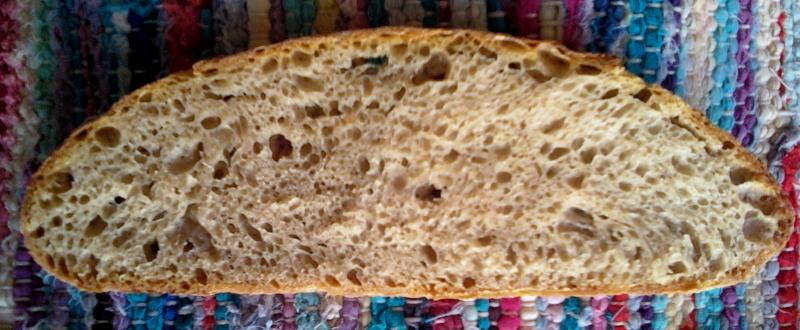
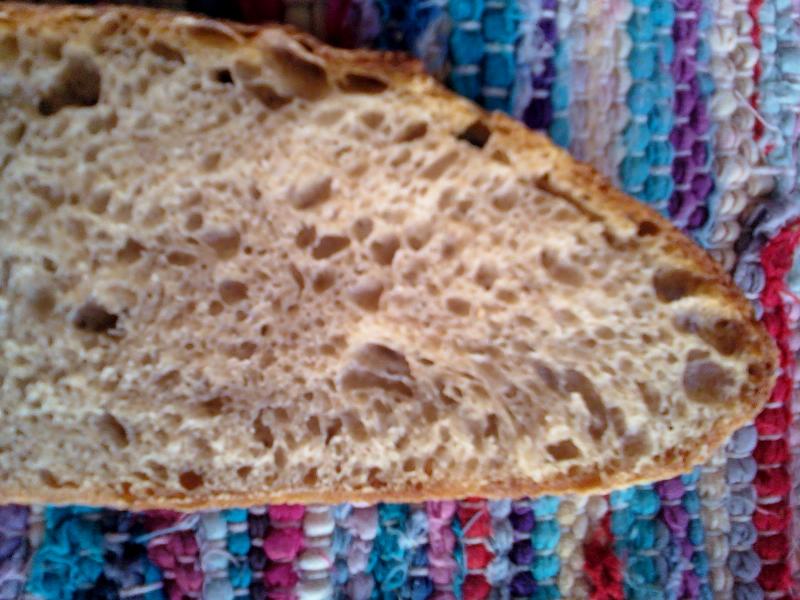
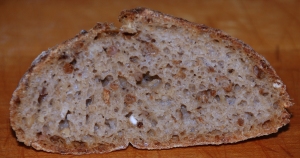
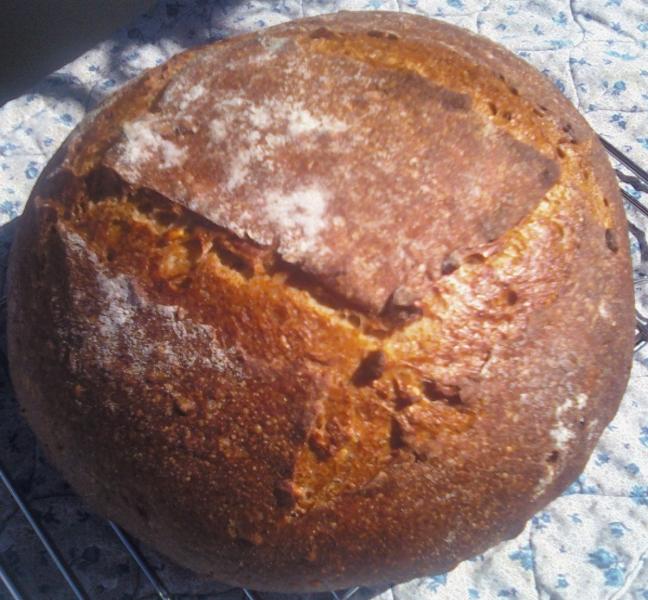
Isand66 (Ian) has been using a much greater percentage of starter/Levain in his recent SD breads.  As I was looking around for a place to start with this idea, I ran across Chad Robertson's Country SD that uses this same technique.  I also prefer at least 10% rye and WW in the finished loaf and wanted to make sure that was the case in this bread.  I also wanted a higher hydration dough and one that had more AP flour and less bread flour.   This bread sure looks good on the outside but I can't cut into it yet until my wife gives the OK since she is taking it into work tomorrow.  I'm hoping the crumb is fairly open this time - and it was fairly airy.  It was also delicious, especially toasted with butter.  This one is a keeper!

 Chad's Sourdough - Modified - makes 1 large boule

Levain Build - Two days before bake day

  • 82 g starter @ 100% hydration (50% rye and 50% WW)
  • 45 g bread flour
  • 60 g rye flour
  • 60 g WW flour
  • 125 g water

Mix and ferment for 6  hours at 68 F and the refrigerate overnight

Noon -  before bake day

  • 370 g starter @ 75% hydration (all from above)
  • 185 g bread flour
  • 185 AP flour
  • 280 g water
  • 14 g salt

Mix all except salt for 2 minutes on KA 1 and autolyse for 1 hour. Then add salt and mix on KA 3 for 4 minutes.  Move to an oiled bowl and let rest 30 minutes.  Do 10 S&F's in the bowl and let rest 30 minutes.  Do 5 S&F's in theowl and let rest 30 minutes.  Do 1 S&F on a floured bench, return to the oiled bowl and let rest 30 minutes.   Do 1 more S&F on a floured bench and form into a ball, return to the oiled bowl and let rest 1 hour.  Retard dough overnight.    The dough will rise about 10-20% in the fridge.

Remove from fridge and let rest on counter for 1 hour.  Do 1 S&F gently  and do final shape into a boule.  Make sure to tighten the skin properly.  Place in cloth and floured bennaton and let rise in a plastic trash can liner for 2 hours. 

One hour before boule is proofed, heat oven to 500 with stone and steaming apparatus in place.  Remove boule from benetton onto parchment lined peel and put in the oven.  After 2 minutes turn down oven to 450 F .  After 15 minutes total, remove steaming apparatus and bake at 400F convection for  another 15- 25 minutes until the temp hits 205 F in the center of the boule.  Turn off oven and  left bread sit on the stone with the oven door ajar for 10 more minutes.  Remove bread to cooling rack until completely cool.

Isand66's picture
Isand66

This recipe is an adaptation from Veronika at http://eattheroses.wordpress.com.  It uses the no-knead method and allows the gluten which is very weak in rye breads to develop slowly.  I decided to add some dark beer to give it an extra kick and also used First Clear flour instead of Bread or AP flour.  I ended up keeping the dough in the refrigerator for an extended period since I ran out of time to let it rise completely at room temperature.  I think this ended up creating an extremely sour sourdough rye which is not for the faint of heart.  If you want a more mellow tasting bread, I suggest you follow the directions below.

All in all, the bread turned out fairly well with a nice crispy crust and chewy, moist crumb.  The beer definitely added another flavor profile which makes this bread ideal for a nice sharp cheese and beer.

Ingredients

Starter

5 oz. water (90 degrees F.)

3 oz. Rye Flour (I used medium grade from KAF)

2 oz. First Clear Flour (you can substitute Bread flour or High Gluten flour)

2 oz. Refreshed Starter (100 % Hydration White Starter or Rye or Whole Wheat)

Final Dough

7 oz. Dark Rye Flour

10.5 oz. First Clear Flour (or Bread flour or High Gluten)

2 Tsp. Salt

1 - 2 TBS Caraway Seeds (more or less depending on your preference.  I used 1.5 TBS)

12 oz. Dark Beer

Directions

Prepare the starter and let it sit out at room temperature for 5-8 hours until it is nice and bubbly and ripe.  You can use it immediately or put it in the refrigerator overnight until ready to use.

Mix the starter with the room temperature beer and break it up.  Next mix in the flours and salt until the dough comes together and is still sticky. You don't need to over-mix the dough as it will now sit covered with some plastic wrap for 18-20 hours at room temperature.  (This is the point where after around 8 hours I put it in my refrigerator).  After 18-20 hours the dough should be nice and puffy and ready to turn out on an either a lightly floured work surface or lightly oiled one.  Do several stretch and folds and then put the dough in your floured banneton or bakers couche for its final journey which should take around 1.5 - 3 hours.

When the final dough is nice and puffy and passes the finger poke test, prepare your oven for hearth baking.

Pre-heat oven with baking stone (I use one on bottom and one on top shelf of my oven), to 500 degrees F.

Slash loaves as desired and place empty pan in bottom shelf of oven.

Pour 1 cup of very hot water into pan and place loaves into oven.

Lower oven to 450 Degrees and bake for 25 - 35 minutes until bread is golden brown and internal temperature reaches 200 degrees.

Shut the oven off and leave the bread inside with the door slightly open for 10 minutes.  This will help dry the loaves out and keep the crust crunchy.

Let cool on cooling rack and enjoy!

This post has been submitted to the Yeast Spotting Site here: http://www.wildyeastblog.com/category/yeastspotting

Our Crumb's picture

Poll: Source of Variation Among Starters

February 29, 2012 - 9:36am -- Our Crumb

Oh I'm sure this has been asked, answered and debated here endlessly.  But having tired quickly of sorting through >100 screens of Sourdough & Starters forum posts and replies, I decided life is too short and I'll ask again:

How would you good people rank the relative strength of contribution to the final character (that is, the exact population of yeast and bacteria) in an established starter, from:

Isand66's picture
Isand66

I get a kick out of trying new types of flours and grains in my bread baking.  I frequently shop on-line at King Arthur Flour and like to try new and different products when I can.  I've read many recipes on The Fresh Loaf using soakers and have tried a few recipes from Peter Reinhart's Whole Grain Bread book with mixed results.  I decided the other day to try my own formula using a multi grain soaker from my baking supply bin and also used some of my existing refreshed sourdough starter mixed with some rye, whole wheat and first clear flours.  The results were surprisingly good considering I had no idea what to expect.  The final bread had a great nutty sour flavor with a nice thick crust and moist crumb.

Ingredients

Soaker

2 oz. Rolled Oats

2 oz. Malted Rye Berries

2 oz. Barley Flakes

1 oz. English Malted Wheat Flakes

1 1/2 Cups Boiling Water

Final Dough

15 oz. White Starter recently refreshed

3.5 oz. Whole Wheat Flour

3.5 oz. Medium Rye Flour

4 oz. First Clear Flour (you can substitute bread flour or High Gluten Flour)

2.5 Tsp. Salt

6 oz. Water, 90 degrees F.

Directions

Mix all ingredients for soaker in a bowl and add boiling water.  Let it sit for 2-3 hours covered until the grains are soft.

After 2-3 hours add the soaked grains along with the remaining liquid in your mixing bowl and add the flours, salt and remaining water and mix for 2 minutes.  The dough should come together in a shaggy mess and should be relatively moist at this point.  Let it rest for 5 minutes and mix for 4 minutes more on medium low-speed.

Remove dough from mixing bowl to work surface and do a stretch and fold.  You may need to wet or oil your hands and the work surface since the dough will still be very sticky at this point. Form the dough into a ball and let it rest uncovered for 10 minutes.  Let the dough rest uncovered for 10 minutes.  After 10 minutes do another stretch and fold and cover the dough with a moist lint free towel or plastic wrap sprayed with non-stick cooking spray.  Do another stretch and fold two more times letting the dough rest 10 minutes each time.  After the last stretch and fold put the dough into an oiled bowl and cover it tightly.

Let the dough sit in your bowl for 2 hours at room temperature.  It should only rise slightly at this point.  After the 2 hours are up put in your refrigerator for at least 12 hours or up to 3 days.

When ready to bake the bread take your bowl out of the refrigerator and let it sit at room temperature for around 2 hours.  After 2 hours shape the dough as desired being careful not to handle the dough too roughly so you don't de-gas it.

Place it in your bowl, banneton or shape into baguettes.

Let it sit at room temperature for 2 hours covered with oiled plastic wrap or a moist cloth.

Pre-heat oven with baking stone (I use one on bottom and one on top shelf of my oven), to 500 degrees F.

Slash loaves as desired and place empty pan in bottom shelf of oven.

Pour 1 cup of very hot water into pan and place loaves into oven.

Lower oven to 450 Degrees and bake for 25 - 35 minutes until bread is golden brown and internal temperature reaches 200 degrees.

Shut the oven off and leave the bread inside with the door slightly open for 10 minutes.  This will help dry the loaves out and keep the crust crunchy.

Let cool on cooling rack and enjoy!

This post has been submitted to the Yeast Spotting Site here: http://www.wildyeastblog.com/category/yeastspotting

dabrownman's picture
dabrownman

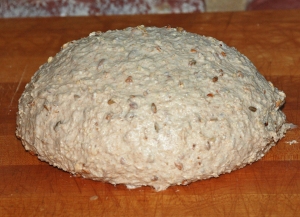
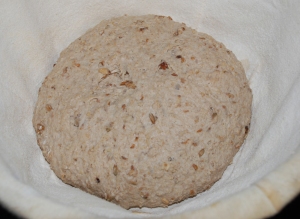
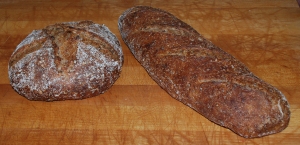
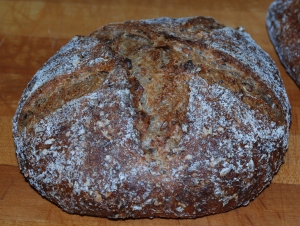
This fancy French named bread is really a Rustic Country San Francisco Sourdough.  It originally started out as a Glenn Snyder Country SD bread minus the rustic and the sweetbird, that she is,  took the recipe and tweaked it some and came up with the most amazing crust on a bread I have ever seen.   I just had to try my hand at it and converted it further to more my liking by; using a rye sour starter,  grinding my own WW and rye, increasing the rye to equal the WW, reducing the AP accordingly and then adding 50 g of whole WW and rye berries that were boiled in water for 30 minutes and then drained.  The berries were put back into the pot with 1 tsp of olive oil and then sauteed until caramelized.  I was hoping for a bread that would be more rustic, have a deeper more flavorful taste, a deep brown crust and crumb that was soft, moist and still somewhat open.  Well, I think all but the somewhat open crumb was achieved.  I guess you can't have everything.  It is the one of the best textured and tasty breads I have ever eaten.  It, like most breads, is much better toasted with butter and I'm guessing the flavor will be better tomorrow as well.  I can't wait to try this on a new sandwich creation tomorrow.  Here are some pix's.  The recipe follows the pix's

 Rustique Pain Comté de San Francisco

Yield: Two 750g Loaves

Ingredients

Levain Build

86 g AP flour

25 g Whole Wheat flour

25 g Whole rye flour

175 g water, cool (60 F or so)

30 g active culture (72% hydration)


   Final Dough (68% hydration, including levain)

600 g AP flour (77.5%)

87 g whole wheat flour (11.25%)

87 g whole rye flour (11.25%)

440 g warm water (80 F or so) (57%)

14 g pink Himalayan sea salt (1.5%)

313 Levain (40%)

Scald and Caramelize: 50 grams of WW and rye berries boiled in twice as much water as berries by volume for 40 minutes.  Drain berries and return to pan with 1 tsp of olive oil and sauté until the berries caramelize and start to leave color on the bottom of the pan.  When color starts sticking to the pan they are done.

Directions

 1.  Levain : Make the final build 10-12 hours before the final mix.

2. Mix: Add all the ingredients to the mixing bowl, including the levain, but not the salt or the scalded berries. Mix just until the ingredients are incorporated into a shaggy mass. Correct the hydration as necessary. Cover the bowl and let stand for an autolyse phase of 60 minutes. At the end of the autolyse, sprinkle the salt over the surface of the dough, and knead 4 minutes with dough hook on KA 3. The dough should have a medium consistency.  Add the scalded and caramelized  berries and mix on KA 3 for 1 minute   

3. Ferment with S&F: 3 hours. Stretch and fold the dough in the bowl once 10 strokes at the 30minute mark. Stretch and fold again, 5 strokes, at the one hour mark folding it into a ball in lightly oiled bowl.  Leave to ferment 1-2 more hours until the dough is at least 75% larger than when you started the ferment.

4. Retard: do 1 S&F in the lightly oiled bowl forming the dough into a ball again.  Refrigerate 8-20 hours, depending on how much time you have and sour your taste.

5. Divide and Shape:  take dough out of refrigerator and let it come to room temperature about 1 ½ hours.   Divide the dough into what 2 pieces and pre-shape, then shape into boules or batards 20 minutes later.

6. Proof: Approximately 1.5 to 2.5 hours at 72° F. Ready when poke test dictates.

7. Pre-heat: oven to 500 with steam apparatus in place - 45 minutes minimum.  I use a loaf pan half full of water and a dry12”cast iron skillet that go in the bottom rack of the oven at the beginning of pre heat and the stone on the rack above.  When the loaves go in, I throw 1 cup of boiling water into the cast iron skillet right after loading the bread on the stone.

8. Bake:  Slash loaves. Bake with steam, on stone. Turn oven to 450 F when it hits 500 F after loading loaves. Remove steaming apparatus after 15 minutes. Bake for another 15 minutes more or 30 to 35 minutes total. Rotate loaves for evenness as necessary. When done (205 Finternal temp), leave loaves on stone with oven door ajar, oven off for 10 minutes.  Move to cooling rack until loaf is room temperature.


Isand66's picture
Isand66
  • This ain't your Momma's traditional cornbread, but if you want to try  a great tasting bread with a nice sourdough twang, and corn flavor then read on.

    I just returned from my trip to North Carolina to celebrate my Father-in-law's 80th birthday.  My wife and myself cooked up a storm but unfortunately I didn't have time to make any bread for the occasion so I'm itching to get back to my bread making.

    I decided to try adapting a recipe I found on the www.thefreshloaf.com  from Steve B. at www.breadcetera.com for a Corn Bread made with a poolish starter.  I used my sourdough starter in place of the poolish and also eliminated the yeast from the recipe.  I used my usual baking method borrowed from Peter Reinhart's Artisan Breads Everyday and the results were excellent if I do say so myself!

    Corn flour is used along with All Purpose flour and since the corn flour does not have the ability to form gluten the resulting bread has a pretty tight crumb.  I tried my best to copy the stenciling design done by Steve B. and I think it came out pretty close.

    Final Dough

    15.80 ounces Refreshed White Starter, 68% hydration  (approximately 6.8 oz. water, 10.5 oz. All Purpose Flour, 3.7 ounces starter)

    14 oz. Water (90 degrees F)

    16 ounces All-Purpose Flour (I used King Arthur's)

    8.95 ounces Corn Flour

    3 Tsp. Salt (sea salt or table salt)

    3 Tbs. Olive Oil

    Directions

    For the final dough, using your stand mixer or by hand, mix the water with the refreshed starter to break it up.

    Add the flours, salt, and olive oil and mix on the lowest speed for 2 minutes.  Let rest for 5 minutes.

    Mix for 4 minutes more on medium speed, adding more flour if necessary to produce a slightly sticky ball of dough.

    Remove dough to your lightly floured work surface and need for 1 minute and form into a ball.

    Leave uncovered for 10 minutes.

    Do a stretch and fold and form into a ball again and cover with a clean moist cloth or oiled plastic wrap.

    After another 10 minutes do another stretch and fold and let it rest again for another 10 minutes.  Do one last stretch and fold and then put it  into a lightly oiled bowl that has enough room so the dough can double overnight.

    Let the dough sit in your bowl for 2 hours at room temperature.  It should only rise slightly at this point.  After the 2 hours are up put it in your refrigerator for at least 12 hours or up to 3 days.

    When ready to bake the bread take your bowl out of the refrigerator and let it sit at room temperature for around 2 hours.  After 2 hours shape the dough as desired being careful not to handle the dough too roughly so you don't de-gas it.

    Place it in your bowl, banneton or shape into baguettes.

    Let it sit at room temperature for 2 hours covered with oiled plastic wrap or a moist cloth.

    Pre-heat oven with baking stone (I use one on bottom and one on top shelf of my oven), to 500 degrees F.

    If you want to make the fancy "Corn Stalk" design, cut a strip of paper and place it on the middle of the round dough and sift a light dusting of flour over the dough.  Next make 3 slashes on both sides of the "stalk" and then  place an empty pan in bottom shelf of your oven.
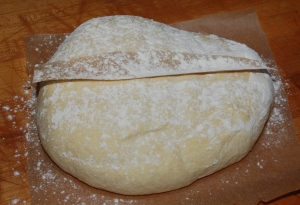
    Pour 1 cup of very hot water into pan and place loaves into oven.  I also prefer to use a water bottle and spray the sides of the oven 2 times at 3 minute intervals to add some additional steam.

    Lower oven to 450 Degrees and bake for 25 - 35 minutes until bread is golden brown and the internal temperature reaches 200 degrees.

    Shut the oven off and leave the bread inside with the door slightly open for 10 minutes.  This will help dry the loaves out and keep the crust crunchy.

    Let cool on cooling rack and enjoy!

    As you can see the crumb is very tight which is mainly due to the corn flour.  When I make this bread again I would try to add some fresh roasted corn to give it an added boost of corn flavor.

    This post has been submitted to the Yeast Spotting Site here: http://www.wildyeastblog.com/category/yeastspotting

  • Please visit my other blog at www.mookielovesbread.wordpress.com for some of my older posts and be sure to let me know if you try this recipe.

mizrachi's picture

what breads convinced you to return to commercial yeast?

February 20, 2012 - 9:14am -- mizrachi

For the last few years I have baked sourdough breads only.  My cultures are thriving and my breads are terrific but I find myself wondering what commercial yeast breads I'm missing.  So, I'm curious to hear from sourdough bakers which yeast breads you choose to bake and why.


bryoria's picture
bryoria

My first post!  I keep my bread notes in a cheap notebook stuck to my fridge, but thought a bread blog might work better, and enable me to share my notes.  I am fairly new to bread baking and find some of the posts here rather intimidating.  I took an artisan bread baking course at our local technical college last fall, developed a wild yeast starter during the class, and was off and running with the longer-fermentation methods.  Before the class I had been making all our bread, but  just plain whole wheat sandwich loaves from my own flour, mixed and kneaded and baked all in one morning. 

Although my freeform sourdough loaves always turn out well, I have not had much luck with 100% whole wheat sandwich loaves using the long fermentation methods, even after experimenting with aging my flour.  I would like to learn how to make a 100% whole wheat sandwich loaf that doesn't crumble in the centre.  Until then, I use my old, all-in-one-day method for sandwich loaves and alternate with the partial white flour sourdoughs I learned in my class.

Today I tried to make buns from one of the recipes we learned in the class, a multigrain sourdough.  It was my first time making buns from one of the class recipes.  They turned out great.

Notes on today's buns:

  • recipe from NAIT course
  • first time trying the dough as buns
  • divided dough into 16 pieces and formed as flat hamburger buns
  • placed on cookie sheets to rise for 30-40 minutes
  • baked on cookie sheets at 400 for 18 minutes, no steam, turning pans halfway through
  • buns softened as they cooled
  • good size for hamburgers
  • flavour fantastic, good texture

(updated to add photo showing crumb)

Pages

Subscribe to RSS - Sourdough