The Fresh Loaf

A Community of Amateur Bakers and Artisan Bread Enthusiasts.

Most bookmarked

txfarmer's picture
txfarmer

Julia Child's Croissant - with major overhaul

Sending this to Yeastspotting.

Click here for my blog index.

This is the theme for this month's Daring Bakers' Challenge. One look at the original recipe (see here), I knew it wouldn't produce the croissants I want. Don't get me wrong, I worship Julia Child, but I think she made some compromises here so that it's less daunting for the home bakers, however, the quality suffers as the result. All the changes I made were based on the lessons I learned over the last few months of croissant marathon, you may find that they correspond closely to the tips I gave in this original croissant post.

1. Reduced the water amount by A LOT
2. Reduced the oil amount by A LOT. The original recipe yields incredibly wet doughs, while it's easier to roll out, it affects crumb negatively. The first 2 changes mean to make the dough drier, and crumb more crisp. Note that this recipe uses oil rather than butter in the dough, which makes the dough more extensible(i.e. easier to roll out). It would make the dough stronger if I replace it with butter, but I kept oil to stay somewhat true to the original recipe - I can get the dough strength in other ways.
3. Reduced salt. The original recipe yields VERY salty croissants.
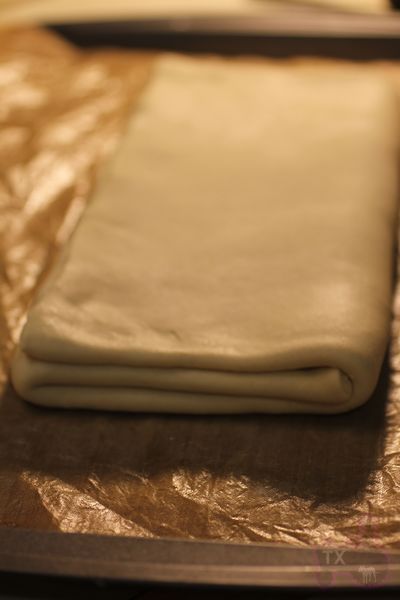
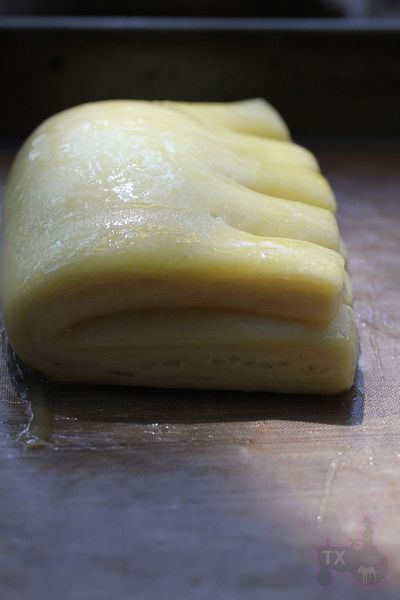
4. The original recipe soften the roll-in butter then "smear" it onto the rolled out dough. It may see easier than making a butter block then enclose it, but softened butter is warmer butter, which means it's easier to melt, a big NO NO if you want clear flaky layers. In addition, smearing doesn't produce even butter layers either. I still used my usual method to enclose butter: make a butter block, fridge, enclose into dough. (picture below with recipe)
5. Used bread flour rather than AP flour.
6. Kneaded the dough much longer than what the recipe required. Both 5 and 6 aim to increase dough strength. Stronger dough rises higher during baking, creating clear layers and open honeycomb crumb. Yes, stronger dough is also harder to roll out, but it's worthwhile.
7. The original recipes requires 4 bookfolds, which IMO, is way too much for such small croissants (much smaller than the standard size I made before). More folds == more layers, good in theory, easy to have leaky butter in practice. Even if the butter doesn't leak, more layers in such a small roll would just make the crumb less "open". I only made 3 bookfolds as usual.
8. The original recipe doesn't produce a lot of dough, yet still makes 12 croissants, so each one is tiny-mini. On top of that, the shaping process has unusal sizes (bottom and sides are of the same length for each triangle, which means each croissant is very long, but doesn't have a lot of layers), and too much stretching (easy to melt the butter). I changed the sizes to make 8 croissants (still much smaller than standard size, but at least each croissant is rolled up enough times to create a layered crumb).
9. Extended proofing time from 1.5 hr to 3.5 hr. Croissants MUST be fully proofed for a good crumb.

Note: this recipe requires a builk rise , which is different from all the other croissant recipes I tried before. Bulk rise made the dough extra strong - again, harder to roll out, but crumb is better.

Croissants (majorly adapted from Julia Child)
Note: Makes 8 small croissants
Note: for details and tips, please see this post
Note: for more tips on making croissants in warm weather, see here

Bread Flour, 228g
Milk, 120g
Water, 13g
Sugar, 14g
Salt, 5g
Instant Yeast, 2.7g (a scant tsp)
Oil, 15g
Roll-in Butter, 125g

1. Mix everything together but the roll-in butter. Knead @ low speed for 3min, @medium speed for 7min, the dough should be very smooth, relatively strong, a relatively weak windowpane.
2. Bulk rise at room temp (24C) for 3 hours until doubled, mine even tripled. Knead to get rid of air, press flat, put in fridge for 2 hours or overnight.
3. Tap roll-in butter between two sheet s of plastic, roll into 5inch square. Put in fridge for at least one hour.
4. Roll out dough into 7inch square, enclose butter block as following, seal well

5. Roll out to 6X14inch rectangle, do first bookfold along the longer side. Don't forget to trim the edges.

6. Put in fridge and rest for 1 hour. Take out dough and repeat the rolling and folding 2 mroe times, which gives 3 folds in total.
7. Put in fridge and rest for at least 120min.Roll out to 8X16inch, 1/8inch thickness. You may need to rest the dough in fridge several times.
8a. For classic croissants: cut into 4 rectangles, each 8X4inch. Then cut each rectangle diagonally into 2 triangles. Trim edges, stretch lightly into skinny long triangles.
8b. For Bear claws, cut into 5X3inch rectangles.
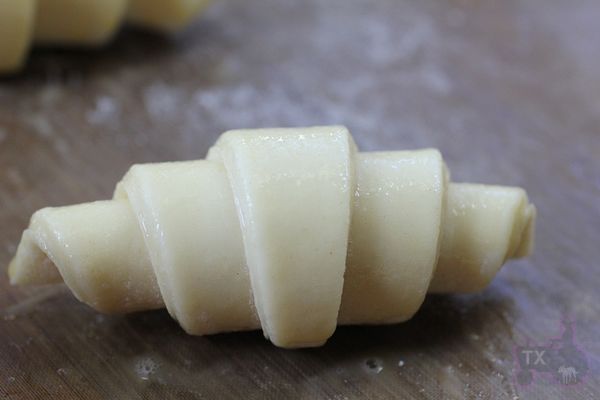
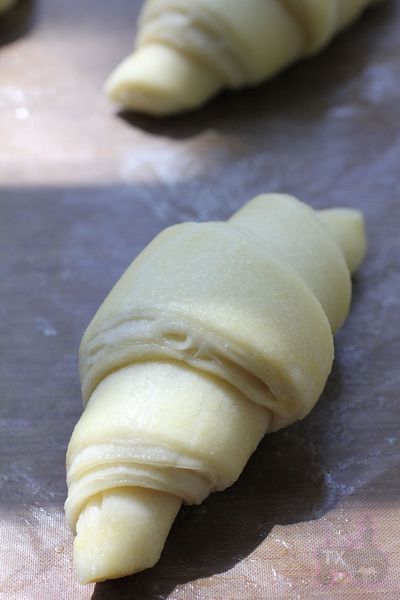
9a. For classic croissants: roll up fairly tight, stretch out the tip with one hand when you roll the bottom with the other hand. Since they are smaller, you won't get as many layers as the standard ones

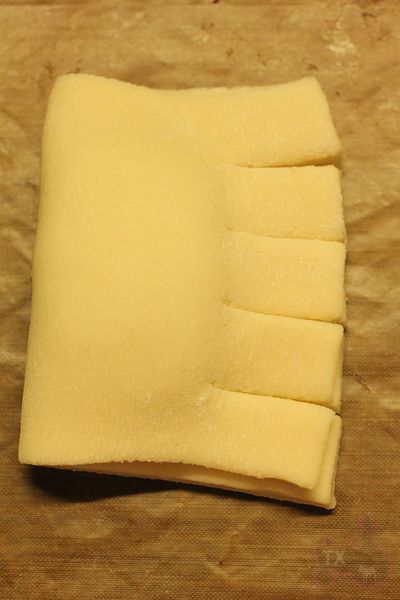
9b. For bear claws, put a TBSP of almond filling on the dough, fold in half along the longer side. Seal, and make 4 cuts for the "claw" effect.

10. At this point, you can proof right away, fridge overnight and proof next day, or freeze (defrost overnight in fridge before proofing). Brush with egg wash (1 egg beaten with 1 TBSP of water), then proof @ about 80F until very soft and jiggly. About 3.5 hours for me. Brush another layer of egg wash after proofing.


12. Bake at 425F for 10min, 375 for 15min.


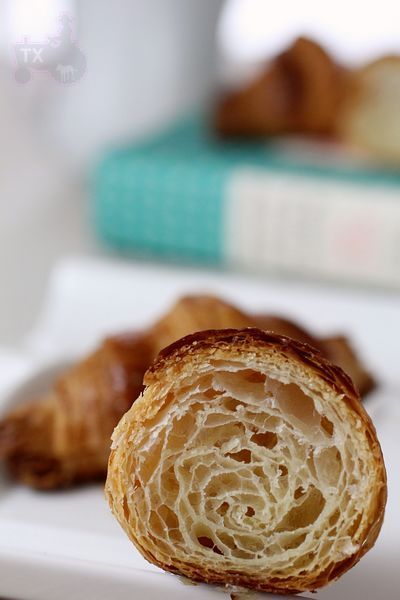
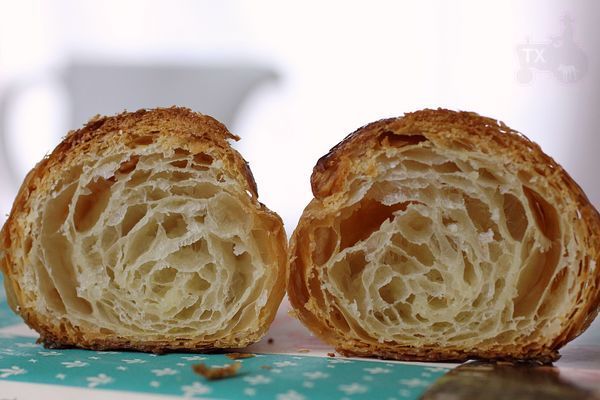
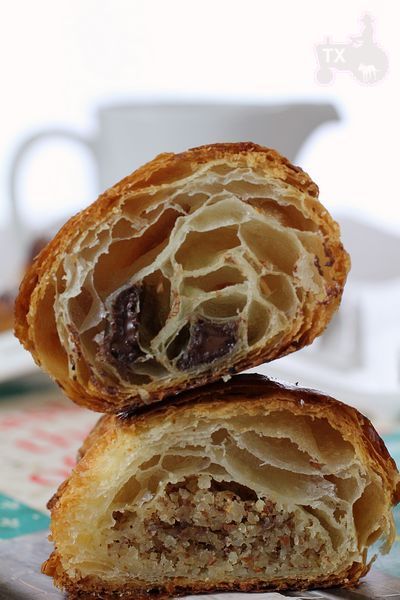
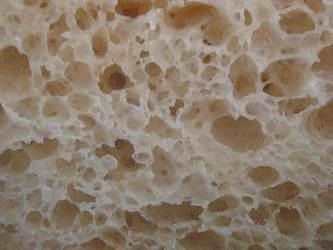
The very round cross section indicates enough dough strength. The crumb is open with a clear honeycomb effect.

I am fairly happy with the crumb, but there's always room for improvement. The smaller rolls has less layers than standard ones, which means the crumb has less "holes".

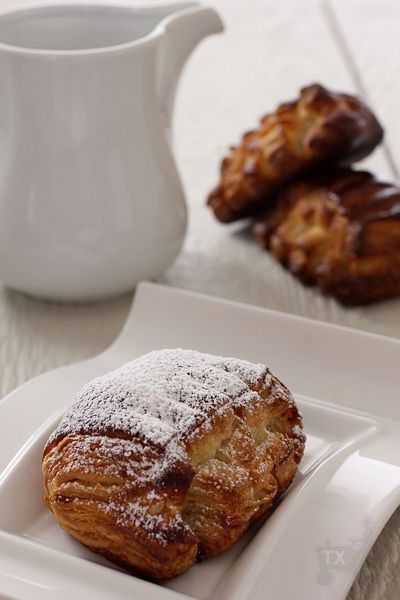
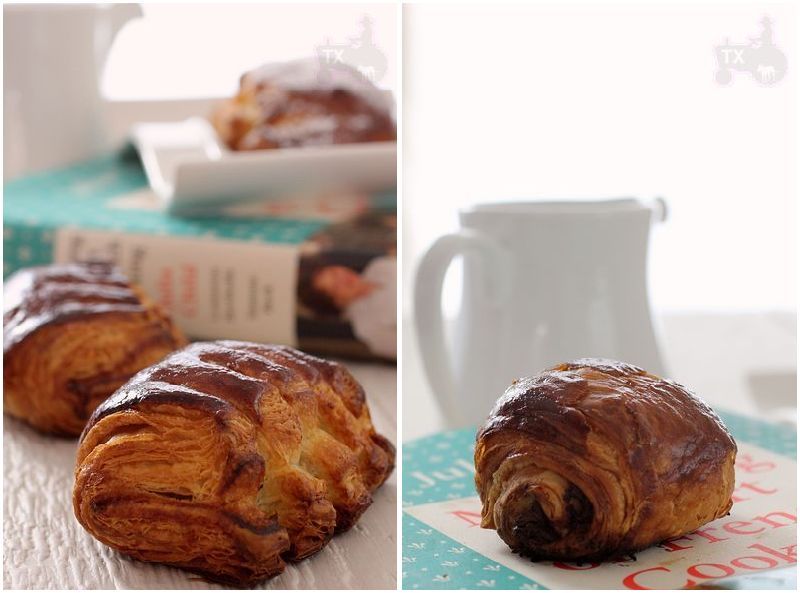
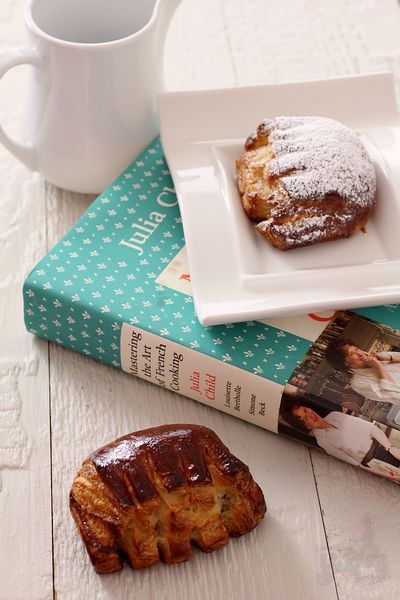
The bear claws came out pretty well, with or without powder sugar. And I used the leftover dough from bear claws for some mini chocolate croissants.


Bear claws and chocolate croissants were rolled up in less turns than croissants during shaping, so the layers are very clear and very flaky - easier to make than the standard ones IMO.

With some major overhaul, this recipe produces very good results.

ehanner's picture
ehanner

Smoked Pastrami-A Reason to Bake Deli Rye

Smoked Pastrami

While we bake bread for many purposes, few could be considered more noble than to aid in the creation of an outstanding Pastrami sandwich. Corned beef is a close second in my opinion but also a nice topping for deli rye breads. I have made this recipe many times and suggest you might consider smoking all you can get in your smoker at one time. It freezes well, sliced, and you will enjoy knowing you have a bag at hand if the need arises to feed special friends on the quick.

A few years ago, a fellow at Kenny and Zuke's Deli in Portland OR , took pity on me and showed me how to make what has been described by many as the best Pastrami in the USA. Many food writers from all over have marveled at the flavor and texture of the absolutely marvelous Brisket done Pastrami style in their restaurant. Even the food writers in NY have waxed on about how there may be better but they haven’t found it yet.  Everything I write here, in fact everything I know about the fine craft of creating this delicious and tender indulgence, I learned from Nick which I think is Zuke. I scaled the quantities back and fooled with the process for  a home cook but it is essentially the original recipe. I have read they are now back to curing their own meats and have changed the recipe slightly to improve the flavors. For a time they sub contracted the curing because it takes up so much space and is a pain to keep track of, in the quantity they go through. I can’t help but to trust these guys to have made it better, hard as it might be to believe. If you find yourself near Portland, please do stop in for a real treat. They serve the very best of everything in this unusual Deli.

There are many ways to cook or smoke Pastrami. As I understand it, the term applies more to the process than the actual meat used. I have read of pastrami  turkey and other poultry. However for me the only real pastrami starts off life as a beef brisket that is first cured and marinated in special preservative (pink) salt, sugar and spices for at least 5 days and as long as 12. The combination of ingredients in the brine has a major impact on the finished product and while I am suggesting below that you start by buying an already cured piece of brisket sold as “Corned Beef” in the grocery, that product was intended to be boiled and consumed as corned beef. It will produce a very good Pastrami but the best flavor will come from starting with a raw, fresh brisket and curing your own. If you want to cure your own, start by finding some curing or “pink” salt. This is available on line and is added at around 1 Tablespoon per gallon of water.  You MUST have the proper salt. You MUST have the ability to refrigerate and rotate the meat daily during the days of curing time. The following pastrami demo was done with pre cured corned beef and it’s delicious.

A full Packer Cut of Brisket consists of a flat and a point, once it is separated and  I find them at Sam's or any real butcher between 9-11 Lbs. Your butcher will be able to remove the point from the flat and leave a 1/8-1/4 inch fat cap remaining. The flat is the more lean piece and usually the larger of the two. When done properly, the point is my favorite. It has more fat and connective tissues so it’s not for those on a diet. To be clear, you definitely want to separate the point from the flat before curing. When I have purchased full Packer cuts of whole brisket that have been cured for corned beef, I always separate them. The cooking (smoking time) and evenness is much better with two smaller pieces. If you have a real butcher, ask him to let you watch how he splits the brisket into a flat and a point. It isn't hard but you need to know how to do it.  I don't think I could describe the process well enough in words to make it meaningful. So ether get a cured piece of flat or find a real butcher and order what you want or need. I like the butcher personally. It's a dying art and I like to support them.

Let’s get started.

Equipment needed:

Smoker
Stock pot
1 gallon Zip Lock bags with gusset
roasting pan
sheet pans
Sharp Carving Knife

Ingredients:

I’m going to include the home curing ingredients now. If you are starting with a cured corn beef, ignore this list of ingredients and skip to the rub ingredients, which is the same for both procedures. The amounts listed for the curing brine is enough for 6 full briskets. Scale down for home use as necessary.

Brine:
6 gallons of water
7 cups kosher salt
1 1/8 cup pink salt
5 cups white sugar
2 cups brown sugar
3/4 cup honey
1/2 cup pickling spice
1/4 cup coriander seed
1/4 cup mustard seed
1/3 cup minced garlic

Rub:

Ground Coriander
Course crushed Black Pepper
Mustard seed ground
Garlic powder or granules.


I don’t think you can hold a slow steady 225-250F indirect heat  on any grill I have seen or used. You have to have some kind of smoker where there is a heat source, wood chip shelf, water bath and grill racks. These fall into categories of fuel type and size. The purist types might opt for a wood or coal fired unit but that means you have to tend a finicky fire for 12 hours. I’ve done that a few times but the convenience of a gas or electric heater makes this smoking far easier and the final product is barely any different than if you stayed up all night singing to yourself. Weber has a couple models that will hold a decent size Turkey that work well for this. I have a Smoke Vault by Camp Chef. You can find it near $220 on sale around or online. I see Brinkman has a less expensive gas model for $149 that looks like it would get the job done, at Home Depot. Get the biggest one your budget will afford. The world of smoked meats is addictive and there are plenty of ways to use your smoker. Turkey breast and salmon are our other smoked favorites.  This process doesn’t impart so much of a smoky flavor that you taste the smoke. It should be a mild and subtle enhancement. Any Low and Slow pit master will tell you it is easy to ruin a Q by over smoking.  You are looking for a little smoke during all the cooking  time. I’ll include a photo but your nose is the best guide. You can just see the smoke as it drifts  out the top. Perfect.

Regardless of your smoker you should be able to get two flats on the rack with space between or on 2 layers.  My smoker will hold 6 large flats at one time but then I tend to do things on a larger scale for parties and such. The smoking process shrinks the meats considerably so I suggest getting the largest flat portion usually about 4 lbs each. By the time the meat is done, you will be wishing you had done 2.  Left over’s freeze well, double wrapped in plastic or vac-u-packed.

The process:

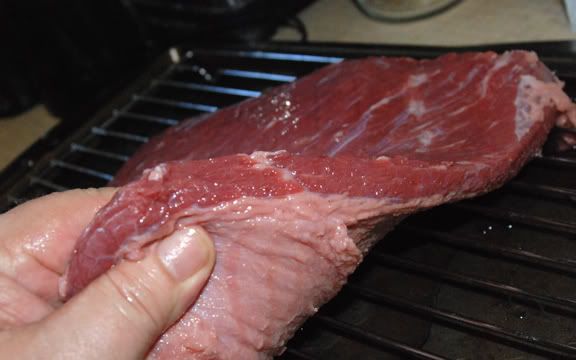
First, purchase the largest one or two corned beef flats from your grocery store. I have to look around to find two the same size above 4 pounds so they cook at the same rate. It is hard to know what a brisket flat will look like out of the bag. It pays to take a little time to find quality and hopefully get a piece that isn’t tapered down to a small flap and thinner on one side than the other. Look at the piece I’m holding below and see how I was moaning I didn’t see the thin side at the store. This meat cooks a long time. You’re  looking for even cooking which comes from even thickness. Ultimately you have to cook for the thickest part of the meat so the thinner part will be more well done at the end. Not the end of the world but a perfect piece is better.

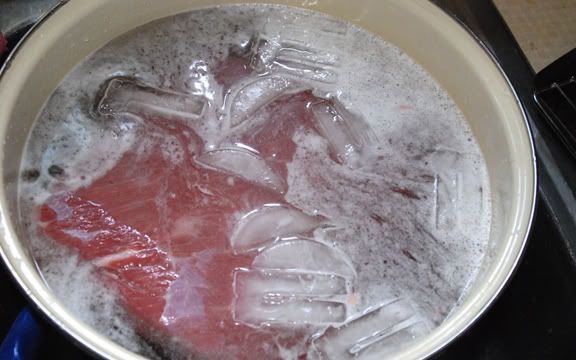
Start by rinsing the meet off under cold water and letting it soak in cold water for 2 hours. After 2 hours, dump the water and replace with fresh cold water. I add ice to keep it cooler. After the second rinse, pat dry and let it drip over the sink on a wire rack for a few minutes.  This soaking will remove some of the salt from the commercial curing process which is usually too salty for our purposes. Additionally, the smoking process will concentrate the remaining salt so it’s good to remove some now.

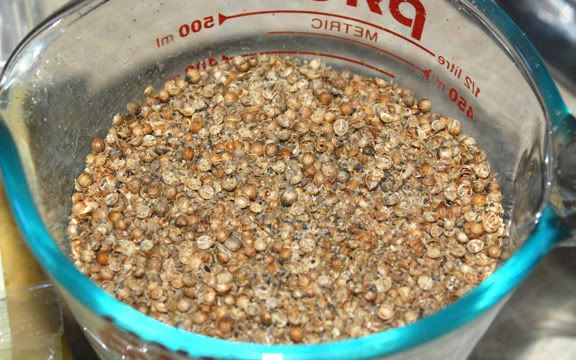
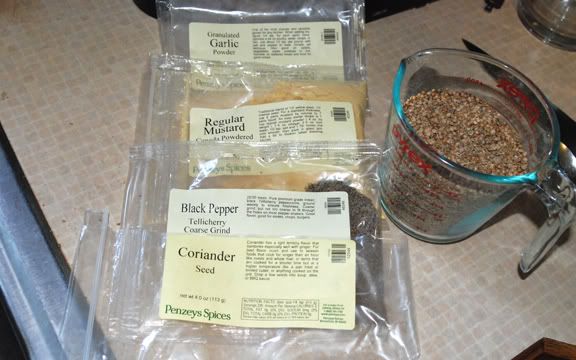
While the meat is soaking, prepare the spices. I buy the whole coriander seeds and run them through my spice mill. Some are ground more finely and some are more like crushed. I usually buy course crushed or cracked black pepper since my spice mill (coffee grinder) has a hard time with whole pepper corns. I use Coriander as the primary spice with black pepper as the secondary. I also use granulated garlic and a small amount of ground mustard. You want the Coriander to be the prominent flavor with the pepper in the second seat. Mix it all together and have it handy for application. I’m not giving exact amounts because the size and number  of meats varies. Mostly Coriander, then pepper, then garlic, then mustard. The spice coating and the fat below it become what is known as the “Bark” or “Mr. Brown” in Southern BBQ circles. The bark is my favorite part but it is an acquired taste, thankfully. You can see in the photo I started with 1-1/2 Cups of spice mixture. I had ½ Cup remaining after covering 3 brisket flats.

I like to pat the meat dry with paper towels and place it on a wire rack over a sheet pan to set for a while and come to room temperature for a bit. Then, remove the rack, dry further and set the meat on the pan. The idea is to apply as much spice as will stay in place, covering all sides completely. I like to wrap the meat in plastic wrap or a gallon bag and refrigerate it overnight if possible. I have started the smoker immediately and started the cooking but it’s better if you can give it an overnight dry marinade.

Smoke Day:

Remove the meat from the cooler a couple hours before you plan to put it on the smoker. Start your smoker and get it prepared with a water bath below the cooking rack filled with hot water. Pre heat the heater and fill the wood chip tray with some hardwood. I don’t use musquiet which is popular in Texas for BBQ due to it’s pungent flavor. Any other hardwood will be fine. Set your heat adjustments to 225-250F and find yourself an adult beverage. It takes a while for the smoker to come to a stable temperature. The meat is cool the water is cool and the wood chips haven’t started to smoke yet. After an hour, make sure you check the thermometer and start making changes to stay between the range of 225-250. Plan on this taking at least 11 hours and maybe more. The larger your meats are, the longer it will take to get them to 175F. If you can hold a stable 250F all through the 11 hours, your internal temp probe should be near 175F. You can over run the 175 to 190F so don’t concern yourself if you do. I always go to 190F for a darker bark (outside crust) and less remaining fats and connective tissue.  The next step is to braise the meat in a baking pan in water so the warmer it is here, the shorter the  braising time will be.

Braising:
Pre heat the oven to 350F.
 I try to plan the smoking process so I am done around 4 or 5 hours before I want to serve the meat. Remove the smoked pastrami to a large roasting  pan with an inch  of hot water in the bottom. Using a double layer of foil, cover and seal the top of the roasting  pan. Place in a pre heated 350F oven to braise and make the meat fork tender. If you removed the meat from the smoker at 175, the braising will take 3 or more hours. If you waited and smoked to an internal temperature of 190F, about 1-1/2 hours or so will do. After 3 hours of braising, check for fork tender. Be sure to check the most lean portion of the meat. The fatty part will be soft regardless.  The problem is that it is hard to check the meat for fork tender and then re cover the top with foil so, do your best. You shouldn’t need to add water if you get a reasonable seal. Once the meat is fork tender, remove from the oven and let it start to cool. If I’m planning to serve right away, I let the meat cool in the pan for about an hour to absorb some juices back in. I’ll set it on a cutting board to cool further and carve on an angle across the grain after it has cooled to warm. This is hard to cut in thin slices so I generally cut ¼ inch or thicker slices. If you simmered it to soft, it will be hard to impossible to cut into small pieces. So wait until the meat has cooled to a nice warm plate temperature before carving with your just sharpened knife.  A stack of smoked Pastrami is the perfect topping to a slice of Jewish Deli Rye bread. Enjoy!

NOTES:
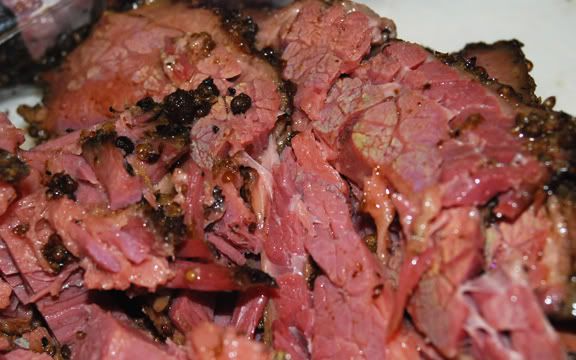
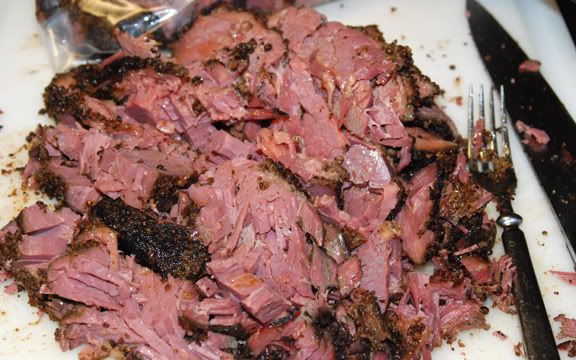
 Notice the photo of 2 slices below. This was cut before the braising was complete. I mistakenly removed the piece and cut a couple slices. Notice how the meat looks like the grain is long.  You have to be very careful to check the bottom of the meat for grain direction and cut across the grain. You would think the grain would be along the longest side but, it usually doesn’t. The first cut should have been on a corner. It makes a big difference in how tender the meat is, pay attention. Notice the end grain in the close up photos.  This is a critical consideration you need to get right. Brisket is a tough stringy meat that becomes soft and deliciously tender when cooked properly AND cut correctly.

One thing to remember. I started with 3 bags of cured corned beef that weighed 12.5 Lbs.. That included the brine. After smoking and braising the total package weighs only 7.5 Lbs. Shrinkage.

Make sure your knife is as sharp as you can get it. Because you are cutting across the grain, I start the cut by drawing back across the piece first so the end doesn’t spit off on the grain. I usually do a better job of cutting stack-able pieces than I did in the close up shot but that’s the idea. I tried to make this clear but if there are questions, fire away.

Enjoy!

Eric
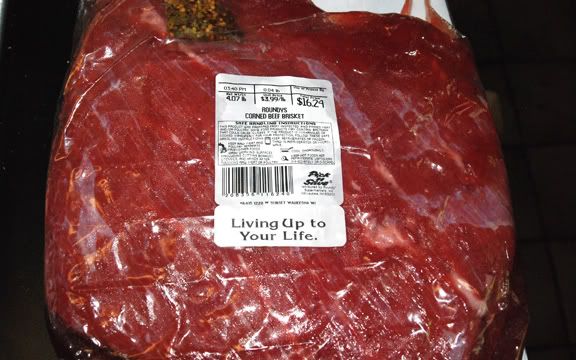
This is to be avoided if possible. Try to find evenly thick pieces.
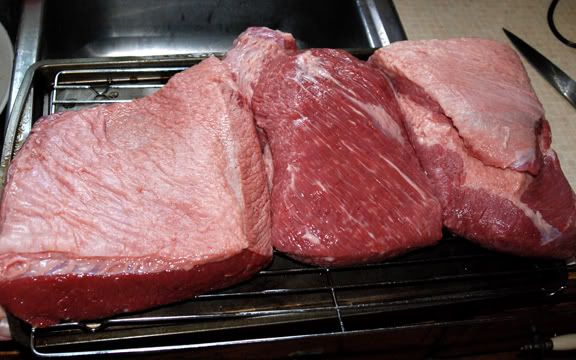

After soaking they need to be patted dry.

Soaking the excess salt out of the cured Brisket.
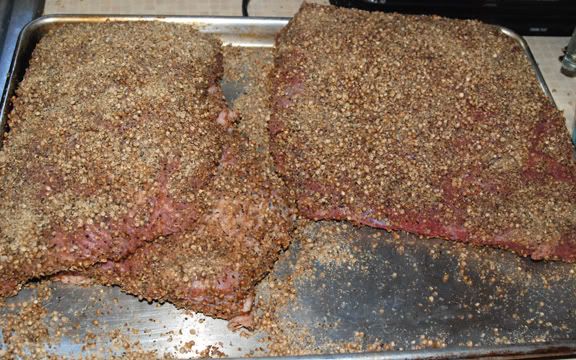

After each piece is spiced heavily, they should sit out for a while to warm to room temperature. The spices
will stay on better if you wait a while. Optionally you can wrap them in plastic wrap overnight in the refrigerator.
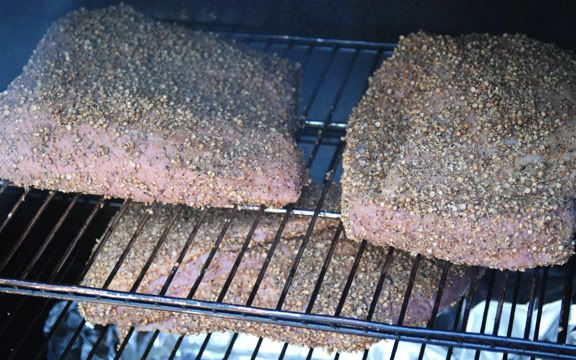

Loaded and ready to go. The smoker is warmed up to temperature already.
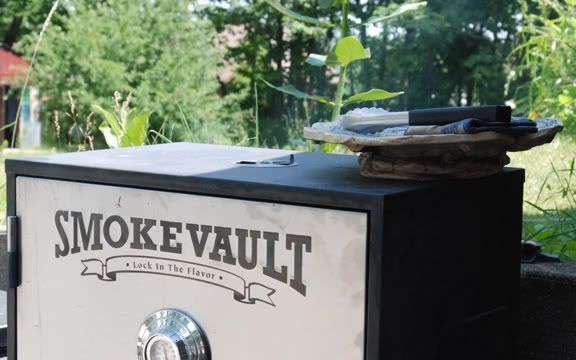

Just a small amount of smoke is all you need. I leave the top vents wide open.
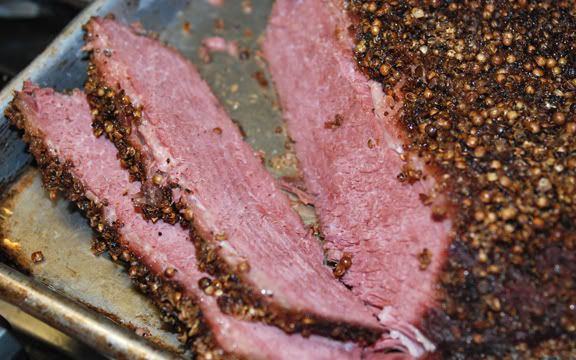

Notice I cut the first slices on the grain and not across the grain. This is a common error.
Be sure to check the grain on the bottom and cut across (at 90 degrees).


breadsong's picture
breadsong

Oatmeal and Sweet Date Bread (courtesy BBGA/Team USA 2005)

Hello,
I really enjoyed the recent course I took that was put on by the Bread Bakers Guild of America, and am grateful for being a member and for having the chance to participate. Another thing I really appreciate about membership in the Guild is access to Guild's online newsletter and formula archive. There's lots of good stuff in that archive!
 
Today's bake is Oatmeal and Sweet Date Bread, one of the Team USA 2005 formulas the Guild provides online.
This one caught my eye last March; oatmeal and dates are two of my dear father-in-law's favorite things and I wanted to make this bread for him. This bread was very moist, and delicious with the sweet dates!

It was so good, I wanted to try making it again today (...a Team USA formula for Canada Day!
...the maple leaf is to add some Canadian content :^) ...   )


Wanting to share this formula, I asked permission of the Guild to post the formula here on TFL; the Guild kindly granted permission and asked me to include this note in the post:
"The mission of The Bread Bakers Guild of America is to shape the knowledge and skills of the artisan baking community through education.  Guild members have access to many other innovative professional formulas, both online and in the Guild’s quarterly publication, Bread Lines.  For more information about membership, please visit www.bbga.org."  

With thanks to the Bread Bakers Guild of America and Jory Downer, William Leaman and Jeffrey Yankellow, the team members of Bread Bakers Guild Team USA 2005 - who were gold medal winners that year at the Coupe du Monde de la Boulangerie!

The formula authors describe the bread and its ingredients:
"The wide range of weather throughout the United States provides for a variety of growing climates. The warm weather of the west coast, allows for California to grow an abundance of palm trees that fruit, the luscious date. In this original formula, rolled oats, another major crop of American farmers, are complemented by the sweetness of dates. A portion of the oatmeal is fermented in a sponge. The high sugar content of the dates creates a rich brown crust that balances their sweetness. The abundance of oats results in a tight textured, full bodied crumb which is a pleasant contrast to the open crumb of the other breads."

A couple of pictures from today's bake (1500 grams dough weight, 540g boule, (6) 160g triangles):   
                                      

My first bake (3 boules, 1635 grams total dough weight):
                                                            

This bread is made with three preferments and a soaker, but the three preferments can be mixed at the same time.

Ingredients ( for 1635 grams dough):


Poolish

Oat sponge

Liquid levain

Soaker

Dough

Total

Bread Flour

120

120

60


300

600

Water

120

132

60

60

219

591

Instant yeast

0.12

0.12


1.5

1.7

Salt

0.6

0.6

0.3


11.5

13.0

Rolled oats


60


60


120

Dates, diced


300

300

White starter


12


12

Poolish


240


Oat sponge


312


Liquid levain


132


Soaker


120


Total

240

312

132

120

1635

1635

I adapted the method for mixing by hand:

12 hours prior to the mixing the dough:
Poolish: Use a water temperature for 72-74F final poolish temperature; mix all until well blended; cover and ferment at 73F for 12 hours.
Oat sponge: Use a water temperature for 72-74F final sponge temperature; mix all until well blended; cover and ferment at 73F for 12 hours.
Liquid levain: Use a water temperature for 72-74F final levain temperature; mix all until well blended; cover and ferment at 73F for 12 hours.
(At 9 hours, my levain wasn't anywhere near ready...the salt taking its effect; I set the container holding the levain in a shallow basin and filled halfway with warm water; replaced with more warm water as needed; this got the levain going and it had tripled by the time the poolish and sponge were ready)

30 minutes to 1 hour prior to mixing the dough:
Using tepid water, mix together so oats are all moistened; cover, and set aside to let rest.

Prepare the dates by chopping; set aside.
"The variety of date used is flexible. It is important that they are not too soft. A soft date will blend into the dough instead of maintaining its shape, creating a dark color in the bread and increasing the likelihood of a burnt crust. The dates should be cut into ¼” pieces in preparation for mixing."

Mixing the dough:
Use a water temperature for 73-76F final dough temperature. (I started with 104F water as I was allowing for autolyse, hand mixing and resting periods during the hand mix, during which my doughs tend to cool down).
Place flour in bowl. Add 85-90% of the water to the bowl and mix until flour is evenly hydrated. Cover and autolyse for 20 minutes.
Add yeast, poolish, oat sponge, and levain to the mixing bowl. Mix with a dough whisk to combine. Cover, place in warmed proof box (to try to preserve warmth in the dough), rest 5 minutes. Dough temp.: 80F.
Oat sponge is on the left in the photo:


Add salt to mixing bowl. Mix, folding in the bowl, 50 folds. Dough temp.: 74F. Cover, place in warmed proof box, rest 5 minutes.
Fold 30 times in the bowl, then 5 minute rest as before, then finally 20 folds. Dough is lifting away from the bowl as I fold it at this point; gluten showed improved mix.

Add remaining water (80F) to the bowl, and mix to incorporate.
Add oat soaker and dates and mix to incorporate evenly.
Dough temp.: 73F (recommended to be 73-76F).
Bulk ferment at 78F for two hours, with (3) stretch and folds every 30 minutes.
Here is the dough at the end of the bulk ferment:

For the first bake I divided the dough into three parts to make boules. For today's bake, I followed these shaping instructions to make (2) triangle breads (remaining dough shaped as a boule):

Divide the dough in 160g / 5 ¾ oz pieces and preshape as a tight ball. Cover and allow the dough pieces to rest for 20 minutes.

Shape the rested balls of dough into triangles, being gentle not to degas the dough too much. Three triangles make up one loaf. Arrange three triangles together on floured linen, seam up, so that the point of one triangle rests in the center of one of the sides of the other triangle. The finished shape will have a circular appearance.
(I proofed top side up as I didn't think I'd be able to successfully flip the triangles over!).
Place the loaves in a draft free place at approximately 74° F for 30 minutes to proof.

Shaping a triangle by gently folding over three sides, towards center, pinching to seal and bring together:
  
                                                                        After proofing:  

A couple of notes about the maple leaf: I used a bit of decorative dough for this (extra dough that I froze after making my fol epi loaf awhile back. After thawing, the dough is just as good as new :^) ... a happy discovery!) 
After cutting the leaf and removing the excess dough, I dusted the leaf with flour.

I used the cutter to gently! mark the boule to help with placement of the leaf. 
                                                              
I brushed the area where the leaf would go lightly with water, to help the leaf stick.
After the leaf was placed, I scored around it and then lightly on the floured leaf, to try to make "leaf veins".

Back to the triangles:
If proofing seam side up, turn the loaves over onto the oven loading device.
Score each triangle with two lines (I did three).

Bake with steam at 475° F for approximately 30 minutes. 
Vent the steam from the oven and continue to bake for an additional 5 minutes.
(I found these were browning fast. I moved the loaves around every 10 minutes, and covered with foil and reduced to 435F after 20 minutes. 30 minutes total bake time; left in oven for 10 minutes with oven off and door ajar).
Remove the bread from the oven and allow to cool.

And lastly, a couple of crumb shots!:
 

Happy baking everyone, and Happy Canada Day!
from breadsong

Submitted to YeastSpotting :^)

dmsnyder's picture
dmsnyder

Proth5's "Starting to get the bear" baguettes


Pat's (proth5) baguettes have been my “go to” recipe for baguettes for quite a while. When she posted a new formula in November  - See Starting to get the Bear  - I promised myself to give them a try. I got around to it today.

These baguettes are made with both levain and a poolish and are spiked with some instant yeast. They still have a relatively long fermentation, for yeasted baguettes. Pat's description of her method included baking some of the dough the day they are mixed and retarding some to shape, proof and bake the next day.

Here is my interpretation of her formula a methods, with some modifications, as described below.


Poolish


Ingredients

Wt (oz)

AP flour

3.7

Water

3.7

Instant yeast

“generous pinch”


Levain


Ingredients

Wt (oz)

AP flour

1.7

Water

1.7

Ripe sourdough

0.35


Final dough


Ingredients

Wt (oz)

AP flour

31.35

Water

19.2

Instant yeast

0.05

Salt

0.55

Poolish

All

Levain

All


Total dough


Ingredients

Wt (oz)

Baker's %

AP flour

37.1

100

Water

25

67.25

Instant yeast

0.1

0.25

Salt

0.55

1.5

Starter

0.35

9

Total

63.1

178


  1. Mix the poolish and the levain and let them ferment at room temperature for 8-12 hours.

  2. Mix all the ingredients except the salt to a shaggy mass. Cover and let rest for 30 minutes. (I actually autolysed for 90 minutes.)

  3. Add the salt and hand mix in a large bowl or machine mix for 3-5 minutes at low speed. (I hand mixed the dough.)

  4. Bulk ferment for 4.5 hours with a stretch and fold at 2 hours. (Or, cold retard for up to some length of time, but surely less than 3 days. Or divide some pieces and retard the rest of the dough. This time, I divided the dough in two after the S&F and retarded half.)

  5. Divide into 10 oz pieces and pre-shape as logs. Rest the pieces, covered, for 20-30 minutes.

  6. Shape as baguettes.

  7. Proof en couche for 1.5 hours (Or until ready. Or retard shaped loaves.)

  8. Pre-heat oven to 500ºF with baking stone and steaming apparatus in place.

  9. Transfer loaves to peel. Score them and transfer them to the oven.

  10. Bake with steam for 5 minutes. Then lower temperature to 480ºF (convection, if you have it), and bake for another 12-13 minutes.

  11. Transfer to a cooling rack and cooling thoroughly before eating.


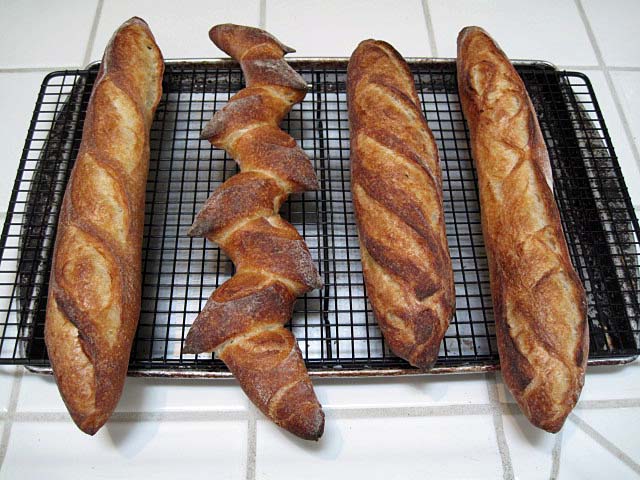
Because of the size of my baking stone, I divided half the dough into 4 pieces to make mini-baguettes.The dough handled really nicely, I thought. The baguettes were proofed and baked as above, according to Pat's directions. After 17 minutes, they were rather dark, especially the one at the back of the oven. They sang loudly when removed to cool. They came out of the oven just in time to eat with dinner, for a change, rather than just in time for bedtime snack.

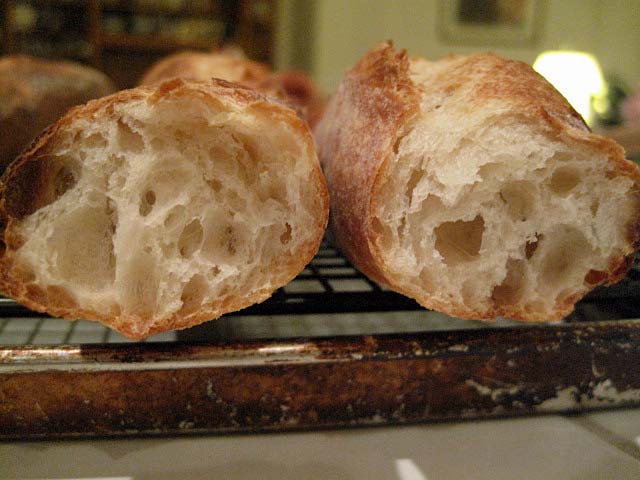
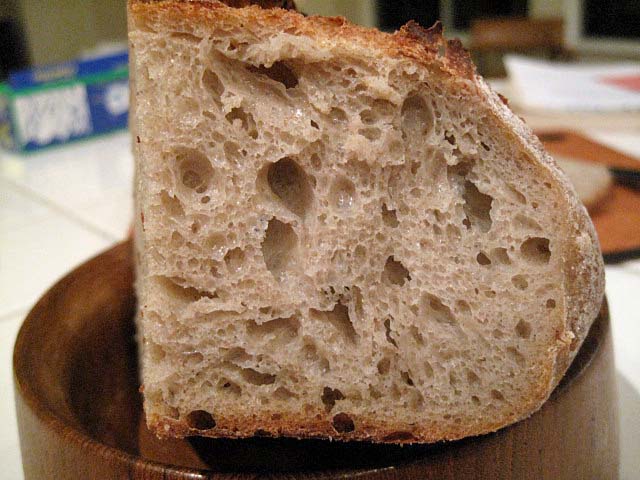
Baguette crumb - torn, not cut

We ate one baguette with dinner – Sautéed petrale sole, leeks vinaigrette and warm Swiss chard salad with olive oil and lemon dressing.

The crust was very crunchy. The crumb was quite chewy and nicely aerated. The flavor was good, but I will use a bit more salt next time. I think I will also bake at a somewhat lower temperature for a slightly longer time. 460-480ºF for 20 minutes would be better for me, I think.

Addendum: I baked the second batch of baguettes today. I baked these at 470ºF for 20 minutes.

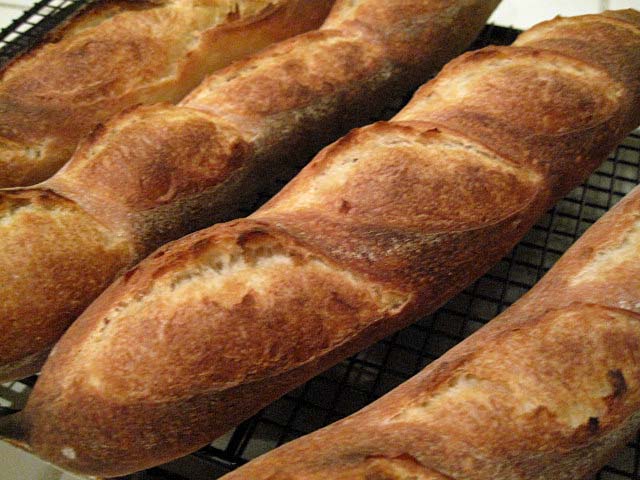
Baguettes with varied shaping and scoring

Compared to the first batch, the second had less dark crust. It was very crisp. The crumb was basically the same. The flavor was noticeably sweeter, but it still was under-salted to my taste.

These are very nice baguettes. I'll be following Pat's reports of her continuing bear hunt.

David


wally's picture
wally

Christmas Breads

My tradition of Christmas bread baking began by accident back in 1975, when, considerably younger and poorer, I discovered a recipe for cheese bread in Joy of Cooking that yielded a pretty tasty product.  So I decided that Christmas that family and friends would receive a loaf, something I could afford and that was personal.

To my surprise, I started receiving inquiries the following holiday season to the effect of, "So, I'm looking forward to another loaf of that fabulous bread."  So began a tradition (curse in my weaker moments) of baking cheese bread at Christmas time.  This year, that amounted to 30 loaves, baked over two weekends.  A busman's holiday for me I reckon.

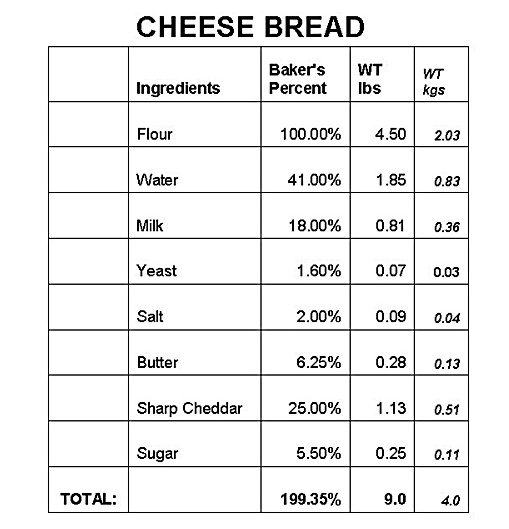
I've tweaked the recipe over the years, but the central ingredients remain extra sharp cheddar cheese, butter and milk.  The combination makes for a rich, dense loaf of bread with excellent keeping qualities and a simple set of instructions I send with each loaf: "Cheese Bread - For best results, slice, toast, butter, and enjoy!"  The recipe below is for 5 loaves which is my standard at-a-time bake these days.

While this is an easy, straightforward straight-dough bread, I've found that to achieve a really good loaf requires a fair amount of hand labor.  I hand grate the cheese - about a quarter pound per loaf - because my experience with KA mixer grater attachments is that they produce too coarse a grate, and I then gently rub the cheese into the flour, a bit at a time, to both coat the individual gratings and to gently warm the flour and cheese which makes for better incorporation.   Beyond that, because I mix 9 lbs at a time, there is no way short of using a commercial mixer to do this except by hand.

It's actually a kind of sensual experience, gently rubbing flour and cheese between my palms until the flour itself begins to take on an orange hue.

The second taxing part is that because this is a stiff dough, it requires kneading.  Not so much for the gluten development I think as for the final effect of warm hands on dough in 'melting' the cheese so that it's really incorporated.  After 7 minutes or so of kneading, you are rewarded with a dough that is silky smooth and now very orange-hued.

The milk, butter, salt and sugar are heated in a pan to a scalding temperature to denature the enzymes in the milk, and then cold water is added to reach DDT.  Instant dry yeast is added to the flour and cheese, the liquid is poured in, and then hand mixed until fully kneaded.  Bulk fermentation is 1 - 1 1/2 hours depending on temperature, and then the dough is divided, allowed to rest for 20 minutes, and then shaped and placed in bread pans and covered. 

I braided one up as a challah, and thinking about it, the formulas aren't that far removed excepting the cheese.

Final proof is a short 1 hour, and then the bread is baked, steamed, in a 375° F oven for 45 minutes.

After removing them to racks to cool, they are brushed lightly with melted butter to achieve a soft crust (no hearth bread, this!).


I've frozen this for several months in frost-free refrigerators after cater-wrapping them in plastic, and they still turn out wonderfully.

Other baking I've done includes some stollen.  I like to marinade my fruit in rum for about 8 weeks prior to making my dough.  Pics are below - sorry no crumb shots as these are all presents.


I wish everyone at TFL the best of our Holiday season!

Larry

dmsnyder's picture
dmsnyder

Hot versus Cold Dutch Oven Baking: an experiment

The recent discussions regarding baking breads in hot versus cold Dutch ovens - those from "Tartine Bread" in particular - prompted today's experiment.

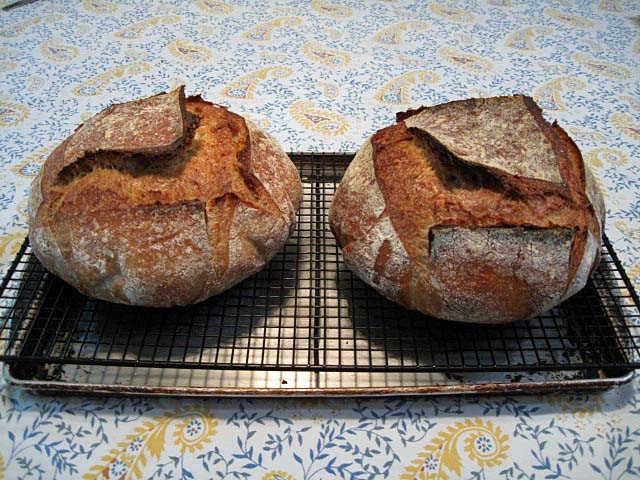
I made two boules of the Country Rye from "Tartine Bread." One I baked starting in a room temperature enameled cast iron Dutch oven. The other I baked in the same Dutch oven, pre-heated. The breads were identical in weight. They were cold retarded overnight in bannetons and then proofed at room temperature for 2 hours before the first bake. The loaf baked in the pre-heated dutch oven proofed for 45 minutes longer, while the other loaf was baking. The second loaf was baked for 7 minutes longer than the first loaf, to get a darker crust.

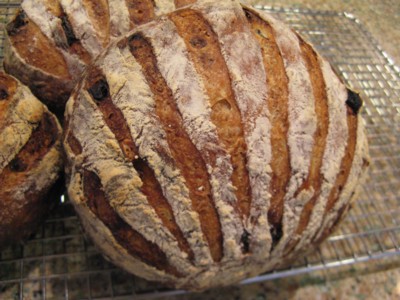
Boule baked in cool Dutch oven on the left. Boule baked in pre-heated Dutch oven on the right.

In spite of the fact that the loaf baked first was relatively under-proofed, the loaf baked second, in a pre-heated Dutch oven, got slightly better bloom and oven spring. I won't be slicing these until next week. They are for my Thanksgiving guests. So, I don't know if there is any difference in the crumb structure.

Overall, I'm happy with both loaves. The differences are very small - arguably of no significance. While pre-heating the Dutch oven does appear to result in slightly better oven spring, the convenience of not having to pre-heat the Dutch oven may be more advantageous for many bakers.

Addendum: Okay. So, I'm weak. I had to try the bread, since it was the firs time I'd baked it.

The crust is crunchy-chewy. The crumb is less open than the "Basic Country Bread," as expected. The 17% (by Robertson's way of doing baker's math) whole rye does make a difference. The crumb is very cool and tender. The aroma is rather sour, but the flavor is less so. The surprise was the prominent whole wheat flavor tone, even though all the WW is in the levain, and it only amounts to 50 g out of a total of 1100 g (my way of doing baker's math). I expect the flavors to meld by breakfast time tomorrow. I think this will make great toast with Almond butter and apricot preserves.

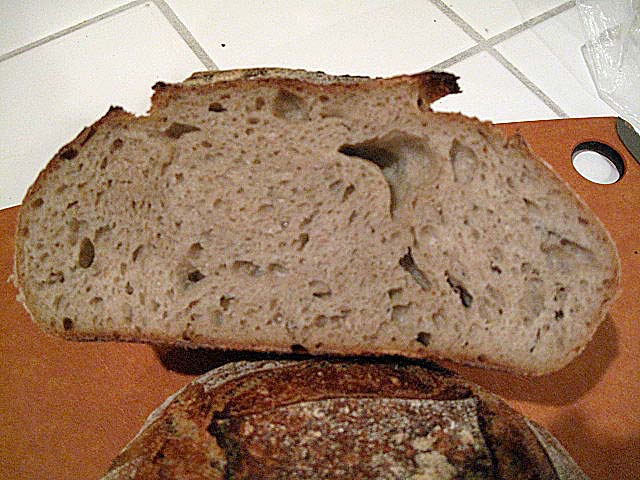
Country Rye, cut loaf

Country rye, crumb

David

Submitted to YeastSpotting

Anonymous baker's picture
Anonymous baker (not verified)

Protein content of flour

The nutritional label of the flour I have been using says that there are 3 grams protein per serving and a serving is 30 grams. That would seem to translate into a 10% protein content. But, since this is labeled bread flour and the protein content is probably at least two percent higher there must be other factors involved. Anybody got a clue? Does ash content get involved? Being able to tell the protein content of the flour from the nutritional label would be much too easy.

Thank you

Greg

dmsnyder's picture
dmsnyder

Sourdough Challah from "A Blessing of Bread"


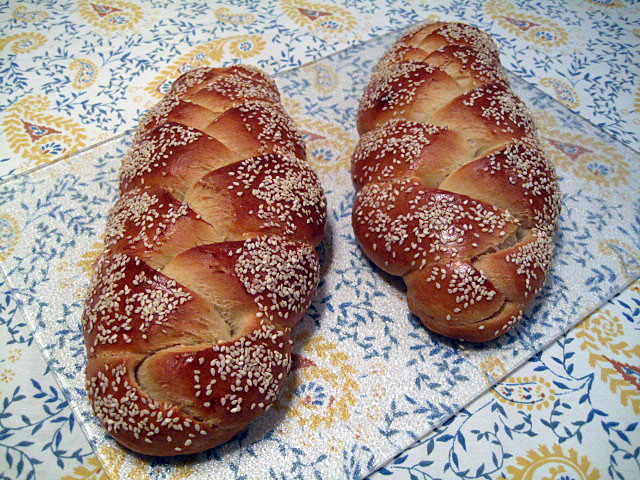
I'm rather fond of challah, but my wife isn't. Most challah is too rich and too sweet for her taste. The closer to brioche it tastes, the less she likes it. So, when I made “My Sourdough Challah” from Maggie Glezer's “A Blessing of Bread,” and both my wife and I loved it, I was delighted.

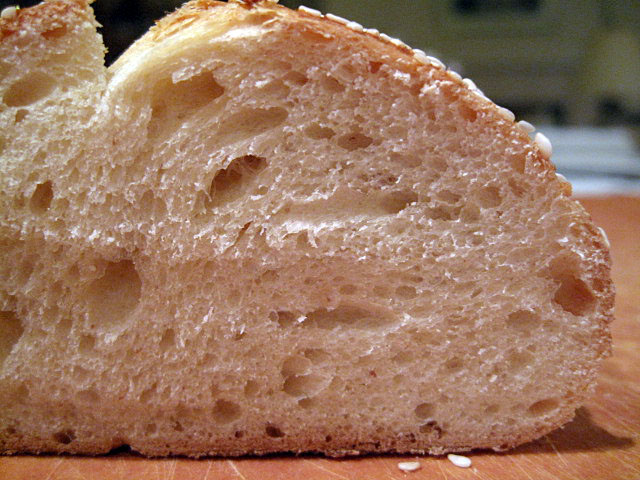
Of course, all challah was made with sourdough before the introduction of commercial yeast. Since then, according to Glezer, challah has tended to be made sweeter and richer. Sourdough challah has a “moister, creamier texture” and stays fresh longer that the yeasted variety. Glezer's version has a delightful sourdough tang which lends it an almost “sweet and sour” flavor. It is wonderful plain, as toast and as French toast.


Ingredients

The starter

Amount (gms)

Active firm sourdough starter

35

Warm water

80

Bread flour

135


The final dough

Warm water

60

Large Eggs

3 eggs + 1 egg for glazing the loaves.

Salt

8

Vegetable oil

55

Mild honey

65

Or Granulated sugar

60

Bread flour

400*

Sourdough starter

All of the above+

    * I added an additional 3 tablespoons or so of flour during mixing, because the dough seemed too wet. This may have been needed due to my using more starter than Glezer specifies. See below.

    + Glezer says to use only 200 gms of starter, but I used all of it (250 gms)

Procedures

  1. The night before baking, mix the starter and ferment it at room temperature for 8-12 hours.

  2. In the morning, in a large bowl or the bowl of a stand mixer, dissolve the starter in the water, then mix in the 3 eggs, salt, honey and oil until completely combined.

  3. Mix in all the bread flour until it forms a shaggy mass.

  4. Knead the dough on the bench or in a stand mixer until it is smooth and there is moderate gluten development. Add small amounts of water or flour to achieve the desired consistency. The dough should be quite firm.
  5. Transfer the dough to a lightly oiled bowl and cover it tightly. Ferment for about 2 hours. It may not rise much.

  6. To make two 1 pound loaves, divide the dough into two equal portions, and divide each portion into the number of pieces needed for the type of braiding you plan to do. (I did 3-strand braids.)

  7. Form each piece into a ball and allow them to rest, covered, for 10-20 minutes to relax the gluten.

  8. Form each piece into a strand about 14” long. (I like Glezer's technique for this. On an un-floured board, flatten each piece with the palm of your hand. Using a rolling pin, roll out each piece to about ¼ inch thickness. Then roll up each piece into a tight tube. Using the palms of your hands, lengthen each piece by rolling each tube back and forth on the bench with light pressure. Start with your hands together in the middle of the tube and, as you roll

    it, move your hands gradually outward. Taper the ends of the tube by rotating your wrists slightly so that the thumb side of your hand is slightly elevated, as you near the ends of the tube.)


  9. Braid the loaves.


  10. Place each loaf on parchment paper in half-sheet pans (I used a quarter-sheet pan for each loaf.) Cover well with plasti-crap or place the pans in a food grade plastic bag, and proof at room temperature until the loaves have tripled in volume. (Glezer says this will take “about 5 hours.” My kitchen was rather cool. I proofed for 6 hours.)


  11. Pre-heat the oven to 350ºF with the rack in the upper third of the oven.


  12. Brush each loaf with an egg lightly beaten with a pinch of salt.


  13. Optionally, sprinkle the loaves with sesame seeds and/or poppy seeds.


  14. Bake until done – 25-35 minutes for 1 pound loaves.


  15. Cool completely before slicing.


David


Submitted to YeastSpotting on SusanFNP's Wildyeastblog


Shiao-Ping's picture
Shiao-Ping

Dan Lepard's Barm Bread (100% sourdough)

My husband text me from China and said his boss told him over pre-dinner drinks that he is a sucker of sourdough!   Immediately I was thinking what would I bake if he ever makes a trip to Australia, not that I've been forewarned of any near-term possibility, but I was just entertaining hypothetical visits.  Somehow, I know it's not MacGuire's that I've been making lately even with all those lovely big holey crumbs that I've been getting.  The flavors of all those MacGuire breads/sourdoughs are not the best of all breads/sourdoughs that I've made.   Indulge me with this explanation: the flavors of all those super-hydrated (and the resulting super-holey) crumbs are not deeply alluring for me to want to come back and have another slice once chewing is done.

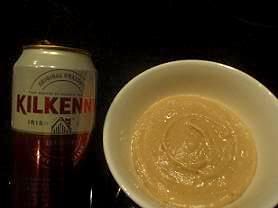
I was out doing a bit of gardening and enjoying the gorgeous sunshine of Australian winter.   It hit me that my husband left a bottle of Irish ale in our bar fridge.  There is a Dan Lepard's recipe that uses ale (as one would expect) in his "The Handmade Loaf" that I've been wanting to try.  It's called "Barm bread."  For most of you out there there will be no difficulty guessing what a barm bread might be, but I've never heard of this word, barm.  My Wiktionary says it is an old English term referring to the foam rising upon beer or other malt liquors, when fermenting, and used as leaven in making bread (and in brewing).  So, that's it - a barm bread is like a sourdough bread.


To make a quick barm

250 g ale (or bottle-conditioned beer)

50 g white bread flour

4 tsp white leaven (Dan's starter is 80% hydration; as the amount used is so little, it would not matter if your is not 80%.)  

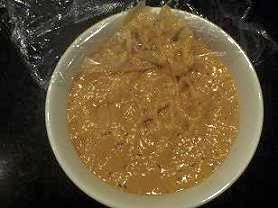
Heat up the ale or beer in a saucepan to 70C (158F), then remove from the heat and quickly whisk in the flour.  Transfer to a bowl, leave to cool down to 20C (68F), then stir in the leaven.  Cover with a plastic wrap and leave overnight to ferment.  (My barm took 36 hours to be bubbly.)  Use as you would a leaven (but adjust your recipe water as the barm is quite liquid).    


          the ale and the barm freshly made up                              the barm is ready

Dan Lepard says this is a perfect replica of the complex barm of olden times for the home bakers.

Now, the above formula is really curious to me.  Recently a TFL user Bruce (Frrogg1son) asked me about a Chinese "65C soupy dough" and when I Googled it a whole string of Hongkonese and Taiwanese bread recipes ran up; many of these breads are on the sweet side with milk powder, butter and sugar, almost like French brioche breads.  I see these type of sweet white breads in Japan a lot too.  

The curious thing is that the ratio of water to flour in this "65C soupy dough" is the same as Dan's ale to flour ratio; ie, 5 to 1, and it is heated up to 65 C, closed to Dan's 70 C.  Bruce told me that the science behind this soupy dough is that "when the flour particles reach about 65C, they burst, releasing starch molecules, which have the capacity to absorb very large amounts of water.  It is like gelatinization."  What this does to a dough is that it improves the moistness of the crumb and keeping quality of the bread.   He first discovered it on the internet as a natural way to extend the moistness of some doughs.   How interesting.  I imagined what this does is similar to what potato does for some sourdoughs - very most crumbs and good keeping quality.

That said, I felt a sense of auspicious foreboding coming for this barm bread.  Dan's book (page 41) says the Barm bread is the traditional wheaten bread of England.  Wow.


The formula

150 g barm from above (the rest can keep in the fridge for a week)

250 g water (adjust your water temp to achieve a dough temp of around 21C / 70F)

500 g strong white flour (or a flour mix of rye and wholewheat, or even soaked grains, but I used white flour only)

10 g salt (or 1& 1/2 tsp)

*  Note: This is a 68% hydration dough; but I added 20 g extra water to bring it to 72%. 

Schedule in hours and minutes 

0 :00    In a large bowl, whisk the barm with the water.  Add the flour and salt, and stir until you have a sticky mass.  Cover.  Autolyse. The dough temp should be about 21C (70F).

0 :10    Turn the dough out onto a lightly floured surface and knead for 10 - 15 seconds.  Return the dough to the bowl.  Cover.  (I gave the dough 7 - 8 folds inside the bowl, which  lasted 15 seconds, much the same way as dough is folded in James MacGuire's pain de tradition here that I recently posted.) 

0 :20    Knead again as above.  (I folded the dough again in the bowl.)  The room temp should be about 20C (68F), if not, you may need to place your dough in the fridge for part of the time to keep the dough temp down.

0 :30    Knead again as above.  (I folded again.) 

1 :00    Knead again as above.  (I folded again.)

2 :00    Knead again as above.  (I folded again.)

3 :00    Knead again as above.  (I folded again.)

5 :00    Turn the dough out and divide it into two pieces of 450 g each (I left mine as whole).  Pre-shape each into a ball.  Cover.

5 :15    Shape dough into boule and place into floured linen-lined baskets or bowls.  Cover.   Leave at room temp of around 20C (68F) for a bit longer than 4 hours or until dough almost doubled.

8 :30    Turn on your oven to 220C/425F (if it takes one hour to pre-heat).

9 :30    Bake with steam for 50 - 70 minutes.


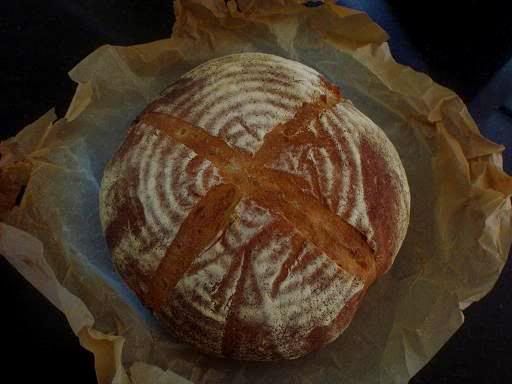
Phew!  This schedule may look like a bread making marathon to you but in truth my dough was not ready until after 12 hours!  I started mixing my dough at 7am yesterday, and it was only ready to bake at 8 pm!  Possible reasons are that my room temp was only around 18C (64F) and/or my barm was very slow.   And this is it:


   Dan Lepard's Barm Bread 


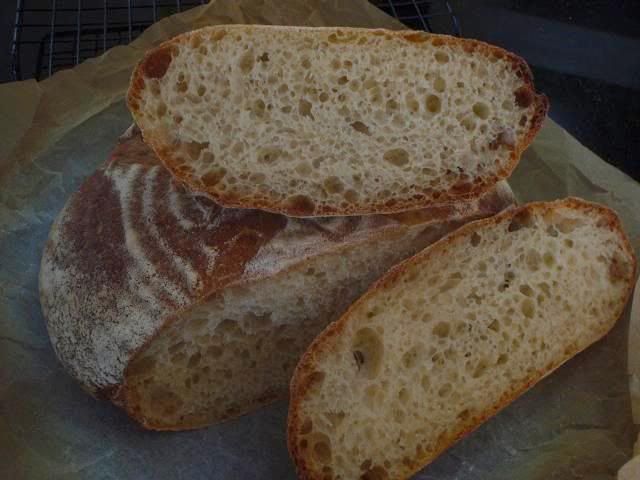
What a beautiful barm bread; the taste is most amazing, richly flavored from the ale-based barm, which has a slight bitterness and sweetness from the ale.  I am most impressed by Dan's formula.  The crumb is sweetly fragrant.  It has a very deep aroma, and allure.  Now, this is something that I would come back to have more.   


It's been years since I ate past 8pm but last night I literally had 1/3 of the loaf on my own!  Any of you ladies out there, don't do what I do. 

I have not recommended any breads to people up until now because most of my breads are frivolous experiments and for my eyes only, but I do commend this one.   Whether your guests are experienced connoisseurs or no foodies at all, there would be no qualms about this superb sourdough.  (I am blowing my own trumpet.)

Thank you, Dan. 

It's time Polly our dog go out for a rumple-trot in our yard; I sang out her name and she stirred from behind my couch.  Out she went through the hallway door to enjoy the green and the afternoon sun.   And me?  I am having my afternoon tea with this bread!


Shiao-Ping 


audra36274's picture
audra36274

Why milk powder in milk bread, and not just milk?

    I just got my copy of Secrets of a Jewish Baker, and got up this morning going to make milk bread. Scanning over them I noticed that they all contained milk powder instead of just plain milk. I have seen the ads in KA claiming the the rise is far superior with their milk powder. I had some but it has gotten old. Surely little old Jewish men and women centuries ago were not going out to milk the cow for milk powder to make bread. Maybe its a dumb question, but why can't I just use milk? Help!

                                                                      Audra

Pages