The Fresh Loaf

A Community of Amateur Bakers and Artisan Bread Enthusiasts.

Most bookmarked

Abelbreadgallery's picture
Abelbreadgallery

Pan de cristal / Glass bread

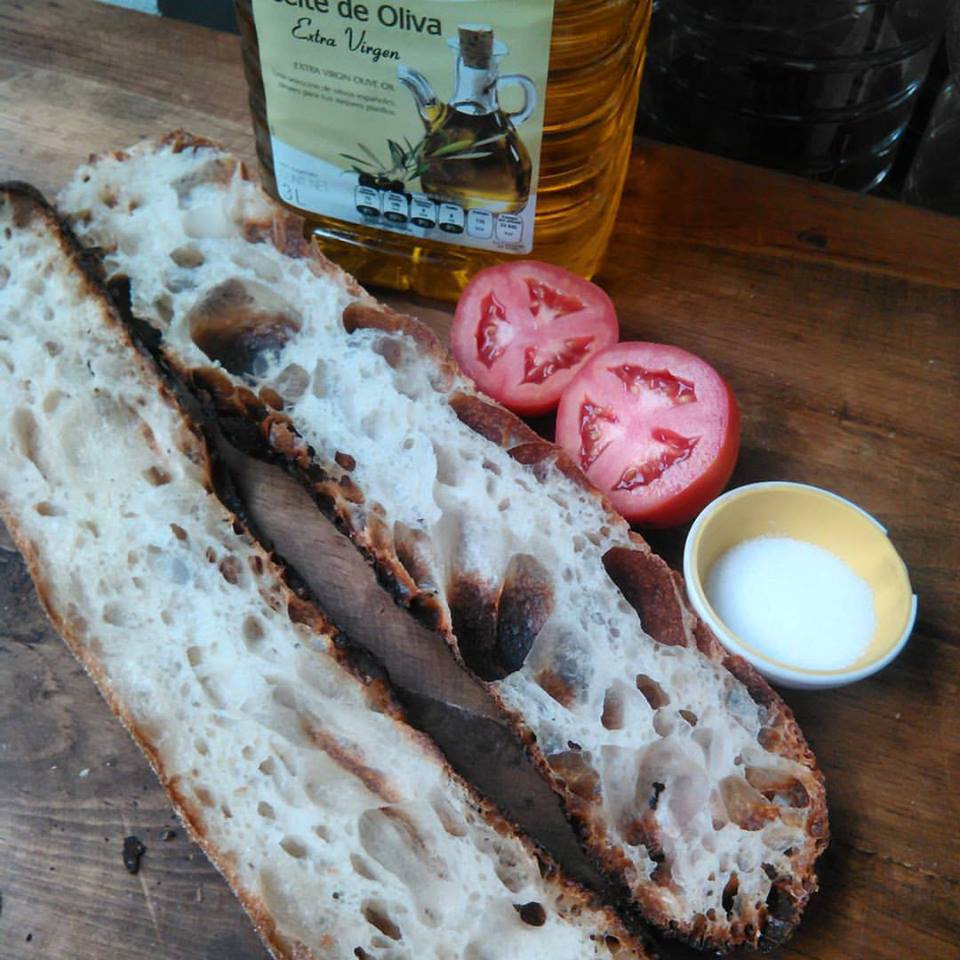
If you have visited Barcelona or the Catalonia region, maybe you have tasted Pan de Cristal, which is the local version of the ciabatta bread. I say it's a version because there are many things that make this bread so special. The main difference is that the crust is thinner, crispier and more delicate than a ciabatta, and the crumb is lighter and more opened than a ciabatta. And, how do you get this? More water (around 110-120% hydration), and just a small quantity of sugar and olive oil. Sugar makes the crust thinner and crispier. That's why this bread is called Pan de Cristal (Glass bread), because it's so delicate that when you want to slice it, it breaks like a cup of glass. Olive oil not only brings mediterranean aroma and flavour, but also changes the structure of the crumb.

This bread was developed around 10 years ago by a local bread company. The name is copyrighted. They deliver this bread, frozen, not only to local restaurants but also to anywhere in the world. In fact I met a businessman from Texas that bought this bread until he learned how to make it.The atributes of this bread make it very special for sandwiches and tapas with tomato spread, olive oil, serrano ham, etc. The shape is long and wide, quite flat.So you don't really have to shape, just divide, and stretch with your fingers and let the magic happen.

You can use sourdogh, yeast, or a combination of both, which is the best option in my opinion. According to my experience, you get better results working this dough in the straight way, without retarding in cool room. It's a just personal point of view according to my daily work.

Enjoy, have a nice baking day.


pjkobulnicky's picture
pjkobulnicky

Naturally leavened panettone

I have been making panettone for some years now but I have always done them with commercial yeast. I've always wanted to try to do them with natural leavening but everything i read about such recipes seemed to indicate that doing them was a life's work.  So, since I am retired and my life is fairly free and clear I thought I'd give it a go. I was also intrigued by this recipe: http://http://www.academiabarilla.com/italian-recipes/regione-lombardia/panettone.aspx 

It is one of their regional recipes, roughly translated from Italian and what can only be called a "Nonna" recipe ... some of this, a few of those, etc. There are lot of places where you just have to figure it out.  But, I was intrigued by the way the sugar and eggs were added as an emulsion, by the several dough builds and by the lack of any bulk fermentation of the final dough. 

The final and sole proof is in the molds themselves and I did mine at 55-60 degrees F for about 22 hrs. The dough barely came to the top of the molds at baking time but had spectacular oven spring. 

I will include my revised recipe below. As I warn in the recipe, this is not a dough for the challenged mixer.  My Bosch struggled.


(NOTE after original post) the starter in the recipe below should be the Italian Sweet Starter described here: 

http://www.sfbi.com/maintaining-an-italian-starter.html )


Paul


PANETTONE

Makes three large loaves


INGREDIENTS:

3 lb all-purpose flour

10 oz butter

¾ lb granulated sugar

milk ~ 7 T

7 oz sultanas

½ lb sourdough starter

4 1/2 oz candied orange

10 “large” egg yolks

3 “large” eggs

1 tsp vanilla

Zest of one orange and one lemon

1/2 - 1 oz salt

package 12” long bamboo skewers


PREPARATION:


Note … this is based on a folk recipe from Barilla. That recipe made a number of unstated assumptions. The recipe below is my more detailed interpretation.


Morning day 1


Early AM: 


Build 8 oz active starter at about 50% hydration (approximately 4.0 oz flour, 2.0 oz water and 2.0 oz active Italian Sweet starter.  Mix into firm ball and let rise until doubled in volume, about 2-3 hrs. When doubled move to first dough.


First dough by hand:

Put 5.5 oz. of flour onto the work surface, crumble the sourdough starter in and slowly work in 4T warm water, 1 T at a time.  Knead to a firm dough. Shape into ball. Put in a bowl to double, about 3 hours at 75 F. Move to second dough. 


Second dough by hand:

Put 9 oz. of flour onto the work surface and place the risen dough in the centre. Incorporate the first dough into the flour while adding about 7 T of milk, one T at a time.  Knead thoroughly into a smooth dough. Put in a bowl and cover with plastic wrap and let rise overnight at 55F. It should triple.


Dice the candied citron and orange, soak the sultanas (and citrus if it is dry) in brandy overnight.


Morning day 2


Set the fruit to drain thoroughly.


In a bain-marie, dissolve the 8 oz sugar into 4 oz warm water to make a syrup, then add the whole eggs and egg yolks and cook while whisking only until all is fully incorporated, smooth and foamy, not to a custard stage. Cool and whisk in the vanilla.  


Final Dough in a stand mixer:  (note, this is a significant dough that requires a tough stand mixer).


Pour 2, lbs of flour into the mixer. Add salt. Put 2 oz. of flour on the work surface. Put the second dough on the flour and cut it into small pieces. Put the second dough and any remaining flour from the work surface into the mixer.  Add the contents of the bain-marie and mix. This is a very stiff dough and your mixer may strain. If so, add water one T at a time up to 3-4 T. Mix until dough is at windowpane stage of gluten development. Then add the softened butter, a bit at a time. Continue mixing until you have a satiny dough. Add the zest and mix until incorporated. 


Turn the dough out and spread. Incorporate the orange and sultanas using the letter fold method followed by some additional folds to distribute the fruit as evenly as possible. 


Divide the dough into three equal pieces (about 2.2 lb each)  shape into rounds and place into 7 inch panettone molds. Place them in a room temperature, draft free place covered with plastic to keep the tops from hardening (you may need to very lightly brush the tops with water or finely mist during the long rise).  Let rise until the centers nearly reach the tops of the molds. At 55-60F this may take 20-24 hrs.


Preheat oven to 400F


When the oven its up to temperature, make a large cross incision on the surface of each panettone, insert a knob of butter into the cross then place loaves into the oven. After ten minutes in the oven turn the heat down to 375  and after 10 minutes more  carefully rotate the loaves and turn the heat down to 350.  Bake an additional 25 minutes. If the tops appear to be getting too dark, place aluminum foil caps on them. 

While baking suspend 2 stout( 1X 3’s worked for me)  boards across the backs of two chairs such that there is about a 7 inch gap between them. When the panettone are done, remove them from the oven and immediately insert two skewers through the panettone molds, parallel to each other and about 1 inch from the bottom.  Invert the panettone and hang each from the boards by their skewers. Let cool hanging. When cool they may be placed upright and the skewers removed.



Lazy Loafer's picture
Lazy Loafer

Challenge - 123 bread

I needed an easy levain-based dough that I could use as a base for testing various flour combinations, add-ins, methods, etc. and 123 bread seems to fit the bill - 1 part fresh levain, 2 parts water and 3 parts flour, with 2% salt. I've used this to test two different starters to see which one is more active, and I also use it when I'm traveling and want fresh bread without a lot of fuss.

It occurred to me that this would also be an excellent challenge for a couple of reasons

  1. It controls the basics while still allowing for a lot of creativity, and
  2. the resulting recipes would be an awesome primer for newby sourdough bakers!

So, in the spirit of the second point, here is your challenge:

  • 100 grams of 100% hydration wheat (can be AP, bread flour and/or whole wheat flour) levain
  • 200 grams of water or other liquid of your choice
  • 300 grams of whatever flour or combination you come up with. The control is that it should be fairly easy to obtain and be easy for a sourdough novice to work with (so, off-the-shelf stuff rather than home-sprouted, hand-milled einkorn, for example)
  • Any spices or other dry(ish) add-ins that you wish, or wet add-ins that don't substantially increase the hydration and make it harder to handle
  • To keep a level playing field, follow this method generally:
  1. Mix flour(s), water (or other liquid) and levain and let sit for 30 minutes
  2. Add salt and other add-ins; mix by whatever method you prefer (but again, make sure it's fairly easy for newbies to follow)
  3. Develop dough, then bulk ferment (short, long or retard)
  4. Pre-shape, rest, then shape and proof (short, long or retard)

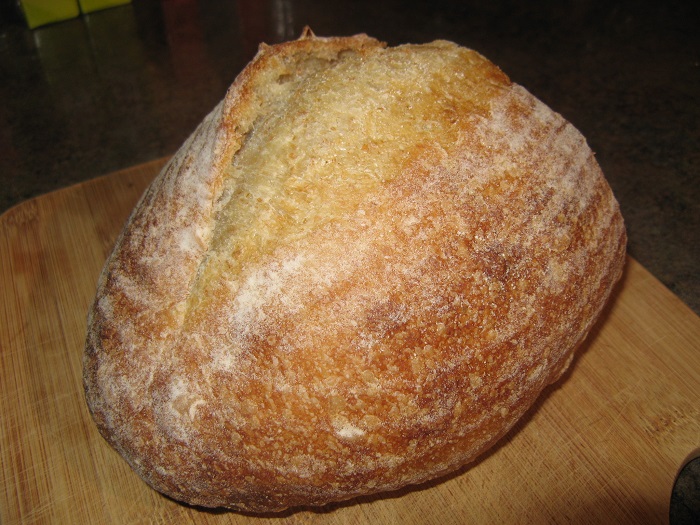
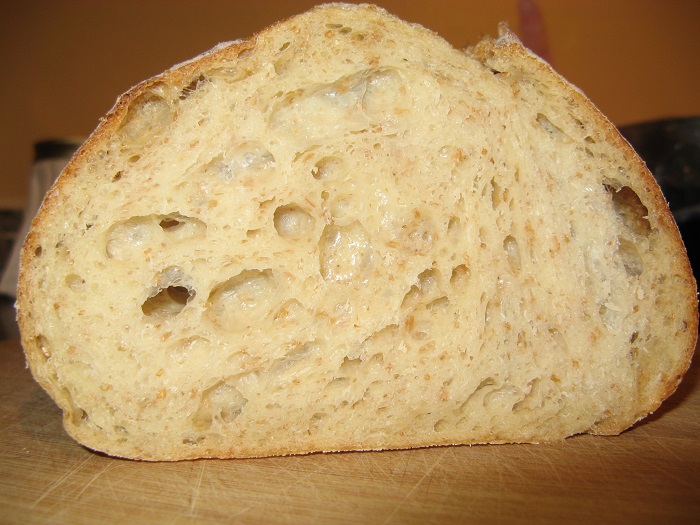
I've done a few of these lately. Here is the basic 123 dough with a little whole wheat flour:

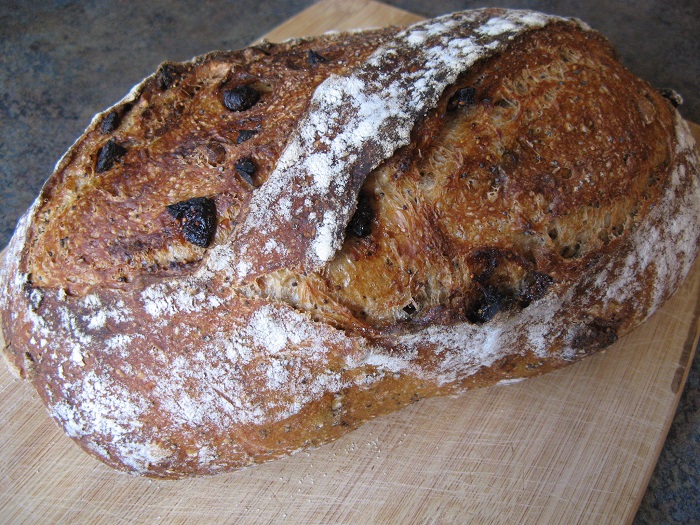
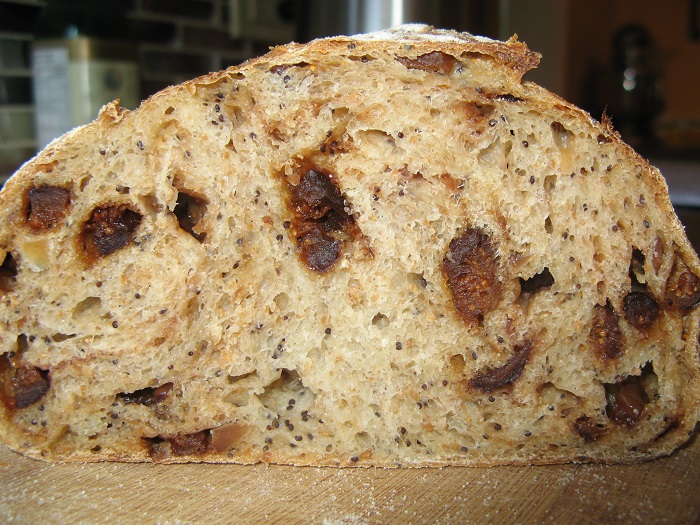
And for my latest 123 bread, check out my blog post here. Fig Nut 123 Levain!

So, whatcha got?


mwilson's picture
mwilson

Gluten: W, P/L and the problem with durum

Baking professionals in Italy commonly refer to the strength of flour by its W index, describing this as its “force”. Italian Millers provide much data in their flour specifications often including rheological properties recorded by the Chopin-Alveograph. Testing performed by the Alveograph involves forcing air into a piece of dough causing it to expand like a balloon until it bursts, at which point the test is complete. The data is recorded on a graph as a line measured in millimetres. The pressure required and therefore resistance of the dough is measured as P. The final size of the dough is measured as L, this being its extensibility. The area under the line is represented by W which indicates overall strength.


The index of W.

Up to W170 (weak):
Biscuits, waffles, and tender baked sweets. Béchamel and thickened sauces.

From W180 to W260 (average):
French bread, bread rolls, pizza, pasta.

From W280 to W350 (strong):
Classic bread, pizza, pasta, baba, brioche.

Above W350 (very strong):
Made with selected types of wheat, that are used to reinforce weaker flours. Ideal for highly enriched doughs subjected to long leavening, often referred to as “Manitoba”.


Extensibility, elasticity and quality.

Gluten consists of proteins gliadin and glutenin, the latter providing the main structure which supports the dough. Flour richer in gluten is attributed to strong flour, but the quantity of gluten does not determine everything, its characteristics are also important. Strength is more dependent on the compositional properties of gluten. Therefore, two flours may have the same amount of gluten, though one may be stronger and the other weaker. (1)

Gliadin in contact with the water forms a fluid sticky mass, while glutenin absorbing water, forms a compact mass, elastic and resistant. When these proteins are hydrated, their properties interact to provide the viscoelastic properties of gluten. In the case of strong flour, it must contain a majority of glutenin as these proteins provide the resistance within the elastic property. Flour that is high in gluten, but consisting mainly of gliadin cannot be very strong however. (1)


Resistance extensibility ratio (P/L) and Durum

Instead of referring to them individually the balance between extensibility and resistance can be expressed with the P/L ratio, the optimal being between 0.5 – 0.6. A P/L ratio higher than 0.7 characterises flour that is resistant, while values lower than 0.4 are weak and extensible. Soft wheat flour is naturally more extensible while hard wheat flours are naturally more tenacious, this is especially true with durum, the hardest wheat of all, where a typical P/L ratio can be above 1 and even exceeding 2.

Durum wheat doughs are distinguished by a high resistance to deformation and consequently limited extensibility. To be judged sustainable for bread making the semolina must have a protein content >12%, a good farinographic stability and alveograph P/L index value below 1. However it should be noted that the bread-making process preferred in the case of durum wheat requires the use of sourdough. A case in point is the pane di Altamura. The proteolytic activities of semolina and/or of the lactobacilli may produce considerable changes in the rheological properties of the gluten network, reducing the natural excessive elasticity of dough made from durum wheat.’ (2)


Numerous factors brought about by fermentation and inclusion of other ingredients will affect the properties of gluten, even water quality. Excessively hard water, rich in minerals will make gluten more tenacious reflecting an increase in the P/L ratio. Soft water will encourage the opposite effect and make dough softer and more extensible which would display a lower P/L ratio.

(1) Giorilli
(2) Handbook of Food Products Manufacturing

Edited [2021.03.19]

Flour.ish.en's picture
Flour.ish.en

Forkish Overnight Country Blonde (vs. Tartine Basic Country Bread)

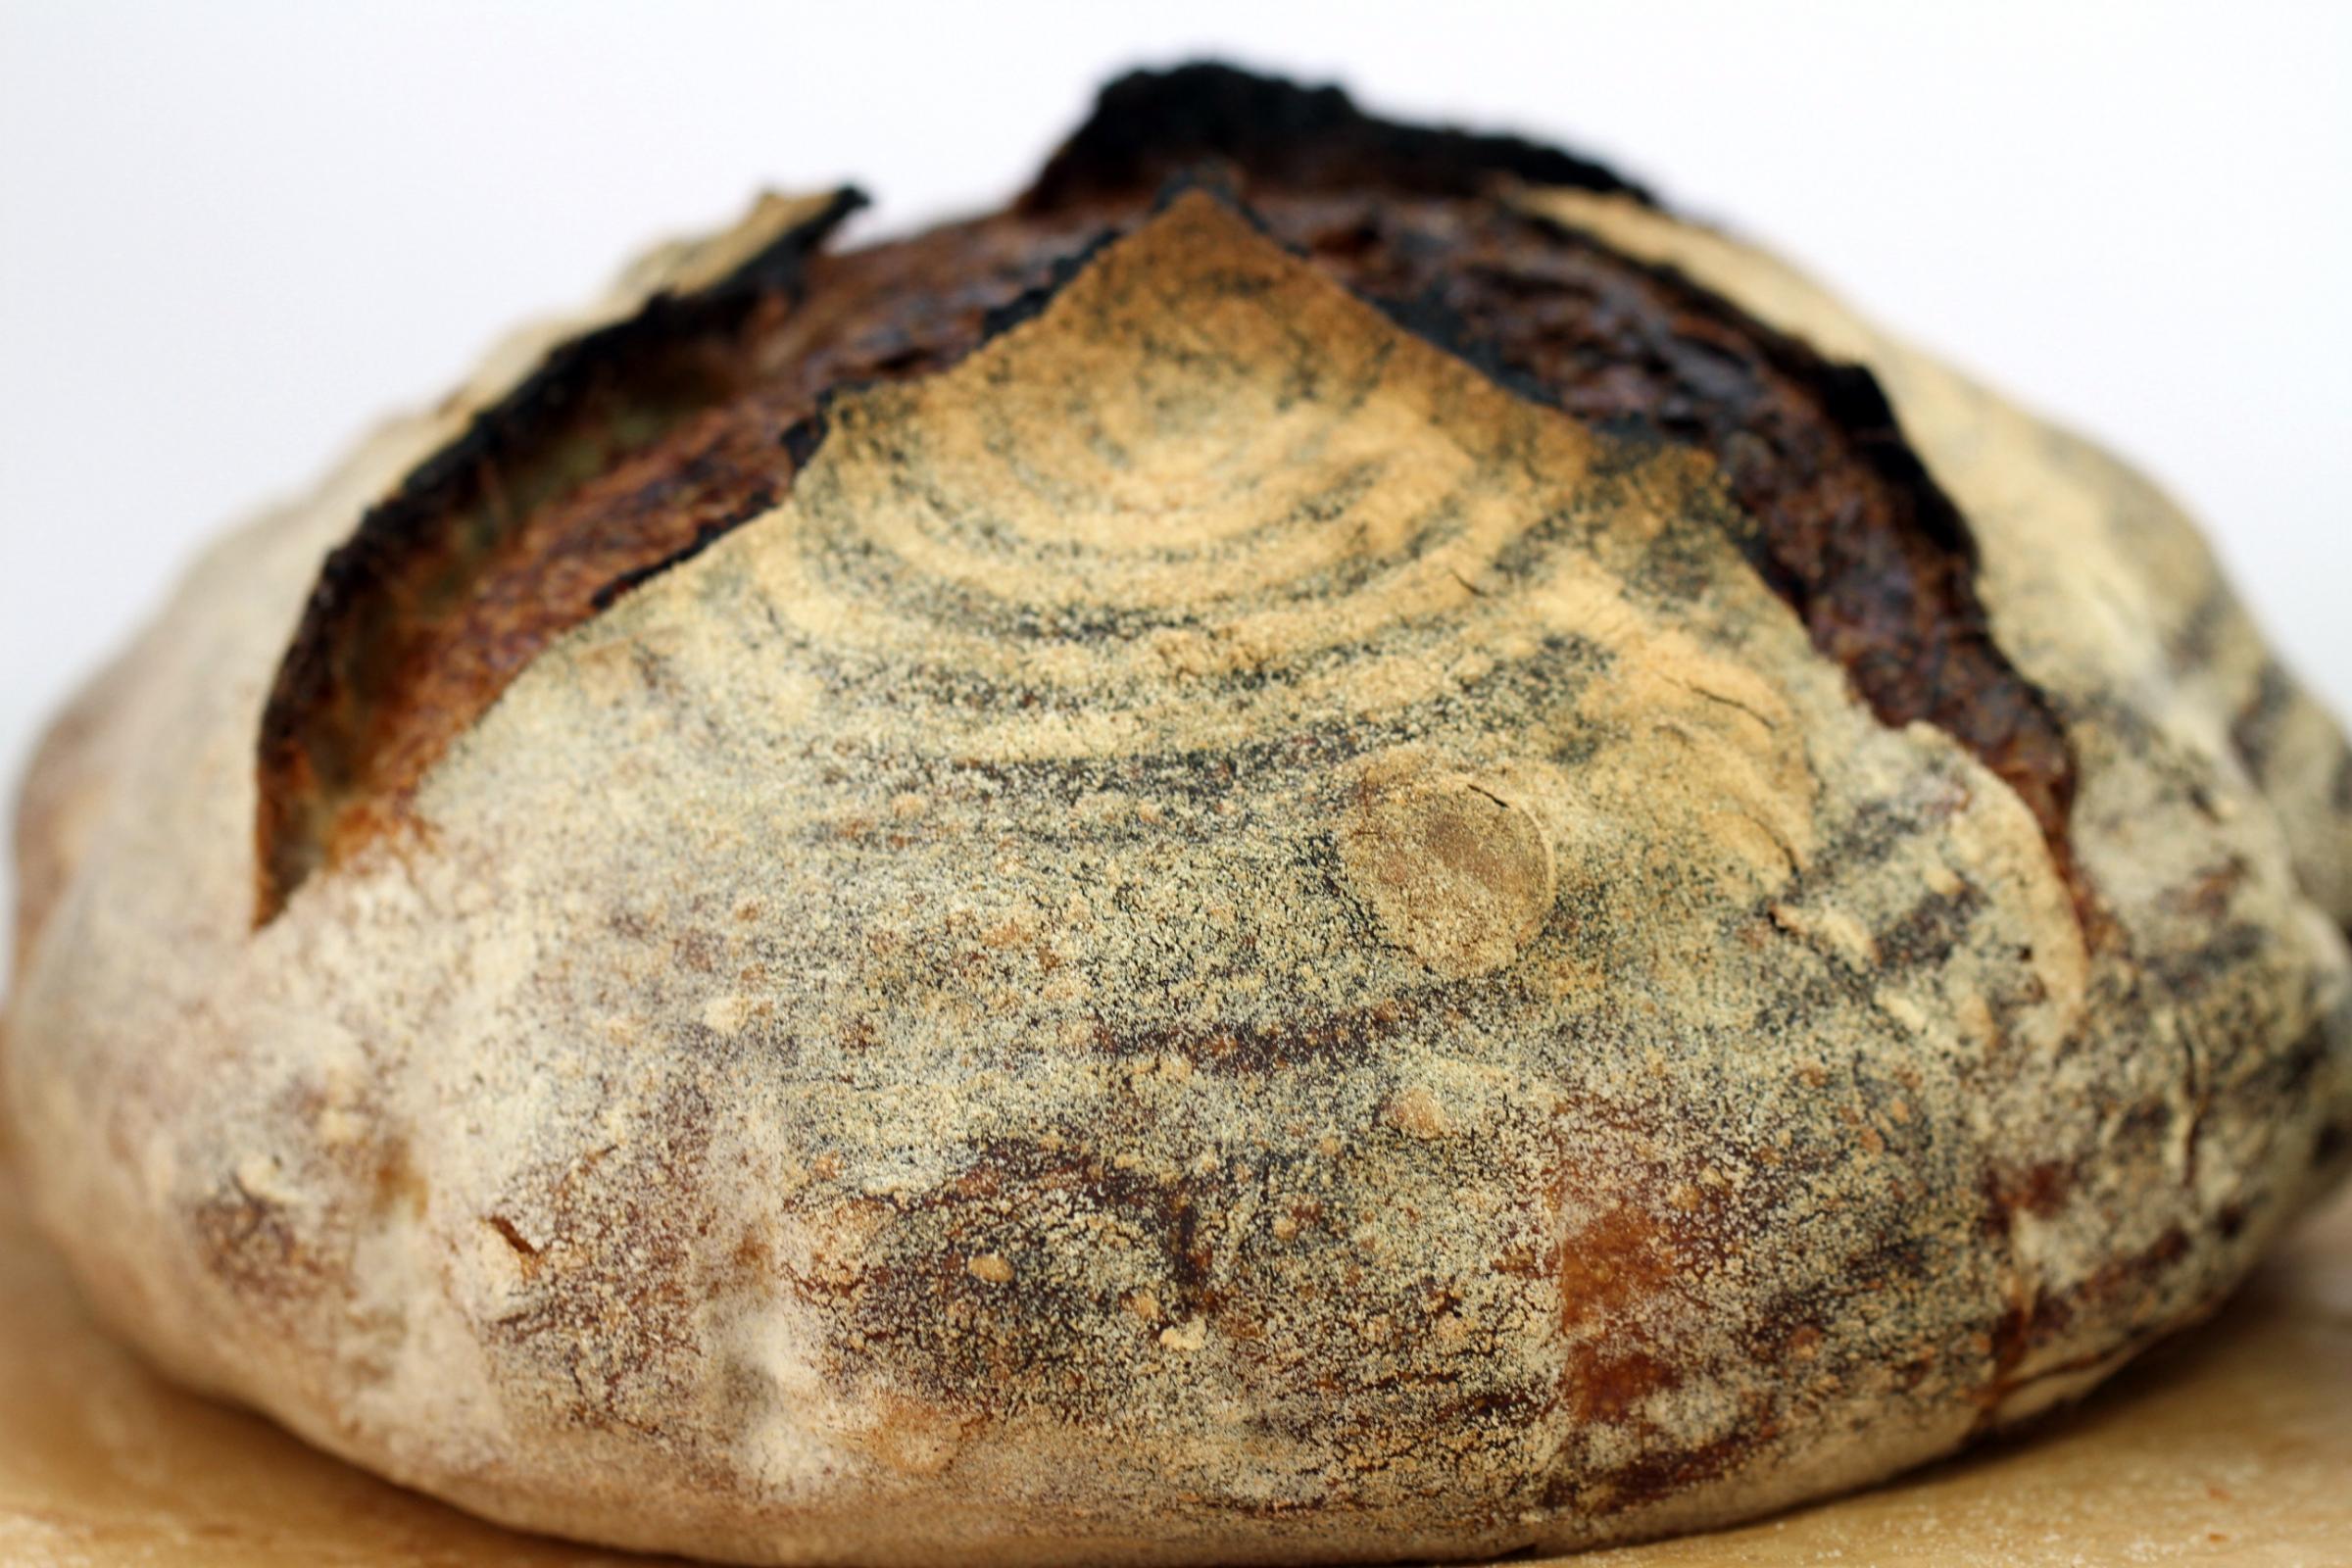
This is the first time I bake any Ken Forkish’s bread. This is the first time I post on the Fresh Loaf blog, although I’ve read and learnt so much from a lot of the active participants here. Rightly or wrongly, I feel I can’t be a complete bread baker, among other things, if I’ve never tried Forkish’s recipes. I started baking a lot of Chad Robertson’s breads after I read his two books, Tartine Bread and Tartine Book No.3, a year ago.

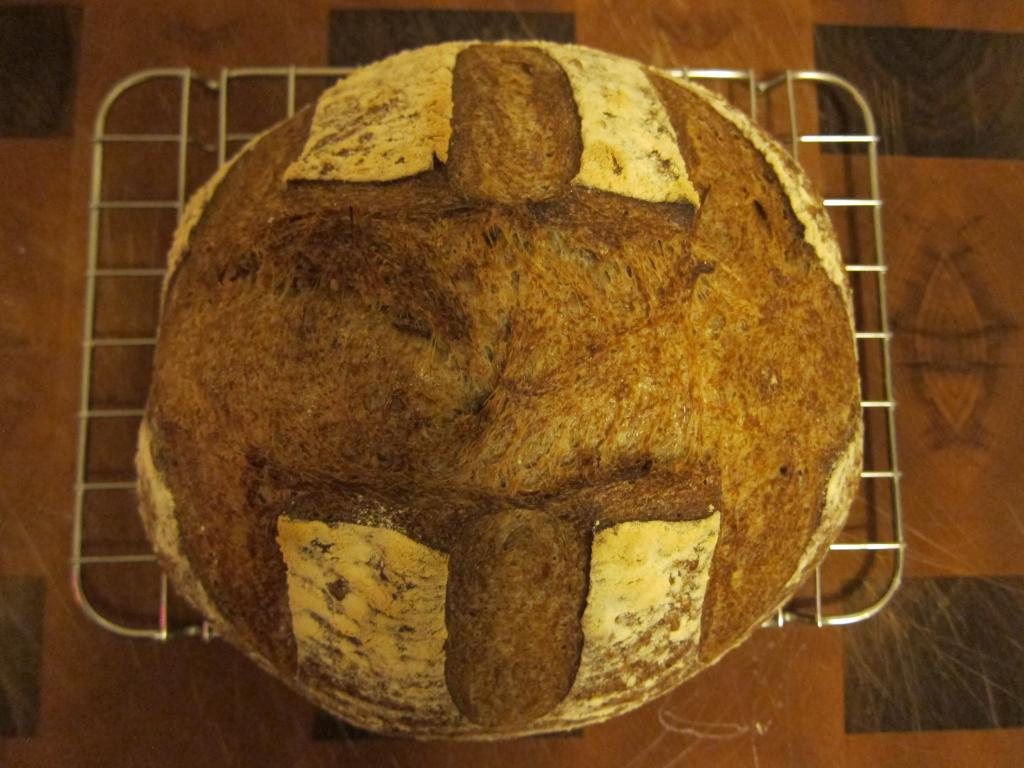
At the same time, I got a new heavy-duty dual-fuel range that is wide enough to bake full size baguettes. Most of these breads were posted on my blog (http://flourishen.blogspot.com). Overnight country blonde was the first I baked from Forkish’s Flour Water Salt Yeast. I figure the best start is to bake something closest to what I am most familiar with,which is the Tartine basic country bread. I followed the overnight country blonde recipe to a T, except for the part that you are not supposed to score the dough, which I did.

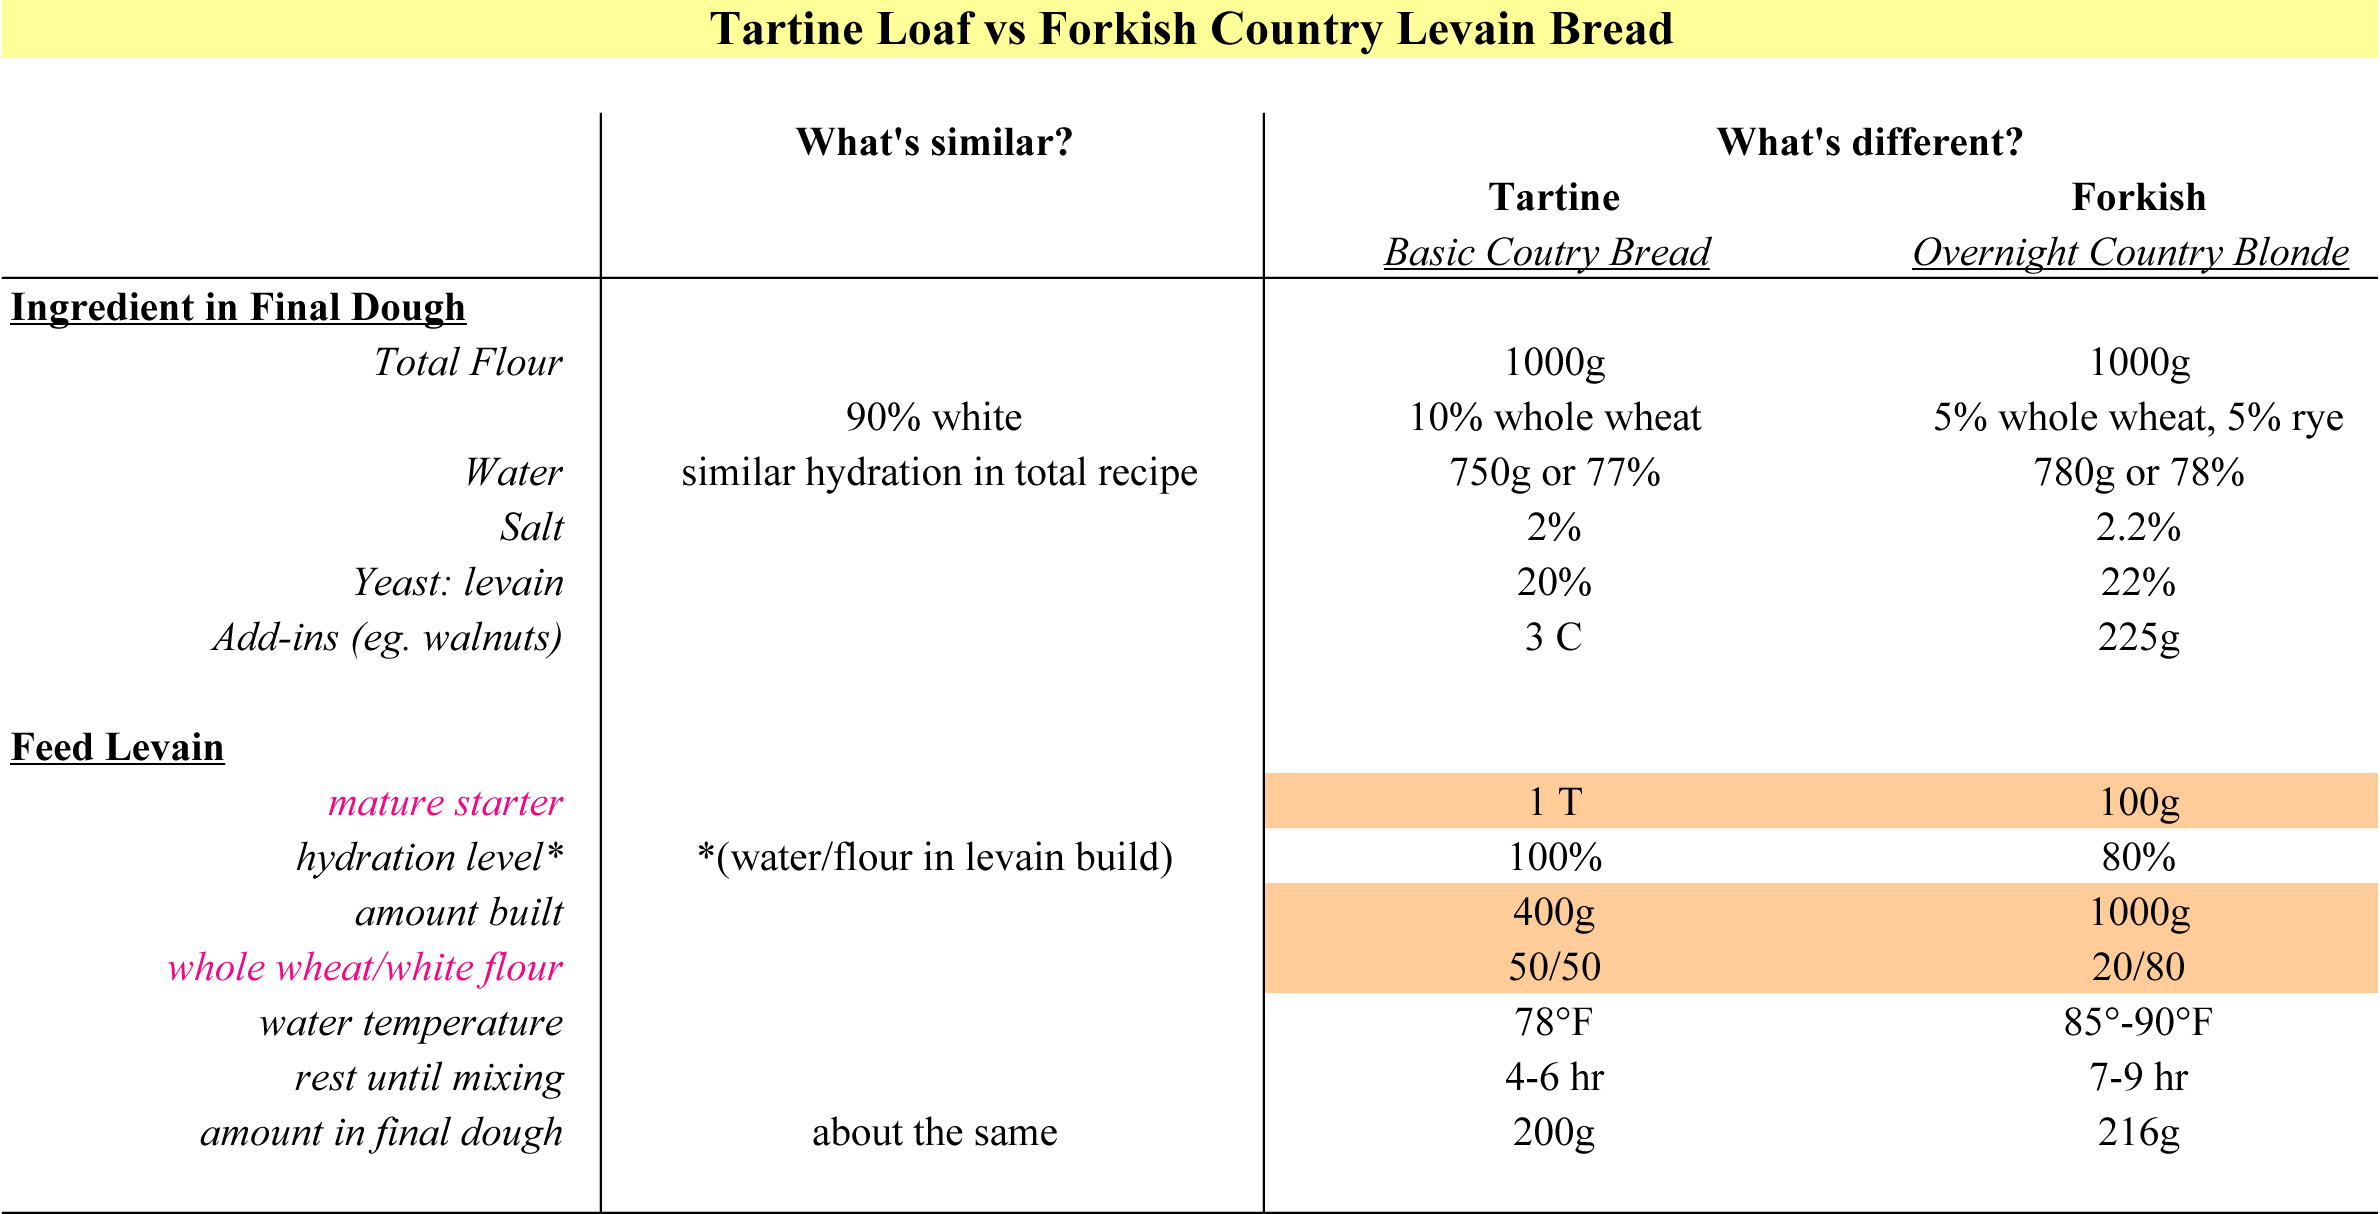
There are a lot of similarities between Forkish and Tartine’s approach, but there are enough differences, e.g. in building the levain, the fermentation process and baking temperature. To keep track of what I was doing and understanding the unique approaches, I put all the steps side by side in a spreadsheet.

Here are the comparisons and my takeaway from having baked the overnight country blonde and many variations of the Tartine country bread.

http://flourishen.blogspot.com/2015/05/overnight-country-blonde-levain-bread.html

  • Both Tartine basic country bread (Tartine) and Forkish country blonde (Forkish) are excellent. It'd be akin to hairsplitting if I say that one is better than the other.
  • Tartine and Forkish have similar hydration level of roughly 77-78% using 90% white flour in the total flour amount. 
  • While Tartine uses one tablespoon of starter to build 400g of levain, Forkish uses 100g to build 1000g, which results in a greater amount of levain being discarded. 
  • Salt and small amount of water are added to the Tartine dough (levain and all) after 30 minutes of resting period, at which point the dough is relaxed, cohesive and easy to work with. Meanwhile salt and all of the 216g of levain are incorporated into the autolyse mixture to make the final Forkish dough, which I find much wetter and stickier to handle.
  • Bulk fermentation is 3 to 4-hr at 80°-85°F for Tartine and 12 to 15-hr at 77°-78°F temperature for Forkish. The longer fermentation of Forkish dough necessitates baking the bread the next day, spanning a two-day process from the time you mix the dough.
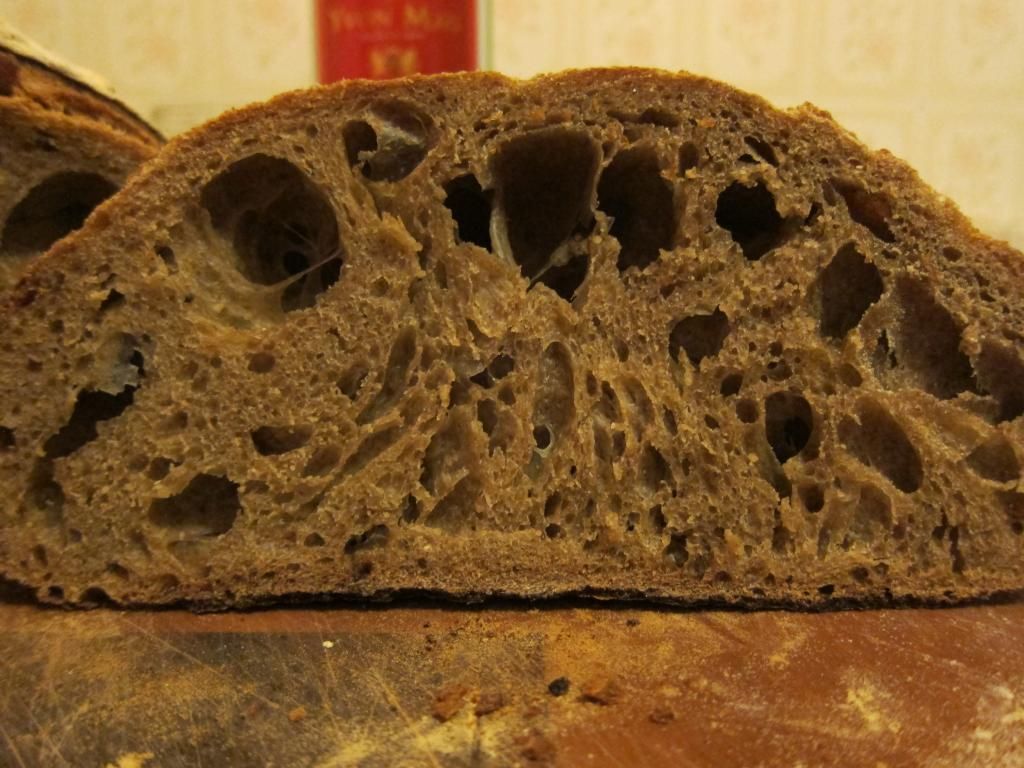
  • The longer bulk fermentation of the Forkish dough imparts a much sourer note in the finished loaf.
  • The higher oven temperature in baking the Tartine dough often results in a thicker and burnished crust, especially on the bottom.

Now I need to integrate these approaches in order to make better breads in my own kitchen setting. I want to move away from baking from recipes and develop a more intuitive feel for my breads. Any suggestions from someone who has gone down this path before?

PetraR's picture
PetraR

Walnut Sourdough bread

This is so yummy, I just had a slice with just unsalted butter and OMG it is so tasty * if I say so myself *

The flavour is amazing,the sour with the sweetish yet earthyness of the walnuts... 


Recipe

200g mature 80% hydration wheat Sourdough Starter

400g bread flour

200g wholemeal flour

350g warm water

2 tbsp Sunflower oil

15g Salt

115 g ready to eat Walnuts *which I put in the food processor to make them smaller.*

I put everyting in the bowl of my kenwood chef premier to knead for approx. 13 minuts on 2 * which is low *

Formed the dough into a boule and put into a  bowl and lid on , let it sit at room temperature for 2 hours and put it in the fridge for 10 hours.

In the morning I degased the dough , shaped into a boule, put in floured banneton , wraped loosley in a cotton kitchen towel and put in a plastic bag and off it went in the fridge to proof for 12 hours.

Baked it as usual in my dutch oven with the lid on at 250C for 30 minutes and with the lid off at 200C for a further 20 minutes.

Managed to let it cool before slicing * but it was still ever so slightly warm :)*.

Unsalted butter on and yummy in my tummy :)

Dave's picture
Dave

Red Fife Stout Sourdough

Hi everyone,

First I would like to thank dabrowman for inspiring me to bake a SD loaf using beer! So thanks dabrowman!! Dude you totally rocked out these calculations, making the whole process much easier to understand.
A few things came to mind when I was browsing his "50% Whole Grain, 50% Sprouted Porter" recipe.
First how precise his recipe was. Because I'm new to this it took me a little to figure out the measurements and percentages, but when I did a whole new world opened up for me to get started on using pre-ferments.

Second was that I love a good dark beer, and what better way to have one then baked with bread.


Thought that I under proofed it by a margin. About 15 minutes. Nice bloom but as you will see it was a little exaggerated on top to the one side.


This is the exaggerated bloom I was talking about. Also I wasn't sure if I had the best seal on the bottom when I place it in the banneton.


The crumb came out super moist, tender, and was absolutely delicious!! You could totally smell and taste the stout. Especially when it came right out of the oven. OMG!! Some larger holes than I might have wanted but pretty happy over all.


This was my first attempt at using a preferment, like a levain build. But after this I'm definitely hooked even more on sourdough and the endless possibilities.

My starter is a 50% Stone Ground Whole Grain Rye Flour, 50% bread flour set at 100% hydration.


Levain Build                  Build 1              Build 2              Total            %

Rye Starter                    30g                     0g                    30g             4

Red Fife                         30g                    60g                  90g             12

Water                             30g                    60g                  90g             12

                                      90g                    120g                210g           28%


Levain Totals

Flour                                         105g            14%

Water                                        105g            14%

Levain Hydration                      100%

Levain % of total flour               14%


Dough Flour

Red Fife                                     45g              6%

Bread Flour                               600g            80%

Total dough flour                       645g            86%


Salt                                             15g              2%

Black Creek Stout                     420g            56%


Dough Hydration                                           65%

Total flour w/starter                                      750g

Stout & water w/flour                                   525g


Hydration w/starter                                      70%

Total weight                                                1290g

% of Red Fife                                               20%

% of bread flour                                           80%


Build 1- 24 hours retard in fridge. First hour was room temp.

Build 2- 24 hours retard in fridge. Take out of fridge 2 hours before, to warm up. First hour after mix was room temp.

Mix dough flour and stout. Autolyse for 2 hours.

Mix levain, salt and dough together. Autolyse for 20 minutes.

Slap and fold for 3 minutes, and shape. Then perform 3 stretch and folds/shape with 20 minutes bench rests, covering with plastic wrap.

Place in glass bowl, cover with plastic wrap. 1st hour at room temp. Retard in fridge for 24 hrs. Take out of fridge 2 hours before, to warm up.

Perform 1 stretch and fold and shape. Cover with plastic wrap and bench rest for 20 minutes.

Perform 3 tension pulls and shape, with 10 minute bench rests covering with plastic wrap.

Place in banneton and proof for 1.5 hrs, or until dough is ready. I usually don't go with times anymore. Instead I go by amount of spring back. Checking every 15 minutes.

Place in pre-heated dutch oven. Bake at 500 for 20 minutes, then 425 for 20-30 minutes.

My partner Alexi says that this was the best SD loaf I had ever baked. The flavor profile, crumb and crust were so tasty. This recipe is definitely a keeper.

Cheers!


Brioche Nanterre

Brokeback Cowboy's picture
Brokeback Cowboy

Description

I've applied here instructions for a classic Brioche Nanterre. This specific brioche is baked in a loaf pan with 8 individual portions which are brilliant for setting at a tea service to be easily pulled apart. This loaf does break from convention in that it is egg washed twice. Once before rising and the second before going into the oven. This creates a richer and more luxurious color as well as shine. I also break up the ingredients list in to three sections consisting of;

Pre-Ferment (Poolish)

Main Dough

Egg Wash

This is to clarify the repetition of ingredients without appropriate spacing. Best of luck in your baking and may the odds be forever in your favor.

Summary

Yield
800g Loaves
Prep time20 minutes
Cooking time40 minutes
Total time1 hour

Ingredients

300 g
Whole milk (Poolish)
65 g
Fresh Yeast (Poolish)
300 g
Bread Flour (Poolish)
750 g
eggs (Main Dough)
1200 g
Bread Flour (Main Dough)
60 g
Sugar (Main Dough)
19 g
sea salt (Main Dough)
750 g
Unsalted butter (Main Dough)
50 g
eggs (Egg Wash)
5 g
Whole milk (Egg Wash)
1 ds
salt (Egg Wash)

Instructions

Pre- Ferment (Poolish)

1. Combine 300g Whole Milk, 65g Fresh Yeast and 300g Bread Flour. Mix until a batter forms and allow to rise at room temperature until the center falls in upon itself.

Main Dough

1. In a stand mixer combine 1200g Bread Flour, 60g Sugar, 19g Salt and 750g Eggs.

2. Begin mixing on low speed gradually incorporating the poolish until a mass forms.

3. Once the ingredients are combined raise mixing speed to medium-high (5 or 6 on Kitchenaid) and let mix for 5 minutes.

4. Gradually incorporate 750g of cubed room temperature butter in to the mass, mixing at a high speed until the dough releases it's self from the bowl.

5. Check temperature of dough which should ideally be 22-23C. Any higher and the butter will separate from the mass and create a greasy end product.

6. Remove dough from mixing bowl and cover with plastic wrap. Place bowl in 4C refrigerator overnight.

7. The next day, remove dough from bowl and cut in to 2- 800g balls. From this point shaping is up to you, however for the Nanterre shape one must cut each ball in to a further 8-100g pieces.

8. Gently round the balls and place in a lightly buttered loaf pan. Each loaf should consist of 8-100g balls arranged symmetrically in the pan.

9. For the egg wash; beat together 50g Eggs, 5g Whole Milk and a dash of salt.

10. Egg wash formed loaves

11. Cover in a plastic bag and allow to proof until risen roughly 1/2 inch above loaf tin tops. This will take about 1.5 - 2 hours.

12. Pre-heat oven to 380F.

13. Remove proofed loaves from bag and egg wash a second time making sure to evenly apply the glaze. Place in pre-heated oven and bake for 37-40 minutes. The loaves should be a rich mahogany color. To check the doneness of the loaf stick a small pairing knife in to the center and pull it out after a few seconds. If the knife is clean of batter it's done. Alternately you can check the internal temperature with a thermometer which will read over 205F.

14. Pull loaves from oven and unmould immediately. At this point you can glaze the loaf if you wish with any topping of your choosing. Some options are;

Melted jam, marmelade or jelly diluted with water to a point that it can be applied freely.

Sugar syrup, equal parts water and sugar.

Apricot glaze, diluted if necessary.

Once glazed many chefs may take the liberty to add a further garnish and this of course up to the creator's inclination.

Some options that would also work fashionably are;

Streusel, equal parts flour, sugar and butter.

Pearl Sugar or another coarse sugar.

Cocoa Nibs, Shaved Chocolate.

Candied Fruit.

Fresh Berries, arranged and dusted with icing sugar.

Candied or Fresh Flower Petals, such as violet or rose.

Notes

For the poolish a rule that applies to sweet bread baking is the 54 law.

The 54 law means that the liquid temperature, the room temperature and the flour temperature should all add up to 54C.

For example,

Your room temperature is 25C

The flour temperature is 15C

The liquid temperature would be x+(25+15)=54 so 54-30=15 so the liquid temperature would be 15C

This rule is completely unnecessary in a home kitchen however I thought I would include it for the more astute bakers.

Floydm's picture
Floydm

Kathleen Weber's Arbrio Rice Bread

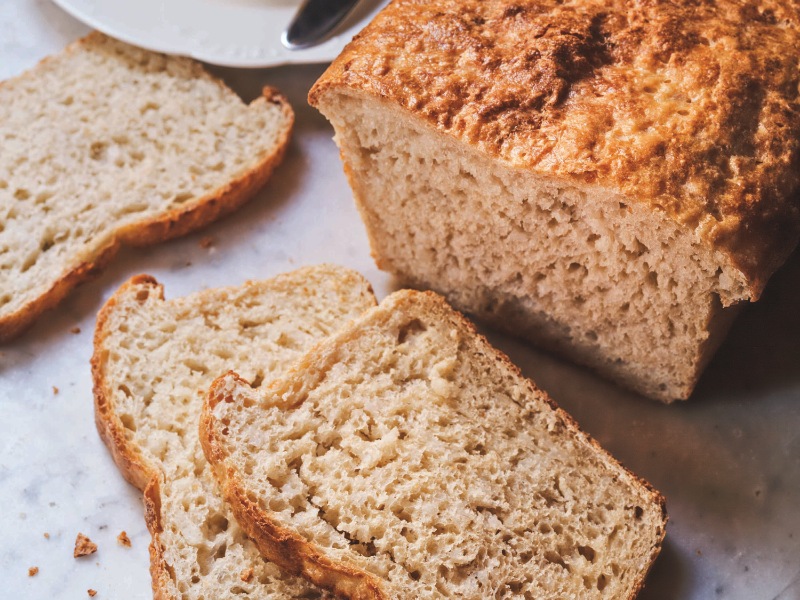
Della Fattoria Bread is the new book by Kathleen Weber, founder of the renowned Della Fattoria bakery in Petaluma, California.  This recipe reprinted with permission.  Copyright 2014, Artisan Books. Photo Credit: Ed Anderson.


Arbrio Rice Bread

Makes 2 standard loaves 

Inspired by a recipe by the brilliant British cookbook writer Elizabeth David, this is one of the easiest breads I've ever made. It comes together fast, is mixed entirely by hand in a single bowl, and is baked in two standard loaf pans. Almost no kneading is required.

It's also one of the most unusual yeasted breads I've seen, as the dough calls for rice. I use Arborio rice instead of regular white rice. Arborio is, of course, the rice that gives risotto its creaminess, and, sure enough, those fat, starchy grains give the bread a similarly creamy texture. If you're calculating exact ratios, the weight of the cooked rice will be 520 grams (18.3 ounces/2 1/2 cups plus 2 tablespoons), which is 70 percent of the flour weight.

When toasted, this bread has a remarkably delicate crunch.


Rice
Arborio rice158 g5.5 oz¾ cup
Water525 g18.5 oz2¼ cups
 
Dough Mix
All-purpose flour735 g26 oz5¼ cups
total flour735 g26 oz5¼ cups
Instant yeast13 g0.5 oz1 Tbsp plus ¾ tsp
Fine gray salt19 g0.6 oz1 Tbsp
Water, at room temperature (65° to 70°F/18° to 21°C)468 g 16.5 oz2 cups 
Total weight1,755 g/1.75 kg61.9 oz/3.8 lbs 
 
Wash
14 to 32 grams (0.5 to 1.1 ounces/1 to 2 tablespoons) olive oil or milk, or a combination

1. To cook the rice, combine the rice and water in a small saucepan and bring to a boil. Cover, turn the heat down to low, and cook until the water is absorbed and there are little holes across the surface of the rice, 15 to 20 minutes. Remove the lid and let the rice cool slightly. The rice should still be very warm when incorporated with the other ingredients.

2. Lightly oil or spray a deep 4 1/2- to 5-quart ceramic or glass bread bowl. (The amount of dough for this bread will work well in a 3-quart bread bowl if you have one.)

3. In a large bowl, whisk together the flour, yeast, and salt.

4. When the rice is still very warm but cool enough to touch, mix it into the flour until the mixture has the texture of a gummy meal. Pour in the water and continue to mix with your hands, gently gathering the mixture together, turning it and pressing it with the heels of your hands, until it all comes together. It will be very sticky, similar in texture to a milky biscuit dough; do not be surprised if you have quite a bit sticking to your hands.

5. Using a plastic bowl scraper, get what dough you can off your hands, pressing it back onto the dough, and turn the dough into the bread bowl. Cover the bowl with a lightly oiled or sprayed piece of plastic wrap and place in a warm, draft-free spot until the dough has at least doubled in volume and there are delicate bubbles across the surface, 1 1/2 to 2 hours.

6. Fairly generously oil or spray two 8 1/2-by-4 1/2-by-2 3/4-inch loaf pans. Flour the work surface. Turn out the dough, using the bowl scraper, and use a bench scraper to divide it in half. With your fingertips, very gently shape each portion into a bâtard, about 3 by 7 inches. Set in the prepared pans and very gently brush the tops with the wash. (This dough is not brushed again before baking because the loaves will be too fragile once proofed.) Cover the tops with a lightly oiled or sprayed piece of plastic wrap. Set the pans in your warm spot to proof until the dough reaches the tops of the pans, 1 1/2 to 2 hours; remove the plastic wrap.

7. Meanwhile, position a rack in the lower third of the oven, set a baking stone on it, and preheat the oven to 450°F.

8. Place the pans on the stone and immediately lower the oven temperature to 400°F. Bake for 30 to 35 minutes, or until the tops are a rich golden brown. The loaves will be delicate, but they can carefully be taken out of the pans to brown directly on the stone: place the loaves on the stone and let brown for about 3 minutes, to brown the sides and bottom more evenly.

9. Transfer the breads to a cooling rack and let cool completely.


Della Fattoria Bread is available now from Amazon, Powell's Books, or your local book seller.

emkay's picture
emkay

Not your typical mooncakes

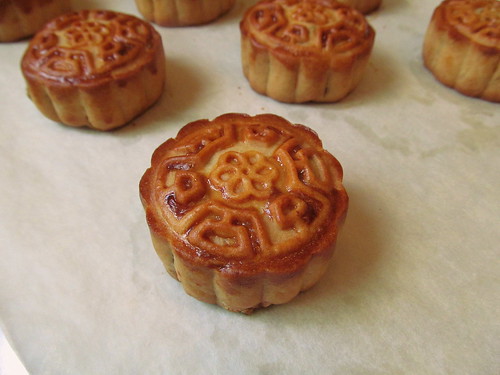
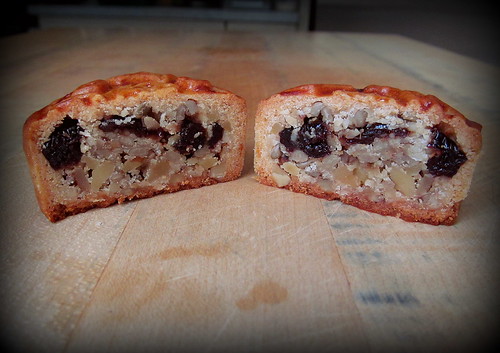
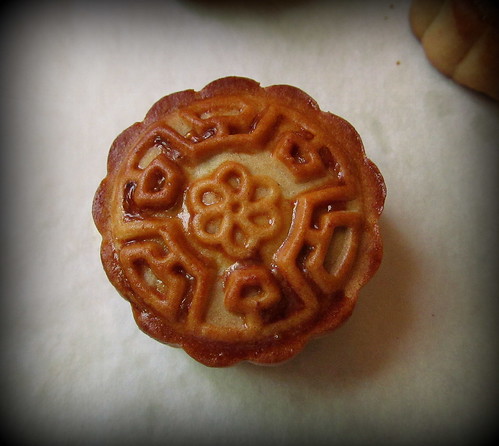
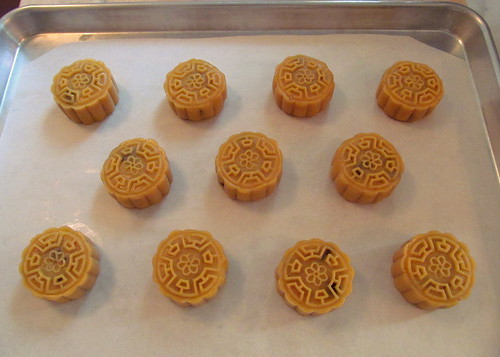
Every year my parents receive many gifts of mooncakes in the days leading up to the Mid-Autumn Festival. Most of the time they are the traditional mooncakes filled with lotus seed paste and salted egg yolks. I thought I would try baking a different sort of mooncake to bring to my family's gathering. I call them American-style mooncakes. I made a trail mix inspired one and a coconut one. Mooncakes need to be baked at least a day (and preferably 2 days) before serving. Freshly baked ones do not have the correct texture since the pastry shell is still too crispy. The resting period allows the pastry shell to "return to oil" which just means that the skin will soften a bit.

mooncake_830_1

Mooncake Pastry Dough

130 g all-purpose flour (10.5% protein level)

90 g Lyle's Golden Syrup

30 g canola oil

1/4 tsp alkaline water (aka kan sui which is a solution of sodium bicarbonate and potassium carbonate)*

* Note: Although a bottle of kan sui is very inexpensive, I didn't want to buy a whole bottle since I needed such a tiny amount. So I dissolved 1/2 tsp of baking soda in 1 tbsp of water and used 1/4 tsp of my solution instead of the 1/4 tsp kan sui.

--

1. Mix syrup, oil and alkaline water.

2. Sift flour into a mixing bowl and add wet ingredients. Mix to form a soft dough.

3. Cover and let dough rest at room temp for 30-60 minutes.

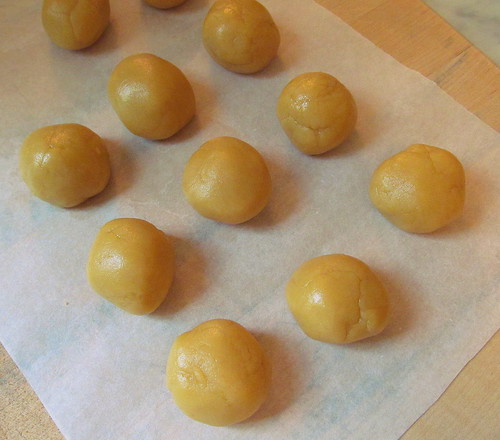
4. Divide the dough into 10 balls each weighing approximately 25 g. (This is scaled for my miniature mooncake mold.)

mooncake__830_skin

"Trail Mix" Filling

70 g almond meal (or chopped almonds)

80 g walnut, toasted and finely chopped

20 g sunflower seeds, toasted

50 g dried sour cherries, chopped

60 g kor fun (aka cooked glutinuous rice flour)

50 g water

20 g granulated sugar

20 g canola oil

10 g walnut oil

10 g sesame seeds (I didn't have any so I used tahini.)

--

1. Mix all ingredients.

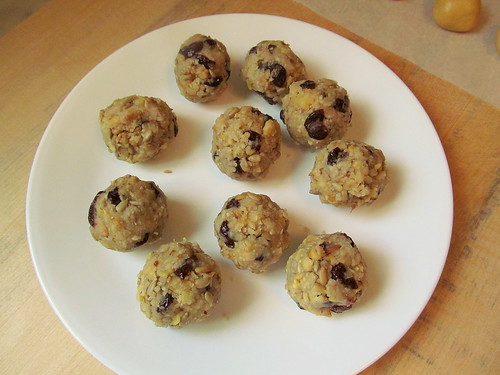
2. Divide filling into 10 balls each weighing approximately 35 g. (This is scaled for my miniature mooncake mold.)

mooncake_830_nut_filling

Egg Wash:   1 egg yolk beaten with 1 teaspoon of water or milk

Assembly

1. Preheat oven to 375F.

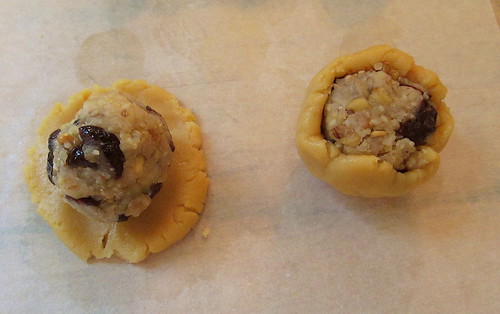
2. Flatten the pastry dough and wrap it around the filling. Try your best to completely enclose the filling with the dough.

mooncake_830_wrap

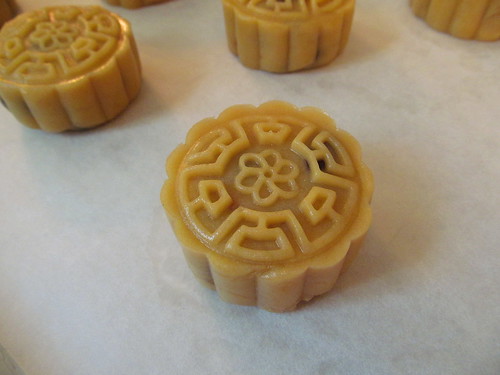
3. Put it into your mooncake mold to shape it. (I used a plastic mooncake mold with a plunger.)

4. Place shaped mooncake on sheet pan.

mooncake_830_shaped_2

mooncake_830_shaped_1

5. Bake at 375F for 8 minutes.

6. Remove from oven and let them cool for 5 minutes, then brush on the egg wash.

7. Lower oven heat to 350F and bake for 15-20 minutes until golden brown.

8. Cool for 10 minutes on sheet pan then remove to cooling rack.

9. When completely cool, store in an airtight container for at least 24 hours before serving.

mooncake_830_inside

mooncake_830_2

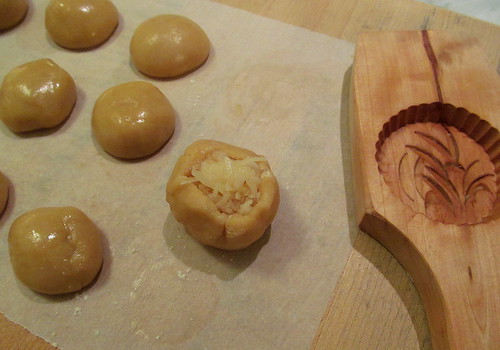
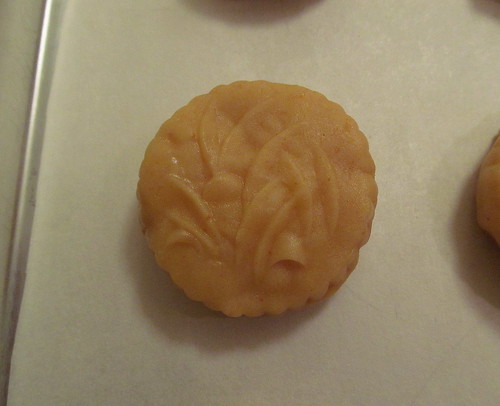
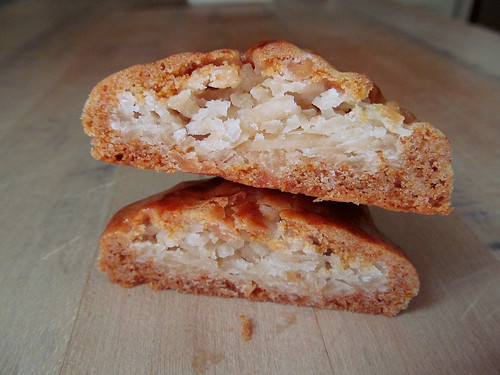
I also made some coconut mooncake "cookies" using wooden cookie mold to shape them. I call them cookies because they are much flatter than mooncakes.

coconut_mooncake_wrap2

coconut_mooncake_shaped

I used cake flour instead of all-purpose flour in my dough for the coconut ones so the dough ended up too soft. As a result, my baked cookies did not keep the carved details of the mold, but they were still delicious. They tasted like a coconut macaroon inside a mooncake pastry shell.

coconut_mooncake_1

coconut_mooncake_inside

:) Mary

Pages