The Fresh Loaf

A Community of Amateur Bakers and Artisan Bread Enthusiasts.

Most bookmarked

mountaindog's picture
mountaindog

Cherry Pecan Pain au Levain

I've always liked the walnut raisin pain au levain Dan Leader sells at Bread Alone Bakery near me, and I've been wanting to try something like this for awhile and finally got around to it this week, but with cherries and pecans.

Both Susan's yeasted version on her Wild Yeast blog and SteveB's version on his Bread Cetera blog gave me a craving for cherry pecan bread when I saw their photos....thanks for the ideas you two, your baked goods are so mouthwatering and professional looking...(I am unworthy of breadblogging in the same sphere as you two!)

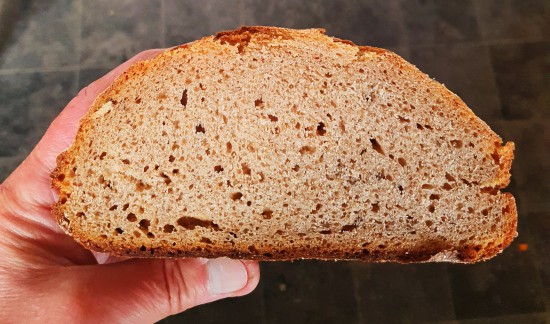
I made this as a sourdough-only version and mixed about 30% whole wheat and 2.5% rye with AP flour. This mix gave a nice dark-colored but light-textured open crumb that tasted good with the fruit and nuts. You could obviously substitue rasins and walnuts, or anything else you can think of. I find it especially tastes great sliced, toasted, and served with cream cheese, and lasts a long time.
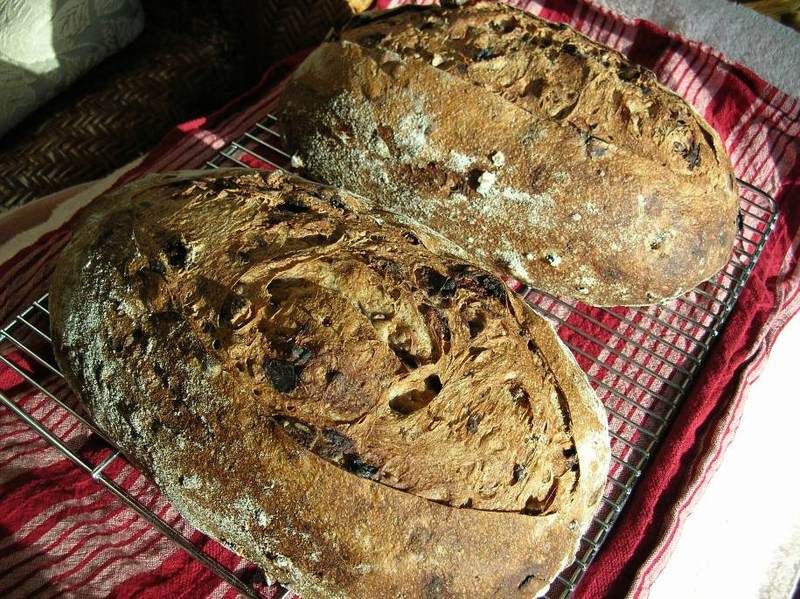
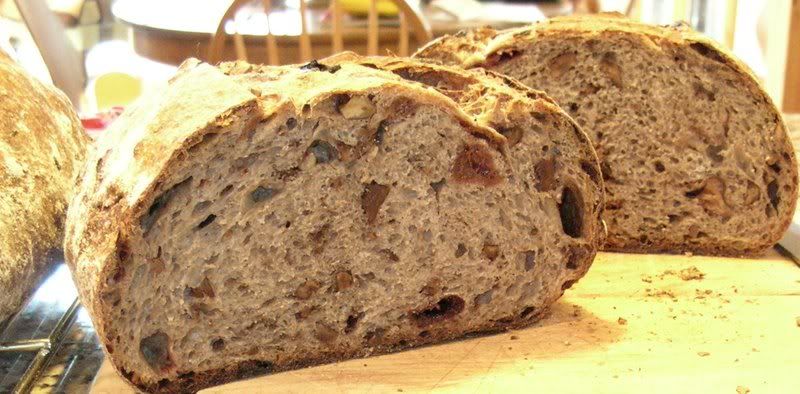
I soaked the cherries for a bit too long as they were a little too mushy and a some color washed out, but the bread tasted great, I'll be making this again a lot I think. It was very easy.

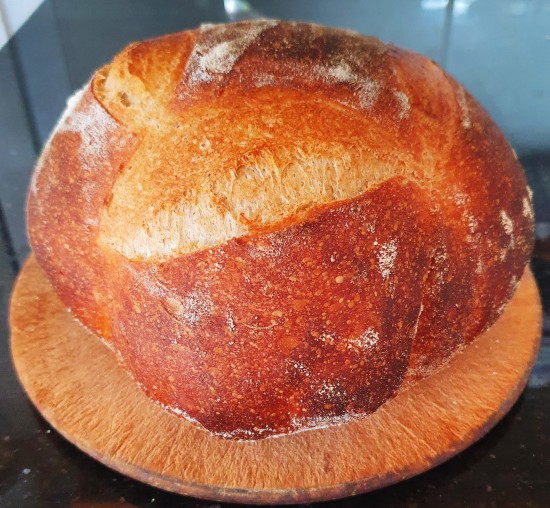
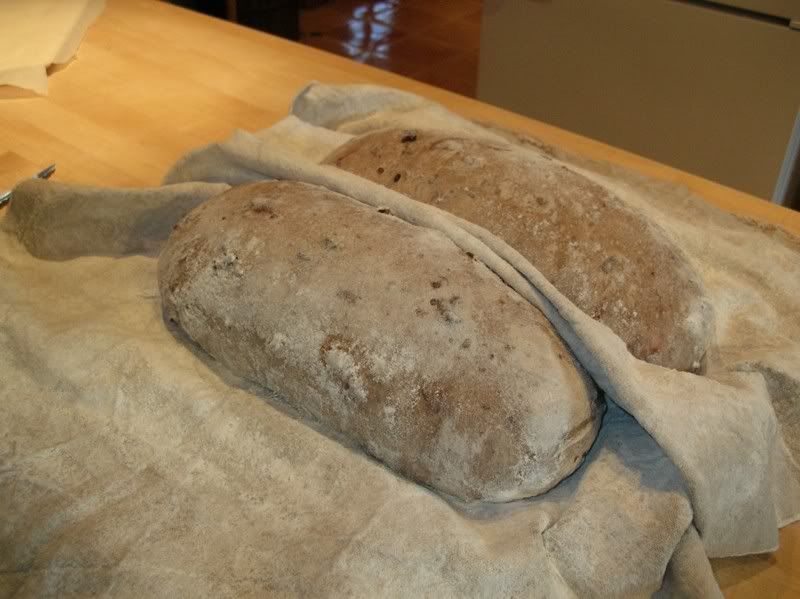
Here are the loaves just before slashing and loading into the oven, after their overnight cold retarding:
Here's the formula:

Pecan Cherry Pain au Levain

Makes 2 large 2.5 lb batards or oblong loaves.

Levain Build

% flour of levaingrams
starter (100% hydration with WW flour) 32.1% 45
warm water 85.7% 120
All-Purpose flour 100.0% 140

Final Dough

% flour final doughgrams
All-Purpose flour 66.4% 750
100% whole wheat flour 31.0% 350
100% whole rye flour 2.7% 30
flour subtotal 100% 1130
 
warm water 69.5% 785
sea salt 2.0% 23
ripe levain 27.0% 305
dried pitted sour cherries, soaked   240
toasted pecans   240

1)  12 hours before making final dough, create the levain using some ripe starter that has been fed and doubled. Mix well and cover in bowl until levain has risen to over double but has not yet begun to collapse, aprox. 10-12 hours at 65-70F. Toast the pecans at 350F for 10-20 minutes and let cool, then coarsly chop and set aside. Soak dried sour cherries in water overnight and strain next morning before making final dough.

2)  When levain is ripe, create final dough by mixing warm water with levain to dissolve. Mix all flours and salt in large bowl until evenly distributed, then add watered levain to flour mix with dough whisk, spoon, or hands until well combined. Cover and let rest for 1 hour at @ 70F. Tip dough onto counter, knead in the cherries and pecans lightly, and french fold for approx. 10 minutes with short 1-2 minute rests as needed to scrape together dough or relax it, and tuck in the fruit/nuts. The cherries and pecans may fall out and it will be quite messy at first, but eventually the dough will come together into a neat lump after 5-6 minutes or so. At end of kneading, round out the dough so that fruit/nuts are tucked inside and good skin of dough is on outside. Place dough in lightly oiled container and cover to rest for 30 min. After 30 min., turn out dough onto lightly oiled counter to give it one good gentle stretch and letter fold, then place dough back into oiled covered container. Repeat one more stretch and fold after another 30 minutes, then let dough continue to rise until doubled at @ 70F (approx. 2 more hours).

3)  Shape dough into 2 batards, place batards in floured couche, cover well so loaves don't dry out, and let loaves cold proof overnight at 40-50F for approx. 8-10 hours. Next morning, place loaves in warmer area (65-70F) while oven preheats for 45 minutes to 450F. Bake loaves on oven stone with steam (I pour 1 cup hot water from tea kettle into pre-heated cast iron pan on oven floor) at 450F for 15 minutes, then turn heat down to 400F for another 30-35 minutes until center registers 200-205F with instant read thermometer and crust is well-browned.

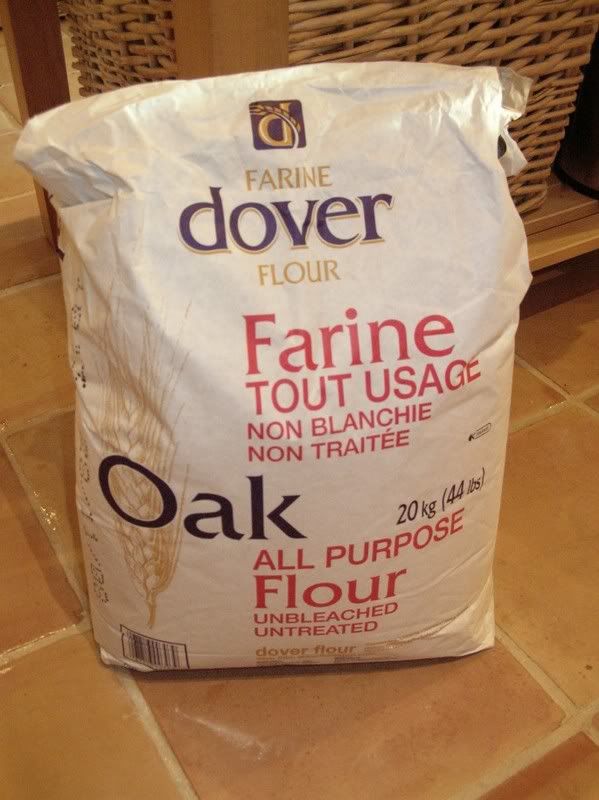
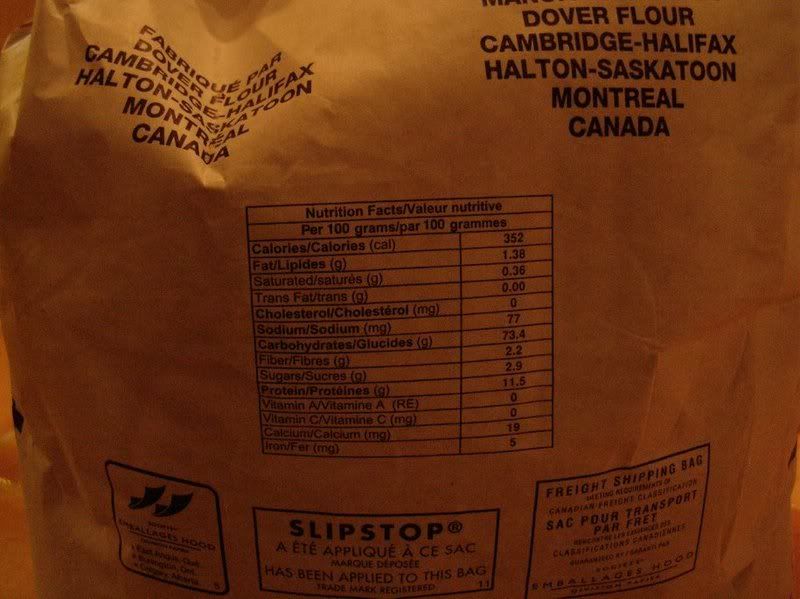
On a slightly different note: my last few batches of bread have been coming out smelling and tasting better than ever, I think it may just be this new flour I was able to pick up in a 50lb bag from Bread Alone Bakery down the road from me. It is an All-purpose flour from Canada with 11.5% protein, not sure about ash content. Anyone ever used or heard of this Oak AP flour before?I like it a lot. It handles nicely in dough.
SourdoughSam's picture
SourdoughSam

How to Develop Sour Flavor in Sourdough

How to Develop Sour Flavor in Sourdough

I just posted this as a response to a query, but thought that it deserved to be posted as a separate topic.  I spent months trying to figure this out, and there was so much inaccurate information posted on the internet on the subject, that I thought this would be useful to lots of people trying to figure out the "secret" of developing sour flavor in sourdough.  It's a heck of a lot simpler than most people seem to think.

In short, there are three key factors in the development of flavor in sourdough:

1. Ash Content of Flour (which affects the Buffering Capacity of the dough)
2. Fermentation Time
3. Fermentation Temperature

Everything else is either secondary or, in some cases, simply wrong.

The ash content of the flour is a key issue for development of total acidity (TTA - Total Titratable Acids) and flavor.  The higher the ash content, the higher the buffering capacity.  The buffering capacity of the flour reduces the volatile acidity (pH) of the dough, allowing the bacteria to work longer before they over-acidify their environment and stop producing acids and flavor compounds.  In addition, ash content is critical for allowing the bacteria to develop amino acids and volatile flavor compounds that contribute to that signature sourdough flavor.  While sourness can be obtained using a low ash content flour, the bread will contain a lesser overall acidity, and will contain fewer amino acids and volatile flavor compounds that contribute to flavor.  All purpose flour normally does not have a high enough ash content to allow substantial flavor development.  High gluten flour (aka bread flour) usually does.  Whole wheat and rye breads have an even higher ash content, which is why people are often more successful in developing sourness and flavor in doughs containing these flours.

The fermentation time must be LONG, meaning 12 to 20 hours.  Acidity and flavor develops during fermentation of the dough, and it takes the bacteria a long time to do it.  If you ferment your bread for less than about 8 hours, you'll get a very tasty, but non-sour bread.

The fermentation temperature should be between 20C and 30C.  Any less, and you're simply slowing down the bacteria in their quest to eat food and develop flavor.  Any more, and you're overheating them and hindering their growth.  However, anything within the indicated range is just fine.  Bacteria do produce some different volatile flavor compounds below 25C than they do above 25C, so this is one way to fine-tune the flavor of your bread, if you so desire.

For more information on the above, here's an excellent, freely available paper on the subject:
http://ethesis.helsinki.fi/julkaisut/maa/elint/vk/katina/
Katina, Kati, "Sourdough: a tool for the improved flavour, texture and shelf-life of wheat bread"
Academic Dissertation, August 2005.
University of Helsinki, Faculty of Agriculture and Forestry, Department of Food Technology.
ISBN 951-38-6650-5

Here's a VERY SIMPLE procedure for creating a bread with a fully-developed sour flavor with any starter (I've got a collection of three of them, including Carl's 1847 Oregon Trail Starter, and this technique works wonders with all of them).

Step 1 - Make a fairly stiff dough using 5% to 20% starter
Step 2 - Place in oiled bowl, cover with plastic wrap, and let sit at room temperature for 12-15 hours (no need to punch down, worry, fret, or whatever... just let it sit).
Step 3 - Gently remove from bowl* and bake.

Yep, that's it.  After months of trying to figure out how to get that sourdough flavor, trying various complicated methods involving overnight refrigeration, letting the starter go sour, multiple starter stages, chanting of mystical incantations, etc., I found out that you just make the dough and let it sit on your kitchen counter.  How's that for uncomplicating things?

Hope this clarifies things a bit.  Good luck with your sourdough baking!

SourdoughSam

* I usually scrape the dough from the bowl with a spatula directly onto an oiled baking sheet, slash the top, and bake.  No shaping and re-proofing necessary if you're simply making a round boule or carefully stretching the dough into baguettes.  If you want to shape the bread otherwise, you should do so 3 to 5 hours before baking.

11 Apr 2008 - Made some updates and changes based on the excellent comments posted in response.

13 Apr 2008 - Added note regarding shaping, clarifications regarding the effect of ash content on acidity, and a note that different flavor compounds are produced below and above 25C.

Search Results

Prairie19's picture
Prairie19

Sourdough Potato Bread

Sourdough Potato Bread


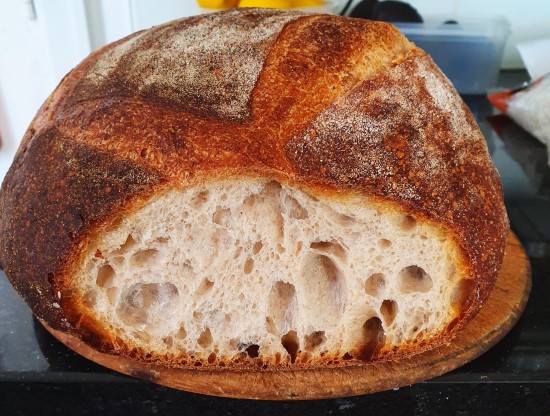
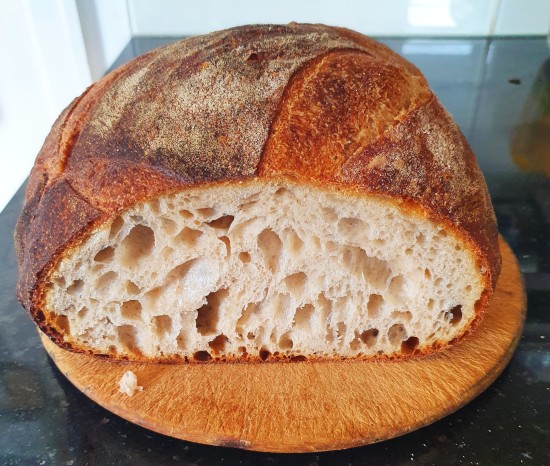
The following recipe is based on Jeffrey Hamelman's “Roasted Potato Bread” converted to a liquid levain sourdough. The recipe is scaled down to make one loaf of about 780 grams. I think the adding potato improves crust color and makes for a milder sourdough flavor. The little flecks of potato add a surprising sweetness.


Bread Flour 318 grams

Whole Wheat Flour 68 grams

Water 193 grams

Liquid Levain (125% hydration) 153 grams

Salt 11.5 grams

Cooked Potato 114 grams


  1. Mix the levain: I have a very active starter, so I make the liquid levain about 6 to 8 hours before mixing the dough. Mix 80 grams of bread flour, 100 grams of water, and about 50 grams of mature liquid starter (125%). If you use a stiff starter add enough additional water to bring the total hydration to 125%. Cover and let stand at 70 to 75 degrees F.

  2. Cook the potatoes: If you haven't already done so, bake or boil some potatoes. Yellow fleshed potatoes such as Yukon Gold are especially nice. You can remove the outer skin or leave it on, whichever you prefer. (I take the skins off) Mash the cooked potatoes without adding any additional liquid and set aside.

  3. Mix the dough: Measure and mix all ingredients. (Save the leftover levain for the next baking.) I mix by hand in a bowl until the all the flour is totally moistened, let it set for 30 to 40 minutes, and then knead briefly with a plastic dough scraper or wet hand. Don't add any additional flour at this stage.

  4. Fermentation: Cover the bowl with plastic cling wrap and set aside at room temperature for an hour or two. At this point I usually retard the dough overnight in the fridge.

  5. Folding and Shaping: Next morning take the covered bowl of dough out of the fridge and let it set at room temperature for an hour or so. Then turn the dough out on to a floured work surface and stretch and fold about 2 or 3 times. Shape roughly. Cover the dough and let rest for 15 to 20 minutes and then do the final shaping.

  6. Final Proof: Place the shaped loaf, seam side down on parchment paper that has been dusted with corn meal. Cover the loaf with a large bowl and proof at 70 to 75 degrees Fahrenheit for two hours or until doubled in size. When proofed, score/slash the loaf as desired. In this example I used a scissors to cut a star shape in the center of the loaf.

  7. Bake: I bake the scored loaf in a preheated cast iron pot at 450 degrees Fahrenheit. Bake covered for 30 minutes, remove the cover, and bake for an additional 10 to fifteen minutes. Remove the loaf and cool.

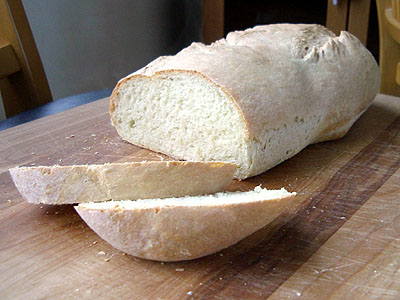
Sourdough Potato Bread - Baked in a potSourdough Potato Bread - CrumbSourdough Potato Bread - Baked in a pot


In lesson one we baked the simplest bread one can bake. It was made up of just flour, salt, yeast, and water.

As anyone who has ever looked at the ingredients on a store-bought loaf of bread knows, a lot of other ingredients can be found in loaves of bread. How those ingredients affect the flavor, color and behavior of your bread is the focus of lesson two.

We'll also bake a loaf to compare to the simple one we made in lesson one.

As one would guess, additional ingredients change the flavor of your bread. But many of these ingredients also change the behavior of your dough in ways that are not immediately obvious. Knowing a little bit about what to expect when you add a given ingredient to a dough will increase the likelihood of your experiment being a success.

Common Additional Ingredients

  • Sugars (sugar, honey, molasses). Sugars obviously sweeten and flavor the loaf, but bakers need to keep in mind the fact that they also provide additional food for the yeast. It is common to add a tablespoon or two of sweetener to a loaf of bread, both to feed the yeast and to add a touch of sweetness. But yeasted breads rarely contain as much sugar as one finds in unyeasted quick breads, largely because the added sugar interferes with the proper yeast cycle.

    Sugars also carmalize in the oven, resulting in the rich brown color of crust.


    Notice how the bread from Lesson One, which contained no added sugars, had a very pale complexion.

    Recipes for sugary breads, such as holiday bread, typically call for fewer and shorter rises. Long rises of highly sweetened doughs can result in beery tasting bread, typically not the result you are after when baking a sweet bread.

  • Fats (butter, oils, milk, eggs). Fats enrich and flavor the bread. They also soften the dough and preserve it: whereas a fat-free loaf of bread like a French bread goes stale after only a few hours, a loaf of bread with a small amount of olive oil or butter (like a sandwich bread) retains moisture and will stay fresh longer.

    Fats increase the bulk of your bread. Rarely do you get the kind of large, irregular holes inside an enriched bread as you do in a fat-free bread.

  • Different Flours/Grains. Different grains and types of flour impart different flavors to the bread. They also have varying levels of gluten and sugar: for example, bread flour is higher in gluten than all-purpose flour. Pastry flour is very low in gluten and is typically avoided in yeasted breads because it is incapable of forming proper crumb (the network of air pockets inside of the loaf).

    In most recipes, even those labeled "Whole Wheat Bread" or "Rye Bread", the specialty flours make up no more than half of the flour in the loaf. The remainder is, more often than not, plain old All-Purpose Enriched Unbleached or Bread Flour. The characteristics of regular wheat flour are hard to beat when baking, and a little bit of specialty flour can go a long way in changing the profile of your loaf.

    Whole wheat flour, rye flour, oats, rice, corn meal, mashed potatoes, and semolina flour are all common ingredients. They contain varying amounts of sugar and gluten, so experimentation and comparison are often necessary to achieve the desired result.

  • Other. There really is no limit on what you can add to a loaf of bread: herbs, cinnamon and raisins, garlic, cheese, nuts, dried fruit, olives, even sausage or preserved meats. Use your imagination!

"Homework" for Lesson Two

The recipe

We'll use the recipe from lesson one as the basis for this one, but we'll substitute milk for most of the water, add a little bit butter to soften it up, and add a touch of sugar. I also reduced the salt and yeast from two teaspoons to one teaspoon. When possible, reducing the yeast and increasing the fermentation time results in a better flavor (more on this in lesson three).

The result is a richer, softer loaf that makes an excellent sandwich bread. Typically I would bake a bread like this in a loaf pan, so that it makes nice, square little sandwiches, but in my example I chose to bake this one on a sheet pan so we can compare it to the loaf from lesson one.

2 cups all-purpose enriched unbleached flour
1 cup bread flour (or all-purpose flour, if you do not have bread flour)
1 teaspoon yeast
1 teaspoon salt
1/8 cup sugar
1 cup warm milk
2 tablespoons butter
1/4 - 1/2 cup lukewarm water

Mix the dry ingredients, then add the wet ingredients. Mix and adjust water until all ingredients are incorporated and the dough is capable of forming a ball. Pour the dough onto a flat, floured surface and knead for approximately ten minutes.

Return the dough to an oiled bowl and let rise until doubled in size, approximately 90 minutes. Shape the loaf and then let rise again until the desired size is reached, approximately another hour.*

Bake at 350 for 40 to 45 minutes, until when tapping the bottom of loaf the bread springs back and makes a hollow sound.

*Note that we're only letting it rise one time for this loaf. Because I added the extra sugar in there, I didn't want it to over-ferment and make the bread taste beery. It is low enough in sugar it probably could have handled another rise, I just didn't feel like risking it tonight!

Wrap up

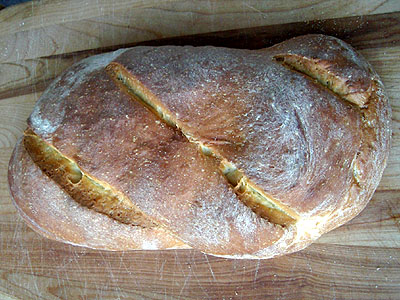
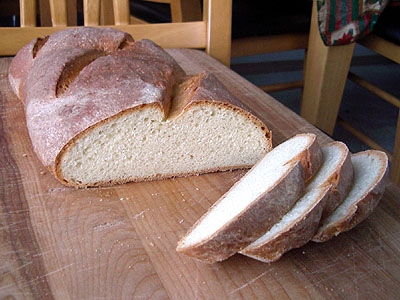
As expected, this loaf was creamier, sweeter, and softer than the loaf we baked in lesson one. The added sugar also carmalized and resulted in a beautiful, brown crust.

A note on storage: sandwich breads like this are best stored in air-tight plastic bags. Paper bags will help keep the crust its crustiest and are better for storing French breads.

I stored this loaf in a plastic bag three nights ago. With a bit of enrichment and proper storage, a loaf like this keeps well for up to a week.

Continue to Lesson Three: Time & Temperature.

Lesson Two: Putting Something More in Your Loaf

PANEMetCIRCENSES's picture
PANEMetCIRCENSES

How I make 'sourwort'

In this post I will describe the simple formula and process I use for preparing 'sourwort' for my bakes.


150g   cracked rye malt (by Weyermann) which I buy from local homebrew supply shops near me

500g   tap water at 47C|117F


I put the malt into one of those vacuum seal containers with hand-pump (picture).

Then I pour over it warm water and stir. Pump out air as much as possible to create an oxygen-free enviroment.

The mash must remain under anaerobic conditions at 42-45C|108-113F for the next 36-48 hours untouched. I am lucky enough to possess a Brod&Taylor foldable proofer for this job.

When time comes I open carefully the container because it has become very fizzy.

You' ll be taken by the sour green-apples aroma that emerges out of the container. No putrid activity whatsoever.

I let cool down to room temperature with open lid (no rush) and strain the soured mash using one of those 'French press coffee makers'.

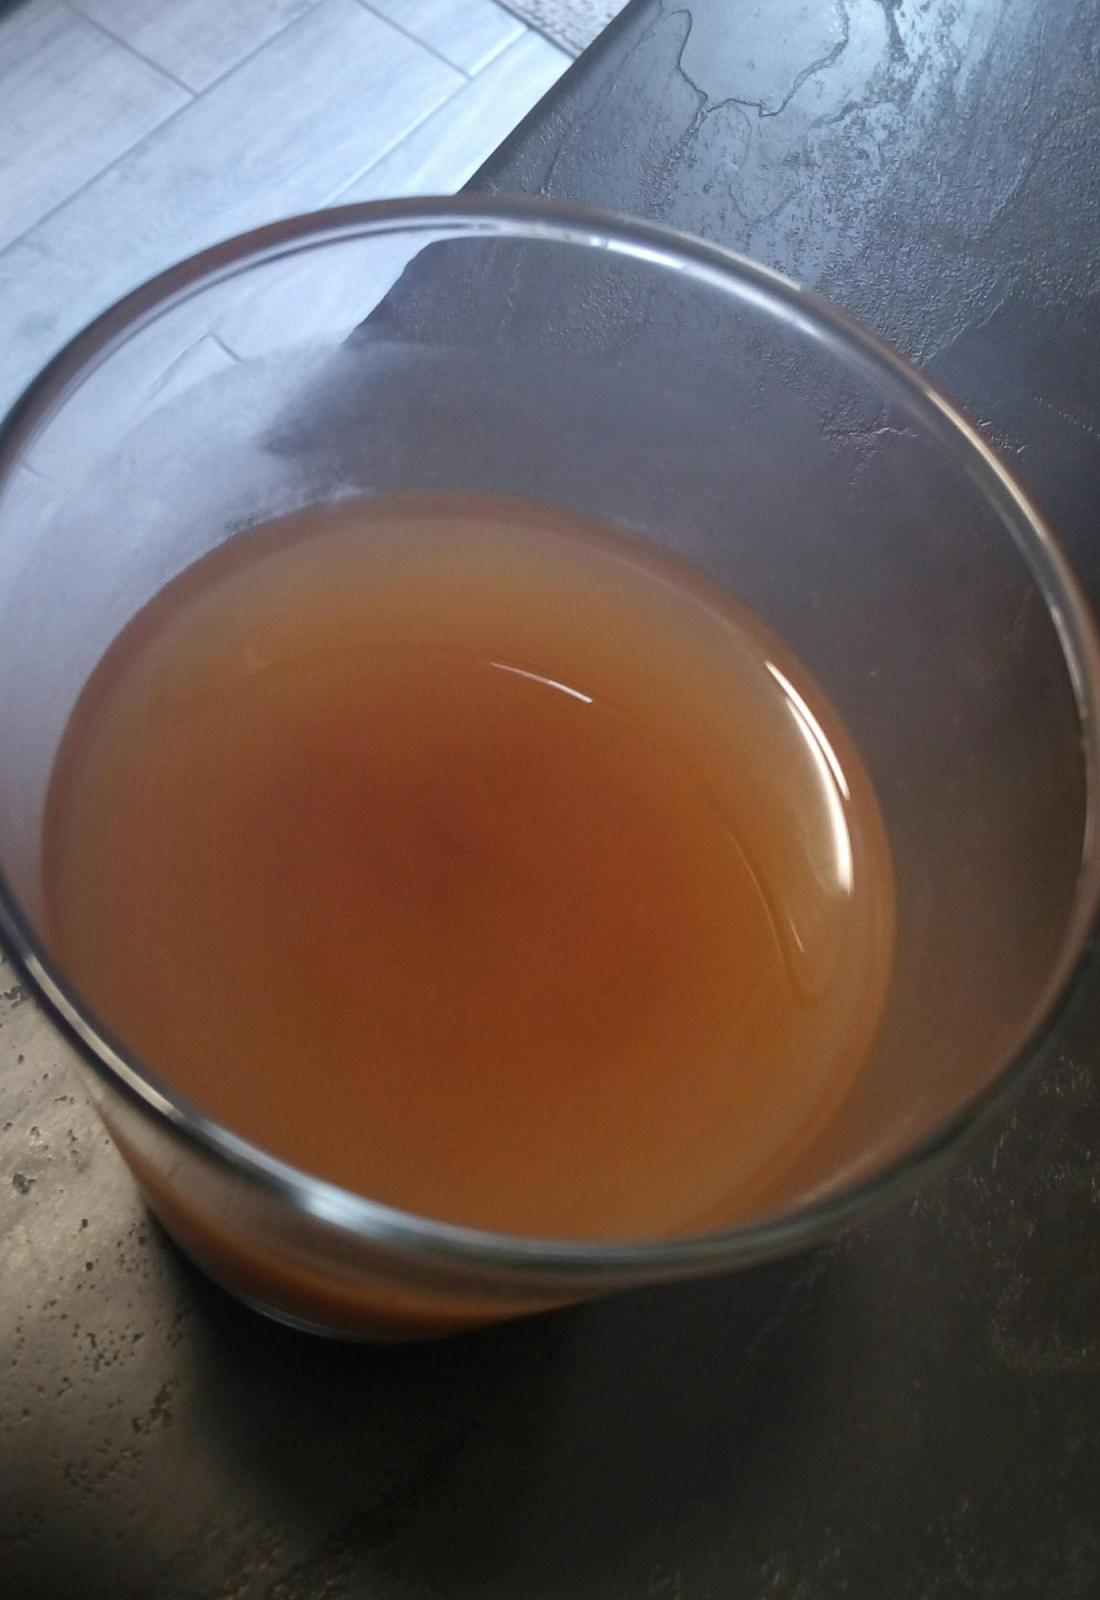
In the picture you can see the strained 'sourwort' in its glass container. The yield is about 300g.

Now it is ready for use to make bread. Or you can store it in the fridge (4C|39F) for the next 1-2 weeks and use it straight from the fridge to make bread at will.

I use this 'sourwort' in conjuction with instant dry yeast to bake my favorite tin loafs and not only.

In my next post I will describe how I make beautiful fragrant sourwort-bread in two and a half hours (plus bake time)

with extraordinary crumb texture.

You 'll be in for a very pleasant surprise with the outcome !!!!!


show

alfanso's picture
alfanso

Community Bake - NY Jewish Bakery/Deli style Rye breads

 The Eric Hanner Memorial Jewish Bakery Rye Bread Community Bake

**********************************************************************

For those who wish to limit or disengage from the flood of email notifications associated with long threads such as these CBs produce, Dan had written up how to do so

http://www.thefreshloaf.com/node/66354/tip-how-stop-email-notification-any-topic

**********************************************************************

As many of you know, Dan has been at the helm of the Community Bakes since its inception, and was his own invention.  Along the way he created a community within the TFL community with smashing success.  Recently Dan asked if I was interested in taking the steering wheel for a while, feeling that he needed to step away for some time.  Rather than hosting, he’d rather assume the role of contributor.  Gladly! 

Suggesting 4 categories to explore for this CB, I asked for those interested to select one.  The overwhelming response was rye.  My goal was to find a few breads that were not demanding of extraordinary time, effort and particularly avoiding out of the ordinary ingredients or baking tools and hardware.  And all having a common theme.

Paul McCool suggested I consider the Eric Hanner Jewish Rye Bread.  Eric passed away unexpectedly 8 years ago this month.  From all accounts he was a liked and well respected participant in the community.  This CB is in memory of Eric.

I offer three differing Jewish Bakery/Deli style Rye Breads.  All provide unique experiences as far as how the dough will react during all phases.  All employ a 100% hydration preferment.

The first two breads have a link to the original post.  The third is my own interpretation as well as my experience and steps.

Eric Hanner employs what he refers to as a Sponge, It is composed of 26% rye, and 71.5% hydration.  If your experience is anything like mine, the dough will challenge the newly initiated Rye baker to a formidable sticky and difficult dough to manage.  It bakes up beautifully and has an extraordinary taste.

David Snyder uses a Rye Sour.  Built in three stages.  It is composed of 44% rye and 72% hydration.  Contrary to any reasonable expectation considering the elevated rye percentage, it does not exhibit any of the overly sticky qualities of the first dough.  I would consider this the closest of the three to a true NY Jewish bakery rye bread.

Alfanso’s is a faux Jewish Bakery Rye, for contrast and variety.  It uses a standard AP flour Levain.  It is composed of 25% rye and 73.5% hydration.  I treat the dough as I do for mostly every other bread that I make.  It is the most manageable of the three and the least traditional.  If you wish to use a Rye Levain instead, make the appropriate adjustments to the amount of AP and rye flours for the final mix.  Percentages will not need to be adjusted (unless you want), only the amounts at Final Mix time.

My blog post of the 3 formula write-ups are found here.

Notes:

  • All three breads call for a Medium Rye Flour.  Mine is also stone ground.
  • All three of my own entries will be found in this link and have been scaled at 1000g.
  • These can be made within a 2 day span or less:
  • Eric’s version is made with a 1 stage overnight sponge, but if you are an early riser, the entire process can be done in the course of a day, the first 8 hours awaiting the sponge to complete fermentation.
  • David’s requires the 3 stage rye sour, which will take a full day to accomplish.  However, for the sake of expediency, I’ve whittled that down to ~6 hours via a heating pad and maintaining a 90dF environment for the rye to ferment.  This may sacrifice some of the qualities a longer fermentation, but can also be done in a short day.  This version also uses a significant boost of IDY, hence the short period between mix and bake.
  • Alfanso’s requires a levain to be readied.  Mixing and fermentation are minimal, but the formula asks for an overnight retard.  Instead, a few hours of countertop proofing if you wish, although I’ve never done that.

Traditional Jewish Rye Bread “begs" the use of an ultra high gluten flour, I wanted to avoid requesting people to source something along the lines of a First Clear flour.  For the first two I use a supermarket brand bread flour that may be as high as 12.9% protein.  For the third I use my standard  King Arthur AP flour that has a stated protein of 11.7%, but to get a more optimal result I did add VWG.

You do not need an ultra high gluten flour to produce these.  Unfortunately if your only available flours are weaker than what I mention above, you may have to supplement the flour with something like a Vital Wheat Gluten to elevate the protein.  If you decide to do this, there is the long-way manual tool Pearson’s Square, which can be used to adjust protein percentages.  OR use this link to the Foodgeek VWG% calculator.

All three breads have caraway seeds added, as do many Jewish Rye breads.  You can eliminate these if you wish or supplement / replace them with a fennel seed, for instance.

A few references about rye flours:

The fine print...

As always, the CB is a place created for a collaborative effort, both to enhance one’s skills as well as to help others with their skills.  By no means are the formulae meant to be the be-all-andend-all of the CB.  Rather, they are a framework of three distinct ways to achieve a bread that meets the general criteria.  I encourage you to experiment and explore, to modify and to introduce to our CB participants your own experiences and versions.  And most of all, to learn and help all of us to better ourselves as bakers.  I also encourage you to find something you like, change one or many things about it and to make it your own!

And as Dan said:

All bakers of every skill level are invited to participate. Novice bakers are especially welcomed and plenty of assistance will be available for the asking. The Community Bakes are non-competitive events that are designed around the idea of sharing kitchens with like minded bakers around the world, "cyber style". To participate, simply photograph and document your bakes. You are free to use any formula and process you wish. Commercial Yeast, sourdough, or a combination of both are completely acceptable. Once the participants gets active, many bakers will post their formulas and methods. There will be many variations to choose from.

Here is a list of our past CBs. They remain active and are monitored by numerous users that are ready, willing, and able to help if assistance is needed. A quick browse of past CBs will provide an accurate picture of what these events are all about.

******************************************************************************************

Since many of the CBs grow quite large, it can become difficult to follow the progress of each individual baker. Things get very spread out. In an attempt to alleviate congestion and consolidate individual baker’s bread post, the following is suggested.

Links to baker’s BLOGs that have posted a compiled list of bakes for this CB

End note:  By no means do I consider myself a skilled rye baker.  This is my first experience baking Eric’s version and my third with David’s. My own version I bake with some frequency.

*For the original postings please click the links above.  My posting of the formula write-ups, click here

albacore's picture
albacore

My Rus-ian bread journey

My Rus-ian bread journey

I've always been interested in Yippee's posts about CLAS and I've done a couple of CLAS bakes with good results. Most of the detail on CLAS is to be found on Rusbrot's blog and in his YouTube videos. What caught my eye recently was his post about Russian Monastery bread. This is presented as a rye/wheat bread made with a custom built starter. The starter is made with coarsely crushed rye malt and raisins, followed by a rye flour build, so I'm guessing it is a composite of a raisin yeast water and sourdough. I didn't have any rye malt, but Rus suggests you can use coarsely crushed rye grain and malt extract instead, so I ordered some malt extract, but it never came. Back to plan A mkII - make my own rye malt! This is the guide I followed, but much simplified as I was only making 200g. A few days later it was ready and I kicked off my Monastery bread build.
I followed Rus's process to make a rye/wheat Mischbrot. All went OK and I ended up with an OK bake. It was a bit solid, (like all my rye bread is!) and had a lot of cracks in the crust - not sure why.


After this, things got more interesting. Rus suggests that you can save some of the dough to make a ripe dough starter - pate fermentee, I guess. So I did this and used it to make a high extraction wheat flour big boule.


Levain build 1

    10g rye malt coarsely crushed
    10g Red Lammas wheat grain coarsely crushed
    10g BF
    10g Red Lammas flour
    12g ripe dough
    40g water
    5 hrs 28C
   
Levain build 2

    10g levain build 1
    100g WW flour sieved
    75g water
    12hrs 25C
   
Main dough

    200g WW flour #40
    200g WW flour #50
    100g Manitoba flour
    350g water
    autolyse 20m
    106g lev build 2
    10g salt
    mix, 2 folds
    3 hrs 45m bulk
    NB: remove 70g dough as a ripe dough starter and store in frij
    shape to  one big boule
    FP 1hr 10m
   
    And what a great bake it turned out to be! Super oven spring, good loft, nice open and moist crumb


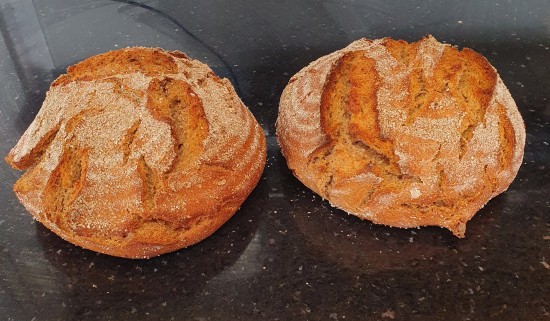
Just to make sure this bake wasn't a fluke, I did a similar bake, but to two small boules and one tubby batard again nice looking loaves:


So go on - why not give it a try! If you have a proofing box, you are good to go!

Lance


Steve Petermann's picture
Steve Petermann

Bread Recipe Spreadsheet

There are many recipes out there both in books and online -- some good, some not so good.  At a point in my bread making journey, I wanted to do some experimentation and try my hand at creating my own recipes or modifying some I liked.  I've had a spreadsheet for years but it was pretty simple and didn't offer a full-fledged tool to be creative. So, late last year I decided to kick it up a notch to make it more complete. This is the spreadsheet I've been using for several months now and have enjoyed using it.  So, since others might enjoy a tool that helps them be creative and learn more about how things work in a recipe, I decided I'd share it.

Now, there are other spreadsheets out there and if they work for you, great.  This one fit my preferences for an interface.  What I particularly wanted was one that offered a seamless integration of soakers and other wet/dry ingredients.  I also wanted a way to import a recipe so that I could try some changes.

This spreadsheet is available both for download (for those who have the Excel PC app) or with Excel Online for those who don't.  

Now, the spreadsheet is pretty involved with a lot of features so I created a YouTube demo/help video.  I give a quick demo at the beginning so you can decide if you might want to watch further.  Here's the link:

https://www.youtube.com/watch?v=utxhSh25dUk

If you want to download the spreadsheet here's the link:

Download: https://onedrive.live.com/download?cid=B126829C89FACFE6&resid=B126829C89FACFE6%21209&authkey=AG3cm-VoQzojrBA&em=2 (1)

If you don't have the Excel App on your PC and you want to try it, message me with your email address.  I need that so I can set up a private spreadsheet on my Microsoft OneDrive for you to use.  You can try it there but if you want to use it long term, you'll need a Microsoft account. It's free and will give you your own OneDrive where you can create and store your spreadsheets.

Full Disclosure:

I wanted some automation in the spreadsheet to make life easier so there are Visual Basic script macros in the spreadsheet. They are represented by the buttons at various places and also do some automatic formating and prevent cut/copy pastes which can mess up the formatting and spreadsheet.  I cover all that at the end of the Disable Macros video. Now, if you're worried I might have put some malicious code in the macros, you can do a couple of things.  If you are using the Excel PC app you can disable the macros before you start using it.  Here's a video that explains how to do that:

Disable Macros: https://www.youtube.com/watch?v=mQfY6D2FNXc

Or, you can just use the Excel Online version because the macros are disabled there.

I've used this for months and fixed anything that didn't seem right to me, but if someone sees something that doesn't seem right, please let me know.  If there is a problem, I'll fix it and post a link to the new version here.

There are many niceties in bread making and bread making techniques but I don't think creating a recipe should be an impediment.  Bread making will still have its intuitive (feel) side and adjustments may be necessary, as always, because of the complexity of ingredients and techniques.  However, hopefully the spreadsheet will minimize them and make it fun to try new things.


DanAyo's picture
DanAyo

Community Bake - Pt2 The Bread - Hamelman's Swiss Farmhouse

Swiss Farmhouse YW
by Jeffrey Hamelman
Jeffrey Hamelman has given us permission to post his copyrighted formula and instructions.  The Swiss Farmhouse bread is taken from his book, BREAD: A Baker's Book of Techniques and Recipes (second edition), by Jeffrey Hamelman. Copyright 2013. Published by John Wiley & Sons. If you don't own this book, it is an all time favorite on TFL and definitely one to consider.

The actual bake was scheduled for Friday, August 6, but some of the bakers already have their YW ready to go.

If you need to make a Yeast Water (YW) and have never done so before, have no fear. It is super simple to make. MUCH EASIER than a sourdough starter. If you are not a sourdough baker, this is a great way to start the learning process. See THIS LINK for full instructions and help.

NOTE - the Total Dough weight was set to 1000 grams for easy recalculation. Suppose you wanted to bake a 750g loaf. You would multiply each ingredient by .75 to get the correct amount. Or, let’s say you want to make two 750g loaves. Simply multiply each ingredient by 1.50 (750 + 750 = 1500). 1500 is 1 & 1/2 (1.5) times larger than 1000. If anyone needs help with this or anything else let us know. We are all here to help. Novice bakers are especially welcomed in all of out Bakes. Learning from, and sharing with others is the reason for our Community Bakes.

Here is a reply I got from Jeffrey concerning the proper type of flour. “Bread flour is the term the Bread Bakers Guild uses for flour with a protein content of about 11.5 to 11.8. Unfortunately this is also what most people refer to as all purpose.“

1.    Prepare Raisin Yeast Water   --- 5 to 6 days before the bake, soak the raisins (organic raisins are recommended) in water. Cover and leave at warm room temperature (75-80F). White mold normally begins to cover the surface of the raisins, an indication that the liquid is ready. Once the ferment starts to actively bubble, it should be ready.

2.    Build #1   --- Discard the spent raisins and measure the required amount of juice, add flour and mix to incorporate. Lightly cover and leave at room temperature for 6-8 hours, until well risen. NOTE – you can keep the remaining YW to refeed and perpetuate. Give the YW another handful of raisins for food and refrigerate.

3.    Build #2   --- Add water for second build to the first, then mix to incorporate. Incorporate the bread flour and the whole wheat flour into the mix. Lightly cover and leave to ripen for 12-14 hours until fully doomed. Note – if the room is too warn and/or humid you may retard the preferment a couple of hours or so to slow things done. The important thing to achieve is a fully risen and doomed preferment.

4.    Mixing--- Add all ingredients to the mixing bowl, except the walnuts and raisins. Mix until the gluten has attained moderate development. After mix in the nuts and raisins at slow speed until evenly incorporated. Desired dough temperature (DDT): 76F.

5.    Bulk Ferment   --- Ferment at room temperature (~76-78F) for 2 ½ to 3 hours.

6.    Folding   --- Fold the dough half way through the bulk fermentation.

7.    Dividing & Shaping   --- Divide, preshape, and shape the dough. Cover the dough to prevent drying.

8.    Final Fermentation   --- Ferment 1 ½ - 2 hours @ 76F.

9.    Baking   --- Slash dough and load into a preheated and steamed oven set to 450F. After 15 minutes lower oven to 430F to avoid excess darkening due to the raisins. Loaves scaled to 1 ½ pound will bake in approximately 36 minutes.

Pages