The Fresh Loaf

A Community of Amateur Bakers and Artisan Bread Enthusiasts.

Most bookmarked

Sam Fromartz's picture
Sam Fromartz

Jim Lahey's Pizza Patate from "My Bread"

One of the challenges for a home baker is to try and figure out how to make a great bread once you've tasted it. Like encountering the Platonic ideal, you recognize it, reach for it and try and duplicate it -- and then you fail miserably and often give up.

Jim Lahey, the founder of Sullivan Street Bakery, was like a culinary Plato for me. Every bread he turned out was amazing and no matter how hard I tried I couldn't find a way to make the airy, light, wonderfully tasteful bread at home. To learn more, I actually visited his bakery in New York several years ago and did a story on him. And while he gave me a few generous tips in an interview (and critiqued the sample I had in my backpack), it wasn't enough. I had to learn on my own and like most bread, I later realized success was less about the recipe than the technique.

Lahey, of course, later caused a storm on the Internet with his no-knead bread recipe, courtesy of Mark Bittman. Then, he spun those recipes into My Bread published this past fall, which ranks as a perfect starting point for an aspiring baker.

Less known than his bread, however, are his terrific pizzas, which he also includes in the book. These aren't the round pizzas he serves up at his New York restaurant, Company, but rectangular sheets of exceedingly thin-crust pizza, topped with onions, mushrooms or just tomato sauce. They are sold by the slice in his bakery.

The big secret about these crispy gems? Like no-knead bread they are dead easy and fast to make. For the effort, you get great results. 

In fact, the pizza recipe was so easy that I was skeptical it would be worth it. You mix the dough quickly, let it rise for a couple of hours, flatten it out in a rimmed baking sheet with olive oil, spread the topping and bake it. The recipe was also quite different from another here, because no mixer is necessary. 

You can dispense with a baking stone, too. And finally, watch your impulse on toppings! The biggest error pizza novices make is to pile on so much stuff the pie turns into a soggy, gloppy mess. As Jim told me many years ago, when it comes to pizza, "less is more." He's right. Like many Italian concoctions, he also avoids cheese on these rectangular pies and the result, in my opinion, is superior. But if you insist, go ahead and add a bit of cheese.

Here's his basic dough recipe and the stellar pizza patate (potato pizza).

Basic Pizza Dough 

Yield: enough dough for two pies baked in 13x18-inch rimmed baking sheets

3 3/4 cups (500 grams) bread flour
2 1/2 teaspoons (10 grams) instant or active dry yeast
3/4 teaspoon (5 grams) salt
3/4 teaspoon plus pinch (3 grams) sugar
1 1/3 cups (300 grams) water
Extra Virgin olive oil for pan

In a bowl, stir together the flour, yeast, salt and sugar. Add the water, and using a spoon, your hand, or a baker's plastic bench scraper, mix together until blended -- about a minute (Jim says 30 seconds but mine took a bit longer). You don't want to mix or knead this dough too much, or else the gluten will develop and you won't be able to shape it in the pan. But you want to mix in all the lumps of flour. In the end, you'll arrive at a stiff dough.

Cover the dough and let rise at room temperature for about 2 hours. (If your room is cold, put it in the oven with a pilot light to warm up a bit, or in a closed cabinet).

Dump out the dough on a lightly floured surface and cut it in half. Use both pieces, or save one in the refrigerator (I use a zip lock bag) for up to 1 day. Oil a 13x18 inch rimmed baking sheet liberally with good extra virgin olive oil (yes, pour it on). Then gently plop the dough on the pan and stretch and press it out to the edges. If it springs back (that's the gluten working) wait five minutes and then proceed. I found the gluten weak enough to spread it fully over the pan. The dough is very thin. If it tears, piece it back together.

Lahey has a few basic toppings in his book, such as pizza pomodoro (tomato sauce), pizza funghi (mushroom), and pizza cavolfiore (cauliflower), but I zoomed in on his pizza patate (potato). This might sound like a carbo-loading dream, but remember the crust is thin, so you're not stuffing yourself with dough.

Pizza Patate

As Jim writes, "Potato pizza is another Italian classic you don't see very often in the United States. While my rendition is pretty traditional, I soak the potatoes in salted water first, which actually extracts about 20 percent of their moisture. That causes them to cook more quickly and makes them firmer. It's a little trick I learned from cooking potato pancakes."

YIELD: One 13-by-18-inch pie; 8 slices 

EQUIPMENT: A mandoline

1 quart (800 grams) lukewarm water 
4 teaspoons (24 grams) table salt 
6 to 8 (1 kilo) Yukon Gold potatoes, peeled 
1 cup (100 grams) diced yellow onion 
1/2 teaspoon (2 grams) freshly ground black pepper 
About 1⁄2 cup (80 grams) extra virgin olive oil 
1/2 recipe (400 grams) Basic Pizza Dough 
About 1 tablespoon (2 grams) fresh rosemary leaves

Preheat the oven to 500 F (260 C) with a rack in the middle

In a medium bowl, combine the water and salt, stirring until the salt is dissolved. Use a knife or mandoline to slice the peeled potatoes very thin (1/16th inch thick), and put the slices directly into the salted water so they don’t oxidize and turn brown. Let soak in the brine for 1-1/2 hour (or refrigerate and soak for up to 12 hours), until the slices are wilted and no longer crisp. (Note: I cut the soaking time to 30 minutes and the results were still good.)

Drain the potatoes in a colander and use your hands to press out as much water as possible, then pat dry. In a medium bowl, toss together the potato slices, onion, pepper, and olive oil.

Spread the potato mixture evenly over the dough, going all the way to the edges of the pan; put a bit more of the topping around the edges of the pie, as the outside tends to cook more quickly. Sprinkle evenly with the rosemary. (Note: I left it out in the version pictured above, but feel it's better with it). 

Bake for 30 to 35 minutes, until the topping is starting to turn golden brown and the crust is pulling away from the sides of the pan. Serve the pizza hot or at room temperature.

Variation • Pizza Batata (Sweet Potato Pizza)

Substitute 2 sweet potatoes (800 grams), peeled, for the Yukon Gold potatoes, and use about 4 cups (about 900 grams) water and 24 grams (4 teaspoons) salt for the soaking liquid. Omit the rosemary in the topping.

(I originally posted this on ChewsWise)

Debra Wink's picture
Debra Wink

Baking Powder

Yes, that's right... baking powder. I'll bet you've never given it much thought before. I know I hadn't. I mean, I know there are basically two kinds---aluminum-based (I call that "regular") and aluminum-free, right? I assumed all aluminum-based baking powders were pretty much the same, and all non-aluminum powders the same. But it turns out that I was wrong on both counts. My recent foray into biscuit-making and quest for cloud-like loftiness, inspired me to do a little informal research into the science of chemical leavening.

It all started with the Flaky Buttermilk Biscuits I baked one night to go with a big pot of homemade vegetable beef stew. I was still on the hunt for a biscuit recipe that I could be happy with, so I turned to the mini library of Cooks Illustrated hard-bound annuals housed in my living room bookcase. CI has several biscuit recipes to choose from, but since I had never laminated them before, I thought the flaky type might be worth a shot.

The only real decision to make was which baking powder to use. Being an avid baker, I keep a selection in my pantry---aluminum-based for when a strong rise really counts, and aluminum-free for when the taste would otherwise overpower. I decided on Clabber Girl, because I can't really remember what's in the glass jar. I think it is Bakewell Cream Baking Powder, which would have been a good choice, except that has a relatively short shelf life and its age is questionable. Rumford is my favorite for cakes, but not much else. So, Clabber Girl it was.

I was both thrilled and impressed with the recipe, for its high rise and many layers. But I was disappointed in the flavor, which closely resembled "biscuits-in-a-can." In other words, a very strong baking powder taste, owing of course, to the full tablespoon of baking powder called for in the recipe. I thought, no problem, I'll just use half Clabber Girl and half Rumford next time. I do that for some things, to get the best of both. But the rise was only mediocre by comparison. Rumford is aluminum-free and gives me great results in butter cakes, but it seems to fizzle too soon in some of my quickbreads, and wears itself out in the mixing bowl---especially when buttermilk is in the mix.

Left: Clabber Girl
Right: Rumford-Clabber Girl combo

At this point, I started wondering about (Original) Bakewell Cream, which is billed in The Baker's Catalog as the "secret ingredient" for biscuits. I checked around a bit on the Internet, and it does indeed receive very high marks by the New England biscuit makers in its limited distribution area. If this is really THE biscuit leavener, then really... don't I need to try it? So, I bit the bullet and placed an order.

While waiting for the Bakewell Cream to arrive, I turned my attention to Calumet. This is the one I grew up with. Once widely available, it is getting harder and harder to find around here. I searched four stores before finally scoring myself some. It gave my biscuits better flavor than the Clabber Girl, but the rise was not much better than the half-and-half Clabber Girl-Rumford combination. Perhaps that's a clue as to its formulation.

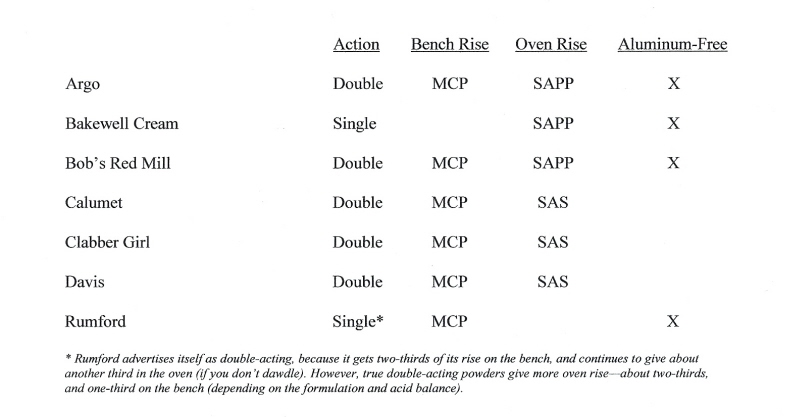
But the exciting thing was, that while on my mission to find Calumet, I stumbled upon a new baking powder. Well, it's new around here anyway, and I had never seen or heard of it before (plus, it says "New!" right on the label). I'm talking about Argo Baking Powder; have you seen it? Yep, it's the same people who make the cornstarch. What's so exciting about this baking powder, is that it has the same active ingredient as the Bakewell Cream, and unlike Rumford, it is a true double-acting, aluminum-free baking powder.

What does that mean? What makes all these baking powders different, you're wondering? Well, the basic equation is the same for all: baking soda + acid = lift. In the presence of moisture, baking soda reacts chemically with the acid, and CO2 bubbles released in the process make a batter or dough rise. Baking soda is the constant, but there are an array of acids to choose from, which can be sorted into two distinct categories---fast-acting, and slow-acting.

Fast-acting are acids that work at room temperature. They react in the mixing bowl when dry and liquid ingredients are combined, to give "bench rise." A good example is cream of tartar, which was used in the first commercial baking powders, and is still used in homemade preparations. The fast-acting acid ingredient preferred in commercial baking powders today is monocalcium phosphate (MCP).

Slow-acting acids don't react right away. They require heat to get going, and don't start reacting until the batter or dough reaches at least 120 degrees F. This is called "oven rise." Slow-acting acids include: sodium aluminum sulfate (SAS), sodium aluminum phosphate (SALP) and sodium acid pyrophosphate (SAPP).

A baking powder is said to be single-acting if it contains only one acid. If the acid is fast-acting, then the baker will need to get the batter mixed and into the oven very quickly---before it loses its bubbles or it won't bake as high. A double-acting baking powder includes both fast- and slow-acting acids. These are designed to create carbon dioxide gas more slowly, and over a longer period of time. Some bench rise during mixing is advantageous in creating bubble structure, for things like butter cakes, pancakes and waffles. However, a strong oven rise appears to be more important for things like biscuits and cornbread.

Here is a breakdown of the baking powders I tested, and a couple others that aren't available to me locally:

If you've stuck with me this far, you probably want to know how the Bakewell Cream measured up against Argo and the rest of the powders. I have to say that Bakewell Cream's lift rivaled that of Clabber Girl, but the flavor was a whole lot better. You have to combine Bakewell Cream---which is just an acid---with your own baking soda, to create the baking powder effect. Some may find the extra measuring a nuisance, but the advantage is that, unmixed, it keeps indefinitely. Baking powders, on the other hand, have a limited shelf life of about a year.

The Argo biscuits baked up just as light as the Bakewell Cream, so I almost had to declare this one a tie. But Argo eked out the win based on flavor (and the fact that I don't have to mail-order it---not that I wouldn't for something that is truly better). The flavor thing was such a close call, though. I really thought they would taste the same, and had I not had the opportunity to have them side-by-side, I wouldn't have noticed the very slight difference. That's how close it was. So for the lightest, best-tasting biscuits, I would say, opt for something with sodium acid pyrophosphate (SAPP) in the ingredient list. If there is a secret ingredient, that would be it.   -Debra Wink

Left: Argo biscuits, baking
Right: Bakewell Cream biscuits, cooling

gothicgirl's picture
gothicgirl

Naan

For the most part, I have had a lot of luck with bread recipes.  If it does not work out the way I want on the first try I begin the tweaking process.  It is not always fast but I get there in the end.  I say for the most part because I have had one bread nemesis.  One bread that, no matter how I tried, would never work out the way I wanted.  

That bread was the delicious Indian flat bread called naan.

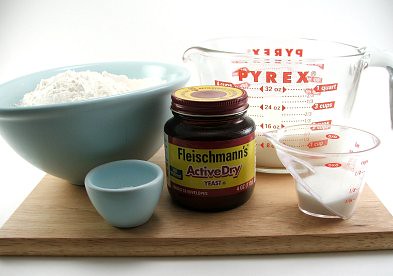
Naan Fixins

Naan is my nemesis no longer.  Now I have a recipe for naan that is tender, chewy, crispy, and soft all at once, and is terrific stuffed with curry.  The recipe is adapted from one found here.  

Along with a good recipe I have a good cooking method.  Naan is made, traditionally, in a tandoor oven which produces an insane amount of heat.  If you want naan that has the right texture, the soft inside with the chewy exterior, you have to find a way to replicate a tandoor at home.  I tried the grill with average results.  I tried the stove, in a similar way that I cooked my tortillas, but it was not hot enough.  

I make pizza at home from time to time and have two very well seasoned pizza stones.  On the internet I had read that some bakers use their pizza stones, in a smoking hot oven, to achieve a tender interior with a crisp exterior.   It sounded promising, so I tried it.  I heated the oven to 500 F with my pizza stone on the lowest rack of the oven.  I let it heat for thirty minutes and then added one rolled out piece of naan.  It was as close as I will ever get to perfect, and it is pretty darn close!

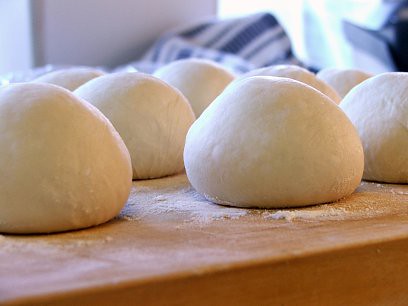
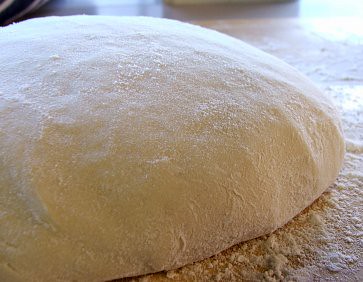
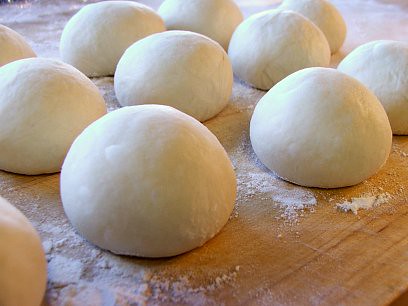
Naan Dough Divided

Another thing I discovered is that you need to have patience.  Don't rush the naan.  Give the dough a two hour ferment, then after they dough is divided give it the full half hour proof on the bench before rolling.  Letting the dough develop will give you the taste and texture you want.

Naan 

Naan   Yield 12 naan

3 1/2 cups all-purpose flour
1 tsp salt
1/2 tsp dry active yeast
1 1/2 cup milk, heated to 110F
1 tsp sugar
ghee to taste

Activate the yeast in the warm milk with the sugar added.

Combine the flour and salt.  Once the yeast is active, combine the yeast mixture with the flour mixture.  Mix in a stand mixer on medium speed for 5 minutes, or knead by hand until the dough is smooth and elastic.

Allow to rest for two hours, covered with a towel or plastic.

Naan DoughNaan Dough Divided

After the dough has rested turn it out onto a floured surface and divide into 12 equal pieces and round them into balls.  Cover with a towel and allow to rest for 30 minutes.

While the dough rests heat your oven to 500 F and place a pizza stone, or cast iron skillet, on the bottom rack of the oven.

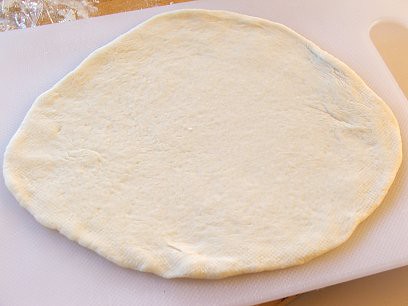
Naan Rolled Out

Once fully rested roll out the dough until it is about 6″ to 7″ wide.  It should be fairly thin.

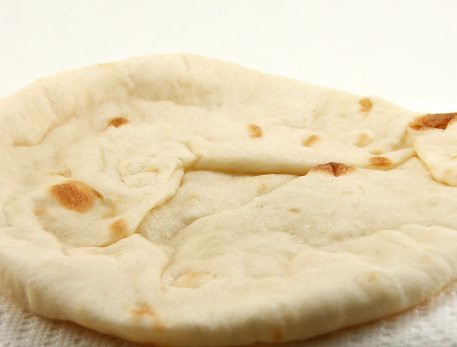
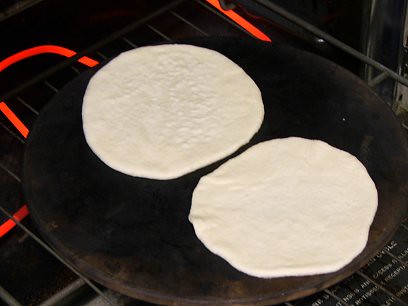
Naan on the StoneNaan Baked

Moisten your hands with water, gently pass the dough between your hands to moisten gently, then lay on the hot pizza stone.  Close the oven and bake for 2 1/2 to 3 minutes, or until puffed and beginning to get brown spots.

Remove from the oven, brush lightly with ghee (or melted butter) and cover with a cloth.  You may need to press the naan to release the air inside.

Serve warm.

Posted at www.evilshenanigans.com - 2/27/2009

Overnight Whole Grain Sourdough with Wheat, Spelt & Rye

JMonkey

This may be my favorite hearth bread. When made well, it has an open crumb, which is unusual for 100% whole grain breads, and a deliciously sour and nutty flavor.

Overall Formula
Whole wheat flour: 60%
Whole spelt flour: 30%
Whole rye flour: 10%
Water: 75%
Salt: 2%

5% of the flour is in the starter, which could be whole wheat, whole rye or whole spelt, and can be  60% hydration or 100% hydration.

Ingredients
Whole wheat flour: 300 grams or 2 generous cups
Whole spelt flour: 150 grams or 1 generous cup
Whole rye flour: 50 grams or a generous 1/3 cup
Whole grain starter: 40 grams if stiff (a dough ball about the size of a golf ball); 50 grams if wet (about 3-4 Tbs)
Water: 375 grams  or 1.5 cups + 1 Tbs
Salt: 10 grams or 1 and 3/8 tsp

Mixing
Dissolve the starter into the water, and then add the salt. Mix the flours together well, and add to the water. Mix until everything is hydrated.

Dough development and the first rise

However you develop the dough, it’ll need to rise at room temperature for 8-10 hours. Use the wet finger test to see whether it’s fully risen in the morning.

Shaping
Be gentle. You want to retain as many of those air bubbles as possible. Rounds and batards are the traditional shapes.

Second rise

You can let it rise for another 2 to 3 hours at room temperature. You can also speed things up (and increase sourness) by placing the dough on an upturned bowl in the bottom of a picnic cooler, throwing a cup of boiling water in the bottom and covering it quickly. After an hour, throw another cup of hot water in. The rise should only take a couple of hours this way.

Baking
Score the bread as you like. Hash marks are traditional for rounds, and batards usually take a single, bold stroke down the center or a couple of baguette-style slashes.

While you can certainly bake this bread on a cookie sheet, it benefits from a stone and some steam, or a covered baker. However you do it, bake at 450 degrees for about 40 minutes.

Section II: Bread Basics

You can jump right in and start baking without knowing much about the ingredients or how the process works, but if you'll take the time to learn a little bit about the baking process you'll find baking to be much more rewarding.  You'll also be equipped to modify recipes to fit your taste if you first understand how those modifications will change the results.

dolfs's picture
dolfs

Multigrain Oatmeal Sandwich Bread

In seeking a tasty and healthy bread for my 6 year old son's lunch box I've been looking to create a sandwich loaf that is in large part whole wheat flour and other grains, yet has a somewhat soft crust (you know children: they don't appreciate the best part of good bread), and fine and soft texture. It should hold up well for PB&J as well as cheese, turkey etc.

Multigrain Oatmeal Sandwich Bread
Multigrain Oatmeal Sandwich Bread 

Today was baking day for me and I made up a new recipe. It started with a variation on Peter Reinhart's Struan from his "Whole Grain Breads," but ended up with substantial modifications. What remains is the "epoxy" method which has always worked well for me since I learned about it. As you can see from the picture most (if not all) of my goals were reached. The whole loaf is airy, and the crust is mild in flavor and "crustiness." The color is lighter than you might expect because a substantial portion of the whole wheat flour used was white whole wheat flour. This is another one of those "fool the kids" tricks. If the bread doesn't look too brown it tastes better! (The white whole wheat does have a milder taste too).

The overall composition of the bread (not counting the oats on the outside) is 37% bread flour (I used Giusto's Ultimate Performer, organic unbleached), 35% white whole wheat flour (I used King Arthur), and 13% whole wheat flour (Giusto's), 14% rolled oats, 3.4% wheat germ (yes, that's a little over 100%, I rounded the amounts for this summary). Salt comes in at 1.85% overall, and hydration is at 75.6%. The bread flour comes in handy to provide enough gluten for a good rise (needed for good air and fluffy bread) and also helps create a milder (less WW) taste. I am not saying you need this much for the gluten reason, it is just what I ended up with and I am happy with bread that is only 1/3 refined flour. You can experiment with less if you want.
The end result was exactly what I was looking for. Within this goal, it was certainly my best ever. I know that some of you frown upon this kind of bread because it is not 100% whole wheat, it is too much like Wonderbread (not really, except texture may be somewhat), etc. I make plenty of "real" bread, but this outcome was the goal. Others have looked for this in the past (although mostly in a "white" bread), so I thought it worth sharing. 

Here is the recipe (from my Dough Calculator Spreadsheet):

Multigrain Oatmeal Sandwich Bread Formula
Multigrain Oatmeal Sandwich Bread Formula 

The recipe, as given here, makes 3% extra of the soaker and the biga to compensate for what might stick to your container and utensils and doesn't (easily) make it into the dough. I bake by weight (highly recommended), but approximate volumes are given for almost all ingredients. The wheat germ, if I remember correctly, was about 5 tablespoons. Not mentioned in the formula, but I also used about 1/16 of a teaspoon of ascorbic acid powder (vitamin C) as a dough enhancer. It promotes dough strength and allows for a "lighter" product. It gets destroyed during baking, so no health benefits!

Also note, for those of you that like to judge a formula by looking at the percentages, that soaker and biga are huge percentages in the final dough. This is normal for doughs made with the "epoxy" method as virtually all flour is part of biga, starter or soaker. In fact, if there was no flour whatsoever in the final step, you wouldn't be able to use percentages, because 0 flour would result in infinite percentages for the other components. The dough calculator has a convenient "Analysis" worksheet that collects all ingredients into an "Overall dough", which is how I got the percentages mentioned above.

Directions:

  • Soaker: Mix all ingredients until everything is mixed well and hydrated completely. Leave out at room temperature for 12 hours (overnight is what I do).
  • Biga: Mix all ingredients until everything is mixed well and hydrated completely, and then knead briefly. For a ball and place in refrigerator for 12 hours (overnight).
  • Final Dough: Cut up soaker and biga each into some 10 pieces and mix them in a bowl with all other ingredients. Mix well (dough whisk, stand mixer, whatever you like) on low speed until you have achieved a good blend. This will happen easier than for doughs not made with the "epoxy" method. Continue to knead until full gluten development has been achieved. With this dough you should be able to achieve a wonderful gluten window (window pane test). Your ideal dough temperature at this point should be 78F (if you don't know why or how, don't worry about it).
  • Bulk Ferment: Shape dough into a ball with tight skin and place, good side up in a greased bowl. Cover and let rise until approximately 2.5 times original size. (This happened for me in about 75 minutes in a 70F) kitchen. The dough will feel very airy! In my case no folds were necessary, but if you feel your dough s not as strong as you want (possible since the dough is fairly wet), give it a folder after 30 minutes and perhaps another after one hour.
  • Divide & Pre-Shape: The recipe makes two 1.5 pound loaves, so divide the dough into two equal pieces and quickly shape each piece into a tight ball. Deflate the dough some, but not completely while doing this. Let the pre-shaped balls rest (covered) for about 15 minutes. The dough might be just a tad sticky to your hands (it should have cleared the mixer bowl). If necessary use a tiny amount of flour, or wet your hands.
  • Shape & Proof: Pre-heat oven at 400F (I used a stone and cast iron pan for steam, but you can do without). Grease your loaf pans (I used spray with flour in it, you can use some butter, oil, or use parchment paper). Shape each ball into a roll/loaf, make sure seam is pinched shut, and roll the top side (seam will go down in loaf pan) in some oats that you have spread out. Place in loaf pan, seam down, oats up, and cover and let proof until a dome forms above the edge of the loaf pan (this took about 1 hour for me).
  • Slash & Bake: Optionally slash the loaves (I used a curved slash through the middle). If you don't slash and you get too much oven spring you may get tearing. I happen to think the slash looks good anyway. Place on the baking stone (i you use one, otherwise straight on rack in lower third of oven) and bake approximately 25 minutes until internal temperature is 205F (or use the "thump" test if you do not have a thermometer). Make sure you rotate pans sometime in the middle to get even heating and browning. I also remove the loaves from their pans when the internal temperature is about 190F so that the sides of the bread get some more browning. Careful with that, the loaves are very fragile at this point!
  • Cool & Eat: As always, let cool fully before slicing and eating. This bread freezes well. I slice the whole loaf and freeze two slices in a sandwich ziploc for easy "on demand" retrieval.


--dolf


See my My Bread Adventures in pictures
zainaba22's picture
zainaba22

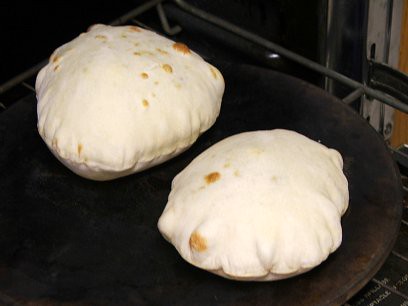
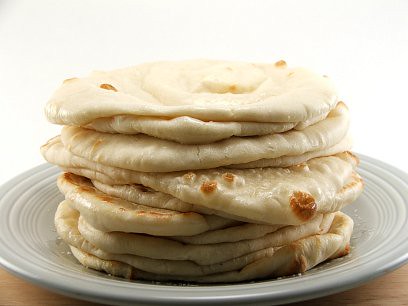
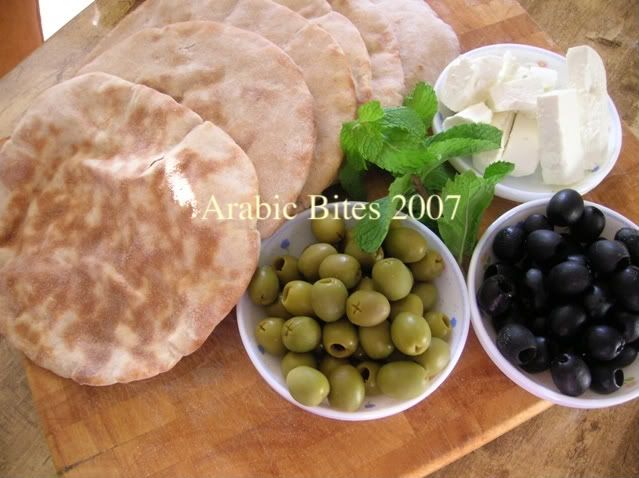
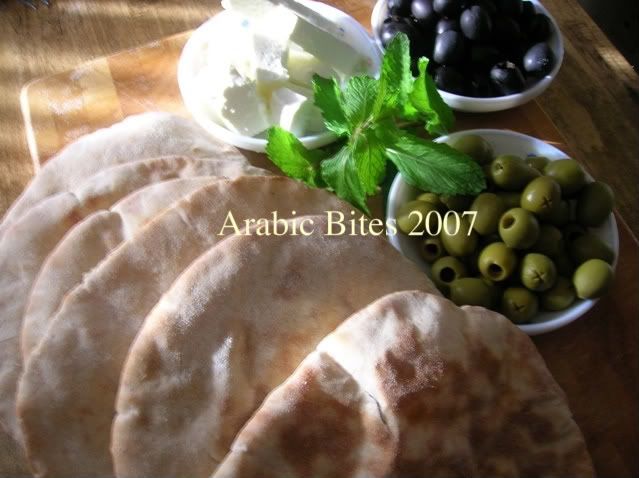
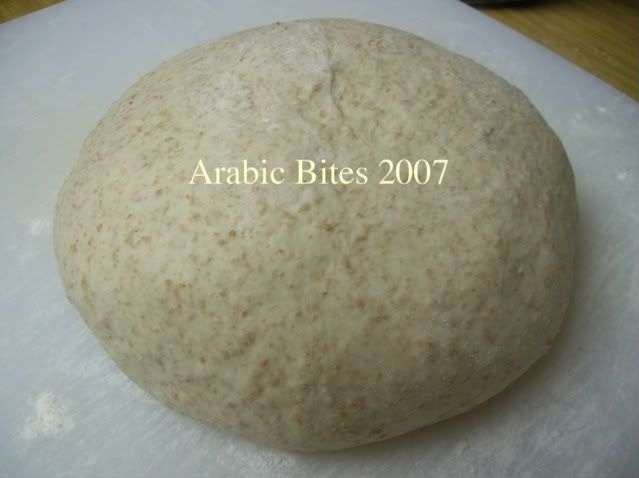
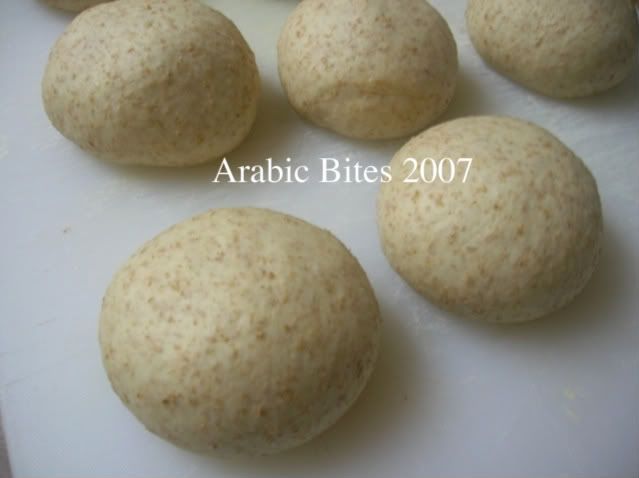
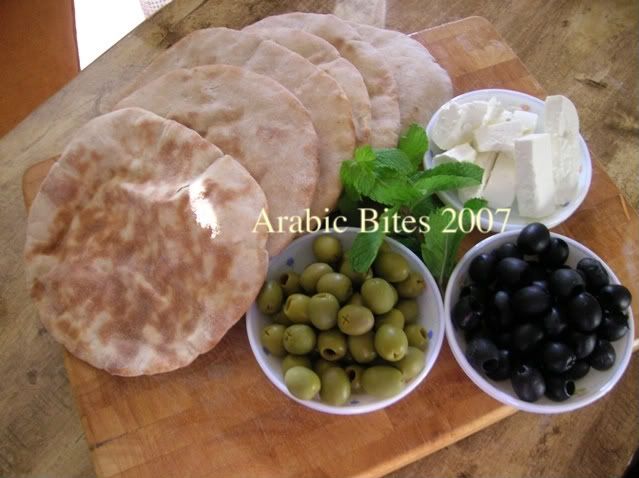
Pita Bread

I post this recipe before for JMonkey, you can see it here.


1 Tablespoon yeast.
1 Tablespoon honey or sugar .
2 1\2 cup warm water.
3 cups white flour.
1 1\2 cups whole wheat flour.
2 teaspoon salt.
2 Tablespoons olive oil.

1)Preheat the oven to 550 degrees.

2)Combine yeast,honey and 1\2 cup water in bowl,cover,stand in warm place about 10 minutes or until mixture is frothy.

3)place all ingredients + yeast mixture in the bowl of mixer ,beat 10 minutes to make a soft dough.

4)Divide dough into 12 pieces.

5)Shape each piece into a ball .cover,let rise in warm place until doubled in size ,about 1 hour.

6)Roll each to a 16 cm round.

7)The old method i bake Pita Bread on hot baking surface for 1 minute per side.

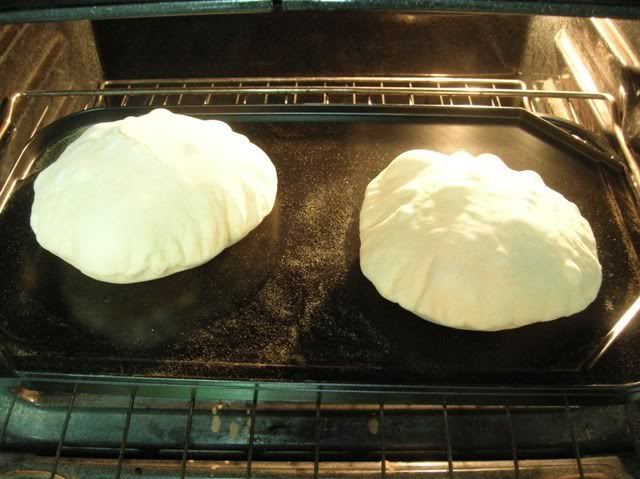
8)The new method I bake pita bread on wire rack over baking pan for 2-3 minutes.you can see it here.

zainab

http://arabicbites.blogspot.com/


JMonkey's picture
JMonkey

Biga vs. straight dough Whole-Wheat Buttermilk Bread experiment

I'm still not ready to write a review, but from my first hands-on experience with their work, I can confidently say that Laurel Robertson and her compatriots know a thing or two about whole wheat bread.

I started my foray into the Laurel's Kitchen Bread Book with their Buttermilk Bread, a loaf that they say "keeps well (when hidden)." It's true. These loaves are moist and delicious days later, but they're so deliciously sweet and light, they won't likely stick around that long.

I made two different loaves. For the first loaf, the night before, I took 30% of the flour and mixed it with the appropriate amount of water from the recipe and a bit of yeast to make a biga. The next morning, the biga was nice and ripe, so I took the remainder of the recipe, reduced the yeast from 1 tsp to 3/4 tsp, mixed it up and started to knead.

And knead.

And knead.

Then about an hour later, I mixed up a second loaf, this time following the straight-dough recipe to the letter.

Laurel recommends a long, hearty knead for whole wheat bread if you want a light, high rising loaf, which I do. About 20 minutes or 600 strokes. A few more weekends of Laurel's Kitchen-style kneading, and I'll not only have great whole-wheat bread, but enormous, rock-hard shoulders to boot. Or a herniated disc, whichever comes first.

But it does make an enormous difference in the quality of the bread. I have never seen whole-wheat bread rise so high. It's astonishing.

Her other piece of advice, which I'd heard of second-hand long before buying the book, was to let whole-wheat doughs rise twice during the bulk rise before shaping. This step takes a lot of the edge of the whole-wheat flavor, and also helps with the final rise.

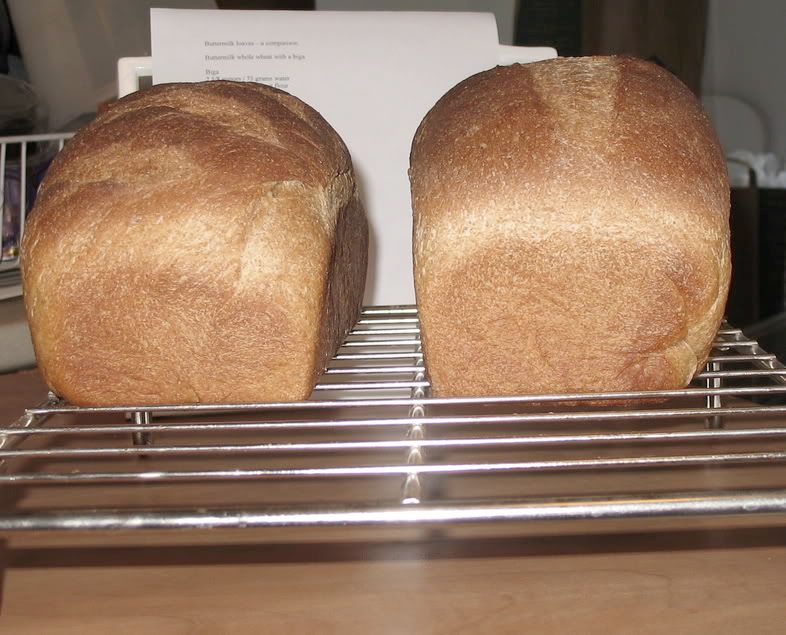
I'd wondered previously in this forum whether the double rise would make a pre-ferment unnecessary. My experiment lacks a wide enough sample (2 loaves does not a sample make) to make a conclusive finding, but ... well, see for yourself. I wasn't able to put them in the oven at the same time, because kneading them seperately takes 20 minutes a piece, but I did keep all other factors equal to the best of my ability. I can't guarrantee that they proofed for exactly the same amount of time, but the age-old finger poke test showed both loaves were ready.

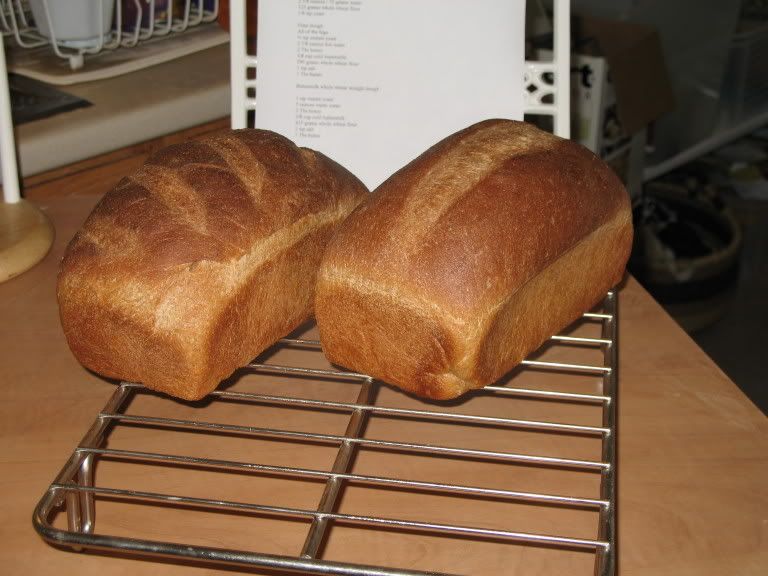
On the left, the straight dough. On the right, the dough made with a biga. Now, the loaf on the right did suffer from a bit of poor shaping that left a moderate gap in the top middle of the loaf, but that gap alone can't account entirely for the difference in size. Clearly, the biga loaf rose higher.

Here's another view. I scored the loaves differently so that I could tell them apart during the tasting.

So, what about it? How did they taste?

Both breads were excellent. Nevertheless, the difference was noticeable, though subtle. The loaf with the biga had a richer, stronger aroma, a deeper sweetness and a longer finish than the straight-dough. If you plan to eat this bread primarily in sandwiches or with jam, the biga will make little difference. As a bike commuter, however, the first thing I usually do after removing my helmet after my ride home is to run to the kitchen for a slice or two of plain bread to tide me over until I can cook the family meal.

If you eat the bread plain, the biga does make a difference.

Here's my version of the Laurel's Kitchen Bread Book Buttermilk Bread, with a biga. NOTE: I made this using the flour and water weights, not cups (except for the buttermilk). Laurel seems to have a heavy hand with a cup of flour, so you may need to add some if you use volumetric measurements -- let the dough be your guide. Some of the cup measurements don't match grams / ounces. That's OK. It all comes out even in the end.

Biga 5 ¼ ounces -- 150 grams -- 1 cup water 250 grams -- 8 3/4 ounces -- 1 3/4 cup whole wheat flour 1/8 tsp instant yeast

Final dough All of the biga 1 ½ tsp instant yeast 4 3/4 ounces -- 135 grams-- 3/4 cup warm water ¼ cup honey 1 ¼ cup cold buttermilk 580 grams / 20.5 ounces -- 4 3/4 cup whole wheat flour 2 tsp salt 2 Tbs butter

The night before, make up the biga. Knead it until it forms a relatively smooth dough, and then cover it to sit overnight for about 12-14 hours.

The next day, tear the biga into about 12 pieces and mix it up with the rest of the ingredients. Start kneading -- it'll take about 600 strokes and 20 minutes, but once you're finished, the dough should stretch nicely into a translucent, whitish pane, flecked with bits of bran. This dough may start a bit sticky, but should lose the stickiness and become simply tacky about halfway through. Add water or flour as necessary.

Form the dough into a ball and put it into bowl or bucket. Cover it, and allow the dough to rise for about 90 minutes or so. Poke the dough with a wet finger. When the indention starts to fill in very, very slowly, the dough is risen.

Gently degas the dough, and tuck it back into a tight ball for the second rise. Fold the dough if you wish, but really, after 600 strokes, the dough shouldn't need any additional strength. Once it has risen, divide the dough into two and shape it into sandwich loaves. Place the loaves into pre-greased 8.5 x 4.5 pans. Cover the pans with plastic for the final rise.

Preheat the oven to 350 degree F. (I like my oven a little hotter than Laurel does -- she prefers 325). Once the dough is risen and has crested one to two inches above the side of the pan in the center, slash the loaves as you wish with a serrated knife or razor blade. Personally, I prefer a single slash down the middle, but do whatever makes you happy. Place them in the oven and steam it if you wish (I find it helps with oven spring quite a bit, even with panned loaves), and bake for about 35-40 minutes, turning once to ensure even baking.

The loaves are done when they register 195-200 in the center. Let them cool for one hour before slicing.

If you want to make this as a straight dough (no biga), just dump everything together and increase the yeast to 2 tsp.

One other point. The quality of the whole wheat flour you use will make a big difference in the quality of your bread. Whole wheat flour, unlike white flour, goes rancid and if your brand has sat on the shelf for a while at the store, it may not make good bread. Also, you want the flour to be high in gluten, so look for flour made form hard spring wheat, if possible. Hard winter will do, but it won't rise quite as high. I use King Arthur Flour, myself, and it's worked fine.

When reading recipes for French Bread, a lot of baking books will tell you to combine the ingredients in the bowl of a stand mixer and then beat the bejeezus out of the dough. 10, 15, even 20 minutes of beating is not unusual to read about in order to get maximum gluten development.

But stop and think for a moment: bread has been around for some time, longer than stand mixers have. Do you honestly think the village baker had the strength to knead a trough full of dough for 20 minutes in the days before stand mixers? Or that he had a gaggle of Oompa Loompas to do the mixing for him? Of course not!

Heavy mixing is how boulangeries today make pain ordinaire, I've been told. But more interesting breads with better, more subtle flavors require different techniques. One of the simplest is known as autolyse.

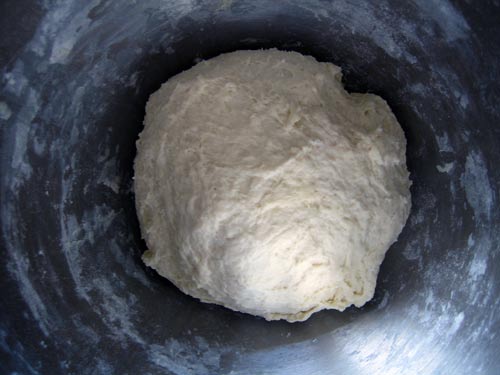
How do you use the autolyse technique? Simply combine the flour and water from your recipe in your mixing bowl. Cover the bowl with plastic or a damp towel. Walk away for 20 minutes to half an hour. That's it.

autolyse

While you were away the flour was absorbing the water and the gluten strands have begun to develop. Now you can mix in your preferment, your salt, and the remainder of your yeast and, with very little mixing, achieve a high level of development with considerably less work. The crumb of your dough is also likely to come out much whiter since it has not been highly oxidized by all the beating and whipping.

Better bread, less work. What's to complain about?

Next up: Number 7: The Wetter, The Better.

Lesson Five, Number 8: Autolyse

Floydm's picture
Floydm

Onion Braid

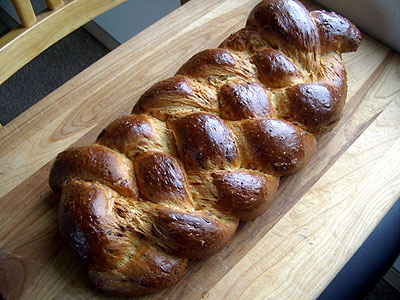
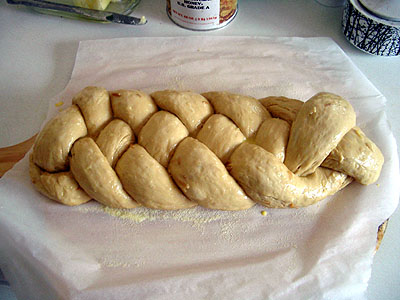
I based this on the Onion Twist Bread in Bernard Clayton's New Complete Book of Breads. I reduced the amount of yeast and used a poolish, and went for a braid instead of a twisted and panned loaf, but otherwise it is basically the same.

Onion Braid

Poolish:
1 cup all-purpose unbleached flour
1 cup water
1/4 teaspoon instant yeast

Dough:
Poolish
3-3 1/2 cups all-purpose unbleached flour
1/2 cup milk
2 teaspoons instant yeast
2 tablespoons butter or shortening
2 tablespoons sugar
1 1 3/8 ounce package of onion soup mix
2 tablespoons grated Parmesan cheese
1 egg

Wash:
1 egg
1 tablespoon milk

The night before, in a bowl, mix together the poolish until it form a batter. Cover with plastic wrap and set aside overnight.

The next morning, combine 2 cups of the flour, the yeast, the sugar, the onion soup mix. Mix in the poolish, the milk, one of the eggs, the butter, and the Parmesan cheese with a wooden spoon. Add more flour a quarter cup at a time until a proper dough forms, one that is dry enough that you can hand knead it yet moist enough that it is still tacky to the touch.

Pour the dough out of the bowl onto a clean work surface and knead the dough for approximately 10 minutes. Return the dough to a clean, greased bowl, cover with plastic, and allow to rise until doubled in size, approximately 90 minutes.

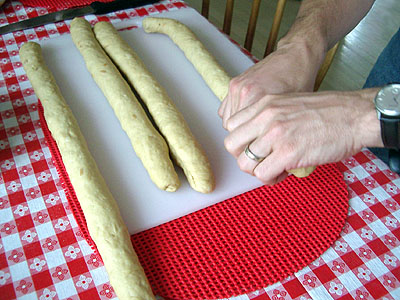
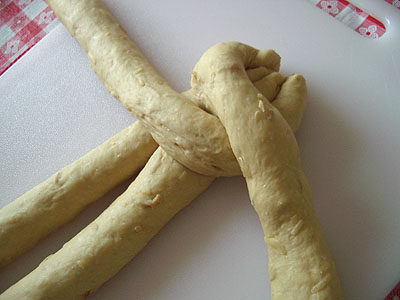
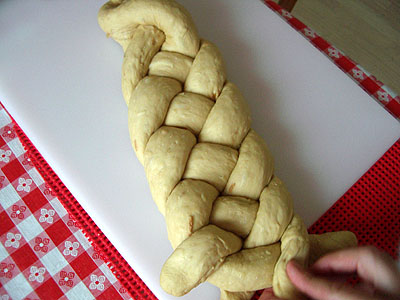
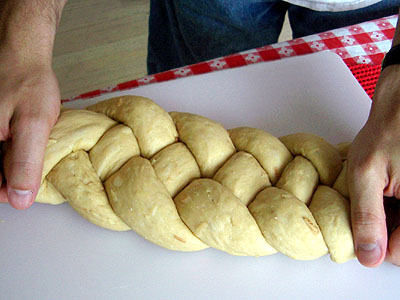
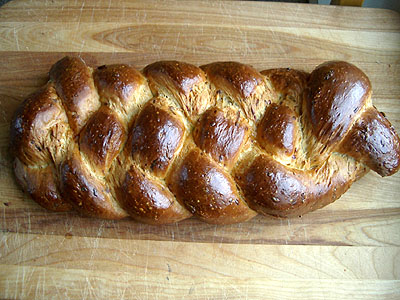
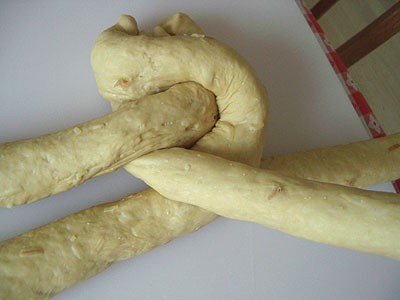
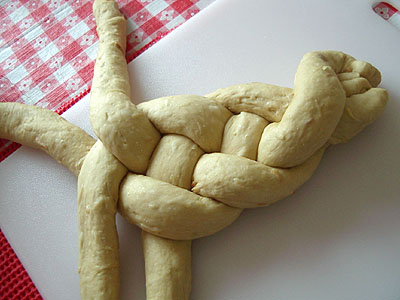
Remove the dough from the bowl and shape it however you like. I tried a braid this time. I'm not good enough that I want to give directions on how to do it yet (for that please see your cookbook), but I will include the pictures my wife took of the process:


Cover the loaf with a damp towel or greased plastic wrap and allow it to double in size again, approximately 45 minutes. While you are waiting, preheat the oven (and baking stone, if you have one) to 450.

Just before baking, glaze the loaf with the egg wash. Put it into the hot oven. After 5 minutes, reduce the temperature to 375 and bake for another 15 minutes. Rotate the loaf and bake until the loaf is done. Total baking time may vary based on shape. My loaf took about 45 minutes.

Pages