The Fresh Loaf

A Community of Amateur Bakers and Artisan Bread Enthusiasts.

Most bookmarked

Floydm's picture
Floydm

Kathleen Weber's Arbrio Rice Bread
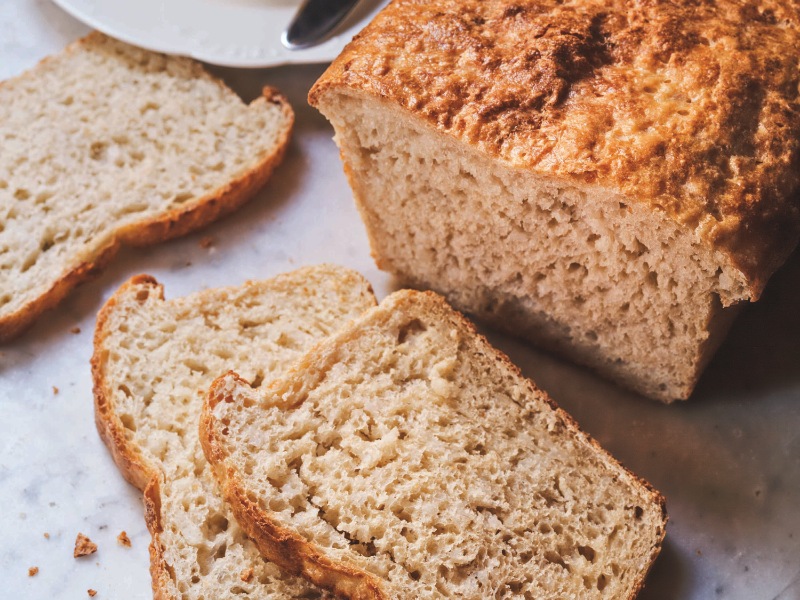
Della Fattoria Bread is the new book by Kathleen Weber, founder of the renowned Della Fattoria bakery in Petaluma, California.  This recipe reprinted with permission.  Copyright 2014, Artisan Books. Photo Credit: Ed Anderson.


Arbrio Rice Bread

Makes 2 standard loaves 

Inspired by a recipe by the brilliant British cookbook writer Elizabeth David, this is one of the easiest breads I've ever made. It comes together fast, is mixed entirely by hand in a single bowl, and is baked in two standard loaf pans. Almost no kneading is required.

It's also one of the most unusual yeasted breads I've seen, as the dough calls for rice. I use Arborio rice instead of regular white rice. Arborio is, of course, the rice that gives risotto its creaminess, and, sure enough, those fat, starchy grains give the bread a similarly creamy texture. If you're calculating exact ratios, the weight of the cooked rice will be 520 grams (18.3 ounces/2 1/2 cups plus 2 tablespoons), which is 70 percent of the flour weight.

When toasted, this bread has a remarkably delicate crunch.


Rice
Arborio rice158 g5.5 oz¾ cup
Water525 g18.5 oz2¼ cups
 
Dough Mix
All-purpose flour735 g26 oz5¼ cups
total flour735 g26 oz5¼ cups
Instant yeast13 g0.5 oz1 Tbsp plus ¾ tsp
Fine gray salt19 g0.6 oz1 Tbsp
Water, at room temperature (65° to 70°F/18° to 21°C)468 g 16.5 oz2 cups 
Total weight1,755 g/1.75 kg61.9 oz/3.8 lbs 
 
Wash
14 to 32 grams (0.5 to 1.1 ounces/1 to 2 tablespoons) olive oil or milk, or a combination

1. To cook the rice, combine the rice and water in a small saucepan and bring to a boil. Cover, turn the heat down to low, and cook until the water is absorbed and there are little holes across the surface of the rice, 15 to 20 minutes. Remove the lid and let the rice cool slightly. The rice should still be very warm when incorporated with the other ingredients.

2. Lightly oil or spray a deep 4 1/2- to 5-quart ceramic or glass bread bowl. (The amount of dough for this bread will work well in a 3-quart bread bowl if you have one.)

3. In a large bowl, whisk together the flour, yeast, and salt.

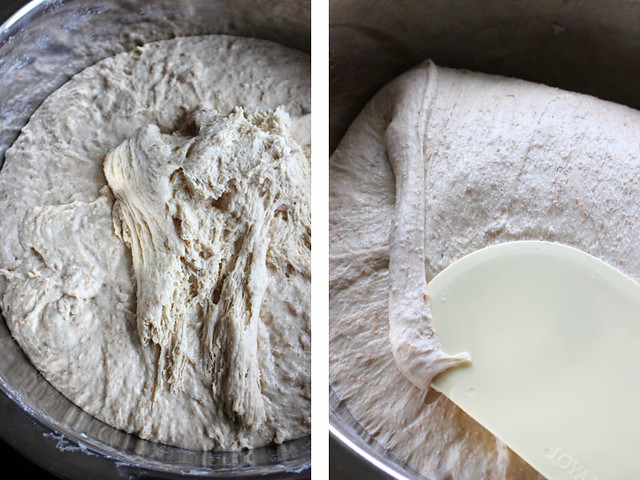
4. When the rice is still very warm but cool enough to touch, mix it into the flour until the mixture has the texture of a gummy meal. Pour in the water and continue to mix with your hands, gently gathering the mixture together, turning it and pressing it with the heels of your hands, until it all comes together. It will be very sticky, similar in texture to a milky biscuit dough; do not be surprised if you have quite a bit sticking to your hands.

5. Using a plastic bowl scraper, get what dough you can off your hands, pressing it back onto the dough, and turn the dough into the bread bowl. Cover the bowl with a lightly oiled or sprayed piece of plastic wrap and place in a warm, draft-free spot until the dough has at least doubled in volume and there are delicate bubbles across the surface, 1 1/2 to 2 hours.

6. Fairly generously oil or spray two 8 1/2-by-4 1/2-by-2 3/4-inch loaf pans. Flour the work surface. Turn out the dough, using the bowl scraper, and use a bench scraper to divide it in half. With your fingertips, very gently shape each portion into a bâtard, about 3 by 7 inches. Set in the prepared pans and very gently brush the tops with the wash. (This dough is not brushed again before baking because the loaves will be too fragile once proofed.) Cover the tops with a lightly oiled or sprayed piece of plastic wrap. Set the pans in your warm spot to proof until the dough reaches the tops of the pans, 1 1/2 to 2 hours; remove the plastic wrap.

7. Meanwhile, position a rack in the lower third of the oven, set a baking stone on it, and preheat the oven to 450°F.

8. Place the pans on the stone and immediately lower the oven temperature to 400°F. Bake for 30 to 35 minutes, or until the tops are a rich golden brown. The loaves will be delicate, but they can carefully be taken out of the pans to brown directly on the stone: place the loaves on the stone and let brown for about 3 minutes, to brown the sides and bottom more evenly.

9. Transfer the breads to a cooling rack and let cool completely.


Della Fattoria Bread is available now from Amazon, Powell's Books, or your local book seller.

wassisname's picture
wassisname

Barley Walnut & Fig Bread

A funny thing happened in the pastry chapter of Tartine No.3… 

Leafing through, like I sometimes do, admiring all of the wonderful looking treats, I settled on the Barley Walnut and Fig Cookies.  Now, I should say that I don’t, as a general rule, bake cookies or pastries.  If I bake them I eat them, and I try to avoid that as much as possible.  Having them in the house makes avoiding them… less possible.  So I get my occasional fix at one of the local bakeries and it all works out.  But I couldn’t stop staring at these Barley Walnut and Fig Cookies.  There isn’t even a photo of the finished cookie, I was fixated on the words alone.  Barley Walnut and Fig Cookies… Mmmmmm… Barley Walnut and Fig Cookies… Mmmmmm… Barley Walnut and Fig Cookies… Mmmmmmm…  The breaded part of my brain decided enough was enough.  It did this: Barley Walnut and Fig Cookies Bread.  Oh.  Yes.  Well, there it is then.

And here it is:  Barley Walnut and Fig Sourdough. 

The add-ins alone would make a fine breakfast.  It took considerable restraint not to grab a spoon and have at it.

The dough is a sticky mess, no way around that.  The refrigerated bulk ferment is key to developing structure without going insane – I would not volunteer to knead this one to full development.  Even stretch and folds were rather undignified.  I did one last fold after it had been refrigerated for an hour and then it finally felt like I was working with bread dough and not so much like cookie dough.  The intensity of this version was worth the trouble, but for something more “bready” the add-ins could be cut in half and still contribute.

The oven light has such a nice, warm glow I can't resist snapping photos. 


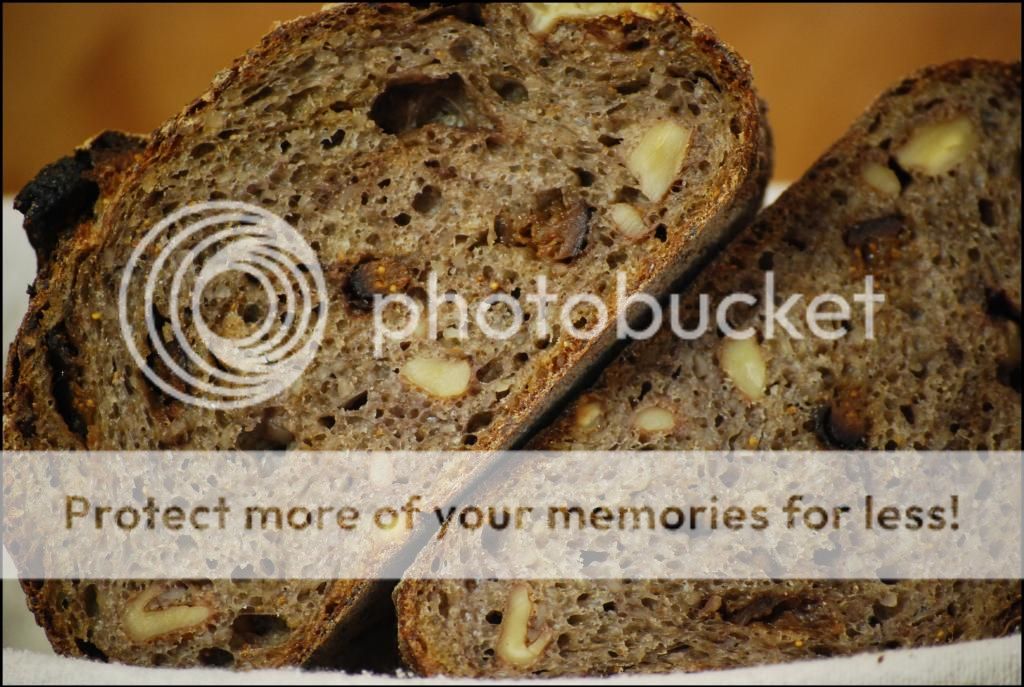
The crust turned dramatically dark from all of the fig sugars and the crumb has a nice purplish tint.

It wasn’t quite cool when I cut the first slice, but it didn’t matter.  This one is really, really yummy - perfect for breakfast.  You can keep the cookies.  I am home :)
Marcus


emkay's picture
emkay

Not your typical mooncakes

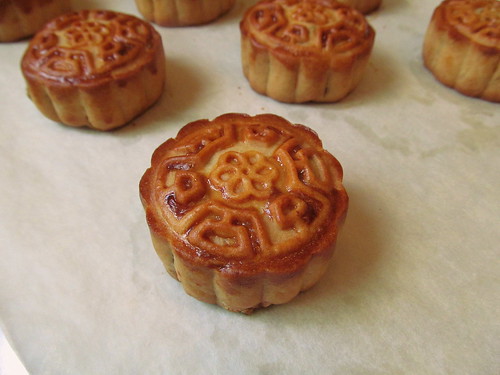
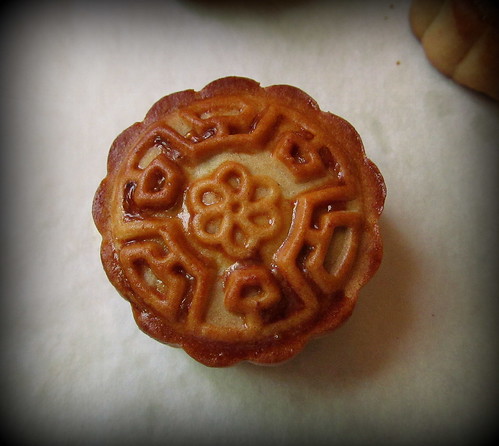
Every year my parents receive many gifts of mooncakes in the days leading up to the Mid-Autumn Festival. Most of the time they are the traditional mooncakes filled with lotus seed paste and salted egg yolks. I thought I would try baking a different sort of mooncake to bring to my family's gathering. I call them American-style mooncakes. I made a trail mix inspired one and a coconut one. Mooncakes need to be baked at least a day (and preferably 2 days) before serving. Freshly baked ones do not have the correct texture since the pastry shell is still too crispy. The resting period allows the pastry shell to "return to oil" which just means that the skin will soften a bit.

mooncake_830_1

Mooncake Pastry Dough

130 g all-purpose flour (10.5% protein level)

90 g Lyle's Golden Syrup

30 g canola oil

1/4 tsp alkaline water (aka kan sui which is a solution of sodium bicarbonate and potassium carbonate)*

* Note: Although a bottle of kan sui is very inexpensive, I didn't want to buy a whole bottle since I needed such a tiny amount. So I dissolved 1/2 tsp of baking soda in 1 tbsp of water and used 1/4 tsp of my solution instead of the 1/4 tsp kan sui.

--

1. Mix syrup, oil and alkaline water.
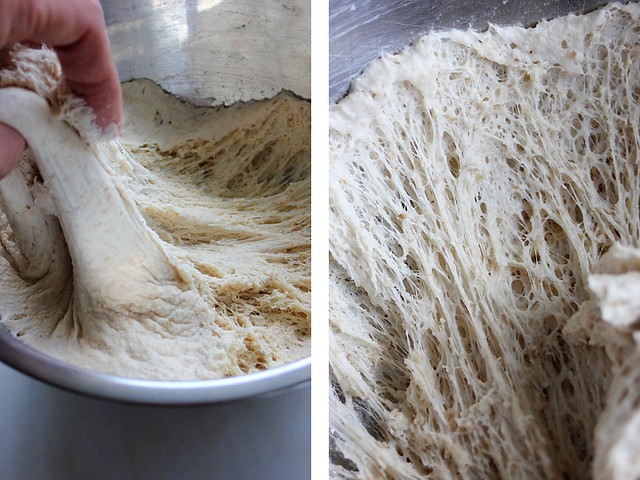
2. Sift flour into a mixing bowl and add wet ingredients. Mix to form a soft dough.
3. Cover and let dough rest at room temp for 30-60 minutes.

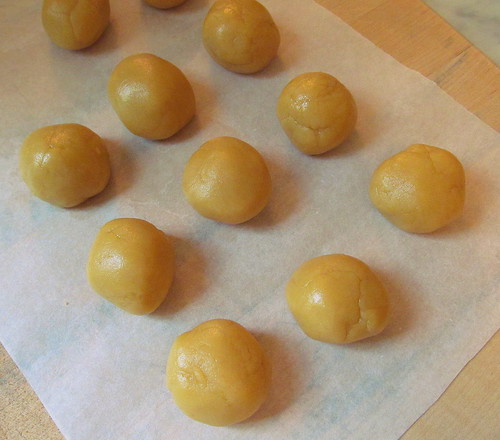
4. Divide the dough into 10 balls each weighing approximately 25 g. (This is scaled for my miniature mooncake mold.)

mooncake__830_skin

"Trail Mix" Filling

70 g almond meal (or chopped almonds)

80 g walnut, toasted and finely chopped

20 g sunflower seeds, toasted

50 g dried sour cherries, chopped

60 g kor fun (aka cooked glutinuous rice flour)

50 g water

20 g granulated sugar

20 g canola oil

10 g walnut oil

10 g sesame seeds (I didn't have any so I used tahini.)

--

1. Mix all ingredients.

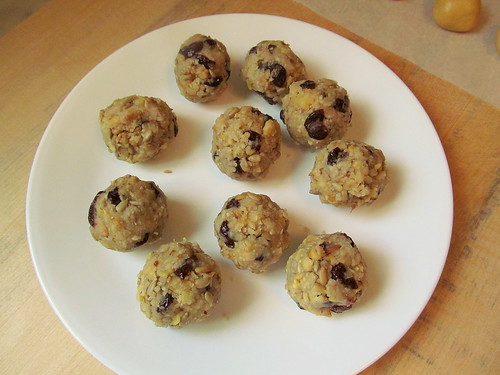
2. Divide filling into 10 balls each weighing approximately 35 g. (This is scaled for my miniature mooncake mold.)

mooncake_830_nut_filling

Egg Wash:   1 egg yolk beaten with 1 teaspoon of water or milk

Assembly

1. Preheat oven to 375F.

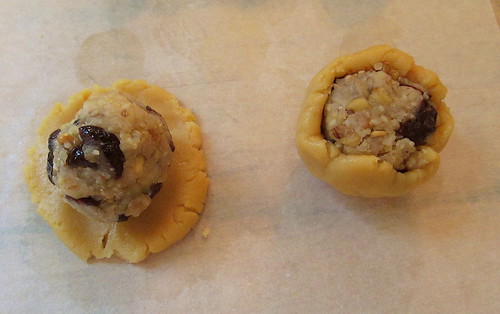
2. Flatten the pastry dough and wrap it around the filling. Try your best to completely enclose the filling with the dough.

mooncake_830_wrap

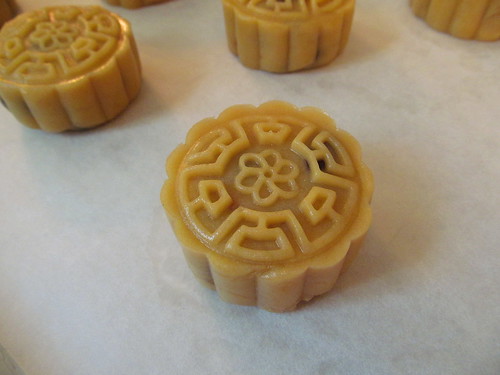
3. Put it into your mooncake mold to shape it. (I used a plastic mooncake mold with a plunger.)

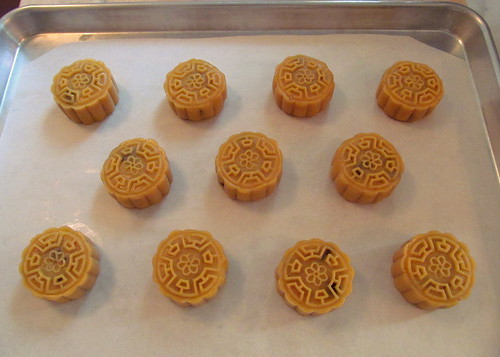
4. Place shaped mooncake on sheet pan.

mooncake_830_shaped_2

mooncake_830_shaped_1

5. Bake at 375F for 8 minutes.

6. Remove from oven and let them cool for 5 minutes, then brush on the egg wash.

7. Lower oven heat to 350F and bake for 15-20 minutes until golden brown.

8. Cool for 10 minutes on sheet pan then remove to cooling rack.

9. When completely cool, store in an airtight container for at least 24 hours before serving.

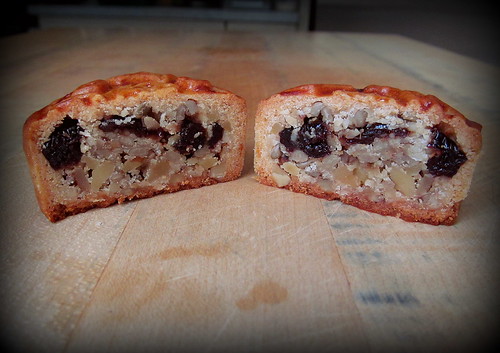
mooncake_830_inside

mooncake_830_2

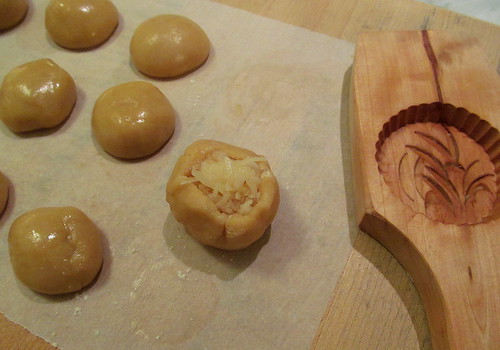
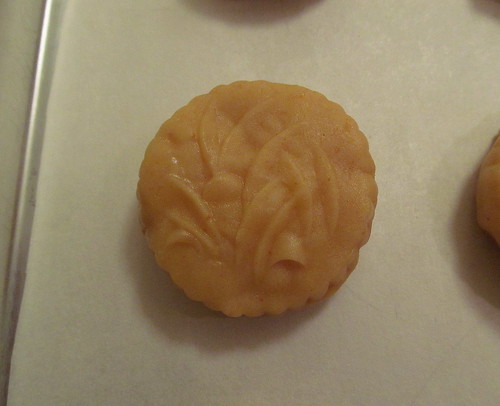
I also made some coconut mooncake "cookies" using wooden cookie mold to shape them. I call them cookies because they are much flatter than mooncakes.

coconut_mooncake_wrap2

coconut_mooncake_shaped

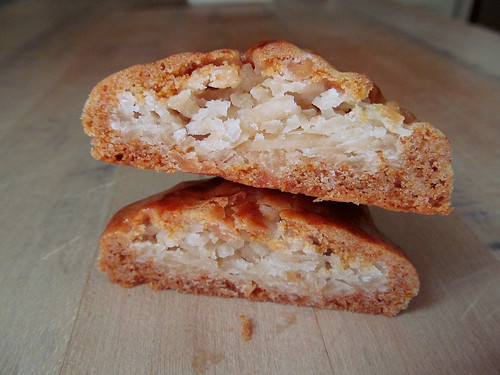
I used cake flour instead of all-purpose flour in my dough for the coconut ones so the dough ended up too soft. As a result, my baked cookies did not keep the carved details of the mold, but they were still delicious. They tasted like a coconut macaroon inside a mooncake pastry shell.

coconut_mooncake_1

coconut_mooncake_inside

:) Mary

dmsnyder's picture
dmsnyder

San Francisco-style Sourdough Bread with increased whole wheat flour

San Francisco-style Sourdough Bread with Increased Whole Wheat

by David M. Snyder

May 5, 2013


Sometimes another TFL member comments favorably on one of my breads, then goes on to say how they have modified my formula or methods. Sometimes these changes seem to be for the member's convenience or to substitute a preferred method for the one I used. Sometimes I feel the changes are of small consequence. The one alteration that consistently intrigues me is an increase in whole grains in a formula of mine that is basically a white bread.

Today, I baked a couple loaves of my San Francisco-style Sourdough Bread with two modifications: I increased the whole wheat content to 30% of the total flour, and I increased the hydration to 76%. I expected this increase in hydration to more than compensate for the increased water absorption of the whole wheat flour. I used a very finely milled organic whole wheat flour from Giusti's. I find this flour has much less cutting of gluten strands than most whole wheat flours. I can get a more open crumb using this flour.

I also made a couple loaves of the San Francisco-style Sourdough without the increased whole wheat.


Total dough

Bakers' %

Wt (g)

AP flour

54

304

Bread flour

14

79

Medium Rye flour

2

11

WW Flour

30

169

Water

76

428

Salt

1.9

11

Total

177.9

1002


Stiff levain

Bakers' %

Wt (g)

Bread flour

95

79

Medium rye flour

5

11

Water

50

45

Stiff starter

80

66

Total

230

201


  1. Dissolve the starter in the water. Add the flours and mix thoroughly until the flour has been completely incorporated and moistened.

  2. Ferment at room temperature 6-8 hours. (Until about tripled in volume, domed and very well aerated.)


Final dough

Wt (g)

AP flour

281

WW Flour

162

Water

350

Salt

11

Stiff levain

201

Total

1005


Method

  1. In a stand mixer, mix the flour and water at low speed until it forms a shaggy mass.

  2. Cover and autolyse for 30 minutes

  3. Add the salt and levain and mix at low speed for 1-2 minutes, then increase the speed to medium (Speed 2 in a KitchenAid) and mix for 5 minutes. Add flour and water as needed. The dough should be rather slack. It should clean the sides of the bowl but not the bottom.

  4. Transfer to a lightly floured board and do a stretch and fold and form a ball.

  5. Place the dough in a lightly oiled bowl and cover tightly.

  6. Ferment at 76º F for 21/2 to 3 hours with a stretch and fold at 50 and 100 minutes.

  7. Divide the dough into two equal pieces.

  8. Pre-shape as rounds and rest, covered, for 10 minutes.

  9. Shape as boules or bâtards and place in bannetons. Place bannetons in plastic bags.

  10. Proof at room temperature (68-70º F) for 1-2 hours.

  11. Cold retard the loaves overnight.

  12. The next morning, proof the loaves at 85º F for 2 to 3 hours. (If you can't create a moist, 85 degree F environment, at least try to create one warmer than “room temperature.”

  13. 45-60 minutes before baking, pre-heat the oven to 480º F with a baking stone and steaming apparatus in place.

  14. Transfer the loaves to a peel. Score the loaves as desired, turn down the oven to 460º F, steam the oven, and transfer the loaves to the baking stone.

  15. After 12 minutes, remove the steaming apparatus, and turn down the oven to 435º F/Convection. (If you don't have a convection oven, leave the temperature at 460º F.)

  16. Bake for another 15-18 minutes.

  17. Transfer the loaves to a cooling rack, and cool thoroughly before slicing.


After cooling, the loaves had a chewy crust and chewy crumb. The flavor was wheaty and moderately sour when first tasted. I am looking forward to trying this bread toasted tomorrow for breakfast.

At the moment, I am considering further modifications such as a bolder bake, adding a bit of honey and increasing the whole wheat to 50%.  

David

dabrownman's picture
dabrownman

Tang Zhong, Ricotta, Scalded Multigrain with and without, Cranberries & Pecans

We use a lot of cranberries around here mainly as part of our snockered fruit bled we put in so many baked good.  Evon published her beautiful cranberry bread she made her Mom and we have been making a bunch of different breads with dried fruits and nuts of late.  The only ones we missed were cranberries and pecans.  Then we saw a beautiful cranberry and pecan batard at Whole Foods when we were there stocking upon whole grain berries.

That sort of moved the cranberry and pecan bread up to the top of the list.  My apprentice just couldn’t leave it at that so she went - with whole; rye, spelt and wheat in the levains only along with some corn flour in dough.  We are trying to get out tongue around corn flavor wise and have seen it so many bakes of late like Janet’s Anadama Bread.

Lucy found some apricot soaking water from the last bake (which we added the cranberry soaker water to) and ricotta cheese in the fridge. She also scalded up multigrain berries as she does for just about every bread.  It must be a German thing.  She also used our normal flavor, color and rise enhancers of malts, Toadies and VWG.  Not including the multigrain scald, we kept to our healthy and tasty minimum of 30% whole grains.

Because of the Tang Zhong, ricotta, scald and re-hydrated cranberries, this dough does not look or act like a 70% hydration bread.  It is very wet feeling, like 78% or more - so not quite ciabatta.  The Tang Zhong took 25 g or the flout mix and 125 g of water not included in the formula to make the roux.

We built 2 separate levains over 3 stages.  One a YW and the other a rye sour.  Both levains had doubled at the end of 2nd 4 hour stage.  At the beginning of the 3rd stage, right after feeding, we refrigerated the levains for 12 hours.  The next morning we took them out of the fridge and allowed them come to room temperature and double again in 4 hours.

We did our usual 4 hour autolyse, starting when the levains came out of the fridge, including everything except; salt, ricotta, YW and rye sour levains, the scald, cranberries and pecans.  When the autolyse met the 2 levains, we added the salt and did 10 minutes of slap and folds.  After a 15 minute rest we did (4) sets of S&F’s on 15 minute intervals.  On the first S&F we incorporated the ricotta.  On the 2nd we put in the scald.

 After the 2nd we divided the dough in half.  On the 3rd we added the cranberries and on the 4th we made sure everything was incorporated for one half.  The other half of the dough was S&F’ed without the fruit and nuts.  This way we get a breakfast toast and a lunch sandwich bread.

 After an hour of counter fermentation the dough was retarded in the fridge for 15 hours.  In the morning they were retrieved from the fridge and allowed to come to room temperature for 1 hour before being shaped into a batard for the fruit and nut version and an oval for the plain.

 Both were placed into a trash can liner to proof for 2 hours before Big Old Betsy was fired up to 500 F with Sylvia’s steaming pan and David’s CI Lava Rock steam in place.  Once Betsy beeped she was at temperature we waited 20 minutes before un-molding the bread, scoring and placing onto the bottom stone.

 After 5 minutes we turned the oven down to 475 F. Our oven reads 25 F low so adjust your temperature accordingly.  After a total of 15 minutes of steam we removed it and turned the oven down to 425 F, convection this time.  We rotated the bread every 10 minutes and after 20 minutes without steam the bread reached 205 F in the center.

 We turned off the oven and left the bread on the stone, with the door ajar for 10 minutes to crisp the skin before removing it to a cooling rack.  The crust browned nicely with small blisters and went from crisp to softer as it cooled.  The spring and bloom were OK too.  The cranberry, pecan version browned more for some reason.

 The crumb of both versions was about the softest, moistest and tastiest we have ever managed to bake into any bread.  it is just fantastic as a sandwich bread and we hope it toasts just as well for breakfast in the morning.  It is like eating two different breads one more cranberry sweet and pecan nutty.  Both are terrific!  Thanks Evon for the cranberry inspiration, to Ian for the cheese and to my apprentice for the nuts. 

 We love spaghetti and meatballs.  Hopefully the plain version will grill up nicely for garlic toast or bruschetta or breakfast.

Formula

YW and Rye Sour Levain

Build 1

Build 2

 Build 3

Total

%

Yeast Water

40

0

0

40

7.21%

Rye Sour Starter

20

0

0

20

2.37%

Spelt

13

13

13

39

4.62%

Dark Rye

34

34

39

107

12.66%

Whole Wheat

13

13

13

39

4.62%

Water

20

60

25

105

12.43%

Total

140

120

90

350

41.42%


Levain Totals


%


Flour

195

23.08%


Water

155

18.34%


Hydration

79.49%


Levain % of Total

19.14%


Dough Flour


%


Corn Flour

50

5.92%


AP

600

71.01%


Dough Flour

650

76.92%


Salt

12

1.42%


Apricot/Cranberry Water 100, Water 300

400

47.34%


Dough Hydration

61.54%


Total Flour

845


Apricot & Cranberry Water 100  & Water

555


T. Dough Hydration

65.68%


Whole Grain %

30.89%


Hydration w/ Adds

70.15%


Total Weight

1,829


Add - Ins


%


White Rye Malt

3

0.36%


Red Rye Malt

3

0.36%


Toadies

10

1.18%


VW Gluten

15

1.78%


Cranberries

75

8.88%


Pecans

75

8.88%


Total

317

37.51%


Weight of cranberries and scald berries are pre re-hydrated weights


Scald


%


WW Berries

33

3.91%


Rye Berries

33

3.91%


Spelt Berries

34

4.02%


Total Scald

100

11.83%


Tang Zhong 25 g of flour was included above but the 125 of extra water was not

PiPs's picture
PiPs

Spring changes

I have baked and baked. Through a long winter I baked. Early mornings in my cold dark kitchen I baked. Every weekend I baked. For my friends I baked. For my family I baked … it was the same bread that I baked.

The fresh smell of spring surrounds us and the star jasmine hanging on our back fence is about to flower and flood our senses further. On our small porch a tomato plant has been busily producing a steady supply of tasty treats. Bruschetta nights have never tasted better. Bushfires colour the air.

With the coming of spring has also come change—unplanned change and unpleasant change—change I must learn to embrace. Our graphic design studio within a government agency has been affected by workplace change and my work colleagues and I have become surplus to requirements. This uncertainty has been ongoing for the past few months and it now seems we finally have some resolution and closure—just in time for the fresh beginnings of spring.

Baking has been a constant throughout this stressful process. Every weekend I would mix large batches of ‘Pain au Levain’ using Gerard Rubaud’s method to share with friends and family. I might perhaps adjust the amount of the freshly milled wholegrain flours in the levain or final dough but I never strayed from the path of consistency.

But consistency requires change. Spring means temperatures have risen (good grief, it is 31°C today). My levain expands quicker and the doughs proof faster—I have to change to adapt.

Spring Levain (4 x 900g batards)

Formula

Overview

Weight

%

Total dough weight

3600g


Total flour

2057g

100%

Total water

1543g

75%

Total salt

41g

2%

Pre-fermented flour

205g

10%


Levain – 5-6hrs 25°C


Previous levain build

77g

50%

Flour (I use a flour mix of 70% Organic plain flour, 18% fresh milled sifted wheat, 9% fresh milled sifted spelt and 3% fresh milled sifted rye)

156g

100%

Water

90g

58%

Salt

1g

1%


Final dough. DDT=25°C


Levain

323g

17%

Laucke Wallaby bakers flour

1575g

85%

Freshly milled spelt flour

277g

15%

Water

1425g

77%

Salt

40

2%


Method

  1. Mix levain and leave to ferment for 5-6 hours at 25°C
  2. Mill spelt flour and combine with bakers flour.  Mix with water holding back 100 grams of water.
  3. Autolyse for 5-6 hours.
  4. Add levain to autolyse then knead (french fold) for three mins. Return the dough to a bowl and add salt and remaining 100 grams of water. Squeeze the salt and water through the dough to incorporate (the dough will separate then come back together smoothly). Remove from the bowl and knead a further three mins.
  5. Bulk ferment for four hours untouched—no stretch-and-folds!
  6. Divide. Preshape. Bench rest 30 mins. Shape into batards and proof in bannetons seam side up.
  7. Final proof was for 1.5 hours at 24°C before being placed in the fridge for 12hrs.
  8. Bring dough to room temperature for an hour while oven is preheating. Bake in a preheated oven at 250°C for 10 mins with steam then reduce temperature to 200°C for a further 30 mins.

It makes beautifully simple bread. Unfussy but elegant with a crust that shatters and sings—a silken crumb within.

So I continue to bake—and soon, who knows, maybe I will be baking even more that I could ever imagine :)

This post is dedicated to my amazing Miss Nat who watched over me and carried me through …  thank you XX
Phil

GermanFoodie's picture
GermanFoodie

Pretzel Rolls (Laugenweck)


Pretzel Rolls (Laugenweck) 

Interestingly enough "pretzel bread" is the one bread that in our collective psyche seems to top all others. No matter what other bread you may have tasted and enjoyed in Germany, “pretzel bread” is the one thing that people seem to remember above all else. And why not? When done right, it IS addictive. A good pretzel roll or “Laugenweck” should be slightly crunchy on the outside, have a deep brown color with a milky-white, if slightly browned, cross on top and be soft and chewy on the inside. If you have never eaten the real thing you don’t know what you’ve missed. There was a bakery in my hometown where people used to trek from the surrounding region just because their pretzels were THAT good. (As things go with German commercial baking these days, though, theirs are only a faint memory now of what they used to be years ago, too – I was really disappointed when I bought one last August as I was visiting my mom...)


Pretzel rolls make the best hearty sandwiches, and while they have become popular lately as “hamburger buns”, I prefer them just with butter and maybe a good, strong cheese. (A word on those “hamburger buns” – unless they were made the traditional way, what you probably ate was a weak imitation of the real thing; but if you like that, imagine what these actually taste like...) They are best eaten fresh on the day they are baked, and you can even toast them back to their original glory a day later. They will freeze fairly well, but the salt on top in conjunction with the crust will have a tendency to render them soggy and mottled-looking after a few days. If you must freeze them, thaw them on the countertop OUTSIDE of their bag. The German “Laugenweck” literally translates to “lye roll”, or what a witty friend called “pipe cleaner roll”. Let’s just say that Germans have a reputation for precision for a reason, but obviously we’re not that good at marketing ourselves. “Pretzel roll” sounds SO much prettier than “lye roll”, and of course you wouldn’t use pipe cleaner for these, but food-grade sodium hydroxide.

That’s right, folks. Sodium hydroxide.

There are all sorts of knock-off recipes out there, but if you want to make REAL pretzels and pretzel rolls, you HAVE to use lye. Anything else won’t give you the same results. My grandma’s cookbook for example makes the solution with something like water and wood ashes – NOT the same thing. As caustic as lye is, it will convert to a simple salt on top of the pastry when baked, giving it the characteristic beautiful, deep brown color.

So, I am including a disclaimer. Not because I think I’d be liable in whatever way, but I think you should be aware of what you will be dealing with:

DISCLAIMER: Sodium hydroxide is highly caustic, even at lower concentrations, and I highly recommend wearing long sleeves, goggles and gloves when handling it. Use all stainless steel equipment as the lye will eat through aluminum and coated baking sheets over time. ALWAYS TAKE GREAT CARE WHEN STORING/HANDLING SODIUM HYDROXIDE AND FOLLOW ALL SAFETY DIRECTIONS ON THE PACKAGE THE SODIUM HYDROXIDE CRYSTALS CAME IN.What you will need (besides the actual dough):

1. pretzel salt - a coarse salt that will not simply melt into the pastry but stay intact during baking. Here’s the difference between “normal” salt (pictured is “real” salt) and pretzel salt:

2. Food-grade sodium hydroxide, available for example from Essential Depot.

3. 1 stainless steel stockpot large enough to hold the water comfortably (see recipe)

4. 1 stainless steel skimmer

5. 1 – 2 stainless steel half sheets

6. 1 sturdy metal scraper

7. chemical resistant gloves (preferably), but any kind would already be a good protection

8. goggles, long-sleeve shirt

I found this originally on an expat German forum somewhere on the Web with very vague information as to how strong the lye should be, but by now we have tweaked this recipe so much that I can regard it as our original. The very first time I tried it, I used an 8% lye solution, which produced really dark, really blistered, and really inedible pretzels. :) 


Pretzel Rolls (Laugenweck)
(Original Recipe.)

For 10 rolls or pretzels:
725 g bread flour
5 g salt
7 g yeast
375 g water
5 g diastatic malt powder

Pretzel salt for topping.

For the lye (at a 3.5% solution):
2 l water
70 g sodium hydroxide crystals

Dissolve the malt powder in water. Add the dry ingredients to a mixer bowl with a dough hook, slowly add the water and keep kneading until the dough forms a ball and clears the sides of the bowl. If it appears to be too dry, add a little bit more water until you achieve the desired consistency. Let rise until doubled, preferably retard overnight. On baking day, preheat your oven to 400 F (200 C). Slowly add the sodium hydroxide to the COLD water, close the pot and bring the lye to a rolling boil, then turn off the heat. Divide the dough into 10 equal pieces, each weighing about 110 g. Spray the stainless steel baking sheets well with cooking spray.

CAUTION: NEVER, EVER ADD SODIUM HYDROXIDE TO BOILING OR EVEN REALLY HOT WATER AS IT IS HEATING ON THE STOVE – IT WILL CAUSE THE POT TO INSTANTLY BOIL OVER AND POSSIBLY SPLATTER YOU WITH LYE. (Believe me, I have been there – filed this experience under “What was I thinking???”)


Shape each piece into a round and be sure to seal them well on the bottom. Proof them at the most to 1/2 proof, not fully. Dip the rolls into the hot lye upside down, remove with the skimmer, drain well and place onto the baking sheet. One half sheet will comfortably fit 10 rolls. Score them with a serrated knife or razor blade. Traditionally, these rolls are scored with a cross on the top. Sprinkle pretzel salt on top.

Bake until they are a deep brown and register at least 180 F (85 C) in the middle. The light part of the roll should remain mostly light and not darken very much.

TIP: Use a scale to make sure they are all the same the weight. If you cannot get your hands on diastatic malt powder (available online for example from home brewing stores), just use brown sugar. Depending on how wet the rolls were when they were put on the baking sheet and on how well they were sealed at the bottom before dipping, they may stick to the baking sheet and appear not to want to come off – use a good scraper, but try not to rip off the bottom.

[Printable Recipe]

hanseata's picture
hanseata

Saatenbrot - Many Seed Bread (Equal Opportunity Baking #3)

The best recipe collection (bread, rolls and snacks) of German bakers' magazine, "Allgemeine Bäckerzeitung", supplied the formula for my third "fair baked" bread.

A heavy weight, scaled for 21 loaves, with selling points, marketing tips, production cost and time calculation, including sales tax (7%) and even a suggested retail price (1.83 Euro). The production steps are briefly listed - no need to explain to professionals what they do every day.

  Die besten Rezepte aus der Allgemeinen Bäckerzeitung - Brot, Brötchen & Snacks

Scaling the ingredients down to home bakering proportions was not difficult (a minimum of 3 loaves), and the instructions, though brief, were precise, and didn't overtax my mental capacities.

The recipe said (more or less) only: "make a dough". I tried to stretch and fold it, but that didn't work too well, the dough was too wet. Therefore, instead of soaking only the flaxseeds in hot water for 1 hour (original recipe) I would include some of the flour in the soaker, to have a larger preferment, and more water already absorbed in the flour.

I like to retard my doughs, overnight fermentation works better for my schedule, and, also, improves the taste (the original recipe had only the longer starter development.)

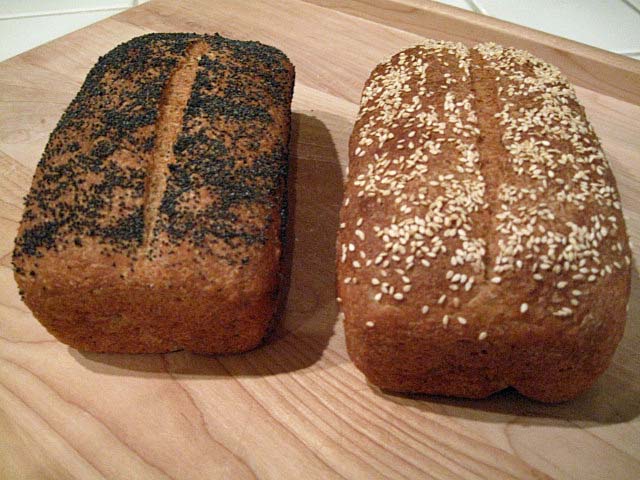
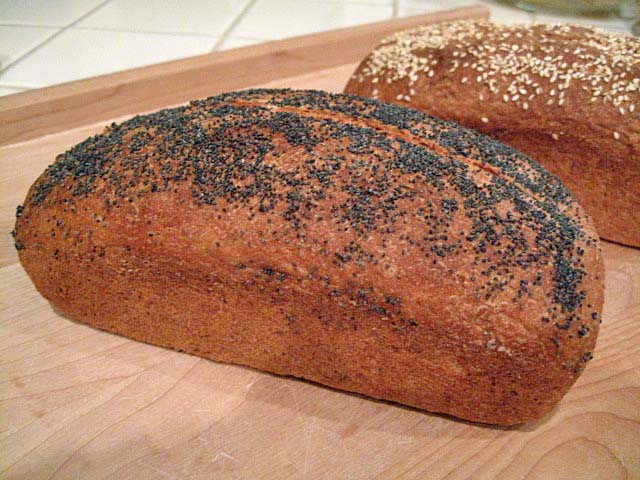
The Bäckerzeitung says: "roll the shaped loaves over a wet towel, and then dip them into the (topping) seed mixture". Though this coated the breads nicely with seeds, they didn't stick well enough, and a lot of them fell off during and after baking. Next time I would either take care to press them more into the dough, or brush the loaves with egg white, instead of just moistening them with water.

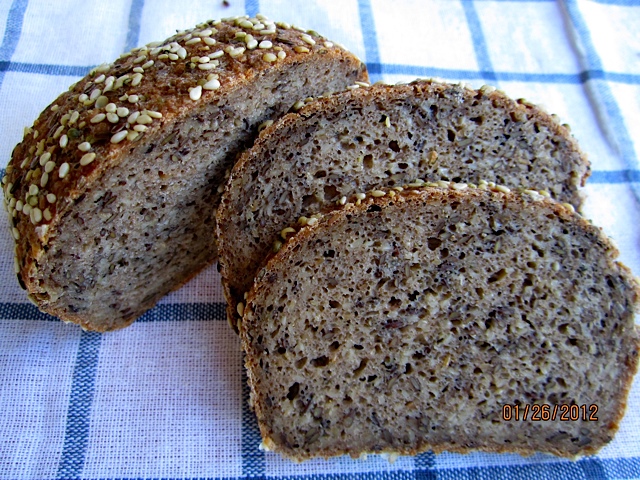
The breads turned out very nice, crusted with seeds they looked quite attractive, and the taste? Modestly (haha!) I will only quote my friend Lynn - beneficiary of this triplet bake: "Our seedy, seedy bread was delish! We toasted it which really brought out the flavor of the seeds! Mmmmmmm!"


SAATENBROT - MANY SEED BREAD (3 loaves)

SOAKER
143 g whole wheat flour
  84 g medium rye flour
299 g water
     4 g salt
129 g flaxseed

 STARTER
  21 g rye mother starter (mine is 100% hydrated)
214 g medium rye flour
214 g water, lukewarm
 
FINAL DOUGH

all starter and soaker
130 g medium rye flour
143 g bread flour
187 g water
    5 g instant yeast
  12 g salt
129 g sesame, toasted
129 g hemp seeds
    2 g anise, caraway, fennel and/or coriander
 14 g sesame seeds (for topping)
 14 g hemp seeds (for topping
 14 g flaxseed (for topping)

 DAY 1:

1. In the morning, stir together all ingredients for soaker, cover and let sit at room temperature. Mix all ingredients for starter (in 1-step), cover and let ferment at room temperature.

In the evening, mix together all ingredients for final dough for 1 - 2 minutes on low speed. Knead on medium-low speed for 4 minutes (or knead by hand). Let dough rest for 5 minutes. Resume kneading for another minute (dough will still be somewhat sticky). Divide dough into 3 portions, place in oiled containers, cover and refrigerate overnight.


DAY 2:

2. Remove dough from refrigerator 2 hours before using. Shape into sandwich loaves. Roll breads over wet towel, and then over seed mixture. Gently press seeds into dough. Place breads in oiled loaf pans. (No scoring). Mist with spray oil, cover, and let rise for 45 - 60 minutes, or until they have grown 1 1/2 times their original size.

3. Preheat oven to 240ºC/465ºF, including steam pan. Place pans into oven, steaming with 1 cup of boiling water. Bake at falling temperatures: 10 minutes at 240ºC/465ºF, 10 minutes at 220ºC/428ºF, then turn loaves out onto baking sheet, remove steam pan and continue baking for 10 minutes at 200ºC/400ºF, and 10 minutes at 180ºC/355ºF. The internal temperature should be at least 200 F/93 C.

4. Let breads cool completely on wire rack before slicing.

Saatenbrot - Many Seed Bread


dmsnyder's picture
dmsnyder

Pizza Napoletana

You can go nuts trying to find the perfect pizza dough formula. The cookbooks and the web are full of recipes for various types of dough and full of opinions regarding the type of flour to use, the ingredients (beyond flour, water, salt and yeast) and the mixing and fermentation methods that work best.

My goal for today was what I understand to be classic pizza napoletana. The dough should consist of the four basic ingredients only – no oil, sugar, malt or other stuff. The crust should be very thin and crisp on the bottom, not soft or soggy. The toppings should be minimal, so the crust is the main attraction.

After reading through many, many recipes, I settled on the one in Maggie Glezer's “Artisan Breads.” It uses the 4 ingredients only. It is for a Naples-style pizza. It is credited to Emanuele Leonforte of Hosteria restaurant in Port Chester, New York.

Leonforte uses a mix of Doppio Zero and high-gluten flour that Glezer calculates as resulting in about 12.5% protein. He uses a remarkably short mix. He ferments the dough for a long time but only once. Glezer gives the option of retarding the dough overnight and fermenting it the next day, and that fit best with my schedule. The method I used is described below.


Ingredients

Wt.

Baker's %

KAF Bread Flour

500 g

100

Instant yeast

1/4 tsp

0.2

Salt

10 g

2

Water, lukewarm

330

66


Method

  1. Measure the flour, yeast and salt into the bowl of a stand mixer and mix them.

  2. With the dough hook in place and the mixer at slow speed, gradually pour in the water.

  3. Mix until the dough forms a ball and cleans the side of the bowl, about 3 minutes.

  4. Cover the bowl and let the dough rest for 10-15 minutes.

  5. Mix the dough at Speed 2 for about 3 minutes. It should be fairly smooth but will not pass the window pane test.

  6. Transfer the dough to a lightly floured board and divide it into 4 equal pieces of about 200 g each (to make 10 inch pizzas).

  7. Shape each piece into a tight ball.

  8. Place each ball into a 1 qt Ziploc bag with a tablespoon of olive oil. Roll the ball in the oil and seal the bags.

  9. The dough can be refrigerated overnight, frozen for later use or allowed to ferment at room temperature for 5 to 6 hours for use the same day. (I refrigerated two balls and froze two.)

  10. For refrigerated dough, remove it to room temperature 3-5 hours before you plan on making the pizza, depending on room temperature.

  11. An hour before baking, pre-heat the oven to 500ºF (or more, if possible) with a baking stone on the middle shelf.

  12. Remove one ball at a time from its bag and shape into a 10 inch round by your method of choice.

  13. Top the pizza as desired, immediately transfer it to the baking stone, and bake for 8-10 minutes until done. Repeat for additional pizzas.

The toppings I used for each pizza were:

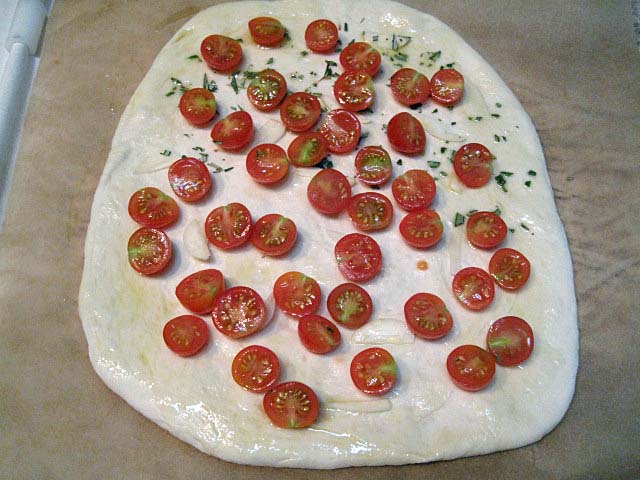
  1. Brush the entire surface of the shaped pizza dough with olive oil.

  2. Sprinkle with a tablespoon of finely chopped fresh rosemary.

  3. Sprinkle with a large clove of garlic, sliced very thin.

  4. Distribute on the pizza a cup of cherry tomatoes, halved, cut side up or a cup of fresh roma tomatoes peeled, seeded and cut into quarters.

  5. After baking, optionally top with fresh arugula or basel leaves.


Pizza with Cherry Tomatoes, pre-bake

Pizza with Cherry Tomatoes, baked

Pizza with Roma Tomatoes, pre-bake

Pizza with Roma Tomatoes, baked

The results were wonderful! The dough stretched easily to paper thin without tearing and baked so crisp there was no sagging when a slice was help up by the corona. Biting into it was a noisy crunch. The flavor of the crust was delicious. The whole experience sold me on minimalist toppings.

Pizza bottom crust

Thin crust

Crust

I don't think adding a few capers, or olives or mushrooms would do any harm, but I don't think making pizzas with heavy saucing, lots of cheese or lots of anything will be tempting again.

 The pizza was a nice follow-up to last night's bruschetta.

Bruschetta with fresh funghi porcini and with tomatoes and basel

David

Submitted to YeastSpotting

dmsnyder's picture
dmsnyder

Light and fluffy 100% Whole Wheat Bread

100% Whole Wheat Bread from BBA

I've been admiring the whole wheat pan loaves txfarmer has shown us in recent weeks. Her use of intensive mixing to achieve a higher rise and airier crumb has particularly intrigued me. (See SD 100% WW sandwich loaf with bulgur (cracked wheat) - discovered a new favorite ingredient). When I read her blog, I decided to make the same bread. However, on further reflection, I changed my plan. I have a favorite 100% whole wheat bread – that in BBA – and I really don't like the combination of sourdough tang and whole wheat flavors. So, I decided to fiddle with Peter Reinhart's formula for 100% whole wheat bread using some of txfarmer's techniques to see if I could get a lighter-crumbed version of a bread I already know well and love. The crumb texture I have gotten with this bread is moist but rather dense and crumbly, following Reinhart's suggestions for mixing time. This is not at all unpleasant to eat, but is very different from the airier crumb txfarmer and khalid have shown.

Reinhart's formula calls for a soaker with a coarsely-ground grain and a whole wheat poolish. As usual, I used bulgur for the soaker, and I used fresh-milled whole wheat flour for the poolish. The flour in the final dough was KAF Organic Whole Wheat. The procedures described are those I used. They deviate from both Peter Reinhart's and txfarmer's in significant ways.


Soaker

Baker's %

Wt (oz)

Medium bulgur

100

4.25

Water

141

6

The day before baking, measure the bulgur into a 3 cup bowl. Pour the water over it and cover tightly. Leave at room temperature until used.


Whole Wheat Poolish

Baker's %

Wt (oz)

Whole wheat flour

100

6.75

Instant yeast

0.41

0.028 (¼ tsp)

Water

88.9

6

The day before baking, mix the poolish ingredients. Cover the bowl tightly. Allow to ferment until bubbles start to form (2-4 hours), then refrigerate.


Final dough

Baker's %

Wt (oz)

Whole wheat flour

100

9

Salt

3.7

0.33

Instant yeast

1.2

0.11 (1 tsp)

Honey

16.7

1.5

Vegetable oil (optional)

5.6

0.5

Egg, slightly beaten

18.3

1.65 (1 large)

Seeds to garnish (optional)


2 T

Soaker

114

All of above

Poolish

142

All of above


Procedure

  1. Mix the soaker and poolish, as instructed above, the night before mixing the final dough.

  2. One hour before mixing, take the poolish out of the refrigerator to warm to room temperature.

  3. Place all the ingredients in the bowl of a stand mixer.

  4. Using the paddle, mix at Speed 1until a ball forms on the paddle and the ingredients are well-mixed (1-2 minutes). Note that the dough should be quite tacky – neither dry nor sticky. Adjustments can be made by adding either water or flour during this step or during the next mixing step. (I added about 15-20 g additional water.)

  5. Let the dough rest, covered in the mixer bowl, for 20-40 minutes.

  6. Switch to the dough hook and mix at Speed 2 until a medium window pane can be made. (20-25 minutes) Note: Reinhart's instruction is to knead for 10-15 minutes, “less” if machine kneading.

  7. Transfer the dough to a lightly oiled bowl.

  8. Ferment for two hours or until the dough has doubled in volume, with a stretch and fold on the board at 60 minutes.

  9. Divide the dough into two equal pieces and form them into pan loaves.

  10. Place the dough into lightly oiled medium loaf pans and place the pans in food-grade plastic bags or cover well with a towel or plasti-crap.

  11. Proof until the loaves have almost doubled and are peaking above the rims of the pans. (About 90 minutes)

  12. Pre-heat the oven to 350ºF with a rack in the middle.

  13. Optionally, spray the loaves lightly with water and sprinkle on seeds or rolled oats.

  14. Optionally, score the loaves.

  15. Bake for 45-60 minutes. At 30 minutes, rotate the pans 180º, if necessary for even browning. The interior temperature should be at least 195ºF, and the crust should be firm on the top and on the sides of the loaves. If necessary, return the loaves to the oven and bake longer. (My loaves were done in 45 minutes.)

  16. Immediately transfer the loaves to a cooling rack.

  17. Cool thoroughly before slicing.

I noticed two significant differences in this dough, compared to my previous bakes of this bread. First, the dough was less sticky than usual. Second, the loaves achieved significantly greater volume during proofing. I attribute this to the more intensive mixing, but also the S&F which serves to further strengthen the dough but also equalized the dough temperature and redistribute the products of fermentation.

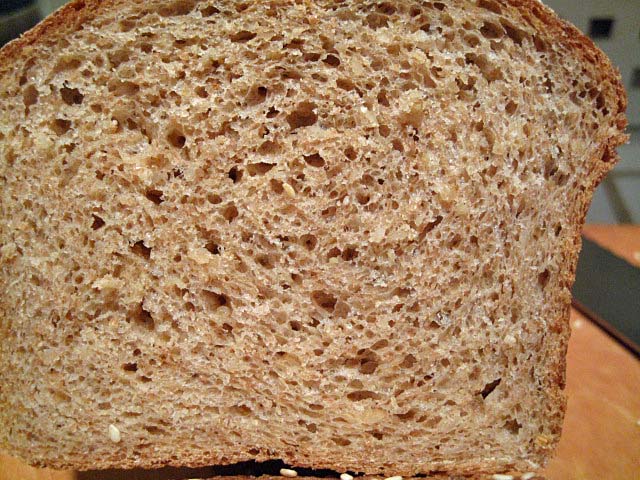
Once baked, the loaves felt much lighter than usual. When sliced, the reason was quite obvious. Rather than the cakey, somewhat crumbly crumb this bread has always had in the past, the crumb was airy and, in txfarmer's words, “shreddable.”

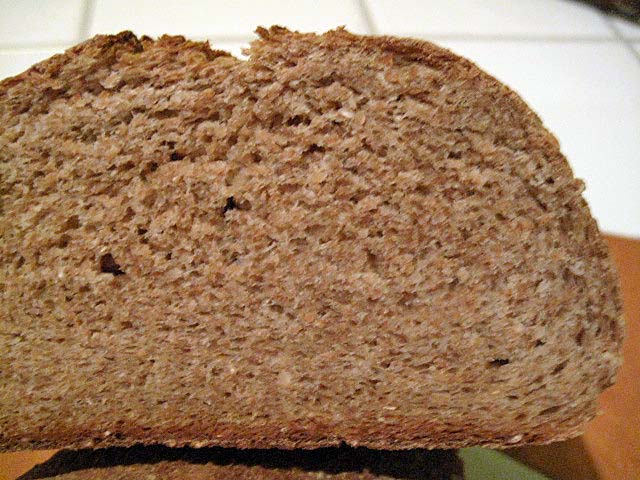
Crumb from a previous bake of the BBA 100% Whole Wheat Bread, made following Reinhart's mixing time instructions

Crumb of the 100% Whole Wheat Bread from BBA mixed as described above

"Shreddable"

The flavor of the bread is basically unchanged, but the mouth feel is entirely different - light and mildly chewy. I was amazed.

I'm looking forward to having toast for breakfast.

Thanks, txfarmer, for your inspiring and informative postings!

David

Submitted to YeastSpotting


Pages