The Fresh Loaf

A Community of Amateur Bakers and Artisan Bread Enthusiasts.

Most bookmarked

Janetcook's picture
Janetcook

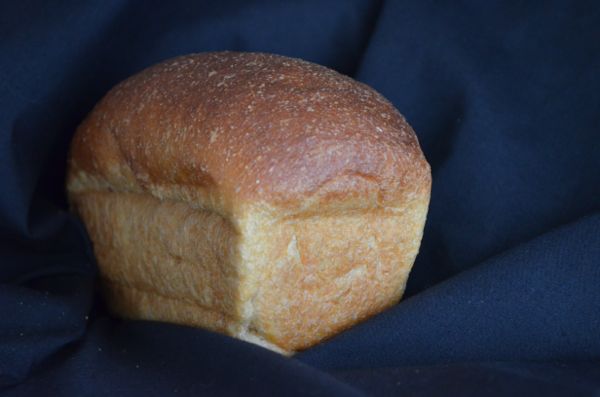
100% Honey Whole Wheat Sandwich Loaf with Roux and SD


When I began baking a couple of years ago I soon found out that my family all loved freshly baked bread.  It was a rewarding feeling to be able to bake something fresh and wholesome for them.

Within a short period of time I discovered that each had a preference for a particular type of bread.  In other words, one loaf did not fit all.  My journey began to find the ONE loaf that would satisfy them all.

It has been about 3 years and I have finally found that loaf.


The first book I fell in love with when my baking odyssey began was Peter Reinhart's Whole Grain Breads. I mentioned that I was baking to a friend and she knew I baked with whole wheat that I ground myself so she sent me a book titled Whole Grain Breads by Machine or Hand written by Beatrice Ojakangas.  I was excited to expand my baking repertoire but I soon found out that Beatrice's book did not use 100% whole grains and that the book was written with volume measurements rather than by metric weights…..

Somewhere between WGB and her book I had learned all about baking math. but was not skilled as yet at converting recipes to metrics.  The book sat on a shelf while I baked through WGB.  


While baking my way through WGB I found TFL and suddenly my baking world expanded by ten fold.  In no time at all I learned how to convert just about any formula I happened across.  I also learned how to convert from using IY to SD.  Beatrice's book was retrieved and I began trying her recipes.  (They are great.)


Things began to change after I read about Syd's Asian Style Pan de Mie about a year or so ago.  In following his formula I found out about using a roux in a loaf to soften the texture.  I began experimenting and found the texture that worked for my son and daughter but the method was still a bit drawn out for a regular loaf and flavor wasn't there yet…


Somehow I hitched the roux up with Beatrice's Honey Whole Wheat and I hit upon a loaf that my son said was his favorite….My daughter was home for Christmas break and she concurred  with him.  Husband vote was not far behind.  Texture and flavor pleasing to them all and it is a loaf the I like to bake.


OVERALL FORMULA

Flour  100%

Milk      62%

YW       10%

Salt      2.3%

Butter   5.4%

Honey   10%

Egg       10%

ND Malt   1%

IY            .2%

ROUX

Milk          18%

Butter      5.4%

Honey      1.2%

Malt             1%

Flour         13%

Leaven contains 15% prefermented flour and 10% YW.

  • Build leaven using YW in the morning and feed again 4 hours later when it has ripened.
  • Make roux in the morning.  Boil milk with butter and honey added.  Add flour and malt. Stir until mixed and firm.  Cover and let it cool until ready to use.
  • In the evening combine flour, egg, honey, milk and leaven in mixing bowl.  Mix into a shaggy mass.  Let it rest for 1 hour for the gluten to begin to develop.
  • Add remaining ingredients in stages while mixing.  
  • Knead until a strong windowpane develops.
  • Place dough in bowl and let it sit at room temp. for 1 hour.
  • Place in refrig. for overnight bulk fermentation.
  • In the morning, remove dough from the refrig and allow it to come to room temp. and to finish expanding.
  • Shape into a loaf and place in pan.
  • Bake at 350° for about 30-40 minutes when internal temp reaches 200°

I do steam my sandwich loaves too but some bakers do not find that necessary with loaves containing enrichments.  

So there you have it.  Three years of work in the making and I know that as soon as I post this here….something or someone will change…

…..and the challenge of trying to bake the 'perfect' loaf for all will continue to confound me….

                                                                 HAPPY BAKING


Isand66's picture
Isand66

Tangzhong Onion Cheese Potato Sourdough Rolls

For Thanksgiving we were visiting my wife's family in North Carolina as we always do and as usual we brought have our kitchen with us so we could bake for the main feast.

This year I made a double batch of my German Sourdough Pumpernickel Pretzel Rolls and another version of my Tangzhong Onion rolls.  I changed up some of the flour and also added some shredded cheese in the mix for added flavor.

Tangzhong is the technique of heating a portion of the flour and liquid in your recipe to approximately 65C to make a paste (roux).  At this temperature the flour undergoes a change and gelatinizes.  By adding this roux to your final dough it will help create a soft, fluffy, moist open crumb.  It is also supposed to help prevent the bread from going stale.

It is not very difficult to do a Tangzhong.  Use a  5 to 1 liquid to solid ratio (so 250g liquid to 50g flour) and mix it together in a pan.  Heat the pan while stirring constantly.  Initially it will remain a liquid, but as you approach 65C it will undergo a change and thicken to an almost pudding like consistency.  Take it off the heat and let it cool before using it in your recipe.  Some people will refrigerate it for a while but you can use it right away as soon as it cools.

The rolls were a big hit along with the pretzel rolls.  If you try these you won't be disappointed.

Please note I had to use my I-Phone to take the photos so they are not exactly up to my usual standards but hopefully you can stand to look at them :).

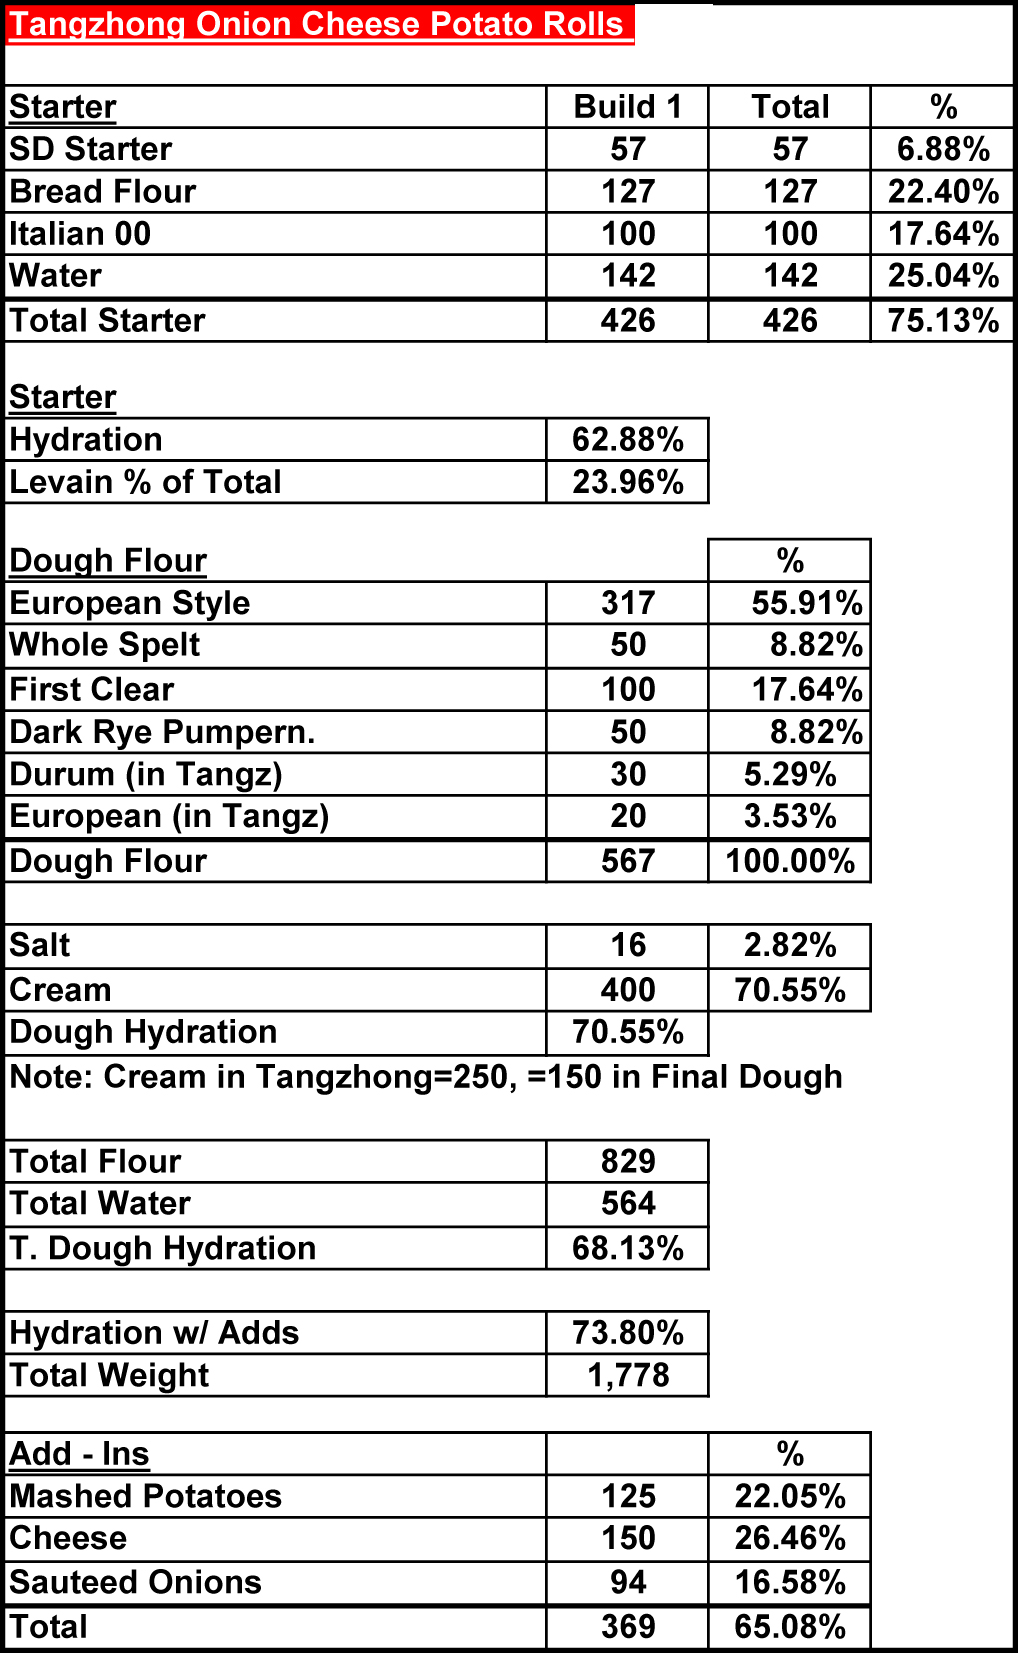
Formula

Note: Tangzhong consisted of 30 grams European Style Flour, 20 grams Durum Flour and 250 grams Cream.  I included this in the overall formula below.

Tangzhong-Onion-Cheese-Pota

Levain Directions

Mix all the levain ingredients together for about 1 minute and cover with plastic wrap.  Let it sit at room temperature for around 7-8 hours or until the starter has doubled.  I usually do this the night before.

Either use in the main dough immediately or refrigerate for up to 1 day before using.

 Main Dough Procedure

Cut up the onion into rings and sauté on low heat until nice and canalized using some olive oil or butter in your pan. Let the onions cool completely and chop into smaller pieces before using in the dough.

Prepare the Tangzhong per directions above and allow to cool to room temperature.

Mix the flours, Tangzhong and cream together in your mixer or by hand until it just starts to come together, maybe about 1 minute.  Let it rest in your work bowl covered for 20-30 minutes.  Next add the salt, potatoes and starter (cut into about 7-8 pieces), and  mix on low for a minute.   Mix for a total of 13 minutes in your mixer starting on low-speed and working your way up to speed #3 for the last 5 minutes.  When you have about one minute left to mix add the cheese to get it evenly incorporated.  I used a mixed cheese blend that was shredded.  (Note: I didn't follow my own directions and only mixed for about 6 minutes on speed #1.  If you want the rolls to be lighter it is better to mix for the total amount of time as originally indicated).  Remove the dough from your bowl and place it in a lightly oiled bowl or work surface and do several stretch and folds.  Let it rest covered for 10-15 minutes and then do another stretch and fold.  Let it rest another 10-15 minutes and do one additional stretch and fold.  After a total of 2 hours place your covered bowl in the refrigerator and let it rest for 12 to 24 hours.

When you are ready to bake remove the bowl from the refrigerator and let it set out at room temperature still covered for 1.5 to 2 hours.  Remove the dough and cut into equal size pieces and shape into rolls.  Place on a baking sheet lined with parchment paper and cover with moist tea towels or plastic wrap sprayed with cooking spray.

The dough will take 1.5 to 2 hours depending on your room temperature.  Let the dough dictate when it is read to bake not the clock.

Around 45 minutes before ready to bake, pre-heat your oven to 500 degrees F. and prepare it for steam.  I have a heavy-duty baking pan on the bottom rack of my oven with 1 baking stone on above the pan and one on the top shelf.  I pour 1 cup of boiling water in the pan right after I place the dough in the oven.

Right before you are ready to put them in the oven, using a simple egg wash brush each roll and sprinkle on your topping of choice.   Next add 1 cup of boiling water to your steam pan or follow your own steam procedure.

After 1 minute lower the temperature to 425 degrees.  Bake for 35 minutes until the crust is nice and brown.

Take the rolls out of the oven when done and let them cool on a bakers rack before for at least 2 hours before eating.

CrumbShot

davidg618's picture
davidg618

sourdough focaccia

Focaccia is one of our favorite breads for sandwiches. We've found tuna fish salad, Italian sausage with carmalized onions and peppers, and grilled portabella mushrooms with red pepper aoili are especially good. The freezer is well stocked with lean sourdough loaves, and baguettes so for this week's sourdough bake I made focaccia. This 72% hydrated loaf is 100% KA Bread flour (17% prefermented in the levain) 4.2% extra-virgin olive oil, and 2% salt. The dough was retarded 15 hours overnight, and baked at 400°F  in a convection oven. We cut it into 4" squares, and freeze it thawing only what we need for a meal.

David G

My basic sourdough bread recipe...

Wartface's picture
Wartface

Description

Flour, water, salt and sourdough starter... That's it.

500 grams of bread flour...

200 grams of sourdough starter... 100% hydration.

300 grams of water... At 85 derees.

11 grams of salt... 

Works like a champ... 

Summary

Yield
1 loaf
SourceShasta at NWSD gave this recipe to me....
Prep time
Cooking time30 minutes
Total time30 minutes

Ingredients

Instructions

Put starter into mixing bowl...

Measure out the water...

Measure out the salt - put into a small bowl... Pour 20 grams of water into the salt. This helps it dissolve and makes it easier to fold in later.

Pour the remainder of the water into bowl with the starter... Stir gently to break it up.

Add the flour... Mix the flour, water and starter just to the shaggy consistency.

Autolyse for 1 hour...

Mix in the salt and remaining water but don't knead it...

Let it rest for an hour...

Stretch and fold every half hour... Usually 4 stretch and folds. You want to get lots of bubbles and some rise but it doesn't have to double in size.

Preshape...

Final shape...

Into the Banneton... Cover with a shower cap

Into the refridgerator for at least 12 hours, 24 hours will give you a better taste and more tang.

Final proofing... About 2 hours. Depends on room temp. 

Preheat oven, pizza or baking stone and mixing bowl or roasting pan for 1 hour to 500 degrees. The mixing bowl or roasting pan will give you really good steam. 

Do the poke test to make sure your boule is ready to bake... Google poke test if you are not familiar with that method.

Score your loaf...

Spray your loaf with water... a mister works fine. That will create steam under the bowl which will give you better oven spring and Ear's...

Put your loaf on the pizza stone or baking stone

Cover with mixing bowl or roasting pan and bake for 20 minutes...

Remove the mixing bowl or roasting pan...

Reduce the heat to 465 and bake for 5 minutes...

Open the oven and rotate the boule 90 degrees so you get even color on loaf...

Close the door and cook to color...another 5 to 8 minutes depending on how dark you want your loaf.

 Try it, you might like it...

dmsnyder's picture
dmsnyder

Sourdough Honey Whole Wheat Multigrain Bread

Sourdough Honey Whole Wheat with Multi-grain Soaker 

May 17, 2013


This is my third version of a whole wheat, multi-grain bread based on my San Francisco-style Sourdough formula. I think this one is a keeper.

Compared to the last version:

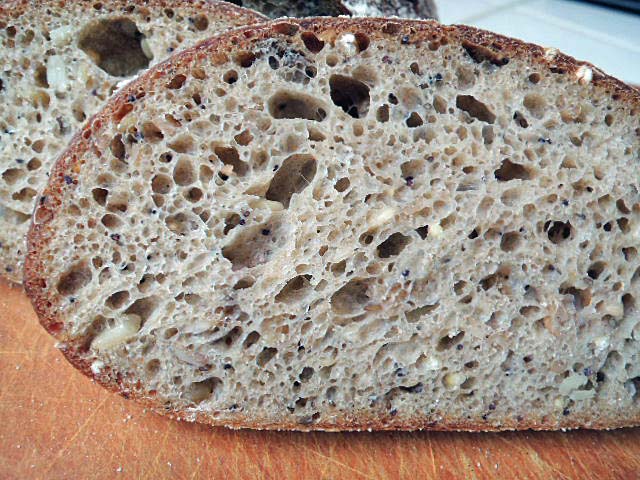
  1. The soaker was hydrated at 100% rather than 125%. Also, it was soaked for less than an hour rather than overnight. This resulted in a very sticky, slack dough but not a goopy one. It behaved like a 75-80% hydration dough, generally.

  1. The soaker was mixed into the dough right after the autolyse, rather than being added after the gluten was well-developed. I had some concern that this might compromise the crumb structure, but I am quite happy with what I got. (See photos, below.)

  2. I reduced the percentage of honey slightly.

  3. I did not retard the dough in bulk but, rather, as formed loaves.

  4. I did not leave the loaves in the turned off oven but removed them to the cooling rack immediately after they were fully baked. This step is still a good option, if you want a drier, harder crust.


Total dough

Bakers' %

Wt (g)

AP flour

34

192

Bread flour

14

79

Medium Rye flour

2

14

WW Flour

50

281

Water

93

528

KAF “Harvest Grains”

18

100

Honey

3

17

Salt

1.9

11

Total

225.9

1222


Stiff levain

Bakers' %

Wt (g)

Bread flour

95

79

Medium rye flour

5

11

Water

50

45

Stiff starter

80

66

Total

230

201


  1. Dissolve the starter in the water. Add the flours and mix thoroughly until the flour has been completely incorporated and moistened.

  2. Ferment at room temperature for 16 hours.


Soaker

Bakers' %

Wt (g)

KAF “Harvest Grains”

100

100

Water (Boiling

100

100

Total

200

200

  1. Just before mixing the autolyse, put the “Harvest Grains” blend in a medium-sized bowl and pour the boiling water over it. Cover.

  2. Allow to soak during the autolyse (see below).


Final dough

Wt (g)

AP flour

169

WW Flour

274

Water

350

Salt

11

Honey

17

Soaker

200

Stiff levain

201

Total

1222

Method

  1. In a stand mixer, mix the flours and water at low speed until they form a shaggy mass.

  2. Cover and autolyse for 30 minutes

  3. Add the salt, honey, soaker and levain and mix at low speed for 2-3 minutes, then increase the speed to medium (Speed 2 in a KitchenAid) and mix for 6 minutes. Add flour and water as needed. The dough should be rather slack.

  4. Place the dough in a lightly oiled bowl and cover tightly.

  5. Ferment at 70º F for 2 1/2 to 3 hours with a stretch and folds in the bowl every 30 minutes for the fist 2 hours.

  6. Divide the dough into two equal pieces.

  7. Pre-shape as rounds and rest, covered, for 10 minutes.

  8. Shape as boules or bâtards and place in bannetons. Place bannetons in plastic bags.

  9. Proof at room temperature (68-70º F) for 1-2 hours.

  10. Cold retard the loaves overnight.

  11. The next morning, proof the loaves for 2-3 hours.

  12. 45-60 minutes before baking, pre-heat the oven to 480º F with a baking stone and steaming apparatus in place.

  13. Transfer the loaves to a peel. Score the loaves as desired, turn down the oven to 460º F, steam the oven, and transfer the loaves to the baking stone.

  14. After 15 minutes, remove the steaming apparatus, and turn down the oven to 435º F/Convection. (If you don't have a convection oven, leave the temperature at 460º F.)

  15. Bake for another 15 minutes.

  16. Transfer the loaves to a cooling rack, and cool thoroughly before slicing.


The crust was chewy. The crumb was not at all gummy but was very moist when the bread was first sliced the morning after baking. The flavor was that of good whole wheat. There was little noticeable sweetness. There was a moderately prominent sourdough tang. The bread was tasted plain and toasted with almond butter and jam. It was quite delicious. Probably because I was tasting it about 16 hours after it was baked, the flavor was more balanced than that of the last version which I first tasted just 2 to 3 hours after it was baked. 

I will be tasting this bread over the next few days. I expect it to stay moist for at least 3 or 4 days.

Yesterday, along with these breads, I also baked a San Joaquin Sourdough bâtard. 


And I used 400g of the SJSD dough to make a focaccia with garlic, fresh rosemary and zucchini.

Focaccia, readty to bake

David

Submitted to YeastSpotting

mwilson's picture
mwilson

The Best Panettone from Iginio Massari

I couldn't resist making my favourite Panettone again!

As I wrote previously my regular Italian sourdough has been dried up and stored away in the fridge so that I could focus on making rustic sourdough breads. I created a new, wet 100% hydration starter but the temptation to convert it into a new Italian starter was too strong. And after bringing it to maturity I couldn't resist making Panettone again!

So here we have one of my favourites courtesy of master pastry chef Igino Massari. Entitled “The Best Panettone” this is one very soft, very sweet and very moist cake!

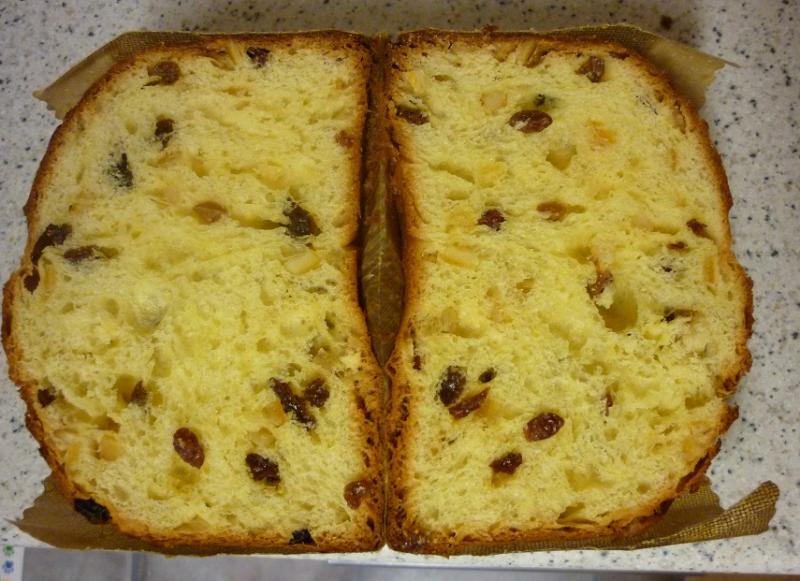
I made dough for a 500g mould but the smallest ones I have in stock are 750g capacity. Consequently the resulting shape isn't as proud as the Milanese style. I didn't glaze it and instead cut ears…


Paper removed.


Cross-section.


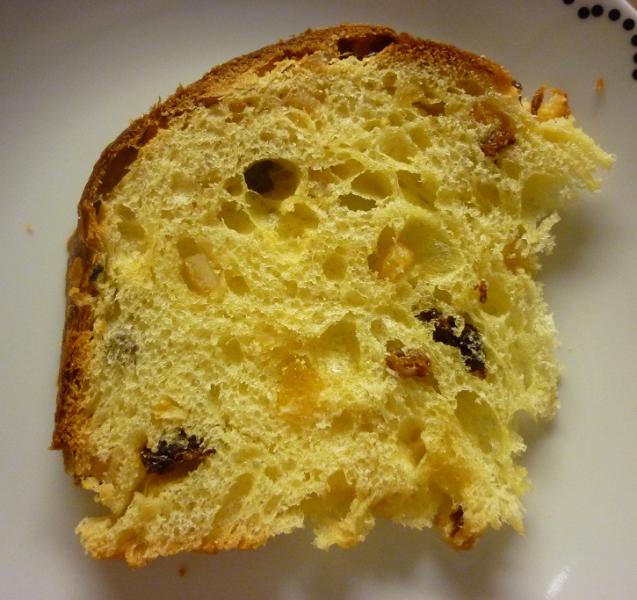
Finally, I now have a better understanding of how best to mix the second dough. I have achieved the best crumb so far. I like those open pockets!

First dough: (26C for 12hrs)

  • 30g Lievito Naturale
  • 120g '00' Flour
  • 45g Water
  • 38g Sugar
  • 30g Egg Yolks
  • 43g Butter

Second dough: (28C until tripled ~8hrs)

  • 30g '00' Flour
  • 39g Egg Yolks
  • 30g Sugar
  • 7.5g Honey
  • 46g Butter
  • 21g Water
  • 2.4g Salt
  • .3g Aroma Panettone
  • .3g Vanilla
  • 60g Sultanas
  • 45g Candied Orange
  • 15g Candied Citron

Total Ingredients:

Flour100
Water45
Sugar40
Honey4
Yolks41
Butter53
Fruit70
Salt1.4
Flavourings.6
 355%
 
dmsnyder's picture
dmsnyder

Jewish Sour Rye from Greenstein's "Secrets of a Jewish Baker"

When I started baking bread again about four years ago, one of my principal reasons was to bake a good Jewish Sour Rye, a favorite bread I could not get locally. Greenstein's Secrets of a Jewish Baker was one of the first bread books I acquired, and I found his Jewish Sour Rye Bread at least as good as any I could remember eating.

His book was criticized by a number of TFL members for providing only volume measurements for ingredients. So, in October, 2008, I made the Sour Rye, carefully weighing the ingredients. I've used that formula since with consistently good results. I still love this bread.


Ingredients

Wt (g)

First Clear flour

500

Water (80-199ºF)

240

Sea salt

12

Ripe rye sour (100% hydration)

750

Instant yeast

7

Altus (optional)

1/2 cup

Caraway seeds

1 T

Cornmeal for dusting parchment


Cornstarch glaze


Notes on Ingredients

  • Rye Sour A sourdough starter or levain fed with rye flour is called a “rye sour.” Note that all the rye flour in the formula is pre-fermented. Traditionally, Jewish Sour Rye or New York-style Deli Rye is made with white rye flour. This is the equivalent of white flour milled from wheat. The bran and germ is removed, and the flavor is much milder than whole grain rye flour. I happen to like the flavor of whole grain rye and for years have used either dark rye or medium rye rather than white rye flour in this bread. If you use white rye, you may want to reduce the water, since this is less absorbent flour.

  • Building the rye sour If you make rye bread frequently, it is worthwhile keeping a rye sour. Otherwise, you can build one starting with a wheat or mixed flour starter. When I am going to be making this bread, I generally build up my rye sour in three feeding, at least doubling the volume with each feeding. I wrote a tutorial on “the care and feeding of a rye sour” which illustrates some of the special techniques involved. (See: Greenstein's Sourdough Rye (Rye Sour) care and feeding, illustrated.)

  • Altus This is “old bread.” It's origin is said to have been a way for the baker to recycle the rye bread he hadn't sold the day before, but, besides being a thrifty practice, the incorporation of some old bread in the dough is felt to enhance both the flavor and texture of rye bread. Its use is optional but recommended. To prepare altus, take a few thick slices of previously baked rye bread. Cut them into cubes and put them in a small bowl, covered with water. After a few hours, squeeze the water out of the bread and add it to your dough before mixing it.

  • Instant yeast As with many sourdough breads, the addition of commercial yeast makes the fermentation and proofing times more predictable. However, it is not necessary to make good bread. Since so much of this bread's flavor comes from the rye sour, I don't think the addition of yeast has any adverse impact on the quality of the bread. I generally use it.

  • Cornstarch glaze Dissolve 1 1/2 – 2 T cornstarch in 1/4 cup cold water. Heat 1 cup of water to a boil in a small sauce pan. Slowly pour the dissolved cornstarch into the boiling water, whisking constantly. Continue to stir until it is somewhat thickened. Remove from heat and reserve.

    Note on the formula: This formula was derived from the recipe provided by Greenstein, with ingredient volume measurements only. If you are interested in the formula including baker's percentages of ingredients, I have written a tutorial on baker's math, using this formula as a model. The baker's percentages can be found there. (See: Baker's Math: A tutorial )

Method

  1. If you have a white rye sour, build it up to a volume of 4 cups or so the day before mixing the dough. If you do not have a rye sour but do have a wheat-based sourdough starter, you can easily convert it to a white rye starter by feeding it 2-3 times with white rye flour over 2-3 days.

  2. In a large bowl or the bowl of an electric mixer, dissolve the yeast in the water, then add the rye sour and mix thoroughly with your hands, a spoon or, if using a mixer, with the paddle.

  3. Stir the salt into the flour and add this to the bowl and mix well.

  4. Dump the dough onto the lightly floured board and knead until smooth. If using a mixer, switch to the dough hook and knead at Speed 2 until the dough begins to clear the sides of the bowl (about 20 minutes). You may need to add a few tablespoons additional First Clear flour to get the right dough consistency. Add the flour, if needed, as early as possible in the mix. Add the Caraway Seeds about 1 minute before finished kneading. Even if using a mixer, I transfer the dough to the board and continue kneading for a couple minutes. The dough should be smooth but a bit sticky.

  5. Form the dough into a ball and transfer it to a lightly oiled bowl. Cover the bowl and let it rest for 15-20 minutes. Even after this short period, the dough is significantly less sticky.

  6. Transfer the dough back to the board and divide it into two equal pieces.

  7. Form each piece into a pan loaf, free-standing long loaf or boule.

  8. Dust a piece of parchment paper or a baking pan liberally with cornmeal, and transfer the loaves to the parchment, seam side down, keeping them at least 3 inches apart so they do not join when risen.

  9. Cover the loaves with plasti-crap or a tea towel and let them rise until almost double in size. (About 60 minutes.)

  10. Pre-heat the oven to 375F with a baking stone in place optionally. Prepare your oven steaming method of choice.

  11. Prepare the cornstarch glaze. Whisk 1-1/2 to 2 Tablespoons of cornstarch in ¼ cup of water. Pour this slowly into a sauce pan containing 1 cup of gently boiling water, whisking constantly. Continue cooking and stirring until slightly thickened (a few seconds, only!) and remove the pan from heat. Set it aside.

  12. When the loaves are fully proofed, uncover them. Pull the sides of the parchment apart to separate the loaves from each other. Brush them with the cornstarch glaze. Score them. (3 cuts across the long axis of the loaves would be typical.) Transfer the loaves, still on the parchment, to the oven, and steam the oven.

  13. After 5 minutes, remove any container with water from the oven and continue baking for 30-40 minutes more.

  14. The loaves are done when the crust is very firm, the internal temperature is at least 205 degrees and the loaves give a “hollow” sound when thumped on the bottom. When they are done, leave them in the oven with the heat turned off and the door cracked open a couple of inches for another 5-10 minutes.

  15. Move the loaves to a cooling rack and brush again with the cornstarch glaze.

  16. Cool completely before slicing.

Parchment paper on peel, folded down the middle and dusted with coarse corn meal

Loaves on parchment. Note the fold separating the loaves and the rolled up towels supporting the sides of the loaves.

Loaves covered for proofing.

Crumb

Crumb close-up

I let the final build of the rye sour get really ripe. In fact, it was starting to collapse when I mixed the final dough. The resulting bread was extremely sour and very delicious. If you don't like very sour rye bread, either use the sour when it is younger, or, if your timing demands, you can refrigerate it over-night, until you are ready to mix your dough.

 David

Submitted to YeastSpotting


Yerffej's picture
Yerffej

Brioche

I am looking for THE great brioche recipe.  I have used the Nancy Silverton recipe from Baking with Julia and think that it is quite good.  I am wondering what your favorite recipe might be and why. 

Jeff

txfarmer's picture
txfarmer

Julia Child's Croissant - with major overhaul

Sending this to Yeastspotting.

Click here for my blog index.

This is the theme for this month's Daring Bakers' Challenge. One look at the original recipe (see here), I knew it wouldn't produce the croissants I want. Don't get me wrong, I worship Julia Child, but I think she made some compromises here so that it's less daunting for the home bakers, however, the quality suffers as the result. All the changes I made were based on the lessons I learned over the last few months of croissant marathon, you may find that they correspond closely to the tips I gave in this original croissant post.

1. Reduced the water amount by A LOT
2. Reduced the oil amount by A LOT. The original recipe yields incredibly wet doughs, while it's easier to roll out, it affects crumb negatively. The first 2 changes mean to make the dough drier, and crumb more crisp. Note that this recipe uses oil rather than butter in the dough, which makes the dough more extensible(i.e. easier to roll out). It would make the dough stronger if I replace it with butter, but I kept oil to stay somewhat true to the original recipe - I can get the dough strength in other ways.
3. Reduced salt. The original recipe yields VERY salty croissants.
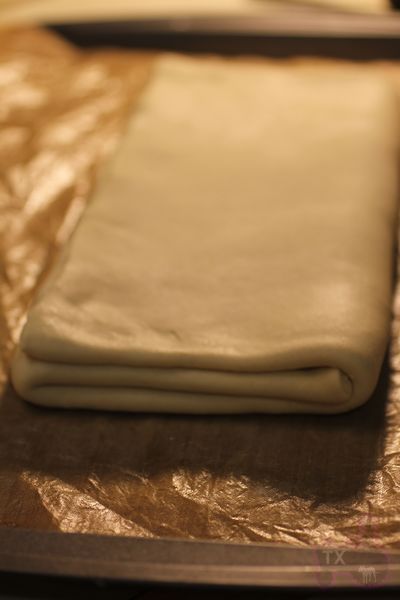
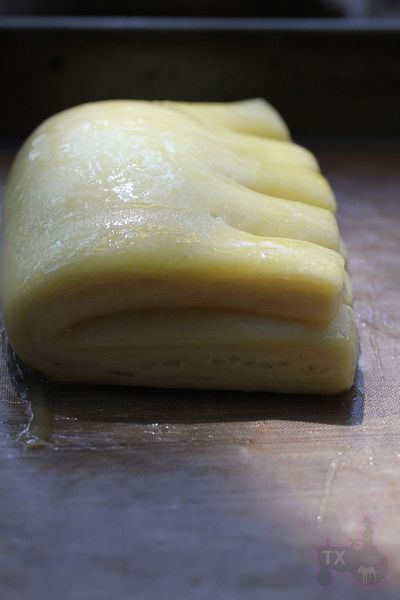
4. The original recipe soften the roll-in butter then "smear" it onto the rolled out dough. It may see easier than making a butter block then enclose it, but softened butter is warmer butter, which means it's easier to melt, a big NO NO if you want clear flaky layers. In addition, smearing doesn't produce even butter layers either. I still used my usual method to enclose butter: make a butter block, fridge, enclose into dough. (picture below with recipe)
5. Used bread flour rather than AP flour.
6. Kneaded the dough much longer than what the recipe required. Both 5 and 6 aim to increase dough strength. Stronger dough rises higher during baking, creating clear layers and open honeycomb crumb. Yes, stronger dough is also harder to roll out, but it's worthwhile.
7. The original recipes requires 4 bookfolds, which IMO, is way too much for such small croissants (much smaller than the standard size I made before). More folds == more layers, good in theory, easy to have leaky butter in practice. Even if the butter doesn't leak, more layers in such a small roll would just make the crumb less "open". I only made 3 bookfolds as usual.
8. The original recipe doesn't produce a lot of dough, yet still makes 12 croissants, so each one is tiny-mini. On top of that, the shaping process has unusal sizes (bottom and sides are of the same length for each triangle, which means each croissant is very long, but doesn't have a lot of layers), and too much stretching (easy to melt the butter). I changed the sizes to make 8 croissants (still much smaller than standard size, but at least each croissant is rolled up enough times to create a layered crumb).
9. Extended proofing time from 1.5 hr to 3.5 hr. Croissants MUST be fully proofed for a good crumb.

Note: this recipe requires a builk rise , which is different from all the other croissant recipes I tried before. Bulk rise made the dough extra strong - again, harder to roll out, but crumb is better.

Croissants (majorly adapted from Julia Child)
Note: Makes 8 small croissants
Note: for details and tips, please see this post
Note: for more tips on making croissants in warm weather, see here

Bread Flour, 228g
Milk, 120g
Water, 13g
Sugar, 14g
Salt, 5g
Instant Yeast, 2.7g (a scant tsp)
Oil, 15g
Roll-in Butter, 125g

1. Mix everything together but the roll-in butter. Knead @ low speed for 3min, @medium speed for 7min, the dough should be very smooth, relatively strong, a relatively weak windowpane.
2. Bulk rise at room temp (24C) for 3 hours until doubled, mine even tripled. Knead to get rid of air, press flat, put in fridge for 2 hours or overnight.
3. Tap roll-in butter between two sheet s of plastic, roll into 5inch square. Put in fridge for at least one hour.
4. Roll out dough into 7inch square, enclose butter block as following, seal well

5. Roll out to 6X14inch rectangle, do first bookfold along the longer side. Don't forget to trim the edges.

6. Put in fridge and rest for 1 hour. Take out dough and repeat the rolling and folding 2 mroe times, which gives 3 folds in total.
7. Put in fridge and rest for at least 120min.Roll out to 8X16inch, 1/8inch thickness. You may need to rest the dough in fridge several times.
8a. For classic croissants: cut into 4 rectangles, each 8X4inch. Then cut each rectangle diagonally into 2 triangles. Trim edges, stretch lightly into skinny long triangles.
8b. For Bear claws, cut into 5X3inch rectangles.
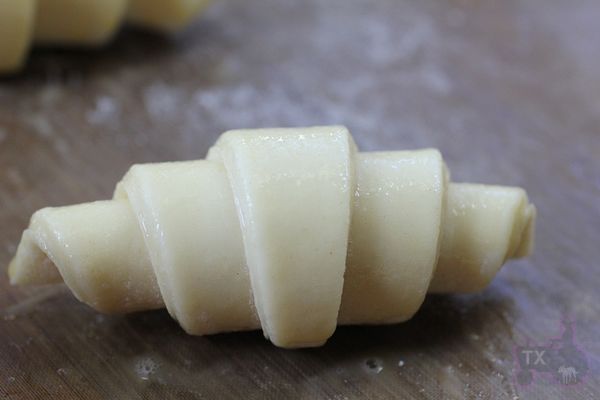
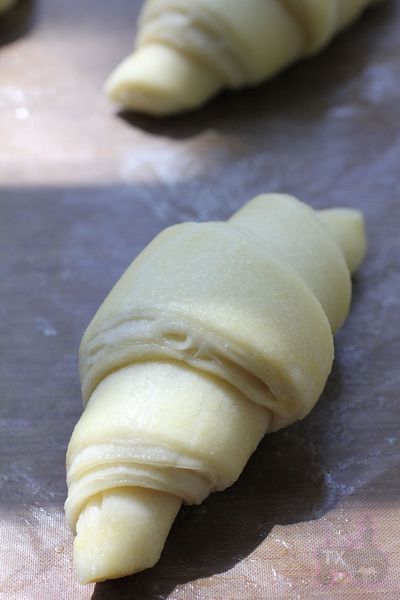
9a. For classic croissants: roll up fairly tight, stretch out the tip with one hand when you roll the bottom with the other hand. Since they are smaller, you won't get as many layers as the standard ones

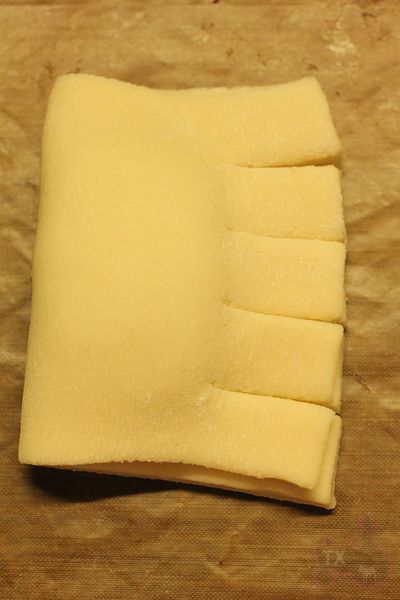
9b. For bear claws, put a TBSP of almond filling on the dough, fold in half along the longer side. Seal, and make 4 cuts for the "claw" effect.

10. At this point, you can proof right away, fridge overnight and proof next day, or freeze (defrost overnight in fridge before proofing). Brush with egg wash (1 egg beaten with 1 TBSP of water), then proof @ about 80F until very soft and jiggly. About 3.5 hours for me. Brush another layer of egg wash after proofing.


12. Bake at 425F for 10min, 375 for 15min.


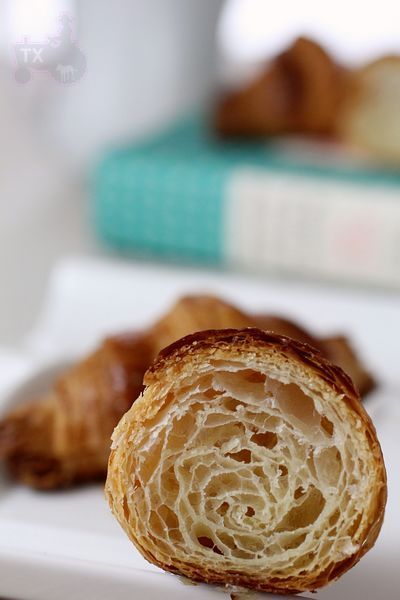
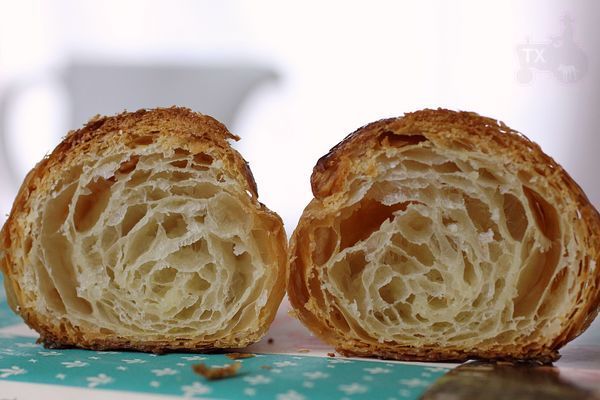
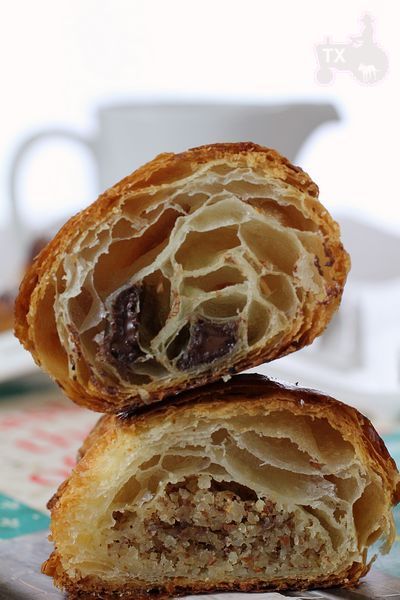
The very round cross section indicates enough dough strength. The crumb is open with a clear honeycomb effect.

I am fairly happy with the crumb, but there's always room for improvement. The smaller rolls has less layers than standard ones, which means the crumb has less "holes".

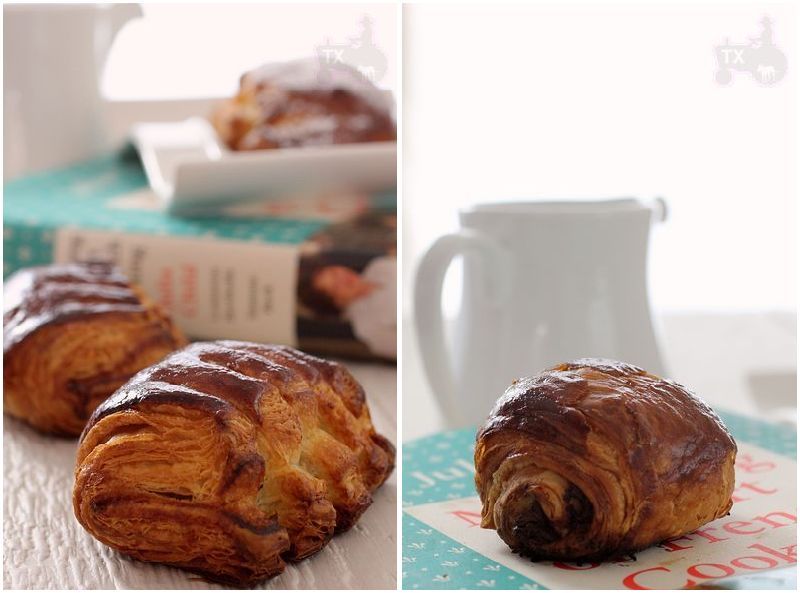
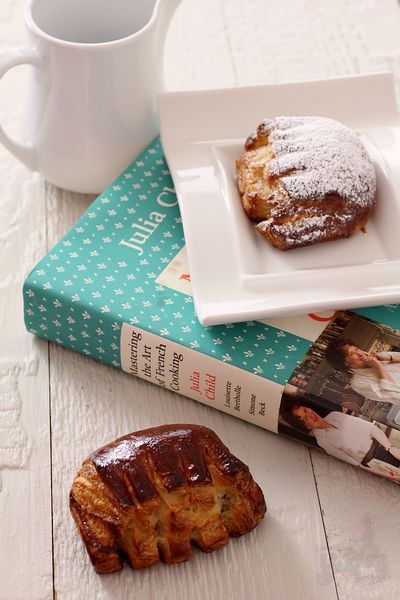
The bear claws came out pretty well, with or without powder sugar. And I used the leftover dough from bear claws for some mini chocolate croissants.


Bear claws and chocolate croissants were rolled up in less turns than croissants during shaping, so the layers are very clear and very flaky - easier to make than the standard ones IMO.

With some major overhaul, this recipe produces very good results.

ehanner's picture
ehanner

Smoked Pastrami-A Reason to Bake Deli Rye

Smoked Pastrami

While we bake bread for many purposes, few could be considered more noble than to aid in the creation of an outstanding Pastrami sandwich. Corned beef is a close second in my opinion but also a nice topping for deli rye breads. I have made this recipe many times and suggest you might consider smoking all you can get in your smoker at one time. It freezes well, sliced, and you will enjoy knowing you have a bag at hand if the need arises to feed special friends on the quick.

A few years ago, a fellow at Kenny and Zuke's Deli in Portland OR , took pity on me and showed me how to make what has been described by many as the best Pastrami in the USA. Many food writers from all over have marveled at the flavor and texture of the absolutely marvelous Brisket done Pastrami style in their restaurant. Even the food writers in NY have waxed on about how there may be better but they haven’t found it yet.  Everything I write here, in fact everything I know about the fine craft of creating this delicious and tender indulgence, I learned from Nick which I think is Zuke. I scaled the quantities back and fooled with the process for  a home cook but it is essentially the original recipe. I have read they are now back to curing their own meats and have changed the recipe slightly to improve the flavors. For a time they sub contracted the curing because it takes up so much space and is a pain to keep track of, in the quantity they go through. I can’t help but to trust these guys to have made it better, hard as it might be to believe. If you find yourself near Portland, please do stop in for a real treat. They serve the very best of everything in this unusual Deli.

There are many ways to cook or smoke Pastrami. As I understand it, the term applies more to the process than the actual meat used. I have read of pastrami  turkey and other poultry. However for me the only real pastrami starts off life as a beef brisket that is first cured and marinated in special preservative (pink) salt, sugar and spices for at least 5 days and as long as 12. The combination of ingredients in the brine has a major impact on the finished product and while I am suggesting below that you start by buying an already cured piece of brisket sold as “Corned Beef” in the grocery, that product was intended to be boiled and consumed as corned beef. It will produce a very good Pastrami but the best flavor will come from starting with a raw, fresh brisket and curing your own. If you want to cure your own, start by finding some curing or “pink” salt. This is available on line and is added at around 1 Tablespoon per gallon of water.  You MUST have the proper salt. You MUST have the ability to refrigerate and rotate the meat daily during the days of curing time. The following pastrami demo was done with pre cured corned beef and it’s delicious.

A full Packer Cut of Brisket consists of a flat and a point, once it is separated and  I find them at Sam's or any real butcher between 9-11 Lbs. Your butcher will be able to remove the point from the flat and leave a 1/8-1/4 inch fat cap remaining. The flat is the more lean piece and usually the larger of the two. When done properly, the point is my favorite. It has more fat and connective tissues so it’s not for those on a diet. To be clear, you definitely want to separate the point from the flat before curing. When I have purchased full Packer cuts of whole brisket that have been cured for corned beef, I always separate them. The cooking (smoking time) and evenness is much better with two smaller pieces. If you have a real butcher, ask him to let you watch how he splits the brisket into a flat and a point. It isn't hard but you need to know how to do it.  I don't think I could describe the process well enough in words to make it meaningful. So ether get a cured piece of flat or find a real butcher and order what you want or need. I like the butcher personally. It's a dying art and I like to support them.

Let’s get started.

Equipment needed:

Smoker
Stock pot
1 gallon Zip Lock bags with gusset
roasting pan
sheet pans
Sharp Carving Knife

Ingredients:

I’m going to include the home curing ingredients now. If you are starting with a cured corn beef, ignore this list of ingredients and skip to the rub ingredients, which is the same for both procedures. The amounts listed for the curing brine is enough for 6 full briskets. Scale down for home use as necessary.

Brine:
6 gallons of water
7 cups kosher salt
1 1/8 cup pink salt
5 cups white sugar
2 cups brown sugar
3/4 cup honey
1/2 cup pickling spice
1/4 cup coriander seed
1/4 cup mustard seed
1/3 cup minced garlic

Rub:

Ground Coriander
Course crushed Black Pepper
Mustard seed ground
Garlic powder or granules.


I don’t think you can hold a slow steady 225-250F indirect heat  on any grill I have seen or used. You have to have some kind of smoker where there is a heat source, wood chip shelf, water bath and grill racks. These fall into categories of fuel type and size. The purist types might opt for a wood or coal fired unit but that means you have to tend a finicky fire for 12 hours. I’ve done that a few times but the convenience of a gas or electric heater makes this smoking far easier and the final product is barely any different than if you stayed up all night singing to yourself. Weber has a couple models that will hold a decent size Turkey that work well for this. I have a Smoke Vault by Camp Chef. You can find it near $220 on sale around or online. I see Brinkman has a less expensive gas model for $149 that looks like it would get the job done, at Home Depot. Get the biggest one your budget will afford. The world of smoked meats is addictive and there are plenty of ways to use your smoker. Turkey breast and salmon are our other smoked favorites.  This process doesn’t impart so much of a smoky flavor that you taste the smoke. It should be a mild and subtle enhancement. Any Low and Slow pit master will tell you it is easy to ruin a Q by over smoking.  You are looking for a little smoke during all the cooking  time. I’ll include a photo but your nose is the best guide. You can just see the smoke as it drifts  out the top. Perfect.

Regardless of your smoker you should be able to get two flats on the rack with space between or on 2 layers.  My smoker will hold 6 large flats at one time but then I tend to do things on a larger scale for parties and such. The smoking process shrinks the meats considerably so I suggest getting the largest flat portion usually about 4 lbs each. By the time the meat is done, you will be wishing you had done 2.  Left over’s freeze well, double wrapped in plastic or vac-u-packed.

The process:

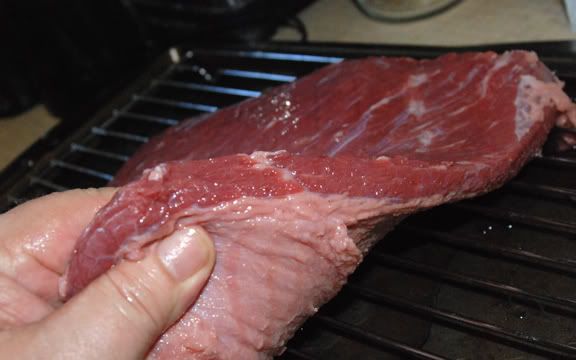
First, purchase the largest one or two corned beef flats from your grocery store. I have to look around to find two the same size above 4 pounds so they cook at the same rate. It is hard to know what a brisket flat will look like out of the bag. It pays to take a little time to find quality and hopefully get a piece that isn’t tapered down to a small flap and thinner on one side than the other. Look at the piece I’m holding below and see how I was moaning I didn’t see the thin side at the store. This meat cooks a long time. You’re  looking for even cooking which comes from even thickness. Ultimately you have to cook for the thickest part of the meat so the thinner part will be more well done at the end. Not the end of the world but a perfect piece is better.

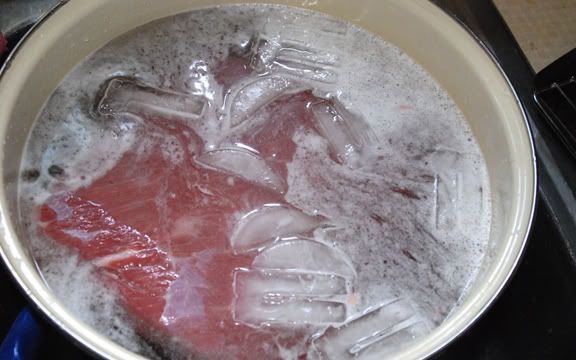
Start by rinsing the meet off under cold water and letting it soak in cold water for 2 hours. After 2 hours, dump the water and replace with fresh cold water. I add ice to keep it cooler. After the second rinse, pat dry and let it drip over the sink on a wire rack for a few minutes.  This soaking will remove some of the salt from the commercial curing process which is usually too salty for our purposes. Additionally, the smoking process will concentrate the remaining salt so it’s good to remove some now.

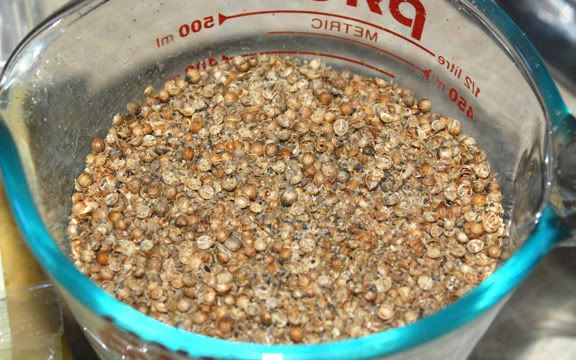
While the meat is soaking, prepare the spices. I buy the whole coriander seeds and run them through my spice mill. Some are ground more finely and some are more like crushed. I usually buy course crushed or cracked black pepper since my spice mill (coffee grinder) has a hard time with whole pepper corns. I use Coriander as the primary spice with black pepper as the secondary. I also use granulated garlic and a small amount of ground mustard. You want the Coriander to be the prominent flavor with the pepper in the second seat. Mix it all together and have it handy for application. I’m not giving exact amounts because the size and number  of meats varies. Mostly Coriander, then pepper, then garlic, then mustard. The spice coating and the fat below it become what is known as the “Bark” or “Mr. Brown” in Southern BBQ circles. The bark is my favorite part but it is an acquired taste, thankfully. You can see in the photo I started with 1-1/2 Cups of spice mixture. I had ½ Cup remaining after covering 3 brisket flats.

I like to pat the meat dry with paper towels and place it on a wire rack over a sheet pan to set for a while and come to room temperature for a bit. Then, remove the rack, dry further and set the meat on the pan. The idea is to apply as much spice as will stay in place, covering all sides completely. I like to wrap the meat in plastic wrap or a gallon bag and refrigerate it overnight if possible. I have started the smoker immediately and started the cooking but it’s better if you can give it an overnight dry marinade.

Smoke Day:

Remove the meat from the cooler a couple hours before you plan to put it on the smoker. Start your smoker and get it prepared with a water bath below the cooking rack filled with hot water. Pre heat the heater and fill the wood chip tray with some hardwood. I don’t use musquiet which is popular in Texas for BBQ due to it’s pungent flavor. Any other hardwood will be fine. Set your heat adjustments to 225-250F and find yourself an adult beverage. It takes a while for the smoker to come to a stable temperature. The meat is cool the water is cool and the wood chips haven’t started to smoke yet. After an hour, make sure you check the thermometer and start making changes to stay between the range of 225-250. Plan on this taking at least 11 hours and maybe more. The larger your meats are, the longer it will take to get them to 175F. If you can hold a stable 250F all through the 11 hours, your internal temp probe should be near 175F. You can over run the 175 to 190F so don’t concern yourself if you do. I always go to 190F for a darker bark (outside crust) and less remaining fats and connective tissue.  The next step is to braise the meat in a baking pan in water so the warmer it is here, the shorter the  braising time will be.

Braising:
Pre heat the oven to 350F.
 I try to plan the smoking process so I am done around 4 or 5 hours before I want to serve the meat. Remove the smoked pastrami to a large roasting  pan with an inch  of hot water in the bottom. Using a double layer of foil, cover and seal the top of the roasting  pan. Place in a pre heated 350F oven to braise and make the meat fork tender. If you removed the meat from the smoker at 175, the braising will take 3 or more hours. If you waited and smoked to an internal temperature of 190F, about 1-1/2 hours or so will do. After 3 hours of braising, check for fork tender. Be sure to check the most lean portion of the meat. The fatty part will be soft regardless.  The problem is that it is hard to check the meat for fork tender and then re cover the top with foil so, do your best. You shouldn’t need to add water if you get a reasonable seal. Once the meat is fork tender, remove from the oven and let it start to cool. If I’m planning to serve right away, I let the meat cool in the pan for about an hour to absorb some juices back in. I’ll set it on a cutting board to cool further and carve on an angle across the grain after it has cooled to warm. This is hard to cut in thin slices so I generally cut ¼ inch or thicker slices. If you simmered it to soft, it will be hard to impossible to cut into small pieces. So wait until the meat has cooled to a nice warm plate temperature before carving with your just sharpened knife.  A stack of smoked Pastrami is the perfect topping to a slice of Jewish Deli Rye bread. Enjoy!

NOTES:
 Notice the photo of 2 slices below. This was cut before the braising was complete. I mistakenly removed the piece and cut a couple slices. Notice how the meat looks like the grain is long.  You have to be very careful to check the bottom of the meat for grain direction and cut across the grain. You would think the grain would be along the longest side but, it usually doesn’t. The first cut should have been on a corner. It makes a big difference in how tender the meat is, pay attention. Notice the end grain in the close up photos.  This is a critical consideration you need to get right. Brisket is a tough stringy meat that becomes soft and deliciously tender when cooked properly AND cut correctly.

One thing to remember. I started with 3 bags of cured corned beef that weighed 12.5 Lbs.. That included the brine. After smoking and braising the total package weighs only 7.5 Lbs. Shrinkage.

Make sure your knife is as sharp as you can get it. Because you are cutting across the grain, I start the cut by drawing back across the piece first so the end doesn’t spit off on the grain. I usually do a better job of cutting stack-able pieces than I did in the close up shot but that’s the idea. I tried to make this clear but if there are questions, fire away.

Enjoy!

Eric
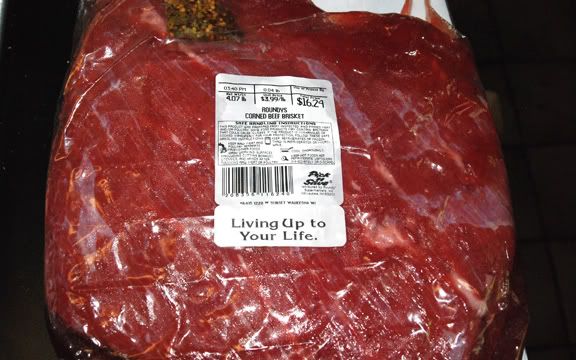
This is to be avoided if possible. Try to find evenly thick pieces.
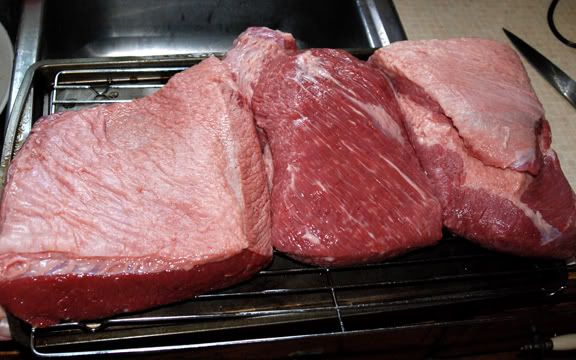

After soaking they need to be patted dry.
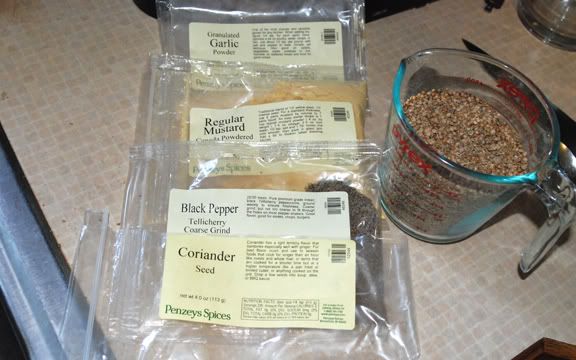

Soaking the excess salt out of the cured Brisket.
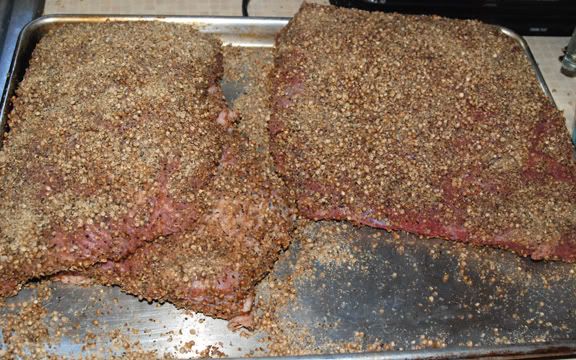

After each piece is spiced heavily, they should sit out for a while to warm to room temperature. The spices
will stay on better if you wait a while. Optionally you can wrap them in plastic wrap overnight in the refrigerator.
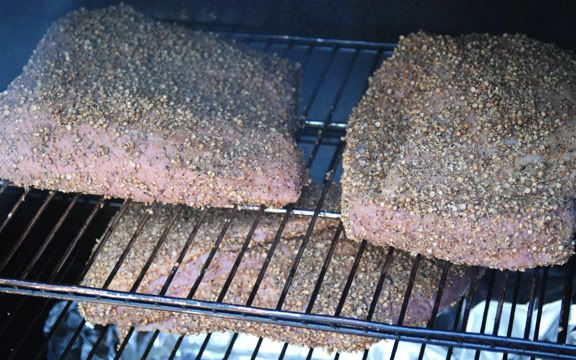

Loaded and ready to go. The smoker is warmed up to temperature already.
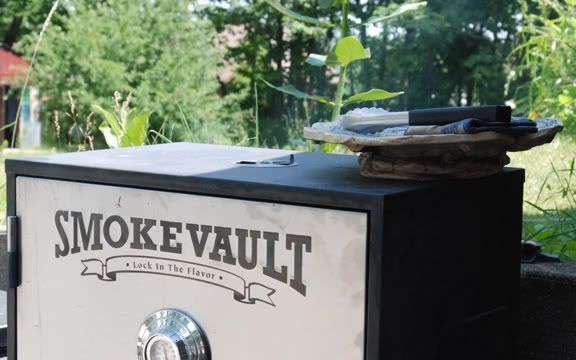

Just a small amount of smoke is all you need. I leave the top vents wide open.
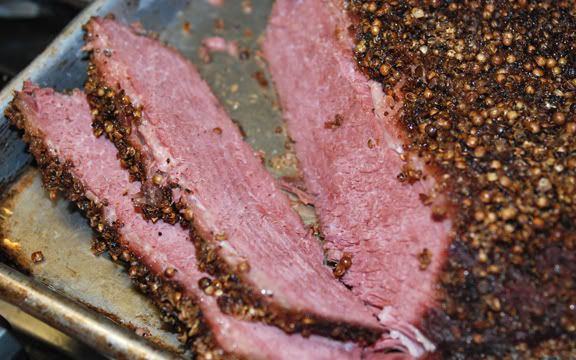

Notice I cut the first slices on the grain and not across the grain. This is a common error.
Be sure to check the grain on the bottom and cut across (at 90 degrees).
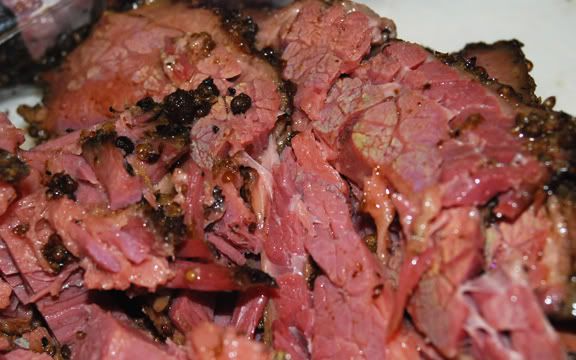
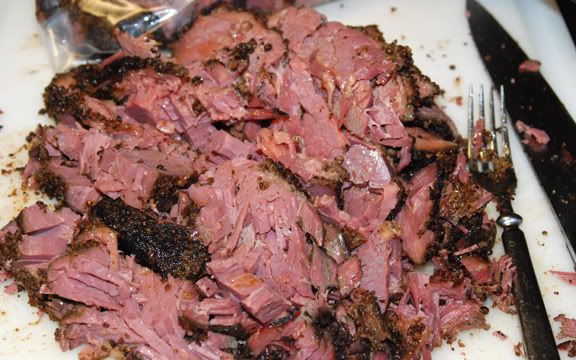


Pages