The Fresh Loaf

A Community of Amateur Bakers and Artisan Bread Enthusiasts.

Most bookmarked

dmsnyder's picture
dmsnyder

Sourdough Bagels for breakfast this morning (Jan. 2, 2019)

Sourdough Bagels

(adapted from Hamelman's bagel formula in Bread)

David M. Snyder

January 2, 2019

Almost two years ago, I converted Jeffrey Hamelman's formula for bagels to sourdough, although I did continue to spike the dough with instant yeast. Since then, I acquired my Mockmill 100 and have been baking almost everything with at least some freshly milled flour. Today, I baked a batch of bagels using 24% home-milled whole white wheat. The rest of the flour was Breadtopia's "High-protein Bread Flour." These are by quite a bit the best bagels I have ever made. They may be the best I have ever eaten.

Total Dough


Ingredient

Wt (g)

Bakers' %

High-protein bread flour

705

76

Whole white wheat flour

223

24

Water

538

58

Barley Malt Syrup

5

0.5

Salt

18

2

Instant yeast

11

1.2

Total

1500

161.7


Makes 13 113 g (4 oz) bagels.

Note: For this bake, the High-protein bread flour was from Breadtopia. The whole white wheat flour was freshly milled using a Mockmill 100.


Liquid Levain


Ingredient

Wt (gm)

Bakers' %

Hi-protein bread flour

200

100

Water (85ºF)

200

100

Active liquid levain

80

40

Total

480

240

  1. Dissolve the levain in the water.

  2. Add the flours and mix thoroughly.

  3. Place in a clean container and ferment until ripe. 8-12 hours, depending on vigor of your starter and the ambient temperature – 76ºF is ideal. (For a liquid levain, this means the surface is bubbly and wrinkled. It should smell fruity, not like raw flour and not sour.)

  4. If not ready to mix the final dough, the ripe levain can be refrigerated for up to 3 days.


Final Dough


Ingredient

Wt (gm)

High-protein bread flour

520

Whole white-wheat flour

223

Water (85ºF)

353

Barley malt syrup

5

Salt

18

Instant yeast

11

Liquid levain

370

Total

1500


Procedures

  1. In the bowl of a stand mixer, place the water, ripe liquid levain and malt syrup. Mix at low speed until these ingredients are well-blended.

  2. In a separate clean bowl, combine the flours, salt and instant yeast. Add this mix to the liquid ingredients a third at a time, mixing each addition at low speed until well-blended before adding the next.

  3. Mix at medium speed until an early gluten window forms (6-8 minutes).

  4. Transfer the dough to a lightly floured board. Form into a ball and place in a lightly oiled clean bowl. Cover tightly and ferment at 76ºF for one hour. The dough should be almost doubled in volume.

  5. Transfer the dough back to the board and divide into 113 g (4 oz) pieces.

  6. Pre-shape into rounds and allow to rest, covered with a towel, for 20 minutes or so.

  7. Form bagels from each piece. Degas gently. Form a tube, as if shaping a baguette. Roll each tube into a cylinder (not tapered) about 12 inches long. Wrap this around your open hand, with the ends overlapping under your palm by 2-3 inches. Roll your open hand back and forth on the board to seal the bagel. If it sticks, flour the board lightly. If it slides, wipe the board with a very slightly damp towel.

  8. Place the bagels with at least an inch between them on parchment-lined baking sheets sprinkled with semolina or coarse cornmeal. Cover with plasti-crap or place in a food-safe plastic bag and refrigerate for at least 6 hours or overnight. (I find quarter sheet pans most convenient. Each holds 6 bagels.)

  9. Pre-heat the oven to 500ºF (with an optional baking stone in place).

  10. In a large sauce pan (4 quart or larger), bring water to boil with 2 tablespoons of barley malt syrup.

  11. Take as many bagels as you can bake at one time out of the fridge.

  12. Boil the bagels right out of the fridge, 3 or 4 at a time, 15-20 seconds on each side. They should float.

  13. Remove the bagels to a cooling rack placed over a sheet pan. If topping, press the top or both top and bottom, if desired, into a pie tin containing the topping of choice. (If the bagels' surface is too dry for the toppings to stick, place a damp paper towel on a baking pan or another pie tin. Put the bagel on this for a moment before pressing into the topping mixture.)

  14. Then place the bagels on a clean, parchment-lined baking sheets sprinkled with semolina or coarse-ground cornmeal with at least one inch between them.

  15. Repeat steps 10. and 11. until all the bagels have been boiled and topped. (Note: If you cannot bake all the bagels at once, leave the ones you cannot accommodate in your first bake in the fridge until the first batch has been baked, then repeat steps 9.-11. with the remaining bagels.)

  16. Bake for 15-18 minutes, until the desired degree of brownness has been achieved.

  17. Cool on a rack for at least 30 minutes. Those that are not to be eaten right away can be frozen for later consumption.

These were baked this morning, so freshly baked for breakfast. I had one half with a lox shmear made yesterday ... 

I don't know how my local Whole Foods Market knew I would be baking bagels today, but yesterday, for the first time I can remember, they had genuine Great Lakes Smoked Whitefish! So, that's what I had with the other half bagel for breakfast. 

Very yummy stuff!

For your interest, this was not actually my first bake of 2019. Yesterday, I baked some more multi-grain sourdough, which continues to be our favorite "daily bread." You can see it here: https://www.instagram.com/p/BsJ7lDLjnSc/?utm_source=ig_web_button_share_sheet

Happy New Year to all my Fresh Loaf friends, and Happy Baking in 2019!

David

not.a.crumb.left's picture
not.a.crumb.left

Over-proofing, under-proofing sourdough or just bad shaping...what does it look like?

Hi, 

I am baking Sourdough since November and managed to get a couple of very good loaves done with a great crust and oven spring and even scoring and ears. That often happens when I do a long cold bulk fermentation in the fridge overnight and then shape and 2nd proof the dough and then bake. A bit like the recipe and process in url below only that I do not do the 2nd day retard in fridge in bannetons but bake on 2nd day with good results.https://thehappyfoodie.co.uk/recipes/no-knead-sourdough

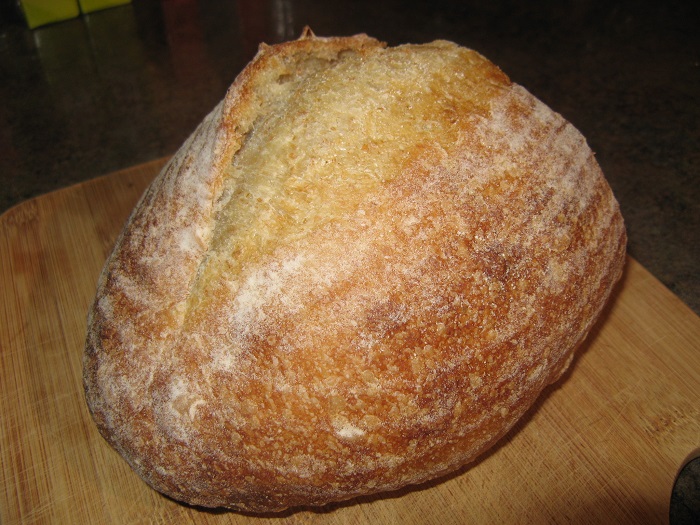
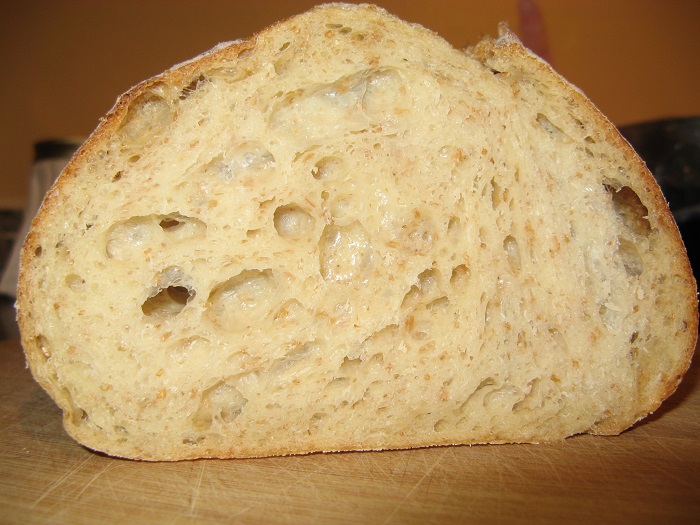
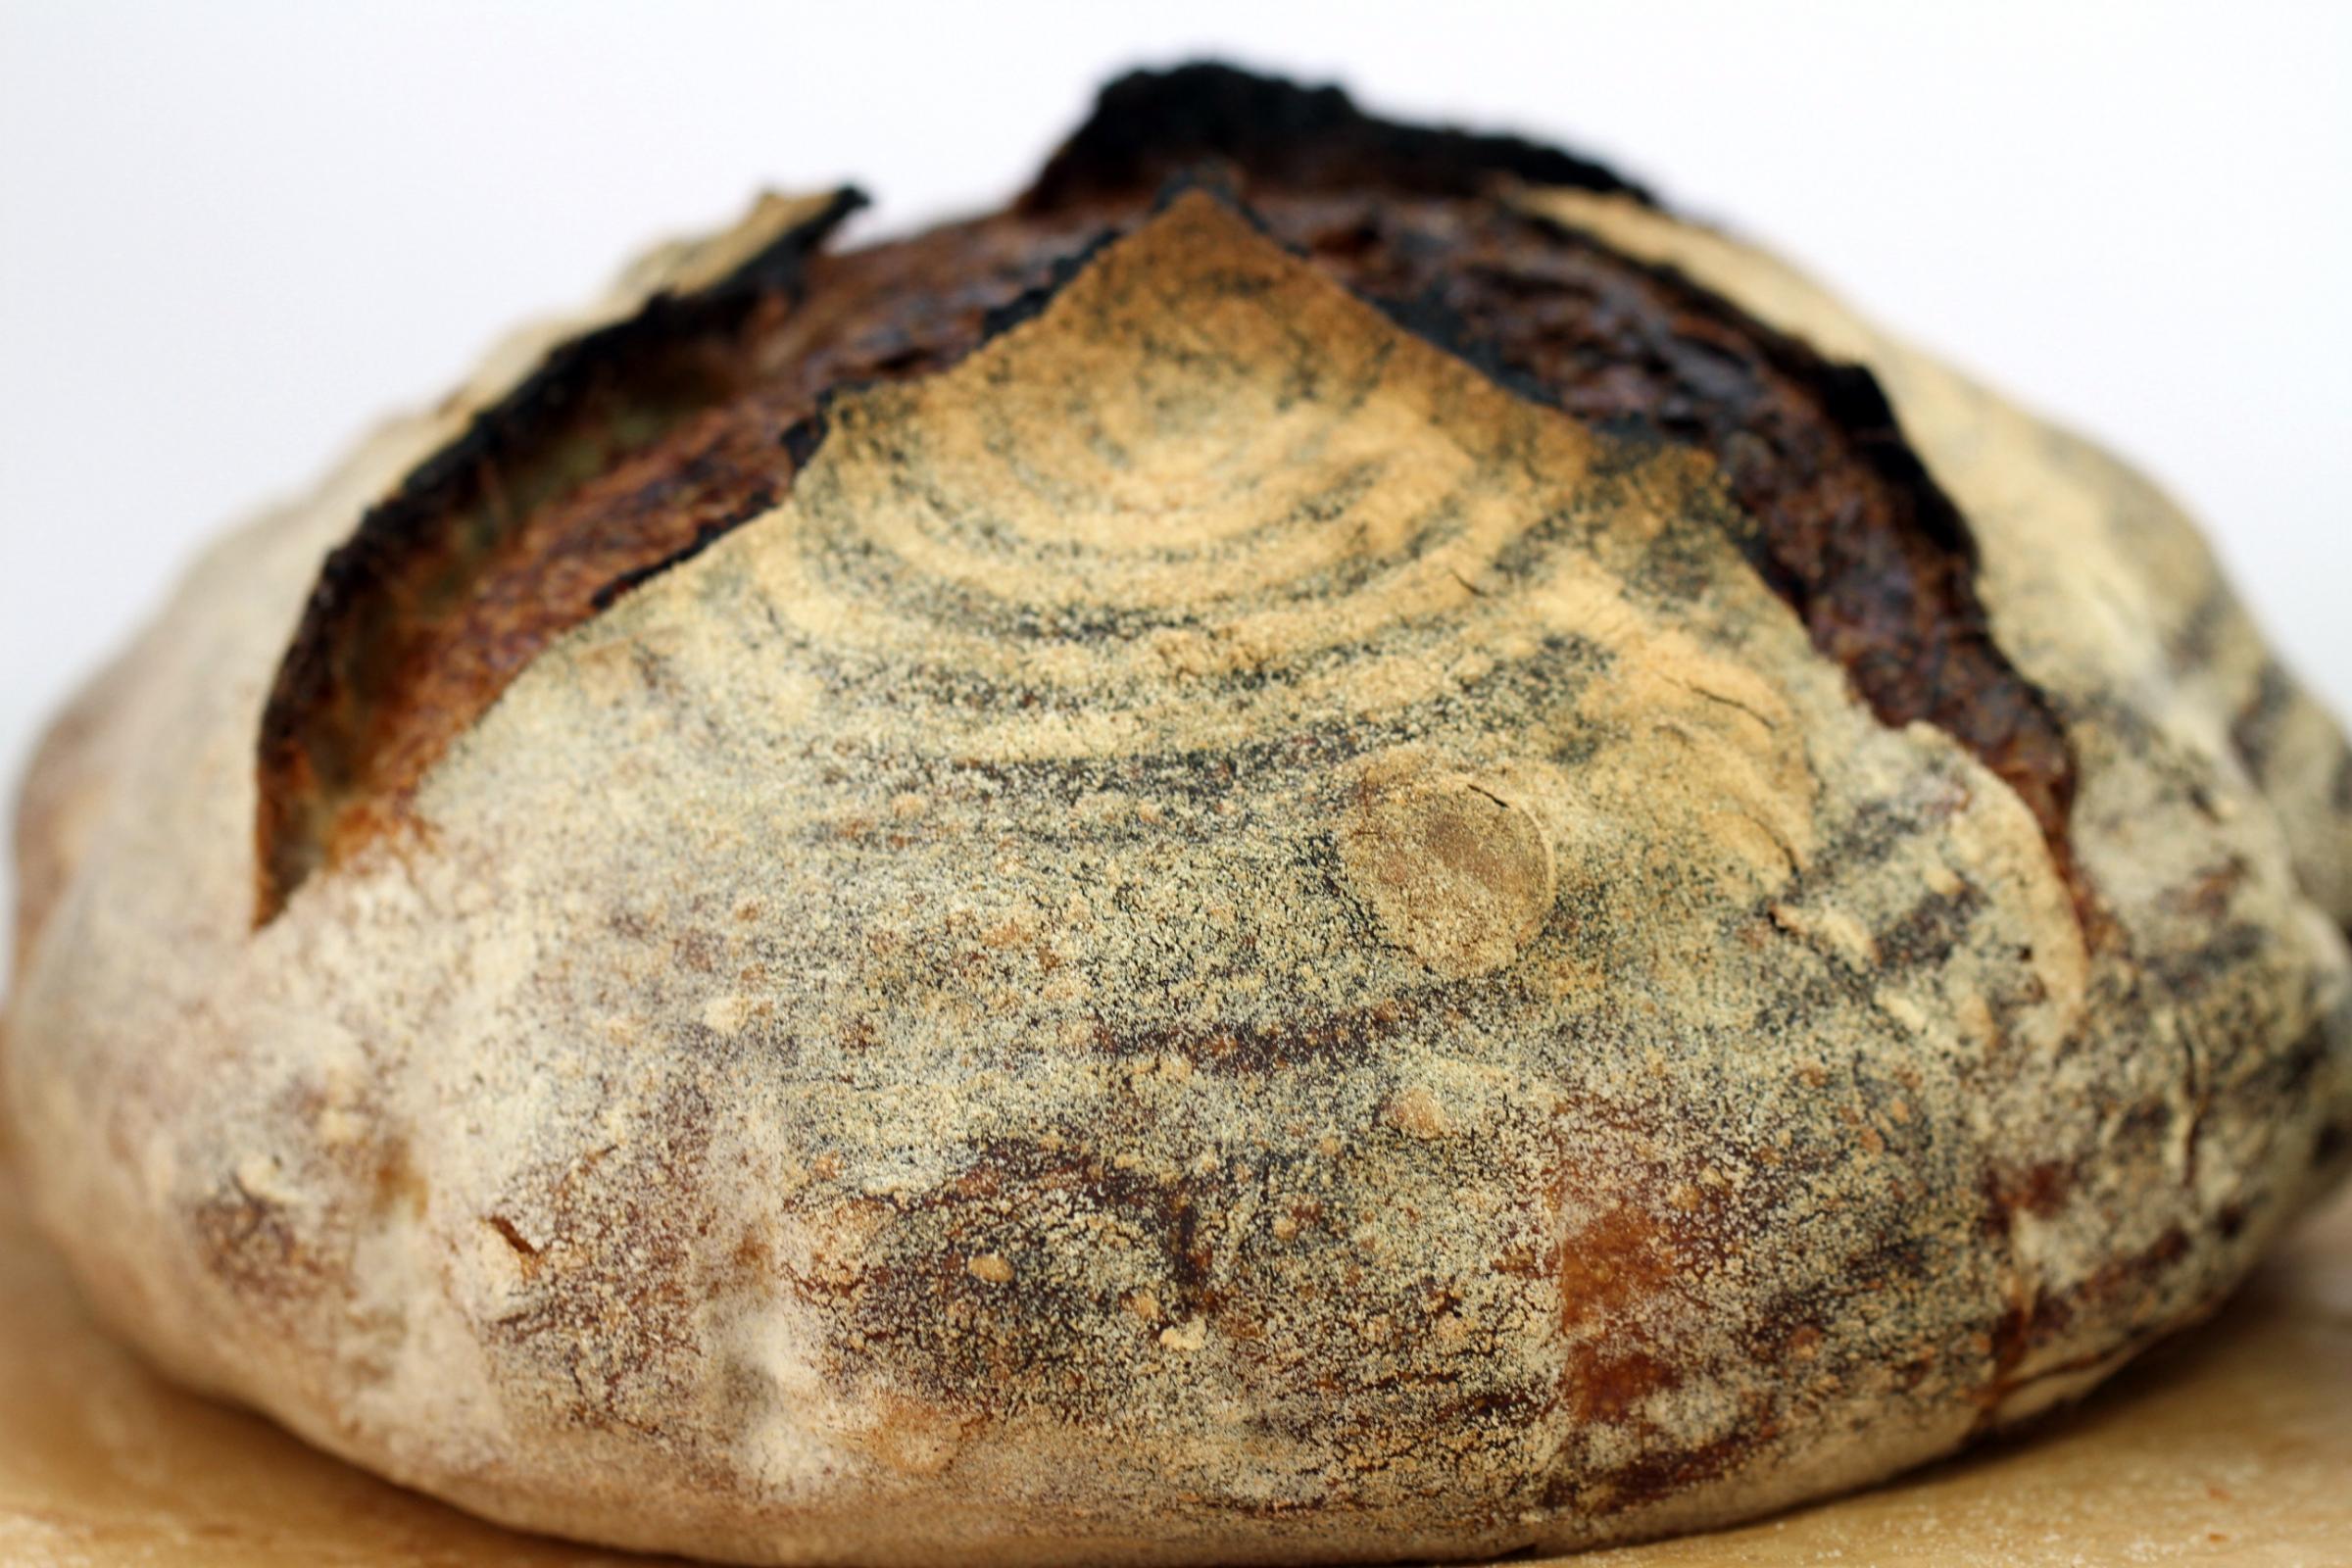
However, if I try the stretch and fold method and then retard in the fridge method overnight as in the Tartine book or in Vanessa Kimbell's recipe from Sourdoughschool.co.uk I most of the time end up with a flatish looking loaf with very little oven spring as you can see in the photos. I can eat it but it is nothing compared to some of the good results I had but I am not consistent in outcomes which is infuriating. I seem to get elasticity in the dough and also thought I am getting better with shaping but then again this morning ...the loaf as in picture!!!

Also, although I am getting better at shaping and creating tension - so I thought - when I score the bread it tends to flatten and loose shape. It that a sign of bad shaping and do I need to create more tension?

Sorry for all these question and I know in the end it just means practise, practise and to be patiens. Any tips, much appreciated.

Danni3ll3's picture
Danni3ll3

Toasted 10 Grain Porridge Sourdough with Sprouted Rye

I really enjoy using multigrain cereal in bread and thought I would combine it with some rye sprouts. So here goes:

1. Sprout 75 g of rye berries. This took 3 days.

2. Toast 75 g of Bob's Red Mill 10 grain cereal and soak overnight in 140 g of boiling water. The next morning, stir in 30 g of kefir and let sit for a few hours.

3. Autolyse all of the above with 650 g water, 550 g no additives unbleached flour, 202 g white whole wheat flour, 100 g fresh milled red fife flour and 100 g Robin Hood Multigrain Best for Bread flour. Let sit for approximately one hour.

4. Mix in 22 g of sea salt and 266 g of 80% levain. (I recalculated to see what my levain was since I do 3 builds at 100% and one build at 80%, and it is actually a 84% levain but 80% is close enough!).

5. Do four sets of folds 30 minutes apart and let bulk ferment for a total of 3.5-4.5 hours or until doubled. I do this in my oven with the light on. The batch that I put into the oven doubled in 3.5 hours, the one that I left out on the counter for 2 hours before putting into the oven took 4.5 hours. For some reason, this was faster than usual. 

6. Divide into 3 770-gram loaves, preshape, rest and do a final shape. Place in bannetons and into fridge for a 12-14 hour proof. 

7. Set the oven on convection bake, Preheat oven and Dutch ovens to 475 F, load dough in pots, and immediately drop temp to 450F for 25 minutes. Remove lids, switch the Dutch ovens from lower to upper rack and vice-versa, drop temp to 425 F and bake for another 25 minutes. I baked them a little bit darker than last week. 

Crumb shot coming later! We haven't cut into them yet!

Doc.Dough's picture
Doc.Dough

In-oven slash dynamics video

For about the last year I have been working to understand exactly what is going on when a properly proofed and slashed loaf is baked with steam. What is the role of the steam?  What is the role of the yeast?  How does hydration and proofing impact the results?  Deep slash or shallow slash? What are the differences between large and small loaves? ...

After a number of false starts, I have produced a short video showing what is going on. It is annotated but not narrated. I offer it for critique.  What is missing?  And what questions are not addressed?

You can find it at:

Slashing 3

Doc


Abelbreadgallery's picture
Abelbreadgallery

Pan de cristal / Glass bread

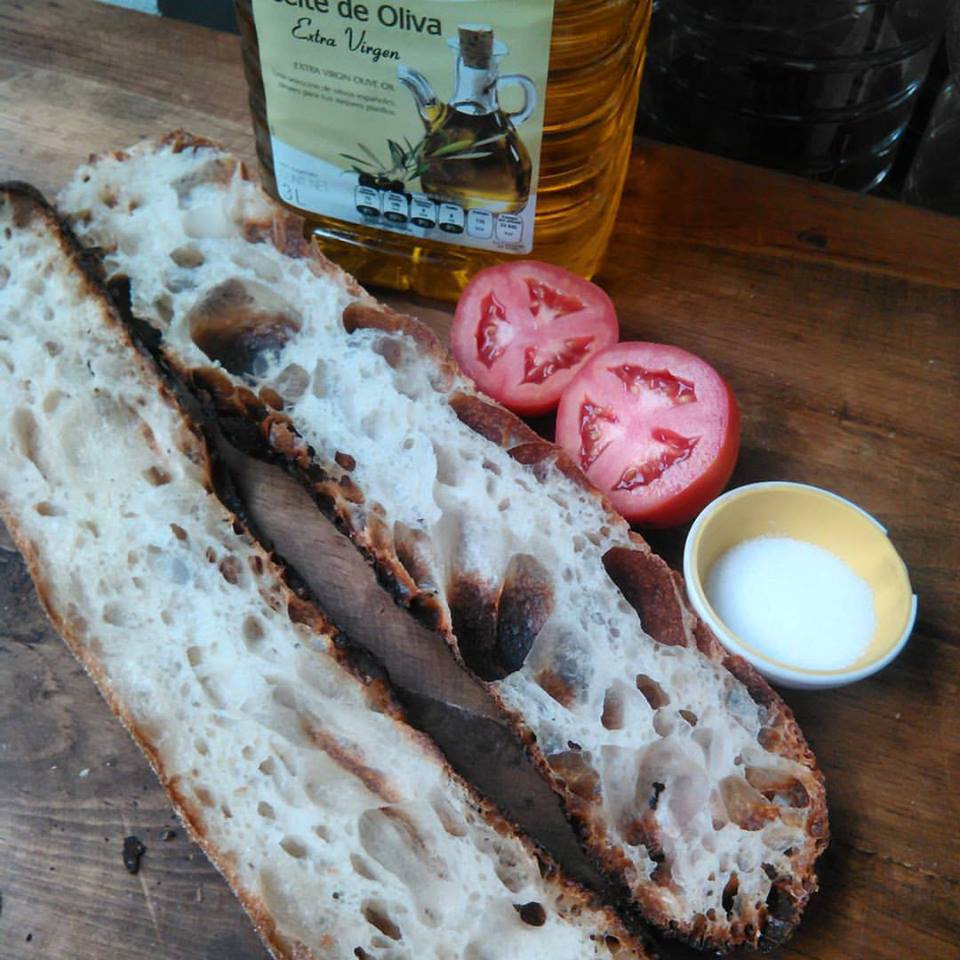
If you have visited Barcelona or the Catalonia region, maybe you have tasted Pan de Cristal, which is the local version of the ciabatta bread. I say it's a version because there are many things that make this bread so special. The main difference is that the crust is thinner, crispier and more delicate than a ciabatta, and the crumb is lighter and more opened than a ciabatta. And, how do you get this? More water (around 110-120% hydration), and just a small quantity of sugar and olive oil. Sugar makes the crust thinner and crispier. That's why this bread is called Pan de Cristal (Glass bread), because it's so delicate that when you want to slice it, it breaks like a cup of glass. Olive oil not only brings mediterranean aroma and flavour, but also changes the structure of the crumb.

This bread was developed around 10 years ago by a local bread company. The name is copyrighted. They deliver this bread, frozen, not only to local restaurants but also to anywhere in the world. In fact I met a businessman from Texas that bought this bread until he learned how to make it.The atributes of this bread make it very special for sandwiches and tapas with tomato spread, olive oil, serrano ham, etc. The shape is long and wide, quite flat.So you don't really have to shape, just divide, and stretch with your fingers and let the magic happen.

You can use sourdogh, yeast, or a combination of both, which is the best option in my opinion. According to my experience, you get better results working this dough in the straight way, without retarding in cool room. It's a just personal point of view according to my daily work.

Enjoy, have a nice baking day.


pjkobulnicky's picture
pjkobulnicky

Naturally leavened panettone

I have been making panettone for some years now but I have always done them with commercial yeast. I've always wanted to try to do them with natural leavening but everything i read about such recipes seemed to indicate that doing them was a life's work.  So, since I am retired and my life is fairly free and clear I thought I'd give it a go. I was also intrigued by this recipe: http://http://www.academiabarilla.com/italian-recipes/regione-lombardia/panettone.aspx 

It is one of their regional recipes, roughly translated from Italian and what can only be called a "Nonna" recipe ... some of this, a few of those, etc. There are lot of places where you just have to figure it out.  But, I was intrigued by the way the sugar and eggs were added as an emulsion, by the several dough builds and by the lack of any bulk fermentation of the final dough. 

The final and sole proof is in the molds themselves and I did mine at 55-60 degrees F for about 22 hrs. The dough barely came to the top of the molds at baking time but had spectacular oven spring. 

I will include my revised recipe below. As I warn in the recipe, this is not a dough for the challenged mixer.  My Bosch struggled.


(NOTE after original post) the starter in the recipe below should be the Italian Sweet Starter described here: 

http://www.sfbi.com/maintaining-an-italian-starter.html )


Paul


PANETTONE

Makes three large loaves


INGREDIENTS:

3 lb all-purpose flour

10 oz butter

¾ lb granulated sugar

milk ~ 7 T

7 oz sultanas

½ lb sourdough starter

4 1/2 oz candied orange

10 “large” egg yolks

3 “large” eggs

1 tsp vanilla

Zest of one orange and one lemon

1/2 - 1 oz salt

package 12” long bamboo skewers


PREPARATION:


Note … this is based on a folk recipe from Barilla. That recipe made a number of unstated assumptions. The recipe below is my more detailed interpretation.


Morning day 1


Early AM: 


Build 8 oz active starter at about 50% hydration (approximately 4.0 oz flour, 2.0 oz water and 2.0 oz active Italian Sweet starter.  Mix into firm ball and let rise until doubled in volume, about 2-3 hrs. When doubled move to first dough.


First dough by hand:

Put 5.5 oz. of flour onto the work surface, crumble the sourdough starter in and slowly work in 4T warm water, 1 T at a time.  Knead to a firm dough. Shape into ball. Put in a bowl to double, about 3 hours at 75 F. Move to second dough. 


Second dough by hand:

Put 9 oz. of flour onto the work surface and place the risen dough in the centre. Incorporate the first dough into the flour while adding about 7 T of milk, one T at a time.  Knead thoroughly into a smooth dough. Put in a bowl and cover with plastic wrap and let rise overnight at 55F. It should triple.


Dice the candied citron and orange, soak the sultanas (and citrus if it is dry) in brandy overnight.


Morning day 2


Set the fruit to drain thoroughly.


In a bain-marie, dissolve the 8 oz sugar into 4 oz warm water to make a syrup, then add the whole eggs and egg yolks and cook while whisking only until all is fully incorporated, smooth and foamy, not to a custard stage. Cool and whisk in the vanilla.  


Final Dough in a stand mixer:  (note, this is a significant dough that requires a tough stand mixer).


Pour 2, lbs of flour into the mixer. Add salt. Put 2 oz. of flour on the work surface. Put the second dough on the flour and cut it into small pieces. Put the second dough and any remaining flour from the work surface into the mixer.  Add the contents of the bain-marie and mix. This is a very stiff dough and your mixer may strain. If so, add water one T at a time up to 3-4 T. Mix until dough is at windowpane stage of gluten development. Then add the softened butter, a bit at a time. Continue mixing until you have a satiny dough. Add the zest and mix until incorporated. 


Turn the dough out and spread. Incorporate the orange and sultanas using the letter fold method followed by some additional folds to distribute the fruit as evenly as possible. 


Divide the dough into three equal pieces (about 2.2 lb each)  shape into rounds and place into 7 inch panettone molds. Place them in a room temperature, draft free place covered with plastic to keep the tops from hardening (you may need to very lightly brush the tops with water or finely mist during the long rise).  Let rise until the centers nearly reach the tops of the molds. At 55-60F this may take 20-24 hrs.


Preheat oven to 400F


When the oven its up to temperature, make a large cross incision on the surface of each panettone, insert a knob of butter into the cross then place loaves into the oven. After ten minutes in the oven turn the heat down to 375  and after 10 minutes more  carefully rotate the loaves and turn the heat down to 350.  Bake an additional 25 minutes. If the tops appear to be getting too dark, place aluminum foil caps on them. 

While baking suspend 2 stout( 1X 3’s worked for me)  boards across the backs of two chairs such that there is about a 7 inch gap between them. When the panettone are done, remove them from the oven and immediately insert two skewers through the panettone molds, parallel to each other and about 1 inch from the bottom.  Invert the panettone and hang each from the boards by their skewers. Let cool hanging. When cool they may be placed upright and the skewers removed.


Lazy Loafer's picture
Lazy Loafer

Challenge - 123 bread

I needed an easy levain-based dough that I could use as a base for testing various flour combinations, add-ins, methods, etc. and 123 bread seems to fit the bill - 1 part fresh levain, 2 parts water and 3 parts flour, with 2% salt. I've used this to test two different starters to see which one is more active, and I also use it when I'm traveling and want fresh bread without a lot of fuss.

It occurred to me that this would also be an excellent challenge for a couple of reasons

  1. It controls the basics while still allowing for a lot of creativity, and
  2. the resulting recipes would be an awesome primer for newby sourdough bakers!

So, in the spirit of the second point, here is your challenge:

  • 100 grams of 100% hydration wheat (can be AP, bread flour and/or whole wheat flour) levain
  • 200 grams of water or other liquid of your choice
  • 300 grams of whatever flour or combination you come up with. The control is that it should be fairly easy to obtain and be easy for a sourdough novice to work with (so, off-the-shelf stuff rather than home-sprouted, hand-milled einkorn, for example)
  • Any spices or other dry(ish) add-ins that you wish, or wet add-ins that don't substantially increase the hydration and make it harder to handle
  • To keep a level playing field, follow this method generally:
  1. Mix flour(s), water (or other liquid) and levain and let sit for 30 minutes
  2. Add salt and other add-ins; mix by whatever method you prefer (but again, make sure it's fairly easy for newbies to follow)
  3. Develop dough, then bulk ferment (short, long or retard)
  4. Pre-shape, rest, then shape and proof (short, long or retard)

I've done a few of these lately. Here is the basic 123 dough with a little whole wheat flour:

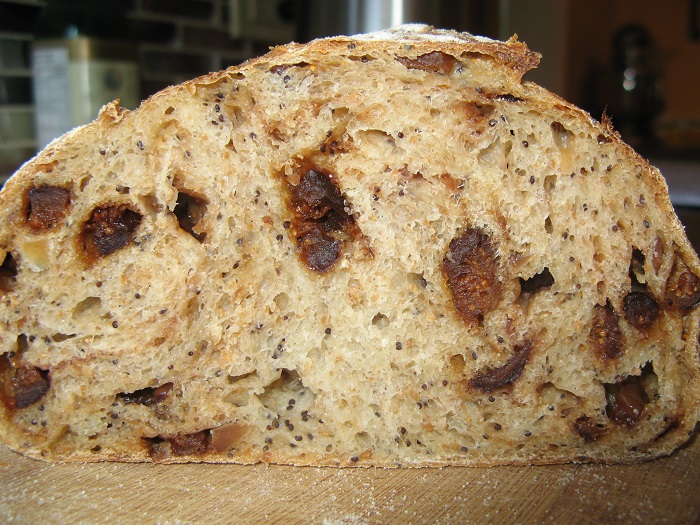
And for my latest 123 bread, check out my blog post here. Fig Nut 123 Levain!

So, whatcha got?


mwilson's picture
mwilson

Gluten: W, P/L and the problem with durum

Baking professionals in Italy commonly refer to the strength of flour by its W index, describing this as its “force”. Italian Millers provide much data in their flour specifications often including rheological properties recorded by the Chopin-Alveograph. Testing performed by the Alveograph involves forcing air into a piece of dough causing it to expand like a balloon until it bursts, at which point the test is complete. The data is recorded on a graph as a line measured in millimetres. The pressure required and therefore resistance of the dough is measured as P. The final size of the dough is measured as L, this being its extensibility. The area under the line is represented by W which indicates overall strength.


The index of W.

Up to W170 (weak):
Biscuits, waffles, and tender baked sweets. Béchamel and thickened sauces.

From W180 to W260 (average):
French bread, bread rolls, pizza, pasta.

From W280 to W350 (strong):
Classic bread, pizza, pasta, baba, brioche.

Above W350 (very strong):
Made with selected types of wheat, that are used to reinforce weaker flours. Ideal for highly enriched doughs subjected to long leavening, often referred to as “Manitoba”.


Extensibility, elasticity and quality.

Gluten consists of proteins gliadin and glutenin, the latter providing the main structure which supports the dough. Flour richer in gluten is attributed to strong flour, but the quantity of gluten does not determine everything, its characteristics are also important. Strength is more dependent on the compositional properties of gluten. Therefore, two flours may have the same amount of gluten, though one may be stronger and the other weaker. (1)

Gliadin in contact with the water forms a fluid sticky mass, while glutenin absorbing water, forms a compact mass, elastic and resistant. When these proteins are hydrated, their properties interact to provide the viscoelastic properties of gluten. In the case of strong flour, it must contain a majority of glutenin as these proteins provide the resistance within the elastic property. Flour that is high in gluten, but consisting mainly of gliadin cannot be very strong however. (1)


Resistance extensibility ratio (P/L) and Durum

Instead of referring to them individually the balance between extensibility and resistance can be expressed with the P/L ratio, the optimal being between 0.5 – 0.6. A P/L ratio higher than 0.7 characterises flour that is resistant, while values lower than 0.4 are weak and extensible. Soft wheat flour is naturally more extensible while hard wheat flours are naturally more tenacious, this is especially true with durum, the hardest wheat of all, where a typical P/L ratio can be above 1 and even exceeding 2.

Durum wheat doughs are distinguished by a high resistance to deformation and consequently limited extensibility. To be judged sustainable for bread making the semolina must have a protein content >12%, a good farinographic stability and alveograph P/L index value below 1. However it should be noted that the bread-making process preferred in the case of durum wheat requires the use of sourdough. A case in point is the pane di Altamura. The proteolytic activities of semolina and/or of the lactobacilli may produce considerable changes in the rheological properties of the gluten network, reducing the natural excessive elasticity of dough made from durum wheat.’ (2)


Numerous factors brought about by fermentation and inclusion of other ingredients will affect the properties of gluten, even water quality. Excessively hard water, rich in minerals will make gluten more tenacious reflecting an increase in the P/L ratio. Soft water will encourage the opposite effect and make dough softer and more extensible which would display a lower P/L ratio.

(1) Giorilli
(2) Handbook of Food Products Manufacturing

Edited [2021.03.19]

Flour.ish.en's picture
Flour.ish.en

Forkish Overnight Country Blonde (vs. Tartine Basic Country Bread)

This is the first time I bake any Ken Forkish’s bread. This is the first time I post on the Fresh Loaf blog, although I’ve read and learnt so much from a lot of the active participants here. Rightly or wrongly, I feel I can’t be a complete bread baker, among other things, if I’ve never tried Forkish’s recipes. I started baking a lot of Chad Robertson’s breads after I read his two books, Tartine Bread and Tartine Book No.3, a year ago.

At the same time, I got a new heavy-duty dual-fuel range that is wide enough to bake full size baguettes. Most of these breads were posted on my blog (http://flourishen.blogspot.com). Overnight country blonde was the first I baked from Forkish’s Flour Water Salt Yeast. I figure the best start is to bake something closest to what I am most familiar with,which is the Tartine basic country bread. I followed the overnight country blonde recipe to a T, except for the part that you are not supposed to score the dough, which I did.

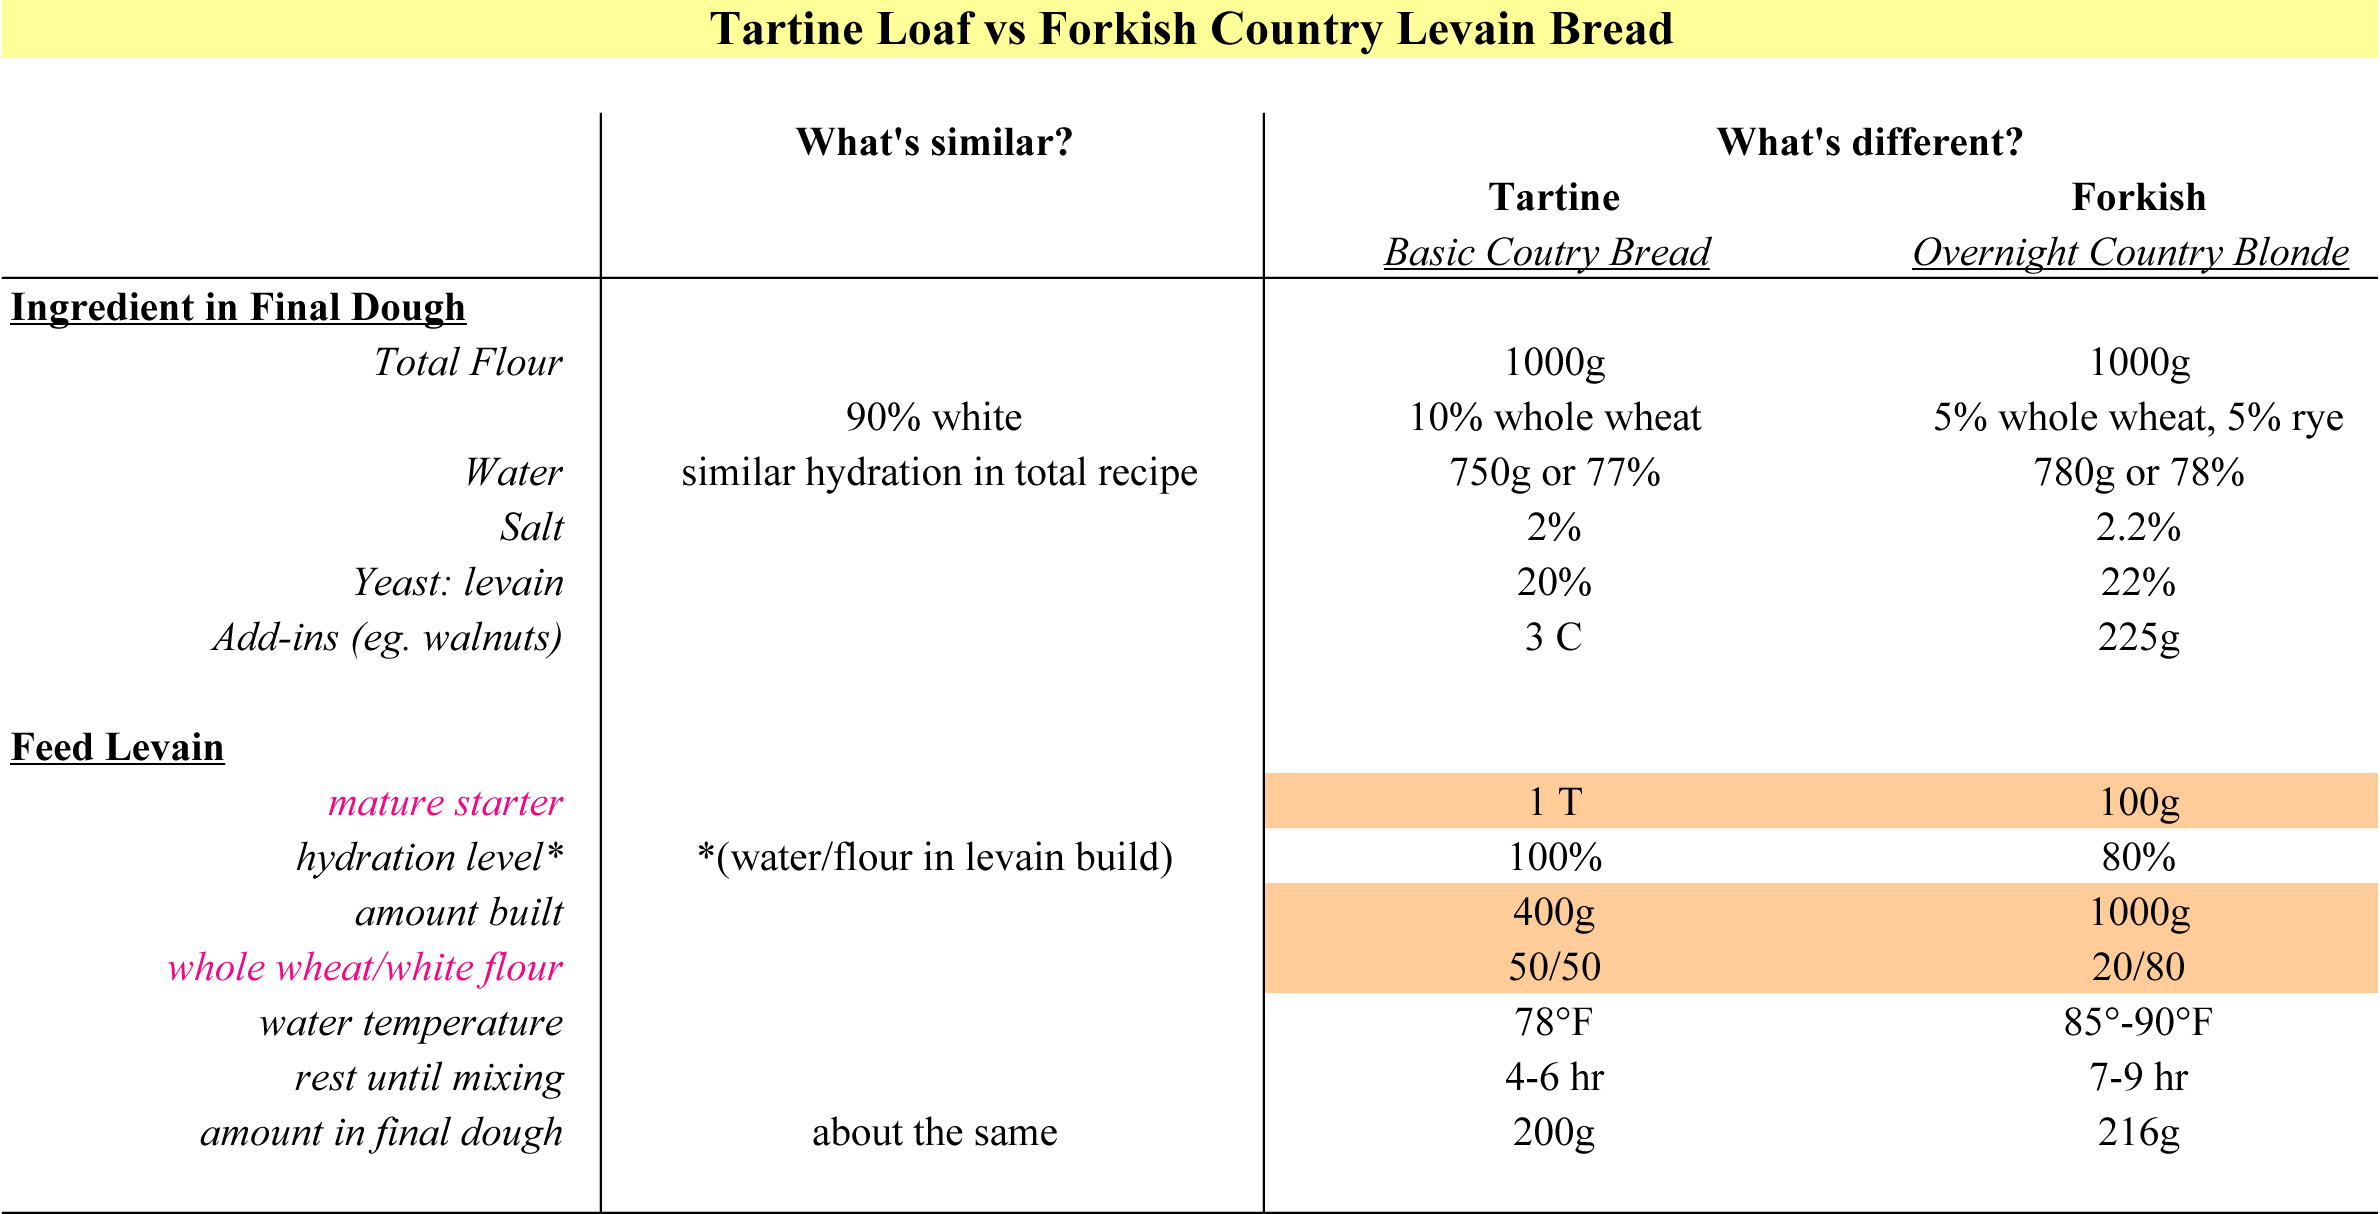
There are a lot of similarities between Forkish and Tartine’s approach, but there are enough differences, e.g. in building the levain, the fermentation process and baking temperature. To keep track of what I was doing and understanding the unique approaches, I put all the steps side by side in a spreadsheet.

Here are the comparisons and my takeaway from having baked the overnight country blonde and many variations of the Tartine country bread.

http://flourishen.blogspot.com/2015/05/overnight-country-blonde-levain-bread.html

  • Both Tartine basic country bread (Tartine) and Forkish country blonde (Forkish) are excellent. It'd be akin to hairsplitting if I say that one is better than the other.
  • Tartine and Forkish have similar hydration level of roughly 77-78% using 90% white flour in the total flour amount. 
  • While Tartine uses one tablespoon of starter to build 400g of levain, Forkish uses 100g to build 1000g, which results in a greater amount of levain being discarded. 
  • Salt and small amount of water are added to the Tartine dough (levain and all) after 30 minutes of resting period, at which point the dough is relaxed, cohesive and easy to work with. Meanwhile salt and all of the 216g of levain are incorporated into the autolyse mixture to make the final Forkish dough, which I find much wetter and stickier to handle.
  • Bulk fermentation is 3 to 4-hr at 80°-85°F for Tartine and 12 to 15-hr at 77°-78°F temperature for Forkish. The longer fermentation of Forkish dough necessitates baking the bread the next day, spanning a two-day process from the time you mix the dough.
  • The longer bulk fermentation of the Forkish dough imparts a much sourer note in the finished loaf.
  • The higher oven temperature in baking the Tartine dough often results in a thicker and burnished crust, especially on the bottom.

Now I need to integrate these approaches in order to make better breads in my own kitchen setting. I want to move away from baking from recipes and develop a more intuitive feel for my breads. Any suggestions from someone who has gone down this path before?

Brioche Nanterre

Brokeback Cowboy's picture
Brokeback Cowboy

Description

I've applied here instructions for a classic Brioche Nanterre. This specific brioche is baked in a loaf pan with 8 individual portions which are brilliant for setting at a tea service to be easily pulled apart. This loaf does break from convention in that it is egg washed twice. Once before rising and the second before going into the oven. This creates a richer and more luxurious color as well as shine. I also break up the ingredients list in to three sections consisting of;

Pre-Ferment (Poolish)

Main Dough

Egg Wash

This is to clarify the repetition of ingredients without appropriate spacing. Best of luck in your baking and may the odds be forever in your favor.

Summary

Yield
800g Loaves
Prep time20 minutes
Cooking time40 minutes
Total time1 hour

Ingredients

300 g
Whole milk (Poolish)
65 g
Fresh Yeast (Poolish)
300 g
Bread Flour (Poolish)
750 g
eggs (Main Dough)
1200 g
Bread Flour (Main Dough)
60 g
Sugar (Main Dough)
19 g
sea salt (Main Dough)
750 g
Unsalted butter (Main Dough)
50 g
eggs (Egg Wash)
5 g
Whole milk (Egg Wash)
1 ds
salt (Egg Wash)

Instructions

Pre- Ferment (Poolish)

1. Combine 300g Whole Milk, 65g Fresh Yeast and 300g Bread Flour. Mix until a batter forms and allow to rise at room temperature until the center falls in upon itself.

Main Dough

1. In a stand mixer combine 1200g Bread Flour, 60g Sugar, 19g Salt and 750g Eggs.

2. Begin mixing on low speed gradually incorporating the poolish until a mass forms.

3. Once the ingredients are combined raise mixing speed to medium-high (5 or 6 on Kitchenaid) and let mix for 5 minutes.

4. Gradually incorporate 750g of cubed room temperature butter in to the mass, mixing at a high speed until the dough releases it's self from the bowl.

5. Check temperature of dough which should ideally be 22-23C. Any higher and the butter will separate from the mass and create a greasy end product.

6. Remove dough from mixing bowl and cover with plastic wrap. Place bowl in 4C refrigerator overnight.

7. The next day, remove dough from bowl and cut in to 2- 800g balls. From this point shaping is up to you, however for the Nanterre shape one must cut each ball in to a further 8-100g pieces.

8. Gently round the balls and place in a lightly buttered loaf pan. Each loaf should consist of 8-100g balls arranged symmetrically in the pan.

9. For the egg wash; beat together 50g Eggs, 5g Whole Milk and a dash of salt.

10. Egg wash formed loaves

11. Cover in a plastic bag and allow to proof until risen roughly 1/2 inch above loaf tin tops. This will take about 1.5 - 2 hours.

12. Pre-heat oven to 380F.

13. Remove proofed loaves from bag and egg wash a second time making sure to evenly apply the glaze. Place in pre-heated oven and bake for 37-40 minutes. The loaves should be a rich mahogany color. To check the doneness of the loaf stick a small pairing knife in to the center and pull it out after a few seconds. If the knife is clean of batter it's done. Alternately you can check the internal temperature with a thermometer which will read over 205F.

14. Pull loaves from oven and unmould immediately. At this point you can glaze the loaf if you wish with any topping of your choosing. Some options are;

Melted jam, marmelade or jelly diluted with water to a point that it can be applied freely.

Sugar syrup, equal parts water and sugar.

Apricot glaze, diluted if necessary.

Once glazed many chefs may take the liberty to add a further garnish and this of course up to the creator's inclination.

Some options that would also work fashionably are;

Streusel, equal parts flour, sugar and butter.

Pearl Sugar or another coarse sugar.

Cocoa Nibs, Shaved Chocolate.

Candied Fruit.

Fresh Berries, arranged and dusted with icing sugar.

Candied or Fresh Flower Petals, such as violet or rose.

Notes

For the poolish a rule that applies to sweet bread baking is the 54 law.

The 54 law means that the liquid temperature, the room temperature and the flour temperature should all add up to 54C.

For example,

Your room temperature is 25C

The flour temperature is 15C

The liquid temperature would be x+(25+15)=54 so 54-30=15 so the liquid temperature would be 15C

This rule is completely unnecessary in a home kitchen however I thought I would include it for the more astute bakers.

Pages