The Fresh Loaf

A Community of Amateur Bakers and Artisan Bread Enthusiasts.

Most bookmarked

zolablue's picture
zolablue

Memo's Brown Bread

I had promised to post this recipe for ehanner so here it is.  This is the “brown” bread my grandmother used to make which we all loved so much.  She passed away 25 years ago and I never thought I would taste it again. 


Being a new bread baker I was determined to find out what recipe she used and duplicate it.  Thankfully, my dear Aunt was there to help me since it was my grandmother’s own and not from a recipe ever recorded.  As my Aunt told me, Memo (mee-moe), which was our name for our grandmother, baked this bread, before my Aunt, now 84, was born, in an old iron range heated by wood logs with guess and bigosh temps, as she says it. 


So you can see that it was a challenge for me to duplicate this.  Through emails my Aunt wrote from the very old hand-written notes of my grandmother and my Aunt’s own notes, I could begin.  It took me several very disappointing attempts but soon I discovered the missing link.  It was the type of graham flour and this is where I stress unless you use the Hodgson Mill Whole Wheat Graham flour or if you know of one that is identical to that in color, texture, and flavor this bread cannot be made properly.  I tried Bob’s Red Mill and it did not even come close and several regular whole wheat flours just wouldn’t do it.  There is something exquisitely yet mildly sweet in the Hodgson Mill graham flour that reminds one of a graham cracker flavor.  And I knew the instant I looked at the HM graham flour it was right.


You can shape the loaves however you wish but I had to do it the way my grandmother did, making the two balls for each loaf.  I can see her doing it in my head, and the first time this bread came out correctly I thought I would cry I was so happy.  It transported me back in time.  And the toast from this bread is simply the best.  I hope if you try it you like it, too.


  Memo's Brown Bread 

1 envelope active dry yeast

1/4 cup warm water (110° - 115°F)

2 1/2 cups potato water*

1 Tablespoon salt

3 Tablespoons sugar

1/4 Cup shortening

3 1/2 - 4 1/2 cups all-purpose flour

1 1/2 cups Hodgson Mill graham flour** (see important note below)


Sprinkle yeast on 1/4 cup warm water.  Stir to dissolve and set aside.


Place sugar, salt, and shortening in mixing bowl and pour hot spud water over this and cool. The potato water should be about the temp of a baby’s bottle, warm to the wrist, otherwise it can kill the yeast.


By Hand:  Stir 2 1/2 cups of all-purpose flour into bowl containing salt, sugar & potato/potato water to make a thin batter. Add yeast and beat well. Then add 1 1/2 cups graham flour and mix well.  Stir in remaining all-purpose flour - 1 to 2 cups – until it can be handled on a floured board or counter. Knead in more flour until you have a smooth ball that no longer sticks to counter.


By Stand Mixer:  Stir 2 1/2 cups of all-purpose flour into bowl containing salt, sugar & potato/potato water to make a thin batter. Add yeast and beat well. Then add 1 1/2 cups graham flour and mix well.

Stir in remaining all-purpose flour - 1 to 2 cups - to make a dough that leaves the sides of the bowl.  Knead/mix until smooth and elastic, about 7 - 10 minutes.  

Place in greased bowl; turn dough over to grease top.  Cover and let rise in warm place until it doubles, about 1 1/2 hours.


Punch down.  Turn onto board and divide in half; round up each half to make a ball. Cover and let rest 10 minutes.


Shape into loaves and place in 2 greased loaf pans.  Cover with cloth or sheet of plastic wrap and let rise until dough reaches top of pan on sides and the top of loaf is well rounded above pan, about 1 1/4 hours.


Bake at 350 degrees for 45 minutes, rotating half-way through if necessary.  Cover loosely with sheet of foil the last 20 minutes, if necessary, to prevent excessive browning.  Makes 2 loaves.


Brush melted butter over top of loaves upon removing from oven.  Allow to cool.


*I peel and slice, very thinly, one small potato and boil in 4 cups of water until very well done – usually takes about 15 minutes because of the size of the slices.  Then mash the potato in the water and usually the remaining water with the potato leaves the exact amount of liquid you need for the recipe – the 2 1/2 cups.  If you need to, add a bit more water if you don’t have enough. 


**You must use Hodgson Mill, whole wheat graham flour to be authentic to Memo’s bread, or if there is another brand that is exactly as Hodgson Mill.  Hodgson Mill is the only brand of graham flour I’ve found so far that is the correct coarseness, color of grain and flavor.  Other flours can be used but the entire flavor and texture of the bread is completely changed from what Memo used to make.  This is a taupe colored wheat bread not golden as with regular whole wheat.  It is beautiful and makes the best toast!


Community members have contributed some great information about baking naturally leavened breads. SourdoLady's pieces (who, as the name implies, knows a thing or two about sourdough) Wild Yeast Sourdough Starter and her Deluxe Sourdough Bread are among the most popular articles on the topic. JMonkey posted a great lesson on getting a sourer sourdough. Gaarp has also posted a wonderful sourdough tutorial. Other folks contributed some excellent recipes for sourdough pancakes and sourdough banana bread.

When I had my first starter going, I was able to write a couple of introductory articles on sourdough: When Yeasts Attack: A First Experience with Naturally Leavened Bread and More about Sourdough. These two articles contain enough information for an amateur baker to learn how to bake with a starter.

More recent forum posts, blog entries, and articles have included information on sourdough as well (and new information gets posted all of the time), so use the site search and look for terms like "sourdough" and "starter" to find the very latest.

Sourdough Lessons

SourdoLady's picture
SourdoLady

My Favorite Basic Sourdough Loaf

I bake a lot of sourdough bread. Over the past several months I have been trying a lot of new techniques and trying to perfect the quality of my loaves. The recipe below is how I am currently making my white bread. Next year I may have a whole different approach, as I am constantly learning and trying new things.

Deluxe Sourdough Bread

1 1/4 cups proofed starter
1 cup water
3 T. dry powdered milk
1 T. lemon juice
1/4 cup instant potato flakes
3 3/4 cups bread flour
1/4 cup white whole wheat flour
2 T. sugar
3 T. butter or margarine
2 tsp. salt

Combine the first 5 ingredients. Mix in the flour just until the mixture is a shaggy mass. Cover and let rest for 30 minutes. Add sugar, butter, and salt and mix until all is incorporated. Knead dough until it is smooth and satiny.

Cover and let dough rest for 45 minutes. Divide dough into 2 equal portions. Pat each dough portion out into a large, flat circle. Gently stretch and fold the left side over the middle, then the right side over the middle (like folding a letter). Pat down with the palms of hands and repeat the folding with the remaining two unfolded ends. Shape loaves, always keeping the folded side as the bottom. I do free-form oval loaves and place them on parchment paper.

Spray the loaves with Pam and cover with plastic. Place in the refrigerator overnight. The next day, take loaves out and let them finish rising at room temperature. They should be very light. Do not rush it or your bread will be dense.

While bread is rising, preheat oven and stone to 400� F. I also place a shallow pan of hot water on the bottom rack for steam.

When bread is fully risen, slash top and slide onto hot stone. If you don't have a stone, just bake on a baking sheet. After 10 minutes, turn the oven heat down to 375� F. When loaves start to show color, water pan can be removed. Bake until loaves are a nice golden brown. Time will vary according to the shape and size of loaf.

Cool on a wire rack. You can brush crust with butter while still hot if you like a soft crust.

The small addtion of white whole wheat flour that I use in this bread gives it an interesting depth of flavor that I like. It does not change the color of the bread. I don't know if white whole wheat flour is easily available just anywhere. I am fortunate to live in an area where wheat is grown and milled so I have easy access to various flours.


Hot Cross Buns! Hot Cross Buns!
One a penny,
Two a penny,
Hot Cross Buns!
If you have no daughters,
Pray give them to your sons!
One a penny,
Two a penny,
Hot Cross Buns!

My recipe below.

Hot Cross Buns are a popular Lenten tradition which are believed to have originated in England 150 years ago, though perhaps they are originally of pagan origin. Most commonly they are eaten on Good Friday. They are not made after Easter.

This year I baked my buns with raisins because that is what I had in the house. In past years I've used currants, which are excellent.

If your raisins or currants are dried out, soak them in warm water for 10 minutes before mixing them into the dough.

Hot Cross Buns

Makes 1 dozen buns

3 cups unbleached all-purpose flour
1/8 cup sugar
1 cup warm (90-100 degrees) milk
2 tablespoons melted butter
2 teaspoons instant (bread machine) yeast
1 teaspoon salt
1/2 cup raisins, currants, or dried fruit
1/4 teaspoon ground cinnamon
1/8 teaspoon ground nutmeg
1/8 teaspoon ground ginger

Egg wash:
1 egg

Glaze:
1/2 cup powdered sugar
1 tablespoon lemon juice

In a large mixing bowl, mix together the flour, yeast, sugar, salt, and spices. Add the warm milk and butter and mix until all ingredients are combined. Add a little flour or milk until you achieve the proper consistency, which is moist enough that all of the ingredients stick together but dry enough that you can knead the dough without it sticking to your hands. I had to add a couple of tablespoons of flour to get to this consistency, but depending on the humidity in your area and how tightly packed your cups of flour are, your may need to add more or less.

Pour the dough onto a floured surface and knead for 5 to 10 minutes. Flatten the dough and pour the raisins or currants on top and press them into the dough. Work the dough until the raisins are well mixed in. Return the dough to a greased bowl, cover with plastic wrap, and allow to rise for 1 to 1 1/2 hours until the dough has doubled in size.

When it has risen, pour the dough out onto a cutting board and divide into 12 pieces. Roll the pieces into balls and place on a greased baking surface (I used a 9 x 13 Pyrex pan). Cover the pan and allow to rise until they double in size again, typically 45 minutes to 1 hour.

While the buns are rising, preheat the oven to 425 degrees. When the buns are ready to bake, scramble the egg in a bowl and brush some over the top of the buns. Then put the buns in the oven and bake at 425 for 15 minutes. Remove and allow to cool for 5 or 10 minutes.


While the buns are cooling, make the glaze by combining the lemon juice with the powdered sugar (you can also use orange juice, milk, or water if you don't have lemon juice around). Use a pastry bag, a spoon, or a knife to paint the crosses on top of the buns. Eat while still hot.

Hot Cross Buns

dmsnyder's picture
dmsnyder

Today's bake 3-15-2019: Mixed grain sourdough by a new/old method

Sourdough Bread

March, 2019

David Snyder


My recent trials of sourdough bread production methods have made some very good breads, but still not exactly what I want. I recall that, about 10 years ago, I baked some breads from a recipe developed by a home baker who was an active participant on The Fresh Loaf at the time, “Susan from San Diego.” At the time, I felt it was the bread I had baked closest to my ideal. So, I thought I would return to that bread, applying some procedures I had adopted with good results since that time.

Of note is that Susan's recipe called for two builds of firm starter before mixing the final dough. As I recall, it produced a rather sour, crusty loaf with a moderately open crumb. Back then, I mixed the dough with a stand mixer. For this bake, I mixed by hand.

I made two loaves. One, I cold retarded for 17 hours then left at room temperature while the oven pre-heated. The second loaf was cold retarded for 40 hours. I was eager to see whether the second would be much more sour, as one would expect.

Total Dough


Ingredient

Wt (g)

Bakers' %

High-protein flour

125

11

AP flour

803

69

Whole Wheat flour

138

12

Rye flour

92

8

Water

826

71

Salt

23

2

Total

2007

173


Starter 1st Build


Ingredient

Wt (g)

Bakers' %

High-protein flour

18

75

Rye flour

6

25

Water

12

50

Seed starter (liquid)

6

25

Total

42

175

  1. Dissolve starter in water.

  2. Add flours and mix thoroughly.

  3. Ferment at 76ºF for 8 hours.

  4. Proceed to 2nd build or refrigerate 1st build overnight and continue the next day.


Starter 2nd Build


Ingredient

Wt (g)

Bakers' %

High-protein flour

104

75

Rye flour

35

25

Water

69

50

Starter 1st Build

42

25

Total

250

175

  1. Dissolve starter in water.

  2. Add flours and mix thoroughly.

  3. Ferment at 76ºF for 8 hours.

Note: If not ready to make the Final Dough when this starter build is ripe, the starter can be refrigerated for up to 3 days, until you are ready to proceed.


Final Dough


Ingredient

Wt (g)

AP flour

803

Whole Wheat flour

138

Whole Rye flour

50

Water

743

Starter 2nd Build

250

Salt

23

Total

2007

Procedures

  1. In a large bowl, mix the water and the flours to a shaggy mass.

  2. Cover the bowl and let rest (autolyse) for 1-2 hours.

  3. Sprinkle the salt over the dough and add the starter in chunks.

  4. Mix the dough to incorporate the added salt and starter uniformly.

  5. Transfer to a clean, lightly-oiled bowl and cover.

  6. Ferment until expanded by 75% with stretch and folds at 30, 60 and 110 minutes. (I do the first two S&F's in the bowl and the third on a lightly floured board.)

  7. Divide the dough as desired and place in floured bannetons or on a couche. Cover.

  8. Proof at room temperature for 1-3 hours, then refrigerate for 8-40 hours (or more?).

  9. If you think the loaves need it, proof at room temperature for additional time before baking.

  10. Transfer to a peel. Score as desired.

  11. Bake: If baking in a Dutch oven, bake at 475ºF covered for 30 minutes, then uncovered at 450ºF for another 20 minutes or until done to satisfaction.

  12. Bake: If baking on the hearth, pre-heat oven at 500ºF for 1 hour with baking stone and steaming apparatus in place. Turn down oven to 460. Load loaf and steam oven. After 15 minutes, remove steam and continue baking for 30-40 minutes, until loaf is baked. (Depends on size and shape of loaf.)

  13. The bread is done when the crust is nicely colored and the loaf sounds hollow when thumped on the bottom. The internal temperature should be at least 205ºF.

  14. Transfer the bread to a cooling rack and cool thoroughly before slicing.

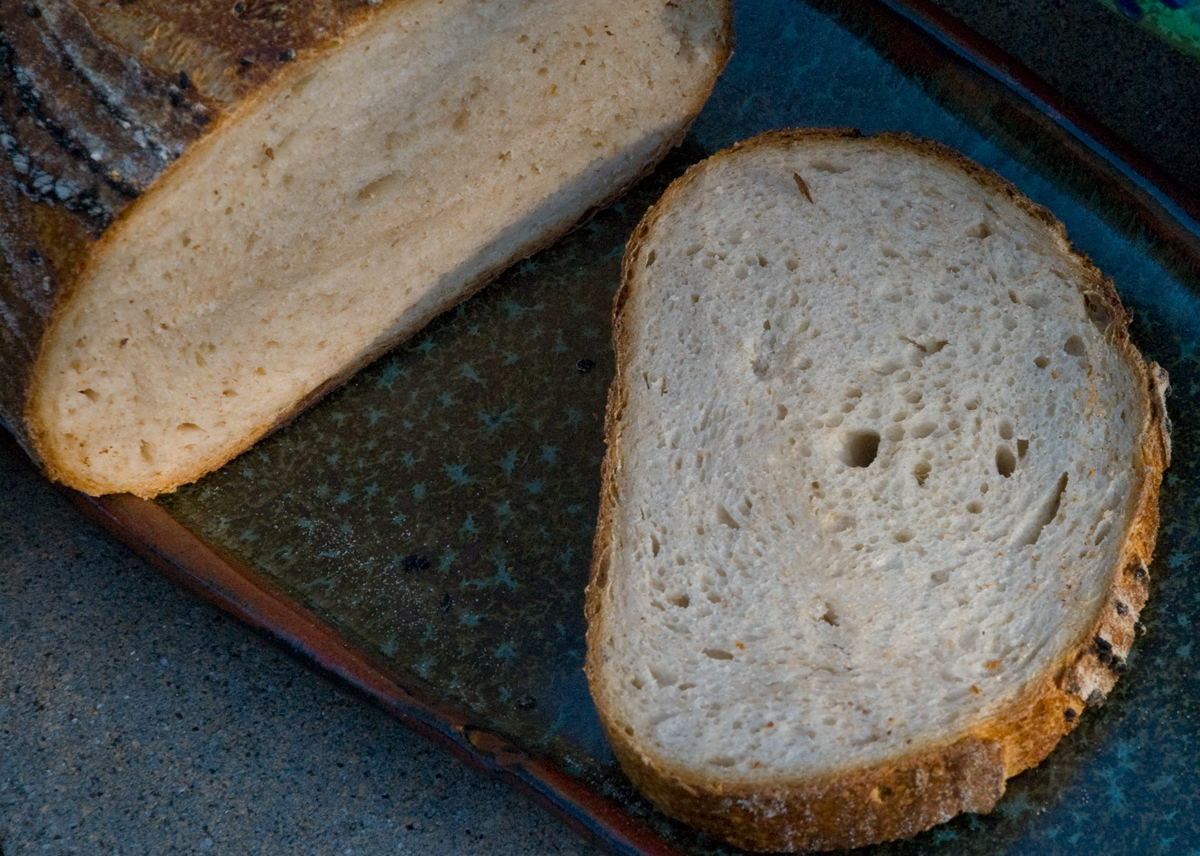
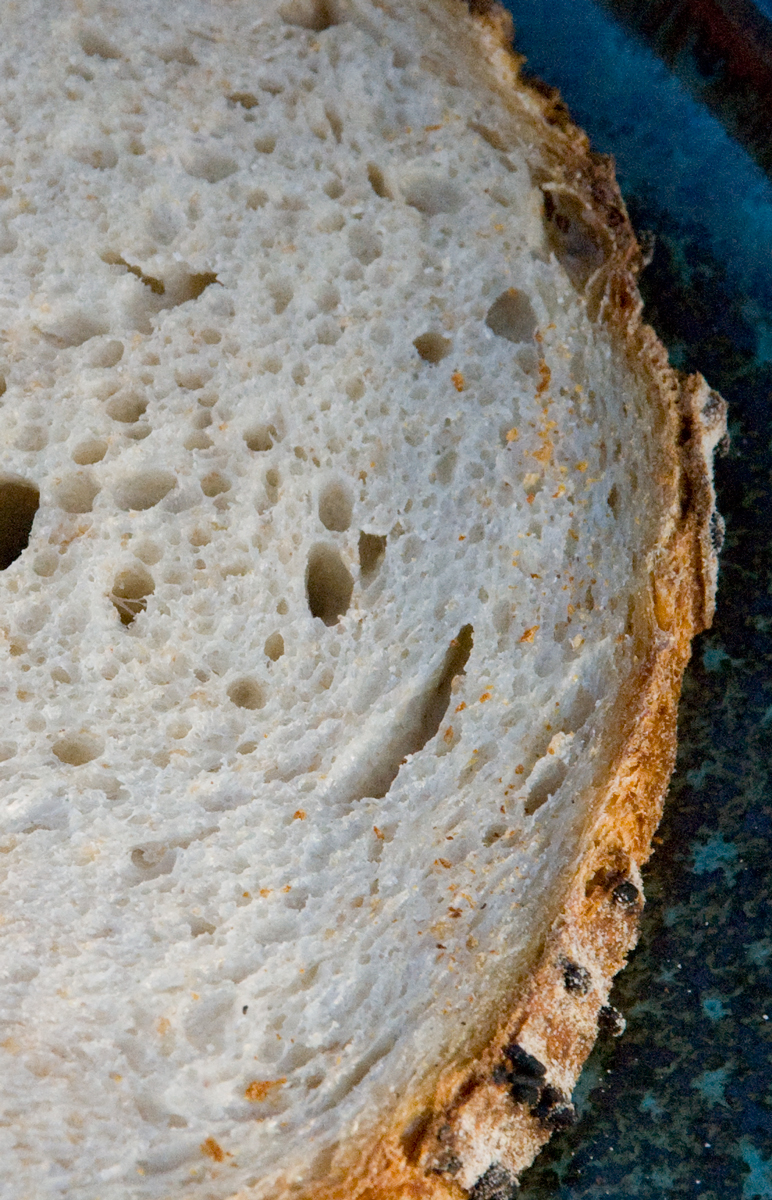
The crust was crunchy in the darker-baked parts and chewy in the rest. The crumb was moderately open and mildly chewy. The flavor was complex, sweet and creamy. There was the slightest hint of acetic acid tang. Interestingly, even though the whole wheat was only 12% of the total flour, the distinctive flavor of Turkey Red wheat came through.

I baked the second loaf 40 hours after retarding it, including the last hour at room temperature, while the oven preheated. It turned out ... well ... it was kind of spectacular, in my humble opinion.

The crust is crunchier. The crumb has the same chewing consistency - what I call tender/chewy - but it is substantially more open, and the flavor is substantially more sour. Interestingly enough, I think creamy, lactic acid flavors still predominate, but there is more of an acetic acid tang. Now, that is all based on a first taste when the loaf was just completely cooled. If the flavor profile evolves, I'll add a note.

As far as I can recall, I have only retarded dough for more than 24 hours once before. That was an experiment with my San Joaquin Sourdough, and the retardation was of the dough before dividing. Today's loaf is so good, that I believe I'm going to stick with this routine for a while. It sure made delicious bread.

Happy baking!

David 

Flour.ish.en's picture
Flour.ish.en

A Challenging Panettone

Didn't know making panettone was a challenge until I read a recent article on the New York Times referring to this traditional Italian bread as "the Mount Everest of baking."  I tasted an exceptional piece of panettone made by Jim Lahey. Met him on his book tour in New York city when he spoke about his new book The Sullivan Street Bakery Cookbook. How difficult could it be to make the panettone armed with a detailed five-page recipe in the cookbook? This is what I've found.

Bread bakers deal with this process everyday: 1) prepare a preferment, 2) mix the dough, 3) bulk ferment 4) shape the dough, then 5) proof and 6) bake the bread. A fairly linear approach going from start to finish; done it, been there many times before. There are a few indispensable things to keep in mind. Among them, you'd need: a lively stiff starter, a stand mixer, panettone molds and long metal skewers. None too daunting. What I was not prepared was how long every stage of the process took. How many times I thought nothing good could possibly come out of this?

I'm starting to understand climbing Mount Everest requires endurance, a clear and focused mindset, a firm belief that you'll reach the destination and the discipline to ward off negative thoughts and resist messing around unnecessarily. It dawns on me that a recipe is just a set of guidelines; it's what we do with it that matters the most to the final outcome.


This Jim Lahey's recipe works, unequivocally. It's perfectly balanced. I have to keep reminding myself to stop messing around on the edges. It may take longer than 24 hours to get the preferment ready, 15 minutes at high-speed in the stand mixer to emulsify, 48 hours for the dough to quadruple during the bulk rise, 7 hours to get the dough to rise to the top of the panettone mold and 55 minutes to bake and several more hours for the inverted panettone to cool completely.

Who knows the unrelenting waiting game, especially if you haven't done it before (or you are type A like me), is the secret to a successful panettone? The panettone is weightless, cotton-candy airy, delicate, indulgent and far better than anything I've ever bought. More important, it's not about the bread. It's about a long and arduous journey, while keeping the hands and impulses (after all, I'm the master of the universe!) from interfering the dough and leaving it alone. Yes, sometimes it may take longer than you believe is sensible. That's the real challenge and a humbling experience.

Happy holidays to you all!


P.S. I have given these breads as gifts, therefore no crumb shots. I have another batch waiting.... Will post the interior pictures in a day or two.

Postscript:12/25

Finally, some crumb shots. Not too shabby. Certainly, there is room for improvement!


Danni3ll3's picture
Danni3ll3

Baguettes Formulas

Alan, you offered to give me more detail on a variety of formulas for baguettes. I really appreciate this.

As to the 80% hydration baguettes that I made, I had no issue with the dough. I am not sure if it is the flour I have in Canada that absorbs more water or the fact I am working regularly with 78% hydration doughs, but shaping and handling is just fine for me.

Danni

alfanso's picture
alfanso

Bouabsa Batards - Against the tide

Reversing direction from my recent thang to make baguettes from boule/batard formulae.  I searched TFL and found minor but inconclusive evidence that anyone had published their results for creating batards from the Bouabsa baguette format.  So it was high time that some silly goose decided to do it.  I waddled into the tide with both webbed feet.

As I'd mentioned earlier when I made a batch of Bouabsa baguettes for the first time in a long time, this is the baguette that "put me on the board", so to speak.  The simplest of them all, by the clock the quickest way to bulk fermentation fame and fortune, and the longest retard period.  Since I got on the levain bandwagon quite a ways back now, I hardly ever bake anything that is purely a commercial yeast product.  Neither political statement nor religious conviction nor an us vs. them confrontation.  It just happens that basically everything else I decide on baking contains either no or scant amounts of IDY.   Fine by me either way.

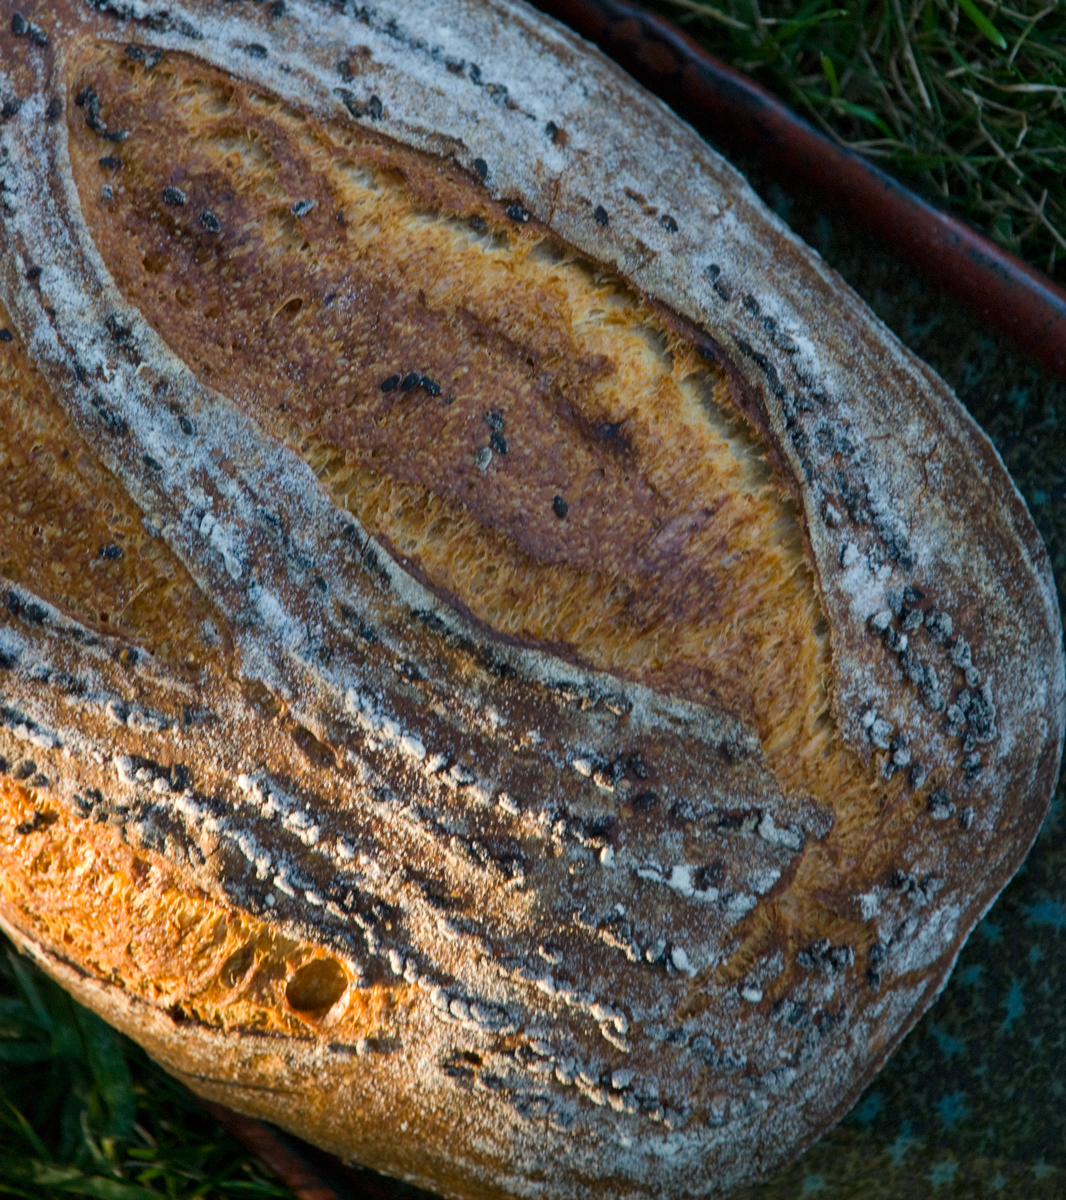
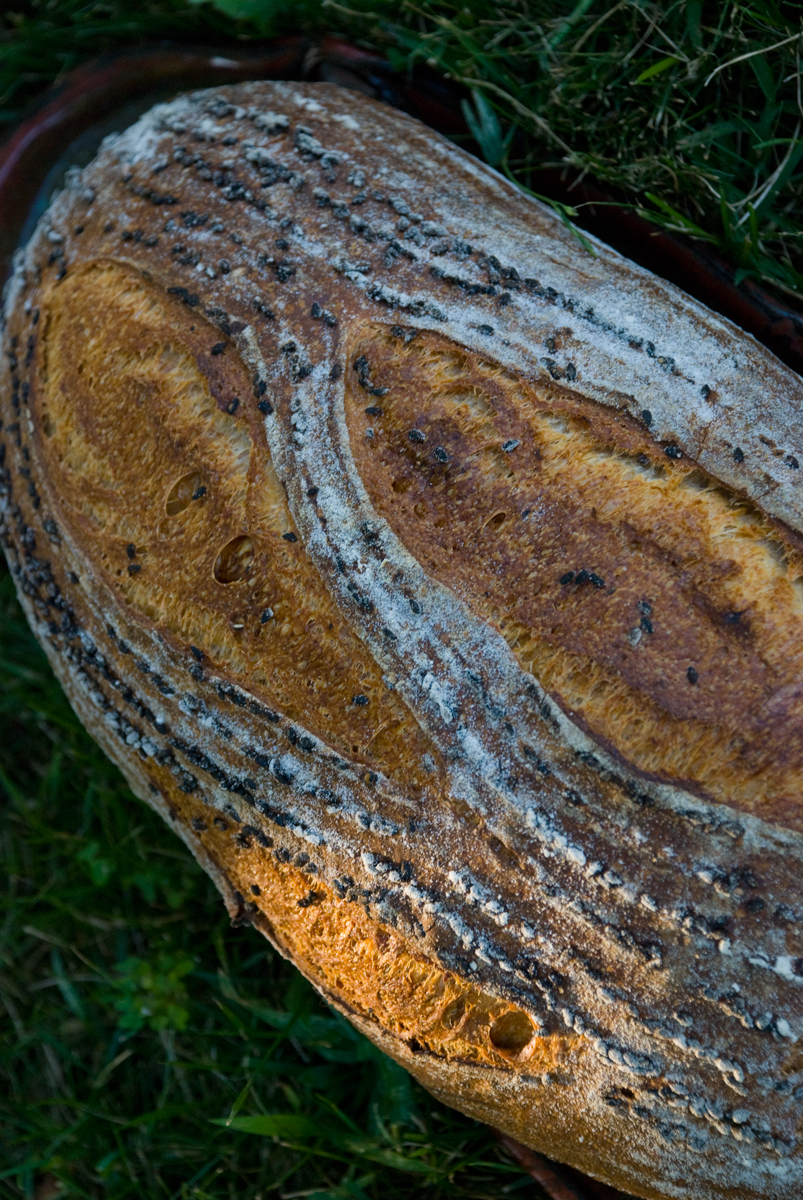
A roll in the sesame seeds for 2 of the boys because I love the look as well as the taste of them.  These should have been handled with a bit more kid gloves than I did, and I think that perhaps the lovely open crumb structure on these suffered due to that.

I should have paid attention to my own heed from that recent bake.  With no out-of-the-retarder warm up and proof, as I bake directly from the refrigerator, I neglected to give the bulk dough an additional 30 minutes of bench rest after the 3rd letter fold.  And of course, my old war cry of "I should have let them take on a half shade more color", was forgotten.

Oh well, they are still nice.  Can't hit a home run every time.

I was a bit too aggressive on shaping the center and right batards, particularly the "nude" batard.  Notice the tear in the skin on the lower left portion of this one.  That means trouble ahead.  Indeed!

And as evidenced by the final product, the tear in the skin did in fact affect the bloom and shape of the center batard.  The bloom and shape of the left batard was also affected by aggressive shaping, although less so.  The right batard is just dandy.  

The two seeded bookends.

The crumb suffered from the aggressive shaping.  This is the innards of the nudie.  The other two had destinations beyond my own kitchen and gullet.

page1image4184 page1image4344alan page1image5088
Isand66's picture
Isand66

Sunday Gravy Italian Style Sourdough

My Father-in-law is staying with us for a couple of weeks so my Wife made him some Sunday Gravy with meatballs, sausage, and pork and beef braciole.  So of course I needed to make a good dipping sauce bread to go with it.

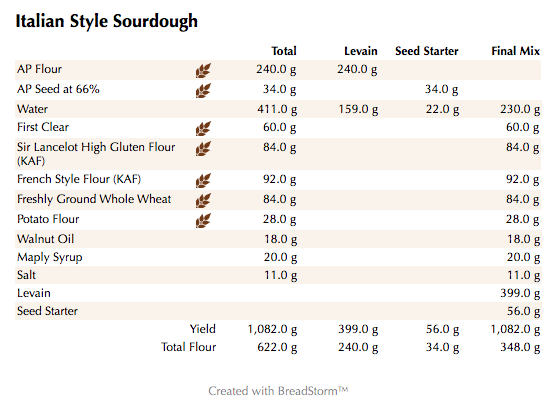
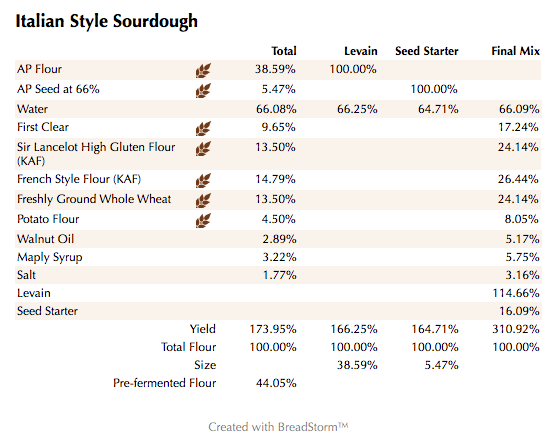
I decided to make a version of a bread I modified from Peter Reinhart's Italian Bread from "The Bread Bakers Apprentice".  He uses a Biga in his formula but I used a AP levain at 66% in mine.  The starter is a pretty high percentage of the overall formal at 44% but in the end it all worked out great.

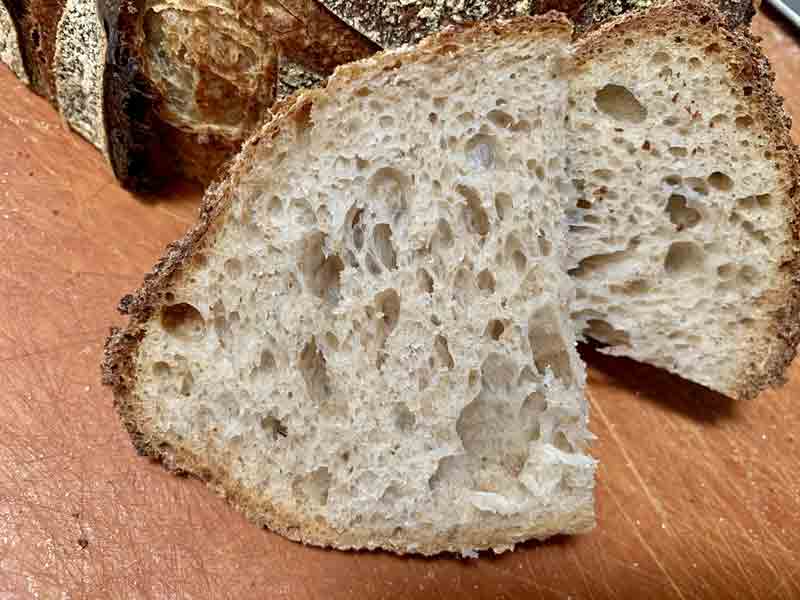
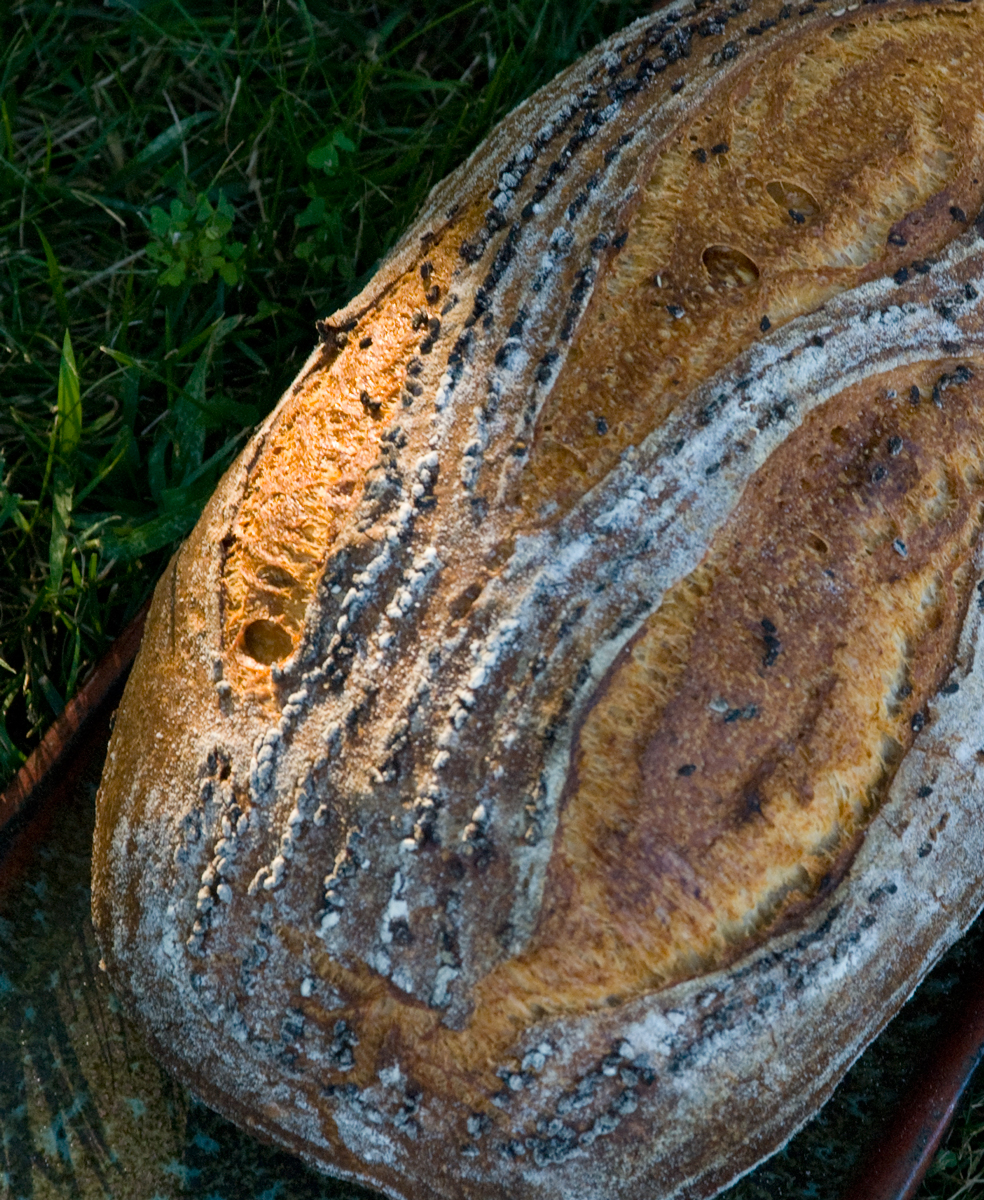
This is not a high hydration dough either, but the final result is a nice soft crumb with a slight sweet taste from the maple syrup with a chewy crust.  The crumb is moderate which is great for mopping up the home made tomato sauce.

closeup1

Formula

Italian Style Sourdough (weights)

Italian Style Sourdough (%)

Download the BreadStorm File Here.

closeup2

Levain Directions

Mix all the Levain ingredients together for about 1 minute and cover with plastic wrap.  Let it sit at room temperature for around 7-8 hours or until the starter has doubled.  I usually do this the night before.

Either use in the main dough immediately or refrigerate for up to 1 day before using.

 Main Dough Procedure

Mix the flours,  and  the water together in your mixer or by hand until it just starts to come together, maybe about 1 minute.  Let it rest in your work bowl covered for 20-30 minutes.  Next add the salt, starter (cut into about 7-8 pieces),  oil, maple syrup and mix on low for 6 minutes.  Remove the dough from your bowl and place it in a lightly oiled bowl or work surface and do several stretch and folds.  Let it rest covered for 10-15 minutes and then do another stretch and fold.  Let it rest another 10-15 minutes and do one additional stretch and fold.  After a total of 2 hours place your covered bowl in the refrigerator and let it rest for 12 to 24 hours.  (If you have a proofer you can set it to 80 degrees and follow above steps but you should be finished in 1 hour to 1.5 hours).

When you are ready to bake remove the bowl from the refrigerator and let it set out at room temperature still covered for 1.5 to 2 hours.  Remove the dough and shape as desired.   Place your dough into your proofing basket(s) and cover with a moist tea towel or plastic wrap sprayed with cooking spray.  The dough will take 1.5 to 2 hours depending on your room temperature.  Let the dough dictate when it is read to bake not the clock.

Around 45 minutes before ready to bake, pre-heat your oven to 550 degrees F. and prepare it for steam.  I have a heavy-duty baking pan on the bottom rack of my oven with 1 baking stone on above the pan and one on the top shelf.  I pour 1 cup of boiling water in the pan right after I place the dough in the oven.

Right before you are ready to put them in the oven, score as desired and then add 1 cup of boiling water to your steam pan or follow your own steam procedure.

After 1 minute lower the temperature to 500 degrees and after another 3 minutes lower it to 450 degrees.  Bake for 25-35 minutes until the crust is nice and brown and the internal temperature of the bread is 210 degrees.

Take the bread out of the oven when done and let it cool on a bakers rack before for at least 2 hours before eating.

closeup3

crumb

crumbcloseup


a_warming_trend's picture
a_warming_trend

Finding the Levain % Sweet Spot (Formula Included!)

One of the most intriguing questions in my (admittedly short!) sourdough adventure thus far has been: How do I create a loaf that I can consistently proof in the refrigerator and bake straight from that cold environment, without it under or over-proofing? While the length of bulk fermentation is important in this calculus, it’s not the only part.

The following is the formula I've developed for one large loaf that is created specifically for a long proof in the refrigerator. The instructions are for a boule, but it could easily be shaped as a batard. Roughly 20% levain (by total weight, 40% by baker's percentage) seems to be my sweet spot for a long, cold-proofed loaf that can be baked straight from the fridge (i.e., proofs fully in the fridge at about 45 degrees F, but doesn’t over-proof!).  I’ve baked this formula five times with great results...it can be modified to include more mix-ins, and even a significant percentage of whole grains.

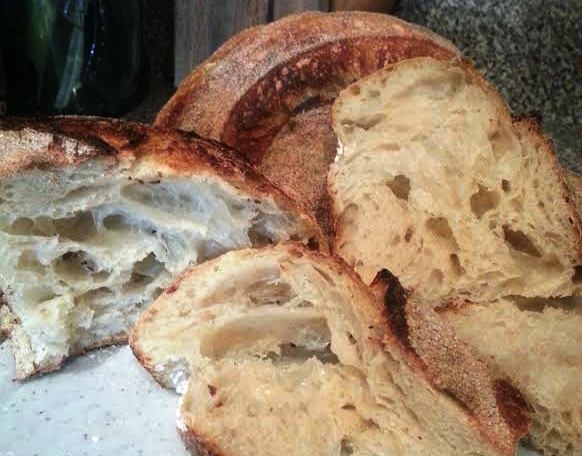
The 78% hydration, long autolyse, chill during bulk fermentation, and long, cold proof yield a custardy, open crumb! The long autolyse also contributes to gluten formation, which make the final dough much easier to handle.

Ingredients:

200 g active 100% hydration white starter (however you want to create that levain)
400 g all-purpose flour (I love King Arthur)
290 g cool water
11 g (sea) salt
15 g sugar
5 g malt powder

Method:

1) Mix together flour and cool water, and set aside to autolyse at room temperature for anywhere from 6-12 hours. Make sure to mix the water and flour very well before this long autolyse; don't be afraid to really mash the dough down with a wet hand. You don't want any dry bits lingering, because they will be difficult to incorporate later. If you mix it well, it will be such smooth sailing when you mix in the levain, I promise!


2) Combine autolysed flour and water with the starter, salt, sugar, and malt powder. Squeeze the dough through your fingers to fully combine for the first two minutes or so, then stretch and fold for 2-3 minutes more. 


3) Fold the dough every 30 minutes for the next 2 hours. When I stretch-and-fold, I like to give it as many turns as I feel the dough “needs.” To perform a fold, I reach under the dough and pull it over itself, rotating 90 degrees every time. At every 30-minute interval, I stop when the whole mass of dough begins to pull up out of the container. This is anywhere between 4 and 20 folds (that is, between 1 and 5 full stretch-and-fold turns). 


4) Allow the dough to rest at room temperature between 2 and 4 hours, or until 70-80% increased in size. I realize that this is a bit more increase than is called for in some formulas, but it is my preference in this case!


5) Place the container of dough in the refrigerator for at least one hour, and up to 6 hours.* 


6) Remove the container from the refrigerator. Sprinkle flour over the top of the dough and spread it. Loosen the dough from the sides of the container, allowing the flour to fall around the edges of the dough. This will create a nice floured gluten cloak at the bottom of your dough. 


7) Pour the dough onto a work surface so that the floured surface is on the bottom. Pull the edges of the dough towards the middle to form a very loose boule -- this is the pre-shape. Rest for ten minutes. 


8) After ten minutes, pull the edges towards the center and pick the ball up, twisting in your hand to create tension. Form a tight boule, however you’re most comfortable doing that. 


9) Place the boule seam-side up in a floured banneton or brotform of some kind, and cover in plastic. 


10) Allow it to rest at room temperature for 30 minutes. 


11) Place in the refrigerator to proof for at least 8 hours, and up to 22 hours. The longer it proofs in the refrigerator, the more open and gelated the crumb will become. 


12) Remove the banneton/brotform and release it onto a piece of parchment paper. 


13) Score the boule, and bake at 475 F for 20 minutes with steam, then 20-25 minutes without steam.

*Alternatively, you could place the dough in the refrigerator directly after the two hours of stretch-and-fold, and then remove it later to sit at room temperature until increased 70-80%. Either way works great; I do stand by having a chill on the dough at some point during bulk fermentation.

Some loaves for which I've used this formula:

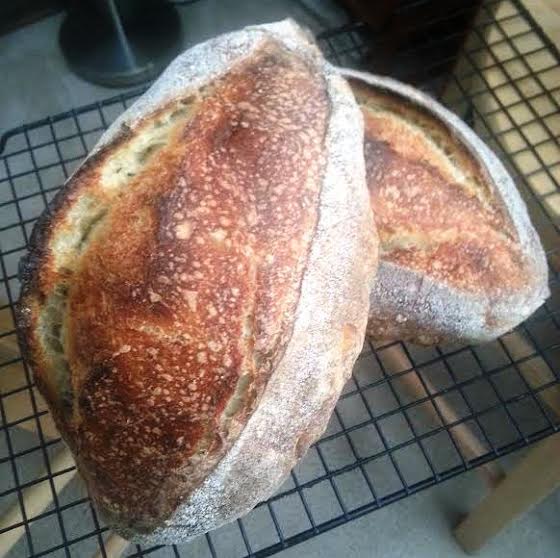
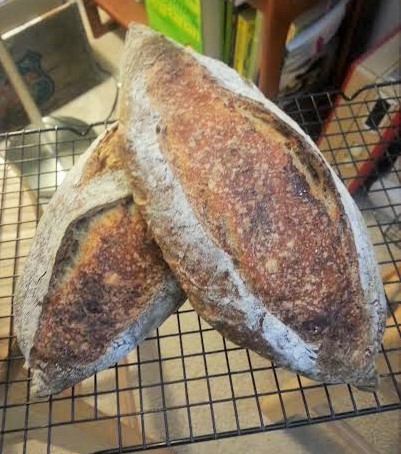
The Basic Formula (As Torpedoes and Boules):


80% Whole Wheat with Toasted Seeds and Cranberries:


Brown Ale and Spent Grain Torpedoes:

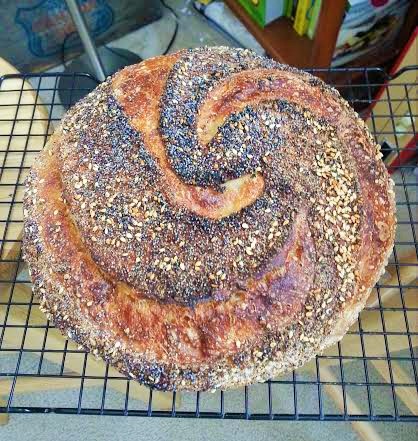
Everything Bagel Seasoning-Topped (Crowd Favorite!):

Thanks to all for your wonderful photos, formulas, and advice. TFL has just been the greatest resource as I navigate my first year of baking!

--Hannah

Pages