The Fresh Loaf

A Community of Amateur Bakers and Artisan Bread Enthusiasts.

Sourdough

t-man's picture

Deck Oven Choices

January 17, 2013 - 1:11pm -- t-man

hi, all... i'm about to begin a new adventure.  i'm a geologist by trade- worked in the environmental industry for years.  but i'm half italian, and i grew up learning how to cook and bake from my grandma and her sisters.  i recently quit my geology job and went to a culinary school in rome for 3 months to learn how to make pizza al taglio, among other styles (wood fired, alla pala, tonda, etc.).  a location has come up that i need to jump on, so i'm looking for some advice on setting up a bakery.  this post is concerend with ovens and associated equipment.

Raluca's picture

Bread all cracked and bottom under baked when using baking stone

January 16, 2013 - 9:40am -- Raluca

Hi guys,

I am very new at baking bread and most of all doing it with a baking stone.

I've baked sourdough bread in  my oven before but without a baking stone and today I tried it with.

The top of the bread looks better than it ever looked, but the bottom has a lot of cracks and is as white as it was when I've put it in the oven...

Any ideas what I've done wrong?

I am thinking the cracks could come from poorly shaping the bread..but how can I get a golden crust on the bottom as well?

Thank you very very much!

Raluca

davidg618's picture
davidg618

When I first began baking sourdough I followed the experts formulae to the letter. Most prescribed 2% salt. Frankly, I was disappointed with most of the mostly (or entirely) White Flour formulae, especially those that included up to 10% Whole Wheat flour in the mix. They were too bland for our palettes. Along the way I discovered overnight hydration, at cool temperatures, developed both flavor and the desired crumb.

Ultimately, as I continued exploring, my "go to" sourdough is a 10% Whole Rye flour (preferably Hodgson's Mill), 90% White (a 50/50 mix of KA Bread and AP flours), 2% salt, 68% hydration, DT 54°F and 15 hours retarded at 54°F. A typical loaf's flavor is neither Rye nor Wheat but an amalgam, perhaps enhanced by the levain acidity.

Along the same journey, we've come to enjoy the distinct wheatiness, and nutty flavors of overnight retarded baguettes leavened by commercial IDY.

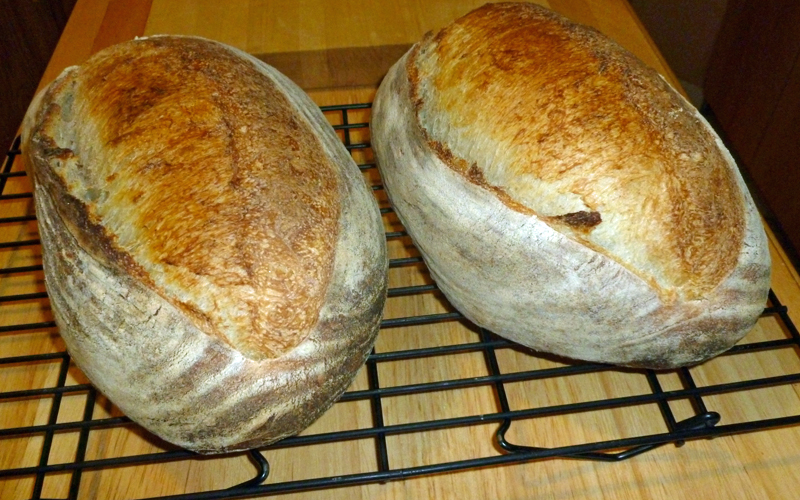
Today I baked two loaves wherein everything was identical to our routine sourdough bakes, except the flour mix was 5% Whole Wheat, and 95% the usual White flour mix. I also upped the salt content to 2.25%. My intent was to achieve a wheaty flavored SD.

The flavor is, as hoped, wheaty; not the in-your-face wheatiness of baguettes but certainly the high note, modulated, softened, by the levain's acidity. All the flavors seem crisper which I attribute to the increased salt.

Coincidentally, I also finished simmering a 5-day-brined corned beef.  I think today's dinner has come together.

David G


FlourChild's picture
FlourChild

In addition to Breadsong's post and Toad.de.b's post, I have a couple more loaves to add from Ken Forkish's Flour, Water, Salt, Yeast.  

I have to say I've really been enjoying baking from this book, it has opened up my repetoire to include a style of SD bread featuring low levain amounts (only 10-12% of the main dough flour is used to build the levain) and extended bulk ferments.  This style is different from Hammelman, and bears some resemblance to Chad Roberston's loaves, though Mr. Forkish seems to be a better teacher and to include more of the details needed for a novice to succeed.  The only drawbacks- and they are small compared to the deliciousness of his breads- are the narrow scope of recipes (no soakers, high percentage rye, brioche, baguette or long loaves, olive bread, fruit & nut bread, croissants, etc.) and the "supersize" scale of both levains and recipes (every recipe is made with 1,000 grams of flour).  

First up is the Bacon Sourdough, which I have to say is one of the best tasting loaves that has ever graced my kitchen.  I followed this recipe to the T, even mixing up the large levain.  Since I like bread best on the day it's baked, I generally prefer to bake smaller amounts more frequently and am not set up for this quantity of dough, so it was a bit of a hassle to find or jerry-rig enough containers, baskets, dutch ovens, proofers, etc.  But the incredibly moist crumb and crisp, red-brown crust on this loaf were superb, and the bacon hit just the right note- plenty to appreciate, but in balance with the crust and crumb flavors.  The photos on this are only of a small demi-loaf made of dough that I siphoned off of the two larger loaves; I wanted a small loaf to try the bread, as the two large loaves were given away as gifts.

The glossy, translucent walls on the larger holes:

The bubbles on the crust:


Next up is the Overnight Brown, a pure levain dough with 30% whole wheat.  For this bake, I decided to scale things back and also tried some whole grain spelt instead of traditional red wheat for the 30% whole grain portion of the dough.  For the scaling, I only made one loaf (50% of the main dough) and scaled back the levain to just a little more than what I needed for the main dough (150g of levain or 15% of what was called for).  Not sure that spelt was the right choice for this bread, it was good but not great.  I'd like to try it again with red wheat.

Here's the loaf, which Forkish doesn't score but rather bakes seam side up for a gnarly, rustic look.

The crumb:

And the bubbly crust that comes from his long room temp ferments:

Pizzas
I also made the levain pizza dough and the high-hydration poolish pizza dough, but my renditions did not turn out as well as the loaves.  They both seemed a bit over-fermented, in that they ended up a little too dense, without enough oven spring, and the flavors were a tad off.  These may be my fault, I suspect both my SD starter and my (commerical yeast) poolish were a little more ripe than was ideal, so I plan to try them again, being more careful to follow the times and temps exactly.  They were both a little harder to shape (elastic) than most of the pizza doughs I mix, which I attribute to the extra acidity from the long ferments.  In the case of the poolish, my pre-ferment only doubled in 12 hours, rather than the triple that is specified, so I let it go to 14 hours (recipe states 12-14 hours) in hopes of getting a bit more rise, which never happened.  This experience has taught me that with Forkish's recipes, it is better to err on the side of underfermenting than the other way around.

All in all, a great book that I've thoroughly enjoyed.


JMonkey's picture
JMonkey

Desem bread is a favorite of mine, in no small part because I can only make it in the winter. But it's also beloved because it was one of the first sourdoughs I ever made, and because it comes from The Laurel's Kitchen Bread Book, a book that, though it is not without its flaws, is still a book that I love dearly and continue to bake from several times a month.

Desem is essentially a 100% whole grain pain au levain, done in the old French way for customers who did not like their bread sour. To keep the acid notes to a minimum, bakers kept their starters firm and chilled, both of which are the key to making this loaf. Laurel Robertson recommends making your starter by placing a dough ball in a bin of 10 lbs of flour at about 50 degrees F, and then feeding it once a day for a week or so. I've done it that way, but I've found it's not really necessary. If you've already got a starter, just feed it with whole wheat at 50% hydration (thereabouts) and store it in a place where the temperature stays in the 40s or 50s. Ideally, you want the starter at about 50 degrees F. Feed it a couple of times that way at that temp, and you should be ready to go. This is why Desem remains a winter bread for me, because only then can I rely on my garage to remain within that temperature range.

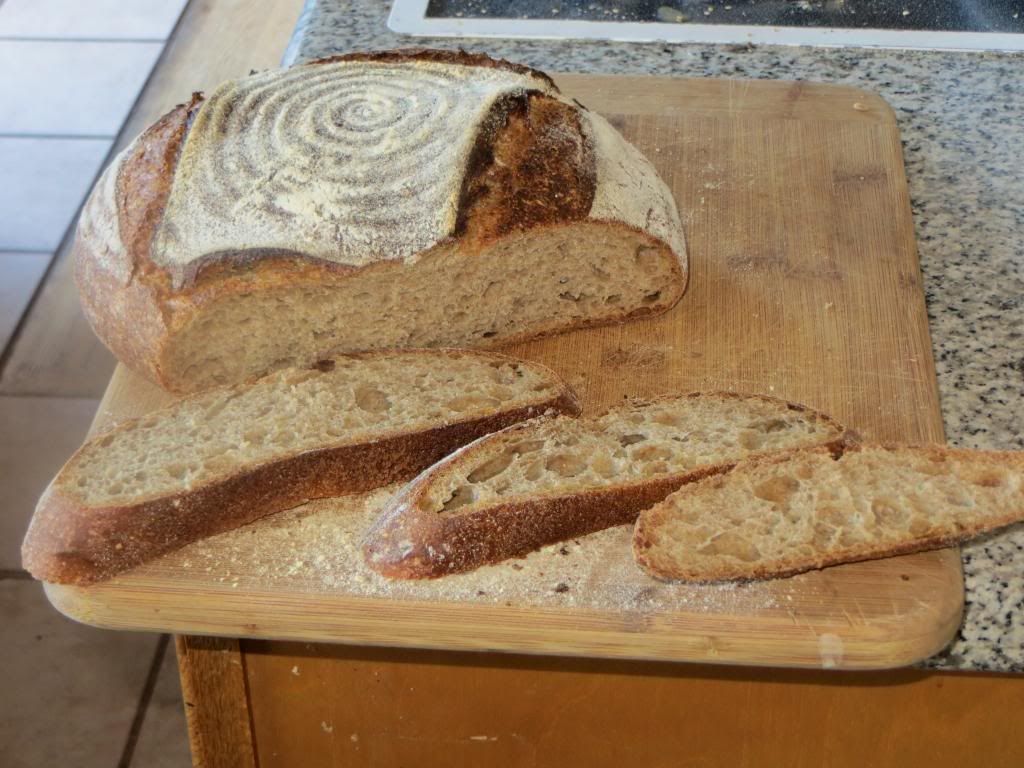
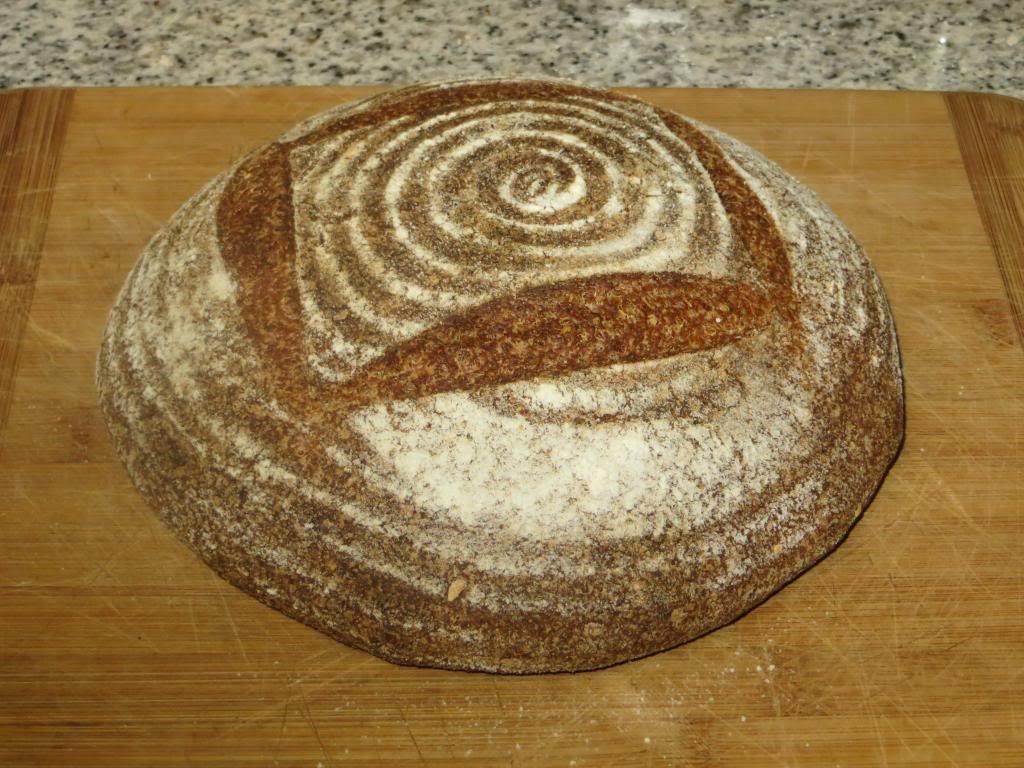
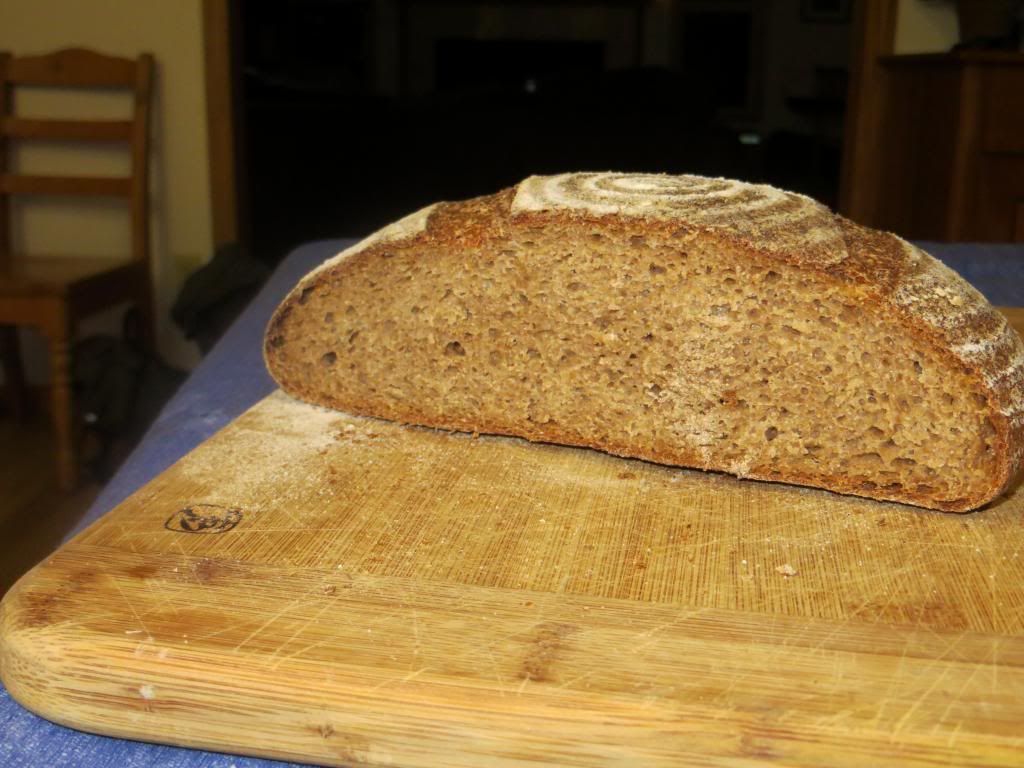
The result is a lovely loaf. Just a little bit sour, with a creamy texture and a nutty, sightly sweet flavor. It's hearty but, though it doesn't typically have the big holes one usually associates with a lean hearth loaf, it's not a dense bread. Tonight, we ate it with a corn chowder,  a dish of which I'm certain Laurel Robertson would not approve, since it's made with chicken stock and a half pound of bacon. I have to say, though, they made fine dinner companions. It will also make tasty sandwiches tomorrow, I'm sure.

Here's what the loaf looked like out of the oven:
And here's what the insides look like:
Finally, here's how I made it.

Formula:

  • Whole wheat flour: 100%
  • Water: 70%
  • Salt: 2%
  • Starter: 30% of the flour is in the starter at 50% hydration.

Ingredients

  • Whole wheat starter at 50% hydration: 225 grams
  • Water: 275 grams
  • Salt: 10 grams
  • Whole wheat flour: 350 grams

Combine the starter and the water, and mash them up together until it's nice and mushy. Add the salt and then add the flour. Stir until it comes together into a mass. I use fresh flour, because I'm one of those nuts with a grinder and a half-dozen 5-gallon buckets full of grain in his garage. If you're not (and your partner or spouse probably thanks you for it) you'll be using store-bought whole wheat flour, which is dryer, so you may want to add some more water, maybe as much as 50 grams. The dough should be shaggy and soft, but not quite sticky.

At this point, I like to let the dough sit for 10 to 20 minutes. I often time this by how long it takes to make a pot of oatmeal or a batch of pancakes, because I usually start making this bread while I'm preparing breakfast. Once the dough has sat for long enough, I knead for 3-4 minutes, let it rest for another 5 minutes or so, and then knead again for another couple of minutes. At this point, it should be done. I love and respect Laurel Robertson to high heaven, but there's really no need to do 300 strokes. Unless you enjoy that kind of thing, of course, which,  I'll admit, I sometimes do.

I try to get the dough temperature to about 70-75 degrees F if I'm thinking about it. Jeffrey Hammelman has a good trick for this. Measure the temperature of the starter with an instant read thermometer, then measure the temperature of the flour (since mine's coming right out of the grinder, it's usually close to 100 degrees!). To know how hot the water needs to be, Multiply the desired dough temperature by 3, then subtract the starter and flour temperatures. Voila! But, to be honest, I usually just guesstimate. In my kitchen, the starter's cold and the flour's pretty warm, so if the water feels lukewarm or just an eesny-weensy bit warm, I figure it's good enough. I'm not making a microchip, after all.

It usually takes about 4 hours to rise, but in the winter, my house is usually pretty chilly. It could take three hours if you keep your home at 68 or 70 degrees. Then, I shape  the loaf and proof it for two hours in a cooler with the bread on an upturned cereal bowl and a cup or two of hot water thrown into the bottom. I like to bake mine in a covered clay baker at 450 F for 35 minutes with the cover on and 10 minutes with it off. If you're using a baking stone or a cookie sheet, try 450 for 35-40 minutes. Steaming the oven is also nice, if your oven steams well and you don't mind the risk of  damaging or ruining your appliance (ask me how I know there's a risk). Let it cool on a rack for about an hour before slicing.

Juergen's picture

Bringing a starter back to life

January 6, 2013 - 10:58am -- Juergen

Over the last months I have neglected my sourdough starter and I only baked yeasted breads. Now I want to start baking with a starter again when I took my old starter out of the fridge today, it smelled really funky, much like acetone, so I dumped it. 

I am left with two options now:

1. starting from scratch again knowing that this will take me at least two weeks or so before I can bake with it

or

2. using some of my old starter that I have kept in my freezer in dry form in a freezer bag dated march 18, 2012.

JMonkey's picture
JMonkey

I bake bread about twice a week for my family, and these days, it's usually either a sourdough from 50% whole wheat, 10% rye and 40% AP or a loaf of Buttermilk and Honey Whole Wheat. But for whatever reason, I was craving rye yesterday, so I set up this loaf. No caraway, as I'd run out, though i do like it.

Here's how I made it:

Formula

  • Whole Rye: 40%
  • High-Gluten Flour: 60%
  • Water: 75%
  • Salt: 1.8%
  • All the rye is in the starter with a hydration of 100%


Ingredients

  • Whole rye starter, 100% hydration: 400g
  • High gluten flour: 300g
  • Water: 175g
  • Salt: 9g
  • Optional -- 9g of caraway seed

To make the bread, mix up all the ingredients and knead. It's sticky, so I like to let it sit for 10-15 minutes first, then I knead with wet hands for 3-5 minutes, let it sit again for 5 minutes, and do a final couple minutes of kneading. Let it rise for 2.5 to 3 hours, shape, and give it another 2.5 to 3 hours to finish. I baked mine in a cloche at 450, covered for 35 minutes, uncovered for 10.

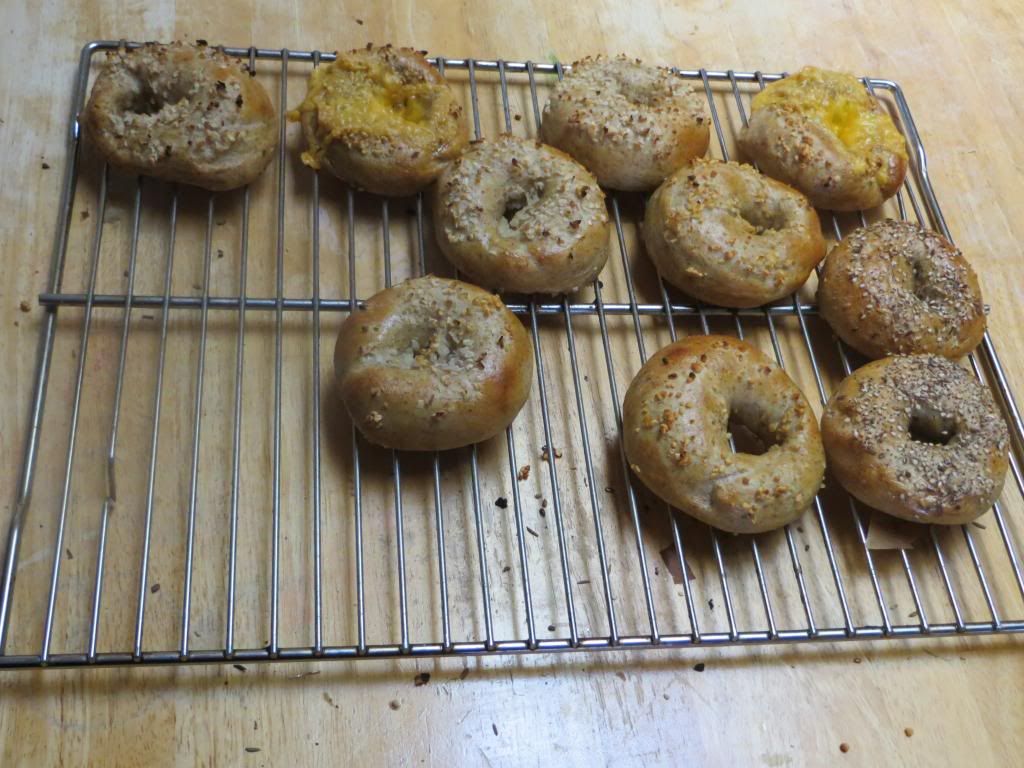
For this morning's breakfast, Iris (my 9-year-old) desperately wanted bagels, so I said I'd make them, but I only had rye starter ready to go. Could be interesting, I thought. So I plowed ahead. They turned out well!

Forumla

  • Whole Rye: 16%
  • High gluten flour: 84%
  • Water: 59%
  • Salt: 2%
  • Diastatic malt powder: 1%
  • All the rye was in the starter at 100% hydration

Ingredients

  • Rye Starter at 100% hydration: 285g
  • High gluten flour: 735g
  • Water: 375g
  • Salt: 18g
  • Diastatic malt powder

Here's how I made them. The night before, I mixed up all the ingredients until they were mostly hydrated, and then let them sit for 15-20 minutes. I then kneaded for about 5 minutes, let it sit for another 5 minutes, and gave it a final kneading of 2-3 minutes. I then cut the dough into 12 pieces of 110 - 120g each.

I pre-shaped each piece into a ball and then rolled them out into a snake, which I wrapped around my hand, sealing the ends together with the heel of my palm. They proofed overnight, covered, in my garage, which is unheated, but rarely gets below 45 degrees F.

The next morning, I brought a big pot of water to boil, to which I'd added a good handful of baking soda. Does it make a difference? Who knows? But I know I'm not messing around with food-grade lye, and baking soda is cheap. Why not? Anyway, it was apparently very cold last night. Usually, I boil them for a minute on each side, and they typically float after 30 seconds or so. These didn't float until 1:45 had passed! Anyway, I put them on a piece of parchment paper that I'd placed on my peel, and let them cool down a bit before brushing them with an egg wash (1 egg + a tsp or two of water, lightly beaten). I like the color it gives them, and it makes the toppings stick better. For toppings, I like garlic, onion, a salt & seed mix, and cheese. For the garlic and onion, I've found that what works best is to rehydrate dehydrated onion and garlic with hot water. Fresh just burns to a crisp in the oven. I add cheese halfway through the bake. Cheese on top of some garlic is particularly nice. I baked at 500 degrees F on a pre-heated baking stone for 10-12 minutes, turning once halfway through the bake.

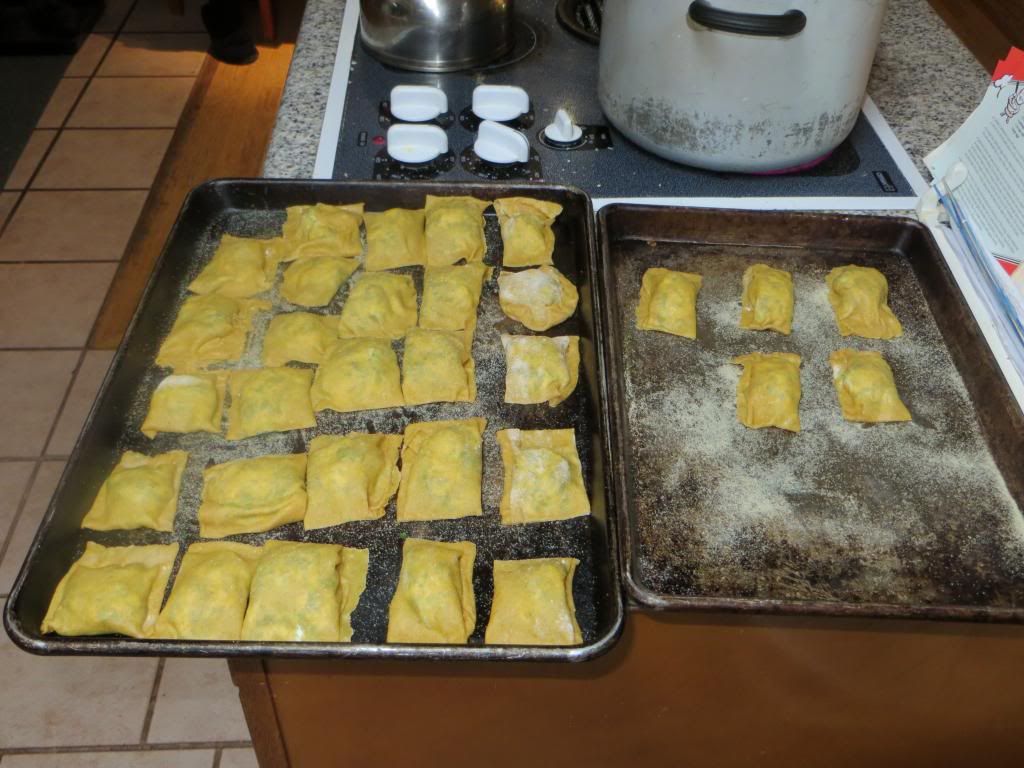
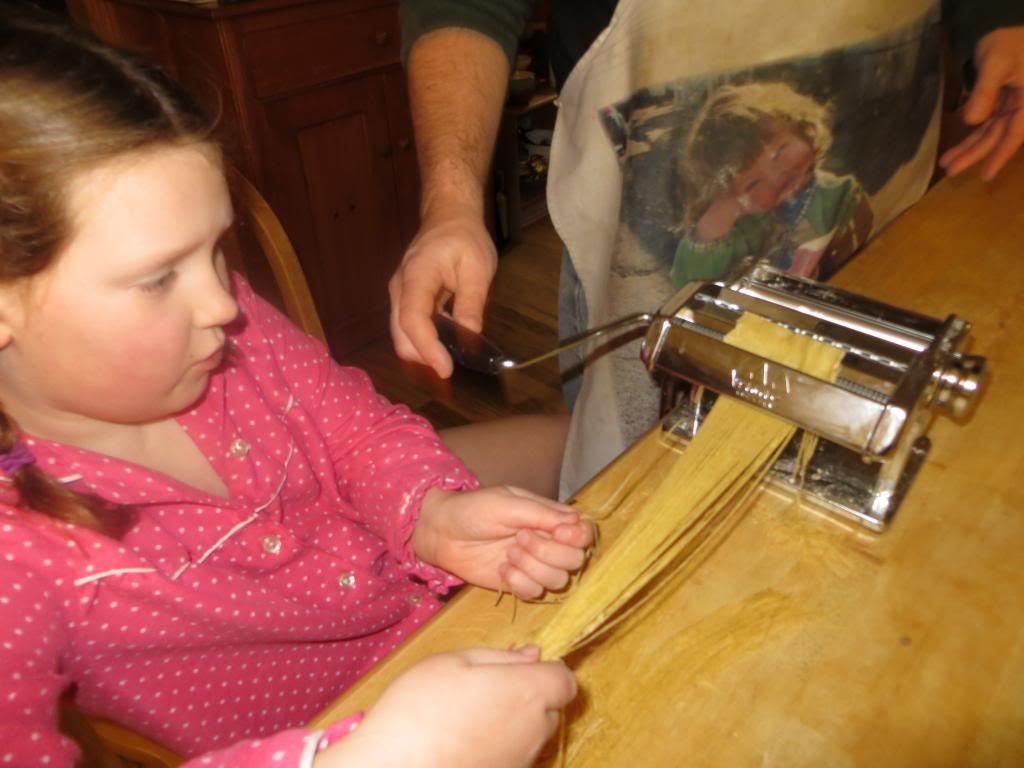
Finally, my daughter and I have had a lot of fun with the pasta machine we got for Christmas from my parents. Last night, we made spinach and cheese raviolis, which were a ton of fun to make, and even more fun to eat.

I sauteed them in some brown butter after they boiled and then topped with grated parmesan. Just delicious. Here's Iris and me turning the scraps into noodles. They went into the freezer and will likely be added to a soup sometime soon.

Happy New Year, fellow bakers!

Pages

Subscribe to RSS - Sourdough