The Fresh Loaf

A Community of Amateur Bakers and Artisan Bread Enthusiasts.

Sourdough

Melissa.cox10's picture

Can overproofed dough be repurposed?

November 25, 2012 - 5:44pm -- Melissa.cox10

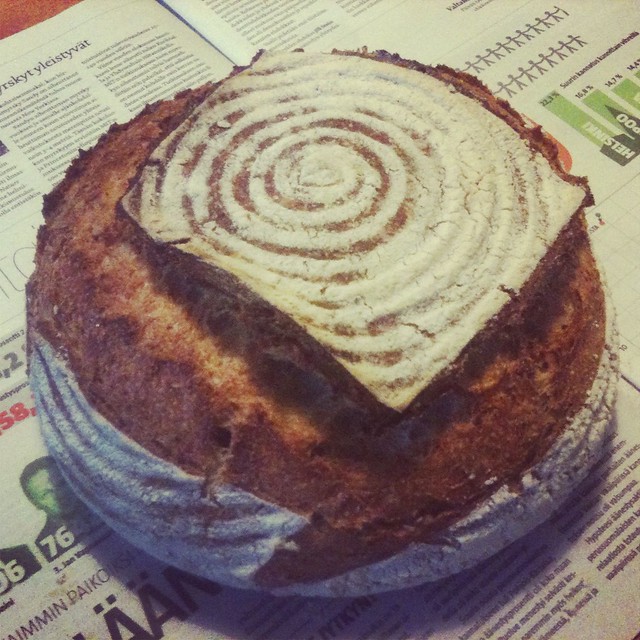
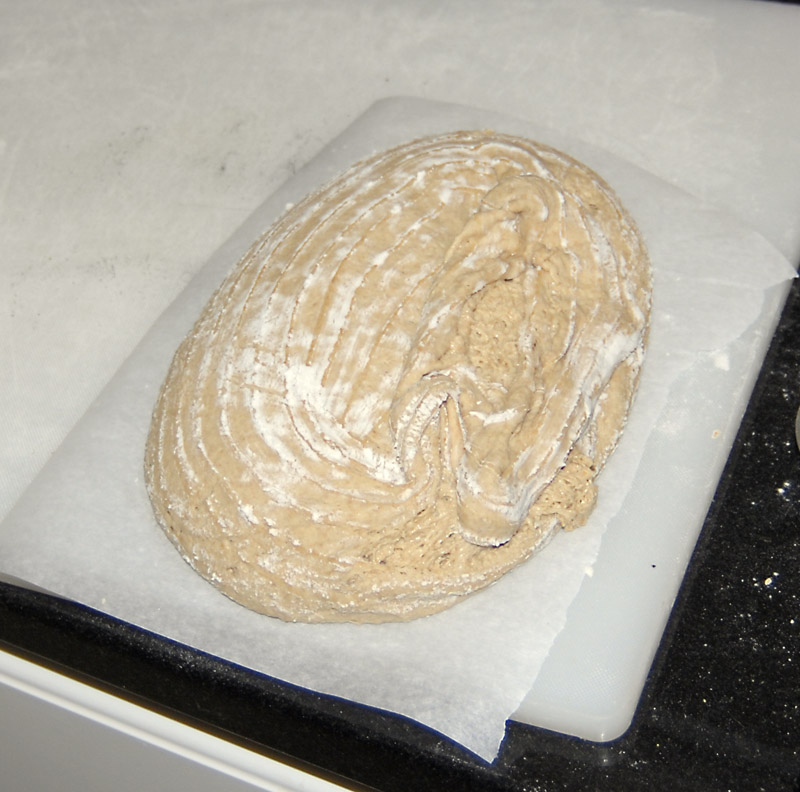
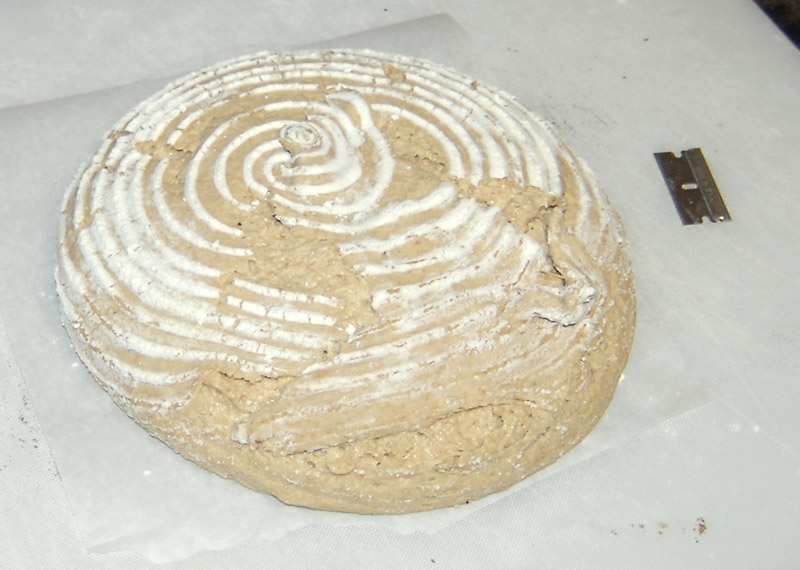
I live in India and have a hot un-air conditioned kitchen. This did not stop me from following the KAF rosemary olive oil sourdough recipe exactly and letting the dough have a long ferment.  This morning I woke up to a wet,bubbly dough. I tried shaping into a boule and this is what it looks like now. Can I use this as a starter for the next loaf? Can I bake it as a "Ciabatta"? 


dabrownman's picture
dabrownman

After the difficult and tedious Not So Stollen bake earlier in the week, we decide to continue our Thanksgiving bake list with something much simpler, less stressful even if not as enjoyable.


After seeing Toady Tom’s fantastic large miche bake and the excellent crust he managed to put on it, we decided to do a large loaf too only using the chacon shape we love to make since it too can produce a beautiful crust if it naturally splits where we would like as it springs and blooms in the oven heat.


We also wanted to try out a toasted wheat germ, soft white wheat extract and oat bran component similar to Toad’s to see what it tasted and looked like in the chacon.  All but 10g went into the dark side.


Instead of using our recent 1  starter and 24 hour counter levain development we went back to our roughly 20% seed levain for the SD starter required for this bake.   One levain was Rye Desem combo SD for the heartier darker portion of the loaf that has 2all of the whole grains listed for the starter. 


The other levain was a YW one that was fed with cake meal, another new ingredient for bread making for us.  Many folks use this ground matzo altus for their lemon, poppy seed walnut cakes or possibly a chiffon cake of any number of possible flavors.  We decided to try it out in the whiter portion of this bread only to see what it tasted like and how it performed in two different kinds of bread.


The instant coffee and the cocoa were only used in the dark portion to, you guessed it, make it darker than the light colored portion.  We also used some yogurt whey water for some of the liquid in both portions with 2/3rds of it going into the dark side.  The sprouts were also split between the two sides in the same proportion as the whey water - 2/3rds to the dark. 


In order to finish the breakout, the white portion ended up being 500 g with 100 g of the AP and bread flour and 80 g of the whole grains in the bread flour and 10g of the toasted bits.  Total flour and toasted stuff was 290 g and the liquid was 210 g (42 g whey) for a little over 72.4% hydration not counting any of the 1/3 of the sprout total that went into it.
  

With the malts, oats, and potato flakes on in the dark side the hydration of it was 82%.
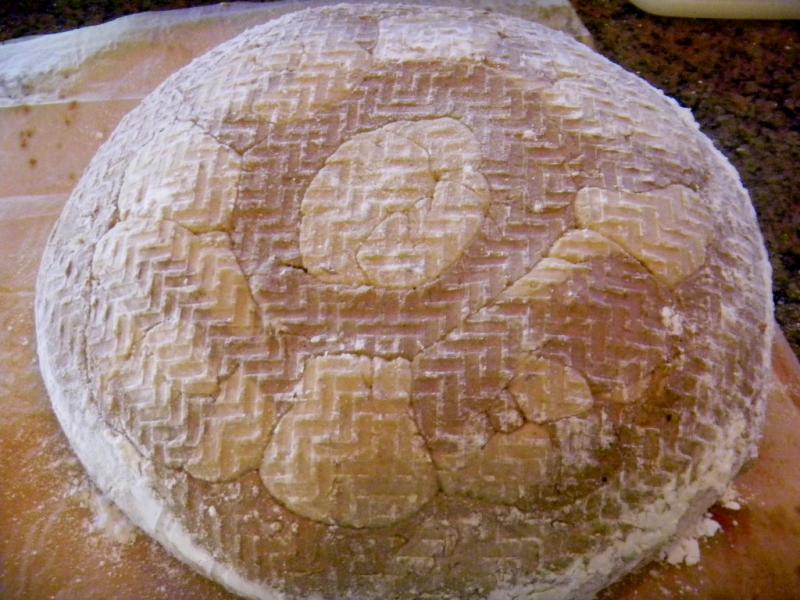
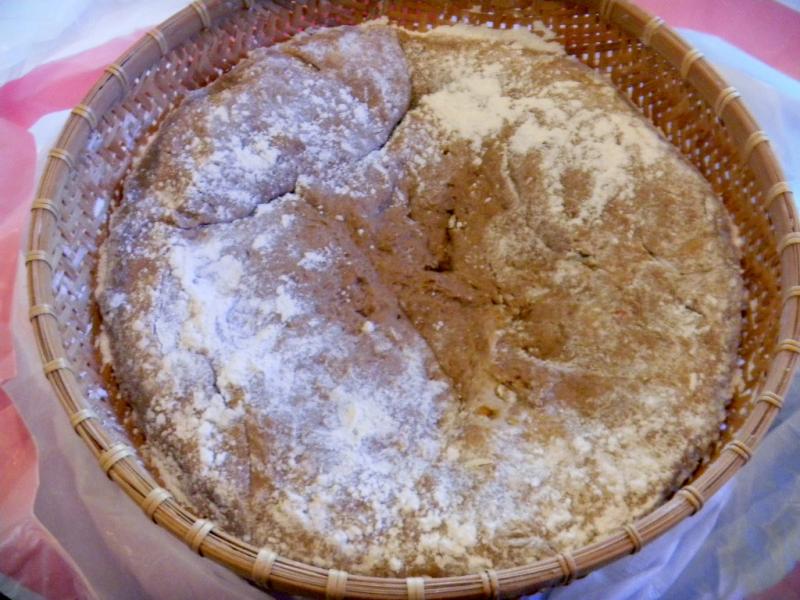
The fun part was putting together the largest chacon we have ever made.  The center knotted roll is made from the light side and the side going down into the basket is sprinkled with rice flour.  It was surrounded by a twisted rope from the dark side.   The 4 other knotted rolls, on the cardinal direction points, were made from equal portions of dark and light that were ropes twisted together to make one rope.  The 4 little balls between the 4 twisted knotted rolls were from the light side.  Remember to rice flour anything that will touch the basket so it doesn't stick - and don't rice flour anything else so it sticks together.
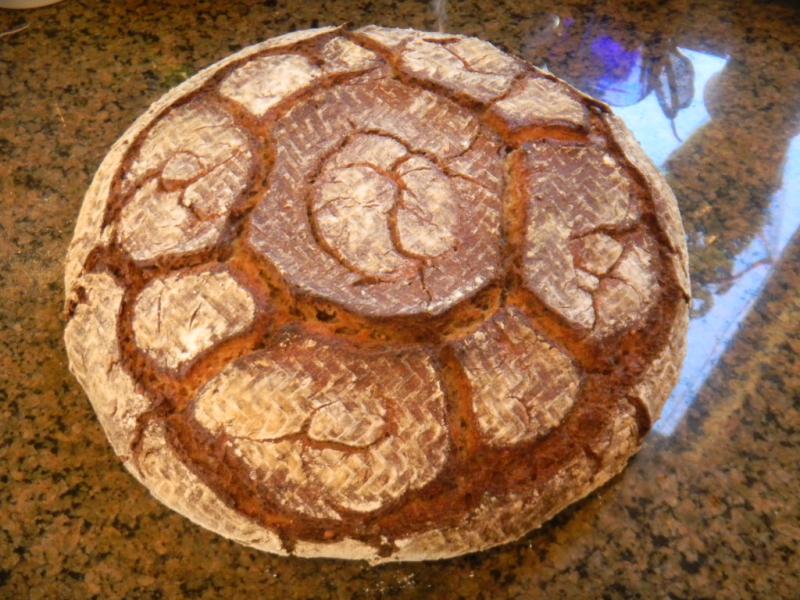
 

What was left over was two light ropes that were placed on the spread out remaining dark side.  The long sides of the dark were folded over the light ropes to encapsulate them making a long rectangle.  The shot sides of the rectangle were folded over to the middle making a near square where the corners were folded into the center making a circle that was quickly shaped as a boule.


This boule was pressed out gently into a large bialy with the center indentation equal in size to the circle of knotted rolls, ropes and balls already in the basket.  The large bialy was floured around the edge that would contact the basket with rice flour and flipped over so the indentation covered the knotted rolls and the assembly was basically flat on top when finished. 
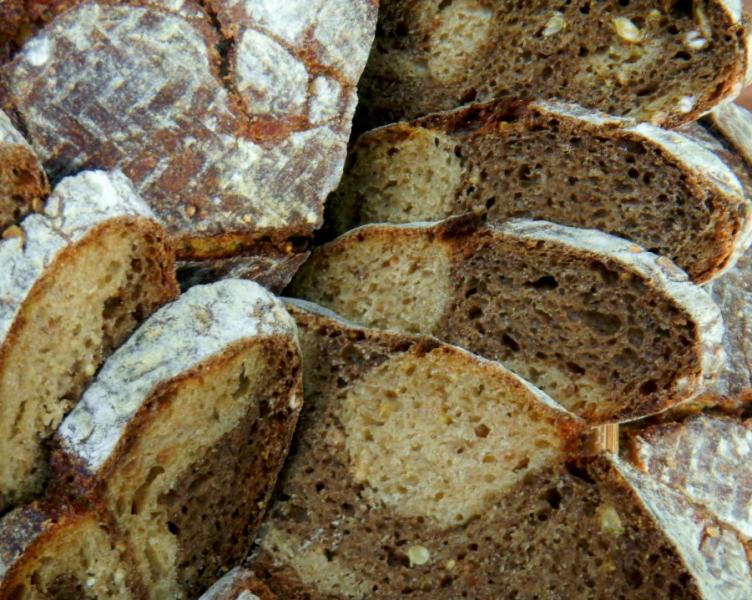
We hope this assembly will make a very pleasing marbled look when the chacon is cut.  Otherwise it was a waste of time and effort…something every baker is well used to if they have been baking more than a couple of minutes with an apprentice that is nearly all paws, bark and ankle bite.

The levains were formed by mixing, letting them double over about 4 hours or so and then chucking them in the fridge for 24 hours to build the labs while suppressing the yeast.   The flours and toasted bits were autolysed with the liquids and the salt for 2 hours as the levains came back to room temperature a day later.
Once the autolye and the levain were combined for each, the gluten was developed with 15 minutes of French slap and folds.  Then 4 sets of S&F’s wee done fpor each where the sprouts were incorporated on the 3rd set.  The dough’s were allowed to develop for 1 ½ hours on the counter before being retarded in a36 F fridge for 15 hours.


They were allowed to warm up for 1 ½ hours before being formed into the chacon and the allowed to proof at room temperature for 2 hours before firing up old Betsy and her16”round stone,  to preheat at 500 F for 20 minutes before 2 of Sylvia’s steaming pans were added.

After 45 minute of total pre-heat the chacon was un-molded easily from the basket using parchment and peel.  It slid into the oven off the peel when a 1/2 C of water was thrown into the bottom of the oven for extra initial steam and the door closed.  The temperature was turned down to 450 F the steaming was done at the 20 minute mark when the pans were removed and the temperature turned down to 425 F, convection this time.

In another 20 minutes the bread was exactly 205 F in the middle and beautifully and evenly brown from rotating it 90 degrees on the stone every 5 minutes after the steam came out.  At the 40 minute total mark, we turned off the heat and left the oven door ajar as the chacon continued to crisp on the stone for another 10 minuets before removal to the cooling rack.

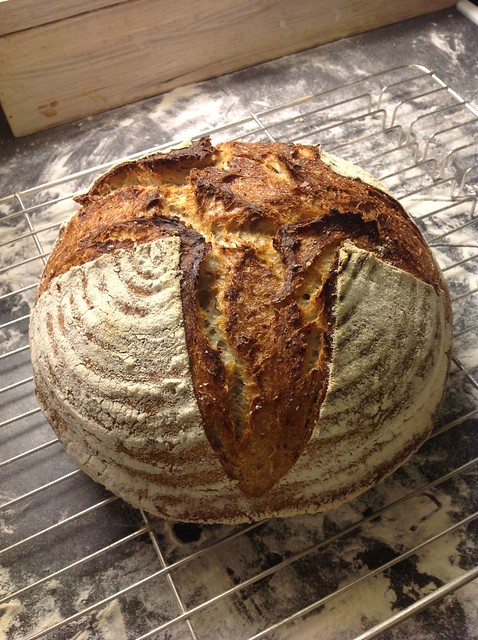
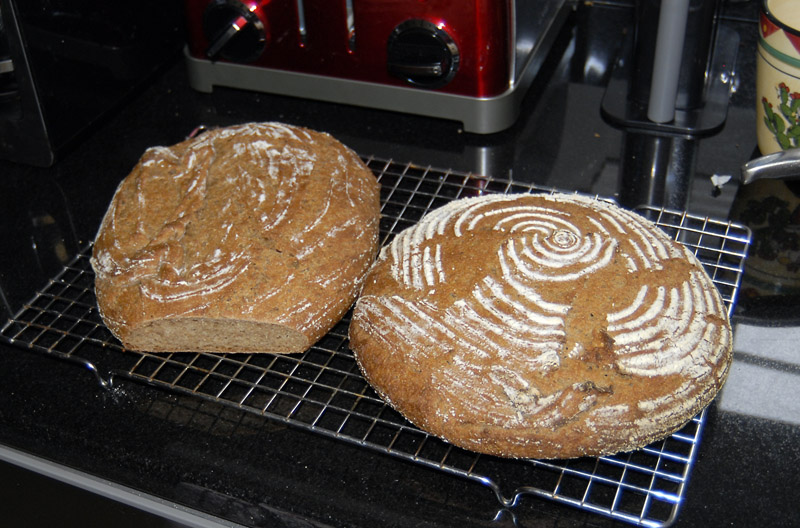
The chacon didn't spring all that much and might have been a little over proofed but it did bloom and crack as expected.  It is a very pretty large chacon and we can’t wait for it to cool down and rest for awhile before we cut it ....   and see if anything interesting happened inside.

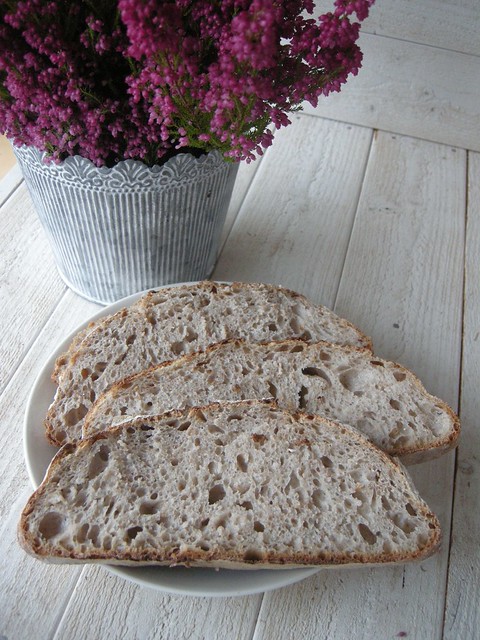
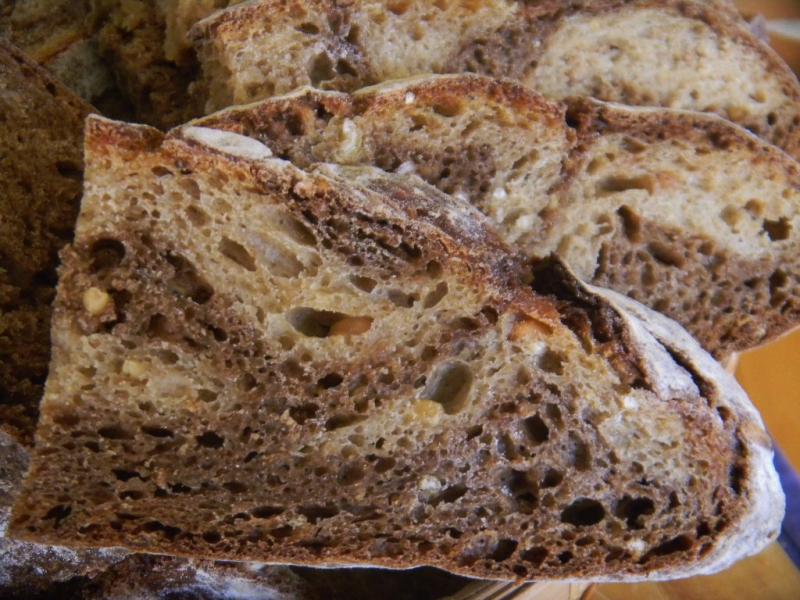
Now that it is cut..... the light and dark did learn to play well together.  We are pleased that it is so pretty on the inside and fitting for such a gorgeous outside.   The crumb is fairly open for so many add ins and whole grains.  The dark is tangy sour while the white is a little sweet, maybe sue to the Cake meal, has no tang and is a little moister as YW tends to impart in crumbs everywhere.  A very nice combination of two tastes.  The toasted bits tend to come through more on the dark side and the millet crunch is prevalent throughout.  This bread will have to to to the top of the chacon list and into the top 15 of our all time top 5 favorites.  I'm glad we made a big one.

Formula

Combo Starter

Build 1

%

SD Desem & Rye Sour

30

3.01%

Bulgar

20

2.56%

Dark Rye

20

2.56%

Kamut

20

2.56%

Buckwheat

20

2.56%

Spelt

20

2.56%

Whole Wheat

20

2.56%

Yeast Water

60

7.69%

Ground Flax

20

2.56%

Cake Meal

80

10.26%

Water

140

17.95%

Total Starter

450

39.74%


Starter Totals


Hydration

97.25%


Levain % of Total

17.88%


Dough Flour


%

Whole Spelt

25

3.21%

Dark Rye

25

3.21%

Whole Wheat

25

3.21%

Whole Kamut

25

3.21%

Bulgar

25

3.21%

Buckwheat

25

3.21%

Cake Meal

50

3.21%

Oats

20

2.56%

Instant Potato Flakes

20

2.56%

Bread Flour

245

31.41%

AP

245

31.41%

Dough Flour

730

93.59%


Whey 125 and Water

610

78.21%

Dough Hydration

83.56%


Total Flour

998


Total Water & Whey Water

822


T. Dough Hydration

82.36%


Whole Grain %

43.19%


Hydration w/ Adds

78.94%


Total Weight

2,517


Add - Ins


%

Red Multi-grain Malt

3

0.38%

Barley Malt

20

2.56%

White Multi-grain Malt

3

0.38%

Total

26

3.33%


Multigrain Sprouts


%

WW

25

3.21%

Rye

25

3.21%

Quinoa

25

3.21%

Buckwheat

25

3.21%

Millet

25

3.21%

Bulgar

25

3.21%

Spelt

25

3.21%

Total Sprouts

175

22.44%


Toasted Bits


%

Toasted Germ, Oat Bran & Extraction

50

6.41%

  10 g each of instant coffee and cocoa went into the dark side only.

jarkkolaine's picture
jarkkolaine

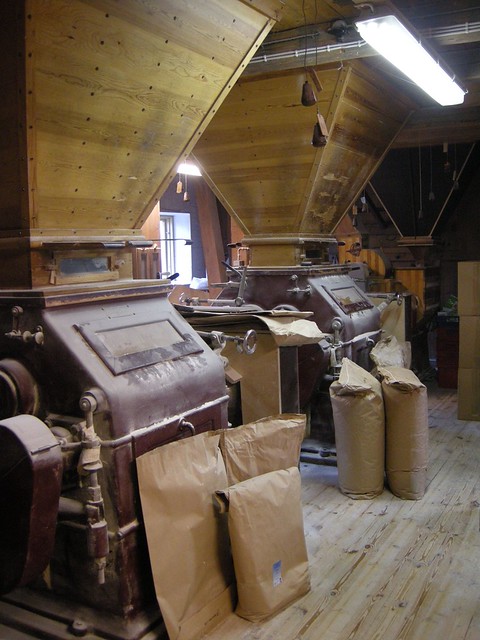
In the beginning of the fall, I took my boys with me on a small trip to Vääksyn mylly, a small mill at about 150 kilometers from where I live. It's the mill of choice of Viipurilainen kotileipomo, the family run bakery I visited earlier this year (and featured in issue 2 of my magazine, Bread), and the owner of the mill is my friend on Facebook. 

The mill has a strong feel of old days. This is how buying flour must have been like in the past, I thought: friendly people asking you what kind of flour you had in mind, seeing where the flour comes from as you enter the shop. And apparently I'm not the only one impressed by what they do: when I said I had come from Helsinki, the mill's staff told me that it's not that far compared to some other customers. One customer had just visited from Lapland and brought big bags of flour with her. 

I bought 5 kilos of rye flour, 10 kg bread flour, some oats and "uutispuurojauho", a very coarse rye flour meant for porridge making and returned home eager to try the flours. 

I started by trying to make my regular white sourdough bread using the bread flour from the mill, and noticed that there was something very different about how the dough behaved. I knew the flour is strong in protein, but this was much stronger than I had expected. I worked the dough for a long time, until I got tired and gave up. Without a machine, making a dough with nothing but this flour seemed impossible. I think Dan Wing or Alan Scott talked about this in Bread Builders, saying that strong flour is not very good for sourdough bread... What surprised me however was that even a long autolyse didn't seem to help. 

After experimenting with different ratios of this bread flour and some organic white flour I had used before, I found a combination that works very well. Using just 200 grams of bread flour from Vääksy, 100 grams of coarse rye flour from the same mill, and 800 grams of the organic flour, I was able to create bread I really liked: 

At times, I was ready to give up, but I guess now I understand better than ever that if all flour is not created equal, and what is good for something (making dough with a mixer in this case) is not good for something else (mixing a dough by hand).

But at the same time, I'm still not quite sure about this: I had previously bought some of this same flour from a small local food shop near the mill and made bread with it quite succesfully, replacing only a small part of the flour with spelt... There could be differences in batches, or maybe some other factor in the environment or even my starter was affecting the results? 

--

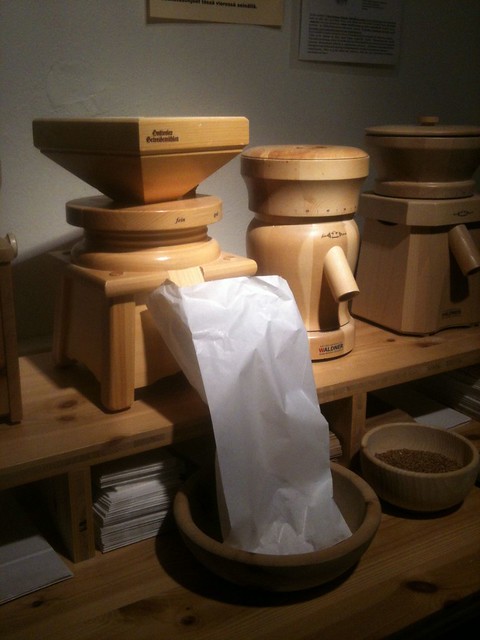
The next step in my flour experiments came by surprise when I visited Eat & Joy Maatilatori, a local food market at the heart of Helsinki and found their flour mills! At the back of the store, I found a small room with about 10 different flour mills meant for home use. Next to the mills they have big bags of grains, a scale, and a note saying "feel free to use the mills to grind your own flour." I had found heaven!

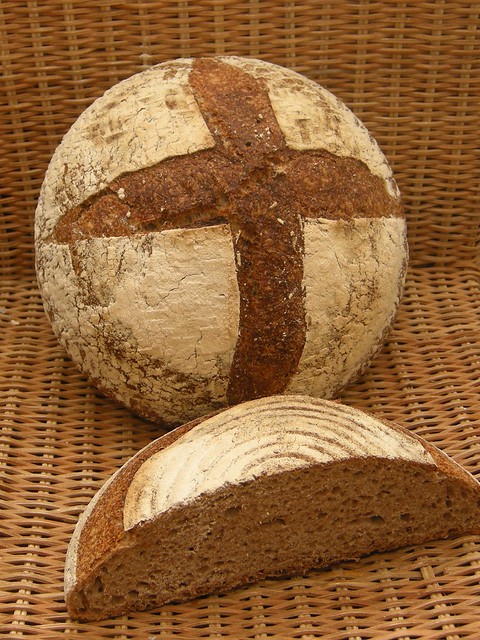
So far, I have visited the shop twice, as it's always a bit of work to take my kids and go flour shopping in Helsinki. Last week, I bought some rye flour and full grain wheat from the shop. Here's the bread that came out of that visit. 50% of the flour used in the bread is stone ground wheat flour I milled myself at the shop and the remaining 50% regular organic white flour. It's quite dense but tastes delicious with a rather strong wheat flavor (it's amazing how much darker and more flavorful this bread is compared to bread I've made from regular, store bought full grain flour before).


I should really be experimenting with heat and oven improvements, but my head is bubbling with ideas for more flour experiments... Maybe next, I'll mill some more flour and try sifting it to a higher extraction level, or maybe I'll mix in some of the strong bread flour from Vääksyn mylly...

Isand66's picture
Isand66


I based this recipe loosely on an old yeast based recipe I had created many years ago which always came out nice and light and moist.  I wanted to make a nice light and airy sourdough loaf using whipped egg whites and cream cheese for a nice flavorful texture.  I like to think my bread making is much more sophisticated now than 15 years ago when I first made this recipe.  Back then I was not into sourdough yet and had just graduated from the bread maker to a Kitchen Aid stand mixer.  Now, I prefer bread that has layers of flavor and a nice chewy crust.

In order to accomplish my goal of a light and airy bread but with a nice crust and layers of flavor I used wheat germ, malted wheat flakes and oat flour to give the finished product a nice nutty flavor.  I used a combination of French style flour and European style flour from KAF along with some white rye and potato flour as well as some raspberry balsamic vinegar.

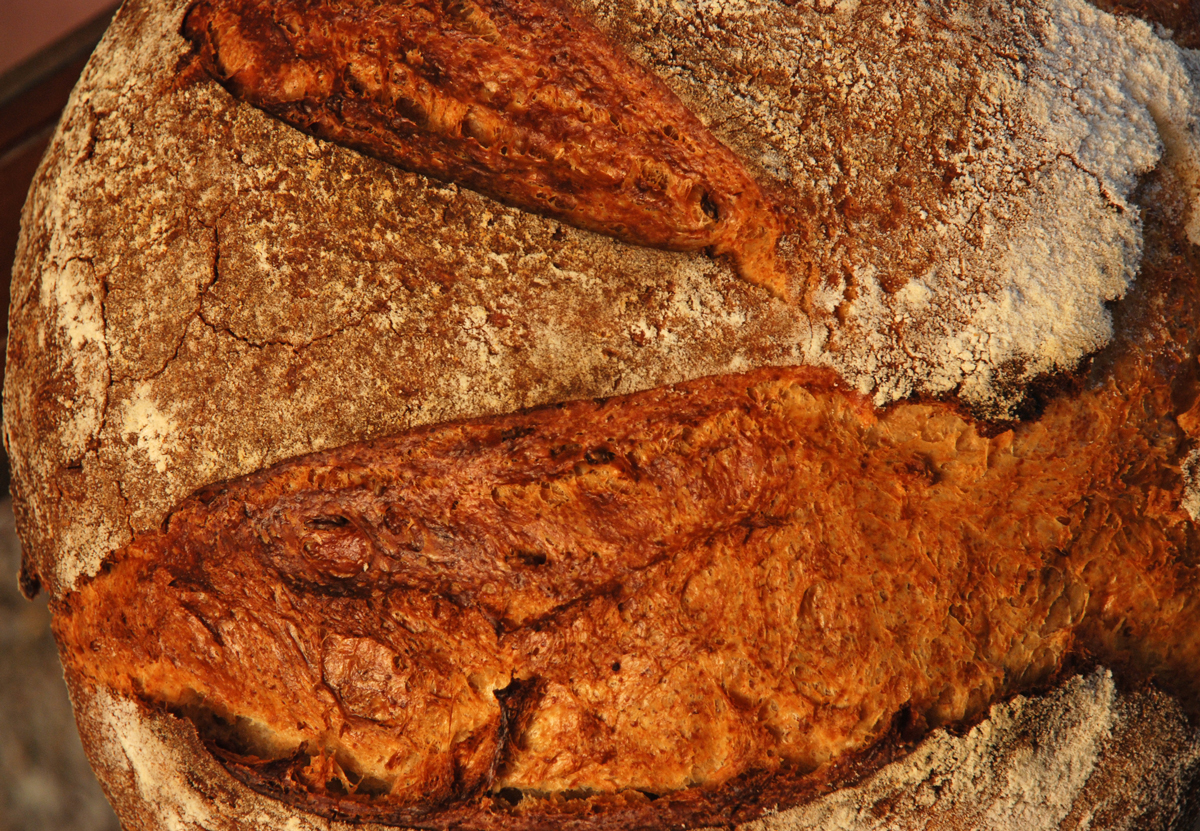
I have to say the end result was exactly what I was hoping for and more.  The crust is perfect with a nice airy open crumb and the taste is nice and nutty but light.  The malted wheat flakes add a nice element in the crumb as well.

This is a perfect bread for just about anything so I hope you give it a try.

I used my standard 65% AP starter for this recipe.

Directions

AP Starter

227 grams AP Flour

71 grams AP Seed Starter

151 grams Water at Room Temperature (80-90 degrees F.)

Mix ingredients in a bowl until thoroughly combined.  Cover the bowl and let it sit at room temperature for around 8 hours.  The starter should almost double when ready to proceed.  You can either mix in final dough or put in refrigerator for at most 1 day before using.  If your kitchen is warmer than mine which is usually about 70-72 degrees with my air-conditioning you can proceed sooner.

Main Dough Ingredients

425 grams Refreshed AP Starter (65% hydration) from above

150 grams European Style Flour (KAF, you can substitute bread flour with a little whole wheat mixed in)

50 grams Wheat Germ

200 grams French Style Flour (KAF, you can substitute AP flour if necessary)

50 grams Oat Flour (KAF)

50 grams White Rye Flour (KAF)

65 grams Potato Flour

40 grams Malted Wheat Flakes

224 grams Softened Cream Cheese (1 Package)

132 grams Egg Whites (4 large eggs)

25 grams Raspberry Balsamic Vinegar

16 grams Seas Salt or Table Salt

343 grams Water at Room Temperature

Procedure

In the bowl of your mixer using your beater attachment whip the egg whites on the highest speed until stiff peaks are formed.  Set aside while you mix the main dough below.

Mix the flours, and malted wheat flakes and wheat germ with the water in your mixer or by hand for 1 minute.   Next fold in the egg whites by hand and let it rest covered in your bowl for 20-30  minutes.   Next cut the starter into small pieces and add to the flour mixture in the bowl and also add the oil, salt, cream cheese and vinegar.  Mix for 4 minute to incorporate all the ingredients. I mixed on speed #1 for 3 minutes and speed #2 for 1 minutes.   Note this is a very wet dough but resist the urge to add too much flour as you don't want the dough to become too stiff.

Next take the dough out of the bowl and place it in an oiled bowl or container.  Do a stretch and fold and rest the dough uncovered for 20 minutes.  After the rest do another stretch and fold and cover the dough and let it rest for 10 minutes.  Do one more stretch and fold and put the dough into a lightly oiled bowl and let it sit at room temperature covered for 2 hours (if it is already in a bowl just make sure to cover it).   (Note: since this dough is very wet, I did 2 extra stretch and folds in the bold and one additional one right before putting it in the refrigerator).  After 2 hours you can put the dough into the refrigerator for 24 hours or up to 2 days before baking.    I baked the bread about 24 hours later.

The next day (or when ready to bake) let the dough sit out at room temperature for 2  hours.

Next, form the dough into your desired shape and put them in floured bannetons, bowls or on a baking sheet and let them rise covered for 2 hours or until they pass the poke test.  Just make sure to not let them over-rise.

I made one large boule and used a basket with a floured linen liner.

When read to bake, score the loaf as desired and prepare your oven for baking with steam.

Set your oven for 500 degrees F. at least 45 minutes before ready to bake.  When ready to bake place the loaves into your on  your oven stone with steam and lower the temperature immediately to 450 degrees.    When both loaves are golden brown and reached an internal temperature of 200 degrees F. you can remove them from the oven.  Since this was one large loaf it took about 55 minutes to bake.  (Note: since I made one large Miche I had to lower the temperature to around 425 degrees F. with about 20 minutes to go so the crust would not get too dark).

Let the loaves cool down for at least an 3 hours or so before eating as desired.

 
Steve H's picture

Hamelman-esque Sourdough Pizza Dough

November 10, 2012 - 6:05am -- Steve H
Forums: 

I am trying to make a sourdough pizza based upon my favorite sourdough recipe, the Hamelman Vermont Sourdough. I've decided that the way to do this is to try to adapt the sourdough recipe to the pizza dough recipe in his Bread book. I'd appreciate any comments or suggestions since this is the first time I have tried to adapt one of the recipes this dramatically:

Vermont Sourdough Pizza Dough

Overall Formula


dabrownman's picture
dabrownman

We decided to take our 1% SD starter experiment to the dark side by using much more whole grains; mainly rye and add some yeast water into the mix to try to open the crumb.  Our previous YW experiments show that YW can open the crumb dramatically more than what SD seed can do on its own when it comes to high percent whole grain breads.


With Thanksgiving less than 2 weeks away we decided to make a small cocktail loaf of rye bread flavored with cocoa, coffee and caraway.  To bolster the flavor and texture of the medium rye bread further we added some scalded rye chops to the 82.5 % hydration mix.


Like Phil says - When it cracks it is ready to go in the oven.  In this case the bran flakes worked perfectly. 

We have no experience to go on using low amounts of SD and YW seeds and long counter top fermentation when using higher amounts of home milled grains.  So we made a wild guess at how long the process should take.  We decided to knock 5 hours off the total 24 hour time and to not add the 5 g YW to the mix until 5 hours after the fermentation started.

It was ready to pan up in 16 hours and it proofed, nearly doubling and cracking the bran sprinkled on top in 4 hours  We baked it with 2 of Sylvia's steaming cups in the mini oven at 450 F for 15 minute. The steam was removed and the temperature was turned down to 350 F and baked for another 10 minutes before being de-panned and baked for another 5 minutes after turning the bread 180 degrees on the oven rack. 

It was left in the off oven, door ajar for 10 minutes to continue to crisp the crust and then removed to he cooling rack.  From the outside the loaf has potential.  It smells beautiful and is quite attractive for a brown lump of a bread covered in bran.  We hope that the crumb is as open as the last rye bake that was 100% whole rye.  We await 24 hours to see if the yeast water worked its magic once again.

24 hours later and this bread turned out open, moist 1/4"slicing is no problem and best of all just plain delicious.  You don't taste the coffee and cocoa and even the caraway is subtle.  It is lovely plain, toasted, buttered and a nice coctail bread for the Holidays.

Formula 

Combo Starter

Build 1

%

SD Desem & Rye Sour

3

1.19%

Yeast Water

5

2.00%

Total Starter

8

3.20%


Starter Totals


Hydration

344.44%


Levain % of Total

1.58%


Dough Flour


%

Whole spelt

25

10.00%

Dark Rye

100

40.00%

Whole Wheat

25

10.00%

AP

100

40.00%

Dough Flour

250

100.00%


Salt

5

2.00%

Water

200

80.00%

Dough Hydration

80.00%


Total Flour

251.8


Total Water

206.2


T. Dough Hydration

81.89%


Whole Grain %

61.76%


Hydration w/ Adds

82.56%


Total Weight

505


Add - Ins


%

Red Multi-grain Malt

2

0.80%

Barley Malt

10

4.00%

White Multi-grain Malt

2

0.80%

Total

14

5.60%


Scald


%

Rye Chops

20

8.00%


1 tsp Caraway Seeds


1 tsp Instant Coffee


1 tsp of Cocoa


loydb's picture
loydb

Round one of this fight can be found at this blog post.

The problem I had the first time was insufficient hydration. I certainly solved that problem...

I changed a bunch of things around this time, resulting in a far superior flavor (IMO), but going completely overboard on hydration to the point that it was more like ciabatta than bread. Here's what I did:

  • First, instead of the spelt poolish, I mixed 1 ounce of my KA New England sourdough starter at 1:3:3 with whole milled spelt. After that sat overnight, I fed it again roughly 1:1:1 to get the volume for my poolish.
     
  • Second, I made a soaker with water, all of the durum flour, and 100g of the spelt flour that was called for in the final dough. I didn't sift any of it -- though I did sift to 85% the final addition of spelt the next day. The soaker sat on the counter overnight. I did add the yeast called for into the final dough, so it wasn't a 100% sourdough fermentation.
     
  • Third, I added a bunch of extra water to get the hydration up. Too far up, as it turned out. As you'll see below, the dough just spread out after having stuck to the banneton...

The taste came out fantastic. I still have half a loaf of the first round I baked of this, so we could do side-by-side tasting. It's not as sour as something done without any commercial yeast, but the tang is still there. So, for round three, I'll repeat everything except the flood of water and see how it comes out.

mwilson's picture
mwilson

To me, the pinnacle Panettone. Formula comes from Iginio Massari.

This is the most challenging formula for Panettone, hence why I have been so drawn to it. I rise to technical challenges. I followed the formula, timings and temperatures without compromise.

Iginio Massari’s formulas typically use only 25% natural yeast and cooler temps for the first dough. The result, more flavour… I can still recall that familiar aroma after the first rise. So aromatic!

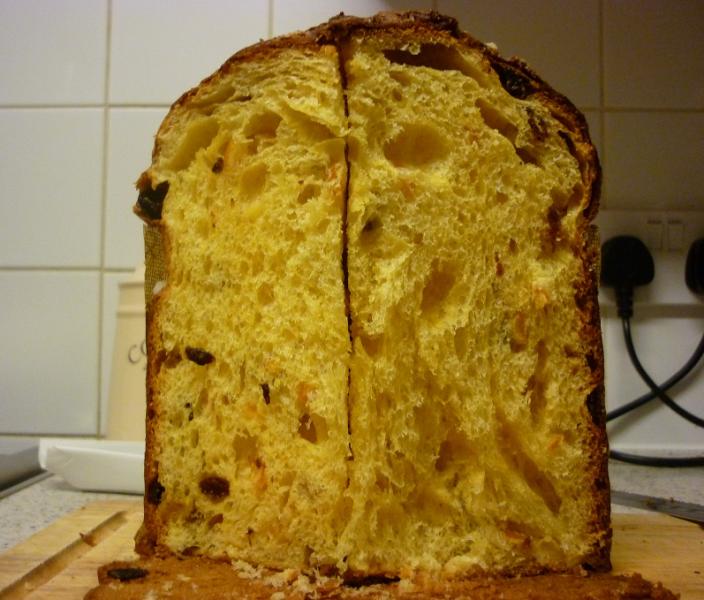
Oven spring was huge. I didn’t know when it was going to stop… Lasting nearly 20mins.

The taste and texture was perfect. I made the choice to use super strong Canadian flour to get that fluffy character I was looking for. A clean taste, not a hint of acidity or sourness. Just sweet, light, fluffy goodness, natural and nutritious.

The volume increase from dough to finished product was about 6 fold. All that lift created by my natural yeast...
 
Here it floats in water fermenting away. Beloved lievito 2.0! 

-Michael

dabrownman's picture
dabrownman

Go to the bottom of the post to see the extension after the ************************************************

It sounds like an interesting experiment to do for SD starter. I can use up to 20g of stater making 200 g of 80% hydration levain over 12 hours in the winter time and kitchen temperatures around 60-65 F. That 200 g levain would normally go into 800 g of flour and 600 g of water and then developed over a couple of hours. In the winter time it could possibly ferment and proof 6-8 hours on the counter before needing to go in the oven.  With yeast water we have gone 12 hours.

 I suppose that if one would use 1 g of SD starter and mix it with the entire 900 g of flour and 675 g of water and 2% salt (no levain build) it would take a while for it to be ready to bake, How long we will have to find out - unless someone has already done this test. I'm not sure, perhaps someone here knows this too, but yeast only lives about 6 days or so before croaking.

No collapse after 24 hours,

So my apprentice took 1 g of starter and tried it out on 100 g of flour and 75 g of water, 2 g of salt to see what happens. She started at 9 AM, Oct 26, 68.2 F kitchen temp and level marked with a rubber band. Lets see how long it takes to double and make a couple knotted rolls out of it :-) Here is a pix exactly 24 hours later the levain had nearly tripled but had not collapsed. Amazing for 1 g of starter and 100 g of flour.


9 AM - Oct 26                                                                                      9 AM - Oct 27. 

Here is a picture of the top of the levain too. I've decided to eventually make some bagels out of some of this and a lower hydration will slow this train down some too. Also want to get some whole grains in the mix too. So we will divide the dough in half and add another 86 g of flour, 44 g of water to get the hydration down to 60% from 75% and a little less than 2 g of salt to each half.  One half got 86 g of whole grain flours (50%rye, 32% WW and 18% spelt).  The other half got 86 g of AP and 44 g of water and less than 2 g of salt - to keep the control of white flour intact.

10 AM - Oct 27 after the 24 hour mark split into two levains one has some Whole Grains now and one is still AP only.

This should perhaps get us from 24 to 48 hours on the counter. The temperature fell to 70 F this morning from a high yesterday of 81 F in the afternoon fall kitchen.

The whole grain levain on the left doubled again at the 32 hour mark and was put in the fridge for a 24 hour retard and the white flour levain doubled at the 36 hour mark and also went into the fridge for a 24 hour retard.  Looks like 36 hours is as far as we would want to go before refrigerating or using.  Retarding the starter should make the sour really come out.

************************************************************************************************************************

Now that we know it takes 24 hours for our 1g of our Desem /Rye SD starter  tpo double 100g of flour at 75% hydration, we are going to extend the experiment to see if we can do a 36 hour bread on the counter top.

We mixed 7 g of 67% hydro starter with 50 g of water to thin it out and liquefy it.  We then added 22 g each of home ground whole: spelt,  rye and wheat along with 2 g each of white and red malts made from the same flours and mixed it up well.  We then added another  455 g of water and mixed again before adding 315 g each of bread and AP flour and mixing again.  This gave us a 72% hydration dough that has 10% whole grains and 1% SD starter. 

We let the dough autolyse for 30 minutes before adding 11 g of salt and starting 15 minutes of  French Slap and folds.  We expect to let the dough ferment for 24 hours before  letting it rise again for 12 hours before baking.  The gluten was well developed after the slap and folds and the dough ball looked like this:

Michael Wilson has had a positive effect on my dough balls!  Can't wait to try out his panettone !


11 AM  11/04/2012                                                                                 7 PM 11/04/2012  +- 10% increase in volume

11 PM  11/04/2012   +-20% increase in volume                               3 AM  11/05/2012  +- 30 %increase in volume


7 AM  + 100% increase in volume

It only took 20 hours to double in volume starting with 1% starter to flour ratio.  Time to split it up and and proof a loaf of fig, pistachio, sunflower and pumpkin seed bread and one plain old SFSF - and see how long they take to double.  The round is SFSD.

The reality was that the dough had doubled again in 4 hours and was ready for Big Old Betsy to bake up so we did.  At our hot kitchen temp of nearly 79 F  Doc.Dough spreadsheet said we would ne ready to bake in less time but we might have over proofed it a little too.

Here they are proofed.  24 hours on the counter from mixing the dough to baking it off worked for this starter, flour and hydration combination.

I will do another post to cover the bread itself which baked up very well.


Pages

Subscribe to RSS - Sourdough