The Fresh Loaf

A Community of Amateur Bakers and Artisan Bread Enthusiasts.

Sourdough

Juergen's picture

The power of autolyse

January 28, 2013 - 7:40am -- Juergen

Over the past year I've had my fair share of sourdough breads ripping apart on the sides while baking. Ever since I've introduced the autolyse method at the mixing stage, these problems have disappeared. Even a minor autolyse of just 20 minutes makes a huge difference. To me, the autolyse method has been a real eye-opener and it has vastly improved the quality of my SD breads. Anyone else gotten the same experience with autolyse?

evonlim's picture
evonlim

weekend baking for friends.

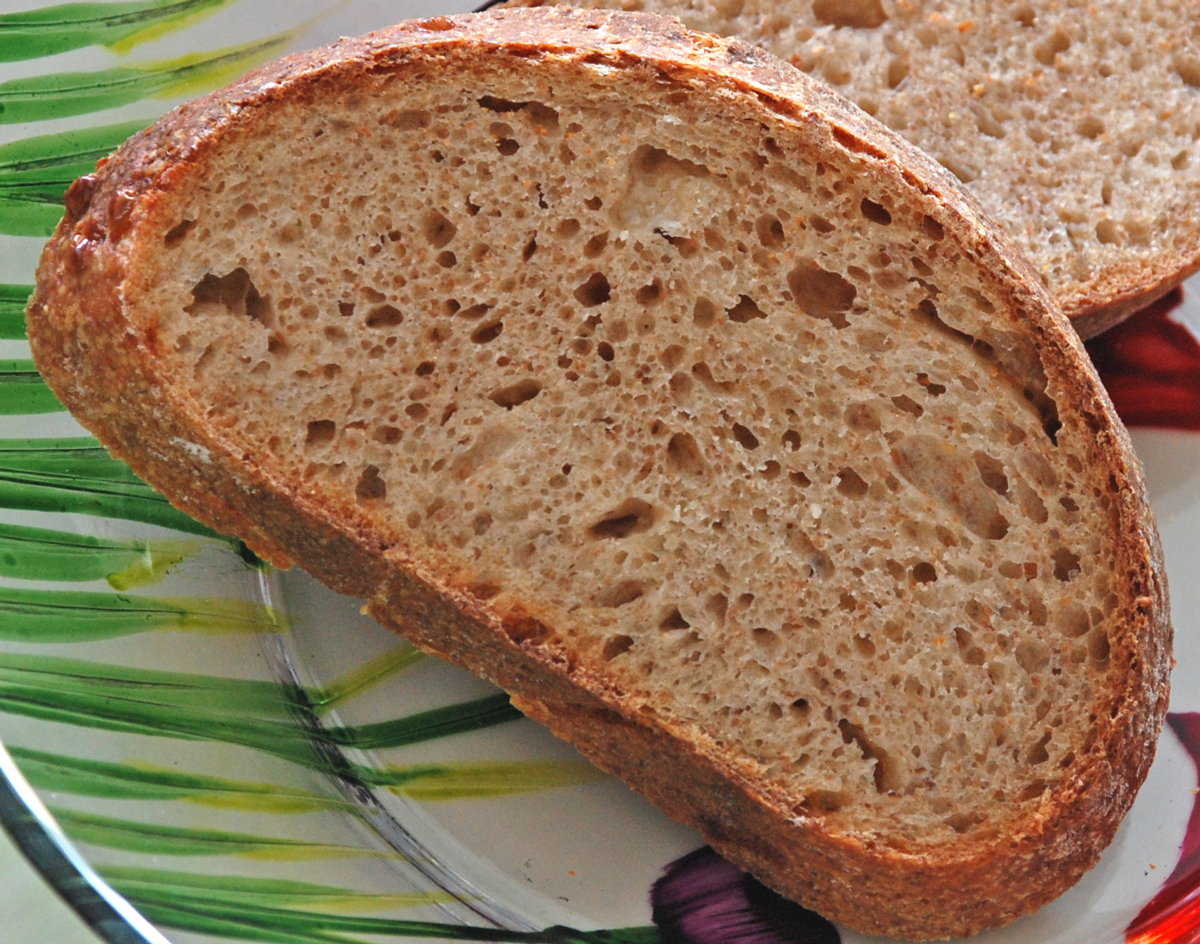
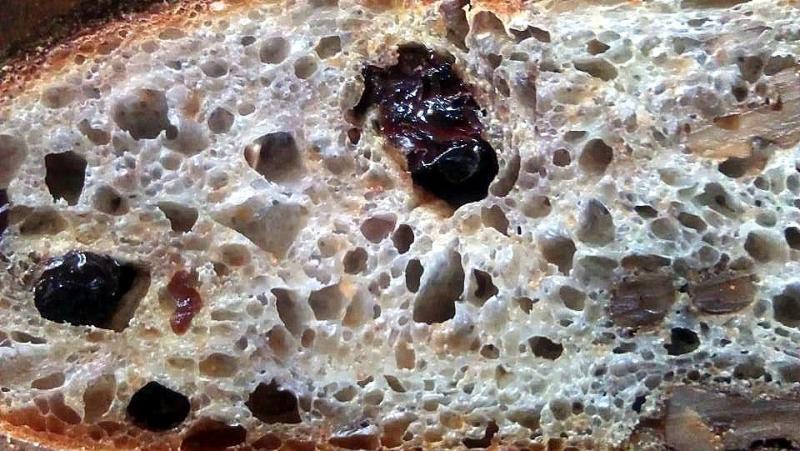
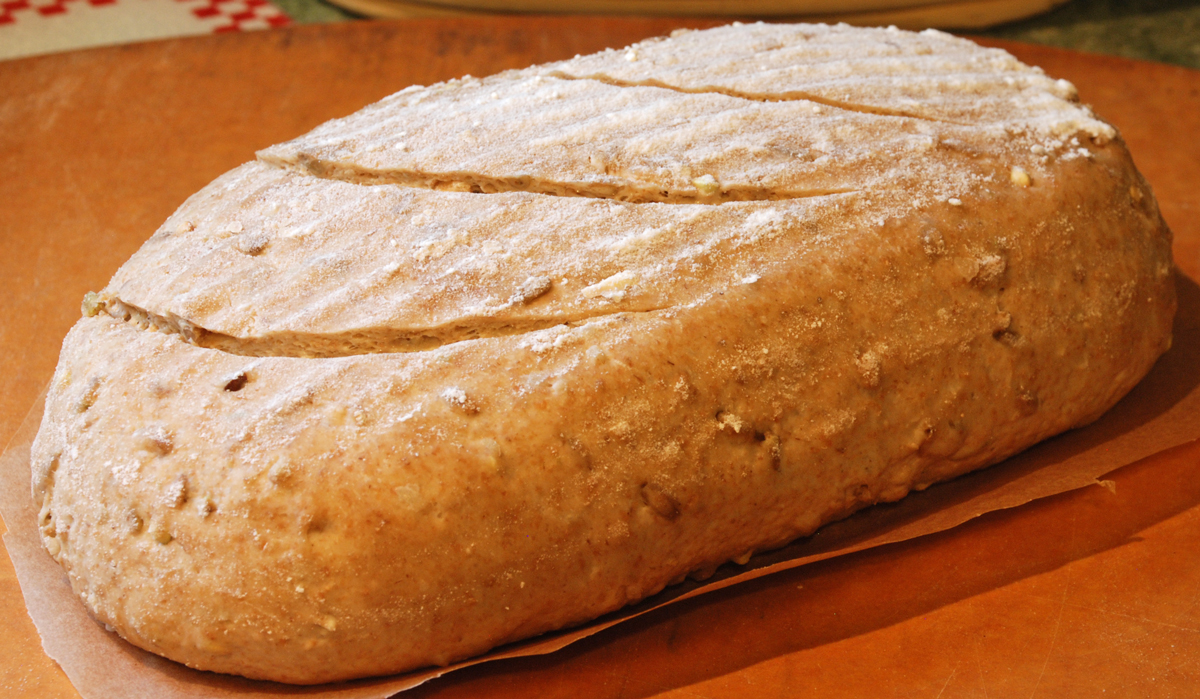
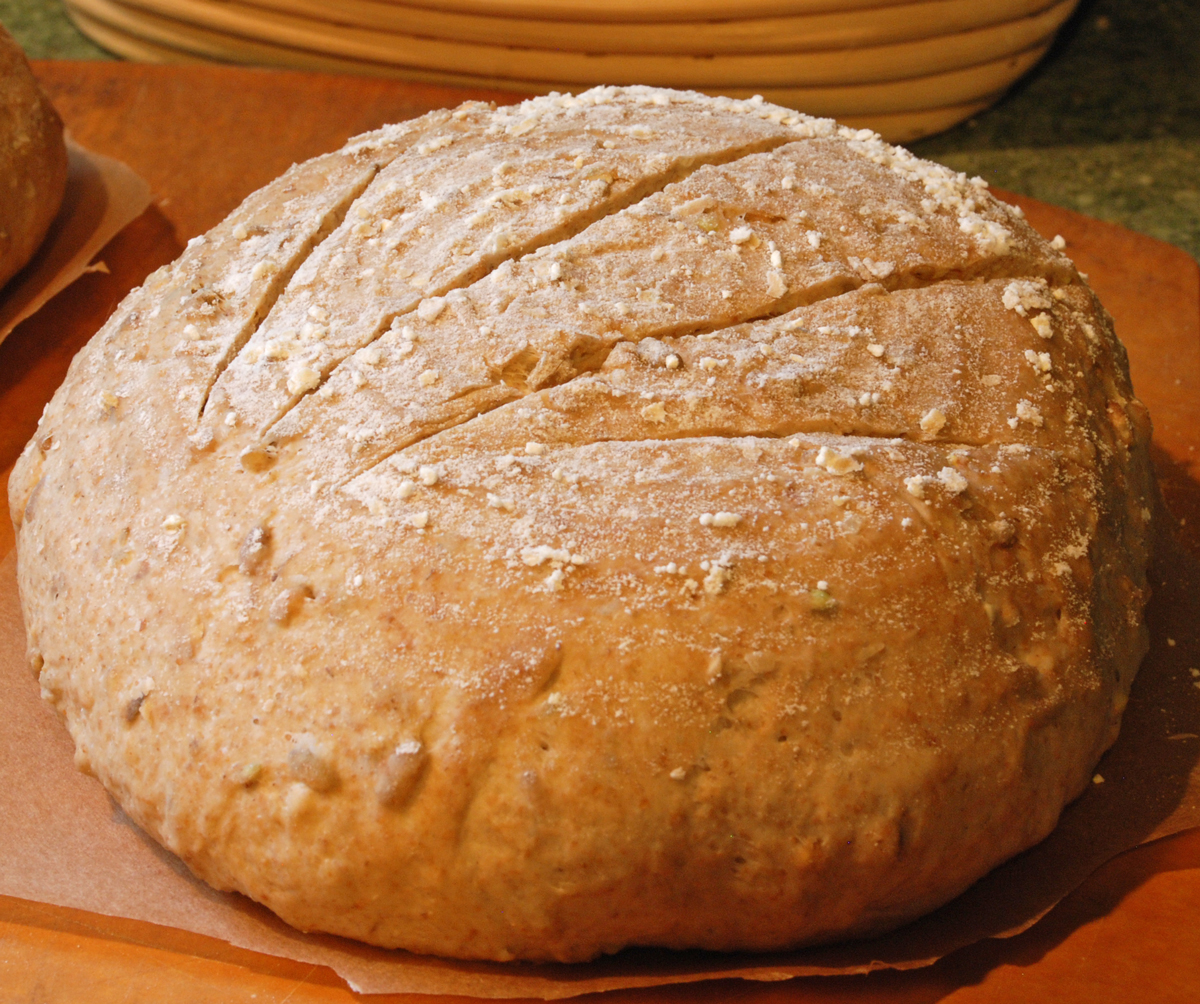
baked a couple of breads for my friends. using Chad's formula for country bread. 500g brown bread flour and 250 gram AP. 150gram wholewheat starter at 75% hydration. 520gram water and 20gram of rum. 150gram raisin soaked in rum. 150gram toasted walnuts. 30gram soaked flaxseeds. 

mixed flour and water keep overnight at room temperature. next day added starter autolysed 30 mins add salt 15gram. rest 30mins, add flaxseeds raisins rum and walnuts. SF for 3 over 30mins interval. bench rest 30mins and shape. retard in fridge overnight. next day, baked at 450C covered 20mins, 425C uncovered 10mins or slightly more till inner temperature reached 210C.

did the above method to suite my working schedule.

works very well, takes 3 days of good planning. 

still learning...

Evon :)


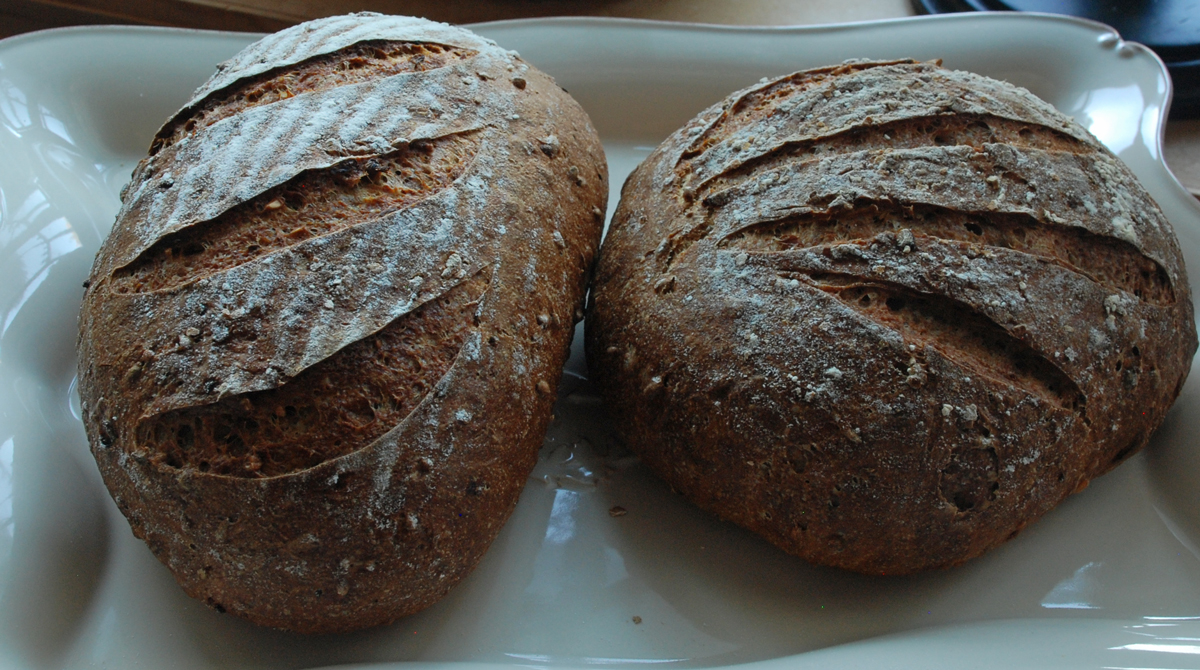
Baked this one last night. with the same formula and method, only difference is i did not add the toasted soaked flaxseeds. as you can clearly see the difference of texture in the crumb. the one with flaxseed has a gummy chewy crunch, this one has a light chewy crunch. 


letrec's picture
letrec

I've been baking a lot of sourdough as of late, and since I'm stubborn I don't ever refrigerate any of the starter and maintain it exclusively on the counter. While this lends to a vigorous starter it also encourages (ok, demands!) frequent baking, or you're going to either end up with the starter that ate your kitchen, or be exceptionally wasteful by refreshing the starter so frequently.

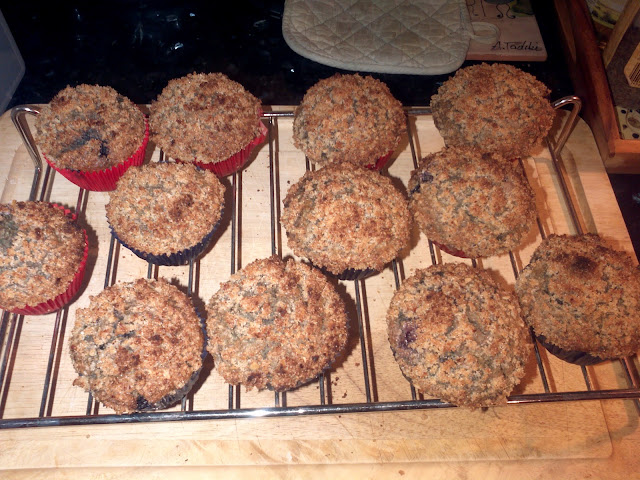
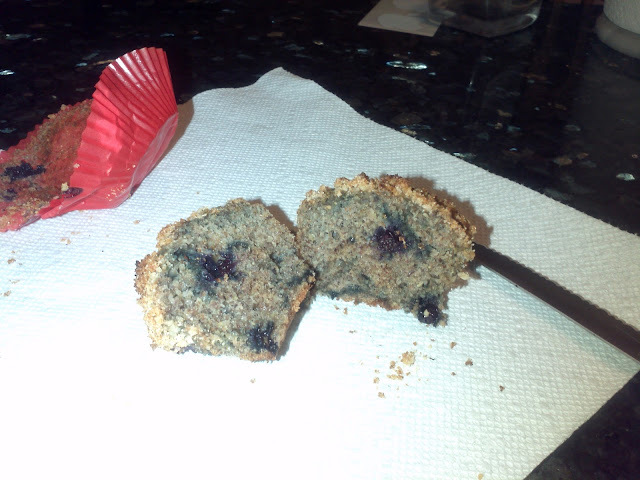
I have a little bit of a sweet tooth, and love blueberries so this was a natural next step.

I have adapted this recipe from this recipe at Sourdough Home:
http://www.sourdoughhome.com/index.php?content=blueberrymuffins

I made some adjustments as to my taste and added a crunchy Streusel topping!

Ingredients
-----------

1 egg
1 tsp vanilla
1/4 tsp salt
1/4 cup oil (EVOO works great here)
1 cup 100% rye sourdough starter at 100% hydration!
2tbsp of Greek Yogurt (adds a little more acidity, good fat)

1/2 cup whole rye or wheat flour if you must
1/2 cup of organic buckwheat flour
1/3 cup of ground flax seeds
1 tsp baking soda
1/3 cup sugar or fructose
3/4 cup frozen blueberries

Streusel Topping

2 cups pecans or walnuts (8 oz.)
½ cup packed light brown sugar (I combined molasses and caster sugar)
⅓ cup old fashioned rolled oats
1 tsp. ground cinnamon
¼ tsp. salt
2 Tbs. vegetable oil (I used more EVOO, though next time I may be decadent and use coconut oil)

Method

Preheat oven to 425F. (I use a convection oven, so actual temp was 400F)

Prepare streusel by combining nuts, sugar, oats, cinnamon and salt in food processor and pulsing a few times until a coarse mixture is achieved. Slowly drizzle in oil taking care to stop before creating a paste. The ideal consistency will be damp, but very crumbly. Set aside.

Combine dry ingredients in small bowl and then stir in blueberries. Combine wet ingredients in medium bowl.
Add dry ingredients to wet ones.

Place muffin cups inside tin and oil and dust them.
Oil a large dough or ice cream scoop and spoon batter into cups.
Sprinkle a liberal amount of Streusel topping over each cup such that you can no longer see the batter.

Bake at 425 for about 20 minutes or 16 min for convection

Allow to cool for 5 minutes in tin and then transfer to rack to cool to room temperature!
This should yield about a dozen full sized muffins. Enjoy!

Isand66's picture
Isand66

I just refreshed my Yeast Water starter earlier in the week after returning home from a long business trip.  I have had great success mixing the Yeast Water starter with a traditional sourdough starter so I decided to follow a similar path.  To make things interesting and because I happen to love durum breads I decided to make a 65% hydration YW starter using only durum flour and for the sourdough starter I converted some of my AP starter first to a 100% hydration starter using durum flour and sprouted whole wheat.  I built both starters up in 3 stages over 2 days to make sure I had nice and lively starters.  I didn't quite think through the amounts correctly so I ended up with a lot of extra starters.  Not too worry as I'm making some YW Durum English Muffins tonight withe the extra starter.  Feel free to adjust the amounts below if you don't want any left-over starter.

The end result was a nice open flavorful crumb with a crisp and chewy crust.  You can taste the Parmesan cheese but it's a subtle flavor and does not overpower.  This is a nice hearty bread to have with a nice Italian meal or a tasty sandwich.

Enjoy!

Procedure

Yeast Water Starter Build 1

60 grams Durum  Flour (KAF) (note: this is not the same as Semolina Flour which is for pasta)

60 grams Yeast Water Starter

Mix the flour and Yeast Water in a bowl until thoroughly combined.  Cover the bowl and let it sit at room temperature for around 6-10 hours.  The starter should almost double when ready to proceed to build 2.

Build 2

Add ingredients below to starter from above and mix until incorporated.  Cover with plastic wrap and let sit at room temperature for 6-10 hours.

100 grams Durum Flour

100 grams Yeast Water

Build 3

Add flour to starter from above and mix until incorporated.  Cover with plastic wrap and let sit at room temperature for 4 hours or until bubbly and either use immediately or put in the refrigerator for the next day.

100 grams Durum Flour

10 grams Yeast Water

(Note: I made extra starter since I wanted to use this for another bake.)

Sourdough Starter Build 1

63 grams AP Starter

30 grams Durum Flour

33 grams Sprouted Whole Wheat Flour (You can use regular Whole Wheat)

75 grams Water

Mix the flour, starter and water in a bowl until thoroughly combined.  Cover the bowl and let it sit at room temperature for around 6-8 hours.  The starter should almost double when ready to proceed to build 2.

Sourdough Starter Build 2

60 grams Durum Flour

40 grams Sprouted Whole Wheat

100 grams Water

123 grams Sautéed Onions (sautéed in olive oil)

Mix the flour and water with the  starter from build 1.  Cover and let sit at room temperature for 6-8 hours until doubled and nice and bubbly.

Sourdough Starter Build 3

62 grams Durum Flour

40 grams Sprouted Whole Wheat

Add the flour to the starter from build 2 and let it rest covered for 6 hours until bubbly and nearly doubled.

Main Dough Ingredients

200 grams Yeast Water Durum Starter from Above

225 Sourdough Starter from Above

250 grams French Style Flour (KAF) (You can use AP Flour or Bread Flour to substitute)

150 grams Durum Flour (KAF)

100 grams Sprouted Whole Wheat Flour

70 grams Roasted Wheat Germ (this really adds a nice nutty flavor to the bread)

16 grams Seas Salt or Table Salt

51 grams Shaved or grated Parmesan Cheese

22 grams Olive Oil

425 grams Water (80-90 degrees F.)

Procedure

Build your Yeast Water levain and Sourdough starter the day before you are ready to bake.

The evening before you want to bake, mix the flours and the water.  Mix on low-speed in your stand mixer or by hand for about 1 minute until the ingredients are combined.  Let the dough autolyse for about 20 minutes to an hour.

Next add both levains and the oil along with the salt and mix for 3 minutes on low.  After 3 minutes add the cheese and mix for about 1 minute until incorporated.  The dough will come together and be slightly sticky.  Place the dough in a slightly oiled bowl and do a couple of stretch and folds.  Cover the bowl and let it rest for 10-15 minutes.  Do another stretch and fold in the bowl and let it rest another 10-15 minutes.  Do another stretch and fold and let the dough sit out in the covered bowl for another 1.5 hours.  Place the dough in the refrigerator until ready to bake the next day.

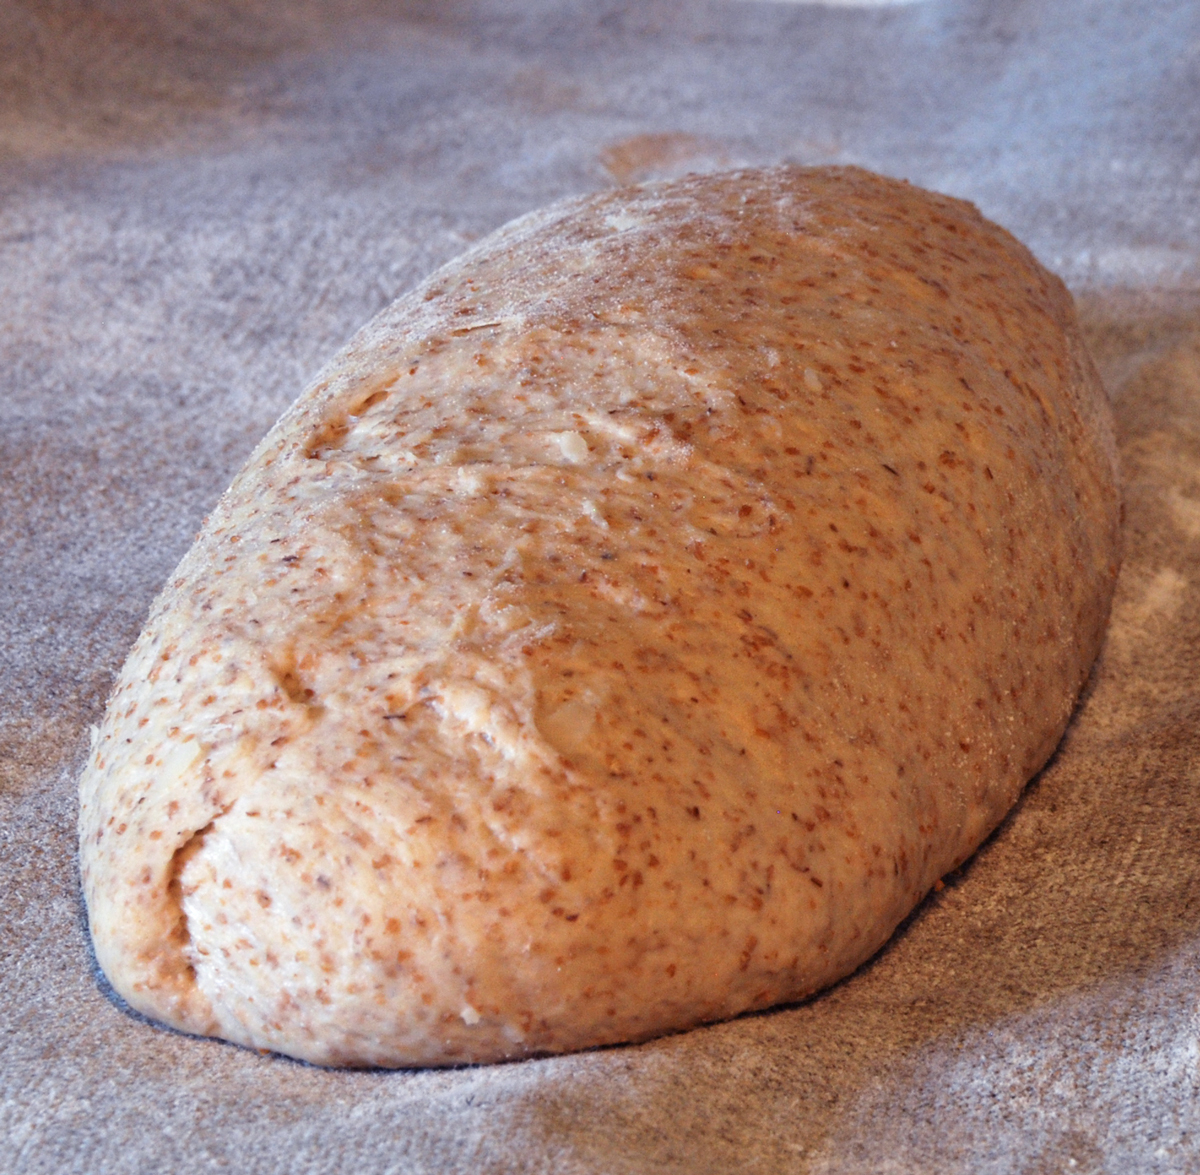
When ready to bake take the dough out and leave it covered in your bowl for 1.5 to 2 hours.  Next divide the dough into 2 loaves and either place in a banneton or from into batards and let them rest in floured couches for 1.5 - 2 hours.
About one hour before ready to bake, set your oven for 500 degrees F.and make sure you prepare it for steam.  I have a baking stone on the top shelf and the bottom and use a heavy-duty rimmed baking pan that I pour 1 cup of boiling water into right as I put the loaves into the oven.

Score the loaves as desired.

When ready to bake place the loaves into your oven on  your oven stone with steam and lower the temperature immediately to 450 degrees.  It should take around 30 minutes to bake  until the breads  are golden brown and reached an internal temperature of 200 - 205 degrees F.

Let the loaves cool down for at least 2 hours or so before eating as desired.

dabrownman's picture
dabrownman

This bake was similar to the last one with a few additions.  We added some spelt and rye upping the whole grains to 60%.  We upped the water roux another 40% or so because we liked the last bake so much and 40 percent more of fine tasting has to be teeth dropping,.  We added aromatic seeds including coriander, anise, black and brown caraway and fennel.  We also put in some pumpkin and sunflower seeds and some pistachio nuts.


Since this bread got larger and more weighty, we decided to make a boule instead of a loaf and hope to be able to turn it out into a round cake pan before putting it into the hot MagnaWare turkey roaster.


This bread is even wetter than the last one, in the very high 70’s at least and we didn’t want it to spread out too much so, the cake pan would have been useful to hold the boule together and keep the spread to a minimum but it wouldn't fit.


We stuck to the 4 and 40 hour method of the last bake hoping the extra whole grains wouldn’t cause the loaf to ferment too much in the fridge.  After 24 hours it looked fine so we cross our fingers and hope that it will hold up after the last loaf over proofed.


This time we will bake this bread cold out of the fridge hoping to catch it before this one can over proof.  Since we had so much add ins to incorporate, we divided them into 3 separate adds – one for each S&F.  The scald went in first followed by the aromatic seeds and then by the rest of the seeds and pistachios all 15 minutes apart.


Also trying to keep the bread from over proofing, instead of an hour of ferment on the counter after S&F’s and  after shaping we cut these down to 30 minutes each.  And instead of S&F’s this dough was so wet we did French swlap and folds to incorporate the add ins instead.  It is really weird to have an apprentice speaking French with a German accent.

The bread un-molded easily onto parchment that was lowered after a quick T-Rex slash into a cold aluminum DO.  The DO was placed into a cold oven that was set for 450 F.  When the beeper went off (about 20 minutes later), saying the oven was at temperature, we set the timer for 25 minutes of steaming woth the lid on. 

After 25 minutes we took the lid off and turned the oven down to 425 F convection this time.  5 minutes later we took the bread out of the CO and placed it on the stone where it hit 205 F on the inside in 6 minutes.  Total time in the oven cold and hot was right at 56 minutes. 

We let the boule crisp on the stone in an off oven with the door ajar for 10 minutes.  Can’t wait to cut into this bread because the smell off the aromatic seeds is quite nice and near intoxicating.  I was hoping to wait 24 hours to cut this bread open but ……

Sadly, this bread also had little spring and bloom but it didn’t collapse either – just like the last bake.  It may be that the 40 hour retard is too much when using a YW and SD levain in conjunction with a biga and Tang Zhong.  That is the great thing about bread.  With a baseline established there is no telling what might be possible.

Janet's mash with the whole multi-grains and 3 yeast boosters, seeds nuts and scald really made this bread taste fantastic.  If you were stranded on an island this is the bread you would want to take with you.  I thought the last batch was tasty but this puts it to shame. the aromatic seeds really put it over the top.  The crumb isn't as open as the last bake but this one is more glossy and it has way more whole grains that we love so much.  My apprentice finds it much more difficult to eat holes anyway.... and this bread is plenty airy enough as it is.

Formula

Starter Build

Build 1

Build 2

Total

%

WWW & AP SD Starter

10


10

1.83%

White Whole Wheat

62.5


62.5

11.42%

Spelt

0

30

30

5.48%

Dark Rye

0

30

30

5.48%

AP

62.5


62.5

11.42%

Yeast Water

75


75

13.70%

Water

50


50

9.13%

Total

185

60

320

20.09%


SD Starter Totals


%


Flour

172.5

31.51%


Water

130

23.74%


Starter Hydration

75.36%


Levain % of Total

24.00%


Dough Flour


%


Red Malt

2

0.37%


Toadies

6

1.10%


Vital Wheat Gluten

5

0.91%


White Malt

2

0.37%


Rye

90

16.44%


Spelt

90

16.44%


AP

180

32.88%


Total Dough Flour

375

68.49%


Salt

9

1.64%


Dough Soaker Water

245

44.75%


Dough Hydration w/   Starter

65.33%


Scald & Soak


%


Spelt

50

9.13%


Rye

50

9.13%


Total Scald & Soak

100

18.26%


Add - Ins


%


Sunflower, Pumpkin 20   ea

40

7.31%


Pistachio

30

5.48%


Barley Malt

17

3.11%


Coriander, Black &   Brown Caraway

15

2.74%


Anise 5, Fennel 5

10

1.83%


Tang Zhong

190

34.70%


Total

302

55.16%


Total Flour w/ Starter

547.5


Total Water w/ Starter

375


Hydration w/ Starter   & Adds

70.05%


Total Weight

1,334


% Whole Grain

60.70%


Tang Zhong not included   in hydration calculations includes


12.5 g each Spelt and Rye and 10 g Oat w/ 175 g of water


cranbo's picture
cranbo

Inspired by a recent thread, I decided to tackle creation of a copycat recipe for Joe's Squared pizza from Baltimore. Anyone want to try it out?

Update 1/26/2012: when I first developed this formula and made this over the last 2 days, it started with a very liquid starter (~170% hydration), then to a loose sponge (~114% hydration), to a firm final dough (~59% hydration). It was also created for double the quantity, to ensure that the sourdough build would be successful. I've now updated it based on what I've read and learned about Joe Squared's pizza, as documented later in this tread: generally lower hydration, original bulk ferment, and more fridge time.

Cranbo's Cubed Pizza

Makes about 4 personal-sized (200g) pizzas.

STAGE 1: STARTER

Caputo 00 flour,50g
Water,60g
Sourdough starter,25g; OR use a pinch (1/16 tsp.) of yeast

STAGE 2: SPONGE

Stage 1 starter,135g
Water,200g
Caputo 00 flour,200g


STAGE 3: FINAL DOUGH

Stage 2 sponge,535g
Caputo 00 flour,300g
Water,69g
Vegetable oil,12g
Salt,12g

TOTAL WEIGHT (g) 928g

TOTAL FORMULA
Caputo 00 flour, 100.00%
Water, 60.7%
Oil, 2.15%
Salt, 2.15%


PROCESS
Stage 1:
Dissolve starter in water
Mix with flour until well incorporated
Set aside overnight at room temp (75F for 8-12 hours) 

Stage 2:
Dissolve stage 1 starter in water
Mix with flour until well incorporated
Let sit at room temp (75F) for 2 hours
Refrigerate overnight (8-16 hours)


Stage 3:
Next day, let come to room temp for about 30 minutes
Add stage 2 sponge to mixing bowl
Add flour, water and salt

Mixing and Kneading:
Knead for 1-2 min at lowest speed, just until it starts to come together as a ball
Now add oil
Knead for 5 min at medium speed (Kitchen Aid speed #4)
If you're going to use same-day, start preheating oven now to 550F with your pizza stone, sheet steel, or cast iron griddle. You'll need to preheat for at least 1 hour.

Bulk rise:
Let bulk dough rise 2 hours at warm room temp (75F). You can probably go longer if desired; however, you do not want your dough to more than double. 

Shaping:
At this point, shape into balls, grease lightly with oil, and refrigerate for future use; OR divide into desired pieces (200g is probably the right size for small individual servings).

Generously flour your rolling surface, and roll out to 1/8-1/4" thick using a rolling pin. If dough is too elastic and springs back, let it rest for 10 min, and try again.

Place pizza dough on cornmeal (on pizza peel or parchment)
For true "cube" square style, use a pizza wheel or a sharp knife to cut a 10 or 11" square.  
Top pizza as desired, putting ingredients right up to the edge in true copycat style. 

Bake at 550F for 3-7 minutes, until bottom crust is browned and toppings are melted as desired.

UPDATE 2012-01-26: my first bake is in the thread below. 

Isand66's picture
Isand66

      I just returned from a 2 week business trip to China and after refreshing my starters I decided to make a coffee flavored bread that also was rich in multi-grains.  I have had great success using soakers in this style bread in the past so this was no different  I used malted rye berries, spelt kernels, buckwheat groats and soft white wheat berries all soaked in 240 grams of chocolate raspberry truffle flavored coffee.

For the starter I used my white 65% hydration starter and added coffee, pumpernickel flour and white rye.  To continue with the all coffee theme I also used coffee in the main dough along with an assortment of flours plus some dehydrated onions that I mixed in with the coffee before adding to the dough.

The end result was nice dark, rich, moist and coffee flavored bread.  If you don't like coffee you will run away screaming from this one, but if you can't get enough Java in your system, give this one a try.

Soaker

30 grams Buckwheat Groats (bought at Whole Foods)

30 grams Spelt Kernels (Berries...not sure which)

30 grams Malted Rye Berries

20 grams Soft White Wheat Berries

240 grams Hot Coffee (I used Chocolate Raspberry Truffle)

Mix coffee in a bowl with other ingredients and let sit covered at room temperature for 24 hours.

Starter

71 grams Seed (Mine is 65% AP Flour Starter)

142 grams AP Flour

85 grams Pumpernickel Flour

70 grams White Rye Flour

151 grams Coffee (85 - 90 degrees F.)

Mix seed with coffee to break up for a few seconds and then mix in flour until the starter forms a smooth dough consistency.  Put it in a lightly oiled bowl and loosely cover and leave at room temperature for at least 10 hours.  The starter should double in volume.  Put the starter in the refrigerator for up to 1-2 days or use it immediately.

Main Dough

Ingredients

425 grams Starter from above (all of the starter)

300 grams European Style Flour (KAF)  (Sub Bread Flour if you don't have this)

150 grams Spelt Flour

100 grams Whole Wheat

80 grams Graham Flour

20 grams Walnut Oil

370 grams Coffee (90 degrees F.)

14 grams Sea Salt (or table salt)

All of the Soaker from above (make sure to drain the soaker thoroughly)

Procedure

I mixed  the flours together with all the coffee except for 50 grams and let them autolyes for 30 minutes.    I then added the levain, oil and the soaker and the rest of the coffee with the salt and mixed on speed #1 for 1 minute and #2 for 4 minutes.  I then did a stretch and fold, rested the dough uncovered for 10 minutes.  I then did another stretch and fold, covered the dough and let it rest for 10 minutes.  I did one more stretch and fold and put it in a lightly oiled bowl for 2 hours.  I then put it in the fridge overnight.

The next day I let the dough sit out at room temperature for 2 hours.  After 2 hours I formed it into loaves and put them in floured bannetons and let them rise covered for 2 hours.

Score the loaves as desired and prepare your oven for baking with steam.

I then baked on my oven stone with steam at 450 degrees until both loaves were golden brown and reached an internal temperature of 200 - 210 degrees F.

Let it cool on a bakers rack for at least 2 hours or longer before diving in.

dabrownman's picture
dabrownman

I had some KA WWW flour that was almost 8 months old hanging around doing nothing.  We like whole grains around here mostly but needed to get rid of the WWW in some kind of bread.  We hate throwing flour away for any reason if possible even if it flour we don’t use much.


We also wanted to try out the water roux method by using 25 g of flour mixed with 125 g of water and cooked on the stove top until it sets up like a thick gravy.  It weighed 135 g when done.  The roux was not used in the hydration calculations in the formula.  We also made a scald with wheat berries and saved the soaker water for the liquid in the dough.


After reading lumos’s post on adding a pinch of yeast to his last baguette post  we decided to go all in on a 3 way leavening by making a quick 4 hour poolish with50 gof autolyse and a pinch of yeast along with separately prepared YW and SD starters.  This is a first, at least for us if you include my faithful apprentice Lucy, at making a triple threat leavening for one loaf of bread


We were into 4’s so after we did the 4 hour scald and 4 hour poolish we did the 4 hour autolyse with the soaker water and the rest of the non leavening and  soaker ingredients.   After all of these 4’s we decided to continue with them a little longer.


We thought we would limit ourselves to a 4 hour maximum, after the autolyse met the leavens, before the finished dough hit the fridge, panned up, for a 40 hour retard as has been our norm of late.


After mixing them together with a spoon we let the dough sit for 15 minutes before starting 12 minutes of French slap and folds.  By the time you take out the time for scraping up the counter a sew times we figure we had about 10 good minutes of slapping and folding the dough around and it made a beautifully smooth ball when formed.


We then let the dough sit for 15 minutes before doing the first of 3 S&F’s that were performed 15 minutes apart.  We incorporated the scalded and soaked wheat berries on the first set and they were fairly distributed after the 3rd.

Red sky in the mnorning , baker take warning. 

We let the dough rest for 1 hour to ferment and develop before panning it up using S&F’s to try to corral this wet dough into something resembling a loaf.   Even though the dough hydration is low at 68% it really is much wetter with the roux and scald contributing extra water. It felt like a high 70’s hydration and the reason we panned it. 

We let it proof for 1 hour on the counter, in a used trash can liner (for bread only), before placing the tin of dough in the fridge for its anticipated slow proofing for 40 hours.

My apprentice gets all excited when we try something new and is always skeptical that her master can pull off these odd bakes we seem to make on the fly.   With a water roux included and an added commercial pinch poolish, her master wasn’t too sure that a 40 hour retard could be met either in all truthfulness.

You don’t know for sure how things will work out till you do and my apprentice thought we, meaning I,  could always keep and eye out for the dough to double and bake it off ahead of time if required, if we weren’t asleep - and my apprentice is asleep nearly 16 hours a day it seems.  But, it looked OK after its long proofing rest and had risen just above the lip of the tin and near ready for the oven.

We decided to bake off the loaf in the big oval Magnalite Turkey Roaster like we do some tinned other breads on occasion.  It can really do steam with the trivet insert and water on the bottom.  It puts the best crust on bread that we have discovered to date.

We took the dough out of the fridge to warm up a little and finish proofing for and hour before Betsy was fired up to heat the roster to 450 F.  The loaf was slashed right before the tin went in the roaster with a half a cup of water.  The lid went on and the roaster went back in the oven.

We steamed the bread for 15 minutes before taking the lid off, removing the bread and let it continue baking at 425 F, convection this time,  another 10 minutes.  We rotated the tin 180 degrees every 5 minutes to ensure even browning.  We also removed the bread  from the tin at the 30 minute mark and finished the baking on the oven rack.

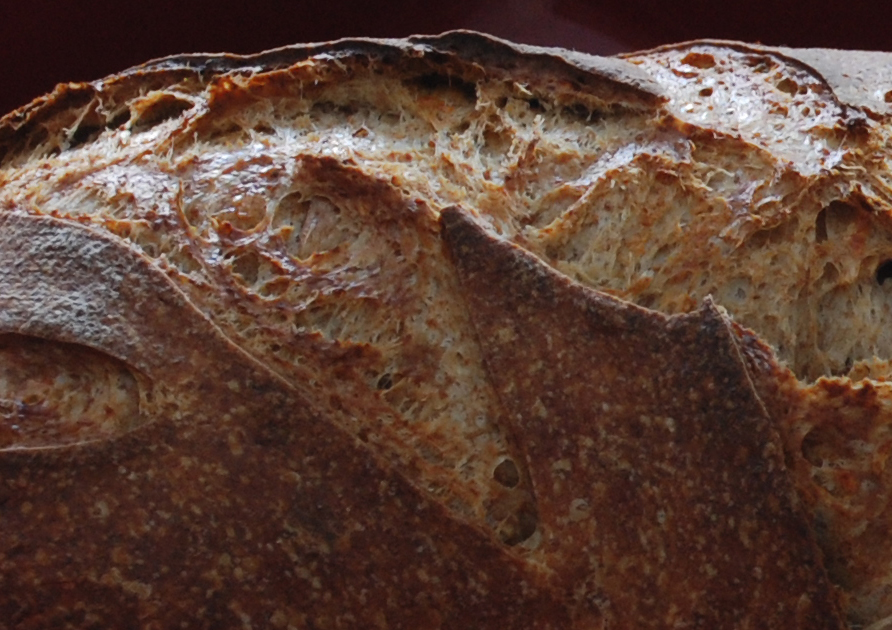
The bread did not spring at all in the roaster or out of it but it or bloom at the cut either.  It did blister and browned up as expected though.  Well. At least it didn’t over-proof so much that it fell when slashed or in the oven.  40 hours with 2 levains  adn poolish working must have been too much for it even though it only rose to the rim of the pan. 

Can’t wait for the bread to cool and slice to see how it compares to our normal boule crumb for this kind of bread after adding in a water roux and a 3rd leaving with the 4 hour poolish. 

It is now sliced and eaten.  Just delicious.  Very wheaty in taste.  The crumb was pretty open for a bread with whole grains and so much soaker.  It had to be the 3 leavens working together.  they couldn't get it to spring and bloom but the crumb was moist as can be, tasty and chewy with the soaker.  This is a really =nice sandwich bread that can be sliced very thin which is great for those of us who need to watch out bread intake.  We like it a lot.  Toasted with butter is a dream come true.

Formula

Combo YW & SD   Starter

Build 1

Total

%

WWW & AP SD Starter

10

10

1.94%

White Whole Wheat

62.5

62.5

12.14%

AP

62.5

62.5

12.14%

Yeast Water

75

75

14.56%

Water

50

50

9.71%

Total

185

260

35.92%


SD Starter Totals


%


Flour

130

25.24%


Water

130

25.24%


Starter Hydration

100.00%


Levain % of Total


23.34%


Dough Flour


%


Red Malt

2

0.39%


Toadies

6

1.17%


Vital Wheat Gluten

5

0.97%


White Malt

2

0.39%


White Whole Wheat

185

35.92%


AP

185

35.92%


Total Dough Flour

385

74.76%


Salt

9

1.75%


Soaker Water

225

43.69%


Dough Hydration

58.44%


Add - Ins


%


Water Roux

135

26.21%


Total

135

26.21%


Total Flour w/ Starter

515


Total Water w/ Starter

355


Hydration w/ Starter   & Adds

68.93%


Total Weight

1,114


% Whole Grain

54.17%


Water Roux is not   included in hydration calculations

linder's picture

Sourdough Whole Wheat Pancakes

January 19, 2013 - 8:12am -- linder

Years ago a friend of mine gave me this simple recipe for sourdough pancakes.  They can be made with AP flour or whole wheat flour, your choice.  I like mine with whole wheat flour and while cooking them, I like to drop some blueberries into the pancakes as they cook on the griddle.

Sourdough Pancakes

The night before you want pancakes, put 1 cup starter in a large glass or plastic bowl.  Add 2 cups flour(whole wheat or AP), 2cups lukewarm milk or water, 2 TBSP sugar.  Mix and let stand covered overnight(at least 12 hours) in a warm place.

Pages

Subscribe to RSS - Sourdough