The Fresh Loaf

A Community of Amateur Bakers and Artisan Bread Enthusiasts.

Most bookmarked

dabrownman's picture
dabrownman

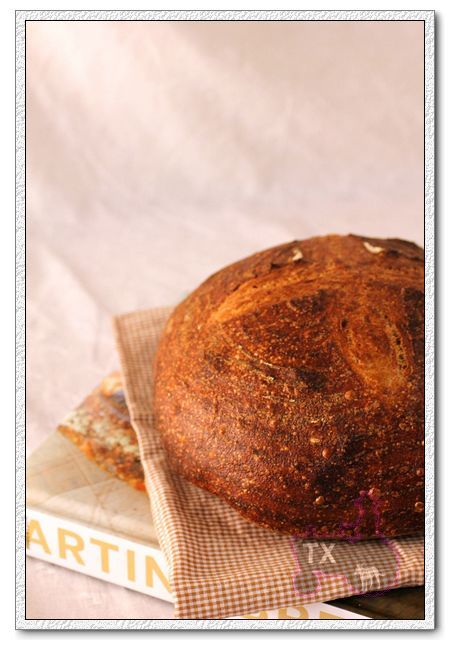
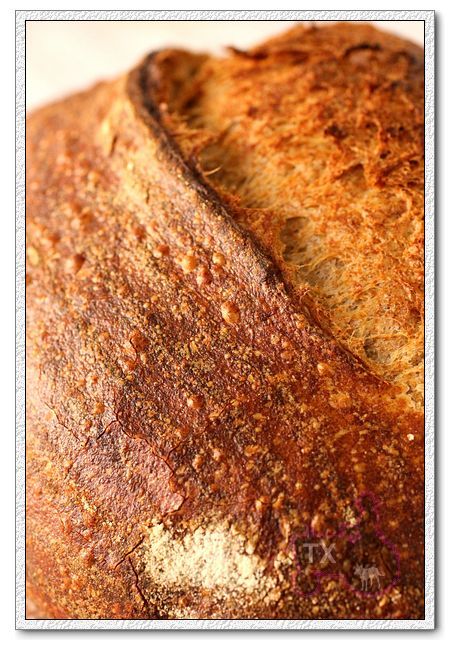
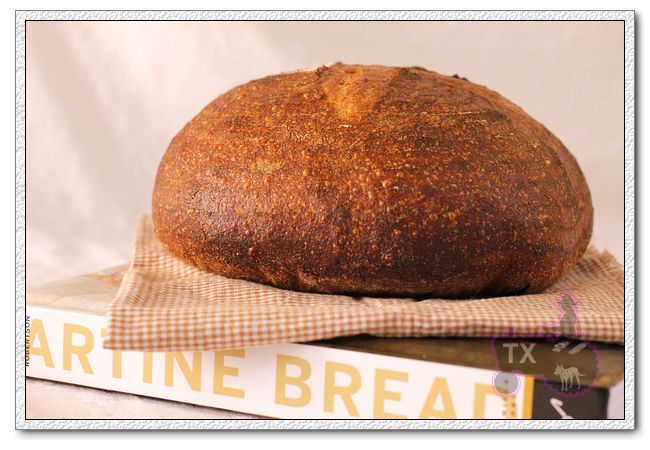
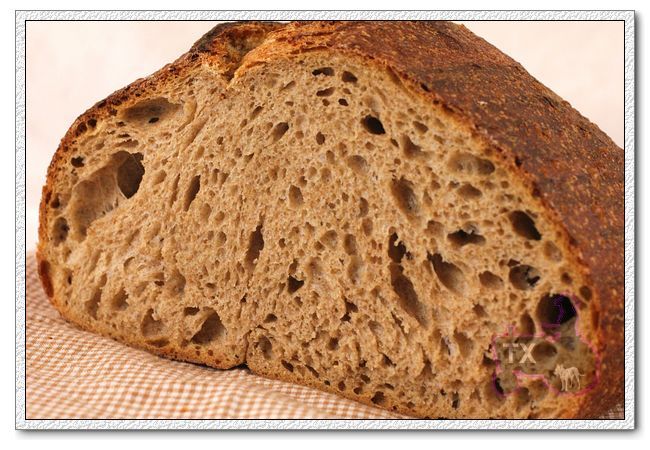
Tang Zhong, Ricotta, Scalded Multigrain with and without, Cranberries & Pecans

We use a lot of cranberries around here mainly as part of our snockered fruit bled we put in so many baked good.  Evon published her beautiful cranberry bread she made her Mom and we have been making a bunch of different breads with dried fruits and nuts of late.  The only ones we missed were cranberries and pecans.  Then we saw a beautiful cranberry and pecan batard at Whole Foods when we were there stocking upon whole grain berries.

That sort of moved the cranberry and pecan bread up to the top of the list.  My apprentice just couldn’t leave it at that so she went - with whole; rye, spelt and wheat in the levains only along with some corn flour in dough.  We are trying to get out tongue around corn flavor wise and have seen it so many bakes of late like Janet’s Anadama Bread.

Lucy found some apricot soaking water from the last bake (which we added the cranberry soaker water to) and ricotta cheese in the fridge. She also scalded up multigrain berries as she does for just about every bread.  It must be a German thing.  She also used our normal flavor, color and rise enhancers of malts, Toadies and VWG.  Not including the multigrain scald, we kept to our healthy and tasty minimum of 30% whole grains.

Because of the Tang Zhong, ricotta, scald and re-hydrated cranberries, this dough does not look or act like a 70% hydration bread.  It is very wet feeling, like 78% or more - so not quite ciabatta.  The Tang Zhong took 25 g or the flout mix and 125 g of water not included in the formula to make the roux.

We built 2 separate levains over 3 stages.  One a YW and the other a rye sour.  Both levains had doubled at the end of 2nd 4 hour stage.  At the beginning of the 3rd stage, right after feeding, we refrigerated the levains for 12 hours.  The next morning we took them out of the fridge and allowed them come to room temperature and double again in 4 hours.

We did our usual 4 hour autolyse, starting when the levains came out of the fridge, including everything except; salt, ricotta, YW and rye sour levains, the scald, cranberries and pecans.  When the autolyse met the 2 levains, we added the salt and did 10 minutes of slap and folds.  After a 15 minute rest we did (4) sets of S&F’s on 15 minute intervals.  On the first S&F we incorporated the ricotta.  On the 2nd we put in the scald.

 After the 2nd we divided the dough in half.  On the 3rd we added the cranberries and on the 4th we made sure everything was incorporated for one half.  The other half of the dough was S&F’ed without the fruit and nuts.  This way we get a breakfast toast and a lunch sandwich bread.

 After an hour of counter fermentation the dough was retarded in the fridge for 15 hours.  In the morning they were retrieved from the fridge and allowed to come to room temperature for 1 hour before being shaped into a batard for the fruit and nut version and an oval for the plain.

 Both were placed into a trash can liner to proof for 2 hours before Big Old Betsy was fired up to 500 F with Sylvia’s steaming pan and David’s CI Lava Rock steam in place.  Once Betsy beeped she was at temperature we waited 20 minutes before un-molding the bread, scoring and placing onto the bottom stone.

 After 5 minutes we turned the oven down to 475 F. Our oven reads 25 F low so adjust your temperature accordingly.  After a total of 15 minutes of steam we removed it and turned the oven down to 425 F, convection this time.  We rotated the bread every 10 minutes and after 20 minutes without steam the bread reached 205 F in the center.

 We turned off the oven and left the bread on the stone, with the door ajar for 10 minutes to crisp the skin before removing it to a cooling rack.  The crust browned nicely with small blisters and went from crisp to softer as it cooled.  The spring and bloom were OK too.  The cranberry, pecan version browned more for some reason.

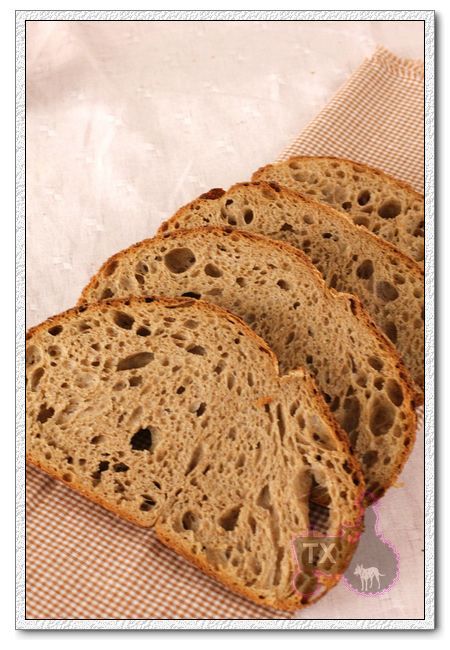
 The crumb of both versions was about the softest, moistest and tastiest we have ever managed to bake into any bread.  it is just fantastic as a sandwich bread and we hope it toasts just as well for breakfast in the morning.  It is like eating two different breads one more cranberry sweet and pecan nutty.  Both are terrific!  Thanks Evon for the cranberry inspiration, to Ian for the cheese and to my apprentice for the nuts. 

 We love spaghetti and meatballs.  Hopefully the plain version will grill up nicely for garlic toast or bruschetta or breakfast.

Formula

YW and Rye Sour Levain

Build 1

Build 2

 Build 3

Total

%

Yeast Water

40

0

0

40

7.21%

Rye Sour Starter

20

0

0

20

2.37%

Spelt

13

13

13

39

4.62%

Dark Rye

34

34

39

107

12.66%

Whole Wheat

13

13

13

39

4.62%

Water

20

60

25

105

12.43%

Total

140

120

90

350

41.42%


Levain Totals


%


Flour

195

23.08%


Water

155

18.34%


Hydration

79.49%


Levain % of Total

19.14%


Dough Flour


%


Corn Flour

50

5.92%


AP

600

71.01%


Dough Flour

650

76.92%


Salt

12

1.42%


Apricot/Cranberry Water 100, Water 300

400

47.34%


Dough Hydration

61.54%


Total Flour

845


Apricot & Cranberry Water 100  & Water

555


T. Dough Hydration

65.68%


Whole Grain %

30.89%


Hydration w/ Adds

70.15%


Total Weight

1,829


Add - Ins


%


White Rye Malt

3

0.36%


Red Rye Malt

3

0.36%


Toadies

10

1.18%


VW Gluten

15

1.78%


Cranberries

75

8.88%


Pecans

75

8.88%


Total

317

37.51%


Weight of cranberries and scald berries are pre re-hydrated weights


Scald


%


WW Berries

33

3.91%


Rye Berries

33

3.91%


Spelt Berries

34

4.02%


Total Scald

100

11.83%


Tang Zhong 25 g of flour was included above but the 125 of extra water was not

GermanFoodie's picture
GermanFoodie

Pretzel Rolls (Laugenweck)


Pretzel Rolls (Laugenweck) 

Interestingly enough "pretzel bread" is the one bread that in our collective psyche seems to top all others. No matter what other bread you may have tasted and enjoyed in Germany, “pretzel bread” is the one thing that people seem to remember above all else. And why not? When done right, it IS addictive. A good pretzel roll or “Laugenweck” should be slightly crunchy on the outside, have a deep brown color with a milky-white, if slightly browned, cross on top and be soft and chewy on the inside. If you have never eaten the real thing you don’t know what you’ve missed. There was a bakery in my hometown where people used to trek from the surrounding region just because their pretzels were THAT good. (As things go with German commercial baking these days, though, theirs are only a faint memory now of what they used to be years ago, too – I was really disappointed when I bought one last August as I was visiting my mom...)


Pretzel rolls make the best hearty sandwiches, and while they have become popular lately as “hamburger buns”, I prefer them just with butter and maybe a good, strong cheese. (A word on those “hamburger buns” – unless they were made the traditional way, what you probably ate was a weak imitation of the real thing; but if you like that, imagine what these actually taste like...) They are best eaten fresh on the day they are baked, and you can even toast them back to their original glory a day later. They will freeze fairly well, but the salt on top in conjunction with the crust will have a tendency to render them soggy and mottled-looking after a few days. If you must freeze them, thaw them on the countertop OUTSIDE of their bag. The German “Laugenweck” literally translates to “lye roll”, or what a witty friend called “pipe cleaner roll”. Let’s just say that Germans have a reputation for precision for a reason, but obviously we’re not that good at marketing ourselves. “Pretzel roll” sounds SO much prettier than “lye roll”, and of course you wouldn’t use pipe cleaner for these, but food-grade sodium hydroxide.

That’s right, folks. Sodium hydroxide.

There are all sorts of knock-off recipes out there, but if you want to make REAL pretzels and pretzel rolls, you HAVE to use lye. Anything else won’t give you the same results. My grandma’s cookbook for example makes the solution with something like water and wood ashes – NOT the same thing. As caustic as lye is, it will convert to a simple salt on top of the pastry when baked, giving it the characteristic beautiful, deep brown color.

So, I am including a disclaimer. Not because I think I’d be liable in whatever way, but I think you should be aware of what you will be dealing with:

DISCLAIMER: Sodium hydroxide is highly caustic, even at lower concentrations, and I highly recommend wearing long sleeves, goggles and gloves when handling it. Use all stainless steel equipment as the lye will eat through aluminum and coated baking sheets over time. ALWAYS TAKE GREAT CARE WHEN STORING/HANDLING SODIUM HYDROXIDE AND FOLLOW ALL SAFETY DIRECTIONS ON THE PACKAGE THE SODIUM HYDROXIDE CRYSTALS CAME IN.What you will need (besides the actual dough):

1. pretzel salt - a coarse salt that will not simply melt into the pastry but stay intact during baking. Here’s the difference between “normal” salt (pictured is “real” salt) and pretzel salt:

2. Food-grade sodium hydroxide, available for example from Essential Depot.

3. 1 stainless steel stockpot large enough to hold the water comfortably (see recipe)

4. 1 stainless steel skimmer

5. 1 – 2 stainless steel half sheets

6. 1 sturdy metal scraper

7. chemical resistant gloves (preferably), but any kind would already be a good protection

8. goggles, long-sleeve shirt

I found this originally on an expat German forum somewhere on the Web with very vague information as to how strong the lye should be, but by now we have tweaked this recipe so much that I can regard it as our original. The very first time I tried it, I used an 8% lye solution, which produced really dark, really blistered, and really inedible pretzels. :) 


Pretzel Rolls (Laugenweck)
(Original Recipe.)

For 10 rolls or pretzels:
725 g bread flour
5 g salt
7 g yeast
375 g water
5 g diastatic malt powder

Pretzel salt for topping.

For the lye (at a 3.5% solution):
2 l water
70 g sodium hydroxide crystals

Dissolve the malt powder in water. Add the dry ingredients to a mixer bowl with a dough hook, slowly add the water and keep kneading until the dough forms a ball and clears the sides of the bowl. If it appears to be too dry, add a little bit more water until you achieve the desired consistency. Let rise until doubled, preferably retard overnight. On baking day, preheat your oven to 400 F (200 C). Slowly add the sodium hydroxide to the COLD water, close the pot and bring the lye to a rolling boil, then turn off the heat. Divide the dough into 10 equal pieces, each weighing about 110 g. Spray the stainless steel baking sheets well with cooking spray.

CAUTION: NEVER, EVER ADD SODIUM HYDROXIDE TO BOILING OR EVEN REALLY HOT WATER AS IT IS HEATING ON THE STOVE – IT WILL CAUSE THE POT TO INSTANTLY BOIL OVER AND POSSIBLY SPLATTER YOU WITH LYE. (Believe me, I have been there – filed this experience under “What was I thinking???”)


Shape each piece into a round and be sure to seal them well on the bottom. Proof them at the most to 1/2 proof, not fully. Dip the rolls into the hot lye upside down, remove with the skimmer, drain well and place onto the baking sheet. One half sheet will comfortably fit 10 rolls. Score them with a serrated knife or razor blade. Traditionally, these rolls are scored with a cross on the top. Sprinkle pretzel salt on top.

Bake until they are a deep brown and register at least 180 F (85 C) in the middle. The light part of the roll should remain mostly light and not darken very much.

TIP: Use a scale to make sure they are all the same the weight. If you cannot get your hands on diastatic malt powder (available online for example from home brewing stores), just use brown sugar. Depending on how wet the rolls were when they were put on the baking sheet and on how well they were sealed at the bottom before dipping, they may stick to the baking sheet and appear not to want to come off – use a good scraper, but try not to rip off the bottom.

[Printable Recipe]

hanseata's picture
hanseata

Saatenbrot - Many Seed Bread (Equal Opportunity Baking #3)

The best recipe collection (bread, rolls and snacks) of German bakers' magazine, "Allgemeine Bäckerzeitung", supplied the formula for my third "fair baked" bread.

A heavy weight, scaled for 21 loaves, with selling points, marketing tips, production cost and time calculation, including sales tax (7%) and even a suggested retail price (1.83 Euro). The production steps are briefly listed - no need to explain to professionals what they do every day.

  Die besten Rezepte aus der Allgemeinen Bäckerzeitung - Brot, Brötchen & Snacks

Scaling the ingredients down to home bakering proportions was not difficult (a minimum of 3 loaves), and the instructions, though brief, were precise, and didn't overtax my mental capacities.

The recipe said (more or less) only: "make a dough". I tried to stretch and fold it, but that didn't work too well, the dough was too wet. Therefore, instead of soaking only the flaxseeds in hot water for 1 hour (original recipe) I would include some of the flour in the soaker, to have a larger preferment, and more water already absorbed in the flour.

I like to retard my doughs, overnight fermentation works better for my schedule, and, also, improves the taste (the original recipe had only the longer starter development.)

The Bäckerzeitung says: "roll the shaped loaves over a wet towel, and then dip them into the (topping) seed mixture". Though this coated the breads nicely with seeds, they didn't stick well enough, and a lot of them fell off during and after baking. Next time I would either take care to press them more into the dough, or brush the loaves with egg white, instead of just moistening them with water.

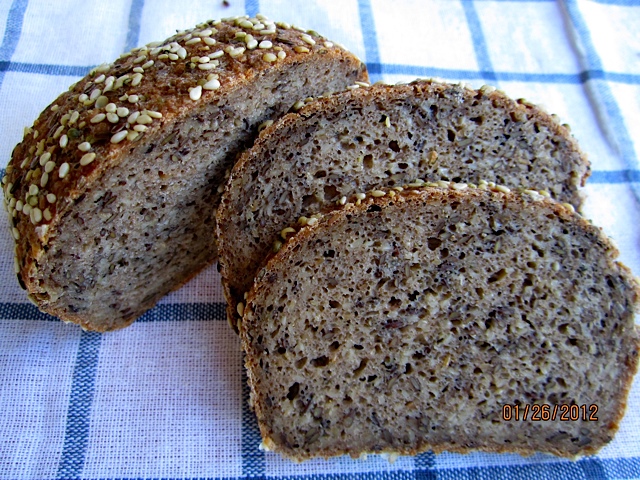
The breads turned out very nice, crusted with seeds they looked quite attractive, and the taste? Modestly (haha!) I will only quote my friend Lynn - beneficiary of this triplet bake: "Our seedy, seedy bread was delish! We toasted it which really brought out the flavor of the seeds! Mmmmmmm!"


SAATENBROT - MANY SEED BREAD (3 loaves)

SOAKER
143 g whole wheat flour
  84 g medium rye flour
299 g water
     4 g salt
129 g flaxseed

 STARTER
  21 g rye mother starter (mine is 100% hydrated)
214 g medium rye flour
214 g water, lukewarm
 
FINAL DOUGH

all starter and soaker
130 g medium rye flour
143 g bread flour
187 g water
    5 g instant yeast
  12 g salt
129 g sesame, toasted
129 g hemp seeds
    2 g anise, caraway, fennel and/or coriander
 14 g sesame seeds (for topping)
 14 g hemp seeds (for topping
 14 g flaxseed (for topping)

 DAY 1:

1. In the morning, stir together all ingredients for soaker, cover and let sit at room temperature. Mix all ingredients for starter (in 1-step), cover and let ferment at room temperature.

In the evening, mix together all ingredients for final dough for 1 - 2 minutes on low speed. Knead on medium-low speed for 4 minutes (or knead by hand). Let dough rest for 5 minutes. Resume kneading for another minute (dough will still be somewhat sticky). Divide dough into 3 portions, place in oiled containers, cover and refrigerate overnight.


DAY 2:

2. Remove dough from refrigerator 2 hours before using. Shape into sandwich loaves. Roll breads over wet towel, and then over seed mixture. Gently press seeds into dough. Place breads in oiled loaf pans. (No scoring). Mist with spray oil, cover, and let rise for 45 - 60 minutes, or until they have grown 1 1/2 times their original size.

3. Preheat oven to 240ºC/465ºF, including steam pan. Place pans into oven, steaming with 1 cup of boiling water. Bake at falling temperatures: 10 minutes at 240ºC/465ºF, 10 minutes at 220ºC/428ºF, then turn loaves out onto baking sheet, remove steam pan and continue baking for 10 minutes at 200ºC/400ºF, and 10 minutes at 180ºC/355ºF. The internal temperature should be at least 200 F/93 C.

4. Let breads cool completely on wire rack before slicing.

Saatenbrot - Many Seed Bread


dmsnyder's picture
dmsnyder

Pizza Napoletana

You can go nuts trying to find the perfect pizza dough formula. The cookbooks and the web are full of recipes for various types of dough and full of opinions regarding the type of flour to use, the ingredients (beyond flour, water, salt and yeast) and the mixing and fermentation methods that work best.

My goal for today was what I understand to be classic pizza napoletana. The dough should consist of the four basic ingredients only – no oil, sugar, malt or other stuff. The crust should be very thin and crisp on the bottom, not soft or soggy. The toppings should be minimal, so the crust is the main attraction.

After reading through many, many recipes, I settled on the one in Maggie Glezer's “Artisan Breads.” It uses the 4 ingredients only. It is for a Naples-style pizza. It is credited to Emanuele Leonforte of Hosteria restaurant in Port Chester, New York.

Leonforte uses a mix of Doppio Zero and high-gluten flour that Glezer calculates as resulting in about 12.5% protein. He uses a remarkably short mix. He ferments the dough for a long time but only once. Glezer gives the option of retarding the dough overnight and fermenting it the next day, and that fit best with my schedule. The method I used is described below.


Ingredients

Wt.

Baker's %

KAF Bread Flour

500 g

100

Instant yeast

1/4 tsp

0.2

Salt

10 g

2

Water, lukewarm

330

66


Method

  1. Measure the flour, yeast and salt into the bowl of a stand mixer and mix them.

  2. With the dough hook in place and the mixer at slow speed, gradually pour in the water.

  3. Mix until the dough forms a ball and cleans the side of the bowl, about 3 minutes.

  4. Cover the bowl and let the dough rest for 10-15 minutes.

  5. Mix the dough at Speed 2 for about 3 minutes. It should be fairly smooth but will not pass the window pane test.

  6. Transfer the dough to a lightly floured board and divide it into 4 equal pieces of about 200 g each (to make 10 inch pizzas).

  7. Shape each piece into a tight ball.

  8. Place each ball into a 1 qt Ziploc bag with a tablespoon of olive oil. Roll the ball in the oil and seal the bags.

  9. The dough can be refrigerated overnight, frozen for later use or allowed to ferment at room temperature for 5 to 6 hours for use the same day. (I refrigerated two balls and froze two.)

  10. For refrigerated dough, remove it to room temperature 3-5 hours before you plan on making the pizza, depending on room temperature.

  11. An hour before baking, pre-heat the oven to 500ºF (or more, if possible) with a baking stone on the middle shelf.

  12. Remove one ball at a time from its bag and shape into a 10 inch round by your method of choice.

  13. Top the pizza as desired, immediately transfer it to the baking stone, and bake for 8-10 minutes until done. Repeat for additional pizzas.

The toppings I used for each pizza were:

  1. Brush the entire surface of the shaped pizza dough with olive oil.

  2. Sprinkle with a tablespoon of finely chopped fresh rosemary.

  3. Sprinkle with a large clove of garlic, sliced very thin.

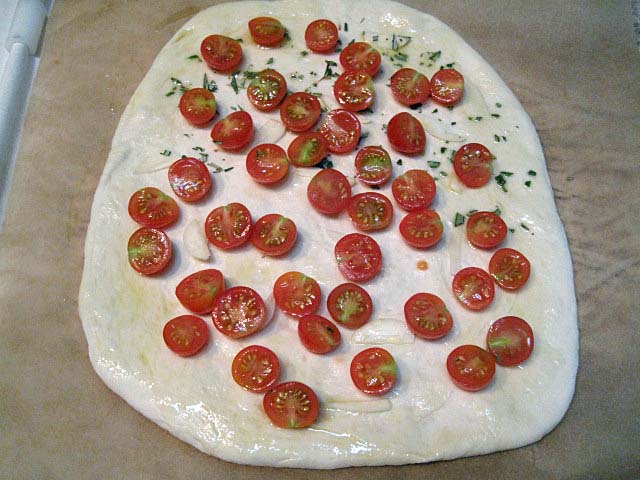
  4. Distribute on the pizza a cup of cherry tomatoes, halved, cut side up or a cup of fresh roma tomatoes peeled, seeded and cut into quarters.

  5. After baking, optionally top with fresh arugula or basel leaves.


Pizza with Cherry Tomatoes, pre-bake

Pizza with Cherry Tomatoes, baked

Pizza with Roma Tomatoes, pre-bake

Pizza with Roma Tomatoes, baked

The results were wonderful! The dough stretched easily to paper thin without tearing and baked so crisp there was no sagging when a slice was help up by the corona. Biting into it was a noisy crunch. The flavor of the crust was delicious. The whole experience sold me on minimalist toppings.

Pizza bottom crust

Thin crust

Crust

I don't think adding a few capers, or olives or mushrooms would do any harm, but I don't think making pizzas with heavy saucing, lots of cheese or lots of anything will be tempting again.

 The pizza was a nice follow-up to last night's bruschetta.

Bruschetta with fresh funghi porcini and with tomatoes and basel

David

Submitted to YeastSpotting

dmsnyder's picture
dmsnyder

Light and fluffy 100% Whole Wheat Bread

100% Whole Wheat Bread from BBA

I've been admiring the whole wheat pan loaves txfarmer has shown us in recent weeks. Her use of intensive mixing to achieve a higher rise and airier crumb has particularly intrigued me. (See SD 100% WW sandwich loaf with bulgur (cracked wheat) - discovered a new favorite ingredient). When I read her blog, I decided to make the same bread. However, on further reflection, I changed my plan. I have a favorite 100% whole wheat bread – that in BBA – and I really don't like the combination of sourdough tang and whole wheat flavors. So, I decided to fiddle with Peter Reinhart's formula for 100% whole wheat bread using some of txfarmer's techniques to see if I could get a lighter-crumbed version of a bread I already know well and love. The crumb texture I have gotten with this bread is moist but rather dense and crumbly, following Reinhart's suggestions for mixing time. This is not at all unpleasant to eat, but is very different from the airier crumb txfarmer and khalid have shown.

Reinhart's formula calls for a soaker with a coarsely-ground grain and a whole wheat poolish. As usual, I used bulgur for the soaker, and I used fresh-milled whole wheat flour for the poolish. The flour in the final dough was KAF Organic Whole Wheat. The procedures described are those I used. They deviate from both Peter Reinhart's and txfarmer's in significant ways.


Soaker

Baker's %

Wt (oz)

Medium bulgur

100

4.25

Water

141

6

The day before baking, measure the bulgur into a 3 cup bowl. Pour the water over it and cover tightly. Leave at room temperature until used.


Whole Wheat Poolish

Baker's %

Wt (oz)

Whole wheat flour

100

6.75

Instant yeast

0.41

0.028 (¼ tsp)

Water

88.9

6

The day before baking, mix the poolish ingredients. Cover the bowl tightly. Allow to ferment until bubbles start to form (2-4 hours), then refrigerate.


Final dough

Baker's %

Wt (oz)

Whole wheat flour

100

9

Salt

3.7

0.33

Instant yeast

1.2

0.11 (1 tsp)

Honey

16.7

1.5

Vegetable oil (optional)

5.6

0.5

Egg, slightly beaten

18.3

1.65 (1 large)

Seeds to garnish (optional)


2 T

Soaker

114

All of above

Poolish

142

All of above


Procedure

  1. Mix the soaker and poolish, as instructed above, the night before mixing the final dough.

  2. One hour before mixing, take the poolish out of the refrigerator to warm to room temperature.

  3. Place all the ingredients in the bowl of a stand mixer.

  4. Using the paddle, mix at Speed 1until a ball forms on the paddle and the ingredients are well-mixed (1-2 minutes). Note that the dough should be quite tacky – neither dry nor sticky. Adjustments can be made by adding either water or flour during this step or during the next mixing step. (I added about 15-20 g additional water.)

  5. Let the dough rest, covered in the mixer bowl, for 20-40 minutes.

  6. Switch to the dough hook and mix at Speed 2 until a medium window pane can be made. (20-25 minutes) Note: Reinhart's instruction is to knead for 10-15 minutes, “less” if machine kneading.

  7. Transfer the dough to a lightly oiled bowl.

  8. Ferment for two hours or until the dough has doubled in volume, with a stretch and fold on the board at 60 minutes.

  9. Divide the dough into two equal pieces and form them into pan loaves.

  10. Place the dough into lightly oiled medium loaf pans and place the pans in food-grade plastic bags or cover well with a towel or plasti-crap.

  11. Proof until the loaves have almost doubled and are peaking above the rims of the pans. (About 90 minutes)

  12. Pre-heat the oven to 350ºF with a rack in the middle.

  13. Optionally, spray the loaves lightly with water and sprinkle on seeds or rolled oats.

  14. Optionally, score the loaves.

  15. Bake for 45-60 minutes. At 30 minutes, rotate the pans 180º, if necessary for even browning. The interior temperature should be at least 195ºF, and the crust should be firm on the top and on the sides of the loaves. If necessary, return the loaves to the oven and bake longer. (My loaves were done in 45 minutes.)

  16. Immediately transfer the loaves to a cooling rack.

  17. Cool thoroughly before slicing.

I noticed two significant differences in this dough, compared to my previous bakes of this bread. First, the dough was less sticky than usual. Second, the loaves achieved significantly greater volume during proofing. I attribute this to the more intensive mixing, but also the S&F which serves to further strengthen the dough but also equalized the dough temperature and redistribute the products of fermentation.

Once baked, the loaves felt much lighter than usual. When sliced, the reason was quite obvious. Rather than the cakey, somewhat crumbly crumb this bread has always had in the past, the crumb was airy and, in txfarmer's words, “shreddable.”

Crumb from a previous bake of the BBA 100% Whole Wheat Bread, made following Reinhart's mixing time instructions

Crumb of the 100% Whole Wheat Bread from BBA mixed as described above

"Shreddable"

The flavor of the bread is basically unchanged, but the mouth feel is entirely different - light and mildly chewy. I was amazed.

I'm looking forward to having toast for breakfast.

Thanks, txfarmer, for your inspiring and informative postings!

David

Submitted to YeastSpotting


txfarmer's picture
txfarmer

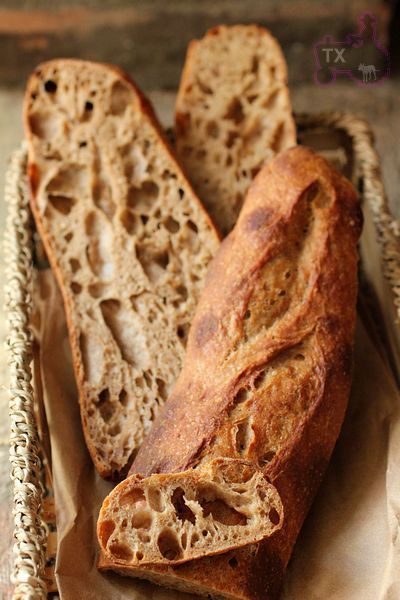
36 hours+ sourdough baguette with 100% whole grain - finale, but not the end


I went all in. (original recipe here, 3 earlier variations here, 3 more variations here, previous whole grain experiments here, with 60% whole grain here, 80% version here)

barley flour, 75g

ww flour, 375g

ice water, 475g

salt, 10g

rye starter (100%) 100g

-Mix flour, ice water and autolyse for 12 hours.

-Mix in salt, starter, then follow the basic 36 hour sourdough baguette formula here.


Whole grain flour breakdown: 15% barley flour, 10% rye flour (all in starter), 75% ww. Hydration: 105%, yup, you read that right, I think it's necessary in order to get an open crumb and relatively thin crust. Note that the percentage of starter is lower than previous versions, that's because whole grain dough fermentate much faster, I reduced starter amount to maintain the convenient 36 hour timeline without over-rise.


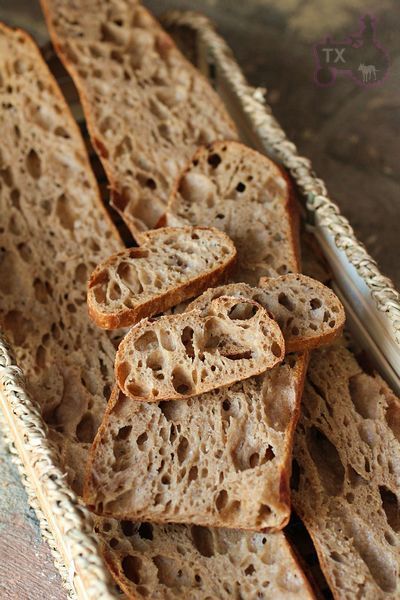
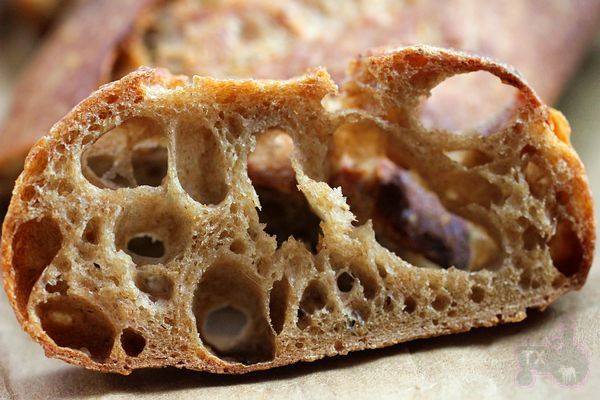
Crumb is open, especially for a 100% whole grain dough, flavor is rich, HOWEVER, it's far from perfect:

1. the crust is a tad too thick for baguettes, and crumb a tad too "chewy", mouth feel is not as light as I would've liked for a baguette

2. the profile is a bit flat, one or two more S&F may give the dough mroe strength to rise higher


All in all a good and delicious baguette, but not our favorite. My husband thinks the 60% whole grain version has the best flavor/texture, I thing the ones with 40% to 60% whole grain all have a good balance between rich whole grain flavor and light mouth feel.


Interestingly, this batch tasted better the next day (baked for another 5min to warm up and re-crisp the crust before eating), the flavor improved, and the texture is less ... "wet", more crisp, this is opposite to white flour baguettes which taste the best fresh. Maybe high ratio whole grain breads need time for the crumb to "set". This is far from the end, I want to keep playing with this dough to see whether I can improve on the rise and the texture.


Submitting to Yeastspotting.

txfarmer's picture
txfarmer

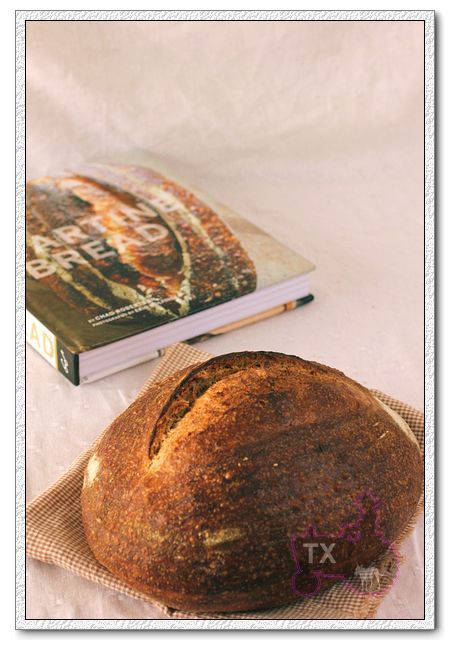
Tartine Whole Wheat Loaf - "hole-y" grail?

This is the WW loaf from the new "Tartine" Book, the procedure is very similar to the basic country loaf (which I posted about here), just with more WW flour(~70%) , even more water(80%+),  and slightly lower mixing temperature since whole grain flour fermentate faster.


One thing that bothers me about the book is his math - when he calculate baker's percentage for ingredients, he doesn't count flour in the levain. He doesn't use a lot of levain, so in reality it probably doesn't matter, but it bothers my engineering brain. That's why I adjusted the formula, so the ww amount is really 70%, both in levain and final dough. Phew, feel a lot better after that.

-Levain:

100% sourdough starter, 1/2 tbsp (I used 8g)

WW flour, 140g

white flour, 60g

water(78F), 200g

1. Mix and put in a cool place until it grows by 20%. If you pinch a bit of levain and put it in water, it should float. About overnight at 65F.


-Final dough

200g levain

700g ww flour

300g bread flour (book says AP flour but I used BF for the extra lift)

water(75F), 800g (I used a bit more, probably 20g)

salt, 20g

2. Mix levain, flour, 750g of water. Autolyse for 40 to 60min. Add the rest of water and salt, mix to combine.

3. Bulk rise around 80F for about 3 hours until it increase about 30% in volume. S&F every 30min in the first 2 hours, after that S&F according to what the dough needs. If mix with cooler water and let rise in cooler temp, the bulk rise time can be adjusted.

4. Divide and round, bench rest for 20min

5. Shape and proof upside down in floured brotform. I retarded my shaped dough in the fridge (40F) overnight, then warm up for another 30min before baking. The dough can also be proofed right after shaping for 3 to 4 hours at 75F to 80F.

6. Bake with steam for 45min at 450F.


Awesome oven spring, crackling thin crust that sang loudly. Since it's a very soft high hydration dough, at the begining of the bake, it tends to spread a bit, so I kept the oven temp at 500F for the first 5min, then dropped to 450F after that. The finished loaves are quite round and tall.


Quite an open crumb for so much ww


It's not quite as "hole-y" as the basic country loaf. Chad Robertson says whole grain hearth bread can indeed have open crumb, even though it might depend on many things including the type of the flour. I might increase the hydration even more to see how much I can push it.


Just like the basic country loaf, this bread is not noticably sour, but very sweet, very fragrant with whole grain flavor. Next up, I want to try the semolina formula.

Sending this to Yeastspotting.


dmsnyder's picture
dmsnyder

Consistent Crackly Crust Conundrum Conquered?

Achieving a thin, crackled crust has been a frustrating pursuit for many, myself included. I have been able to get it, sometimes, but not consistently. There have been numerous discussions of how to get that crackly crust. I've been slowly digesting what's been written, and I think I may have arrived at a reliable method, at least for my breads, my dough handling and my oven.

The basic principles

The crust crackles during cooling because the interior of the bread contracts as it cools, and the crust is too dry to absorb water vapor which is trying to migrate outward and too rigid to contract with the crumb.

In order to optimize oven spring, bloom, crust shine and crust thickness when baking hearth breads, it is necessary to have a moist environment for the first part of the bake. Keeping the surface of the bread moist delays hardening of the crust, so it is extensible enough to expand with oven spring and permit a nice blooming of the scoring cuts.

Thus, it is desirable to have a humid oven for the first part of the bake but a dry oven for the last part of the bake.

Convection ovens, by increasing hot air circulation, tend to dry the surface of whatever is cooking. That's nice for crisping chicken skin, but it is counter-productive for keeping the bread surface moist early in the bake. On the other hand, convection baking helps dry the loaf surface, as is desirable during the last part of the bake. Convection ovens made for bakeries solve this problem by injecting steam under pressure over a time period under control by the baker. The home baker can achieve something like this by covering the loaves or using a cloche for the first part of the bake. The cover protects the loaf from excessive water evaporation, even in a convection oven. When the cover is removed, the crust can be dried, and a convection oven can presumably achieve this better than a conventional oven.

Allowing the loaf to sit on the baking stone with the oven turned off and the door ajar can achieve additional crust drying, but it may be that a less gradual cooling results in faster contraction of the cooling crumb and greater likelihood of crust crackling, according to some.

The protein content of the flour used and the inclusion of other ingredients that increase water retention, for example, potatoes or soakers, may also have an impact. These factors may impact both the degree to which the crumb contracts and the difficulty of drying the crust, and both of these would inhibit crackle development. If so, crackles should be easiest to achieve in a straight bread dough made with lower protein flour. Indeed, the bread most associated with a thin, crackly crust is baguette, which meets these conditions.

The principles applied

My oven is made by KitchenAid and has both convection and conventional baking options. This provides me with the opportunity to apply the principles discussed above.

I baked two breads yesterday and today with these principles in mind. The first was one I've baked dozens of times, my San Joaquin Sourdough. The second was one I had not baked before, the Vermont Sourdough with Increased Whole Grain from Hamelman's Bread. Both breads had 20% pre-fermented flour in the form of a 125% hydration starter fed with a mix of 70% AP, 20% WW and 10% whole rye flour.

The San Joaquin Sourdough was made with KAF AP and 10% KAF Medium Rye flours. The dough was 72% hydration. The loaves were scaled to 480 gms and shaped as bâtards. The Vermont Sourdough with Increased Whole Grain was made with KAF Bread Flour and 15% KAF Medium Rye Flour. The dough was 65% hydration. The loaves were scaled to 810 gms and shaped as boules.

For both bakes, the oven was pre-heated to 500ºF on convection bake for 60 minutes, with a baking stone on the middle shelf, pushed to the left, and a 7 inch cast iron skillet filled with lava rocks at the right front of the lower shelf. The oven was pre-steamed by pouring about 1/3 cup of boiling water over the lava rocks. The loaves were then transferred to a peel, scored and loaded onto the stone. Another ½ cup of water was poured over the lava rocks and the oven door quickly closed. The oven was immediately turned down to 460ºF, conventional bake.
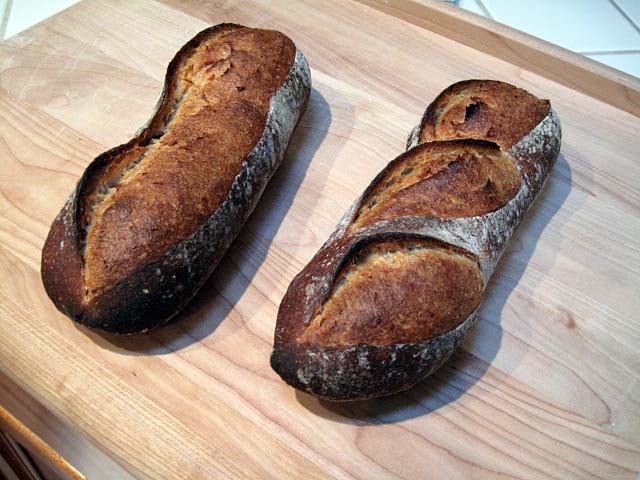
San Joaquin Sourdough Bâtards

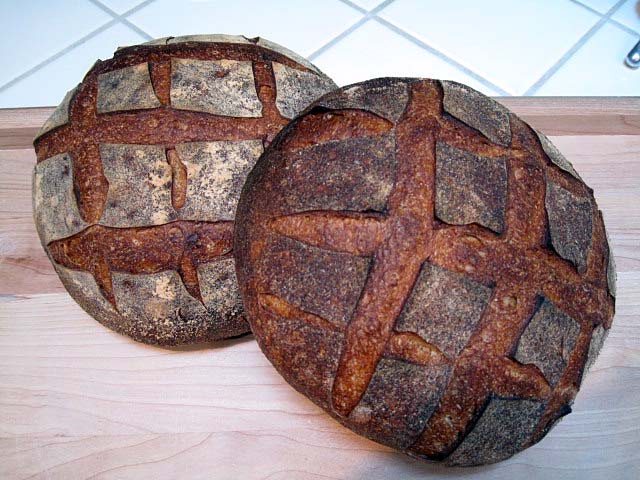
Vermont Sourdough with Increased Whole Grain from Hamelman's "Bread"

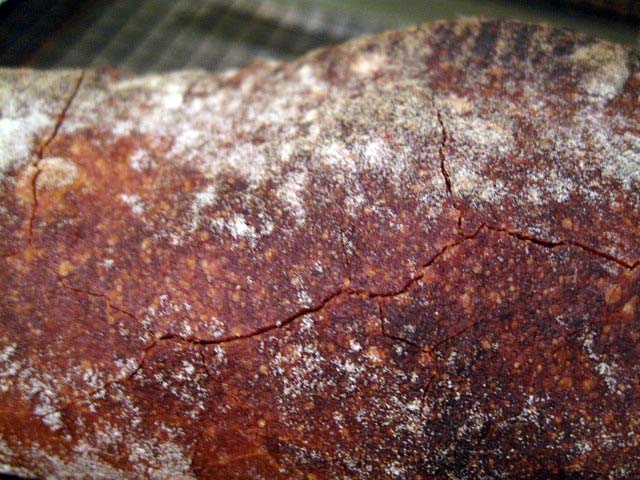
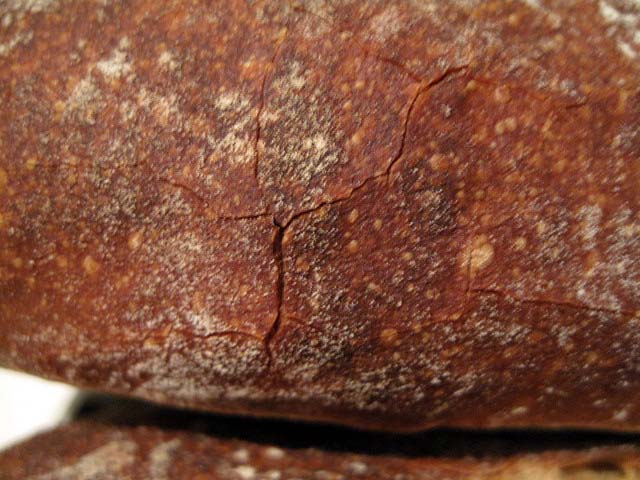
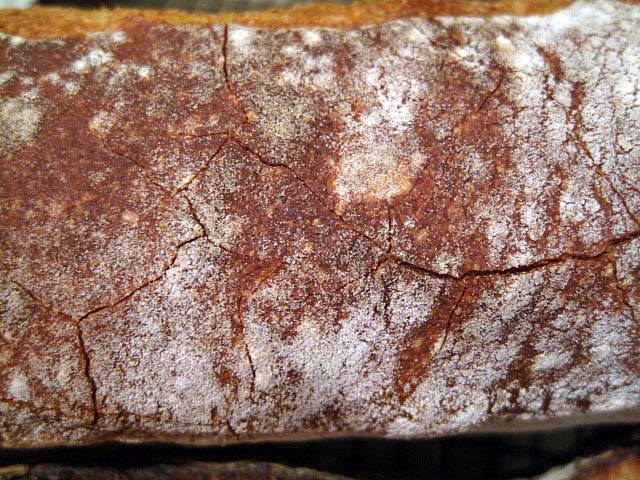
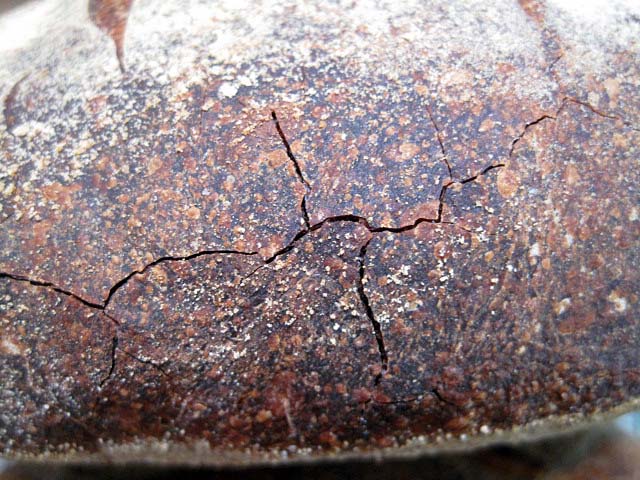
For the San Joaquin sourdough, the skillet was removed from the oven after 12 minutes, and the temperature was reset to 440ºF, convection bake. After another 18 minutes, the oven was turned off, and the loaves were left on the stone with the oven door ajar for another 7 minutes before being transferred to a cooling rack. The loaves commenced “singing” immediately and exceptionally loudly. By time they were cooled, they had developed many crust crackles, as pictured.

Crackly Crust on San Joaquin Sourdough

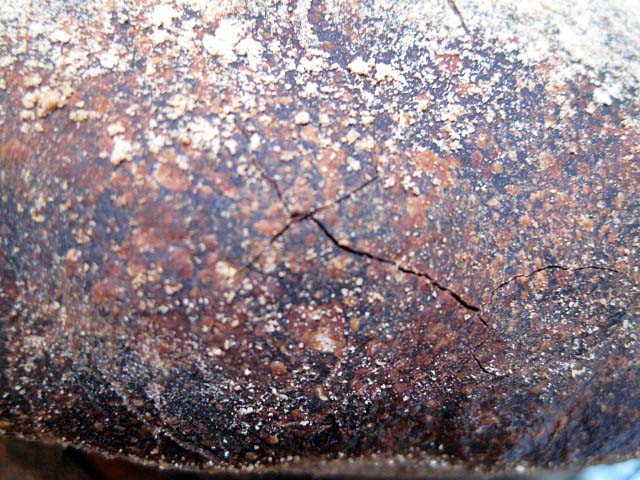
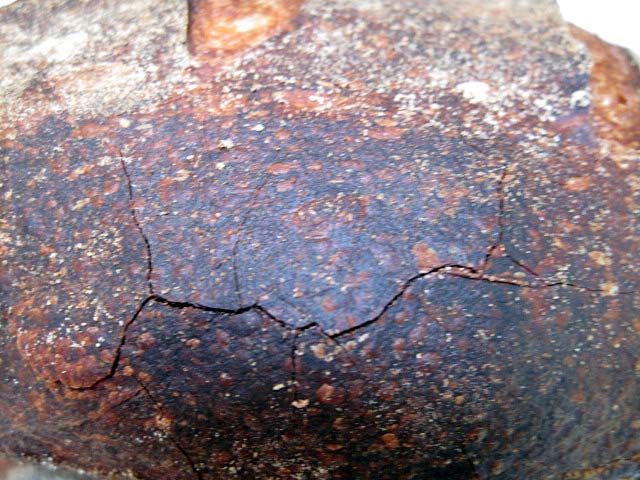
For the Vermont Sourdough with Increased Whole Grain, the skillet was removed after 15 minutes, and the oven was re-set to 435ºF, convection bake. The loaves were baked for an additional 25 minutes. Then, the oven was turned off, and the loaves were left on the stone with the oven door ajar for another 7 minutes before being transferred to a cooling rack. The loaves were already singing when I took them out of the oven, and, to my delight, there were already a few crackles. I had never before seen crackles develop before a loaf was cooled out of the oven. More lovely crackles appeared as the loaves cooled.

Crackles in crust of Vermont Sourdough with Increased Whole Grain, right out of the oven

More crackles appeared as the loaves cooled

And more ...

And yet more crackles

Conclusions

While two bakes is not sufficient to completely establish that the method described will reliably produce a crackled crust with all hearth breads, or even these, every time, this experience certainly supports my current understanding of the mechanisms involved and suggests the possibility that other bakes and other bakers might achieve similar results by applying these techniques.

I'd be happy if others would give this a try and share their experience.

David


ananda's picture
ananda

Horst Bandel's Black Pumpernickel


Horst Bandel's Black Pumpernickel.

This is a recipe from "Bread: A Baker's Book of Techniques and Recipes" by Jeffrey Hamelman.   A number of TFL regulars have posted on this recipe, notably,

ehanner: http://www.thefreshloaf.com/node/16501/learning-pumpernickel and http://www.thefreshloaf.com/node/16348/horst-bandel039s-black-pumpernickel-bread

 txfarmer: http://www.thefreshloaf.com/node/13965/still-struggling-horst-bandel%E2%80%99s-black-pumpernickel and http://www.thefreshloaf.com/node/14315/horst-bandel%E2%80%99s-black-pumpernickel-finally

and Shiao-Ping: http://www.thefreshloaf.com/node/12790/horst-bandel039s-black-pumpernickel

This is the recipe and formula I adapted and used

Material

Formula [% of flour(??)]

Recipe [grams]

Rye Sour Dough


Dark Rye Flour

30

300

Water

30

300

TOTAL

60

600

Soaked Bread


Old Bread

11

110

Water

17.7

177

TOTAL

28.7

287

Soaked Rye Berries


Whole Rye Berries

20

200

Water

22.7

227

TOTAL

42.7

427

Final Dough


Rye Sour Dough

60

600

Soaked Bread

28.7

287

Soaked Rye Berries

42.7

427

Salt

1.8

18

Molasses

4

40

Cracked Rye Grain

25

250

Strong Wholemeal Flour

8

80

Dark Rye Flour - sifted

17

170

Water

15

150

TOTAL

202.2

2022


Notes:

The 100% of "flour" is made up of: dark rye in the sour, whole rye berries in the first soaker, plus the cracked rye and the flour in the final dough.   I have not counted the old bread, as that seemed too arbitrary to sub divide accurately into water and flour.

The total water content does include the water in the old bread soaker, as well as the water taken up by cooking the rye berries.   My aim was to establish a formula which accurately created an overall moisture content of 85% of the "flour".

Obviously there will be some variation from batch to batch, but I really wanted to establish how much liquid is taken up in the bread soaker, and in the berry soaking and boiling process.   From seeing other peoples' postings, I had decided this information was crucial.

For what it's worth, the pre-fermented part is 30%.


Method:

  • Prepare the rye sour dough using starter from stock.   Allow the sour dough to ferment for 14 - 16 hours at 21°C.
  • Soak the rye berries overnight in cold water.
  • Soak the old bread overnight in ambient water.   Use the amounts given in the above table - weighed.   The bread will take up all this water, so you can eliminate any problems of squeezing!   I used some wholewheat pain siègle, and some white bread.   This was deliberate, as I did not have any high gluten white flour in stock, so had to change the flour used in the final dough, using more dark rye plus a dash of wholemeal.   It was all I had at the time!
  • Next day, cook the rye berries in fresh boiling water [3 times volume of water to berries] for about an hour.   Drain the berries, and discard the cooking liquor.   At this point I weighed the berries to establish exactly how much water they had taken up.   This is the figure shown in the table.
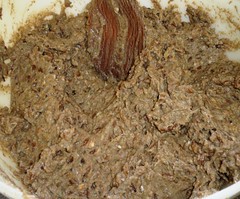
  • For the final dough, dissolve the molasses into the water, which should be 40°C.   From there, mix all the ingredients together with the soakers and sour to form an evenly mixed paste.   It was cold in the house when I made this, so both the sour and flour, plus the soaked bread were all well below 20°C    The final dough temperature was 28°C.   Photographs of the mixed paste are shown below.
  • Bulk ferment for 45 minutes.   Meantime lightly grease 1 large Pullman pan and lid.   Pre-heat the oven to 190°C.
  • Use wet hands to scrape up and shape the paste, and deposit it into the tin.   Smooth the surface as necessary.   Cover with an oiled piece of plastic, and prove at 32°C for 1¼ hours.   I use the hearth in front of our wood burning stove.   When the dough is just short of the top of the tin, slide the lid in place, and set in the oven.

  • The baking process is long and complex.   The idea is the loaf should be baked in a falling oven.   For the home baker, this is really difficult to achieve.   I turned the heat down to 120°C after 1½ hours.   After a further 6 hours I turned the oven off.   Then I left the bread in the cooling oven overnight.   This was the best equivalent I could come up with to the recommendations in the book.
  • De-pan the bread and cool on wires.   Wrap in a tea towel, and let the bread sit a full 24 hours before giving into temptation and cutting off that first slice.


Analysis:

  • I'm pleased with how this loaf came out in some ways.   For a start Alison, my wife, has been raving about her sandwiches I make for lunch...all week.   I made this bread a week ago now, and didn't cut into it for nearly 2 days.   It served us for lunch sandwiches Tuesday, Wednesday, Thursday and Friday.   There is a little left for today, and it's still almost as moist in the middle of the crumb as when first cut.
  • I like the formula, and am happy with the hydration calculations.   I've attached a couple of photos of the mixed paste to try and show the texture, although I accept they are not the best of shots, I hope it gives an idea.
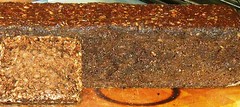
  • I know Eric added too much flour, and commented on the adverse effect in the eating.   Well, I didn't have any high gluten flour in the house when I made this.   I had a tiny amount of strong wholemeal, and some dark rye!!!   That's why I went with lighter bread in the soaker.   This has definitely made a difference to the finished bread.   It is quite difficult to cut through cleanly without the dough trying to tear a little in places.   You can also spot the giveaway hole just underneath the top crust near the middle of the loaf.   It was the plague of some of the VB rye loaves, and is caused by the weakness in the structure of the starch as the final fermentation draws to conclusion.   This is clearly the typical instability from rye as opposed to the stretchy gluten in the wheat.   Still, the flavour does not detract.
  • My main disappointment, however, is in the baking.   The outer portions of the crumb are over-baked, and the crust is too firm.   But the middle of the crumb is very moist [I had thought about writing overly-moist here, but that's not right; the bread is baked through, and was fine once it had stood before cutting]   I'm thinking the major issue with such a large loaf [it's just over the 2kg mark], with such high hydration [85%] is to be able to "cook" it properly.   I think I set the bread at too high a temperature in the first place.   I've been with Eric all the way on the idea of steaming.   Eric, could you give me the link to the discussion you had with qahtan regarding steaming?   Baking seems a very difficult way to deal with this bread.   It takes me back to producing 000s of Christmas Puddings at the Village Bakery.   We loaded them into wire baskets in their plastic pots, covered with foil lids.   We lowered the wires into coffins made of aluminium.   These were the same size as a standard baking sheet, and would be about 40cm tall, so they filled the height of our oven.   The coffins had water in the bottom, and a raised platform with 3 big holes in, for the wires to sit on.   They also had tight-fitting lids.   They weighed a lot and were really difficult to control with the peel.   Our peels had handles which were 5m in length!   So, the puddings sat at the back of the cooling wood-fired oven for several hours and cooked beautifully in the steam.   I want to devise a similar sort of system to cook the Horst Bandel loaf.   But this is not that easy.   As you can see in the photos, I've made some in the Christmas pudding pots, and this was very successful.   But I love the shape and size of loaf gained from using the Pullman pan.   I want to find a large enclosed vessel which will hold a Pullman pan, and can take a layer of water on the bottom.   I figure some sort of raised wire racking will support the Pullman pan and keep it above the water level.   Anyway, I need to do some work to come up with something along those lines.   I envisage steaming time in the region of 10 - 12 hours.   I do like those glass pans, Eric!
  • I used cracked rye grain instead of rye chops.   I have 2 suppliers for organic rye: one had wholegrain, flour and cracked grain.   The other had chops and flour, but no wholegrain; the explanation was that the grain was tipped straight into the mill on delivery, hence they could not supply wholegrain.   I think this must be a Health and Safety issue, but I found it a little unhelpful, so I went with the other supplier, and the cracked grain option.   I don't think the substitution was that significant.   The whole rye berries need a minimum of 1 hour boil.


I'm going to count this as my first recipe in the "Bread Challenge".   To those already signed up, I hope you all think it worthy.


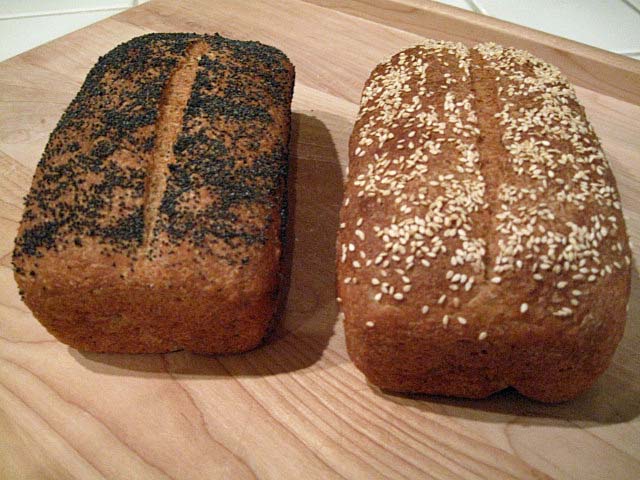
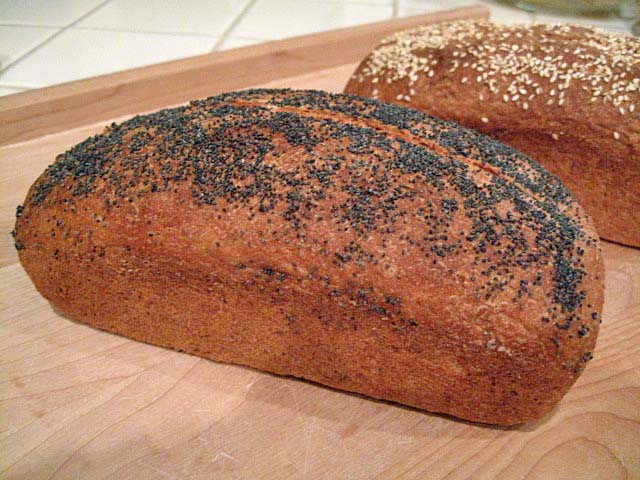
 Lots of photos all shown below.   The top 2 on the left were steamed in pudding pots.   The next 2 are of the mixed paste.   Then 5 of the finished loaf baked in the pullman pan.


Best wishes

Andy

AW's picture
AW

Whole Wheat Sandwich Bread

After much searching for a whole wheat sandwich bread that would be soft yet nutritious, my friend Ben shared this recipe with me. Ben and his mother have perfected over the years and given us some choices on substitutions for ingredients, which is so nice.

I think the texture and crumb are simply perfect. The dough can also be nicely worked up into individual soup rolls, though I have to say that I much prefer it as a sliced loaf. If you'd like a step-by-step show of this friend me on FB.

___________________________________________________________________

Whole Wheat Sandwich Bread

From Ben Chaffee

Makes 2 loaves (8-1/2" by 5-1/2")

1 package active dry yeast or 1 cake compressed yeast (2-1/2 tsp)

1/4 cup water

2-1/2 cups hot water

1/2 cup brown sugar (can interchange honey or molasses 1:1 for brown sugar)

3 tsp salt

1/4 cup shortening*

3 cups (374 g) stirred whole-wheat flour

5 cups (663 g) stirred all-purpose white flour           


  1. Soften active dry yeast in 1/4 cup warm water (110°) or compressed yeast in 1/4 lukewarm water (85°). Combine hot water, sugar, salt, and shortening; cool to lukewarm.
  2. Stir in whole-wheat flour, 1 cup of the white flour; beat well.
  3. Stir in softened yeast. Add enough of remaining flour to make a moderately stiff dough. Turn out on lightly floured surface; kneed till smooth and satiny (10 to 12 minutes).
  4. Shape dough in a ball; place in lightly greased bowl, turning once to grease surface.
  5. Cover; let rise in warm place till double (about 1-1/2 hours). Punch down (or fold). Cut in two portions; shape each in smooth ball. Cover and let rest 10 minutes.
  6. Shape into loaves.† Place them in greased 8-1/2" by 5 2-1/2" loaf pans. Cover with a damp towel. Let rise till double (about 1-1/4 hours).
  7. Bake 375° for 45 minutes. When tapped, the bottoms of the loaves should have an almost hollow sound. Cover with foil last 20 minutes, if necessary.


*Other fats, such as vegetable oil or butter, can be used 1:1 for the shortening.

Place dough on counter. Press out large bubbles and gently form each dough ball into a rectangle. Ensure the shortest side of the rectangle is approximately the longest size of your loaf pan (8-1/2"). Roll up the dough. Pinch the seam closed. Tuck open sides down and under. Place in loaf pan.


Whole Wheat Sandwich

Pages