The Fresh Loaf

A Community of Amateur Bakers and Artisan Bread Enthusiasts.

Most bookmarked

DanAyo's picture
DanAyo

Community Bake - Pt1 Yeast Water - Hamelman's Swiss Farmhouse - Part 1

This Community Bake (CB) will feature Jeffrey Hamelman's Swiss Farmhouse bread. It is a full flavored bread with no sour flavor. The dough is leavened with a Raisin Yeast Water (RYW). And raisins and walnuts are used to enhance the flavor of the bread. Abe has been after me for a long time to try this bread. And after finally getting around to baking it I can fully appreciate his enthusiasm. The flavor is unique and I'm certain that all who bake it will agree...

For those that may not be familiar with our Community Bakes, check out the top paragraphs in  this LINK, for a little background.

Jeffrey Hamelman has given us permission to post his copyrighted formula and instructions.  The Swiss Farmhouse bread is taken from his book, BREAD: A Baker's Book of Techniques and Recipes (second edition), by Jeffrey Hamelman. Copyright 2013. Published by John Wiley & Sons. If you don't own this book, it is an all time favorite on TFL and definitely one to consider.

For those that don't have access to the book, the formula and instructions will be posted on the Community Bake.

Since this particular bread utilizes Yeast Water (YW) for the leaven, it seems best to host the bake it 2 parts. Part 1 will detail the instructions to make your own YW using only Raisins and water. It is much more simple to make than a sourdough starter and is generally mature and ready to use in 5 days or less. Everyone, including bakers that use commercial yeast are encouraged to participate. NOTE - the actual bake (Part 2) is scheduled to begin Friday, August 9.

 By-the-way - any kind of yeast water will do...

Once your yeast water is active see THIS LINK for the formula and instructions to bake the bread.

Instructions to make a Raisin Yeast Water Starter, by Jeffrey Hamelman.

At least 5 days before the bake, soak 74 grams (2.6 ounces) of raisins in 179 grams (6.3 ounces) of cholrine free water. Organic raisin are preferred. Any additives or preservatives in the raisins should avoided. Cover and leave at warm room temperature (75-80F). White mold normally begins to cover the surface of the raisins, an indication that the liquid is ready. Occasionally, however, no mold is visible. Once the ferment starts to actively bubble and the smell is sweet and has a tangy aroma, it should be ready and the dough mixing process can begin. If your YW is ready before you want to bake, it can be left out on the counter for a few days, or stored in the refrigerator for much longer storage. NOTE - YW is not nearly as finicky as a sourdough starter and requires very low maintenance. Like sourdough starters, some have kept their YW for years.

I am not an authority on YW, but those that are, will be available to answer your questions. 

Abe sent me a link for a good teaching video about making a Raisin Yeast Water (RYW). https://youtu.be/vcfuUtbnteY

If you are new to YW, be prepared to have a blast...

Danny

DanAyo's picture
DanAyo

Community Bake - Pizza

We're going to sneak in a special Community Bake (CB). Every body likes a da pizza! The promised Swiss Farmhouse Bread will be featured towards the end of July. But for now, “When the moon hits you eye like a big pizza pie, that’s Amore..."

 In researching all things pizza, it is obvious that great pizza is a extremely subjective thing to each individual. Everyone has their own opinion. With that in mind we are going to throw this CB wide open. Use whichever formula and process that you like. For those that want to try a tested formula, see The RoadSide Pie King's go-to dough. It is posted in both Instant Dry Yeast and Sourdough versions. The spreadsheet is set to a Total Dough Weight (TDW) of 350 grams, which should be suitable for a 12" pie. If anyone is interested in a larger size dough, I can post a link to my spreadsheet. The TDW can be changed to any weight you desire. Let me know if you are interested. The spreadsheet was built in Excel.

Instruction for the YEASTED version - - - NOTE - - - If using the sourdough version you may have to adjust the amount of levain. At 7.5% PreFerment Flour (PFF) 24- 48 hr. retard should work. For longer retardation, it might be best to reduce the PFF to 5 or even less. A little goes a long way.

(1) In your mixer bowl(or by hand) dissolve the Starter or yeast in all of the Final Dough Water except the HOLD OUT Water. (2) Mix in the flours until well hydrated (3) Allow to fermentolyse for 1hr (4) Mix in the remaining HOLD OUT Water, salt, sugar, and malt (if using), mix until well-incorporated. (5) Slowly drizzle in the oil until well combined. (6) Beat or knead by hand until dough is moderately developed. The dough will be sticky and elastic. If kneading by hand, use slightly wet hands and avoid adding more flour. (7) Oil your hands and a suitable container. (8) Shape into a tight ball (9) Cold ferment in the refrigerator for 24hr-48hrs. (10) Remove to warm up to room temp 1hr or so before use, or you can ferment at room temp. for 6hrs. 1(11 Stretch the balls into your desired size skins (see video below), top and bake at 500F-550F (as high as your oven will go) Until the crust is browned and the cheese has melted. Spin the pie at least once to avoid burning due to oven hot spots. I have included a link to a skin stretching tutorial. Watch this video, more than a few times then go through the motions in your head. If you can see it in your mind's eye, you too can be a home oven pizzaiolo! 

https://youtu.be/GtAeKM_f2WU

I plan to add videos and other resources here as they become available. Check back often

By-the-way - a great pizza forum for researching all things pizza is www.pizzamaking.com . The pizza bakers on that site have been extremely patient and helpful towards me. I ask a lot of questions :-D

Let's have a blast and have a great time learning...

Danny
dmsnyder's picture
dmsnyder

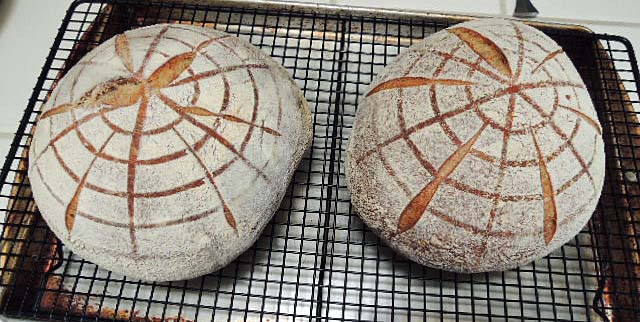
San Francisco-style Sourdough Bread 3-22-2019

Sourdough Bread: March 22, 2019

David Snyder

This bake is a kind of hybrid (high bread?). It utilizes elements of the formula and method shared by Mike Giraudo on Facebook, Peter Reinhart's James Beard Award-winning “San Francisco Sourdough,” as presented in his book, “Crust and Crumb” and various techniques I have adopted over the years, such as autolyse.

The fermentations in a warm environment should enhance yeast and lactobacillus growth and production of lactic acid. The cold retardations and low hydration of the starter and the final dough should enhance acetic acid production. I am hoping the final result will be a moderately sour bread with a pleasing balance of flavors.

Total Dough


Ingredient

Wt (g)

Bakers' %

High-protein flour

152

13

AP flour

771

66

Whole Wheat flour

116

10

Whole Rye flour

131

11

Water

769

65

Salt

23

2

Total

1962

167


Starter


Ingredient

Wt (g)

Bakers' %

High-protein flour

110

88

Whole Rye flour

15

12

Water

62.5

50

Firm starter

62.5

50

Total

250

200

  1. Dissolve the starter in the water.

  2. Add the flours and mix thoroughly.

  3. Ferment at 76ºF for 8-10 hours.

  4. Refrigerate for 12 hours or up to 3 days.

Note: Prior to mixing this starter, I fed a firm starter with high-protein flour at 50% hydration every other day for a week. These builds were fermented at room temperature until ripe, then refrigerated until the next feeding. Substituting 10-25% of the white flour with whole grain wheat, rye or a mix will speed fermentation and is generally felt to make the starter “healthier.”

Final Dough


Ingredient

Wt (g)

AP flour

771

WW flour

116

Whole Rye flour

116

Water

686

Salt

23

Starter

250

Total

1962

Procedures

  1. Place the flours and water in the bowl of a stand mixer and mix at low speed to a shaggy mass.

  2. Cover the bowl and let it rest (autolyse) for 1-2 hours.

  3. Sprinkle the salt over the surface of the dough. Add the starter in chunks. Mix at Speed 1 for 2 minutes to distribute ingredients then for about 9 minutes at Speed 2 to develop the dough.

  4. Transfer the dough to a lightly floured board. Shape into a ball.

  5. Transfer the dough to a clean, lightly oiled bowl. Cover the bowl and ferment at 80ºF for about 3 hours with stretch and folds at 50 and 100 minutes.

  6. Divide the dough into two equal pieces. Cover and let rest for 10-30 minutes to relax the gluten.

  7. Shape as boules or bâtards and place in floured bannetons. Cover or place in food-grade plastic bags.

  8. Proof for 2-3 hours at 80ºF until the loaves have expanded by about 50%.

  9. Refrigerate for 12-40 hours (The longer the cold retardation, the more sour the final loaf).

  10. Remove from refrigerator. Check on degree of proofing. Proof further at 80ºF, as needed. (May need 1-3 hours.) If adequately proofed, proceed to scoring and baking.

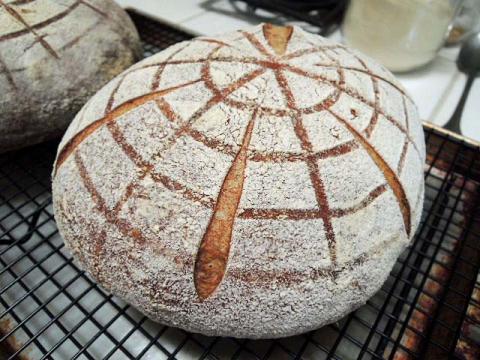
  11. Transfer to a peel. Score as desired.

  12. Bake: If baking in Dutch oven, bake at 475ºF covered for 20 minutes, then uncovered at 450ºF for another 10 minutes or until done to satisfaction.

  13. Bake: If baking on the hearth, pre-heat oven at 500ºF for 1 hour with baking stone and steaming apparatus in place. Turn down oven to 460. Load loaf and steam oven. After 15 minutes, remove steam and continue baking for 20-35 minutes, until loaf is baked. (Depends on size and shape of loaf.)

  14. The bread is done when the crust is nicely colored and the loaf sounds hollow when thumped on the bottom. The internal temperature should be at least 205ºF.

  15. Transfer the bread to a cooling rack and cool thoroughly before slicing.


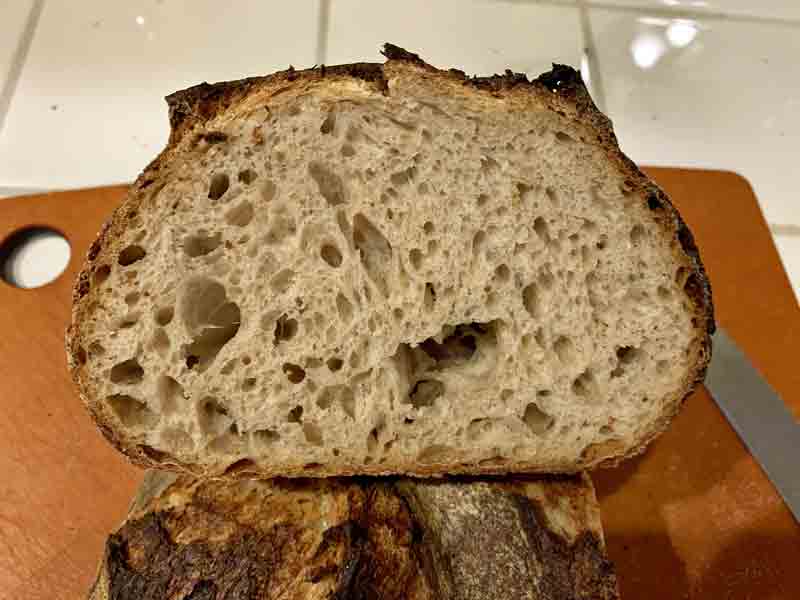
I think I finally nailed it. The crust is super crunchy. The crumb is tender but chewy. The flavor has a decidedly sour flavor with lactic acid tones dominating. Except for the flavors attributable to the rye and whole wheat, I could convince myself this was a Parisian Bakery sourdough bread.

Happy baking!

David

DanAyo's picture
DanAyo

Community Bake - 123 SD (Tenth Anniversary)

It’s been ten years this October since Flo posted her (now famous) 123 SD Bread. For those not familiar with our Community Bakes see THIS LINK.  Reference links are posted below below. The idea of a Community Bake is for those interested in baking and learning, to bake with us and post the results. I idea is that we all learn together. This is not a bread baking competition, everyone wins!


For those that don’t use a sourdough starter, there is a yeasted version on the very bottom of this post. If you need help with anything, reply requesting help.


Those that have baked this bread before might want to add vairious ingredients. New bakers to this bread can use the links below to get the basic loaf dialed in. The beauty of the 123 SD is the formula (recipe) requires no math. As Flo said, “it’s as easy as 1.2.3...”


Flo wrote me and asked that I post her correspondence for the gang to read.


- - - - - - Flo’s Correspondence - - - - - - 


Yes Oct. 2018 is the 10th anniversary of the 123 and I'm so delighted it is such a popular formula !


I don't bake bread anymore these days because I have been quite sick and one of the culprits that has been identified is wheat... I already knew since 2010 that rye makes me terribly sick, but baking without wheat is much more complicated.I have  been tempted to adapt 1.2.3 to GLuten Free flours but my results have not been great.I really have had to grieve over my inability to bake bread anymore, it was such a joy and pleasure for me...I will certainly, though, one day, put my hands -and my heart- back into some (gluten free) flours to bake bread once again !


Thank you SO much for posting the bake, it thrills me as much as it honors me !


Happy baking, and please feel free to post this email from me to all the SD bakers, with a big warm hello from me.


Flo


- - - - - - Second Correspondence - - - - - -


My 123 SD is my husband's fault ;-)


I had been baking with sourdough for many years, absolutely loving it, and so did my family. I had read many books about it, and kept experimenting with new recipes. One day, as I was saying that I had too much sourdough starter for the recipe I wanted to bake, my husband said "why don't you come up with a formula to easily bake with the precise weight of ripe starter you have on hand ? I'm sure it would be helpful". I answered something like "you mean as easy as 1.2.3 ?", while thinking "hey, why not try that ?" So I weighed my starter, added double that weight of water, and then triple that weight of flour. I mixed and let the dough rest 20 minutes. I added almost 2% of the flour's weight of salt, mixed again, let it rest, folding the dough once in a while etc. We loved the result and I began to play with the formula. A publisher even wanted to edit a book on it ! With a friend, we toyed with the idea, came up with numerous variations (which have never been rendered public), but life happened and we never did it. 2 years later, I began suspecting that one of my daughters and myself were not tolerating well gluten filled flours. I tried to adapt the 1.2.3 to gluten free bread baking. It did work but my sourdough starter was then too bitter. Nowadays, I rarely bake bread. But it fills me with joy (and maybe a hint of pride ;-) ) to hear about the 123 formula being still liked and useful !


Best regards

Flo


- - - - - - End Fol’s Correspondence - - - - - - 


Resources


123 Sourdough - No Knead - Do Nothing For those baking the 123 for the first time - check this out.


123 Challenge Great ideas for those considering spicing things up.


Everyone is welcomed to join. Beginners and experts, all learning together.


For those that don’t use a starter, you can you this recipe that has been converted to yeast. Using a pre-ferment will boost the flavor tremendously.


- - - - - - Yeasted version of the 123 bread - - - - - -


Here is a LINK  with information concerning preferments.


 Formula:

350g flour

250g water

7g salt

Poolish:


50g flour

50g water

0.2g dried (0.17g to be exact but 0.2g is fine) or 0.5 fresh yeast. NOTE - a pinch of dry yeast is 0.22 which is plenty close enough.

Left overnight and to be used the next day when active like in the photo on My Weekend Bakery. 


Final Recipe:


100g poolish

200g water

300g flour

7g salt

An optional pinch of extra yeast otherwise expect it to be slower

Something along these lines. But with such small amounts of yeast you can just use a small pinch in the poolish and use when ready. You'll get an overnight cool ferment out of it. Some extra yeast in the final dough is often added but not strictly necessary. 


- - - - - - End yeasted version of the 123 bread - - - - - - 


Dan

bäckerdave's picture
bäckerdave

Viennese Potato (and Raisins) Bread

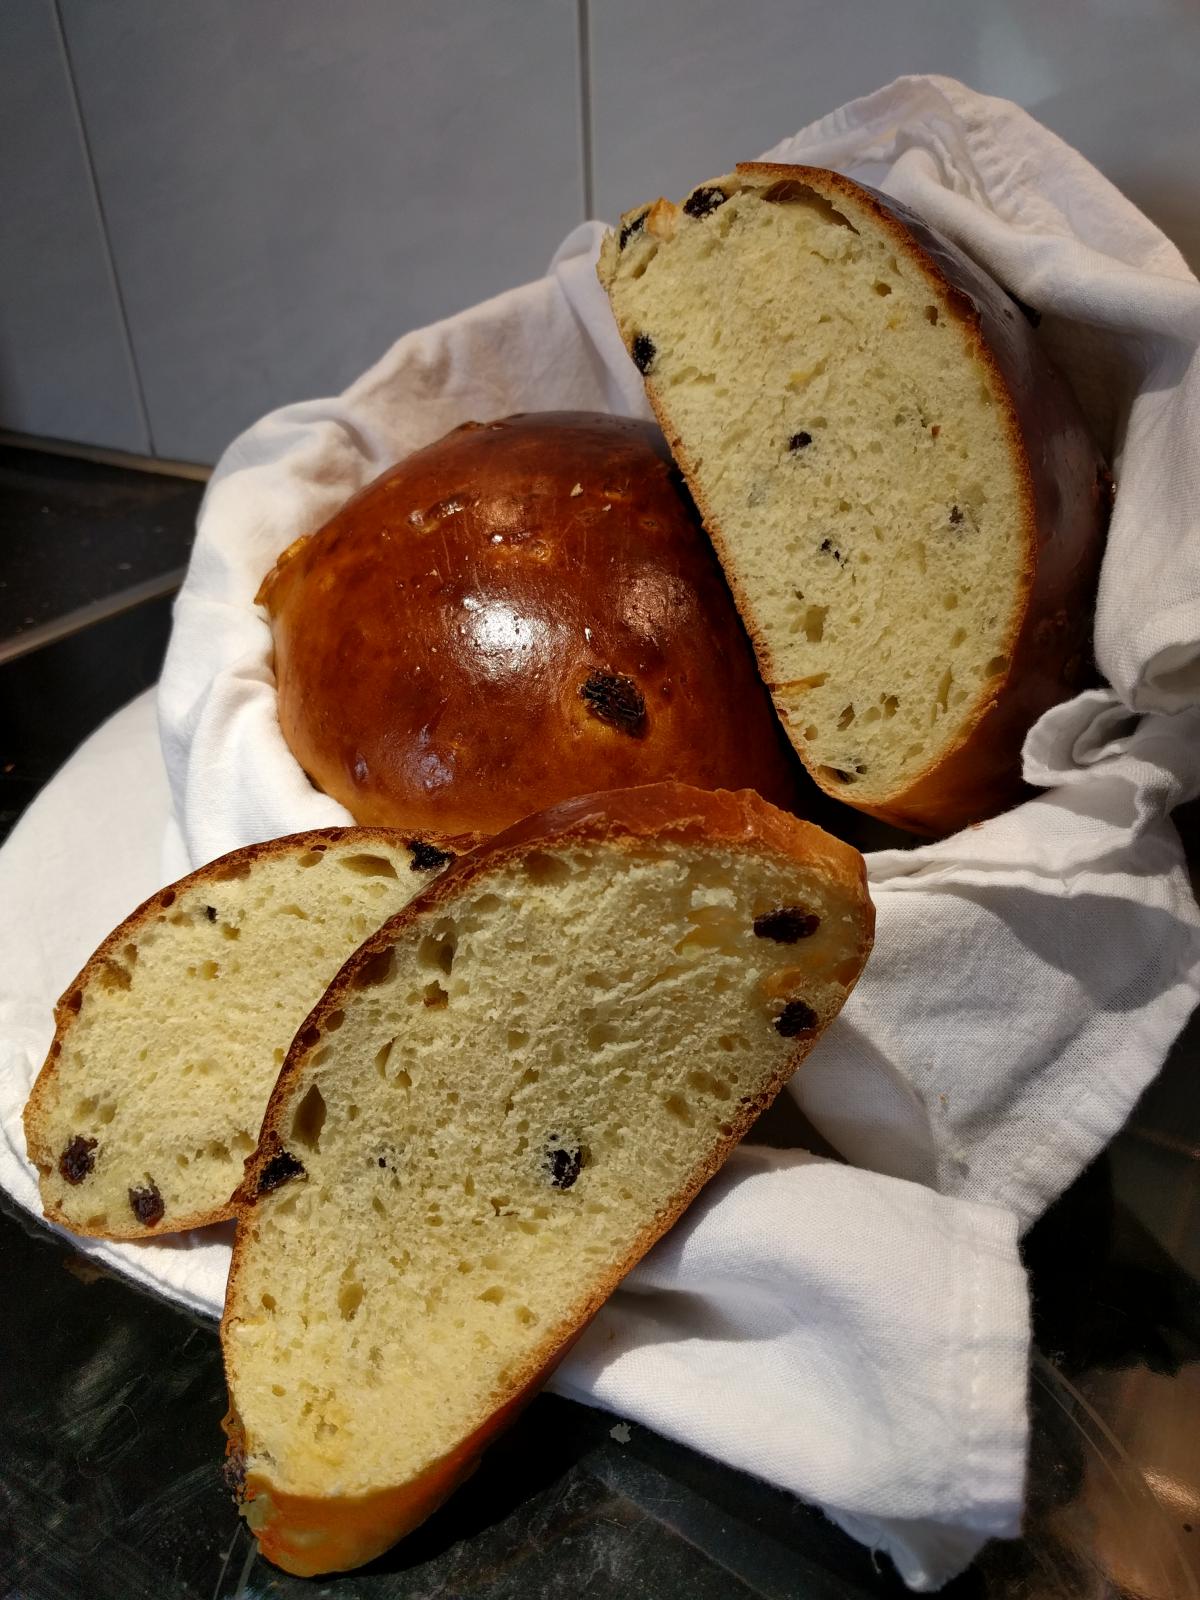
I was really excited after being able to buy  Barbara van Melle's book "Der Duft von frischem Brot" ("The Aroma of Fresh Bread") last week in Vienna.  It's a wonderful collection of recipes from the supposed best master bakers of Austria.  So I was really itching to try out a recipe this weekend and it did not disappoint!

I decided on something easy: Wiener Kartoffelbrot (Viennese Potato Bread, although I prefer adding Raisins to the title since it makes much more sense) from Josef Schrott.  Even though it has potatoes in the bread, you really can't taste that they are there.  The raisins, candied oranges, and other flavors of the bread really make you think it is something entirely different.  Although, I found it slightly too sweet; so I think I'll have to add slightly less sugar next time.  But regardless! it is incredibly delicious and very light (contrary to it being a potato bread).  It reminds me of a brioche with flavoring added to the dough and less fat content.  It makes for a really great dessert bread or perhaps something sweet with breakfast.

Flour (APF)                        100%
Eggs                                    28%
Potatoes (peeled, cooked)  20%
Milk (80°F)                          20%
Raisins                                20%
Butter (softened)                 10%
Sugar                                  10%
Yeast (fresh)                         8%
Candied Orange Pieces       3%
Vanilla Sugar*                       2%
Salt                                    1.5%
Lemon Juice                         1%
Distastic Malt Powder          1%
-------------------------------------------
Total                               224.5%    (1122.5g for a large round loaf or can be divided into two med. sized loafs)

*Can be substituted with 1.5 tsp sugar + 1tsp vanilla extract.

Dissolve yeast in milk.  Mix all ingredients except raisins.
Speed 1 - 4 mins
Speed 2 - 8 mins

Add raisins
Speed 1 - 2 mins

Bulk Rise - 45 mins

Divide, shape, proof - 45 mins

Brush with (1 egg yolk + 1 Tbsp milk), dry - 5 mins

Bake 350°F - 30 mins

Remove and cool

Guten Appetit!

Brioche Nanterre

Brokeback Cowboy's picture
Brokeback Cowboy

Description

I've applied here instructions for a classic Brioche Nanterre. This specific brioche is baked in a loaf pan with 8 individual portions which are brilliant for setting at a tea service to be easily pulled apart. This loaf does break from convention in that it is egg washed twice. Once before rising and the second before going into the oven. This creates a richer and more luxurious color as well as shine. I also break up the ingredients list in to three sections consisting of;

Pre-Ferment (Poolish)

Main Dough

Egg Wash

This is to clarify the repetition of ingredients without appropriate spacing. Best of luck in your baking and may the odds be forever in your favor.

Summary

Yield
800g Loaves
Prep time20 minutes
Cooking time40 minutes
Total time1 hour

Ingredients

300 g
Whole milk (Poolish)
65 g
Fresh Yeast (Poolish)
300 g
Bread Flour (Poolish)
750 g
eggs (Main Dough)
1200 g
Bread Flour (Main Dough)
60 g
Sugar (Main Dough)
19 g
sea salt (Main Dough)
750 g
Unsalted butter (Main Dough)
50 g
eggs (Egg Wash)
5 g
Whole milk (Egg Wash)
1 ds
salt (Egg Wash)

Instructions

Pre- Ferment (Poolish)

1. Combine 300g Whole Milk, 65g Fresh Yeast and 300g Bread Flour. Mix until a batter forms and allow to rise at room temperature until the center falls in upon itself.

Main Dough

1. In a stand mixer combine 1200g Bread Flour, 60g Sugar, 19g Salt and 750g Eggs.

2. Begin mixing on low speed gradually incorporating the poolish until a mass forms.

3. Once the ingredients are combined raise mixing speed to medium-high (5 or 6 on Kitchenaid) and let mix for 5 minutes.

4. Gradually incorporate 750g of cubed room temperature butter in to the mass, mixing at a high speed until the dough releases it's self from the bowl.

5. Check temperature of dough which should ideally be 22-23C. Any higher and the butter will separate from the mass and create a greasy end product.

6. Remove dough from mixing bowl and cover with plastic wrap. Place bowl in 4C refrigerator overnight.

7. The next day, remove dough from bowl and cut in to 2- 800g balls. From this point shaping is up to you, however for the Nanterre shape one must cut each ball in to a further 8-100g pieces.

8. Gently round the balls and place in a lightly buttered loaf pan. Each loaf should consist of 8-100g balls arranged symmetrically in the pan.

9. For the egg wash; beat together 50g Eggs, 5g Whole Milk and a dash of salt.

10. Egg wash formed loaves

11. Cover in a plastic bag and allow to proof until risen roughly 1/2 inch above loaf tin tops. This will take about 1.5 - 2 hours.

12. Pre-heat oven to 380F.

13. Remove proofed loaves from bag and egg wash a second time making sure to evenly apply the glaze. Place in pre-heated oven and bake for 37-40 minutes. The loaves should be a rich mahogany color. To check the doneness of the loaf stick a small pairing knife in to the center and pull it out after a few seconds. If the knife is clean of batter it's done. Alternately you can check the internal temperature with a thermometer which will read over 205F.

14. Pull loaves from oven and unmould immediately. At this point you can glaze the loaf if you wish with any topping of your choosing. Some options are;

Melted jam, marmelade or jelly diluted with water to a point that it can be applied freely.

Sugar syrup, equal parts water and sugar.

Apricot glaze, diluted if necessary.

Once glazed many chefs may take the liberty to add a further garnish and this of course up to the creator's inclination.

Some options that would also work fashionably are;

Streusel, equal parts flour, sugar and butter.

Pearl Sugar or another coarse sugar.

Cocoa Nibs, Shaved Chocolate.

Candied Fruit.

Fresh Berries, arranged and dusted with icing sugar.

Candied or Fresh Flower Petals, such as violet or rose.

Notes

For the poolish a rule that applies to sweet bread baking is the 54 law.

The 54 law means that the liquid temperature, the room temperature and the flour temperature should all add up to 54C.

For example,

Your room temperature is 25C

The flour temperature is 15C

The liquid temperature would be x+(25+15)=54 so 54-30=15 so the liquid temperature would be 15C

This rule is completely unnecessary in a home kitchen however I thought I would include it for the more astute bakers.

Floydm's picture
Floydm

Kathleen Weber's Arbrio Rice Bread

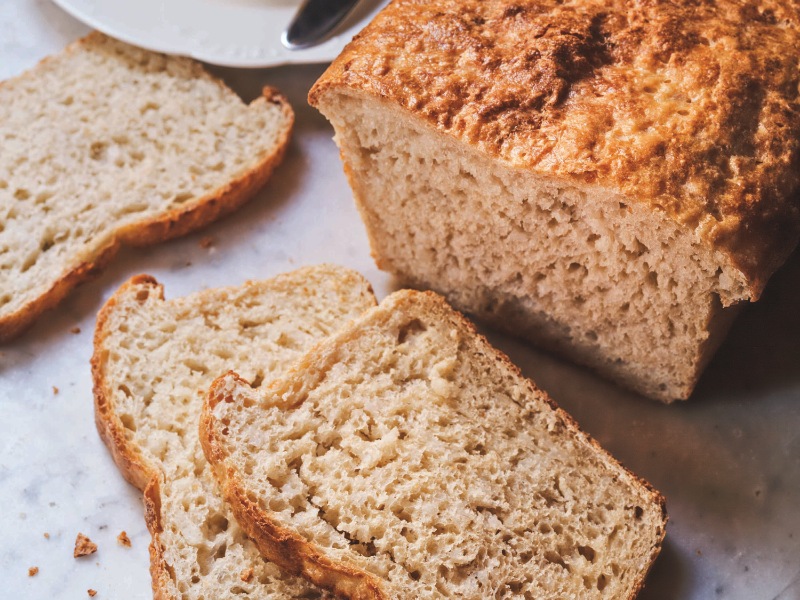
Della Fattoria Bread is the new book by Kathleen Weber, founder of the renowned Della Fattoria bakery in Petaluma, California.  This recipe reprinted with permission.  Copyright 2014, Artisan Books. Photo Credit: Ed Anderson.


Arbrio Rice Bread

Makes 2 standard loaves 

Inspired by a recipe by the brilliant British cookbook writer Elizabeth David, this is one of the easiest breads I've ever made. It comes together fast, is mixed entirely by hand in a single bowl, and is baked in two standard loaf pans. Almost no kneading is required.

It's also one of the most unusual yeasted breads I've seen, as the dough calls for rice. I use Arborio rice instead of regular white rice. Arborio is, of course, the rice that gives risotto its creaminess, and, sure enough, those fat, starchy grains give the bread a similarly creamy texture. If you're calculating exact ratios, the weight of the cooked rice will be 520 grams (18.3 ounces/2 1/2 cups plus 2 tablespoons), which is 70 percent of the flour weight.

When toasted, this bread has a remarkably delicate crunch.


Rice
Arborio rice158 g5.5 oz¾ cup
Water525 g18.5 oz2¼ cups
 
Dough Mix
All-purpose flour735 g26 oz5¼ cups
total flour735 g26 oz5¼ cups
Instant yeast13 g0.5 oz1 Tbsp plus ¾ tsp
Fine gray salt19 g0.6 oz1 Tbsp
Water, at room temperature (65° to 70°F/18° to 21°C)468 g 16.5 oz2 cups 
Total weight1,755 g/1.75 kg61.9 oz/3.8 lbs 
 
Wash
14 to 32 grams (0.5 to 1.1 ounces/1 to 2 tablespoons) olive oil or milk, or a combination

1. To cook the rice, combine the rice and water in a small saucepan and bring to a boil. Cover, turn the heat down to low, and cook until the water is absorbed and there are little holes across the surface of the rice, 15 to 20 minutes. Remove the lid and let the rice cool slightly. The rice should still be very warm when incorporated with the other ingredients.

2. Lightly oil or spray a deep 4 1/2- to 5-quart ceramic or glass bread bowl. (The amount of dough for this bread will work well in a 3-quart bread bowl if you have one.)

3. In a large bowl, whisk together the flour, yeast, and salt.

4. When the rice is still very warm but cool enough to touch, mix it into the flour until the mixture has the texture of a gummy meal. Pour in the water and continue to mix with your hands, gently gathering the mixture together, turning it and pressing it with the heels of your hands, until it all comes together. It will be very sticky, similar in texture to a milky biscuit dough; do not be surprised if you have quite a bit sticking to your hands.

5. Using a plastic bowl scraper, get what dough you can off your hands, pressing it back onto the dough, and turn the dough into the bread bowl. Cover the bowl with a lightly oiled or sprayed piece of plastic wrap and place in a warm, draft-free spot until the dough has at least doubled in volume and there are delicate bubbles across the surface, 1 1/2 to 2 hours.

6. Fairly generously oil or spray two 8 1/2-by-4 1/2-by-2 3/4-inch loaf pans. Flour the work surface. Turn out the dough, using the bowl scraper, and use a bench scraper to divide it in half. With your fingertips, very gently shape each portion into a bâtard, about 3 by 7 inches. Set in the prepared pans and very gently brush the tops with the wash. (This dough is not brushed again before baking because the loaves will be too fragile once proofed.) Cover the tops with a lightly oiled or sprayed piece of plastic wrap. Set the pans in your warm spot to proof until the dough reaches the tops of the pans, 1 1/2 to 2 hours; remove the plastic wrap.

7. Meanwhile, position a rack in the lower third of the oven, set a baking stone on it, and preheat the oven to 450°F.

8. Place the pans on the stone and immediately lower the oven temperature to 400°F. Bake for 30 to 35 minutes, or until the tops are a rich golden brown. The loaves will be delicate, but they can carefully be taken out of the pans to brown directly on the stone: place the loaves on the stone and let brown for about 3 minutes, to brown the sides and bottom more evenly.

9. Transfer the breads to a cooling rack and let cool completely.


Della Fattoria Bread is available now from Amazon, Powell's Books, or your local book seller.

wassisname's picture
wassisname

Barley Walnut & Fig Bread

A funny thing happened in the pastry chapter of Tartine No.3… 
Leafing through, like I sometimes do, admiring all of the wonderful looking treats, I settled on the Barley Walnut and Fig Cookies.  Now, I should say that I don’t, as a general rule, bake cookies or pastries.  If I bake them I eat them, and I try to avoid that as much as possible.  Having them in the house makes avoiding them… less possible.  So I get my occasional fix at one of the local bakeries and it all works out.  But I couldn’t stop staring at these Barley Walnut and Fig Cookies.  There isn’t even a photo of the finished cookie, I was fixated on the words alone.  Barley Walnut and Fig Cookies… Mmmmmm… Barley Walnut and Fig Cookies… Mmmmmm… Barley Walnut and Fig Cookies… Mmmmmmm…  The breaded part of my brain decided enough was enough.  It did this: Barley Walnut and Fig Cookies Bread.  Oh.  Yes.  Well, there it is then.

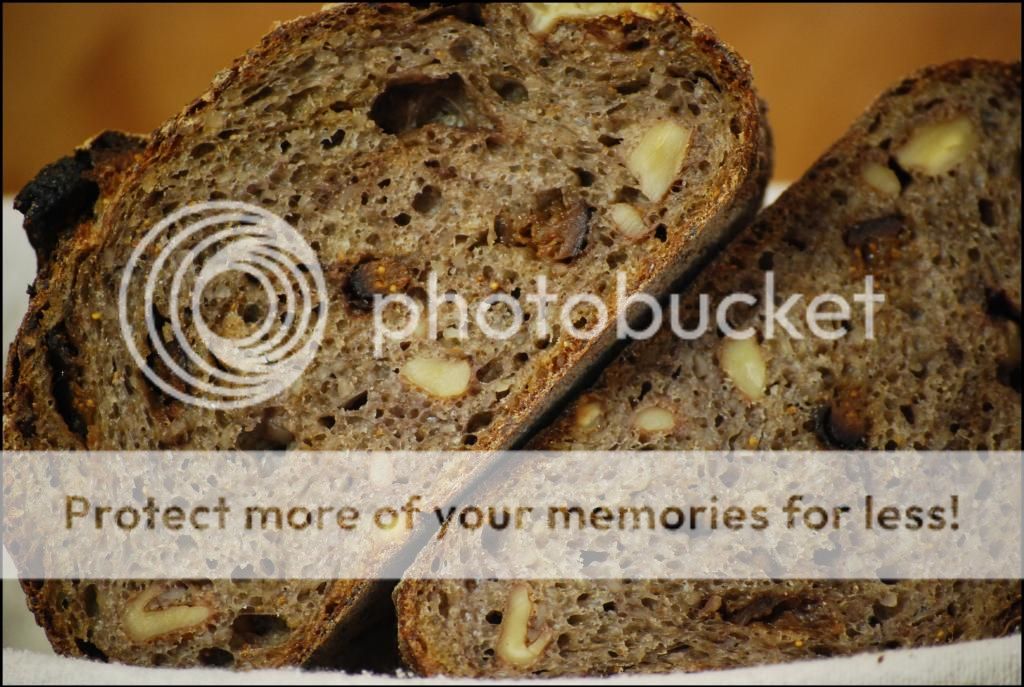
And here it is:  Barley Walnut and Fig Sourdough. 

The add-ins alone would make a fine breakfast.  It took considerable restraint not to grab a spoon and have at it.

The dough is a sticky mess, no way around that.  The refrigerated bulk ferment is key to developing structure without going insane – I would not volunteer to knead this one to full development.  Even stretch and folds were rather undignified.  I did one last fold after it had been refrigerated for an hour and then it finally felt like I was working with bread dough and not so much like cookie dough.  The intensity of this version was worth the trouble, but for something more “bready” the add-ins could be cut in half and still contribute.

The oven light has such a nice, warm glow I can't resist snapping photos. 


The crust turned dramatically dark from all of the fig sugars and the crumb has a nice purplish tint.

It wasn’t quite cool when I cut the first slice, but it didn’t matter.  This one is really, really yummy - perfect for breakfast.  You can keep the cookies.  I am home :)

Marcus


emkay's picture
emkay

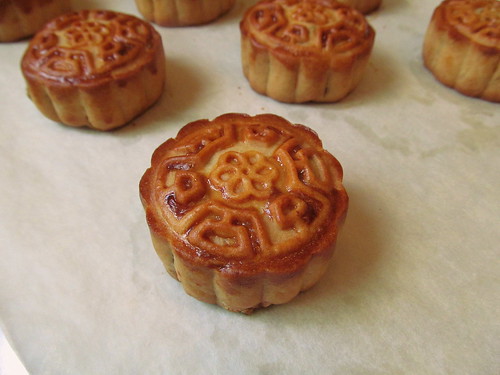
Not your typical mooncakes

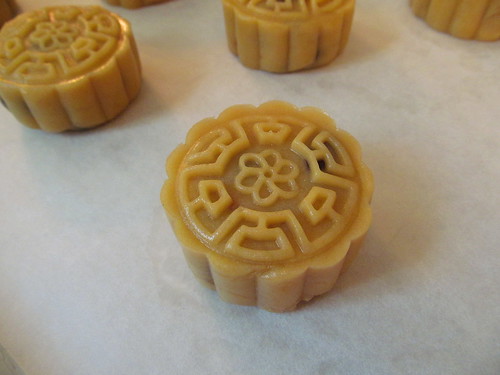
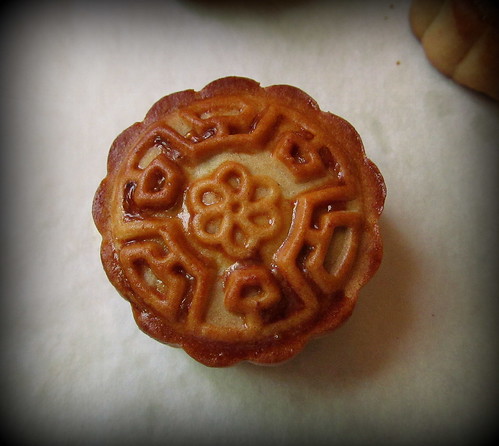
Every year my parents receive many gifts of mooncakes in the days leading up to the Mid-Autumn Festival. Most of the time they are the traditional mooncakes filled with lotus seed paste and salted egg yolks. I thought I would try baking a different sort of mooncake to bring to my family's gathering. I call them American-style mooncakes. I made a trail mix inspired one and a coconut one. Mooncakes need to be baked at least a day (and preferably 2 days) before serving. Freshly baked ones do not have the correct texture since the pastry shell is still too crispy. The resting period allows the pastry shell to "return to oil" which just means that the skin will soften a bit.

mooncake_830_1

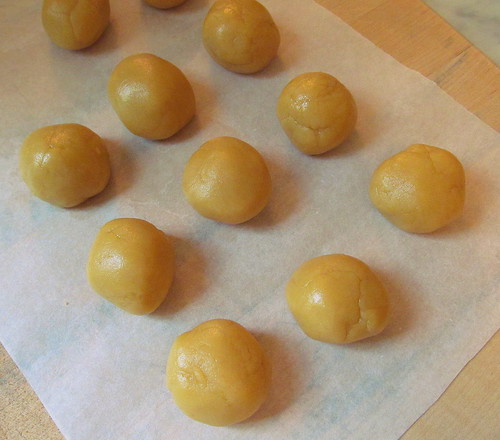
Mooncake Pastry Dough

130 g all-purpose flour (10.5% protein level)

90 g Lyle's Golden Syrup

30 g canola oil

1/4 tsp alkaline water (aka kan sui which is a solution of sodium bicarbonate and potassium carbonate)*

* Note: Although a bottle of kan sui is very inexpensive, I didn't want to buy a whole bottle since I needed such a tiny amount. So I dissolved 1/2 tsp of baking soda in 1 tbsp of water and used 1/4 tsp of my solution instead of the 1/4 tsp kan sui.

--

1. Mix syrup, oil and alkaline water.

2. Sift flour into a mixing bowl and add wet ingredients. Mix to form a soft dough.

3. Cover and let dough rest at room temp for 30-60 minutes.

4. Divide the dough into 10 balls each weighing approximately 25 g. (This is scaled for my miniature mooncake mold.)

mooncake__830_skin

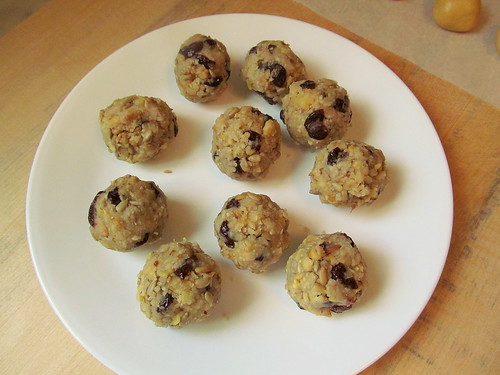
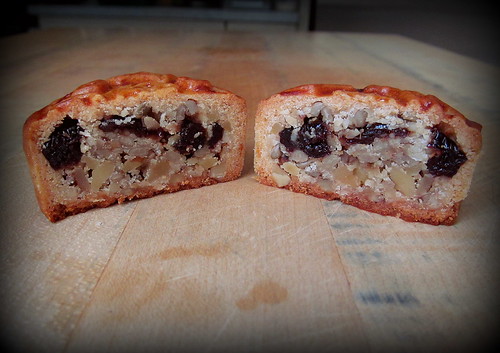
"Trail Mix" Filling

70 g almond meal (or chopped almonds)

80 g walnut, toasted and finely chopped

20 g sunflower seeds, toasted

50 g dried sour cherries, chopped

60 g kor fun (aka cooked glutinuous rice flour)

50 g water

20 g granulated sugar

20 g canola oil

10 g walnut oil

10 g sesame seeds (I didn't have any so I used tahini.)

--

1. Mix all ingredients.

2. Divide filling into 10 balls each weighing approximately 35 g. (This is scaled for my miniature mooncake mold.)

mooncake_830_nut_filling

Egg Wash:   1 egg yolk beaten with 1 teaspoon of water or milk

Assembly

1. Preheat oven to 375F.

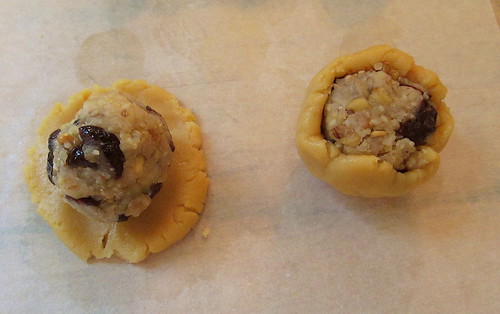
2. Flatten the pastry dough and wrap it around the filling. Try your best to completely enclose the filling with the dough.

mooncake_830_wrap

3. Put it into your mooncake mold to shape it. (I used a plastic mooncake mold with a plunger.)

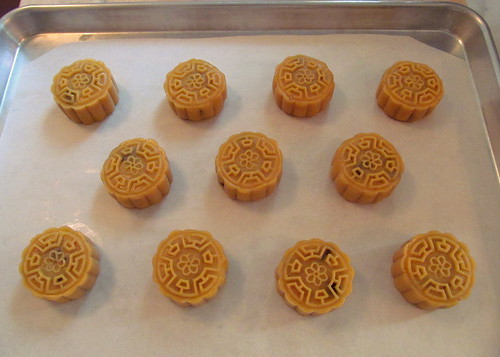
4. Place shaped mooncake on sheet pan.

mooncake_830_shaped_2

mooncake_830_shaped_1

5. Bake at 375F for 8 minutes.

6. Remove from oven and let them cool for 5 minutes, then brush on the egg wash.

7. Lower oven heat to 350F and bake for 15-20 minutes until golden brown.

8. Cool for 10 minutes on sheet pan then remove to cooling rack.

9. When completely cool, store in an airtight container for at least 24 hours before serving.

mooncake_830_inside

mooncake_830_2

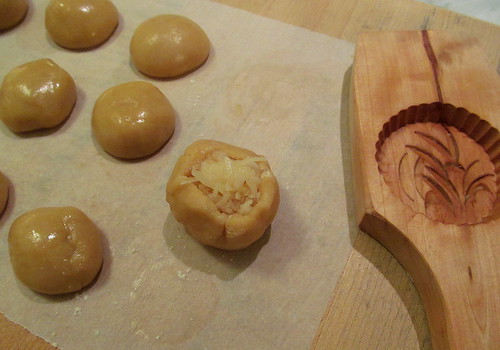
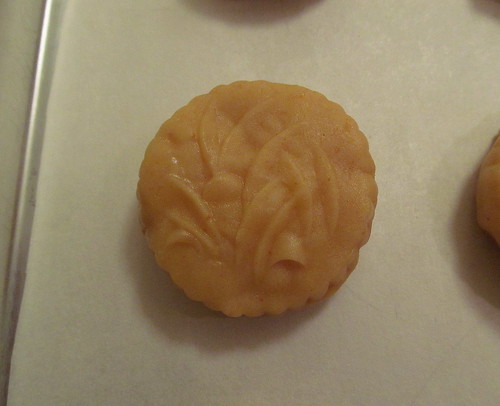
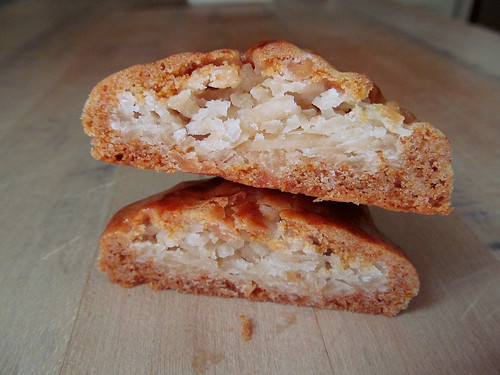
I also made some coconut mooncake "cookies" using wooden cookie mold to shape them. I call them cookies because they are much flatter than mooncakes.

coconut_mooncake_wrap2

coconut_mooncake_shaped

I used cake flour instead of all-purpose flour in my dough for the coconut ones so the dough ended up too soft. As a result, my baked cookies did not keep the carved details of the mold, but they were still delicious. They tasted like a coconut macaroon inside a mooncake pastry shell.

coconut_mooncake_1

coconut_mooncake_inside

:) Mary

dmsnyder's picture
dmsnyder

San Francisco-style Sourdough Bread with increased whole wheat flour

San Francisco-style Sourdough Bread with Increased Whole Wheat

by David M. Snyder

May 5, 2013


Sometimes another TFL member comments favorably on one of my breads, then goes on to say how they have modified my formula or methods. Sometimes these changes seem to be for the member's convenience or to substitute a preferred method for the one I used. Sometimes I feel the changes are of small consequence. The one alteration that consistently intrigues me is an increase in whole grains in a formula of mine that is basically a white bread.

Today, I baked a couple loaves of my San Francisco-style Sourdough Bread with two modifications: I increased the whole wheat content to 30% of the total flour, and I increased the hydration to 76%. I expected this increase in hydration to more than compensate for the increased water absorption of the whole wheat flour. I used a very finely milled organic whole wheat flour from Giusti's. I find this flour has much less cutting of gluten strands than most whole wheat flours. I can get a more open crumb using this flour.

I also made a couple loaves of the San Francisco-style Sourdough without the increased whole wheat.


Total dough

Bakers' %

Wt (g)

AP flour

54

304

Bread flour

14

79

Medium Rye flour

2

11

WW Flour

30

169

Water

76

428

Salt

1.9

11

Total

177.9

1002


Stiff levain

Bakers' %

Wt (g)

Bread flour

95

79

Medium rye flour

5

11

Water

50

45

Stiff starter

80

66

Total

230

201


  1. Dissolve the starter in the water. Add the flours and mix thoroughly until the flour has been completely incorporated and moistened.

  2. Ferment at room temperature 6-8 hours. (Until about tripled in volume, domed and very well aerated.)


Final dough

Wt (g)

AP flour

281

WW Flour

162

Water

350

Salt

11

Stiff levain

201

Total

1005


Method

  1. In a stand mixer, mix the flour and water at low speed until it forms a shaggy mass.

  2. Cover and autolyse for 30 minutes

  3. Add the salt and levain and mix at low speed for 1-2 minutes, then increase the speed to medium (Speed 2 in a KitchenAid) and mix for 5 minutes. Add flour and water as needed. The dough should be rather slack. It should clean the sides of the bowl but not the bottom.

  4. Transfer to a lightly floured board and do a stretch and fold and form a ball.

  5. Place the dough in a lightly oiled bowl and cover tightly.

  6. Ferment at 76º F for 21/2 to 3 hours with a stretch and fold at 50 and 100 minutes.

  7. Divide the dough into two equal pieces.

  8. Pre-shape as rounds and rest, covered, for 10 minutes.

  9. Shape as boules or bâtards and place in bannetons. Place bannetons in plastic bags.

  10. Proof at room temperature (68-70º F) for 1-2 hours.

  11. Cold retard the loaves overnight.

  12. The next morning, proof the loaves at 85º F for 2 to 3 hours. (If you can't create a moist, 85 degree F environment, at least try to create one warmer than “room temperature.”

  13. 45-60 minutes before baking, pre-heat the oven to 480º F with a baking stone and steaming apparatus in place.

  14. Transfer the loaves to a peel. Score the loaves as desired, turn down the oven to 460º F, steam the oven, and transfer the loaves to the baking stone.

  15. After 12 minutes, remove the steaming apparatus, and turn down the oven to 435º F/Convection. (If you don't have a convection oven, leave the temperature at 460º F.)

  16. Bake for another 15-18 minutes.

  17. Transfer the loaves to a cooling rack, and cool thoroughly before slicing.


After cooling, the loaves had a chewy crust and chewy crumb. The flavor was wheaty and moderately sour when first tasted. I am looking forward to trying this bread toasted tomorrow for breakfast.

At the moment, I am considering further modifications such as a bolder bake, adding a bit of honey and increasing the whole wheat to 50%.  

David

Pages