The Fresh Loaf

A Community of Amateur Bakers and Artisan Bread Enthusiasts.

Most bookmarked

gutschke's picture
gutschke

One of my favorite childhood breads: German "Dreikorn" (3 seed) Bread

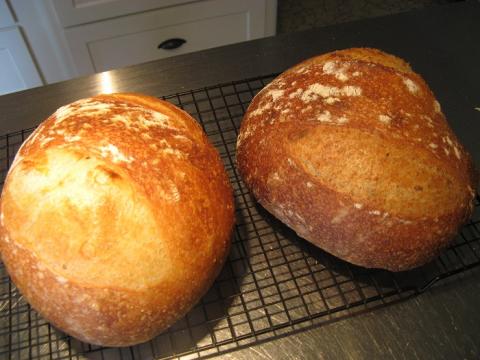
This must be one of my absolute childhood favorites. It's a basic 50% whole wheat sourdough recipe, but it gets most of its flavor from the copious amounts of seeds: flax, sesame, and millet. It's an instant crowd pleaser and probably the bread that my kids ask for most frequently.

When I first started making my own breads, "Dreikorn" bread was high on the list of recipes that I wanted to reverse engineer. Turns out, it's actually one of the easier breads to make.

150gGolden flax seeds
250mlwater
60gsour dough culture
200gwhite whole wheat flour
135mlwater
250gKing Arthur flour
180mlwater
17gsalt
3gdry yeast
100gmillet
70groasted sesame seeds
10gsesame oil
2 Tbsproasted sesame seeds

Soak flax seeds in water until softened.

Combine mother starter culture, whole wheat and water, and let rest at room temperature for about eight hours or until doubled in volume

Combine all of the ingredients and knead thoroughly for 5 minutes.

Let rest at room temperature until approximately doubled in volume, about three hours. During this time, stretch-and-fold four times in about 15 minute increments.

Coat a dutch oven with margarine or butter and dust with semolina flour.

Form dough into a boule and transfer into dutch oven. Let rest at room temperature for another 30-60 minutes.

Preheat oven to 500°F (260°C).

Brush dough with water, and sprinkle with remaining sesame seeds.

Cover Dutch oven and bake at 500°F (260°C) for 25 minutes. Remove lid and continue baking at 375°F (190°C) for about another 35 minutes or until interior temperature reads 200°F (95°C).

Remove from oven, let cool for 10min then remove from Dutch oven. Let bread rest on a cooling rack for at least two hours.

Lazy Loafer's picture
Lazy Loafer

Real barm bread

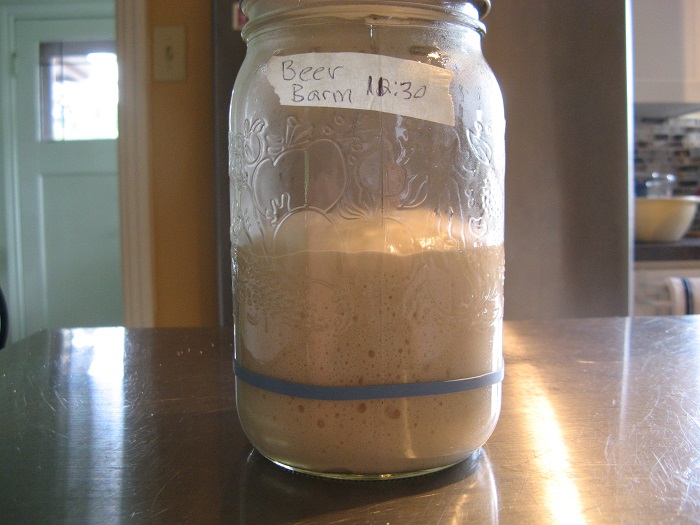
I'm blessed in that I have a husband who not only washes dishes, but also makes excellent beer and wine. A couple of days ago he was mopping up the 'warm' cupboard after his beer primary foamed over. I handed him a small bowl and spoon and asked him to skim some foam of the top of the beer for me - real barm!

After sitting for an hour or two the bowl of barm had subsided to a murky, foamy puddle of about 2 tablespoons in the bottom of the bowl. Then the adventure began...

I added some flour and water and mixed it up. I didn't measure, but it ended up about the consistency of a 100% hydration starter when you first mix it up. I then literally watched it rise!

After 10 minutes...

After 20 minutes...

After an hour and 45 minutes...

It filled the jar just before 2 hours. The dome collapsed slightly just after this.

I then stirred it down and took off 100 grams for a new build. This one had 100 grams of barm starter, 200 grams of water, 100 grams of bread flour, 50 grams of whole wheat and 50 grams of coarse rye flour. I then added water and bread flour to what was left in the jar and let that go again. It doubled after 2 hours and eventually filled the jar again.

Once the starters were risen and bubbly again I made dough with them. The white dough was 100% bread flour, 68% water, 29% barm starter (100% hydration) and 2% salt. The multigrain dough was 71% bread flour, 29% whole wheat flour, 68% water (note that I later added a bit of water), 29% multigrain barm starter (100% hydration) and 2% salt.

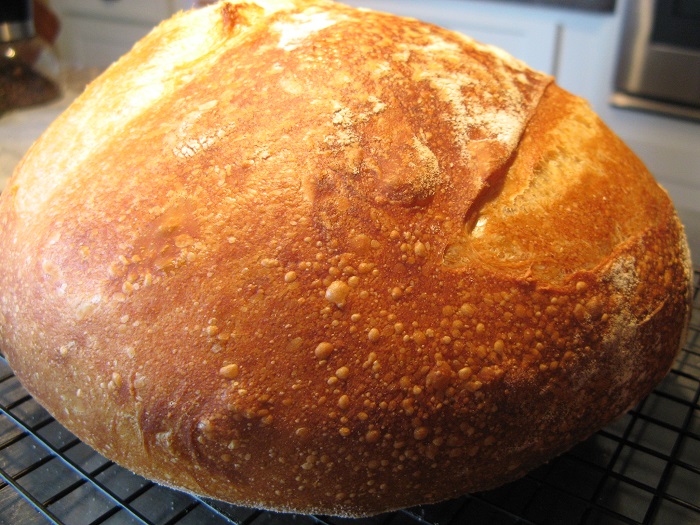
Beautiful silky dough! I did a few stretch & folds, then put the dough in the fridge overnight (and half the next day; I was busy making dough for the shop). When I had time I folded and shaped the dough into boules and into baskets to proof for a couple of hours. I had a certain time in mind to bake it (I was baking a bunch of different things) but when I poked it to make sure it was ready it poked back! This stuff is strong like ox and had a huge amount of push left! I had to bake it though, so onto peels, scored and into the oven. Five minutes at 475F, then about 20 minutes at 425. Finished temperature was about 204F inside. Fabulous oven spring!

I cut the multi-grain loaf today. I was very pleased at the crumb - fairly open and very moist.

And the great thing is - no sour! Basically this is just S. cerevisiae without the bacteria that make sourdough sour, so it makes a sort of 'sweet' starter. I'm interested to see how it keeps in the fridge, and whether it later develops any additional characteristics. Next time I will also cut down the percentage of starter to about 20% of the flour.

Next adventure - bread made with the sludge from the bottom of the beer primary!

alfanso's picture
alfanso

Pane di Altamura, alfanso style

Well, wouldn't ya just know it.  Another day, another Pane di Altamura posting.  With my recent trip down to Lorenzo's in N. Miami Beach (no beach!) and finding a source for semola rimacinata at US$1/pound, I was stocked up and stoked up with all of this durum discussion underway here.  Following David Snyder's posted formula (for the most part) and seeing what Brad (breadforfun) and Abe (A BakEr) were up to, it was my turn to also jump on the bandwagon.

I decided to do concurrent first builds of the biga, just for the experimentation of it all.  One biga with my ever-ready levain fed down to 60% hydration, and the other with my stiff starter, already ~60% hydration.  The levain based biga took 7 hours for the 1st build to double, while the starter based version barely showed signs of life at that point, until it started moving and took a full 12 hours for each of the 1st and 2nd builds.  So I stuck with my levain based version.  2nd build was another 7 hours, however the 3rd build was under 6 to grow beyond doubling.

As an aside, I felt it was time to refresh my starter, which was last refreshed on 02 Nov 15.  But 5 months old and it was still going strong, for anyone who still wonders how long a stiff starter can live a healthy refrigerated life.

I did bump the overall hydration of the dough up to 65%, and also made the mix 25% larger than the formula posted by David, so it clocked in at a total of ~1145g total dough weight.  

One set of 200 French Folds, a 10 minute rest followed by another 200 FFs.  And then left to rise on its own for 5 hours, no stretch and folds, before dividing.  

Being alfanso, once it was shaped and couched, it went into the refrigerator for an overnight nap and was baked this morning, as usual, directly out of the retard.  Also, being alfanso, and liking to change around a thing or two, I decided that these would be shaped and scored as batards.

Abiding by the oven temperatures and timings in David's post, these baked for 15 minutes with steam, and then another 21 minutes, with 2 additional minutes of venting before being removed.  As noted, the dough was quite soft and puffy, and I wonder if my shaping was a tad too aggressive considering the crumb.  But the oven spring was all I could have asked for.  Since I really didn't know what to look for in this bread, nor how it should taste, it was all, and I mean all, new to me.

Due to the retard time, there is a mild SD tang to the bread. 

The first build completes in 7 hours.  The third build in just under 6 hours, but I was late to snap this 2nd picture.  I made a few dozen more grams of biga than needed.  Some biga or dough is always lost to my hands or the workbench or mixing/fermenting vessel, so my habit is to always make a little more than the formula calls for.

The dough after the 2nd set of 200 French Folds, and after the 5 hours of bulk rise at 80dF completed.

Shaped as batards and the double score applied just a minute before entering the oven.

Steam released after 15 minutes, and batards have been rotated front to back & left to right.


The end game.  In this case, the colors are accurate.

alan

JJBakerJJ's picture
JJBakerJJ

Favorite YouTube Tutorials?

Can anyone recommend some good YouTube turorials? I'm looking for general instruction so I can better understand basic techniques, although tutorials for great recipes are also welcome. Thanks! 

dmsnyder's picture
dmsnyder

Semolina Capricciosa: a new sourdough Italian-style bread.

Semolina Capriccioso

DMSnyder

March 25, 2016


This bread combines many streams of inspiration – my own Pugliese Capriccioso and San Joaquin Sourdough, Hamelman's Semolina Bread and Tom Cat's Semolina Filone, as described by Maggie Glezer in “Artisan Baking.”

 This is a high hydration dough that is a challenge to mix and shape. Because it was so gloppy, even after machine mixing and multiple stretch and folds in the bowl, I decided to retard the dough in bulk and use the techniques and timing of the San Joaquin Sourdough for shaping and proofing. I had intended to coat the loaves with sesame seeds before proofing, but – again because of how loose the dough was – opted to load onto parchment after proofing and apply the seeds by brushing with water and sprinkling the seeds onto the loaves.


Total Dough Ingredients

Wt (g)

Baker's %

AP flour

223

40

Fine durum flour

334

60

Water

446

80

Salt

11

2

Sesame seeds, toasted

29

5

Sesame seeds (un-toasted) to coat loaves


Total

1043

187

20% of the flour is pre-fermented.


Biga Naturale Ingredients

Wt (g)

Baker's %

Fine durum flour

97

100

Water

48

50

Active starter (50% hydration)

21

22

Total

166

172

  1. The day before baking, mix the biga.

  2. Ferment until doubled in volume at 76ºF.

  3. Refrigerate overnight


Final Dough Ingredients

Wt (g)

AP flour

223

Fine durum flour

223

Water (Warm - 80-85ºF)

391

Salt

11

Biga naturale

166

Sesame seeds, toasted

29

Total

1043


Method

  1. Take the biga out of the refrigerator and let it warm up for about an hour.

  2. Mix the water and flours to a shaggy mass, cover and autolyse for 20-60 minutes.

  3. Sprinkle the salt on the dough and add the biga in chunks.

  4. Mix at Speed 1 for 1-2 minutes until the ingredients are well-mixed.

  5. Mix at Speed 2 for about 10 minutes. The dough will be quite slack. It will not clean the sides of the bowl but will form a ball on the dough hook,. A large portion of the dough will still be on the bottom of the bowl.

  6. Add the toasted sesame seeds to the dough, and mix on low speed for a couple minutes to distribute them.

  7. Transfer the dough to a lightly oiled bowl with a tight-fitting cover.

  8. Ferment at 76ºF for 2 1/2 to 3 hours with a stretch and fold in the bowl every 30 minutes.

  9. The dough will not expand much, but, if fermented in a clear container, tiny bubbles should be seen throughout it.

  10. Cold retard the dough at about 40ºF until the next morning (8-18 hours).

  11. Divide the dough into two equal pieces. Pre-shape into balls, cover, and let the dough rest for 50-60 minutes.

  12. Shape the pieces as boules or bâtards.

  13. If bâtards: Place the loaves on a linen couche seam-side up and cover. If boules: Place the loaves in a well-floured banneton, seam-side up, and cover.

  14. Proof at room temperature until the dough springs back slowly when you poke a finger into it. (About 40 minutes)

  15. 45-60 minutes before baking, preheat the oven to 500ºF with a baking stone and steaming apparatus in place.

  16. Transfer the loves seam-side down to a piece of parchment paper the size of your baking stone and slide a peel under it.

  17. Brush the loaves with water and sprinkle them with sesame seeds. Score the loaves as desired.

  18. Steam the oven and turn the temperature down to 460ºF.

  19. Transfer the loaves to the baking stone.

  20. After 12 minutes, remove the steaming apparatus. (If you have an electric convection oven, switch to Convection Bake and turn the temperature down to 440ºF.) Bake for another 14 minutes or until the loaves are done. The crust should be nicely colored. The internal temperature should be at least 205ºF.

  21. (Optionally) Leave the loaves on the baking stone with the oven turned off and the door ajar for another 10 minutes to dry the crust.

  22. Transfer the loaves to a cooling rack. Cool completely before slicing.


After the loaves had cooled, the crust was soft. On slicing, the crumb was moderately open. The crust and crumb were quite chewy. The flavor was sweet and nutty.

I cut a bite-sized piece for my wife who was up to her elbows in washed lettuce for our dinner salad. “Mmmmm ….,” says she. “Why are we making all this other food?”

 This is a delicious bread. It has earned top ranking among my Italian-style sourdough breads. I may try making it with a somewhat lower hydration. Might try “shaping” this dough as Ciabattas. It should be tried as rolls as well. Gonna be a fun set of experiments!

 Happy baking!

David


Isand66's picture
Isand66

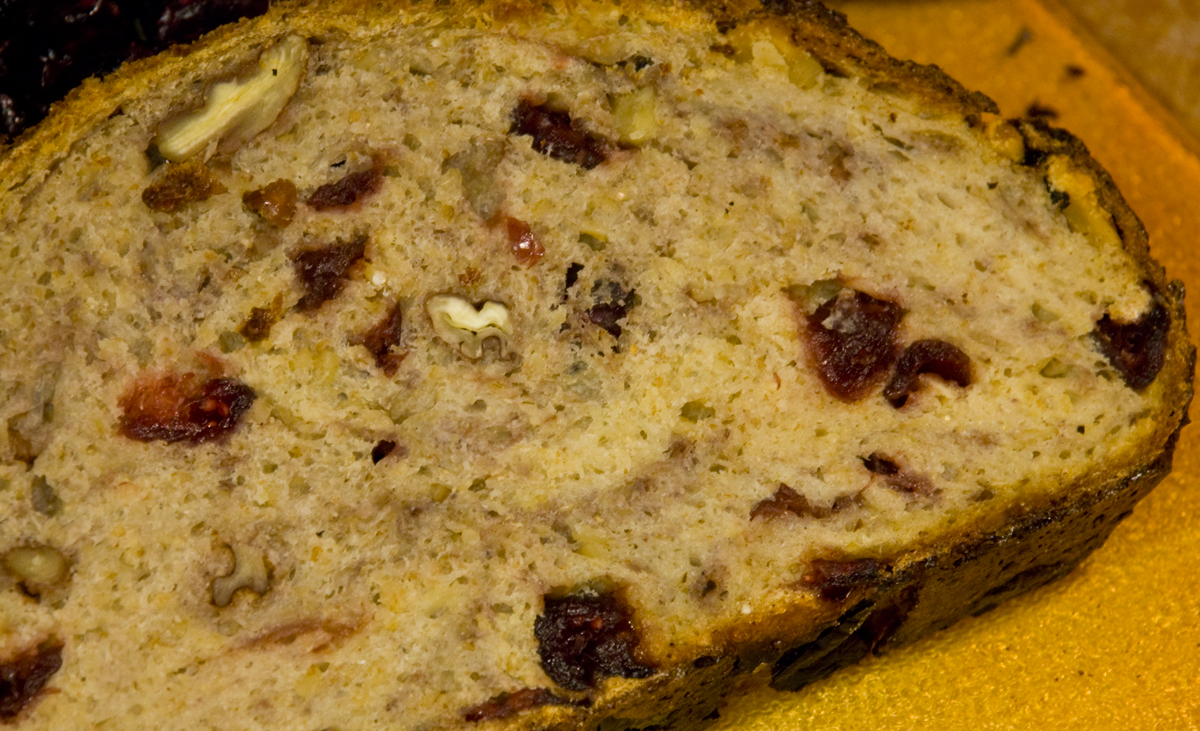
Cranberry Walnut Porridge Bread

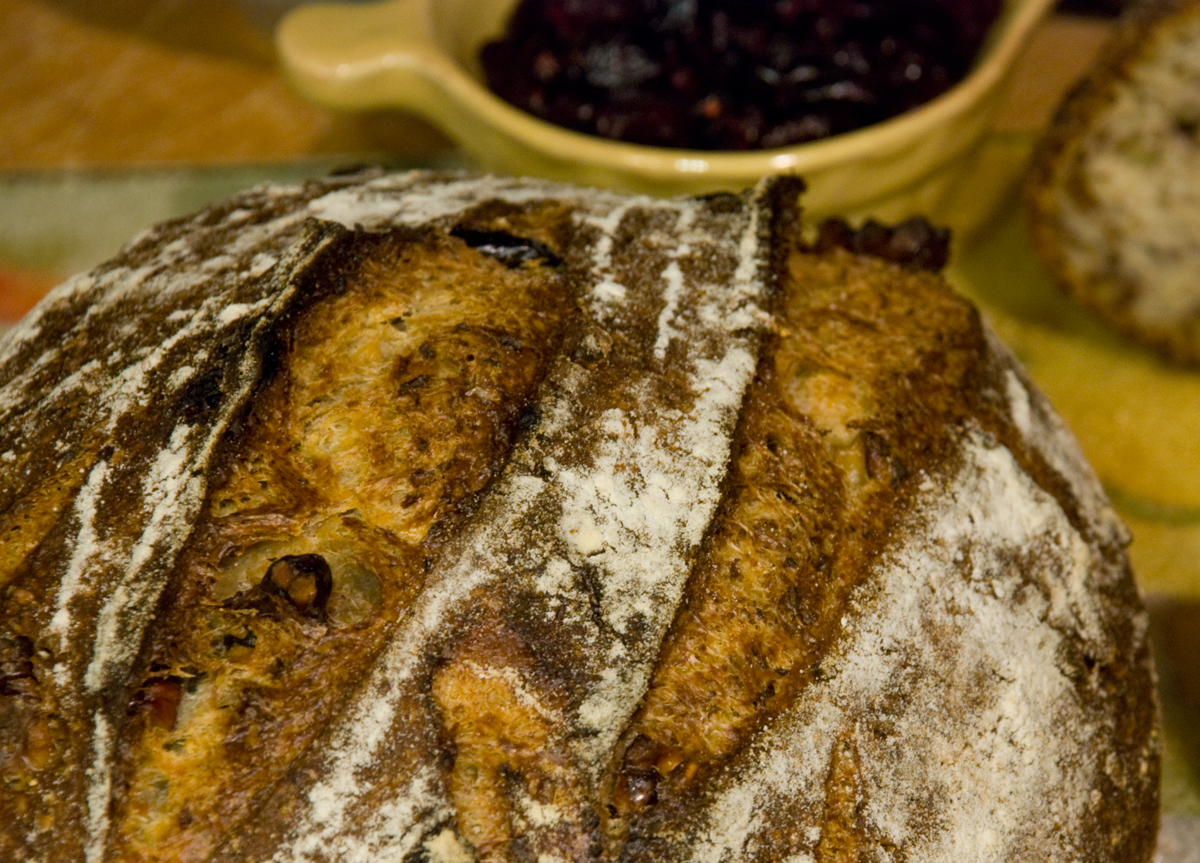
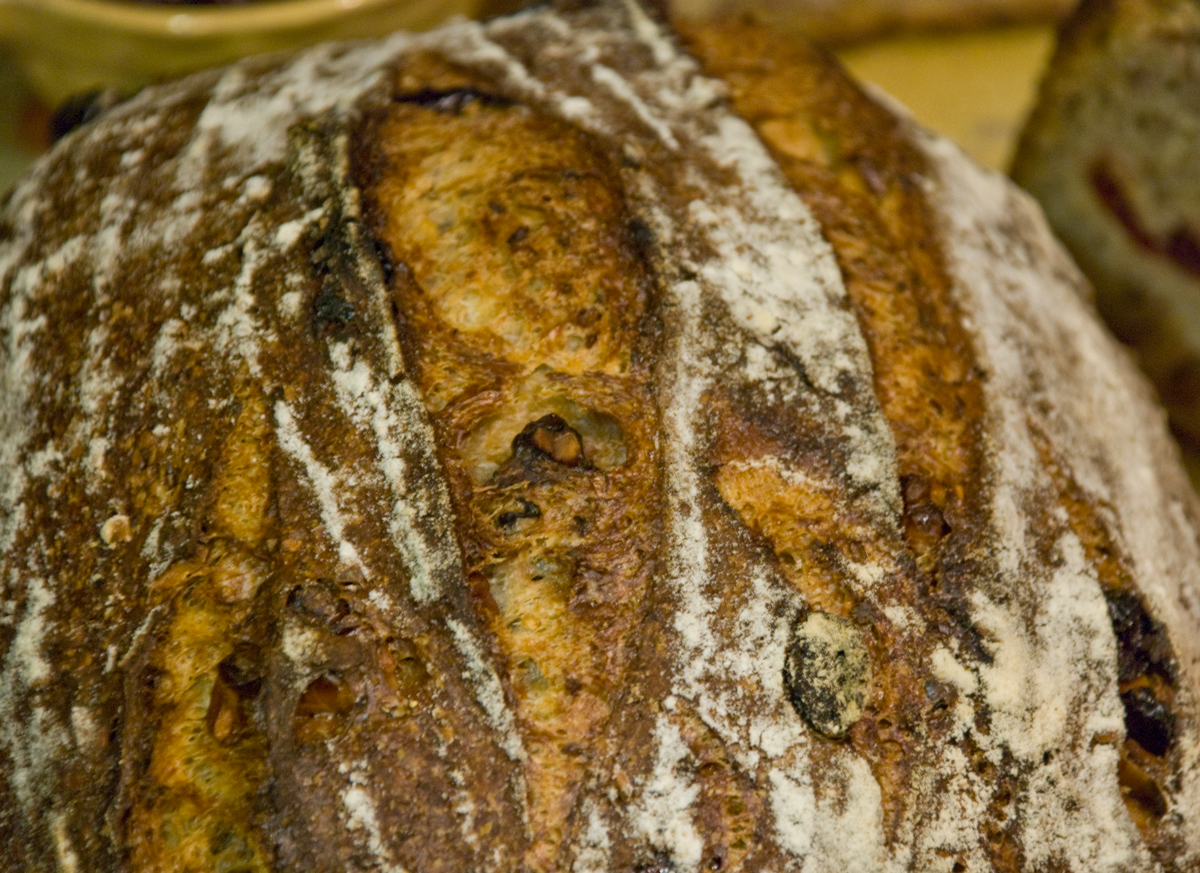
I made a similar version of this bread over Thanksgiving but never had a chance to post it.  I changed a few things including increasing the hydration and used walnuts instead of pecans.  I wanted to really bring out the nutty flavor in this one and used barley flakes along with rolled oats for the porridge.  The Greek Yogurt was added for a little extra sour edge and I find it adds a little extra creamy texture to the final loaf.

All in all this is one of my favorite breads I have come up with and made an excellent grilled ham and cheese sandwich :).

closeup2

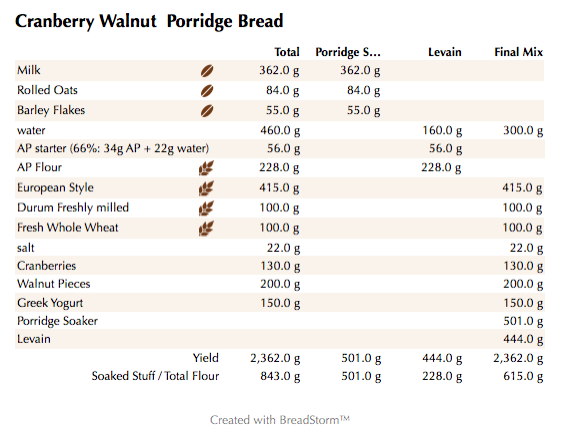
Cranberry Walnut Porridge Bread (weights)

Cranberry Walnut Porridge Bread (%)

Here are the Zip files for the above BreadStorm files.

closeup1

Levain Directions

Mix all the levain ingredients together  for about 1 minute and cover with plastic wrap.  Let it sit at room temperature for around 7-8 hours or until the starter has doubled.  I used my proofer set at 83 degrees and it took about 4 hours.  You can use it immediately in the final dough or let it sit in your refrigerator overnight.

Porridge Directions

Add about 3/4's of the milk called for in the porridge to the dry ingredients in a small pot set to low and stir constantly until all the milk is absorbed.  Add the remainder of the milk and keep stirring until you have a nice creamy and soft porridge.  Remove from the heat and let it come to room temperature before adding to the dough.  I put mine in the refrigerator and let it cool quicker.

 Main Dough Procedure

Mix the flours  and the water for about 1 minute.  Let the rough dough sit for about 20 minutes to an hour.  Next add the levain, cooled porridge, Greek Yogurt and salt and mix on low for 5 minutes.  Now add the walnut pieces along with the cranberries and mix on low for another minute until they are incorporated.    You should end up with a cohesive dough that is slightly tacky but  manageable.  Remove the dough from your bowl and place it in a lightly oiled bowl or work surface and do several stretch and folds.  Let it rest covered for 10-15 minutes and then do another stretch and fold.  Let it rest another 10-15 minutes and do one additional stretch and fold.  After a total of 2 hours place your covered bowl in the refrigerator and let it rest for 12 to 24 hours.  (Since I used my proofer I only let the dough sit out for 1.5 hours before refrigerating).

When you are ready to bake remove the bowl from the refrigerator and let it set out at room temperature still covered for 1.5 to 2 hours.  Remove the dough and shape as desired.

The dough will take 1.5 to 2 hours depending on your room temperature and will only rise about 1/3 it's size at most.  Let the dough dictate when it is read to bake not the clock.

Around 45 minutes before ready to bake, pre-heat your oven to 550 degrees F. and prepare it for steam.  I have a heavy-duty baking pan on the bottom rack of my oven with 1 baking stone on above the pan and one on the top shelf.  I pour 1 cup of boiling water in the pan right after I place the dough in the oven.

Right before you are ready to put them in the oven, score as desired and then add 1 cup of boiling water to your steam pan or follow your own steam procedure.

After 5 minute lower the temperature to 450 degrees.  Bake for 35-50 minutes until the crust is nice and brown and the internal temperature of the bread is 205 degrees.

Take the bread out of the oven when done and let it cool on a bakers rack before for at least 2 hours before eating.

crumb1

crumbcloseup


Sour Dough Bread

KelleyHomey's picture
KelleyHomey

Description

Great recipe for old sourdough starter

Summary

Yield
loaf
Prep time
Cooking time
Total time

Ingredients

1 1⁄2 c
Warm Water
4 c
Unsifted Bread Flour
2 t
Sugar
2 t
salt
2 c
Bread Flour (more or less)
1⁄2 t
baking soda (or more)

Instructions

Combine water, starter, the 4 cups of flour, salt and sugar.  Mix well, place in a crock and leave in a warm place for about 18 hours, or until sponge has doubled in size. (If you start at 3 pm you can begin next step at about 9 am the next day). Stir in 1 cup of remaining flour, which has been mixed with the soda: the resulting dough will be very stiff.  Turn dough onto floured surface and knead, adding remaining 1 cup (more or less) as needed.  Knead until smooth- at least 8 minutes, until the dough cannot absorb any more flour.

Shape into 2 oblong loaves or one large Boule.  Place on lighly greased cookie sheet, cover and place in a warm place for 3-4 hours or until nearly doubled in size.  Just before baking brush (I use a spray bottle) with water and make diagonal slashes in the top with a very sharp knife. 

Bake in a hot oven 425 degrees (with a shallow pan of hot water if crispy crust is desired) until crust is medium dark brown. About 45 minutes for oblong loaved 50-55 for boule

Notes

Takes about 24 hours total - most inactive rising time. 

Anonymous baker's picture
Anonymous baker (not verified)

How to make bread taste more sourdoughy?

I've been working with some active starters and turning out decent loaves, but they're not very sour. What is the secret? Is it letting it go longer in the refrigerator between feeds? Right now I'm typically making a loaf weekly, which means feeding it every 4-5 days.

pjkobulnicky's picture
pjkobulnicky

Semolina Porridge Bread

This recipe is for those of you who are experimenting with adding porridges to your dough. You can substitute most any grain into the porridge with good results. The recipe follows the now standard Robertson/Forkish formula for closed vessel baking. The result is a nice, moist and chewy crumb with a solid crust.


Semolina Porridge Bread


Makes 2 loaves of about 1 Kg each


Refresh natural starter at 100% hydration to yield at least 200 gm ( I use 100 gm flour, 100 gm slightly warm water and 30 gm starter)


While the starter is refreshing add 200 gm coarse semolina to 700 gm boiling water. Keep the water boiling. Add the semolina slowly in a fine stream so it does not clump. Once the semolina is fully added, turn off the heat and put a lid on the pot. Let the semolina mixture cool. 


When starter is fully refreshed place your mixing bowl on a scale and set the tare to zero. Add all of the semolina mixture to the mixing bowl and check the weight. Add sufficient cool water to bring the total weight back to the original 900 grams (200 gm semolina plus 700 grams water). Then add:


 200 gm starter. Wisk to incorporate.  Add 800 gm KA or equivalent AP flour.


Using your hands, mix into a dough .  Let dough autolyse for 30 minutes. 


While dough is autolsying, mix 22 gm salt with 50 gm boiling water and let cool.


When cool add the salt water to the autolysed dough and fully incorporate it into the dough. When incorporated do several stretch and folds in the bowl. Let rest for 30 minutes and do another set of stretch and folds. Repeat rest and stretch and folds two more times over the next hour. Then let dough rest lightly oiled and covered in warm room temps until doubled … maybe 3-4 hrs. 


Divide dough in half, roughly shape into rounds and let rest about 15 minutes. Shape into final form  and place into banneton's .  Proof about 1 hr 30 minutes or until risen about 50-75 % .  Turn out onto semolina or cornmeal dusted surface, score and place in two preheated (to 500F) dutch ovens, Romertopfs or such. Put lids on.    Place into  500F oven, immediately reduce temp to 475F,  bake 25 minutes covered at 475F and 25 minutes uncovered at 450F.


greedybread's picture
greedybread

Pain Aux Raisins...Brioche style

IMG_0537 (1024x768)

Hope you made the ones yesterday!!

These Pain aux raisin are more like a brioche dough than yesterdays.

Not overly rich, almost cake like in texture.

I prefer the more flaky pastry texture myself but you try both and see.

Both are gorgeous but I would like to try these making a richer brioche recipe though.

Try making just brioche too and see how you like it.

I think brioche is sort of hybrid, not a bread but not exactly a pastry either.

I have also tasted these made with pastry, not yeasty bread pastry.

You do need to make the Brioche dough the night before in most recipes and this is no exception.

IMG_0512 (1024x768)

For the Dough:

4 cups of Bread flour.

2 tsp of salt.

1/4 cup of sugar.

3 tsp of dried yeast.

1/4 cup of cold water.

6 eggs.

200g butter at room temperature.

1 & 1/2 cups of pre soaked raisins.

IMG_0514 (1024x768)

IMG_0520 (1024x768)

Creme Patissiere;

150 ml of milk

Vanilla Bean with seeds scraped out.

2 Tbsp of castor sugar.

1 Tbsp of cornflour.

3 egg yolks.

Apricot Glaze:

3 big Tbsp of apricot jam (I like Roses Apricot Conserve).

4 Tbsp of warm water.

IMG_0524 (1024x768)

Combine all dry ingredients, including yeast together.

Mix water and eggs together and combine to make a dough.

Knead for about 5-6  minutes until smooth.

Add in butter, 30 gms at a time.

The dough will be very sticky initially but will come together.

Knead about 10 minutes in total.

Place dough in an oiled bowl, cover and leave for about an hour.

IMG_0525 (1024x768)

Remove dough from bowl and gently knock back a little.

Return to bowl, cover & refrigerate overnight.

Place raisins in a bowl and cover with hot water.

Leave for 5 minutes, drain and then leave raisins draining overnight in the fridge.

This will make them nice and plump.

IMG_0526 (1024x768)

Make Patissierie creme.

Place the milk in a saucepan and scrape in the seeds from the vanilla bean.

I also put the seedless bean in too as it's still has lots of flavour to give us!!

Bring to slow boil.

Beat yolks in a dish and add in sugar and cornflour.

Remove bean.

Pour milk over this mixture and whisk well.

Return to sauce pan and simmer over a low heat, whisking all the time.

Cook for 2-3 minutes and then remove from heat.

Place patissierie creme in a bowl, cool and cover and place in fridge with dough and raisins for tomorrow):

IMG_0532 (1024x768)

Remove dough from the fridge the next day and roll out to about 60 x 30 rectangle.

Using a pallet knife if possible, or a spatula or non stick scraper, spread patissiere creme over dough.

Sprinkle raisins over the dough.

From the top edge, furthest away (long end) roll dough towards you, as tightly as possible.

IMG_0511 (1024x768)

If you look at my other version of Pain aux raisins, you can see the whole rolling up of the dough process.

Cut the dough into 3 cm slices and place on baking tray with paper.

Give each pain aux raisin about 5-6 cm between as they will expand a little.

Gently cover and leave for an hour to prove.

IMG_0513 (1024x768)

Pre heat the oven to 200C .

Place apricot jam in a small pan and warm with water until clear...place aside for pain aux raisins as soon as they come out of the oven.

Gently egg wash the pastries and place in the oven.

Bake for 15-18 minutes and rotate half way through.

Warm thinned apricot and as soon as you remove the pastries from the oven, brush heavily with apricot jam.

Leave to cool on racks...

All glossy and yummy!

ENJOY ENJOY ENJOY!

IMG_0531 (1024x768)

IMG_0534 (1024x768)


Dean Brettschneider was my inspiration for this recipe from his latest bread book, " Bread".

Fabulicious!!

Pages