The Fresh Loaf

A Community of Amateur Bakers and Artisan Bread Enthusiasts.

Most bookmarked

soupcxan's picture
soupcxan

How to get apple flavor in yeasted bread?

I threw some bread together with following ingredients, and while it turned out just fine, I can't detect even a hint of apple flavor in the result. The loaf that came out is tasty with a bit of sweetness...but why don't I taste any apple? And how much apple would I have to add to get it? I'm not looking for a thick chunky apple bread leavened with baking powder, but a light sandwich loaf with a little apple flavor. Appreciate any thoughts you have.

  • 16 oz unbleached flour
  • 1 whole apple, peeled and cored, then finely grated
  • 6 oz 2% milk
  • 2 tbsp butter
  • 1 tbsp honey
  • 2.5 tsp instant yeast
  • 2 tsp kosher salt
fleur-de-liz's picture
fleur-de-liz

When do you retard your dough?

Is it best to retard the dough overnight in the refrigerator after  bulk fermentation or after the final shaping?  I have seen both methods  mentioned in various recipes.  For most sourdough breads, I prefer the taste after an overnight slow fermention in the refrigerator.  I also prefer the timetable of an overnight slow ferment.  Would appreciate your advice. Thanks, Liz

tattooedtonka's picture
tattooedtonka

Mocha Java Bread

Here is my Mocha Java bread.  The bread has the color of WW but only contains white bread flour.  It is infused with chocolate and coffee.  The crust is soft, with a very soft creamy crumb that has melted chocolate and caramel throughout.  With a nice flavor of coffee to go with the chocolate.

Sponge:

  • 20oz. Bread Flour
  • 20oz. Brewed Coffee; Cooled ( I used Green Mountain Coffee Roasters - Mocha Java)
  • 1oz.   Finely ground coffee  (same as above )
  • 1/2 Teaspoon Instant Yeast

Mix all together and let rest on counter for 1 hour.  This is not really done for yeast activity as much as it done to help start the extraction of the coffee oils from the grounds. This allows plenty of time for the hydration of the coffee and start blending the flavors in a wet environment)

Dough:

  • 2lb. 8oz. Bread Flour
  • 16 oz. Brewed coffee; cooled (Mocha Java)
  • 8oz. Milk
  • 4oz. Sugar
  • 1 Tablespoon Vanilla Extract
  • 3 1/2 Teaspoons Instant Yeast
  • 10oz. Bag of Milk Chocolate/Caramel Morsels (I used Toll House)
  • All of Sponge from above recipe

Mix all items together in large bowl, cover with plastic wrap, and let set for 1 hour. 

After hour is up, dump contents onto lightly floured counter top and spread out only lightly degassing.  Fold top towards you into the middle, then fold the side closest to you into the middle, then fold left in, then right in.  Then place back into bowl seam side down, and cover.

Do this again two more times, folding at 1 hour intervals.

After this third hours fold, cut dough in half.  Shape two loaves as you wish, I used a basic batard type of shape but a round loaf would work as well.  After dough is shaped I put them right into a cold start oven and did the slashes just before putting them in. Both loaves opened up nicely.  (basically after fold, cut-shape-score-bake, no waiting around for final resting.....daaaa)

I Baked at 375' F. for 40 minutes until  internal temp of 202'F.

Image of SpongeSponge Image

After 1st mixing all ingredients

After 1st rise before folding

After first fold

After final fold

Finished product


TT

Susan's picture
Susan

Stone Beer Boule

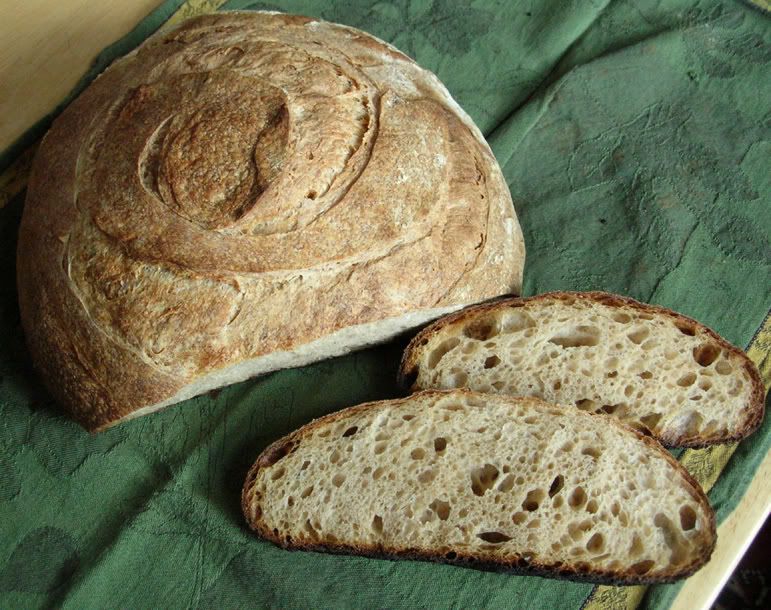
Due to an unfortunate happenstance to which we will not admit, a growler of Stone Brewing's 10th Anniversary IPA went flatter than a pancake. So DH Gary wouldn't have to drink the whole thing, I volunteered to make a Beer Boule. Mmmmmmm. The baker doesn't get a sample, as it will go to Stone tomorrow as a peace offering for almost ruining their special brew. Blatant, shameless pandering never hurts when it comes time to refill a growler!

Thanks again, JMonkey, for your NK Sourdough recipe. I love it!

Susan

Stone BouleStone Boule

mountaindog's picture
mountaindog

Giving No-Preheat a Try

With warm weather and more time spent in the garden than in the kitchen these days, I finally decided to give the "no-preheat" method a try since ehanner, crumb bum, sourdough-guy, and many others seem to like the results and the ease (not to mention energy savings).

I must admit I have been very skeptical of this method, it goes so against the grain of how I have made bread my whole life - I couldn't bring myself to do it for the longest time after carefully making each batch of dough, not wanting to sacrifice it, and I was convinced people who liked this method didn't require a thick, crispy crust like my family does - maybe it works fine for sandwich loaves, but crusty, chewy hearth loaves? Bread is sacred to my French husband and not something to be trifled with (he often hovers about the kitchen while I'm baking to make sure I hear the oven alarm and don't ruin the precious bread...)

So this past weekend I made a double batch of both the Thom Leonard and the Columbia (both from Glezer's ABAA) and decided to try the Leonard as the no-preheat and compare it to the Columbia which I would do on the hot baking stone as usual. First, as I mentioned to Zolablue in another blog, this weekend's bake was different than any previous sourdough bake I've done since starting back in November in that with the warm weather and warm house temps (70-75F) my starter was incredibly active and I've never seen these same doughs rise as much in the same time period as they did this weekend, they nearly blew the lids right off the dough buckets I use.

So I was a little worried the dough would be over-proofed, but when I slashed the Thom Leonard loaves after flipping them out onto a cold parchment covered baking sheet they seemed to hold their shape well. I put them in the cold oven on the middle rack (baking stones removed) and turned the oven on to 425F to bake the whole time, no steam or mist (needless to say, my husband was probably more nervous than I was...). I kept the light on to watch, and I noticed the slashes opening up and the loaves spreading - and I thought "great, I'll end up with pancakes", so I was extremely surprised to check back about 10 min later to see the loaves had bloomed and rose up very high - good oven spring - I was impressed! I left them in for about 15 min. before I opened the oven and rotated the loaves, then let them get nice and brown for another 15-20 minutes. I took them out when they looked nice and brown and the internal temp was about 204 . The crust felt nice and hard as they always do when you first take them out of the oven, but I knew the real test would be once the loaves cooled and we could cut into them and taste them. I should also mention that I have a gas stove, so the oven pre-heated and reached 425F pretty quickly without the stones in there.

Results below: we were very pleasantly surprised at the oven spring and open crumb, and the crust was crispy, but thin. Still, I could live with that considering how easy this was to do, no waiting for the stone to heat up, no misting, etc.


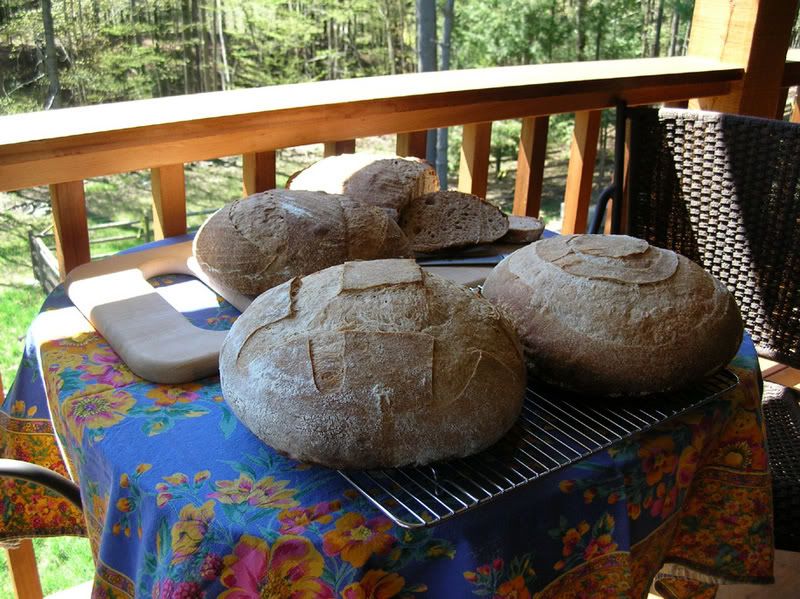
For comparison, below in front are some Columbias that I baked on a hot stone that I let heat up to 500F after the oven was already hot from the previous bake, then turned down to 400F after misting first 2 minutes. No-preheat Leonards are in the back. I made these Columbias as very large 3 lb boules rather than the usual batards (I like this large shape as it seems to keep the bread fresh longer throughout the week with just the cut side wrapped partially in foil). These Columbias also had tremendous oven spring, height, and open crumb, in fact they had better height and more open crumb than the no-preheat Leonards, and they also had a very thick crisp crust, which we prefer over the thin.

That said, I am still very happy with the no-preheat results given how easy it is, and will continue to use this method throughout the hot weather when I'm using the oven less anyhow. So I tip my hat to Sourdough-guy, ehanner, crumb-bum, and others who use this method, I've learned much from your advice before, but on this particular one I was skeptical, I'll never doubt you again...

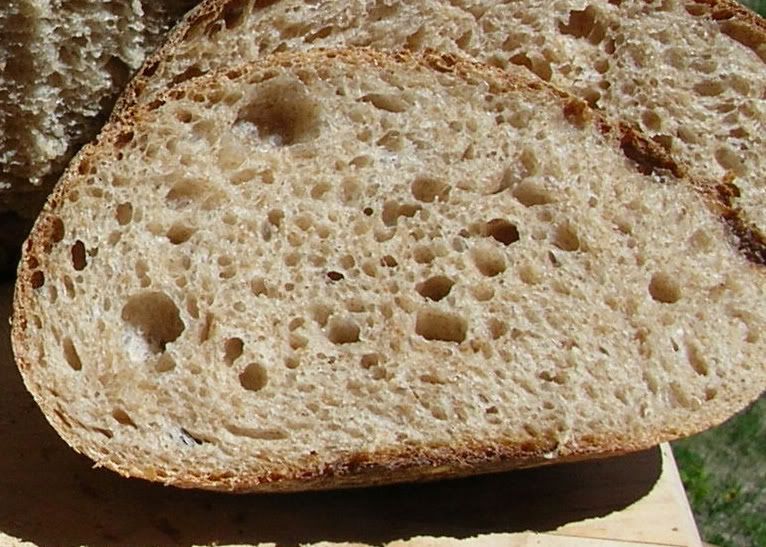
Still, in cooler weather we cook so much on the weekends in the oven that I prefer to keep the stones in place, and my husband definitely prefers the resulting thick crust. Here is a crumb shot of the Columbia baked on the hot stone.

HokeyPokey's picture
HokeyPokey

Starter - how much?

I've got a questions about sourdough starters - how do you substitute starter for yeast?

I've got John's starter, with 50-50 flour and water - does it make it 50% hydration?So whats the percentage between a liquid starter and Total Flour Weight (TFW - I am learning from my BBA:) 


Thanks in advance

BROTKUNST's picture
BROTKUNST

Keep 'Secrets of a Jewish Baker' better a secret ....

just received the newly publlished Secrets of a Jewish Baker ... To make it short, this is the first book I will return to Amazon. I have no idea how this book got some awards but the 'formulas' are all measured by volume ... that's inconvenient but manageable. The real insult is that the quantity of flour in the 'formula' is specified as for example "2 1/2 to 4 cups" (!!!!!!!!!!!!!!!) I had no idea that one would even dare to publish something like that .... how about 'some flour', 'some handful of flour' or 'have your kids scoop in whatever they like'. I guess it is obvious that this book actually upset me.

If you would like to consider buying it anyway (the cover looks good and the award must be for that), then look at it in your local bookstore first.

BROTKUNST

pmccool's picture
pmccool

Hardball starter (Dial-up warning: lots of photos!)

A few years ago, while still living in Houston and being totally ignorant of sourdough, I attempted a starter from Tom Jaine's Baking Bread at Home. It was not a good experience. The flavor was intensely sour and the bread more closely resembled a brick than anything else. I'm still not sure whether it was my own ineptness, stale flour, Houston microflora, temperatures, or perhaps some combination of all of those things that led to such disappointing results.

Since then, having moved back to Kansas, I have experienced some modest successes following Sourdolady's procedure for getting a starter up and running. My thinking was that if Jaine's starter was still too sour for my tastes, that maybe I could combine my existing mild starter with a more sour version and come up with something that had the rising power of my present starter but with a more robust flavor. Or not. So far, I'm liking the results with Jaine's starter and haven't attempted a shotgun wedding of the two starters.

Jaine's instructions, with my photos, follow.

The starter:

1/2 cup (60 g) wholewheat or rye flour (I used Wheat Montana Bronze Chief wholewheat flour)

2 tablespoons non-chlorinated water

Mix the flour and water to a paste and knead it with your fingers and thumbs until it is a smooth, firm dough. (I found it necessary to add almost another tablespoon of water to make the dough hold together.)

Put this nut of dough in a glass or small bowl, cover with cheesecloth, not plastic wrap, and leave it in a warm place, at approximately 75-80F, for about 2 days. (Not having cheesecloth on hand, I covered the bowl with a clean dish towel.)

Freshly mixed and kneaded starter

Although the outside will crust over, the inside will be moist and slightly aerated. The smell will be sweet. Discard the crust and proceed with the first refreshment. (Hence, the "hardball" designation in the title of this post.)

The First Refreshment

1/4 cup (60 ml) non-chlorinated water

1 cup (120 g) wholewheat flour

Dissolve the starter in water, add the flour and mix to a dough. Knead with the fingers on a work table.

Ready to mix; 1st refreshment

Put the dough in a smll bowl and cover with plastic wrap. Put it back in your warm spot and leave for a day or two.

After 1st refreshment

It will crust again, but it will also have enlarged and the aeration will be greater. The smell will be very slightly sharp.

48 hours after 1st refreshment

(48 hours after first refreshment, above. Note that it has easily doubled in volume. The crack came from me breaking open the ball before remembering that I wanted to take a photo. Interior of ball, below.)

48 hours after 1st refreshment

Discard the crust and proceed with the second refreshment.

The Second Refreshment

1/2 cup (120 ml) non-chlorinated water

scant 2 cups (225 g) unbleached white bread flour (I stayed with wholewheat flour for this refreshment.)

Repeat as for the first refreshment, but this time leave it for about 8-12 hours and it should show every sign of life: growing and rising like a normal piece of dough with a slightly sharp edge to the smell, but not rotten or "off".

The leaven is now ready to be added to a dough that will proceed as any other, though often more slowly. (At this point, I put mine in the refrigerator since it would be another day or two before I could bake.)

Results

This time, I really like this starter! The flavor is complex, combining moderate acidity with rounded, almost sweet, wheat notes. Never having had desem bread, I'm not able to draw a comparison, but I wonder if there are similarities in flavor between this approach and the desem approach. The flavor isn't nearly as overpowering as the first attempt was.

To give it a test run, I baked the Pain au Levain with Whole Wheat, page 279, from the King Arthur Whole Grain Baking book. Since I made the starter with 100% wholewheat, about half of the wholewheat flour in the bread came from the starter. I started the dough Friday night, it went into the refrigerator overnight and then I finished it the following morning. The fermentation proceeded slowly but steadily after the dough warmed back up (kitchen temperatures were in the low to mid 70F range). Here's one of the loaves just before it went into the overn:

WW Pain au Levain dough

And here is how it looked after it came out of the oven:

WW pain au levain, baked

Plenty of oven spring and a deeply colored crust (probably because of the honey in the formula). Sorry, no crumb photo. Maybe I can add one after we cut into the surviving loaf. The crumb was moderately open with some medium-size cells. Pretty good for a bread containing wholewheat.

The only downside, if such it is, is that I now have two starters to keep track of!

browndog's picture
browndog

Meteors or Morels?


Dutch Crunch 2

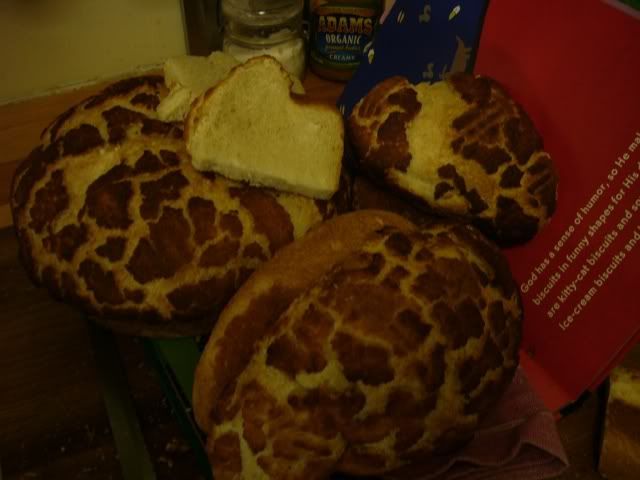
Meteors...or morels? Dutch Crunch makes an odd and intriguing loaf, and I don't pretend to understand the mystery behind the results. A thick coating of yeast and rice flour transforms your loaf into something other-worldly, and it was with more than passing surprise I saw it turn up on redivyfarm's no-knead loaf uninvited, a wild version of this domestic specimen. Honestly I find Dutch Crunch in the eating to resemble nothing so closely as grit in its Sunday best, however, my family is taken with it and it makes a spectacular presentation. The bread itself is a basic white loaf to which was added leftover mashed potato and brown rice flour. With more than a little chagrin I must allow this to be the tenderest crumb ever to emerge from my oven, presumably due to the combined effects of potato and rice. My son on taking a bite exclaimed, "Oh, I'm eating Wonder bread!", but I let him live.

redivyfarm's picture
redivyfarm

Experimenting with a Savory Braid

We're having fun on the farm! With the Mother's Day picnic coming up I decided to bake my own version of a filled braid. I admired the fruit filled braids and loved Floyd's suggestion that a savory filling with a different dough would be good. A search of the BBA formulas led me to use Pain de Campagne because it is said to be suited to shaped loaves; never disappoints. I followed Reinhart's steps with the exception that I used an overnight retarding of the dough after the first partial rise to better fit my schedule. I knew that this dough was going to have to stand up to some serious handling and honestly, I had my doubts.

Today I proceeded with Floyd's excellent instructions, dividing my dough in half to make two braids. Rolling it out to about a 3/8 inch thickness required letting the dough rest a bit with the rolling pin anchoring the corners to achieve the pan sized rectangle. My silicon baking sheet was helpful; I was able to handle the dough a little less when transferring it to the pans. I lined two baking pans with oil sprayed parchment and sprinkled a little rice flour where the braid would rest. Scissors worked well to make the inch wide angled strips. The short sides on my pans did not allow enough room to cut with the scraper. The dough with filling looked like this-

Braid Building

Braid Building

For this braid I used part cream cheese, part grated parmesan with one tablespoon of the egg wash mixture per Floyd's example. On top of that, sauteed Italian sausage, mushrooms and sweet peppers with garlic and herbs, salt and pepper. The other braid is filled with caramelized onion and sauteed mushroom on cream cheese with s and p. They get two applications of egg wash, the last one just before baking. The criss-cross fold works for me just like it works for Floyd. Wonder of wonders, in spite of lots of handling, the dough rose up puffy in about an hour and a half! Floyd and I agreed that the oven temperature should most likely be 450 degrees as required for the Pain de Campagne. I baked one braid at a time for 20 minutes.

Mushroom Onion Braid

Mushroom Onion Braid

Braid Slice

Braid Slice

This is really a fun baking, yields an impressive product and will adapt to limitless tasty fillings. I strongly recommend the ultra-reliable BBA Pain de Campagne formula for shaped breads.  

Pages