The Fresh Loaf

A Community of Amateur Bakers and Artisan Bread Enthusiasts.

Most bookmarked

French Boule 8 hour bread (simple - and deeeeelicious.

taibiz2010's picture
taibiz2010

Description

I took this recipe (with a bit of a twist) from Mark Bittman's NY Times No Kneed Bread.  Instead of good 'ol AP flour from the US, I used Francine brand Farine de Ble.  You can get this from Le Panier Frances' website.  Here's the recipe:


Summary

Yield
slices
SourceMark Bittman / Ken Forkish
Prep time8 hours, 20 minutes
Cooking time50 minutes
Total time9 hours, 10 minutes

Ingredients

3 c
Flour, White
1 1⁄2 c
water, see note (90 degrees F)
4 g
Yeast (Instant) (SAF Gold)
15 g
salt (sea salt, not course grind...)

Instructions

Mix flour & water, cover, let stand for 20 min.  After 20 minutes, add 4 grams yeast (I used SAF instant / gold) and 12 grams sea salt.  Mix using pincher method, thumb, pointer pinching the loaf (yep.... didn't make that one up) until blended.  Once blended, let sit for about 8 hours.  I put the bowl into the oven, turned off.... and let rise.  Once it's bubbled up into happy land, dump onto lightly floured counter & fold each side over once & flip the dough so the crease side faces down.  Let rest for an hour, while the dough is resting, place a covered dutch oven into your oven and heat to 450 F.  

After an hour, and using amazing oven mitts, take the cover off of the dutch oven, and without the oven mitts, place the boule into the dutch oven, put the mitts back on, cover & cook for 30 minutes.  After 30 minutes, put the oven mitt back on, uncover (put the lid somewhere where you don't accidentally pick it up.  I have a pizza stone on top of our fridge & put it up there.... trust me, after 2 massive blisters, I've learned my lesson).  Leave in oven, uncovered for 20 min, or until you see a nice light burn on the crust.  Don't take out until at least 15 min has passed.  

Put oven mitts back on, pull dutch oven out of oven, tip bread out onto small bread rack; not cookie sheet - use a rack, and I usually put the dutch oven back into the oven, turn off oven, and leave in there until the dutch oven cools down.  

Let the glorious bread rest for about 20 min; 40 if you can hold out, and then enjoy. 

Notes

Use oven mitts with a rating protecting up to 500 degrees.  Do not use dish towels to handle hot objects.

Lazy Loafer's picture
Lazy Loafer

Fig Nut 123 challenge bread

I issued myself a challenge (posted here in the Challenge forum) to see what kind of fun I could have with a simple 123 method sourdough. In other words, 1 part fresh starter, 2 parts water (or other liquid) and 3 parts flour. Also, a customer had asked me to create a 'sweet' version of my Three Friends Levain (Tom[ato], Olive and Rosemary) that she could have with peanut butter and jam. So, a double challenge!

My first version was bread flour and whole wheat flour, 100% hydration fresh levain, chopped Brazil nuts and dried figs, and a bit of cardamom. It turned out very nice, but still needed something. Oh, and just as an aside - I use Brazil nuts because they are about the most environmentally-sustainable tree nuts around. They grow best in an intact rain forest!

I had to try it with my home made nectarine jam, just to check! :)
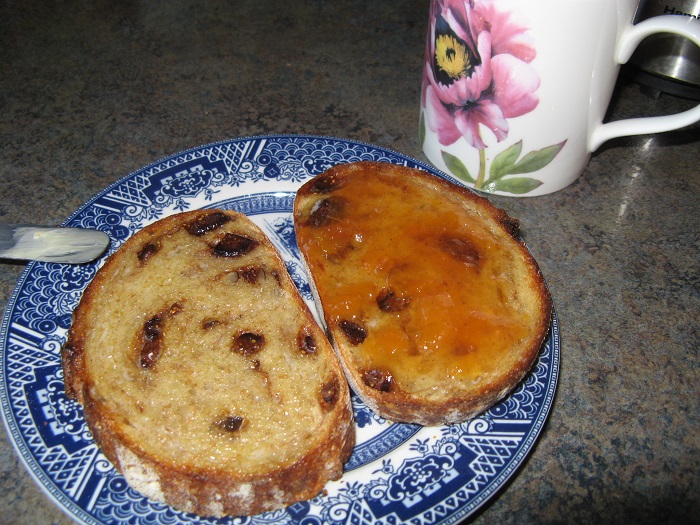
Good, but still needed a couple of tweaks.

Today's version was much the same, but I toasted the chopped Brazil nuts and added a bit of honey and some poppy seeds.

Here's the formula:

Bread flour22575%
Whole Wheat flour7525%
Water20067%
Starter10033%
Honey207%
Salt62%
Chopped Brazil nuts3010%
Chopped dried figs5017%
Poppy seeds83%
Ground cardamom (1/2 tsp/loaf)00%
 714238%

The method was pretty basic:

  • Mix flours, water and levain and let sit for 30 minutes
  • Add salt and add-ins and mix [note, I mixed this in the big Univex mixer (Max) because I actually made six loaves today; you can mix and develop the dough in other ways]
  • Stretch and fold every 30 minutes over the next couple of hours, until the dough is strong, stretchy and springy
  • Leave in a cool basement to bulk ferment overnight [in the morning the dough had nearly tripled in volume and was beautiful - soft and jiggly but with a nice dome on it and still a lot of strength]
  • Bench, scale and pre-shape
  • Shape and let proof for about an hour
  • Load onto peels, then into hot stones (475F) with steam. After 5 minutes, turn heat down to 425F. Turn loaves after 15 minutes, then bake for another 15 to 20 minutes. Internal temperature around 205F

It looks a little rough at the pre-shape stage but was actually beautifully strong and springy.

You can see how nice and taut the shaped dough ended up.

Slashed and ready to load.
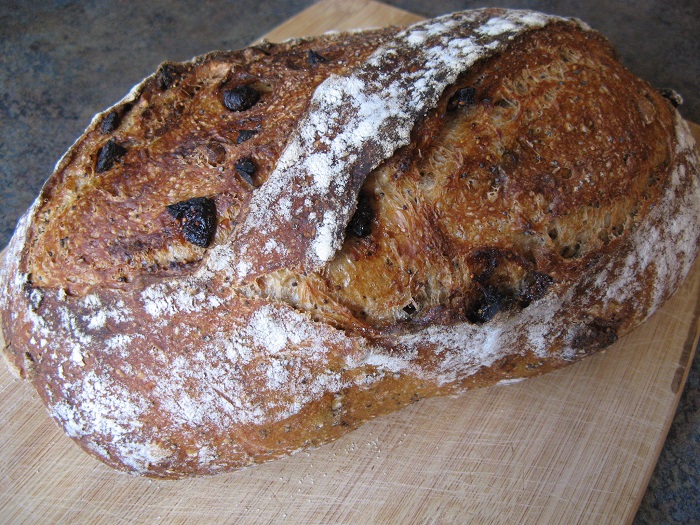
Very nice oven spring and burst, and a lovely colour on the crust.

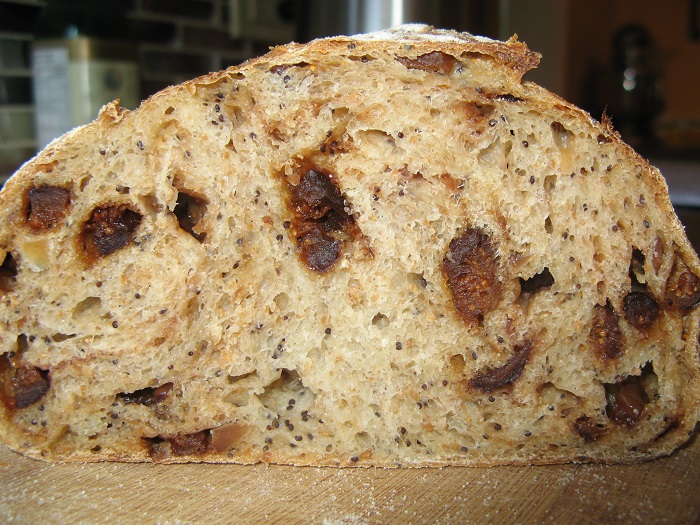
The crumb is divine - very moist and chewy, and the flavour is now everything I was looking for.

So, over to you! See the 123 challenge on the Challenge forum for details... :)


alfanso's picture
alfanso

My personal set of do and don't rules

Not to be complete and comprehensive and certainly not to be pedantic, but I decided to list a set of my own do and don’t “baking rules”.  I expect no one to take any/some/all of these to heart or put into practice - least of all because I say I do them.  None of these are absolute, but in general, they serve as my personal list of commandments – at least around dough and baking.
  
We have, will develop and hopefully forever evolve our own individual set of rhythms and axioms for what works best for each of us.  There is probably no “one size fits all”.
I’ve been doing these long enough now that it is pretty much second nature to me and I don’t need a checklist to abide by.  Let’s start with the don’ts...

I DON’T

  • I don’t do a float test.  Once I have a mature and reliable levain, it works.  I trust it.
  • I don’t temp the water.  After a while the old “baby bottle drip on the wrist” is all that one needs.  Get to know what temperature your water needs to be.  Need colder water?  Add ice.  Need colder still?  Put the flour in the freezer.
  • I don’t do a windowpane test.  It is not necessary to wring my hands over a failed windowpane, and to keep on mixing, especially because I almost never use a mechanical mixer.  So far I can’t be convinced that I’m wrong on this.  This rule does have a singular caveat.  There are a very few doughs that may be absolutely dependent upon a successful windowpane.  But they are few and far between.  And that is when I’ll use a mixer.  
  • I don’t temp the post-mix dough.  It will be 77-78dF.  I know that from experience.  I trust it.
  • I don’t watch the dough, I watch the clock.  This is the get-myself-into-hot-water-around-here rule.  My kitchen temperature is almost always 78-80dF.  Once I am comfortable with how a dough reacts to the fermentation and the room temperature, it is a reliable and repeatable activity.  I trust it.  Science!
  • I don’t really care how long my retarded dough sits in the refrigerator post-bulk ferment.  As long as it is more than at least 10-12 hours and under ~24 hours.  I’m fine with that.
  • I don’t care how long the dough goes without a divide/pre-shape/shape.  As long as it has been retarding for at least more than an hour or two.  Ten hours is also just as okay in my book.
  • I don’t temp bread when it comes out of the oven.  I trust that experience will lead me to judge that the bread is sufficiently baked.
  • I don’t use any excessive raw flour on my breads.  I’m a minimalist here.  I understand that there is a rustic look that some appreciate, and I’m okay with that – on occasion for myself too.  But in general, the least amount of flour that I can use on the dough without it sticking to a couche or other surface, the better.  For me.
  • I don’t allow the loaves to be loaded too close to each other.  Insufficient room between loaves will keep the sidewalls of the dough insulated and lead to under baked and under colored/gelatinized sides.
  • I don’t change a blade until it has scored a number of loaves or has had a rough time of it due to nuts, seeds and/or fruit on prior scoring.  My double edged razor blades stay sharp for a long time.  And of course I get four tips out of each blade.


I DO

  • I do pay attention to pre-shape.  Every inconsistency that is made during a divide and pre-shape will almost always be magnified in a subsequent step.  I still make occasional mistakes here.
  • I do return the couched dough to retard after shaping.
  • I do bake directly out of retard – with occasional exceptions.
  • I do pay attention to the depth and angle of the blade when I score.  And at times I’m still not giving the individual scores enough room for oven spring and find that the bloom will just plain burst through the scoring.
  • I do place a pan with Sylvia’s Steaming Towel into the oven 15 minutes before baking.  Yes, I know that all of the steam it creates will be gone the second I open the oven door to load the dough, but the water surrounding the towel is boiling away and already prepped to go right back to work the second the oven door closes again.
  • I do use parchment paper as a base for delivery of the dough to the oven deck.  I’d rather not have the dough get stuck on the peel and as stated above, I don’t like to introduce excess raw flour or corn meal, etc. to the underside of the dough to facilitate the movement between peel and baking deck.
  • I do use a secondary source for steam – a 9”x13” pan filled with lava rocks for a brutal burst of pure steam. Near boiling water poured onto the lava rocks just after the dough is loaded.
  • I do remove the parchment paper when the steam is released.  The paper, as thin as it is, still acts as an insulator between the deck and the dough.
  • I do reuse parchment paper at least a second time.  I do it just because it is “fun” to do, but it is a money-saver, however minimal.  I can see no degradation in the finished product with a re-use.
  • I do rotate the loaves from left to right and front to back halfway through baking.  I want equal opportunity for the dough to be exposed to front and back temperatures, oven side walls and hot and “cool” zones in the oven.  The baking deck immediately above the lava rock pan is consistently cooler than the remainder of the baking deck.
  • I do try to vent the finished bread for 1-2 minutes before removing from the oven, thereby giving the bread its first opportunity to dry out a bit.  This can’t be done to the first loaves when there are mixed sizes baking at once – i.e. baguettes and batards.


These baguettes are Forkish Field Blend #2.  At 78% hydration they are a bit too sticky to work with as baguettes, so I lower the hydration down to 75% and they are delightful to handle.
4x350g.

alan

dmsnyder's picture
dmsnyder

This week's baking - July 18, 2016

A relatively new TFL member recently asked how to make a sourdough bread. His description of the desired characteristics brought to mind a bread we made in the San Francisco Baking Institute Artisan II Workshop on sourdough baking. It was a decidedly French-style pain au levain with minimal acidic acid tanginess but a creamy, sweet complex flavor. It was the preferred bread of the SFBI faculty. The special features of this white bread were a liquid levain fed every 12 hours that made up about 30% of the total flour in the final dough.

My bake differed slightly from the original, but I give the SFBI formula as it was given to us.


Total Dough Formula 

Baker's %

Wt (g)

AP flour

99.2

641

Rye flour

0.8

5

Water

68

438

Instant yeast (optional)

0.1

0.5

Salt

2.1

13

Total

170.4

1097.5


Levain

Baker's %

Wt (g)

AP flour

95

102

Rye flour

5

5

Water

100

108

Liquid starter

40

43

Total

240

258

Note: for the starter feedings, including the levain mix, I actually used my usual starter feeding mix of 70% AP, 20% WW and 10% Rye. So, in the levain, rather than the AP and Rye specified in the SFBI formula, I used 107 g of the above mix.

  1. Mix ingredients thoroughly.

  2. Ferment 12 hours at room temperature. (Note: Because of my own scheduling needs, I refrigerated the levain overnight before mixing the final dough. This was not the procedure at the SFBI, and it would be expected to make the bread somewhat more sour. If you can, omit this levain retardation.)

Final Dough

Baker's %

Wt (g)

AP flour

100

517

Water

60

310

Instant yeast (optional)

0.1

0.06

Liquid starter

50

259

Salt

2.5

13

Total

212.6

1099.06

Procedures

  1. In the bowl of a stand mixer with the paddle attachment, pour in the water, add the liquid starter and mix to dissolve the starter.
  2. Add the flour and mix to a shaggy mass.

  3. Let rest, covered, for 20-60 minutes.

  4. Add the salt (and yeast, if you are using it) and mix with the dough hook at Speed 2 for 5-6 minutes. Adjust flour or water to achieve a medium consistency. (Note: I did not use added instant yeast.)

  5. Ferment for 2-3 hours at 76ºF with 1 or 2 folds, as needed to strengthen the dough. (Note: The fermentation time depends on whether you use the instant yeast and on your fermentation temperature. As usual, “Watch the dough, not the clock.” The dough should end up expanded by 25-50% and should be light and gassy. If you ferment in a transparent container, your should see the dough to be well-populated with tiny bubbles.)

  6. Divide the dough into two equal pieces and pre-shape as boules or cylinders.

  7. Let the pieces rest, covered, for 25-30 minutes.

  8. Shape as boules or bâtards.

  9. Proof for 90-120 minutes at 80ºF. (I had a class to teach, so I refrigerated the loaves for 3 hours, then proofed for 2 hours at 80dF)

  10. Bake at 460ºF with steam for 25 minutes. ( I baked at 460dF with steam for 12 minutes, then another 16 minutes at 435dF convection bake in a dry oven.)

  11. Leave in the turned-off oven with the door ajar for another 10 minutes. (Optional)

  12. Cool thoroughly on a rack before slicing.

I also baked a couple loaves of a Pain de Campagne. It is based on the one in FWSY, except I leave out the instant yeast and boost the whole grain flours a bunch. For today's bake, I halved the recipe in the book to make 1100g of dough and divided that into two. We are traveling next week, and I wanted to take a small loaf along for breakfasts and picnics.

Happy baking!

David

dann's picture
dann

vital gluten with excel

hi,

i m french, and i m going to try to be inclusive :), sorry for my english :)

I try to develop an excel file which calculates the amount of vital gluten to add in a mixed bred flours,when using poor gluten flours.( to correct the total amount of the dough gluten)

is sommeone has developped a calculation of such tools ?

or mathématical formulas that could help me for this ?

Thank you


BobS's picture
BobS

Is Fred Dead? Practical Starter Abuse

A while ago I wrote a post, Life With Fred; Maintaining a Starter In Pictures, about how I maintain my starter; an approach focused on minimizing both waste and stress. The starter, Fred, seemed pretty resilient. While I usually baked every week or two, sometimes Fred would cool his heels in the fridge for a month or more. I wondered how long he could go between feedings and still remain viable. I knew that dabrownman was taking a similar no-waste, laissez-faire approach. He had some additional goals and described them and his approach in his excellent No Muss No Fuss Starter post.

I also knew that there were a lot of beasties in my 75g of Fred; it would take some time and effort to kill them all. On the other hand, at 100% hydration, Fred might not last as long as a stiffer starter.

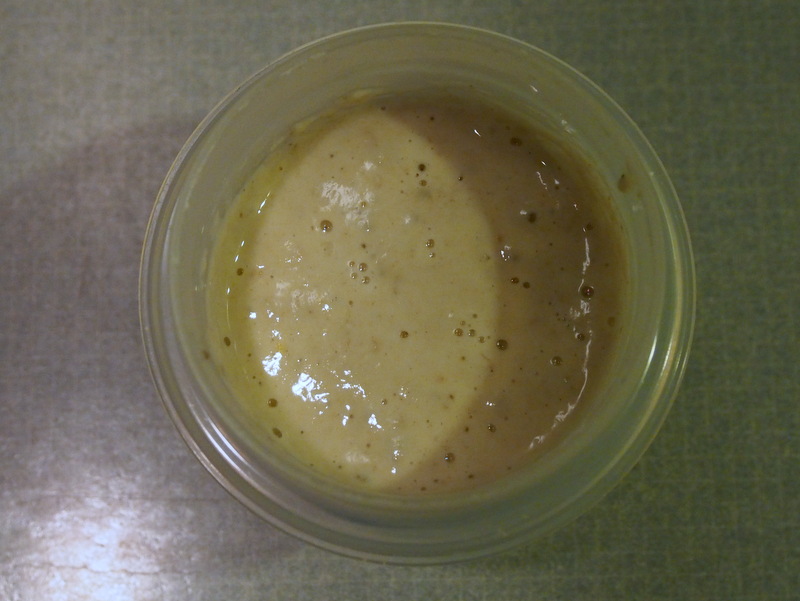
So I cloned Fred by removing 15g and feeding with AP flour and a pinch of rye  it 1:2:2 to make a clone known as Dead Fred (DF) . I kept DF in a warm place until he was starting to bubble.


Then I put him in the back of the fridge and left him undisturbed. For 11 months.

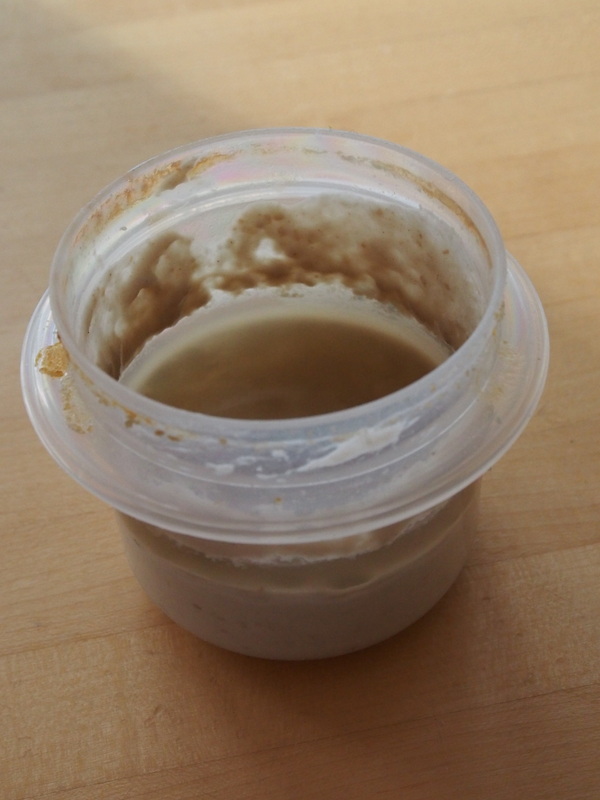
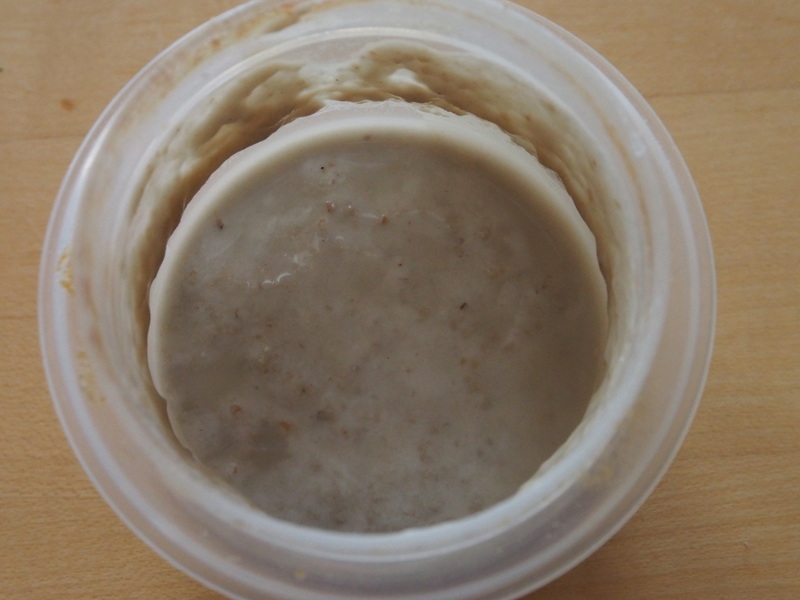
When I removed DF it was clear that he had been cold and lonely back there. He had even turned to drink. Sad.


I poured off the hooch and left him at room temperature for a while. There were no signs of life; he's starving, I think.


But was the yeast dead or just dormant? Let’s see.

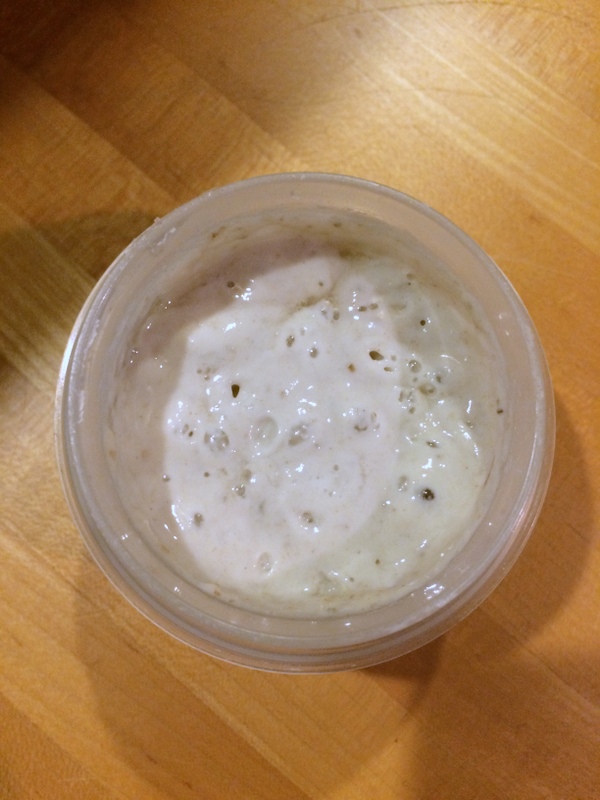
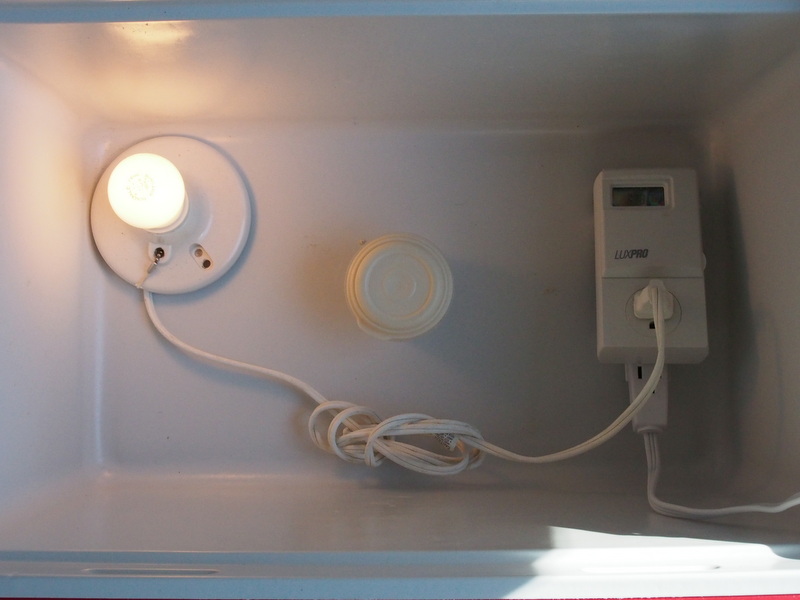
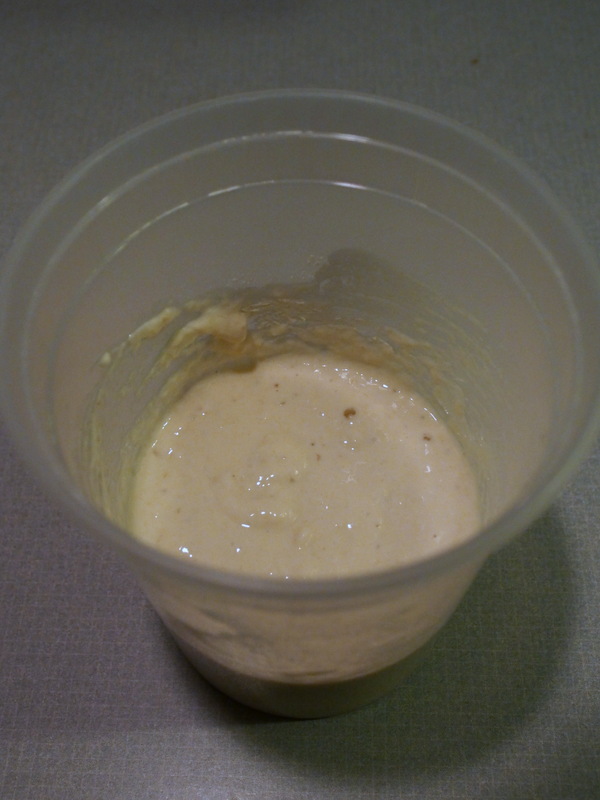
Once again I removed 15g, this time from Dead Fred, and fed it 1:2:2 with AP flour and a pinch of rye to make 75g of 100% hydration  or Zombie (i.e un-Dead)  Fred (ZF). ZF went into the proofing box at 78 F:


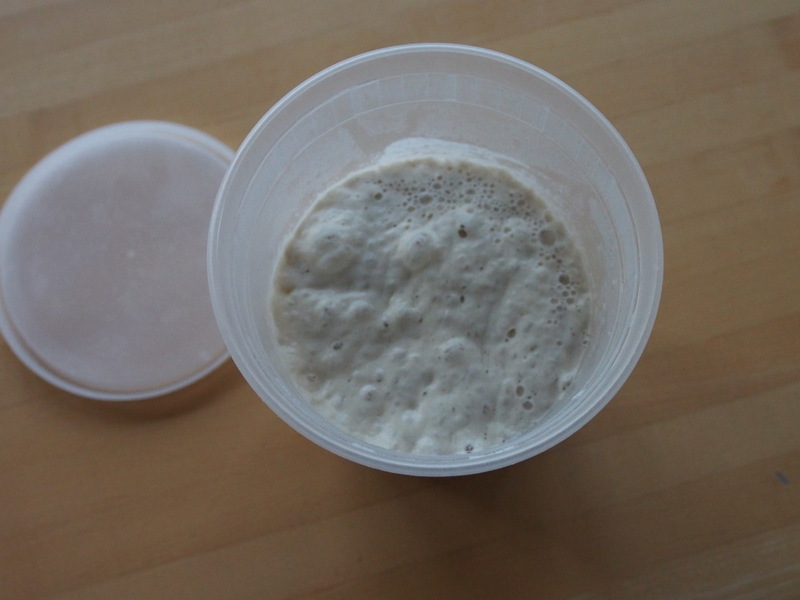
About 11 hours later there are signs of life. He really was just sleeping.


Looking good, but not quite as active as the original Fred yet. Normally I would have fed him again before building a levain - a multi-stage build - but timewise, if I tried to build a levain immediately it would fall into my usual baking schedule. So I went for it and built a 123% hydration levain for my spin on Hamelman’s Vermont Sourdough. Lately I’ve been doing mostly whole-grain breads, but I knew I’d have better chances with a whiter bread if the levain were a little weak.


After about 14 hours in the proofing box at 78F, the levain is looking good:


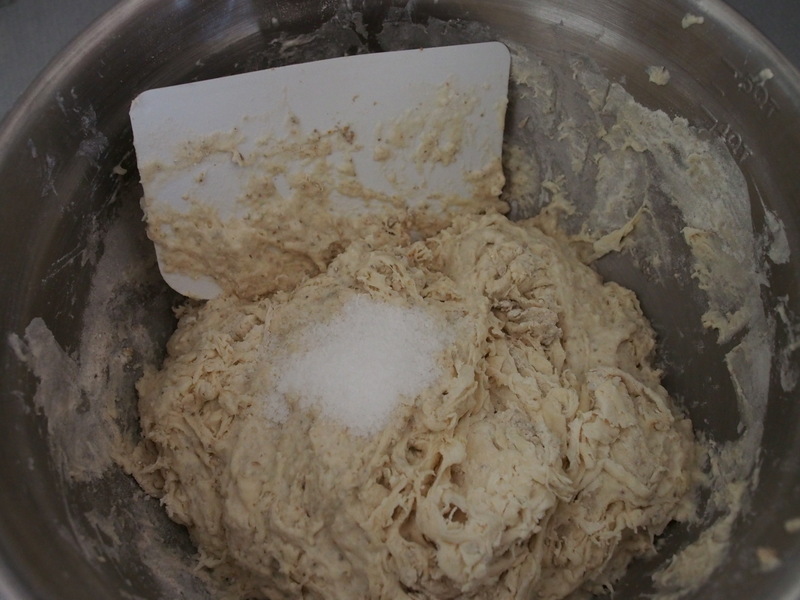
The levain and the remainder of the ingredients get rough-mixed:


Then some slap-and-folding, a bulk ferment with a couple of folds, shape, retard overnight, and et voilà. From dead to bread.


There are a lot of yeastie beasties in a starter. They're simple organism, very focused on survival. Maybe your starter's not dead.

Just sleeping.


Debra Wink's picture
Debra Wink

Sourdough Starter Care and Use

Questions are raised here often by those new to sourdough, about the specifics of how to feed and care for sourdough starter once created, and how to know when it is ready to be used. The answer is always going to be some variation of it depends (followed by a lot of words about conditions and objectives) --- frustrating and confusing to those who feel the need to understand a project before starting, because the volume of information is contradictory and overwhelming.  It makes more sense when you see it in action, so the best approach is jumping in and starting somewhere, anywhere. Sourdough is interactive, and you get a feel for it as you go. By doing. Like learning to ride a bicycle. With that said, here is a really nice guide -- training wheels -- to get you on the bike and start riding:

http://www.theperfectloaf.com/sourdough-starter-maintenance-routine/#more-1429

Final crumpet recipe

PlainPopcorn's picture
PlainPopcorn

Description

I wasn't happy with the flavour and texture of many crumpet recipes online so I decided to find something that did work for me. This is the crumpet recipe I wrote after many tests with other recipes. See my post here in the challenges forum http://www.thefreshloaf.com/node/43608/crumpet-inconsistencies-please-help

I think this recipe gives me constant good results and tastes good. But I do understand that it's subjective.

Many fresh loaf people gave me advice on the things I was struggling with so I couldn't have made this without them.

Thank you.

If I forgot something, made a mistake or when you have questions don't hesitate to ask.

Summary

Yield
crumpets
Prep time
Cooking time
Total time

Ingredients

1 t
Sugar
200 ml
Whole milk
2 t
dried yeast
150 g
Strong white flour
100 g
plain white flour
2 T
white vinegar (Use anywhere between 1 and 2.5 T of vinegar, I think 2 T works fine.)
1 pn
salt (Salt to taste, don't go above 3.5 ml.)
1 1⁄2 t
baking powder (Use anywhere between 1 and 2 teaspoons of baking powder, see additional notes.)
20 ml
water (after first rise, add approximately 20 ml. Batter should be thicker than pancake batter.)
1
oil (for greasing rings and pan or hotplate.)

Instructions

Mix sugar, milk, and boiling water(which together with the milk makes a lukewarm liquid) in a bowl or jug and stir in the yeast. Leave it in a warm place for 15 minutes.

Combine the flours in a mixing bowl. Stir in the liquid and mix vigorously until smooth. Now mix in the vinegar.

Cover with a damp towel and leave in a warm place for 1 hour and 45 minutes to 2 hours until nice and bubbly.

Now add in salt, 20 ml water (approx, see ingredients) and mix. If you are confident you have the right consistency you can now add in the baking powder (approx 1.5 tsps, see ingredients and additional notes). Mix well, cover with damp towel and rise for 45 minutes in a warm place.

My house tends to be too cold to properly rise anything in so I use my oven to rise dough and batter like this. With this batter I shoot for a 34 to 45 degree celsius rising temp in the oven.

When your batter is nice and bubbly (like really fluffy and bubbly) you can start frying/baking them either on a hotplate (I recommend this) or just in a pan. When using a hotplate it usually takes 5 minutes to preheat (so plan ahead, it takes 5 minutes to grease the rings and 5 minutes to heat the hotplate and the rings) and the temperature should ideally be somewhere between 165 and 200 degree celsius. When using a regular pan on the stove aim for a medium low heat. Just try what works best and be prepared to sacrifice the first crumpet.

So grease your cooking surface and the rings, place greased rings on cooking surface and start preheating the hotplate or the pan. When the pan/hotplate and rings are nice and hot, ladle in the batter so it reaches about 1.75 ~2 cm high. Watch as holes start to form and the top starts to dry up. Once the top is set you can choose to de-ring and flip them or to give them a golden brown colour with the use of the oven grill (heat from above only, door open). The bottom should be golden brown or a bit darker, chestnut brown is too dark.

You can eat them warm from the pan/hotplate or from under the grill. But if you decide to keep em (as you probably will since this recipe makes 12) you can keep them for a day or two and pop them in the toaster when you're ready to have them. They also freeze wonderfully, take them out of the freezer and let them sit for an hour and then toast them in the toaster. I tried microwaving a frozen one for 30 seconds followed by putting them in the toaster. It worked.

If by chance the crumb is a teensy weensy bit too wet when eaten right after cooking them, they are better the second day after putting them in the toaster. Or let them cool and toast them the same day, perhaps that helps as well.

Notes

On baking powder amounts and composition; the baking powder I use is from dr Oetker. It contains Disodium Diphosphate and Sodium Hydrogen Carbonate (the last one is also known as bicarbonate of soda). I don't know if the ingredients of the baking powder make any difference but I thought about including this info just in case.

If you use the full amount (2 tsps) you will get a very bubbly batter that results in large and deep holes in the crumpets which is what I was looking for. You can taste the baking powder in the baked crumpets at this amount if you have a sharp sense of taste, but it's not necessarily a bad taste. Definitely a hundred times better than the taste of baking soda which is often used in crumpet recipes. But this is subjective. I would not be surprised if there were people who did not mind the taste of baking soda but who detested the taste of baking powder.

I calculated the amount of baking powder by using a conversion rates I found on the internet that lets you convert baking soda to baking powder that also takes into account other (acidic) ingredients.

If you do choose to use less than the maximum amount of baking powder you do sacrifice some of the bubbliness but you can always try to make up for it a bit by keeping the covered batter in a 40~45 degree celcius oven during the second rise. Just try to get as much big bubbles in the batter and you should be fine.

Trouble shooting;

-no holes on top? either the batter is too thin (so the holes will fill up again), the crumpet too high, the batter too thick (so holes never appear in the first place) or the temperature too low.

-top won't set? either the batter is too thin, the crumpet too high or the temperature too low.

-batter won't rise during second rise? put it in a warmer place, maybe you forgot the baking powder?

-the crumpets are stuck to the rings when I want to de-ring them? Ideally the crumpets shrink away from the rings if the surface and the rings are hot enough and if you used enough oil to grease them. But sometimes they stick anyway. Just use a knife to free them, or toothpick if you don't want to scratch the rings.

-the inside is uncooked/soggy/pastelike but everything else seems fine? the inside of a crumpet should be somewhere between a pancake and a fresh ciabatta when it comes to the wetness of the crumb. It should not feel pastelike, and if it is it's probably because the batter was too thin. This can happen if your flour sucks up less water than other flours of the same kind. Just remember that the batter should be thicker than pancake batter.

dmsnyder's picture
dmsnyder

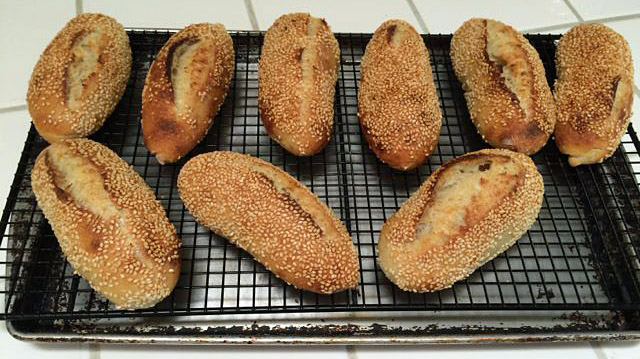
Sourdough Italian Rolls

Sourdough Italian Rolls

April 18, 2015

Those familiar with my San Joaquin Sourdough will recognize the rolls I baked today as its Italian cousin. Besides the obvious difference that these are rolls rather than bâtards, they also have around 20% Durum flour, some sugar and olive oil, and they have a sesame seed coating.

I developed this formula in 2011. Originally, it had both diastatic malt and suger. It was pointed out to me that the AP flour is already malted, and, as a sweetener, the malt is redundant. I really didn't need both malt and sugar. So, today's version omits the malt.


Total Dough


Ingredient

Amount (gms)

Bakers' %

AP flour

434

79

Fine Durum flour

100

18

WW flour

11

2

Whole Rye flour

5

1

Water

400

73

Salt

10

1.8

Sugar

14

2.5

EVOO

14

2.5

Total

988

179.8


Liquid Levain


Ingredient

Amount (gms)

Bakers' %

Liquid starter

40

40

Water

100

100

AP flour

70

70

WW flour

20

20

Whole Rye flour

10

10

Total

240

240

  1. Disperse the liquid starter in the water.

  2. Add the flours and mix thoroughly.

  3. Ferment at room temperature until expanded and bubbly (8-12 hours). If necessary, refrigerate overnight and let warm up for an hour before using.


Final Dough


Ingredient

Amount (gms)

AP flour

400

Fine Durum flour

100

Water

350

Salt

10

Sugar

14

Active liquid levain

100

EVOO

14

Total

988

Procedures

  1. In a large bowl, disperse the levain in the water.

  2. Add the flours and sugar to the liquid and mix to a shaggy mass.

  3. Cover the bowl and let it rest for 20-60 minutes.

  4. Add the salt and olive oil and mix thoroughly. (Note: I squish the dough with my hands until it comes back together, then do stretch and folds in the bowl until it forms a smooth ball and the oil appears completely incorporated.)

  5. Transfer the dough to a 2 quart lightly oiled bowl, and cover the bowl tightly.

  6. After 30 minutes, do stretch and folds in the bowl. Repeat 3 more times at 30 minute intervals.

  7. Refrigerate for 12-36 hours. (Today, I retarded for 23 hrs.)

  8. Divide the dough into 8 or 9 equal pieces and pre-shape as rounds or logs. Cover with a clean towel, baker's linen or plasti-crap and let rest for one hour. (Today, I scaled 6 rolls at 4 oz and 3 rolls to 3.65 oz.)

  9. Shape as long rolls and proof en couche or on a baking sheet for about 45 minutes. (Note: Optionally, roll the rolls on damp paper towels, then in a tray of sesame seeds. Alternatively, you can brush the loaves with water and sprinkle with sesame seeds.)

  10. One hour before baking, pre-heat the oven to 480ºF with a baking stone and steaming apparatus in place.

  11. Transfer the rolls to a peel. Score them, if desired. Transfer the rolls to the baking stone. Or, if the rolls were proofed on a baking sheet, score the rolls and place the sheet in the oven. 

  12. Steam the oven, and turn the temperature down to 460ºF.

  13. After 10 minutes, remove the steaming apparatus. (Note: If you have a convection oven, switch to convection bake and turn the oven down to 435ºF for the remainder of the bake.) Continue baking for another 6-8 minutes or until the rolls are nicely browned and the internal temperature is at least 205ºF.

  14. Transfer the rolls to a cooling rack. Cool completely before eating.

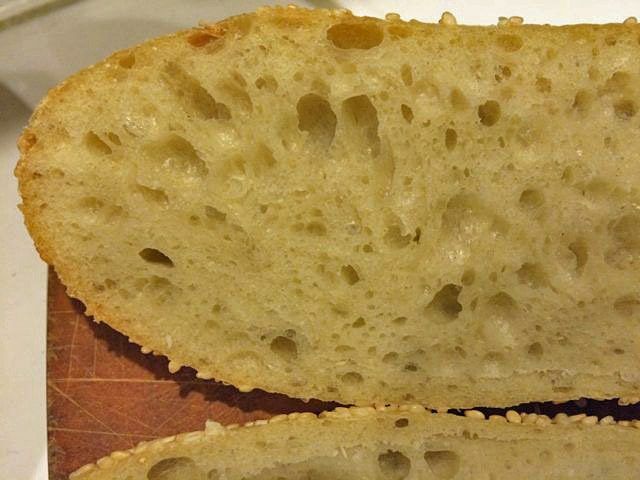
Sourdough Italian Roll crumb

My wife frequently asks me to make “soft” rolls to use for her sandwiches, but I seldom do so for some reason. I baked these while she was out. When she got home and saw them, she asked if she could use them to make sandwiches for the bridge group she is hosting next week. I know I can make more, so I just asked to save one for us to share with dinner. Well, after tasting the dinner roll, she started talking about getting rolls from the bakery for her bridge group and reserving the sourdough Italian rolls for us. I thought they were pretty good too. In fact, the flavor was so good I would hesitate to cover it with sandwich fillings.


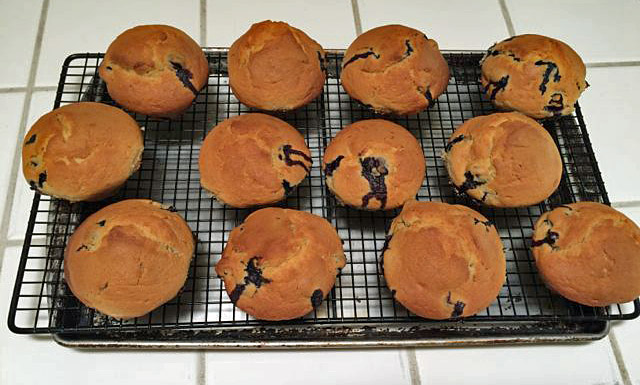
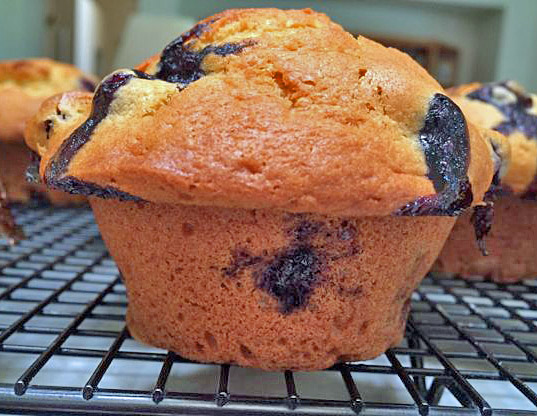
I also made some blueberry muffins. The recipe is from The Best Recipe, by the America's Test Kitchen folks. 


They were delicious as well.


Happy baking!

David

Submitted to yeastspotting

quirkey's picture
quirkey

Flaxseed + Raisin Sourdough

First post!

I've mainly been working on my high hydration country loaf (based on Tartine, but with tweaks for our cold kitchen + weather) but this week my wife bought a loaf of Raisin/sunflower seed bread from the co-op and then asked if I could make something like it. A Challenge! I found a recipe for a sunflower/flaxseed loaf in Tartine 3 and thought since I don't have sunflower seeds, but did have raisins, I could soak both and add to the same base dough.
The dough was mostly whole wheat, and unfortunately I cant find high extraction flour (anyone have any tips or good sources in NY?), so I tried the trick of sifting whole wheat through a fine sieve.

The mix ended up being:
200G Levain
500G Sifted KAF Whole Wheat
300G KAF Bread Flour
200G KAF Whole Wheat
70G Wheat Germ
25G Salt
850G Water (100*)

After the first 2 folds I added
110G Flaxseed
140G Raisins
Soaked over night in 220G Warm water (they absorbed all the water).

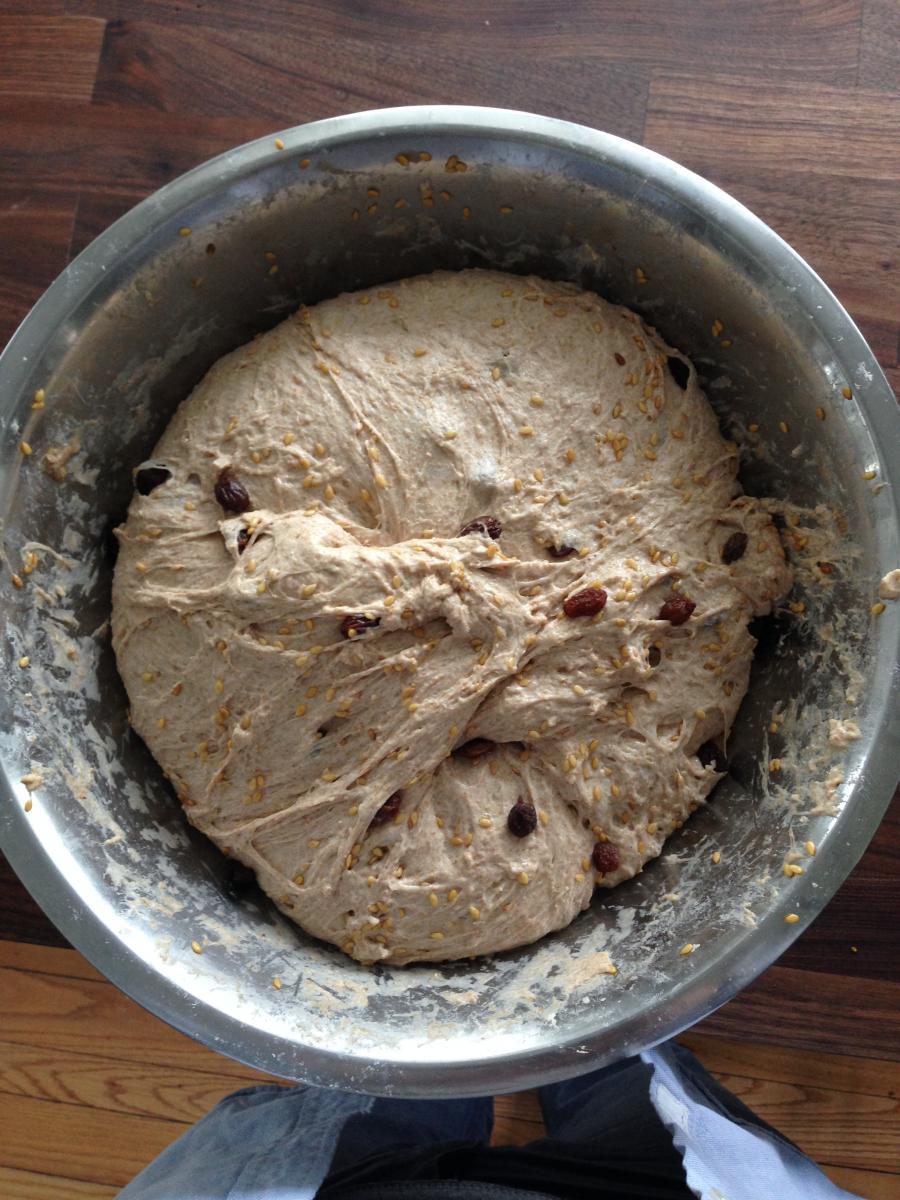
After mixing in the seeds


Bulk rise for 4.5 hours total, then proofed at warm room temperature for 4 hours before baking in dutch ovens.

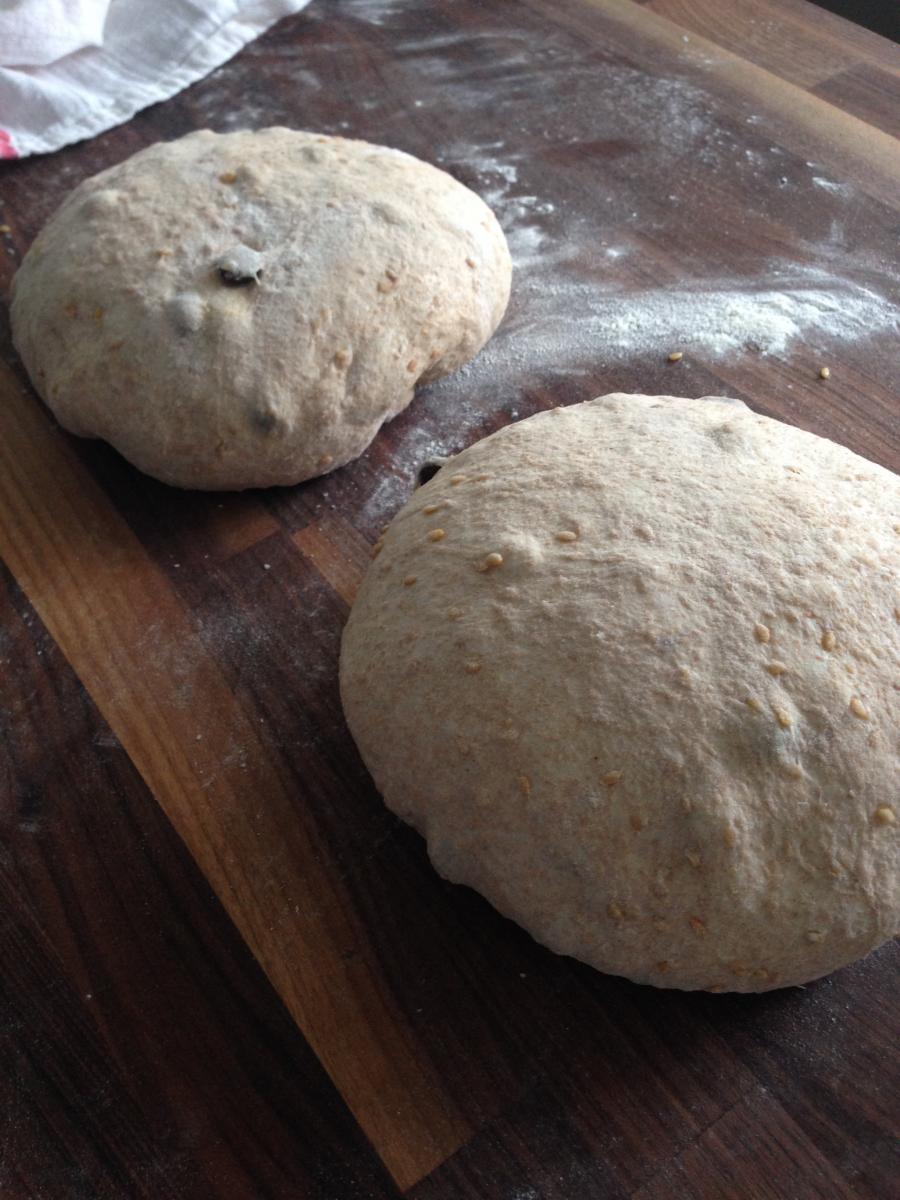
benching/shaping

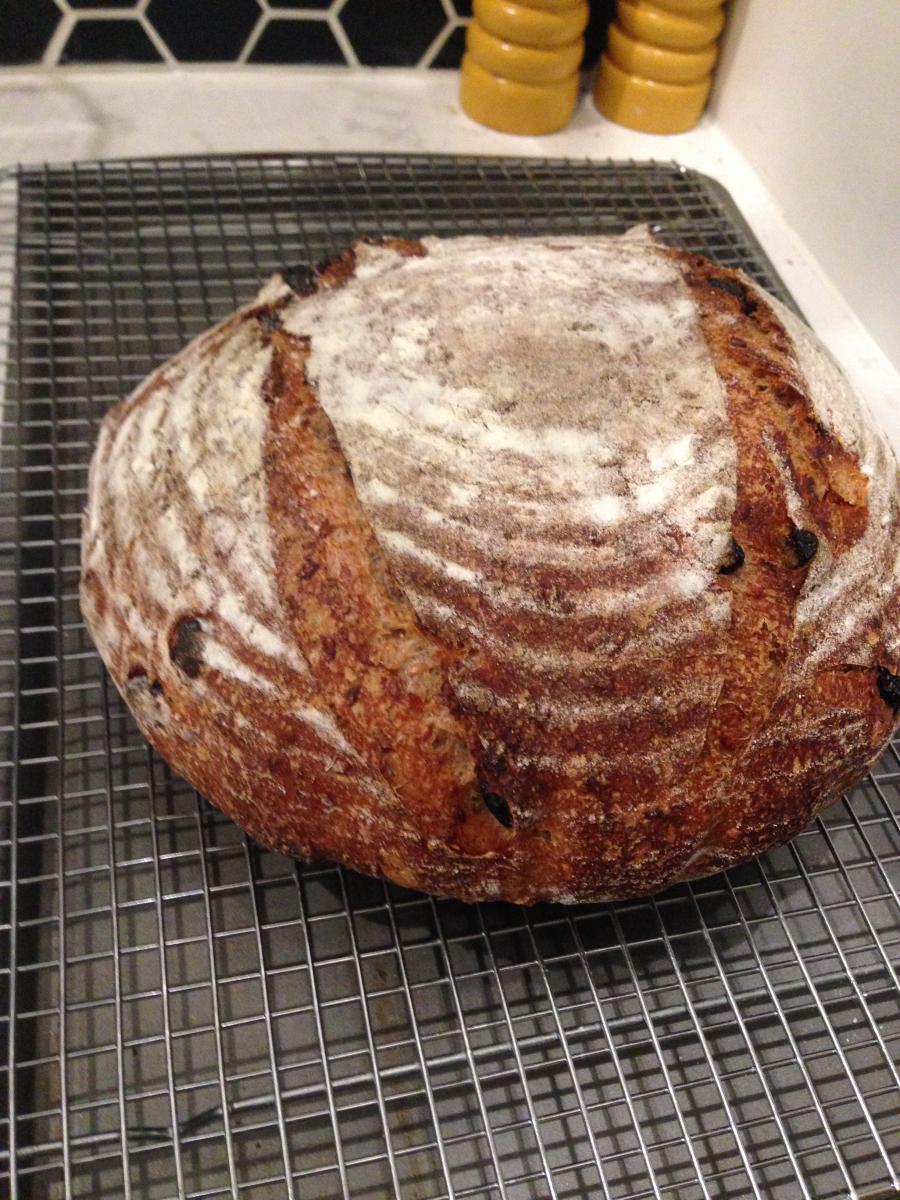
I let them cool over night before cracking into them.

End result: Flavor is great and makes for a really good breakfast bread. Lots of whole wheat flavor and the seeds add a nice textural element. Slight sour flavor, but happy that its actually very mild. The crumb is actually really interesting. The bread is very soft and the crust is great, but the crumb is much less open then I was hoping for - consistent small pockets, but no big openings. A couple ideas:

- I think I didn't score deeply enough, so I'm guessing that that caused not a lot of steam to escape in the dutch oven, which reduced the oven spring (but not sure how much this resulted in the tighter crumb).
- Even though the dough was 85% hydration, I think that was actual low for the amount of whole wheat in the dough. If I do something like this next time, going to try using white whole wheat instead or really seek out the high extraction OR just use a greater ratio of white flour.

Next up, I'm going to go back to working on the basic country loaf. I also finally found some Einkorn flour at a local health food store, so going to try experimenting with that.

Pages