The Fresh Loaf

A Community of Amateur Bakers and Artisan Bread Enthusiasts.

Most bookmarked

Susan's picture
Susan

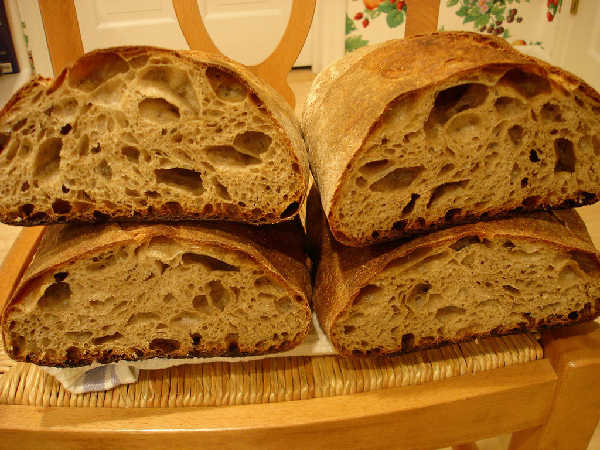
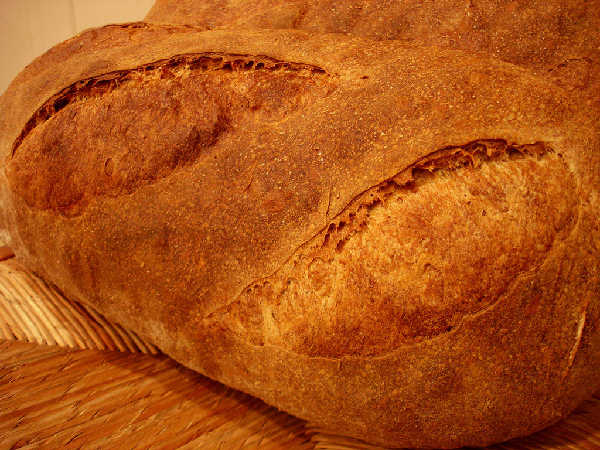
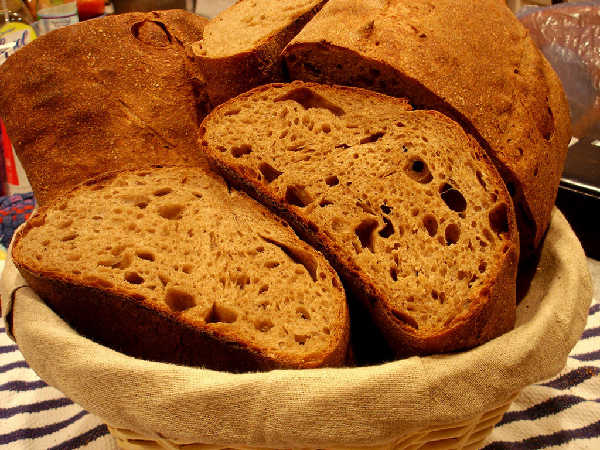
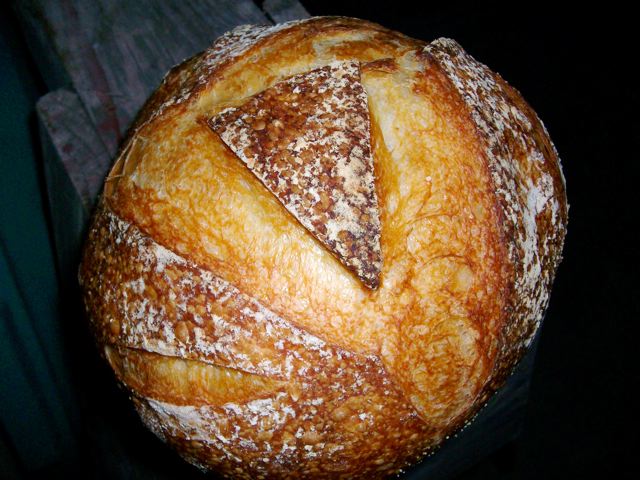
63% Hydration Sourdough

A pretty loaf; more fluffy crumb and less sour than my Ultimate loaf, well-risen, excellent thinner crispy crust.  I suspect retarding overnight would increase the sour somewhat. 

60 grams 100% starter
180g water
300g high-gluten flour
6g salt

Mix starter and water, add flour and salt.  Mix until rough.  Cover and rest 10 minutes.  Fold from bottom to top around tub.  Cover and ferment until doubled (~7 hours@lower 70'sF).  Stretch and fold.  Let relax.  Shape and put in linen-lined colander until floured finger leaves an indentation (~2.5 hours).  Place in 530F oven, covered, for 10 minutes.  Reduce heat to 430F.  Remove cover at 20 minutes.  Continue baking for 12-15 minutes.  Turn off oven and leave for 10 minutes.  Cool on rack. 


dmsnyder's picture
dmsnyder

Susan from San Diego's "Ultimate Sourdough"


Last week, I baked Susan from San Diego's “Original Sourdough.” My description can be found at:

http://tfl.thefreshloaf.com/node/11321/susan-san-diego039s-quotoriginal-sourdoughquot

Susan also shared her formula for her “Ultimate Sourdough,” which has replaced the “Original Sourdough” as her personal favorite, I gather. The “Original Sourdough” was so good, it was hard to imagine a bread that would outdo it, and I was tempted to just make it again. But I thought the other deserved a try. So, this week, I baked Susan's “Ultimate Sourdough” - again, with some variations I will describe.

Susan's formula for her “Ultimate Sourdough” is described in her blog, here:

http://www.thefreshloaf.com/node/6927/well-i-finally-did-it

Susan's formula makes “one small boule.” I doubled the recipe. I wanted to make two boules, one to bake after overnight cold retardation, as I did with the “Original Sourdough.” I also added a bit more WW flour than Susan called for and used a different mixing and fermentation approach.


Ingredients


Active 65% hydration starter

24 gms

Water

350 gms

KAF White Whole Wheat Flour

75 gms

KAF Bread Flour

425 gms

Sea Salt

10 gms


Procedures

  1. I dissolved the starter in the water in a large bowl.

  2. Both flours were added to the water and mixed thoroughly.

  3. The bowl was covered tightly and the dough was allowed to rest (autolyse) for 60 minutes.

  4. The salt was then added and folded into the dough using a flexible dough scraper.

  5. After a 20 minutes rest, the dough was stretched and folded in the bowl for 20 strokes. This was repeated twice more at 20 minute intervals.

  6. The dough was then transferred to a lightly oiled 2 liter glass measuring “cup” with a tightly fitting plastic cover and allowed to ferment, undisturbed, until doubled. (10 hours, overnight).

  7. The next morning, the dough was very soft, puffy and full of bubbles. I divided it into two equal pieces, gently rounded them, and allowed them to rest for 10 minutes.

  8. The pieces were then formed into boules and placed in well-floured coiled reed brotforms, each of which was then placed in a food-grade plastic bag.

  9. At this point, one loaf was allowed to proof on the bench, and the other was placed in the refrigerator to retard until the next day.

  10. The first loaf was allowed to expand by about 75% (3 hours).

  11. The oven was preheated to 500F, with a baking stone in place for1 hour.

  12. The loaf was transferred to a peel dusted with semolina, transferred to the baking stone and covered with a stainless steel bowl preheated with hot tap water. The oven was turned down to 460F.

  13. After 15 minutes, the bowl was removed. The loaf was baked for another 10 minutes, then left in the turned-off oven with the door ajar for another 5 minutes to dry the crust.

The retarded loaf was baked the next day. It was allowed to proof in a warm (75F) place for 4 hours. It was baked covered for 12 minutes, then another 15 minutes uncovered. It rested in the turned off oven for 10 minutes.

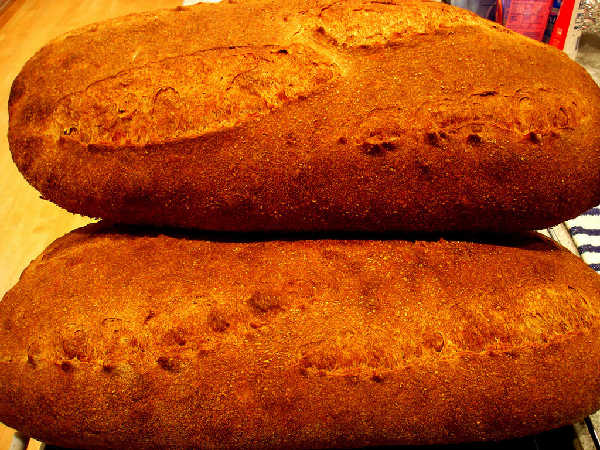
Susan's Ultimate Sourdough (Not retarded)

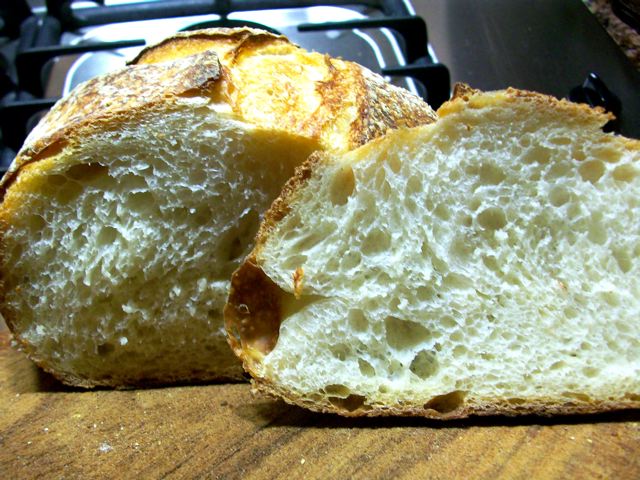
Susan's Ultimate Sourdough (Not retarded) - Crumb

Susan's Ultimate Sourdough (Retarded)

Susan's Ultimate Sourdough (Retarded) -Crumb

The boule that was baked without retardation was very similar in taste to the one I had made using Susan's “Original Soudough” formula. It had a nice flavor and was mildly sour. The sourness increased the next day, as expected. The crust was relatively thin but crunchy the first day and chewy the second day.

The boule that was retarded had a lot less oven spring. I think it was proofed more fully than the other had been. It was a bit more sour than the un-retarded loaf, as expected, but less sour than the “Original Sourdough” retarded loaf was. Tasted 5 hours after baking, the whole wheat flavor was coming through. I expect this to mellow out by tomorrow.

Bottom line: Both of Susan's sourdoughs are wonderful. I can't say I prefer one over the other after making each once. I expect I'll be making both regularly.

Thanks again, Susan!

David


dmsnyder's picture
dmsnyder

Susan from San Diego's "Original Sourdough" -


Susan from San Diego, of “Magic Bowl” fame, has posted two of her basic sourdough bread recipes. These have been on my lengthy “to bake list” for a long time. The photos of her breads are stunning, and many other TFL members have baked from her recipes and enthused about their results.

This weekend, I baked two boules of her “Original Sourdough” - to be distinguished from her “Ultimate Sourdough.” The latter can be found here:

http://www.thefreshloaf.com/node/6927/well-i-finally-did-it

I made some modifications in procedures which I will describe, but Susan's original “Original Sourdough” formula can be found here:

http://www.thefreshloaf.com/node/8884/susan039s-original-sourdough-3262007


David's Un-original Sourdough after Susan from San Diego's Original Sourdough

Note: This recipe involves 3 “builds” - a “starter,” a “sponge” and the “dough.”

Starter

Active starter 1Tablespoon

Water           15 gms

Bread flour    25 gms


Sponge

Water           240 gms

Bread flour    173 gms

Whole wheat flour 50 gms (I used KAF White Whole Wheat.)

Starter All of the above


Dough

Bread flour      284 gms

Water              60 gms

Olive oil           14 gms

Salt                7.5 gms


Procedures

(I did my mixing in a KitchenAid Accolade.)

Make the Starter by dissolving the active starter in the water in a small bowl, adding the flour and mixing until all the flour is well hydrated. Cover tightly and allow to ferment for about 8 hours. It should be puffy and slightly bubbly. Refrigerate for up to 3 days if you are not ready to use it immediately.

Make the Sponge by dissolving the Starter in the water in a medium-sized bowl. Mix the flours and add them to the dissolved starter. Mix thoroughly and then cover the bowl tightly. Allow the Sponge to ferment until it is bubbly and has expanded - about 8 hours.

Make the dough by dissolving the Sponge in the water and mix in the olive oil in the bowl or your mixer. Mix the flour and salt, add it to the wet ingredients and mix with a spoon or spatula or with the paddle at Speed 1 to a shaggy mass. Cover the bowl and let it rest for 20 minutes to an hour. (This will allow the flour to hydrate and the gluten to start developing.)

Switch to the dough hook and mix at Speed 2 until you have moderate gluten development. (This took me about 10 minutes.) The dough should clean the sides of the bowl but stick to the bottom with a diameter of about 6 inches.

Scrape the dough onto your lightly floured bench and do a couple of stretch and folds. Transfer the dough to a lightly oiled bowl and cover tightly. (I use a 8 cup glass measuring “cup” with a tight-fitting plastic cover.) Stretch and fold the dough 3 times at 30 minute intervals, then allow to rise in the bowl until double the original volume – about 4 hours in my coolish kitchen.

Divide the dough into 2 equal parts and pre-shape into rounds. Cover and allow to rest for 10-15 minutes. Then, shape the pieces into boules and place each in a floured banneton. Cover with plastic wrap, a towel or place the bannetons in food grade plastic bags.

At this point, you can either allow the loaves to proof until 1.5 times their original size or retard them for 8-12 hours in the refrigerator. (For this bake, I proofed and baked one boule immediately and retarded the other.) If you retard the loaves, allow an extra hour or two for proofing – about 4 hours from when you take them out of refrigeration until you bake them.

Forty-five minutes (or 45-60 minutes, if using a baking stone) before baking, pre-heat your oven to 480F with a sheet pan or baking stone in the oven. (Make sure your sheet pan is large enough to form a base for the cover you will be placing over the loaf. See below. I used a heavy-gauge black steel, non-stick sheet pan that is larger than the standard “half sheet” size.)

When the loaf is proofed, transfer it to a peel dusted with semolina or corn meal, load it onto your sheet pan or stone and immediately cover it with a stainless steel bowl that has been pre-heated with hot tap water. (Dump the water but do not dry the bowl just before loading the loaf in the oven.)

Bake for 15 minutes, then remove the bowl from the oven, close the door and lower the temperature to 450F. Bake for another 15-18 minutes until the loaf is nicely colored and its internal temperature is at least 205F. Turn off the oven and leave the door ajar with the loaf in it for another 5-10 minutes to dry the crust.

Cool the loaf on a rack completely before slicing.


The loaf that was baked without overnight cold retarding was much like a French pain au levain. Right after cooling, it was only very mildly sour and had a nice wheaty flavor. Thirty-six hours later, it had a more pronounced but still mild sourness. The flavors had melded and were improved, to my taste. As you can see, the crust was rather light-colored. There was almost no coloration at the point I removed the bowl. The boule had moderate oven spring but great bloom. This is typical of the results I get when I bake loaves covered in this manner. The crust was crisp, and the crumb was nice and open but chewy.

Susan from San Diego's SD boule

Susan from San Diego's Sourdough (Not cold retarded)

Susan from San Diego's Sourdough (Not cold retarded) Crumb

I baked the cold retarded loaf the next day. This time, I baked the loaf covered for the first 15 minutes, but on a baking stone rather than a sheet pan. Also, I preheated the oven to 500F then turned it down after loading the loaf. I baked at 450F for 30 minutes total, then left the loaf in the turned off oven with the door ajar for another 5 minutes.

As you can see, the second loaf had significantly greater oven spring. I think this was due to the hotter initial temperature and, maybe, the stone. Also, the crust is significantly darker, which I prefer in this type of bread.

Susan from San Diego's "Original Sourdough" baked after cold retardation.

Susan from San Diego's "Original Sourdough" baked after cold retardation - Crumb

This loaf had a crunchier crust and significantly more sour flavor than the loaf that had not been cold retarded. The crumb was chewy but maybe a bit less than the loaf baked the night before.  To my taste, this loaf was just about perfect - very close to my personal ideal sourdough bread. I bet it's going to be even better the next day.

Thanks Susan!

David


pmccool's picture
pmccool

Sweet Vanilla Challah

I wanted to make a bread for a recent gathering of friends.  My preference was for something sweet but not a sticky, gooey kind of sweet.  After paging through a number of books, I came across a recipe in Beth Hensperger's The Bread Bible for a sweet vanilla challah that sounded like it would fit the bill.  The recipe called for just 1/2 cup of sugar in a two-loaf batch of bread, so it wasn't excessively sweet.  The flavor, though, was driven by 1-1/2 tablespoons of vanilla extract in the dough and another teaspoon of vanilla extract in the glaze.  How could it be anything but good?

The dough ingredients include:

1 tablespoon yeast (instant or active dry)

1/2 cup sugar

1 tablespoon salt

6-1/2 to 7 cups of flour

1-3/4 cups hot water (120 F)

4 large eggs at room temperature, lightly beaten

1/2 cup vegetable oil

1-1/2 tablespoons vanilla extract

The glaze ingredients include:

1 large egg yolk

1 teaspoon vanilla extract

1/2 teaspoon sugar

Process

Combine the yeast, sugar, salt and 2 cups of the flour; mix by hand or by mixer.

Add the hot water, eggs, oil, and vanilla.  Beat hard until smooth.  Add the remaining flour, 1/2 cup at a time.  Continue beating until the dough is too stiff to stir.

Turn out on a lightly floured surface and knead until soft and springy and a layer of blisters shows under the skin, about 4 minutes.  (Note: I did not see any blisters forming, but kneaded until the dough was smooth and elastic.)  The dough needs to be slightly firm for free-form loaves.

Place the dough in a greased deep container.  Turn the dough once to coat the top and cover with plastic wrap.  Let rise at room temperature until doubled in bulk, 1-1/2 to 2 hours.  (Even with room temperature at a relatively cool 65F in my kitchen, it did not need this much time to double.  I could see this doubling in less than an hour with warmer, summer-time temperatures.)

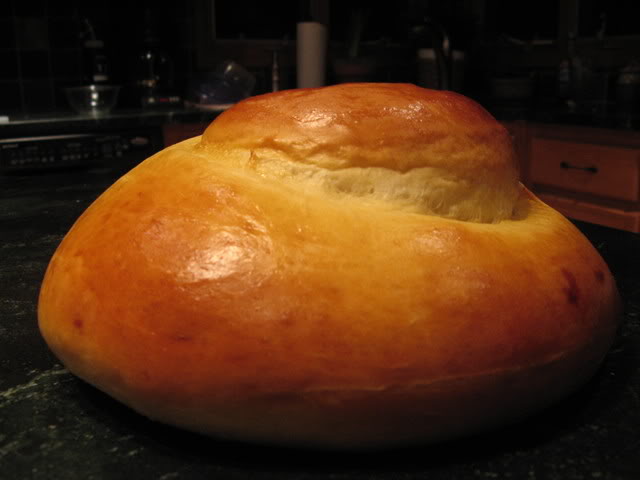
Grease or parchment-line 1 or 2 baking sheets.  (I went with 2 sheets, not wanting to risk the two loaves growing together while they baked.  It turned out to be a good choice.  Note that Ms. Hensperger also offers the option of using springform pans.)  Gently deflate the dough.  Turn the dough onto a lightly-floured surface.  Divide the dough in 2 equal portions.  Roll each portion out into a smooth, thick strip about 30 inches long, with one end 2-3 inches wider than the other.  (Picture a shorter, thicker billiard cue stick.)  Roll to to lengthen and taper the thinner end.  With the wide end on the work surface, lift the tapered end and wind the rest of the dough around the thick end 2 or 3 times, forming a compact coil.  Pinch the thin end to the body of the coil and tuck it under.  Place the coils, with the swirl pattern facing up, on the baking sheet(s).  Cover loosely with plastic wrap and allow to rise until nearly doubled in bulk, about 30-40 minutes.  Because of the eggs, this loaf does not need to double completely; it will rise enough in the oven.  (And how!  It sprang up to double or treble its original height.)

Twenty minutes before baking, preheat the oven to 350F.  To make the vanilla egg glaze, whisk together the egg yolk, vanilla and sugar in a small bowl.  Beat until well blended.  Gently brush the dough surfaces with a thick layer of the glaze.  Place the baking sheet(s) on a rack in the center of the oven and bake 40-45 minutes, or until a deep, golden brown and the loaves sound hollow when tapped with your finger.  Carefully lift the turbans off the baking sheet(s) with a spatula and transfer to cooling racks.  Cool completely before slicing.

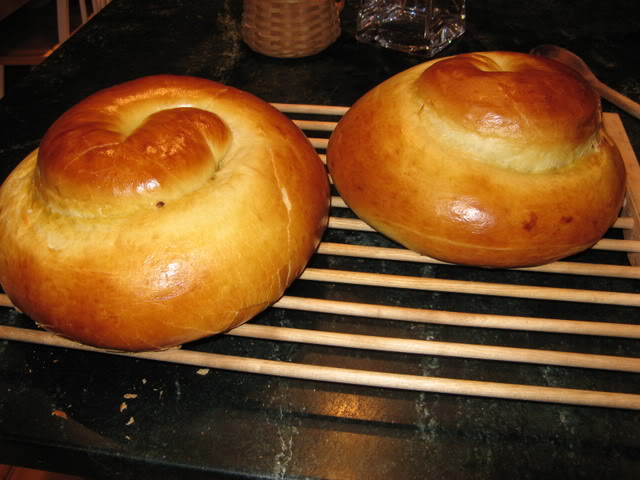
The finished bread looks like this:

Now, any bread smells good when it's baking.  This bread's fragrance while baking is over the top; our whole house was perfumed with vanilla. 

The flavor is also marvelous.  The crumb is fine-textured, smooth and moist.  It's good all by itself, with a dab of butter, with jam or marmalade, and toasted.  It will never last long enough to go stale, but it would make a wonderful base for either French toast or bread pudding.

The results were every bit as good as I had anticipated and a big hit with my friends.

Paul

Sourdough

Before the 19th century, sourdough was really the only leavening available (unless you’re talking about salt rising bread, which uses bacteria alone – a leavening with which this book does not deal). Sourdough is really not that hard to work with – as some Internet sage once wrote, “People who thought the earth was flat made bread like this for thousands of years.”

First, what is this stuff? Sourdough starter is a stable symbiotic culture of wild yeasts and bacteria. The yeasts break down starches into sugars, which the bacteria eat. The bacteria, on the other hand, create an acidic environment that kills off competitors to the yeasts. The yeasts were almost certainly already living on the grains when they were out in the field. As for the bacteria, that’s a trickier question, but the consensus seems to be that they come from us – studies have failed to isolate Lactobacillus Sanfranciscensis anywhere except in long-lived sourdough starters and on human teeth. The individual mix of yeasts and bacteria varies from starter to starter, and region to region. It’s part of their charm; every starter is unique, and produces bread that tastes somewhat different from those produced with other starters.

Sourdough starters work more slowly than commercial yeasts, which are much more concentrated that starters and have been carefully selected for their gas production. Typically, a sourdough loaf will rise for at least three to four hours in the bowl and will then need another two to three hours as a shaped loaf before it will be ready to bake.

Not all sourdough breads are sour. The French pain au levain and Flemish desem breads are typically not very sour at all, while San Francisco-style sourdoughs and many German ryes are very sour, indeed!

Different starters will produce different levels of sourness, but by far the most important factor in a sourdough bread’s flavor is temperature. If the dough is allowed to ferment at 80 to 85 degrees or is allowed to rise slowly overnight in the fridge or in a cool room (35 to 50 degrees F), the bread will have a markedly stronger flavor than a sourdough that rose at room temperature (65 – 70 degrees F).

Sourdough breads generally keep well, because their acid content slows down the staling process. In addition, the acid in sourdough both reduces the impact of bread on one’s blood sugar and also neutralizes phytic acid in whole wheat breads. Phytic acid prevents the body from absorbing many nutrients.

nbicomputers's picture
nbicomputers

Double knot roll

with all the flour i bought i  cant just let it sit there so i made two dozen of these . i gave one dozen to a friend and this is the other

knot1

knot2


bwraith's picture
bwraith

Home Milled and Sifted Sourdough

Home Milled and Sifted Sourdough Crumb

Home Milled and Sifted Sourdough Loaf

The home milling and sifting adventure continues. My most recent effort felt like a big step forward in several ways. Tempering, based on some suggestions by proth5 in response to a previous blog entry, was explored. Multiple successively finer passes of the mill were used this time, including re-milling of the sifted results from various steps in the process. Home ash content tests were performed, to understand better the distribution of bran and outer seed coat particles across the various outputs of my milling process. The outputs were then blended to a desired ash content and a sourdough loaf was baked. Photos of the process are posted, as well as a video of the tempering system I rigged up at the last minute (this is more for entertainment, but it may have helped). A process flow chart is posted showing the steps followed to mill and sift this flour, as well as a spreadsheet showing the ash content analysis for the various outputs of the milling process.

Notes on the Bread

The recipe for the sourdough loaf is similar to that for previous blog entries except no whole wheat was used in the levain and the rye was lightly sifted through a #25 sieve to remove the larger bran particles. A levain was prepared with 15% fermented flour as a percentage of total flour in the dough. The rye flour was 5% of the total flour, and the remainder of the flour was the home milled and sifted blend from this adventure. The rye flour went into the levain. The hydration was 79%, which proved to be too high. I realize the water absorption is in between whole wheat and white flour, so I probably would have been happier with a hydration around 74%. The resulting dough was closer to a ciabatta dough than I was intending, but the bread that resulted was wonderful. I was using my brick oven for some braising earlier in the day, which forced me to refire the oven in an attempt to bring up the temperature. I mismanaged the heat a little, which caused the somewhat scorched bottoms of the loaves you see in the photos. The resulting bread had a much lighter crumb than previous attempts, showing that I was much more effective at separating out the dark from light components of the berry.

Tempering

Based on a great suggestion from proth5, I explored tempering the wheat berries before starting to mill. Proth5 added 2% water to the berries. Some discussion in "Wheat Flour Milling" by Posner and Hibbs suggested 14%-17% moisture content. A Delmhorst G7 Grain Moisture Meter was used on Heartland Mill "Milling Wheat (M2 product)" and found to have a 10.6% moisture content. I decided to split the recommendations of proth5 and the suggestions in "Wheat Flour Milling" and added enough water to the grain to bring the moisture content to 14%. In a later discussion with a representative of Meadows Mills (my mill is a Meadows 8 inch stone mill), 14% was considered a touch too high, and 13% was suggested as a reasonable moisture content for my mill. So, Proth5 suggestions were very good, but by then I had already added the water to the berries.

Concern for very even moisture distribution motivated a couple of strategies for tempering the wheat. First, an atomizer was used to spray the water a few grams at a time onto berries, stirring in between sprayings to initially do a good job spreading the water evenly throughout the grain. I then borrowed the rotisserie from my outdoor grill, and rigged it in my workshop to be able to mount a plastic container of grain on it. In order to rotate the grain for a few hours without putting undue strain on the rotisserie, it was counterbalanced by attaching some small, heavy vices on the counterweight, which was too small on its own. A video of the contraption is available, as it is hard to describe accurately, but easy to understand once you see the video. The rotisserie was used for a few hours until the wheat seemed fairly dry to the touch. It was then allowed to sit for about 30 hours before milling.

Multiple Pass Milling and Sifting

After reading some of the chapter on milling in "Wheat Flour Milling" and browsing through various diagrams of milling processes, I took a wild shot at doing what I could as a complete novice to approximate the processes in a general way with my Meadows 8 Inch Stone Mill, and a series of sieves stacked in a Sieve Shaker. The equipment is described in an earlier blog entry.

The basic idea was to first mill very coarsely to separate the bran gently from the rest of the berry, followed by sifting out the flour from the darker material, followed by re-milling and re-sifting the darker material to obtain more flour. True to the discussions in "Wheat Flour Milling", the whiter flour was extracted from the 2nd, 3rd, 4th, and 5th passes, not from the first pass. I was surprised to discover this, but the ash content results showed much lower ash content for passes 2-5, particularly for the flour extracted from 3rd and 4th passes.

Passes 1-4 were successive, meaning that the "coarse red material" sifted from the #40 or #60 sieve was re-milled and resifted in series. In pass 5 the coarser results of passes 2 and 4 were mixed, re-milled, and re-sifted. In pass 6 the very coarse, mostly bran output caught in a #40 sieve was re-milled and re-sifted.

A process flow chart is posted that shows the details of the milling and sifting procedure followed.

Ash Content and Blending

Six flours, two coarse red "products", and 1 "bran" were the final results of all the milling and sifting above. Home ash content tests were performed on all of those products, as well as on sample saved from some of the intermediate steps. A spreadsheet is posted showing the results of the ash content measurements.

The results show that the flour through a #60 sieve that looks very much like Heartland Mills Golden Buffalo has a very high ash content. It was the flour from passes 2,3,4, and 5 that went through a #60 sieve that ended up having lower ash content. The flour from pass 1 had an ash content of 1.4%, not that far from whole wheat. In earlier one or two pass attempts, the ash content was probably closer to 1.4%, which explains the almost whole wheat quality of the breads from my first two tries. The ash content of passes 2 and 5 was around 1%, a little lower than Golden Buffalo flour from Heartland Mill. The flour from passes 3 and 4 was lowest, around .7% and much closer to a white flour, which might be something like .55%.

In the spreadsheet I created blends of the various outputs, so that I could get the ash content desired. As it turns out, by combining all the "flours" and leaving out all the coarse red and bran products, an ash content around 1.1%, maybe a little lower but very comparable to Heartland Mill Golden Buffalo would be obtained. So, all the flours were blended to obtain the flour used in the bread pictured above. This bread was clearly lighter than previous attempts. The dough handled much more like white flour, created a satin smooth surface texture, and seemed strong and extensible. The yield was much higher than in previous attempts, 85% of the final products and 81.5% of the weight of the berries before tempering, yet the ash content was lower than flour obtained in previous attempts that only yielded around 65% of the initial weight of the berries.

Nutritional Editorial Comment

Sifting, as done here, does remove some of the bran, outer layers, and germ from the flour. However, since the ash content is around 1.1% and whole wheat is around 1.7%, it can be argued that around 2/3 of the outer layers is making it into this flour. So, although it is not a pure whole grain flour, it still has much of the material from the outer layers. By dusting the loaf with the bran, further fiber is added. As a results, this bread should contain a significant proportion of the nutritional benefits of freshly milled whole grain flour. For me, it's worth doing this to be able to enjoy breads with lighter flavors and textures closer to white flours, without much loss of the nutritional values and freshness of milled-on-demand flour.

A More Practical Approach (Maybe)

Many of you may immediately view this little adventure as very impractical - with good justification, too. However, it at least is an example of creating flour of various grades at home, a drastically scaled down version of what happens in a real mill, doable at home, even if a little too large for the majority of home bakers.

I believe a simple version of this could use one #60 sieve and one #40 sieve and a Retsel Stone Mill or other similar mill that provides good control of the coarseness of the flour output. If set to much coarser settings, multiple passes could be performed on the coarse results caught in the #40 and #60 sieves. The sifting could be done by hand, even in quantities up to around 2Kg, although it is a little tedious and laborious. Maybe only 3-4 passes would be done, to minimize the labor, but the results of running tempered berries through at a coarser setting, and then re-milling more finely the coarse results caught in the sieve and re-sifting should allow the extraction of a reasonable flour similar to Golden Buffalo, just as shown above.

Where From Here

Even with a sieve shaker, the sifting is the most tedious and time consuming part of this process. The milling for all the steps combined for about 2Kg of berries was probably only about 10-15 minutes. The milling goes very quickly. However, the sifting drags on for 20 minutes at a time at first. Later steps are quite fast, and the last couple of passes can be done more quickly by hand, given the reduced amount of product.

I've ordered a Meadows Mill Eccentric Sifter (Goetter, hehe?) to add to the burgeoning list of equipment in the workshop. My hope is that this will make the sifting take only minutes at a time, more comparable and well matched to the milling speeds. Of course, this is all massive overkill for home baking. Yes, massive, massive overkill, no question. However, it is a hobby pursued with passion that may not always make sense in practical terms. It is the beauty of the home engineering, the resourcefulness required, and the delicious freshness of the bread that all contribute to the enjoyment.

Another remaining nagging missing piece of the puzzle is a flour analysis tool that would allow more thorough understanding of all the outputs, such as protein content, moisture content, water absorption, and ash content. Maybe I've figured out the ash content using the conductivity method described previously, but it seems to take a good 12-24 hours to get useful results from it. I'd like to be able to get quick turn-around for these measurements, in order to optimize the milling and sifting strategies.

Update (1/28/07)
Loaves Made With Flour From Meadows Sifter

Loaves Made With Flour From Meadows Sifter - Crust

I received the Meadows Eccentric Sifter (see video) and conducted a milling, sifting, and baking session (see photos), as well as some home ash content tests to check out the results with the new sifter. The Meadows sifter is far faster than my original approach with a sieve shaker and produces 4 separations simultaneously with great ease.

The sieve shaker had some advantages, in retrospect. You could inspect the results easily and fine-tune the sifting strategy very easily and quickly. Also, very little product is lost using the mining sieves, which is valuable for the smaller amounts I tend to do each time. The Meadows Sifter kept a couple of pounds in it, probably in the nooks and crannies of the wooden sieves and some built up on the fabric sleeves used to transport the flour. The Meadows Sifter made it more difficult to inspect or change the sifting process, as the sieves are tightly bolted down with wing nuts on long threaded rods. You can open it up, but it's much more time consuming than it is to detach and separate the mining sieves.

In this milling session, I tempered the wheat to a 13% moisture content. The tempering process was shortened to only 12 hours as a result of impatience to test out the sifter. The first pass through the Meadows 8 Inch Mill was troublesome. The breaker tripped even though I had the mill set to a fairly wide opening of about 1/8 turn on the adjustment screw. After several tries, I was able to complete the first pass with the screw open between 1/4 and 1/8 turn. A while later, I tried running untempered wheat at 10.6% moisture content through the mill, and it also had a tendency to jam the mill. Since I really don't have the slightest idea what the right opening is for the first pass through the mill, I'm not sure what to conclude. On the one hand, the milling went very smoothly with wheat tempered to 14% moisture content for more than 24 hours. On the other hand, the Meadows representative seemed very clear that 13% moisture content or less was preferred for the Meadows Mill. However, when I used less moisture and less tempering, the milling seemed more difficult on the first pass. All subsequent passes were uneventful, even on the finest settings.

After completing the milling session, I ran some home ash content tests. Clearly the yield of lower ash content white flours was much lower. I believe this again had to do with using lower moisture content wheat tempered for a shorter time. The flours seemed more like my earlier attempts with the Retsel mill, where one or two passes with untempered wheat berries resulted in a flour much closer to a whole wheat flour.

The sense that the flours were darker was corroborated by the home ash content tests, which showed the flour coming the the #60 sieve had an ash content almost as high as Heartland Mills WW flour (I'm making my flour with Heartland Mills "Milling Wheat (M2)". Output from subsequent passes had an ash content close to 1%, whereas in my earlier attempt with 14% moisture content 24 hour tempered berries, the flour from passes 3-4 that was the whitest had an ash content of about .75%. I think this explains why my earlier one or two pass attempts made loaves that seemed so much more like whole wheat loaves than my more recent multi-pass attempts with well tempered 14% moisture content wheat.

In order to get a flour something like Heartland Mills Golden Buffalo, I had to accept a lower yield this time. The home ash content tests take at least 24 hours of soaking, so I used color and inspection of the flour, plus the knowledge that the middle passes would be lower in ash content to blend the outputs to get a flour of the same approximate "color" as the Golden Buffalo. My "high touch" method came out to have an ash content almost equal to that of Golden Buffalo, but my yield was only about 65% this time, whereas I had a lower ash content with close to 80% yield in my earlier attempt with berries at 14% moisture content and tempered for more than 24 hours.

The loaves were made without any diastatic barley powder this time, and the crumb had no hint of gumminess. The color of the crust stayed slightly lighter than before. The gluten seemed a little better this time, which makes me wonder if the protein content or quality from this session was slightly better. It's hard to say, because I reduced the hydration based on the previous results, and this dough may have behaved well just because of more optimal hydration. However, maybe the gluten quality is somehow improved due to the different ash content, tempering method, and sifting method.

The loaves that resulted were very good. As noted above, the crumb was a touch darker than the last one, which correlates with the higher ash content measurement. However, the crumb was still much closer to a white bread, similar to the last one, as opposed to earlier attempts that were clearly closer to a whole wheat bread.

JMonkey's picture
JMonkey

Bad Boy With Poolish

I realize that I seriously risk tanking my whole grain cred, here, but lately ... I've been taking a shine to poolish. It'd been a long time since I'd worked with yeasted pre-ferments, and aside from an occasional baguette here and there, I'd not make a serious white bread in quite some time.

But after the New Year, in the course of just a couple of days, I made three poolish baguettes and one poolish ciabatta.

I used Jeffrey Hamelman's masterpiece Bread as a guide. I was so pleased with the baguettes, that for the ciabatta, I modified my sourdough spreadsheet to accommodate commercial yeast breads with pre-ferments, and inserted his formulas.. Aside from scaling each recipe down (I made a half-batch of poolish baguettes, which made three demi-baguetts, and a single 1.5 pound ciabatta), the only other change I made was to add a tiny speck of yeast to each poolish. With the baguettes, since they required about 1/10 gram of yeast, I added one gram of yeast to 19 grams of water and then added two grams of the solution to the poolish.

This was a pain.

So, next time, I just eyeballed about 1/4 of 1/8 tsp of yeast. Both ways turned out fine.

The biggest takeaway for me from making both of these breads is that, so long as the bread is handled firmly but gently and the loaf is well-shaped, the crumb can still be very open without a super gloppy dough. The baguettes, for instance, are just 66 percent hydration and the ciabatta is 73 percent. Of course, the poolish probably helps, since it denatures the protein and makes it more extensible. All the same, the lesson for me stands - good handling goes a long way towards getting an open crumb.

Sourdough is still my preference, but, wow, I'd forgotten how tasty a good, simple loaf of French bread is: nutty, buttery with a strong wheaty flavor that lasts, and lasts, and lasts.

Here's the photographic results. Recipes are below.

Poolish Baguettes

I'm finally starting to the hang of shaping these buggers.


I cut these in half the next day to make garlic bread and cheese bread to go with pasta.


Ciabatta with Poolish

This is, without doubt, the prettiest ciabatta I've ever made. I didn't score it - it just opened up on its own.


And an interior shot. Not as open as some ciabattas I've seen, but open enough for me. Next time, I'll bump the hydration up to 75 or maybe 78 percent.


Recipes

Poolish Baguettes (Makes 3 demi-baguettes of about 8 oz. each):
Overall formula:

  • White flour: 100%
  • Water: 66%
  • Salt: 2%
  • Instant yeast: 0.36%
  • 33% of the flour is pre-fermented as a poolish at 100% hydration with .07% yeast


Poolish:
  • White flour: 5.3 oz
  • Water: 5.3 oz
  • Instant yeast: Just a speck (about 1/32 of a tsp)

Final dough:
  • All of the poolish
  • White flour: 10.7 oz
  • Water: 5.3 oz
  • Salt: 1.5 tsp
  • Instant yeast: 1/2 + 1/8 tsp

The night before, dissolve the yeast into the water for the poolish, and then mix in the flour. Cover and let it ferment at room temperature for 12-16 hours. Once the poolish has bubbles breaking on top and has started to wrinkle, it's ready. It'll also smell ... really nice - sweet and nutty. Mmmm.

For the final dough, measure out the water and pour it into the poolish to loosen it up. Then pour the entire mixture into a bowl. Mix together the salt, yeast and flour, and then add it to the bowl as well. Mix it all up with a spoon and, once everything is hydrated, knead it for about 5 to 10 minutes, until it passes the windowpane test. Cover and let it ferment for two hours, giving it a stretch-and-fold at the one hour mark.

Divide the dough into three pieces, and preshape into rounds. Cover and let them rest about 20 minutes. Then shape into baguettes and cover, letting them rise for about 1 hour to 90 minutes. Score and bake on a preheated stone in a 460 degree oven with steam for about 25 minutes.

Ciabatta with Poolish (Makes one 1.5 lb loaf):
Overall formula:
  • White flour: 100%
  • Water: 73%
  • Salt: 2%
  • Instant yeast: 0.36%
  • 30% of the flour is pre-fermented as a poolish at 100% hydration with .07% yeast


This is all in grams, because I used my spreadsheet - Hamelman uses ounces.

Poolish:
  • White flour: 136 grams
  • Water: 136 grams
  • Instant yeast: Just a speck (about 1/32 of a tsp or 1/10 of a gram)

Final dough:
  • All of the poolish
  • White flour: 318 grams
  • Water: 195 grams
  • Salt: 9 grams
  • Instant yeast: A heaping 1/8 tsp or .5 grams

The night before, dissolve the yeast into the water for the poolish, and then mix in the flour. Cover and let it ferment at room temperature for 12-16 hours. Once the poolish has bubbles breaking on top and has started to wrinkle, it's ready. It'll also smell ... really nice - sweet and nutty.

For the final dough, measure out the water and pour it into the poolish to loosen it up. Then pour the entire mixture into a bowl. Mix together the salt, yeast and flour, and then add it to the bowl as well. Mix it all up with a spoon and let it sit for one hour. At one hour, give it a stretch and fold, followed by two more every 30 minutes. Then let it ferment for one more hour, for a total of 3 hours bulk fermentation.

Remove the dough onto a well floured surface, and pat it out into a rectangle, carefully degassing any truly gigantic bubbles that you noticee. Let it rest for about 90 minutes.

Tranfer to the oven, dimpling it with your fingers if you desire, onto a hot stone at 460 degrees with steam for about 35 minutes or so. Let it rest one hour before slicing.
meedo's picture
meedo

Ataif bil ashta

This recipe from the Middle East, we eat it especially in Ramadan or any time of the year, cause it's so tasty.

For the dough:

2 cups all purpose flour

1/4 cup whole wheat flour

1 1/2 teaspoon yeast

1 1/2 teaspoon sugar

1 1/2 cup fat free milk

1 1/2 cup water

For the filling (ashta):

2 cups fat free milk

7 1/2 tablespoons corn starch

1/4 cup + 1 tablespoon sugar

2 to 3 tablespoons thick cream (qaimar which is an Iraqi cream) but you can use the regular thick cream  

2 tablespoons rose water

1 teaspoon vanilla

Chopped pistachio


To make the dough:

1-Mix all the  ingredient and let it rest about 40 minutes.

2- cook about 2 tablespoon of the dough mixture in a hot pan until it bubble (just cook one side).

After finishing ,let them cool then fold half round then fill them with the filling ( using a pastry bag ) then dip them in the chopped pistachios.

To make the filling:

Mix corn starch with milk and sugar then bring it to boil in a medium pan, stir until thickens, then add the rest of the ingredient.

Spoon mixture into a bowel, refrigerate until cold.

Pastry bag:

qaimar (Iraqi cream):

Serve with honey or syrup


http://arabicbites.blogspot.com/

meedo

dolfs's picture
dolfs

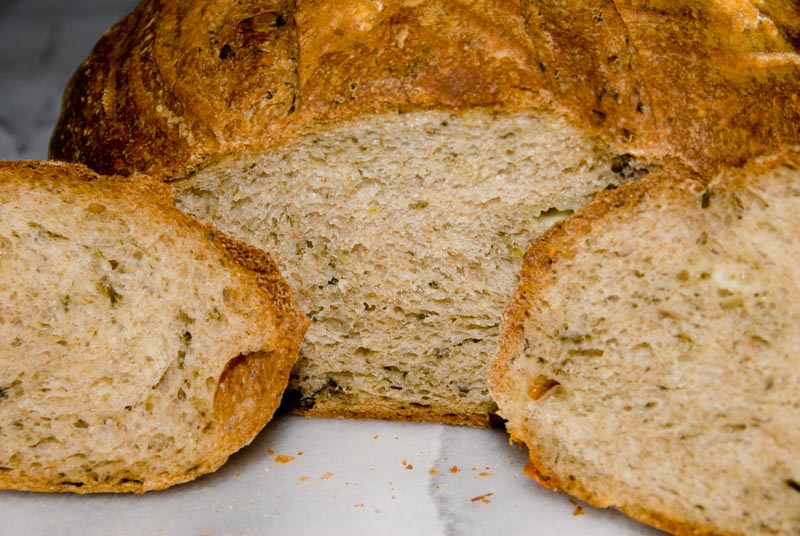
Spinach Cheese Boule with Whole Wheat

Many a Sunday my wife and son buy a boule at the local farmer's market which they call Spinach Cheese Bread, even though it has lots of other veggie stuff in it too. They like it, so for last week's baking session I decided to try and make my own.
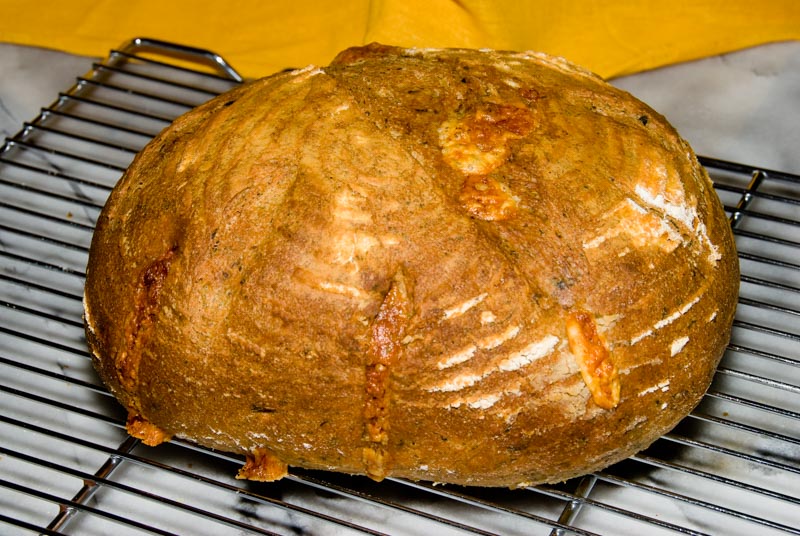
First problem was no recipe available on the Internet that seemed to make what I wanted. So I had to make my own. I decided to use frozen chopped spinach, mild gouda cheese (what else to expect from a Dutchman), and I also wanted to have a portion of whole wheat flour in it. I've made whole wheat bread before and using a poolish did wonders for my schedule as well as for the dough and overall taste. So, I decided this one was to use a poolish too!

I've also been working on a spreadsheet the allows me to do all baker percentage calculations (helps with recipe scaling and design). While I was at it, I added an ingredient database to it with cost information, hydration information and specific gravity for ingredients so I can correctly convert weight measurements to volumes for those we like to bake that way. You'll find a PDF of this recipe here.

A few words about the spreadsheet

The spreadsheet's yellow cells is where you input your desired values (this includes ingredients). A "Y" in the "Pre" column indicates an ingredient that is part of a preferment. A "P" indicates an ingredient that is a separately created preferment. Although there are different options for baker's percentages when using preferments, I have chosen to express everything as percentages of dough in the overall recipe. Note that tap water temperature, mixer friction and baking loss are specific to my situation (and an estimate I am still refining for each type of bread for the loss, mostly evaporation, and friction).

The component temperatures are to be entered on the bottom, if you want to be precise with final dough temperature. If necessary it will calculate how much ice to add to the water if it needs cooling (rarely the case in my home baking). The spreadsheet automatically adjusts for the number of components that have a temperature specified so if you do not enter a value for the preferment (presumably because you are not using one), the factor will be 3 instead of 4.

Some measurements in the "US Weight" column are given in tablespoons etc. The spreadsheet does this if the actual value as a weight becomes so small that, with most scales, you can not accurately measure. Since I have (pretty accurate) specific gravity values for the ingredients, I can quite reliably (subject to all the fallacies of measuring volumes: packed, spooned, shifted) give the volume. I use a scale accurate to 1 gram myself, but for these small amounts, a small measuring spoon workds great (I have a set for dashes, smidgens, and pinches as well).

Hydration is calculated by computing the water content of all ingredients that are composed 50% or more of water and adding them up. That catches water, milk, eggs etc., but does not count water content in dough. Cost is based on a home baker buying pretty regular ingredients in a super market. The exception is that I use KA prices for my flour as I will not use the cheap stuff.

The recipe

Making the poolish is straightforward. I make it the night before and leave it on the counter (about 68F), and it'll be close enough to ready the next morning around 11AM. The amount of final dough in this recipe is about right for an 8" banneton (scaled up from what I used to make the one in the picture above, which got misshaped whe inverting onto the peel). Nevertheless, it is borderline not enough to knead properly in my KitchenAid so I finish with manual labor.

In the last minute or two of kneading I add the cheese (room temperature, cubed in 1/4" pieces), and spinach. I made the mistake of not squeezing enough water out of the thawed spinach, so my dough got too wet and I had to add flour (not represented in the recipe because you should squeeze it out).

Next bulk ferment, about 90 minutes in my case. I did a fold about half way through. Next degas and preshape. Twenty minutes relaxing and final shaping.

I preheated oven at 500F, with water for pre-steam added in a baking pan in the last few minutes. Invert the bread out of the banneton onto parchment paper on the peel. Scored in a \ | / pattern, a sprayed with water. Into the over on baking stone, more water in the pan for steaming. Spray oven walls with water twice, 30 seconds apart after putting loaf in the oven. Then reduce to 475F.

Baked for a total of 35 minutes, oven vented for last 10. Here was the result.


Pages