The Fresh Loaf

A Community of Amateur Bakers and Artisan Bread Enthusiasts.

Most bookmarked

hanseata's picture
hanseata

Bauernbrötchen - Rustic Rolls with Old Dough

Gerd Kellner, aka Ketex, is not only an accomplished baker, but, also, writes one of Germany's best bread baking blogs. A book with his recipes: "Rustikale Brote aus deutschen Landen" is available as e-book at Amazon.

When I saw his post on Bauernbrötchen, I wasn't only attracted by the attractive look of these rustic rolls, but, also, intrigued by his use of old dough as leaven.

"Old dough" in bakers' lingo means a piece of dough, cut off before shaping the bread, and kept in the refrigerator for later use. After I learned how to make a wild yeast starter, and bake my first bread from a French cookbook, I had always saved a portion of the dough for my next loaf.

Advancing from a series of weapon grade, dense and chewy "bricks" to more edible breads, this method had worked very well for me, until I branched out and started baking other types of bread than just my everyday German Feinbrot.

German Feinbrot - originally made with old dough

The old dough was replaced by a whole wheat mother starter, and all but forgotten as a viable rising agent.

With Ketex' beautiful Bauernbrötchen in mind, I reserved a piece of dough from a yeast bread I made, and put it for later use in my basement refrigerator - and then promptly forgot all about it!

About 3 months later, when I was looking for something in the depth of the fridge, I came upon the little container, and remembered what it was.

 Though I was rather suspicious about how this might affect the taste, my distrust was unfounded, the rolls, though not looking as nice as Gerd's, rose well and tasted surprisingly good. And I had a new, interesting formula to work with.

I opened it gingerly, expecting nothing good after all the time, and the old dough, indeed, looked, shall we say, "antique", and didn't smell very nice, either. At least there was no mold on it!
Rose Hip Levain - made from accidentally fermenting jam

Always curious, and open for experiments before I throw something in the trash, I just wanted to see whether there was any life left in the mummified relic, and proceeded with the recipe.

For my second bake I did just the opposite: my old dough had slumbered only for 3 days in the fridge. With my first batch of Bauernbrötchen, I had followed Ketex recipe to the t, using a poolish as preferment and adding the piece of preserved dough later to the final mixture.

"Old dough" - refreshed and ready to go!

I didn't quite see the rationale for an additional poolish, especially since the dough was to be retarded in the refrigerator overnight. Why not, instead, feeding the old dough up front, and let it act the part of the poolish?

And, since the percentage of rye flour in the dough was not so high that a change would influence the crumb, I used whole rye instead of medium rye (easy to come by in Germany, but, alas, not readily available in the US.)

Rather than kneading the dough for 15 minutes, and folding it only once, I followed Peter Reinhart's procedure in "Artisan Bread Every Day" (my default S&F) with a brief mix, an autolyse, and 4 stretches and folds over a period of 40 minutes.

Measuring spoon for very small amounts

Ketex adds a tad of yeast to his dough. For these very small amounts (that, nevertheless, make the rising time more predictable) you need a special scale, able to accurately weigh a few grams or ounces.  Mine looks like a big spoon, and is easy to use (about $15 at Amazon)

The second batch, without the poolish, performed just the same, but tasted a bit heartier with the whole rye. I had to adjust the baking temperature and time, but every oven is different, and you have to adapt to this, anyway.

We found these crusty rustic rolls great for open faced sandwiches, and they, toast well, tool. You can easily freeze them, therefore it's worth it to make a double batch.

But don't forget to save a piece of the dough: for your next Bauernbrötchen!
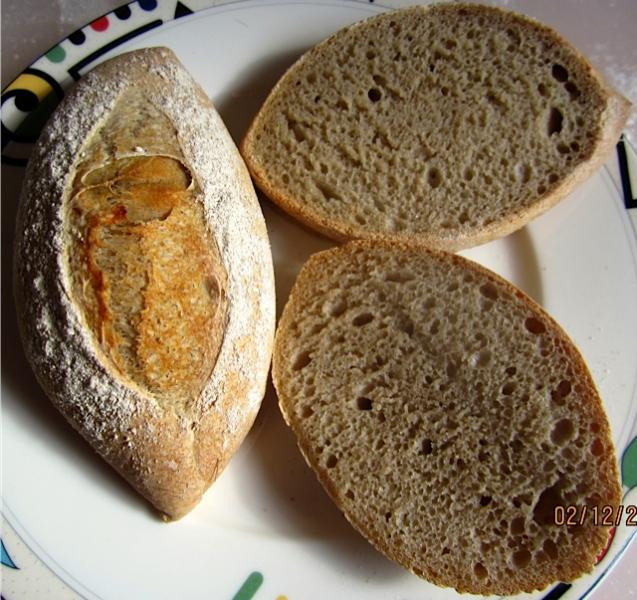
My first batch of Bauernbrötchen - made with truly "antique" dough!


BAUERNBRÖTCHEN WITH OLD DOUGH  (adapted from Gerhard Kellner/Ketex) 

OLD DOUGH
100 g/3.5 oz old dough
    5 g/1 tbsp whole rye flour
  42 g/3 tbsp water

FINAL DOUGH
147 g/5.2 oz refreshed old dough (all)
400 g/14.1 oz bread flour
  45 g/1.6 oz whole rye flour
258 g/9.1 oz water
    8 g/0.3 oz olive oil
  10 g/0.4 oz salt
 1.8 g/0.06 oz instant yeast (or 5 g fresh yeast)
 3.5 g/1 1/2 tsp barley malt
 rye flour for sprinkling
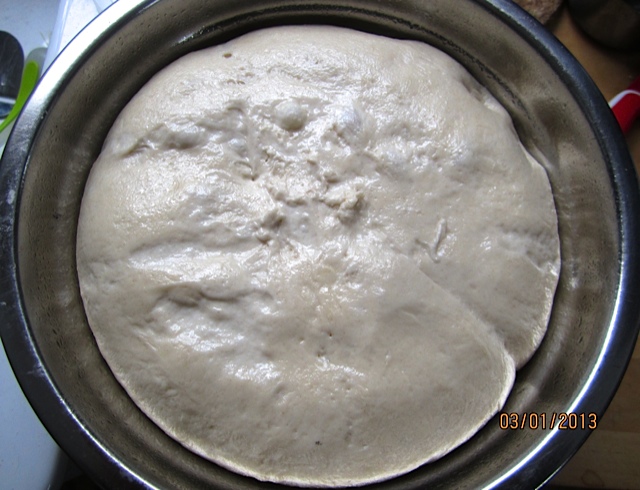


Rejuvenated old dough

DAY 1:
In the morning, feed old dough with rye flour and water. Cover, and leave at room temperature until lively and bubbly (like poolish.)

In the evening, mix final dough ingredients at low speed (or with wooden spoon) until all flour is hydrated, 1 - 2 minutes. Let dough rest 5 minutes. Then knead at medium-low speed (or by hand) for 2 minutes, adjusting with a little more water or flour if necessary (dough should be a bit sticky.) Continue kneading for another 4 minutes. Dough should be still more sticky than tacky.

Ready for S & F on oiled work surface

Transfer dough to lightly oiled or wet work surface. With oiled or wet hands, pull and stretch it into a rough square. Fold dough from top and bottom in thirds, like a business letter. Then do the same from both sides. Gather dough together in a ball, and place it, seamside down, in a lightly oiled bowl. Cover, and let it rest for 10 minutes.

Repeat this stretching and folding 3 more times, at 10 minute intervals. After the last fold, reserve 100 g/3.5 oz of the dough (for the next "old dough".) Refrigerate reserved piece (container with lid.) (Ketex recommends using it within 10 days, but it keeps longer.

Place remaining dough also in an oiled container with lid, and refrigerate it overnight.

I find these kinds of containers very practical for overnight retardation

DAY 2:
(Since these are small pieces, you can shape them cold.)

Divide dough into 8 pieces (à 100 g/3.5 oz) and shape them into balls. Let them relax for 20 minutes, then roll them into strands with pointed ends. 

The dough pieces are first pre-shaped into rolls

Place rolls in a couche, seam side up. Sprinkle with rye flour. Cover, and let proof for 1 - 2 hours. (Preheat oven 45 minutes before baking.)

Preheat oven to 500ºF, including steam pan. 

Bauernbrötchen are proofing on a couche

Place rolls, seam side down, on perforated or parchment lined baking sheet, sprinkle them with whole rye flour, and score lengthwise.

Bake Bauernbrötchen for 20 - 26 minutes at 450ºF, steaming with a cup of boiling water. (Rotate the baking sheet 180 degrees after half the baking time, and remove the steam pan). They should be golden brown, and register at least 200ºF.

Submitted to YeastSpotting

Submitted to Panissimo:  Bread & Companatico

                                          Indovina chi viene a cena                                             


hkooreman's picture
hkooreman

How to store Italian starter (lievito naturale) in water

I have been working tirelessly to develop an Italian firm starter.  So far, it seems to be going well.  My question is how does one store an Italian starter in water and what are the benefits of doing so?  I saw a video done by Iginio Massari that showed him cutting up his starter and washing it in water into which he had placed a heaping spoon of sugar.  I am not sure what the benefit of this process is either.  Any thoughts or experience with this process would be appreciated.

4akitchenblog's picture
4akitchenblog

Sourdough Wine Bread

I LOVE wine.

I drink wine every single day.

And, I am addicted to baking bread....

Why not!?

My favorite combination : Wine + Bread = Yum :-)

I added chopped cranberries, too.

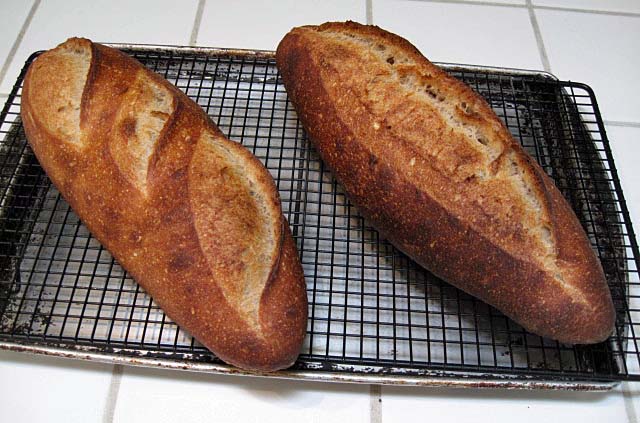
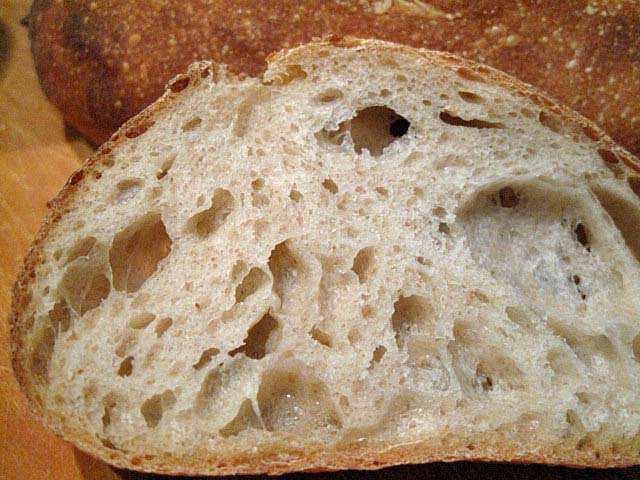
Sourdough Wine Baguette & Batard 

Thanks to wine and cranberry, it has a nice sweet and tangy flavor and definitely goes well with blue cheese!

I can't stop drinking & eating wine!

———————————————————————

Sourdough - Wine Baguette + Batard

Makes 1 baguettes and 2 small batards

—————————————-

Ingredients

102 g 100% hydration starter

287.8 g Gold Medal All-purpose Flour

80 g Water

123 g Red Wine

6.7 g Salt

80 g Dried Cranberries

—————————————-

Formula

338.8 g Gold Medal All-purpose Flour (100%)

 131 g Water (38.6%)

123 g Red Wine (36.3%)

6.7 g Salt (1.98%)

80 g Dried Cranberries  (23.6%)

—————————————-

Directions

  1. In a bowl, mix flour and Wine + Water roughly, cover it with plastic and Autolyse for 12 hours in the fridge.
  2. Add Sourdough starter and mix by folding dough in the bowl.
  3. Add chopped Cranberries and mix by folding dough in the bowl.
  4. Add Salt and Slap & Fold for 3 - 4 minutes or until the dough becomes a ball.
  5. Bulk fermentation at room temperature, 1 sets Stretch & Fold (1 set = right over left, left over right, bottom over the top, top over bottom) every half hour until enough strength has been developed.
  6. Let it rise until the dough starts showing the 'activity' and becomes about a third in size. It takes about 6 hours total in winter time (it depends on the season) in my kitchen.
  7. Put it in the fridge for 16 – 18 hours.
  8. Pull it out of the fridge and leave it out for 1 hour.
  9. Divide into 2 equal parts and preshape the dough.
  10. Let it rest for 15 - 30 minutes.
  11. Shape into baguettes / batards and place onto a floured couche, seam-side up.
  12. Preheat the oven to 500°F
  13. Final fermentation for 45 minutes - 1 hour.
  14. Score the top of the baguettes / batards using a lame or a sharp, serrated knife.
  15. Place the bread in the preheated oven, pour the water onto the brick blocks and shut the oven door immediately. Turn down the oven to 480°F, bake the bread around 20 minutes.
  16. Let them cool onto a rack.
  17. Ready to eat!

The time and temperature will be changed depends on the season.


dmsnyder's picture
dmsnyder

Three-Stage 80% Sourdough Rye Bread from Hamelman's "Bread"


One of my thoughts in purchasing a Brød & Taylor Folding Proofer was that I would be able to make Three-Stage Detmolder rye breads with more precise temperature control than I could otherwise achieve. After using this device for fermenting other starters, fermenting doughs and proofing loaves over the past couple of months, I my first rye by the three-stage Detmolder method employing the Folding Proofer this weekend.

My one previous bake of a Detmolder 3-stage rye was almost 3 years ago. (See: http://www.thefreshloaf.com/node/12742/hamelman039s-70-3stage-rye-sourdough) I do recall that bread as having a delicious, sweet, earthy, complex flavor. The bread I baked this weekend was the very similar 80% Three-Stage Rye from Bread. This bread has an hydration of 78%. 37.8% of the flour is pre-fermented.

As described by Jeffrey Hamelman in Bread (pg. 200), this method, developed in Germany, “develops the latent potential of a mature rye culture through a series of builds,” each of which optimizes the development of yeast growth, lactic acid and acetic acid production, respectively. The builds differ in hydration, fermentation temperature and length of fermentation.

Hamelman calls the three stages or builds “Freshening,” “Basic Sour” and “Full Sour.” The first build encourages yeast multiplication in a moist paste fermented at a moderate temperature. The second build is much firmer and is fermented for a long time at a relatively cool temperature to generate acetic acid. The third build is, again, moister, and it is fermented at a warm temperature for a short time. This build is to increase the lactic acid content of the sour. After that, the final dough is mixed.


Freshening

Wt (g)

Baker's %

Medium Rye flour

8

100

Water

12

150

Mature rye culture

4

50

Total

24


Ferment 5-6 hours at 77-79º F.


Basic Sour

Wt (g)

Baker's %

Medium Rye flour

100

100

Water

76

76

Freshening sour

24

24

Total

200


Ferment 15-24 hours at 73-80º F. (Shorter time at higher temperature.)


Full Sour

Wt (g)

Baker's %

Medium Rye flour

270

100

Water

270

100

Basic sour

200

74.1

Total

740


Ferment 3-4 hours at 85º F.


Final Dough

Wt (g)

Medium Rye flour

422

High-gluten flour

200

Water

422

Salt

18

Instant yeast (optional)

8

Full sour

740

Total

1810

Procedures

  1. Mix all ingredients 4 minutes at Speed 1 then 1-1 1/2 minutes at Speed 2. DDT=82-84º F. (Note: Hamelman's times are for a spiral mixer. If using a KitchenAid, I double these mixing times.)

  2. Bulk ferment for 10-20 minutes.

  3. Divide into 1.5-2.5 lb pieces and shape round.

  4. Proof about 1 hour at 85º F.

  5. Dock the loaves. Bake for 10 minutes at 480-490º F with steam for the first 5 minutes, then lower temperature to 410º F and bake 40-45 minutes for a 1.5 lb loaf and about 1 hour for a 2.5 lb loaf.

  6. Cool on a rack. When fully cooled, wrap in linen and let rest for at least 24 hours before slicing.

These loaves scaled to 807 g. After baking and cooling, each weighed 700 g.

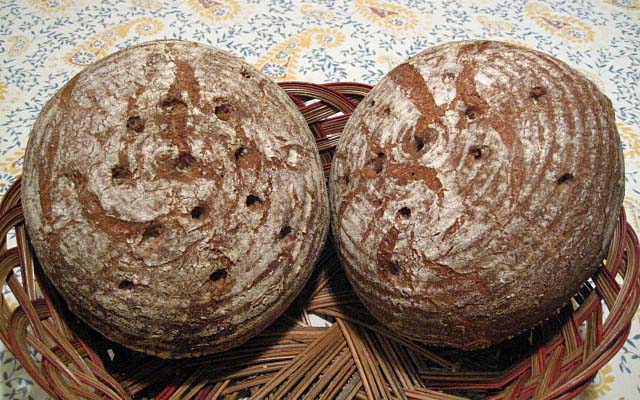
Crumb and loaf profile

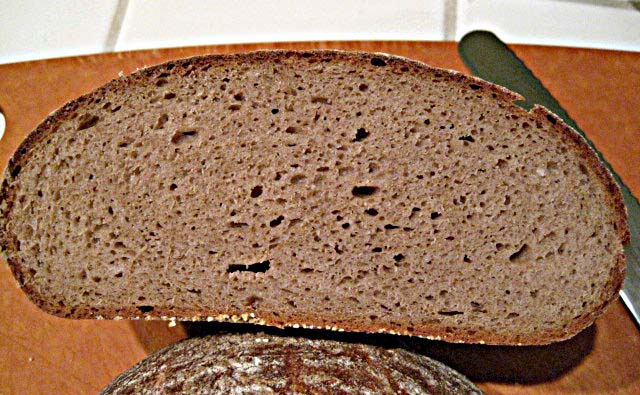
Slices

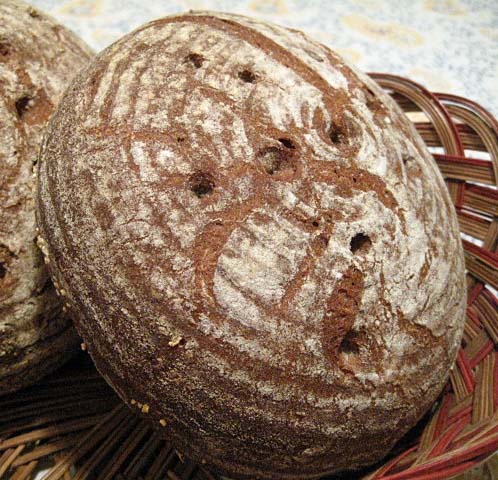
I sliced the bread after it had sat, wrapped in linen, for 24 hours. The crust was chewy, and the crumb was moist and tender. The flavor was very mellow and balanced. It was not as sweet as I remember the 3-stage 70% rye being, but that was 3 years ago(!). The sourdough tang was present but subdued. A lovely flavor.

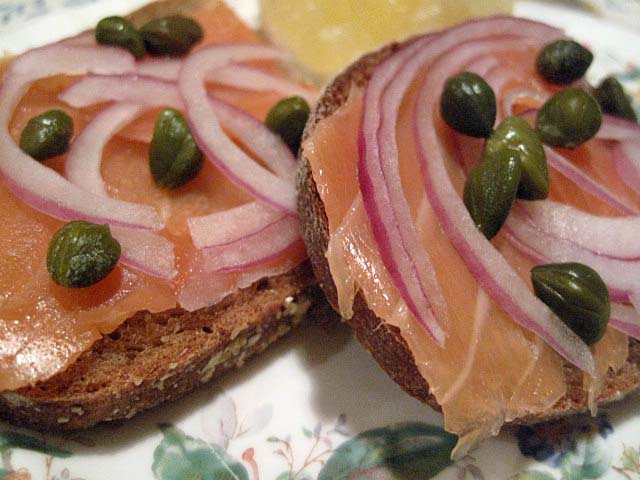
I had been planning on leaving the loaves unsliced for another 12 hours, but my wife decided she wanted rye with smoked salmon as an appetizer for dinner. How could I refuse such a tempting proposition?

Delicious!

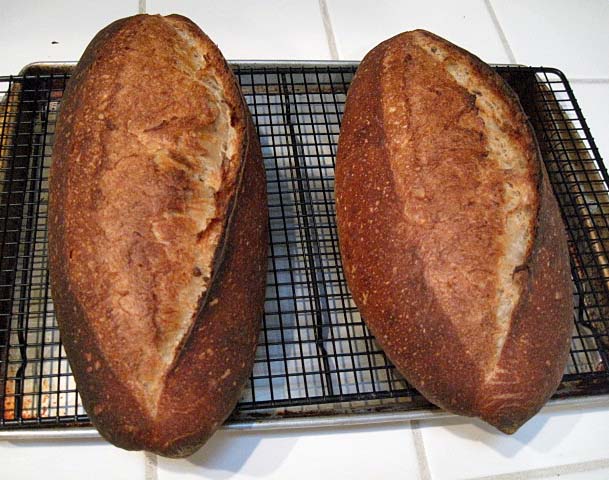
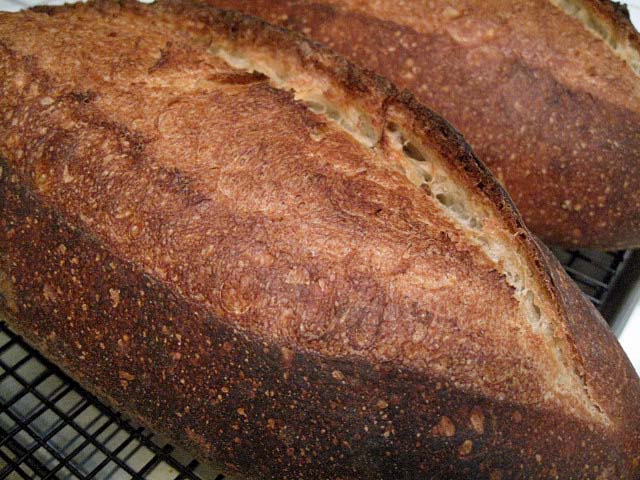
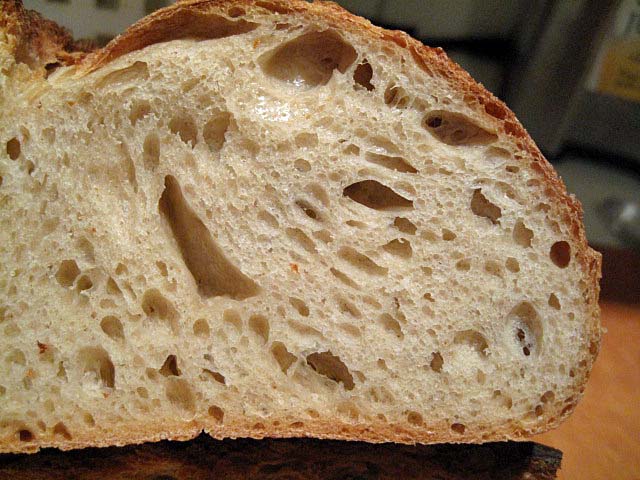
I also made a couple loaves of Hamelman's Pain au Levain today. As simple and straight-forward as it is, this is one of my favorite breads.

Pain au Levain bâtards

Pain au Levain crust

Pain au Levain crumb

 David

Submitted to YeastSpotting

scottfsmith's picture
scottfsmith

Philosophy of bread with no gluten

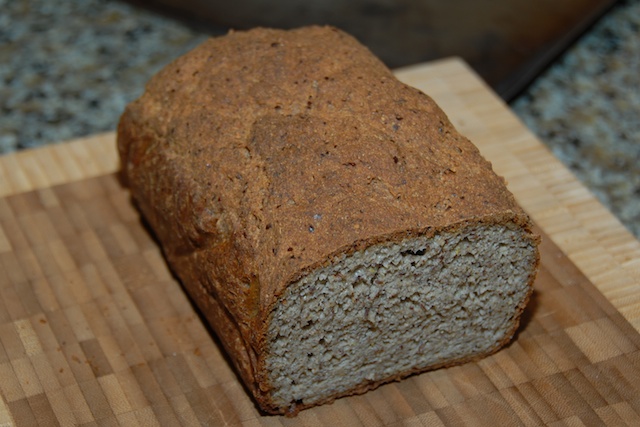
I have been recently been baking breads with no gluten.  I have not been super impressed with most of the recipes which call for lots of starch and xantham or guar gum which can lead to odd consistency and flavor (the oddnesss is caused by the gums, the starches seem OK).  I did find some good recipes eventually and can make pretty good bread now, but I am trying to understand on a deeper level the philosophy of bread without gluten, which is quite different than bread with gluten.  Here are some of my current rough opinions.

  • There is no need for gums to be added, a combination of chia seeds and flax seeds ground up works just as well to get a good rise.  I don't know the best subsitution for gum, I have been doing 4-1 or thereabouts seeds to gum, in other words a recipe calling for 10g of gum turns into 40g ground seeds.  These seeds have gelatinous stuff on the hulls and serve a similar effect as the gums.
  • In terms of rise time, something like 3 hours (x 2) seems to be the best for me so far.  Too long and there is not much rise, too short and the water isn't fully absorbed.
  • It may seem odd to add so much starch as many recipes call for, but white flour is nearly all starch and if you are using whole grain flour plus starch at 50-50 you are still at less % starch than with pure white flour.
  • That said, it is still possible to get a good rise with very little starch; currently I am using 5-1 grains and seeds to starches.
  • A combo of mainly rice and sorghum flours works well; I am now using that plus smaller amounts of other grains.  I need to experiment more to see what the best combination is.  Too much rice and the loaf is rather bland tasting, I have been slowly reducing the amount of rice.
  • The flour should be ground as fine as possible; with more coarse flour it seems like the rise is less and the taste can be more gritty.
  • Most recipes call for oil, vinegar, and sugar of some form.   I have no firm opinion on how important adding oil and vinegar is.  I have found I can leave out the sugar and still get  great loaf.  I have not tested leaving out the oil and vinegar yet.  I definitely prefer without all the sugar, I don't like sweetness in my everyday bread.
  • Most recipes call for eggs.  I am currently using egg whites only, not whole eggs, and beating them and folding them in (like a quiche).  I don't know if this helps much, I need to do a side by side test.
  • The hydration should be high compared to bread with gluten.  I'm not sure how high but I am using 110% or so now (including the egg whites as hydration).  The dough is "looser" with more hydration and so will more easily rise than a stiff loaf.  With gluten you can get away with a lot less water.
  • Baking times need to be a lot longer given the high hydration.  I am now baking around 60 minutes, to an internal temperature of 210F.

Here is a current recipe I have been using which includes the above ideas.  It evolved from various recipes I found online, including some here.

  1. brown rice 70g
  2. sorghum 60g
  3. buckwheat 25g
  4. amaranth 25g
  5. teff 30g
  6. quinoa 10g
  7. tapioca flour 25g
  8. cornstarch 25g
  9. flax seed 30g
  10. chia seed 30g 
  11. active dry yeast 1/2 tsp
  12. salt 6g
  13. 2 egg whites, beaten to stiff peaks
  14. water 310g
  15. olive oil 23g
  16. apple cider vinegar 8g

All of the grains are ground as fine as possible.  If you don't have a mill the Bobs Red Mill brand flours seem to be finest grind.  I have a hand coffee grinder I can grind the chia seeds in, they are hard to do in a mill.  The seeds also need to be ground, but don't have to be as fine a grind.   Ground flax seed is available locally for me but chia seed I can only find whole.

The recipe is simple, mix the dry, mix in the wet minus egg whites, then fold in egg whites until all mixed.  Let rise three or so hours til doubled.  Gently mix again and put in a loaf pan (I line mine with parchment to avoid sticking) and proof for another 2-3 hours.  Bake 60 minutes or when internal temp is 210F in a 425F oven.

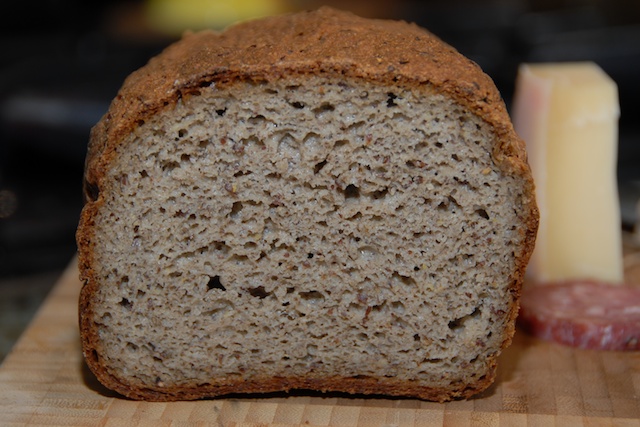
 Here are some pictures of today's bread:


This bread tastes less whole-grainy than you might think given all the whole grains and seeds, but by adding more starches it can be made more white-like.  This rise is perfectly fine to me, its not a baguette but its not a brick, either.

I'm hoping some others have thought about the philosophy behind gluten-free bread and have worked on their own recipes and can offer their own opinions on the above points and others.  Gluten-free bread is quite different than glutenous bread and I had to abandon some of my long-held bread making beliefs to get things to work.

Scott


dmsnyder's picture
dmsnyder

Sourdough Bread from SFBI Artisan II

Sourdough Bread made with Liquid Levain fed twice a day

from the SFBI Artisan II Workshop

Probably the key experience provided in the SFBI Artisan II workshop on sourdough baking was baking a series of breads with liquid versus firm starters, starters fed either once or twice a day and breads with different proportions of starter. Each variation produced breads with noticeably different flavor profiles.

Our instructor made it quite clear that he and his colleagues at the SFBI had a clear consensus that the best-tasting bread was produced using a liquid levain fed twice a day and with the liquid levain constituting 40-50% (baker's percentage) of the final dough. The dough had an overall hydration of 68%.

The characteristics of bread made in this manner were a very mild sourdough tang with a predominance of the “milky” sourness provided by lactic acid but a dominance of sweet, wheaty flavor over acidity.

It has been quite a while since I have made bread using this formula, although I did like it a lot. I made it again this weekend. I have made some minor modifications in the procedures prescribed by the SFBI. Note: Apparent discrepancies in the ingredient weights are due to scaling down from the original formula for a much larger dough batch and rounding.


Total Dough Formula

Baker's %

Wt (g)

AP flour

95

641

Rye flour

0.83

5

Water

68

438

Instant yeast (optional)

0.1

0.5

Salt

2.1

13

Total

166.03

1097.5


Levain

Baker's %

Wt (g)

AP flour

95

102

Rye flour

5

5

Water

100

108

Liquid starter

40

43

Total

240

258

Note: for the starter feedings, including the levain mix, I actually used my usual starter feeding mix of 70% AP, 20% WW and 10% Rye. So, in the levain, rather than the AP and Rye specified in the SFBI formula, I used 107 g of the above mix.

  1. Mix ingredients thoroughly.

  2. Ferment 12 hours at room temperature. (Note: Because of my own scheduling needs, I refrigerated the levain overnight before mixing the final dough. This was not the procedure at the SFBI, and it would be expected to make the bread somewhat more sour. If you can, omit this levain retardation.)

Final Dough

Baker's %

Wt (g)

AP flour

100

517

Water

60

310

Instant yeast (optional)

0.1

0.06

Liquid starter

50

259

Salt

2.5

13

Total

212.6

1099.06

Procedures

  1. Mix all ingredients except the salt (and the yeast, if you are using it) to a shaggy mass.

  2. Let rest, covered, for 20-60 minutes.

  3. Add the salt (and yeast, if you are using it) and mix at Speed 2 for 5-6 minutes. Adjust flour or water to achieve a medium consistency. (Note: I did not use added instant yeast.)

  4. Ferment for 2-3 hours at 76ºF with 1 or 2 folds, as needed to strengthen the dough. (Note: The fermentation time depends on whether you use the instant yeast and on your fermentation temperature. As usual, “Watch the dough, not the clock.” The dough should end up expanded by about 20% and should be somewhat light and gassy. If you ferment in a transparent container, your should see the dough to be well-populated with tiny bubbles.)

  5. Divide the dough into two equal pieces and pre-shape as boules.

  6. Let the pieces rest, covered, for 25-30 minutes.

  7. Shape as boules or bâtards.

  8. Proof for 90-120 minutes at 80ºF.

  9. Bake at 450ºF with steam for 25 minutes.

  10. Leave in the turned-off oven with the door ajar for another 10 minutes.

  11. Cool thoroughly on a rack before slicing.


The crust softened as the bread cooled. I think this was mostly because I adjusted the dough consistency by adding a little water. This made for a more open crumb but a less crunchy crust. The aroma of the cut loaf was very nice with a noticeable acetic acid aroma. However the flavor, while more tangy than this bread is meant to be, was still only mildly sour. Otherwise, it had the delicious sweet-wheaty flavor I remember.

This bread was lovely. I am happy with the results I got, but it merits another bake following the SFBI formula and procedures without my modifications.

 David


sonia101's picture
sonia101

German Pretzels

I needed a break from gluten free baking and felt like baking with REAL flour!!! lol I found this recipe a while back on the Internet somewhere but sadly no longer have the link.

500 grams wheat flour
280 ml water
7 grams dry yeast
15 grams baking malt
15 grams of salt

Lye solution
20 grams of sodium hydroxide (NaOH)  dissolved into 1 litre of cold water


Mix all ingredients until the dough forms a nice soft ball, I used my mixer with the dough attachment and then kneaded by hand because I haven't kneaded a dough in soooo long! Kneading is like free therapy :-)


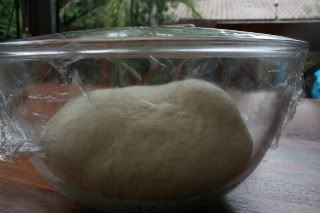
Cover the dough and place in a warm spot for 1 hour or until it has doubled in size.


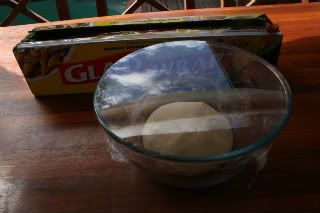
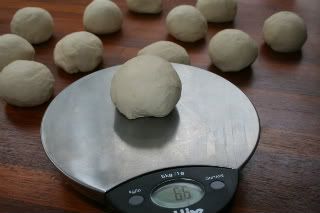
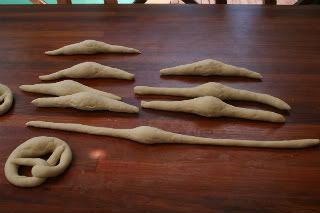
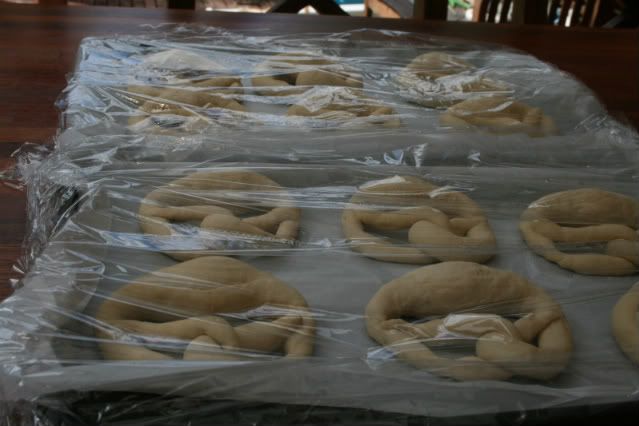
Remove the dough and knock it down and then divide the dough into 12 equal balls (66grams) let rest for 10 minutes and then form into pretzels and place on an oven tray lined in baking paper.


 Cover and let rise for 20 minutes in a warm place.

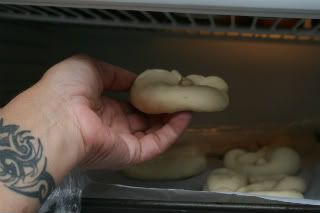
Then place the trays in the fridge for 1 hour (or longer if that suits you, I have left them overnight) this makes the pretzel firm and they will not fall apart when you dip them into the lye bath.

BTW this photo is NOT my food fridge, it's the beer fridge in the backyard!! lol

As you can see after 1 hour in the fridge you can easily pick them up without the pretzels bending. Leave the pretzels in the fridge until you are ready to dip them, they soften very quickly!

Next the Lye Bath:

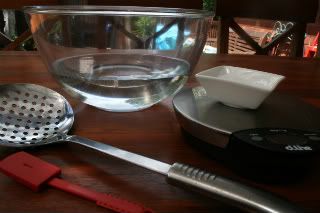
USE EXTREME CAUTION: Caustic even a weak solution like this is considered corrosive. Always use gloves and use extreme care. Never use Aluminium with caustic soda, and always line your baking trays.

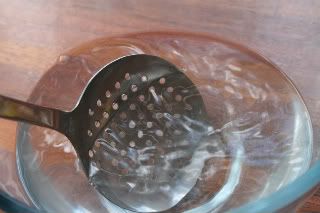
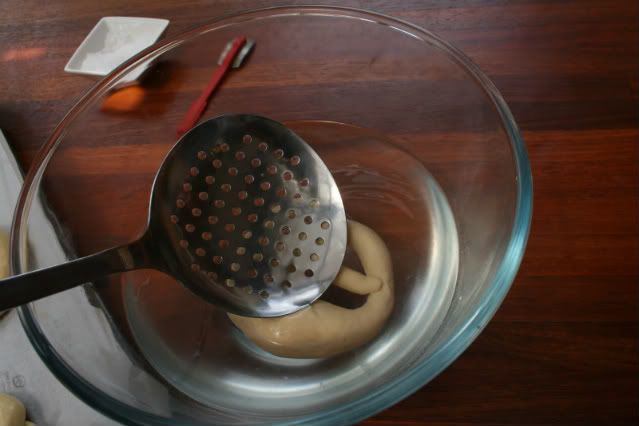
Add 1 litre of COLD water into a GLASS bowl and then add 20 grams of sodium hydroxide (NaOH) into the water and stir until dissolved. I used a stainless steel slotted spoon to stir the mixture.


Put the pretzel onto the stainless slotted spoon and then lower it into the lye bath for about 10 seconds.


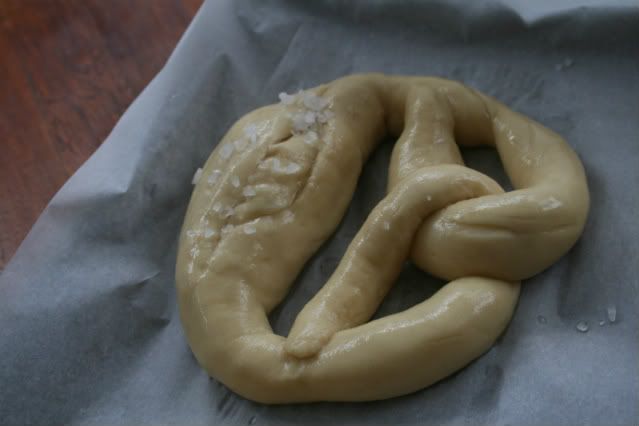
 Drain the Pretzel and place back onto the lined baking tray, score (through the thick part of the pretzel horizontally) and  sprinkle with salt. Place in a preheated oven at 180 Degrees Celsius for 20 minutes. Once you have dipped them they need to go straight into the oven, so if you have a few trays leave the surplus trays in the fridge  and dip and bake them when the oven is free.


Now I'm off to eat these with a BBQ dinner that my husband is cooking :)

Cheers Sonia


dmsnyder's picture
dmsnyder

Pugliese Capriccioso, Take 2


Back in October, 2011, I baked a pugliese-type bread I enjoyed a lot. (See Pugliese Capriccioso) I gather from various TFL comments, a few other bakers have baked from my formula with good results. However, I wanted to bake this bread again using a more authentic biga rather than a liquid levain and at a somewhat higher hydration. Today, I did.

Biga Naturale Ingredients

Wt (g)

Baker's %

AP flour

48

100

Water

24

50

Active starter (50% hydration)

29

60

Total

101

210

  1. The day before baking, mix the biga.

  2. Ferment for 6 hours at 78ºF.

  3. Refrigerate overnight

Final Dough Ingredients

Wt (g)

Baker's %

AP flour

375

75

Fine durum flour

125

25

Water

400

80

Salt

10

2

Biga naturale (50% hydration)

100

20

Total

1010

202

Note: The biga consists of 67 g flour and 33 g water. Thus, the total flour in the dough is 567 g, and the total water is 433 g. Therefore, the actual final dough hydration is 76%. Likewise, the actual salt percentage is 1.8%.

Method

  1. Take the biga out of the refrigerator and let it warm up for about an hour.

  2. Mix the water and flours to a shaggy mass, cover and autolyse for 20-60 minutes.

  3. Sprinkle the salt over the dough and add the biga in chunks.

  4. Mix at Speed 1 for 1-2 minutes until the ingredients are well-mixed.

  5. Mix at Speed 2 for about 8 minutes. The dough will be quite slack. It will clean the sides of the bowl and form a ball on the dough hook, but a large portion of the dough will still be on the bottom of the bowl.

  6. Transfer the dough to a well-floured board, form into a ball by stretching and folding.

  7. Place in a lightly oiled bowl with a tight-fitting cover.

  8. Ferment at 78ºF for about 2 hours with a stretch and fold at 50 and 100 minutes.

  9. Pre-shape into a ball and let the dough rest for 10 minutes to relax the gluten. (This wasn't much of an issue. The dough was extremely relaxed and extensible.)

  10. Shape the dough as a tight boule and place it seam-side down in a floured banneton.

  11. Place the banneton in a food-safe plastic bag or cover with a damp towel. Proof the boule at 85ºF until the dough springs back slowly when you poke a finger into it. (About 2 hours)

  12. 45 minutes before baking, preheat the oven to 490ºF with a baking stone and steaming apparatus in place.

  13. Transfer the loaf to the baking stone, seam-side up, steam the oven and turn the temperature down to 460ºF.

  14. After 15 minutes, remove the steaming apparatus. Bake for another 30 minutes or until the loaf is done. The crust should be nicely colored. The internal temperature should be at least 205ºF.

  15. Leave the loaf on the baking stone with the oven turned off and the door ajar for another 10 minutes to dry the crust.

  16. Transfer the loaf to a cooling rack. Cool completely before slicing.


The dough was even more slack than the last bake, and it spread significantly when transferred to the peel. However, there was very nice oven spring. The boule ended up with about 4 times the height it started with. The folds did not open up like the last bake. This may have been partly due to longer proofing, but I probably sealed them too well in tightening the boule when shaping.

I would describe the crust, crumb and flavor as essentially identical to my first bake of this bread: Crunchy crust, cool, sweet, chewy crumb. Perhaps a subtle nuttiness from the durum flour. Pretty darn delicious! This bread is a strong contender for the list of breads I bake frequently.

David


Floydm's picture
Floydm

Honey Whole Wheat Challah

Reprinted with permission from Stanley Ginsberg's and Norman Berg's Inside the Jewish Bakery: Recipes and Memories from the Golden Age of Jewish Baking.

Honey Whole Wheat Challah

Honey Whole Wheat Challah

Makes two 24oz/680g loaves
Volume Ingredient Ounces Grams Baker's Percentage
3½ cups Bread or all purpose flour 16.75 475 60%
2 2/3 cups Whole wheat flour, preferably stone-ground 11.25 320 40%
2¼ tsp Table salt 0.50 16 2%
1¾ tsp Instant Yeast 0.25 8 1%
2 tbs + 1 tsp Honey 1.75 55 7%
1¼ cups Warm (90°F/32°C) Water 9.25 265 33%
Large eggs, beaten 6.00 170 21%
1/3 cup Vegetable oil 2.75 80 10%
1 large Egg, lightly beaten, for glazing 1.75 50  
2 tbs Poppy, sesame or chernushka seed (optional) 0.50 15  
  1. Combine the flours, salt and instant yeast into a mixing bowl or the bowl of a mixer, and use the flat (paddle) beater to blend at low (KA 2) speed, about 1 minute.
  2. In a separate bowl, whisk together the honey, water, eggs and oil, then add to the dry ingredients. Continue blending until the dough is evenly hydrated and comes together in a shaggy mass.
  3. Switch to the dough hook, if using a stand mixer, and knead at low (KA 2) speed for 10-12 minutes until the dough forms a smooth, glossy ball that leaves the sides of the bowl. If kneading by hand, turn the dough onto a well-floured work surface and knead for 12-14 minutes until the dough is smooth and elastic.
  4. Form the dough into a large ball, put it into an greased bowl, cover with a damp towel or cling wrap and allow to ferment until doubled in bulk, about 60 minutes.
  5. Turn the dough onto a lightly floured work surface and punch it down. Divide it into two pieces of approximately 24 ounces/680 grams and divide each of these into as many pieces as appropriate for the braid you’re using. Roll each piece into a tight ball, cover them with a damp towel and allow them to rest for 20-30 minutes to relax the gluten.
  6. Using your hands, roll each piece into a long sausage that is thick in the middle and tapered to a point at the ends and braid.
  7. Put the braided loaves on a piece of baking parchment, cover them with a damp towel and allow them to proof until your finger leaves a dent in the dough that doesn't spring back.
  8. About 20-30 minutes before bake time, preheat your oven to 350°F/175°C with the baking surface in the middle.
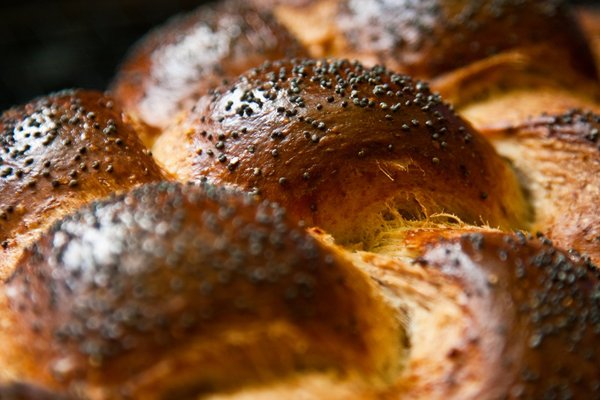
  9. Brush each loaf lightly with beaten egg, wait one minute and then give them a second coat. Sprinkle with poppy, sesame or chernushka seeds to taste.
  10. Slide the loaves and parchment onto your baking stone or bake on a sheet pan for 30-40 minutes, turning the loaves halfway through so they’ll brown evenly.
  11. Transfer the finished loaves to a rack and let cool for at least an hour before cutting.

Inside the Jewish Bakery can be purchased on the Inside The Jewish Bakery website, on Amazon.com or Amazon.ca, or at your local bookseller.


Mebake's picture
Mebake

Shaping a Boule: An illustration

This is an illustration of Shaping a dough into a ball (Boule). I learned this technique from San Fransisco Baking circle.
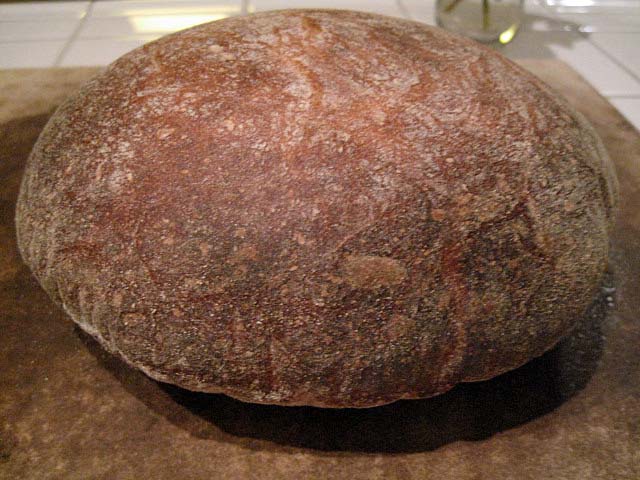
David (dmsnyder), was the first to demonstrate this shaping method here.(thanks David!). I thought of illustrating the method, and share it with all of you.
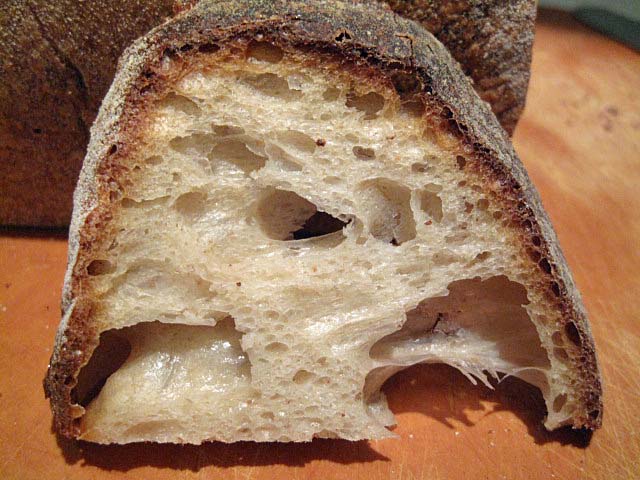
Pages