The Fresh Loaf

A Community of Amateur Bakers and Artisan Bread Enthusiasts.

Most bookmarked

browndog's picture
browndog

Evolution

Here is an adaptation of an adaptation. The original recipe was featured in a bed & breakfast cookbook, adapted and published by the Boston Globe, and tweaked once again by me.

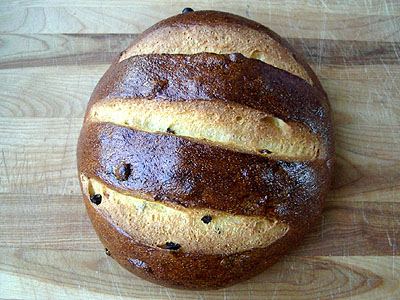
Cranberry Nut breakfast Rolls

1/4 c orange juice

1/3 c sweetened dried cranberries

1/4 c unsalted butter, melted and cooled

1 c buttermilk or 1 c water + 2 tbsp buttermilk powder

2 eggs

1/4 c granulated sugar

1/2-2/3 c marmalade

1 1/8 tsp salt

2 tsp active dry yeast

3 c unbleached all-purpose flour

1/3 c coarsely chopped roasted pecans

6 tbsp butter, softened

(This is a good place to use up some starter discard if you have it. I used 50 grams firm discard and reduced the liquid by 1/4 c initially, then added a little more during kneading to make a tacky, silky dough.)

1. Combine juice and berries in a small saucepan, bring to a boil, remove from heat and let sit 10 minutes. Drain and reserve liquid.

2.Warm your buttermilk, add yeast to proof, then combine with the melted butter, eggs, 1/4 c sugar, and salt. Stir thoroughly.

3. Add flour and knead til dough comes together. Add cranberries and nuts, continue kneading til dough is smooth and elastic.

4. Let rise til doubled. Grease two 9" cake pans. Divide dough in half. Roll one half into a 12x8 rectangle. Spread with 3 tbsp soft butter, then enough marmalade to cover in a thin, even layer. Roll up from the long side and seal seam well. Cut into 12 even slices. Place the slices cut side down, in one of the cake pans. Repeat with remaining dough. Cover and refrigerate overnight.

5. 30 minutes before bake time, remove from refrigerator and set in a warm place to rise til doubled. Set the oven at 375. If desired, drizzle 1/4 c heavy cream over each pan of rolls. (My Puritan up-bringing would not allow this.) Bake 20-30 minutes, til golden brown.

Icing

1 c powdered sugar

reserved juice

additional milk as needed

Combine, stir, and spoon over rolls. Serve warm.

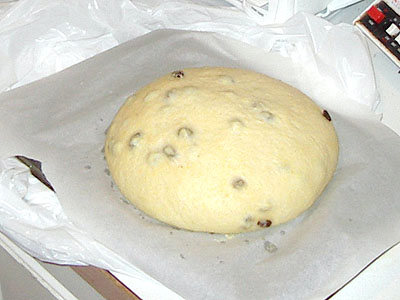
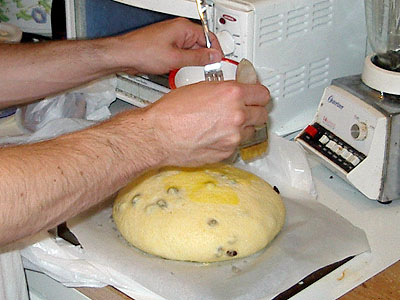
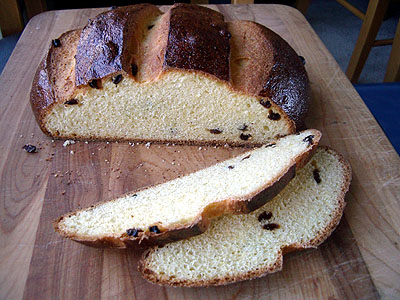
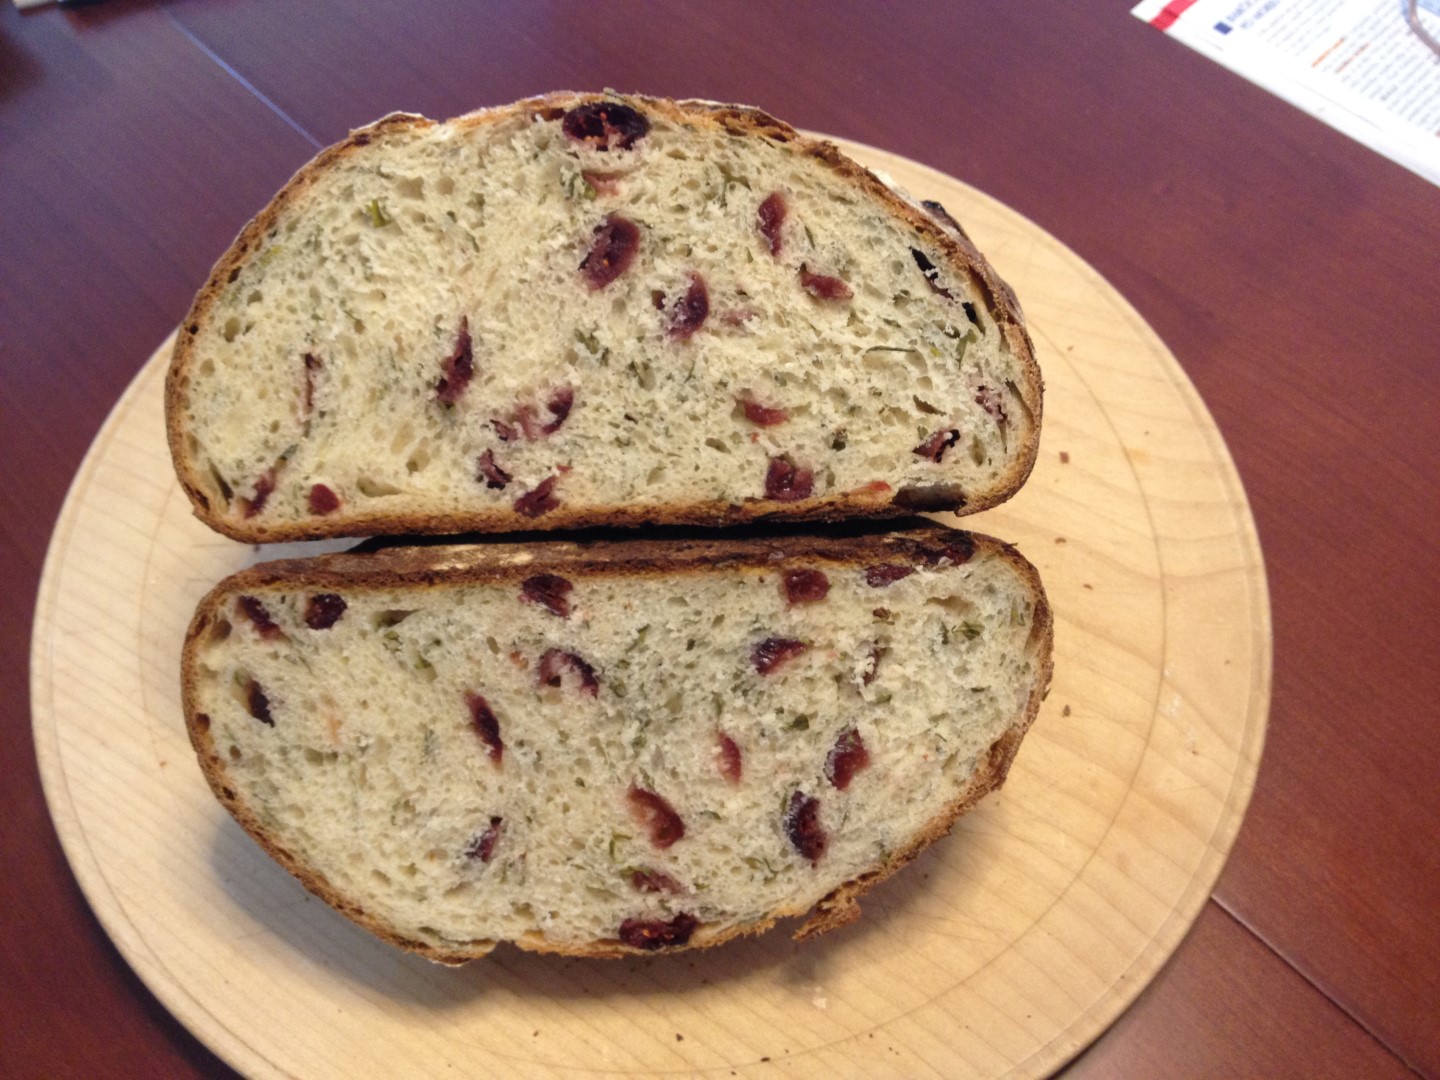
Note: Not needing, for a family of three, 24 rolls to face first thing on a Saturday morning, I chose to make and bake the same day a small pan loaf with the remaining half of the dough. I spread the dough with butter and marmalade, rolled it without slicing and baked it for about 30 minutes. Lovely. The original recipe did not call for marmalade but a quarter cup of granulated sugar and half an orange's worth of zest. I found the marmalade to donate a fine bit of texture and piquancy.

And with this entry I'm pleased to be part of Bread Baking Day #2.

corn raisin artisan breadLast week I posted a basic cornbread recipe. I suspect some folks reaction was "ho-hum". So this week I'm showing that you can, indeed, do more with corn meal than just make cornbread.

How about a yeasted bread with corn meal? How about a sweet raisin yeasted bread with corn meal in it? Sound good? It did to me.

The recipe and a lot more photos are below.

I based this one on a recipe from a little Betty Bossi baking book that my father-in-law brought back from France (Betty Bossi is, I gather, like a Swiss equivalent of Betty Crocker). My French is fair, as is my metric system, but thanks to my scale, which can toggle from metric to imperial, I was able to pull something together pretty quickly.

I'm going to print the recipe with the original metric measurements. Next to each I'll include my imperial approximation, which also include my substitutions. My translations and measurements aren't exact, so if you are a stickler you can use the metric measurements or do the math yourself!

Sweet Corn Raisin Bread

Original Metric Measurements Imperial Approximation and Substitutions
150 grams corn flour
1 deciliter water
1 cup corn meal
1/2 cup water
350 grams white flour
1/2 cube (approx. 20g yeast)
3 tablespoons sugar
2 deciliters milk
1 1/2 teaspoons salt
1 pinch saffron
50 grams butter
2-3 cups unbleached all-purpose flour
2 teaspoons instant yeast
3 tablespoon sugar
1 cup milk
1 1/2 teaspoons salt
saffron I'm too cheap!
2 tablespoons butter
75 grams raisins 1 cup raisins
1 egg yoke
1 teaspoon water
1 pinch salt
2 pinches sugar
1 egg yoke
1 teaspoon water
1 pinch salt
2 pinches sugar

Mix the corn meal and the water together in a small bowl and allow to soak for half an hour.

Pour two cups of the flour in a bowl and combine with the yeast, sugar, salt, and saffron. Make a well in the middle and pour in the corn meal soaker, remaining milk, and butter. Stir until well blended.

Stir in the raisin and then add additional flour by the handful until the proper consistency is reached (tacky to the touch but not sticky, and clearing the sides of the bowl when mixed).

Pull the ball of dough out of the mixing bowl and place it onto a clean work surface. Knead the dough for 10 to 12 minutes, until it begins to feel smooth and satiny. Place the dough back into a clean, oiled bowl, cover with plastic wrap, and allow the dough to rise until it has doubled in size, roughly 90 minutes.

Remove the dough from the bowl and gently degas it, then shape into the desired shape. Cover the dough with plastic wrap or a moist towel and allow it to rise until doubled in size again, roughly 45 minutes to 1 hour.

sweet corn raisin bread rising

While it is rising again, preheat the oven (and baking stone, if you are using one) to 425.

sweet corn raisin bread being glazed

When it has doubled in size, glaze the loaf with egg wash made from the egg yoke, water, salt, and sugar. Score the loaf so that it doesn't tear in the oven, and then place it into the preheated oven.

sweet corn raisin bread glazed and scored

After 5 minutes, reduce the oven temperature to 350 degrees. After 15 minutes rotate the loaf so that it bakes evenly, and then bake it until it is done. You'll know it is done when it is nice and brown, sounds hollow when tapped on, and reaches an internal temperature of at least 185 degrees. In my oven this took around 40 to 45 minutes.

Allow the loaf to cool for at least half an hour before slicing.

sweet corn raisin bread complete

Further Exploration

I was very pleased with this loaf, but I have some ideas I'd like to try to make this bread even better. One idea is instead of using 1 cup of medium grind corn meal, use a mixture of finely ground corn flour and coarsely ground polenta. Something along the lines of 3/4 cup corn flour and 1/4 cup presoaked polenta ought to lend the loaf a smooth, creamy crumb with a few crunchy bursts of polenta here and there.

The other idea I have is to substitute honey for sugar, and maybe increase the amount of sweetener just a tad. The thought is that I might be able to get a flavor something along the lines of cornbread with honey butter baked right into the loaf. I haven't tried it yet, but it sounds good.

Olive oil instead of butter might be good too.

So many options... and never enough time to bake!

Have any ideas for other ways to modify this loaf? Or questions about it? Please comment!

Sweet Corn Raisin Bread

DanAyo's picture
DanAyo

Community Bake - Baguettes by Alfanso

This Community Bake will be featuring one of our very own; the "Baguette Baker Extraordinaire", Alan, aka alfanso. He is among a handful of fine baguette bakers on TFL who have spent years concentrating on baguettes, alfanso's favored craft, and his baguettes are consistently outstanding and consistently consistent.. Consistence and repeatability, coupled with breads that visually signify a particular baker are the hallmark of excellence. When viewing an image of any of Alan's baguettes, those that have been around for a while know exactly who baked the bread. We are fortunate to have him on the forum.

We have extracted the bakes of 4 participating bakers and present it in PDF form

Attention New Readers:
Although the Community Bake started some time back, it is still active. New participants are welcomed to join in at any time! It's constantly monitored and help of any kind is still available.

For those that are not familiar with Alan and his baguettes check out his blog.


Since the Covid Pandemic many new bakers have joined the forum. For those that are not familiar with our Community Bakes (CB) see THIS LINK. It should give you an idea of the concept and how things work.

Alan supplied the following information as a guide line to the bake. There are links below with additional resources. Alan's choice of baguette for the CB is Pain au Levain with Whole Wheat, by Jeffrey Hamelman. Jeffrey Hamelman recently retired as Head Baker at the King Arthur Flour Company. His book, "Bread: A Baker's Book of Techniques and Recipes, 2nd Edition" is considered a "must have" by most of the bakers on this forum.

Alan writes:

I’ve attached the formula and some photos of my most recent bake of this bread.  It is another really easy to manipulate bread that has a fantastic taste, but is not too heavy on the whole grain side. 1250g is a nice amount to create 4 "comfortable sized" baguettes.

I’ve simplified the formula a little by converting it from a 60% hydration to a 100% hydration levain.

Mr. Hamelman uses the term “Bread Flour” but in our realm this really means a standard AP flour with a similar protein profile to King Arthur AP flour, 11.7% protein.

This dough can also be mixed mechanically if you have neither developed the skills nor have the desire to mix by hand."

NOTE - for those using home milled flour a tweak may be necessary.  Whole grain (100% extraction) will absorb quite a bit more water than white flour as well as commercial whole wheat flour. Since I used home milled grain, it was necessary to add more water before the dough became extensible enough to slap and fold. I estimate the water added was approximately 28 grams which brought the hydration to ~72%. I should have taken my own advice and measured the additional water, but I didn’t. For those using home milled grains, if would be helpful if you reported the extra water necessary to do the Slap & Folds. See THIS TECHNIQUE.

   Additional Resources


Everyone is welcomed. Both expert and novice can learn and improve their baking skills by participating and sharing their experience. Make sure to post your good, bad, and ugly breads. We learn much more from our failures, than we do from our successes.  

Danny 

A late addition -

In Alan’s reply below he reminded us that this is not a competition. The goal of every Community Bake is to learn from one another. There are no losers, only winners. Each and every participant should become a better baguette baker with the help of others.

DanAyo's picture
DanAyo

Table of Contents

The following are links to our Community Bakes

Below are tips & ideas that you may find useful. 
You can use THIS LINK to view all tips in a web browser.

For those in the US, the History of King Arthur Flour Company is very interesting and historic.

Although not listed as a tip, the links below may prove interesting for some.

Miscellaneous Blog Post

A compilation of my bakes during a Community Bake


I am trying to use a Table of Contents for my BLOG. Links to blogged bakes will be posted to this page. I plan to post a link to this page on all BLOG bakes, experiments, tips, Community Bakes, etc..

Ru007's picture
Ru007

(Mostly) white sourdough

Hello friends! 

Happy monday :) This is was my bake yesterday...

I've been working on this formula for a couple of months and I've almost settled on a flour blend that I really like. 70% white, 25% whole grain and 5% rye. I'm still working on what grain the 25% is. I'm not really spoiled for choice in terms of flour, but I've tried 25% spelt, and 25% whole wheat and a few variations in between. This one is 25% whole wheat. 

The hydration has varied from 75% to 85% this week. I must say this has been my favorite version of the dough to work with. I use 2.4% salt.

Method: 

1. Levain build the night before mixing 16g 80% hydration 100% rye NMNF starter, 6g rye, 36g whole wheat, 33g water. I typically use the levain when its some where between 10 and 12 hours old (although I do want to try using it when its a bit younger, just to see what happens)

2. 2 hour autolyse on mixing day (316g water, 296 white unbleached bread flour, 67g whole wheat flour)

3. Add 10 g salt and 90g levain to flour and hand mix for a couple of minutes. Rest for 10mins and mix again. Repeat 3 -4 times. 

4. S&F 60, 120 and 180 mins after mixing. 

5. Bulk ferment for another 3 hours or until the dough is jiggly (yes, this is a very technical term!)

6. Preshape and rest for 30mins then shape. 

7. Proof at room temp for another 1 -2 hours (depending on the weather, it was cold this weekend so I let it go for 2 hours).  

8. Retard overnight, bake straight from the fridge. 250dC with steam for 20mins ,230dC without steam for another 25mins.

Result... 

I'm happy with the crumb on this one, its nice and soft.

I've tried this leafy scoring pattern before, but I think I like this version better, with the more aggressive slashes down the side... but I might change my mind next week! 

Have a great week everyone and happy baking :)

Ru

dmsnyder's picture
dmsnyder

Pane Tipo di Altamura - March 31, 2016

Pane Tipo di Altamura

31 March, 2016

David Snyder


Back in 2011, several TFL bakers worked on trying to replicate Pane di Altamura at home. I participate with one bake (see: http://www.thefreshloaf.com/node/24139/pane-tipo-di-altamura-quotlocal-breadsquot), but did not work to refine it and have not baked this bread since. Abe's (A BakEr on TFL) recent efforts have inspired me to give this bread another go.

Since my prior attempt, I have had a little experience baking in a wood-fired oven, which is how Pane di Altamura is baked. I realize how different that oven is from my home electric oven. I have further amended Abe's amendment of the Italian DOP specification based on this experience. Most significantly, almost all instructions for baking this bread omit steaming the oven. My thinking is that, in a wood-fired oven, generally there are multiple loaves baking at once, and the water that evaporates from them, in effect, steams the oven without the addition of any water by the baker. This effect is much less with a single loaf in an electric oven. Therefore, I did steam my oven for the first part of the bake. That said, the formula and procedures I used are largely based on the information Abe kindly shared with us.


Total Dough

Wt. (g)

Baker's %

Semola Rimacinata (Fine Durum flour)

550

100

Water

330

60

Salt

10

1.8

Total

890

161.8


Biga Naturale

Wt. (g)

Baker's %

Semola Rimacinata (Fine Durum flour)

50

100

Water (80-90ºF)

30

60

Semola Rimacinata starter

20

40

Total

100

200

I already had a biga naturale from a previous bake in my refrigerator. So, the biga used in the Final Dough was fed three times with about 12 hours' fermentation of each build.

  1. Place the starter in a medium bowl.

  2. Add the water and mix until the starter is in pea-size pieces.

  3. Add the flour and mix until there is no dry flour and the biga feels like a bread dough.

  4. Place the biga in a clean bowl and cover tightly.

  5. Ferment for about 12 hours at 70-76ºF.

  6. Repeat twice more.


Final Dough

Wt. (g)

Baker's %

Semola Rimacinata (Fine Durum flour)

500

100

Water

300

60

Salt

10

2

Biga Naturale

100

20

Total

910

182

 Procedures

  1. Mix the flour and water well in a large bowl. (There should be no dry flour in the bowl.)

  2. Cover the bowl tightly and let it rest at room temperature for an hour.

  3. Add the salt and the biga to the bowl. Mix thoroughly using the French “pinch and fold” method.

  4. Knead in the bowl or on an un-floured board for about 10 minutes.

  5. Cover the dough and let it rest for 10 minutes.

  6. Knead for another 10 minutes.

  7. Transfer the dough to a clean bowl. Cover the bowl tightly.

  8. Ferment for 6 hours at 76ºF. (I used a Brød and Taylor Proofing Box set to 76ºF.) The dough should be expanded to double its original volume and feel soft and puffy.

  9. Transfer the dough to a board lightly dusted with durum flour and pre-shape as a boule.

  10. Pre-heat the oven to 500ºF with a baking stone and steaming apparatus in place.

  11. Place the boule on baker's linen and cover well. Let it rest for 30 minutes.

  12. Transfer the dough to the board and pre-shape as a bâtard, taking care to de-gas the dough as little as possible. (Note: Pane di Altamura is traditionally shaped as a boule. I elected to shape it as a long loaf. If shaped as a boule, the bake time should be increased, since the loaf would be thicker.)

  13. Place the bâtard on the baker's linen and cover well. Let it rest for another 30 minutes.

  14. Transfer the bâtard to the board. Gently stretch it by grasping the two long sides and pulling it into a flat oval.

  15. Using the sides of your two hands, make a wide groove down the long axis of the loaf. Then fold the loaf at the groove so that the upper half over-laps the lower half 3/4 of the way. Gently seal the seam between the upper and lower layers.

  16. Transfer the loaf to a peel.

  17. Turn the oven down to 450ºF, steam the oven and transfer the loaf to the baking stone.

  18. Bake with steam for 15 minutes.

  19. Remove the steam source from the oven. Turn the oven temperature down to 420ºF (or 400ºF convection bake).

  20. Bake for another 15-18 minutes. The loaf should be nicely browned. It should sound hollow when the bottom is thumped with a knuckle. The internal temperature should be at least 205ºF.

  21. Transfer the loaf to a cooling rack and cool thoroughly before slicing.


Tasting Notes

When fully cooled and first sliced, the crust is thin and chewy. The crumb is amazingly open for such a low-hydration bread, and a most attractive yellow color. The slices show that the multiple shaping steps did not over-de-gas the dough. The profile shape is pleasing. On tasting, the crumb is mildly chewy. There is a slight yeasty aroma. The flavor is balanced and mild with some nutty, some sweet and very little if any sour tang. When eaten toasted the next morning, the crust becomes pleasingly crisp. The crumb is a bit more tender. The flavor is similar to that of a couple hours after baking.

When tasted dipped in a local, low-acid, fruity EVOO, this bread is transformed into something ambrosial. Of course, Puglia is famous for both Pane di Altamura and for its ancient olive groves, so it is no surprise. The neutral flavor of the bread allows the full, complex flavor of the oil to come through, and the oil brings out the sourdough tang that was otherwise faintly present in the bread. Delicious!  

Photo Gallery

Fully fermented dough, on the board prior to first pre-shaping (Step 9) 

Pre-shaped dough, wrapped in baker's linen for a rest

After first pre-shaping and a 30 minute rest wrapped in linen

Dough after second pre-shaping as a bâtard (Step 12)


A helpful illustration of shaping I found on the agradolce.it web site (Pane di Altamura | Agrodolce)


My loaf, after final shaping. On a peel, ready to bake. (Step 15)

Pane Tipo di Altamura

A slice

Crumb, close-up


Final Notes

This bread is fun to make. The dough is easy to mix and enjoyable to handle. Shaping is a challenge. I am pleased with the result. The baked loaf is attractive.

 I do not find the bread provides outstanding eating by itself or with butter, however, dipped in olive oil as is traditional, it is transformed into a wonderful food. It is not merely a vehicle. The olive oil and the bread each compliment the other. (See "Tasting Notes," above.) I still need to taste this bread grilled then rubbed with garlic, another traditional way of eating it.

The obvious necessity is a trip to Altamura to calibrate my expectations.

 David 


baybakin's picture
baybakin

Graham's Brown Bread

With the new office job, I find myself making more pan breads, perfect for a sandwich to take to the office.  I have tried many a recipe, ended up building from my Vienna Bread recipe's formula, replacing ingredients, and tweaking percentages around.  I finally landed on this bread, exactly what I wanted in a brown bread.  This bread makes for great sandwich bread, toasted and dipped in runny eggs in the morning, made into toast points for spreads, and with cheeses for mid-day snack on the weekends.  The use of a yeast instead of sourdough, along with all of the whole grains in the preferment helps a clean wheat flavor come though as the major flavor in the bread

Graham's Brown Bread:

Preferment (~12 hours):

  • 100g Water
  • 100g Graham Flour
  • 20g Sprouted Whole Wheat Flour
  • Pinch of Instant Dry Yeast

Final Dough:

  • All of the Preferment
  • 130g Water (Warm)
  • 40g Egg (Save the rest for egg wash)
  • 20g Lard (If you're scared of lard, use shortening)
  • 5g Mollasas (Blackstrap, if a ligher grade is used, add a little more)
  • 15g Golden Syrup (Honey will do)
  • 250g Strong Flour (I use Central Milling Type 70)
  • 15g Potato Flour
  • 6g Salt

Method:

  1. Mix Preferment about 12 hours before final dough.
  2. Stir in Water, Egg and Sugars together until homogenous
  3. Mix in Flour, Fat, and Salt until shaggy dough is formed
  4. Rest for 20 mins, kneed until gluten is well developed
  5. Bulk ferment for 2 hours, folding ever half hour.
  6. Shape, place in greased tin (scaled for 4x8)
  7. Proof until 3-4 inches above sides of tin, apply egg wash as needed to keep top from drying
  8. Bake in pre-heated 400F oven for about 20-25 mins, or until top reaches a dark chestnut color
  9. Remove from tin as soon as possible, cool on rack completely before slicing.

Hope you enjoy this bread as much as I do!


varda's picture
varda

Jewish Corn Rye

Several years ago, when I first started haunting TFL for clues on how to make Jewish Rye, I came across references to George Greenstein's Secrets of a Jewish Baker.   The breads I made from this book were god awful which had nothing to do with George Greenstein and everything to do with the (lack of) skill of the baker.   As time went on and I learned more about bread baking in general and Jewish Rye in particular, SOAJB got pushed to the back of the shelf and almost forgotten.  And yet people like David Snyder reminded me of it with his occasional Jewish Corn Rye bakes.    See for instance here.   Yum.  

The other day I came back to it   I decided to handle the volume measurements in Greenstein by pulling out the old measuring cups and then weighing what I did as I went along.   Then make adjustments from the weighed measurements going forward.   Since then this bread has become my new favorite.   I already make Tzitzel and Flaxseed Rye and Borodinsky and Schuster Loaf, so do I really need another rye on my plate?   Absolutely.   So good.   Must have more.

Formula:

         Final        Sour        Total  Bakers %
KAAP181 18145%
Whole Rye1338621955%
Water2146928371%
Caraway9 92.3%
Salt7 71.7%
Rye Sour (80%)156 15622%
Cornstarch glaze   
Caraway to sprinkle 700 

Method:

Ripen 80% rye sour until pungent

Mix all ingredients

Bulk ferment until somewhat puffy (this took two hours today in 70degF kitchen)

Shape into a jelly roll and mold the ends shut

Proof until it starts to soften (this took 1 hour today)

Glaze with cornstarch mix (boil two cups water - dissolve 2 tbsp cornstarch in 1/4 cup cold water.   Whisk into boiling water until thickens and clear.)

Sprinkle with caraway seeds

Preheat oven to 500.  Load bread with steam for 1 minute.   Turn off oven for 6 minutes.   Bake at 430 for 20 minutes. 

Note that I did not use yeast in addition to the rye sour as Greenstein does.  Nor did I keep the fermenting dough wet as Greenstein says - just the regular old bulk ferment in a covered bowl.  

emkay's picture
emkay

San Francisco Country Sourdough

I think my 17-day old starter is ready for prime time. I baked this San Francisco Country Sourdough using Glenn's formula.


sfsd_0324c

  • Everything was done at room temperature (approximately 73F). No retarding.
  • Autolysed for 45 minutes, then I pinched in the salt and 50 g reserved water.
  • Bulk fermented for 4 hours (S&F every 30 minutes for the first 3 hours and then untouched for 1 hour).
  • Preshaped and bench rested for 30 minutes.
  • Proofed seam side down in brotform for 2.5 hours.
  • Baked with seam side up (no scoring) in a preheated cast iron combo cooker.
  • 450F for 20 minutes with the lid on and 25 minutes with the lid off. 


sfsd_0324b

sfsd_0324d

It's the best naturally leavened bread I have baked to date. Well, that's not really saying much since this is only my 4th time baking bread using a starter. But I think it's a good start!


sfsd_0324a


:) Mary


Noah Erhun's picture
Noah Erhun

Onion, Poppy seed and Turmeric


Thought it was time I join the yellow mellow bandwagon, at least with one yellow add-in, with little flavor impact. 

Leavin:

200g white starter (100% hydration)

400g flour     200g guisto's bakers choice 200g BRM spelt

400g water

11 hr RT ferment @ ~71F

Final dough:

1000g leavin (all of the above)

1240g cool water 

2000g guisto's bakers choice

50g salt

25g EVOO

25g poppy seeds

10g Turmeric

175g finely minced red onions 

45 min autolyse (flour water leavin and onions)

2 hours bulk with S/F every 30 min @ 73F

3 hour retard in the fridge @ 36F

Scaled, shaped and tranfered to proofing baskets.

19 hour cold ferment @ 36F 

Baked for 30 minutes with steam (THANK YOU Sylvia) @ 465F lowered to 450 for around 15-20 minutes. 

For steaming I used Sylvia's towel method with three loaf pans, producing a wondeful blistered crust.

Although well balanced, I think the flavor would have beinfited from twice as much onion and a few cloves of garlic along with 5-10% dark rye in the leavin. 

 I'm still working on/playing with different scoring, the simple single slashed loaf came out the best. 


-Noah


Pages