The Fresh Loaf

A Community of Amateur Bakers and Artisan Bread Enthusiasts.

Most bookmarked

Pablo's picture
Pablo

Quick proofing box from available materials

I've moved from the couche sitting on the peel on top of a 2 x 8 over the bathtub with hot water, to the couche on a serving tray inside a large plactic bag.  After visiting a bakery and seeing their stand of trays covered in a zippered plastic bag I've been thinking.  I saved some zippered plastic bags from the department store when I bought some sheets.  One of them is almost the exact size of my baking stone.  No sense proofing more than I can bake. 

Materials:

1 14" x 17" piece of scrap plywood -small hole drilled in each corner

1 zippered plastic bag that a sheet set came in

2 coat hangers, trimmed and rebent

1 small piece of duck tape

open proofing box

open proofing box

closed proofing box

closed proofing box

:-Paul

scottfsmith's picture
scottfsmith

Pain Ancienne WW version?

Hi I have been baking bread for many years but only recently decided to try to bake artisianal breads.  I also decided I wanted to stick with WW flour, or at least no white flour, since I am already eating too much of that.  My first goal is to make a simple WW "baguette" in the pain ancienne style.  Here is more or less my current recipe:


400g flour 100%

340g water 85%

8 g salt 2%

<1/8 tsp yeast


You will see I am also trying to keep it simple.. get the simple version right first I figure.  I am using no starters bigas etc - just instant yeast.  The low amount of yeast and the high hydration are techniques I have gotten enamored with in my pizza dough making, along with a very long room-temperature fermentation.  


The recipe itself is pretty simple (and partly inspired by JMonkeys recipes here): mix all together in the early evening and leave out.  When it has risen do a stretch-and-fold.  If still awake when risen again do another.  Next morning early do another s&f, rise, and one last s&f.  After the final rise I gently dropped it on to parchment and gently stretched into a crude loaf shape with wet hands.   Immediately baked the loaf at 450F (no proofing following pain ancienne) and steamed the oven following pain ancienne again.  The final products have been nice, with a crumb that is quite airy, similar to a baguette.  I like the taste a lot.  However, they are too flat and wide.  I was planning on working on slightly less hydration and/or using a lot of bench flour when the final loaf is shaped to help hold it a bit perhaps (this also follows the pain ancienne recipe in Reinhart).  The loaves initially have a very nice crisp crust, but it quickly softens.  I am wondering if the high hydration is also keeping the final loaf on the moist side. Your thoughts appreciated.  I would particularly like to know if there was some recipe for a WW pain ancienne style baguette out there which I could draw from.  I have Reinharts WW book and did not find anything in there.


Scott


JMonkey's picture
JMonkey

Poolish baguettes and a flying sourdough round

It's been a while since I posted, mainly due to ramped up work and family obligations, but I've not stopped baking. And, despite the fact that both of these breads are white, the vast majority of my baking is still 100% whole grain.

But, dangit, white bread -- I just can't quit ya.

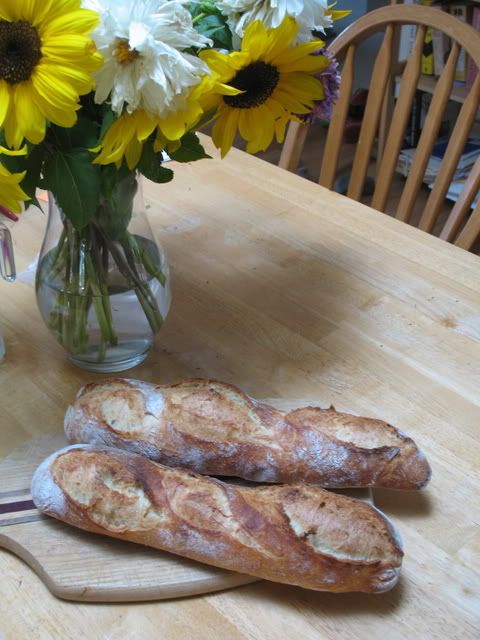
I was particularly pleased with the poolish demi-baguettes that I made for dinner last night. I had my first acorn squash of the season, and had made a soup with it. For some reason, poolish baguettes seemed just the right accompaniment.


These are, without a doubt, the best looking baguettes I've ever made. Took a lot of less-than-perfect loaves, but I think I now understand how to shape these buggers so they don't look like a string bean with big bulbous ends, how to time them so they still have some room to spring in the oven, and how to slash them so they look like ... well ... a baguette.

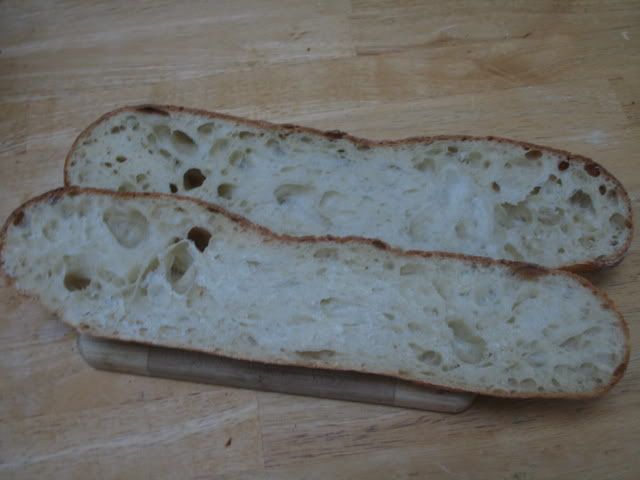
The insides were lovely.


Today, they were starting to get stale, so I cut the leftover baguette in half and broiled it with some mozzarella, which we ate with a chopped up tomato from the garden. These were about 12 oz each, with 33 percent of the flour in the pre-ferment and a hydration of 66%. I used about 1/16 tsp of yeast in the poolish (135g of water and flour, each) and then about 2g instant yeast in the final dough (270 flour, 135 water, 8g salt). The poolish ripened for about 12 hours, but it's pretty cold in my house -- mid 60s at bestt.

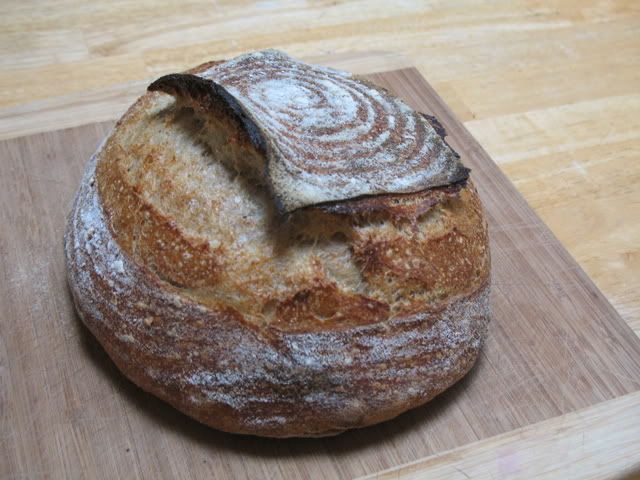
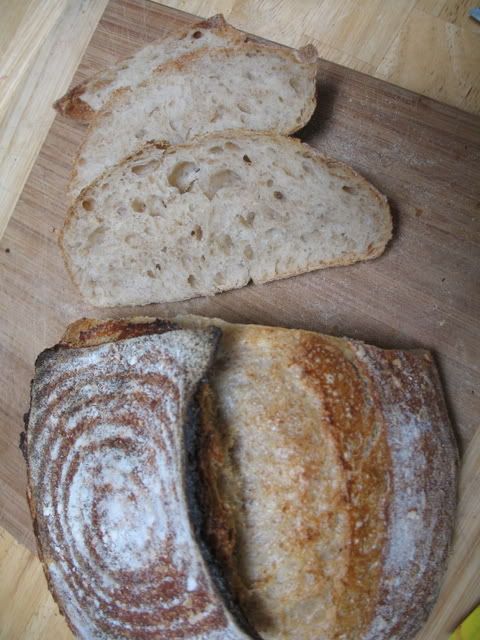
Earlier in the week, I also made a white sourdough (20% of the flour in a thick starter at 60% hydration -- the starter was 100% whole wheat, and the overall hydration was about 75%) which I let retard overnight outside. It was lovely, but the top seemed as if it wanted to peel away. Was probably a little underproofed.


Again, I was pleased with the crumb.


Hopefully, things have calmed down enough so that I can post a little more frequently. I've missed this community!

apprentice's picture
apprentice

Tom Jaine's Barley Bread

I love this bread! I love it for a lot of reasons, not least of which that it's easy and delicious. I also feel as if I'm reclaiming a bit of our bread heritage, when I make this loaf. Barley has a long and wonderful history. Now it is almost exclusively used in brewing – understandable on account of its very low gluten content. But a pity from the nutritional point of view!

I've made it three times, and I'm not quite there yet. But I'm well within sight of the changes that will make it work for me. So here's the story to date:

#1 Bake: The dough, silky soft and extensible. Not much elasticity:


Bulk ferment was good, but not much oomph left for the proof.

Shaped as pain-fesses, about as ready as it would ever get.


Beautiful crumb, lovely taste:


But short!!!!


Got a little more height after experimenting. That's Bake #2 on the right:


The trick seems to be substituting some bread flour for a portion of the whole wheat. I also threw in a pinch of gluten. Am happy to share the percentages of barley, ww and bread flour that seem to work best for me. But it will have to wait until I return from a short holiday.

Meanwhile, if anyone else wants to play with this, go check out the thread on Mini O's Oat & Barley Loaf. PMcCool posted Jaine's recipe there about half-way down. It's dated Aug. 23/06. (Sorry, the taxi's due, or I'd go get the link to post it here for you.)

Happy Baking!

Carol

chahira daoud's picture
chahira daoud

pumpkin yeast bread " recipe & preparation steps"

Hello everybody,

It was my first attempt to use pumpkin in baking ,i was totally amazed from the result, the bread was light , veeeery delicious, my kids could not wait even to fill its slice with any filling, so i will put the recipe and try it, you will not stop making it.

I got the recipe from a french book" i think that the original version was in english because the author is australian, i do not know exactly, her name is Ann wilson , the book name is " Pains et petits pains".

I love the book because 99% of the ingredients used are familiar in Egypt,except " Rye flour"< we do not have, can you send me some pleaaaaaaase, hahahaha,There is a pumpernickel recipe,and i can not do it ,do not you feel petty for me????

Anyway , i will show you the pumpkin kind that i used in the recipe,

That is the only kind we have in Egypt, and we use pumpkin rarely, that is a shame !!! we have very good pumpkin harvest.So i tried to use and create a lot of recipes " in which pumpkin is a main ingredient".O.K, i will start now, here is the recipe:-

7g. yeast" i used fresh yeast , about 1 tbls"

1/4 cup of pumpkin boiling water " in the recipe they boiled the pumpkin, i did not , i cooked it in the oven, i made it puree, and i left it in a strainer to get rid from its juice, and i used this juice to prepare the dough"

4-41/2 cups bread flour.

1 tspn salt

1 cup of pumpkin puree " about 300 g. raw pumpkin", it was different with me because this kind of pumpkin is veeery juicy, i got a lot of liquid from it"

1/4-1/2 cup pumpkin water.

1 beaten egg.

2 tspn water

pumpkin seeds for decoration.

instead of explaining i will let you with the pics, and feel free to ask about everythink , that you think it is not clear.

First the pumpkin from inside:

url=http://www.0zz0.com][/url]

Here is my lovely yeast" i am in love with yeast"

I gave it to eat " some sugar " i made for her some massage , then i cover her to take a nap,she became now very good and happy,

I started to prepare the ingredients, then making the dough.

I kneaded it for 10 mn,it turned soft and smooth like a baby skin.

I put 2 drops of olive oil on it to prevent it from sticking . then i covered it with a clean towel " of course"

shshshshsh, i warned all my family members, not to disturb my baby" i am fool , am not i???"

it is ready now , let us start the game,i re knead it for 2 mn.

I took 1/4 the dough,

then the remaining dough, i made with it a ball, and i put it in a sponge cake pan after oiling it and

sprinkle it with flour" i used corn flour"

I glazed it with the beaten egg, then i decorated it with the rubbon.

I glazed it again, i let it to rise.

My oven was too busy this day, so i let it more than an hour" it became like a monster" oh!lalala!!! 

url=http://www.0zz0.com][/url]

I forgot to tell you about the pumpkin seeds.

I baked it on 210c.

here it is:

url=http://www.0zz0.com][/url]

I forgot to take a pic for it after removing it from the pan.

So on my second attempt, with another shape , i did, voila,

And the Crumb??????

I will let  to you the judgment!!!!!????

Sorry for taking too much time, but i think the details will be so helpfull for beginners.

Thank you , and for all the yeast & bread making fans, a big hug from me to you.

Chahira DAoud , Alexandria , Egypt.

P.S: wait for my " pate morte" lantern & our feast cookies & biscuits.

DanOMite's picture
DanOMite

nutrition of flour after being milled....

I had a co-worker tell me today that after 24 hours of being milled that all nutrtion in flour is lost. Is there any truth to this? I'm really quiet curious to know...I remember reading in peter reinharts whole grain book that after flour is milled it has to be used within like 8-24 hours or you can't use it for like two some odd weeks.  That could make sense because obviously its going through a shock of being a berry into powder. But I don't see how its possible that all nutrtion is lost. I've been using King Arthur whole grain flours and everytime I use them and eat the bread my fiber levels are up higher.

Could anyone share some light on this

Or should I just try to ignore what I heard because its not true?

I hope sombody's got some answers because this bugs me...


Thank you for all your help in advance...

-Daniel

Anonymous baker's picture
Anonymous baker (not verified)

100% Sourdough Rye - my second success!

I figured that I'd make myself a blog rather than posting back into the forums all the time. No point cluttering up a perfectly good forum with my one-track-minded baking experiences! 

Last weekend I took another shot at the 100% Sourdough Rye recipe kindly passed on to me by a good work colleague. My previous attempt had been a fair to middling success, and I was confident that this would turn out even better than the first. I was pleasantly surprised by how good the loaves turned out, given my total inexperience in making bread. 

Here's how they turned out: 


and the interior:


What I'm most happy about is that the resulting loaves - apart from tasting great - have my mind working to figure out ways to improve them. The scoring didn't take, so I'll need to think about different ways to work the scoring out. Plus the surface tension is probably not right, so I'll need to work on my folding.

Lastly - for my own benefit as much as anyone else's - this is the recipe I've been using successfully (all credit to OliverN from my work. I've made a couple of small annotations over time). Any suggestions or variations are absolutely appreciated!

Stage 1:

Mix together

4 x cups rye flour.

3 x cups luke warm water

2 x cups starter.

Leave for 16-24 hrs, until the mix has a domed top.


Stage 2

Mix into previous mixture

3 teaspoons sea salt

4 x cups rye flour.

Leave for 12 hours.


Split mixture into two bread pans and leave for a couple of hours (I never do that though). For rye flour you do not need to kneed it. I just flatten the mixture and roll into a log.

Bake in 180 preheated oven for an hour. 

sharsilber's picture
sharsilber

Diastatic Malt Powder

I have been baking challah bread for about a year and am planning to make about 30 next weekend.  In order to bake a few a day ahead I have been looking into some natural products that extend the bread's shelf life.  Has anyone used dastatic malt powder in their yeast breads?  Does it really help keep it fresher longer?

I would love some input.

Sharon

www.thebraidedloaf.com

dmsnyder's picture
dmsnyder

Susan from San Diego's Sourdough - I join the fan club

Susan from San Diego Sourdough

Susan from San Diego Sourdough

Susan's Sourdough Crumb

Susan's Sourdough Crumb

It was time to get back to basics. My wife and I love sourdough bread. I have been having lots of fun exploring other breads, especially rye breads and baguettes of late, but I was missing "plain old" sourdough bread.

 The formula that Susan from San Diego developed has been made by many on TFL, and, if there is anyone who has not loved it, they have kept it to themselves. So, Susan's sourdough has been on my "to bake" list for quite some time. Here is how I made it:

450 gms Giusto's Ultimate Performer (High Gluten Flour)

50 gms Giusto's (Whole) Rye Flour

340 gms Water

50 gms Active Starter

10 gms Sea Salt


Mix the water and flour in a large bowl until they form a shaggy mass. Cover tightly and allow to rest (autolyse) for 15-60 minutes.

Add the starter to the autolyse and mix it in. Then add the salt and mix it in.

On a lightly floured bench, do 4 or 5 French folds. Cover the dough for 30 minutes. Repeat the folds and resting for 30 minutes. Then, do the folds a third time. (At this point, I had moderate gluten development.)

Place the dough in a clean, lightly oiled bowl and cover tightly. Allow to rise until doubled. (I used my favorite Anchor Glass 8 cup/2 liter glass pitcher with a tight-fitting plastic cover. My dough doubled in 6 hours.)

Divide the dough into two equal pieces and pre-shape as rounds. Cover and allow to rest for 10-20 minutes.

Shape as boules and place in floured bannetons. (I used French linen-lined wicker ones.) Spray lightly with oil and place in food-grade plastic bags or cover with plastic wrap.

Proof for 1 hour, then place in the refrigerator over night (8-12 hours).

Take the loaves out of the refrigerator at least 4 hours before you plan to bake them. Allow them to warm up and rise to 1-1/2 times their original size.

45-60 minutes before baking, pre-heat the oven to 450F with a baking stone on the middle shelf and a cast iron skillet and metal loaf pan on the bottom shelf.

When the loaves are ready to bake, bring a cup of water to a boil and place a handful (4-6) ice cubes in the loaf pan. Shut the oven door.

Sprinkle semolina on a wooden peel. Transfer a loaf to the peel. Score it, and load it on the baking stone. Do the same with the second loaf. Then pour the boiling water into the skillet, being careful not to scald youself, and shut the oven door.

After 10 minutes, remove the two water recepticles from the oven. Bake another 10-15 minutes, until the loaves are nicely colored, the bottoms have a hollow sound when thumped and the internal temperature of the loaves is at least 205F. When they are done, turn off the oven but leave the loaves on the baking stone with the oven door held open 1-2 inches for another 5-10 minutes to dry the crust.

Remove the loaves from the oven and cool them thoroughly on a rack before slicing. (2 hours, if you can stand it.) You are allowed to smell the loaves and listen to them sing while they are cooling.

Notes
1. My sourdough starter is "1:3:4" (starter:water:flour). If your starter is more liquid or more firm, you should adjust the amount of water you use in the dough accordingly.
2. The 2-pan oven humidification and steaming method is from Hamelman's "Bread." Susan bakes her loaves under a stainless steel bowl for the first 1/2 to 2/3 of the time. I would have done this, if I had made a single large boule. But Hamelman's method gives me the second best oven spring and bloom.
3. With overnight cold retardation, this bread was moderately sour when first cool. The crust was thin but crunchy. The bread had a firm chewiness but was in no way "tough." It was, in short, what I regard as a "classic San Francisco-style Sourdough." Since this is precisely what I wanted, I am delighted with this bread. I am moving it from my "to bake" list to my "bake often" list.

David

Larry Clark's picture
Larry Clark

Is this actually working?


I checked Hamelman's  "Bread" out of the library, mostly because I wanted to learn to braid the Winston Knot. While thumbing through the book, I came across a section on scoring loaves and according to him I've been doing it all wrong. He insists that the slashes start on the left end of the bread and work toward the right AND the slashing stroke should be done left to right - backhanded. How could this possibly make a difference?
Well, yesterday I needed a "quickie" baguette and after the final proof decided, "What the hey?" and tried Hamelman's technique. The first cut I tried was too deep and just dragged the dough, so I lightened my touch and sort of scratched the surface. Disappointed in my attempts, I put the bread in the oven and this is what came out.


 This morning, I tried it again on some Anis baguettes:


 Both of these were 75% hydration doughs and I've never had this kind of success on wetter doughs.

I don't understand it, but I'm going to keep doing it until something better comes along.


 Larry

Pages