Woman does not live by rye or barley alone.
So this woman decided to follow suit, when she saw that a lot of other bloggers on The Fresh Loaf were having fun with bagels. I have a formula for Montreal-style bagels from my instructor at baking school. He got it, scribbled in pencil on a brown paper bag, from bakers at the St. Viateur Bagel Bakery where they've been supplying bagel lovers since 1957.
First, I had to scale back the formula. St. Viateur makes almost 10,000 bagels a day at its main location, so the original formula is a big one. It uses 40 kilos of flour, which they make several times a day. At school, we cut that back to 5 kilos. I thought I might manage with 1 kilo at home, which would produce just a baker's dozen. Even so, my poor Kitchen Aid mixer was straining. I quickly moved to hand kneading after the dough came together.
I'll publish the recipe below. There are two significant differences from others I've seen. Firstly, no salt. That always surprises people. I never know how to answer. Either the baker forgot to write it down, or it's what makes this particular bagel extra chewy and delicious. I don't miss it -- not a bit. Secondly, no proofing. At all. You can even skip bulk fermentation, if you let the bagels rest in the fridge overnight after shaping. Or production can be a continuous process after bulk fermentation where you go directly to dividing, shaping, boiling and baking. Then eating. :)
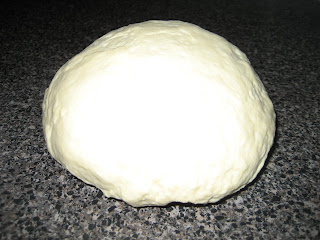
Here's the dough after 8 minutes of kneading:

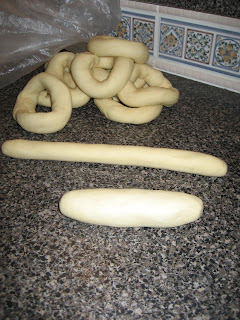
You can see the stiffness characteristic of bagel dough. I flattened the ball to a circle about 2" high and used my bench scraper to divide it into 4 oz. wedges. These, I rolled into strips much as Jeffrey Hamelman describes in Bread. As you handle the dough, it becomes smoother and more pliable.
I hadn't made these in over two years, but it was coming back to me. (Don't stack them like that...argh, they'll stick together. Oh yeah, keep a spray bottle handy to mist them or remember to cover with plastic while I process the rest. Wait a minute, no dusting flour...best worked on a damp surface!) The stream of consciousness continued, as I talked myself through the vague memories that my hands recalled better than my brain.

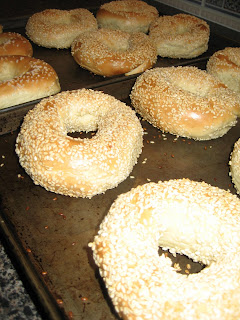
Then came the boiling and seeding. We never worried about colouring the water much. A handful of brown sugar or some malt syrup if it was handy -- just enough to help gelatinize the starch on the surface in a tasty way, making the bagels smooth and shiny. The dough already has sweetness from malt extract. Today, I used about 2 T of brown sugar in the boiling water. I love sesame seeds, so I used them for most of the bagels and coarse salt for the rest.

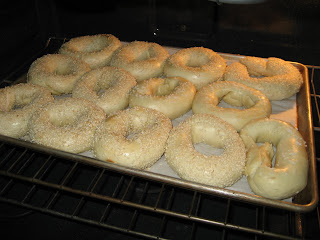
Here's what they looked like at half-time on my baker's half sheet pan in the oven. #13 of the baker's dozen got squished. That's okay. I found they needed extra time to brown properly. So near the end, I divided them between two smaller sheet pans without parchment and jacked the heat back up for about three minutes. Did the trick.

Who's got the cream cheese?


Montreal Style Bagels
1 kilo bread flour (about 8 cups)
2 grams instant yeast (2/3 tsp)
40 grams sugar (3 tbsp + 1/2 tsp)
9 grams malt (4 1/2 tsp)
50 grams egg (1 large)
463 grams water (scant 2 cups)
2 1/2 tsp vegetable oil
Scale or measure out all ingredients. Blend dry ingredients together in mixing bowl. Add wet ingredients and mix until dough starts to come together. If using a stand mixer, change to hand kneading at this point rather than strain the motor of your machine. Continue kneading until developed fully. At this point, you have some choices. The instructions that follow are for continuous processing. If you want to incorporate overnight retardation, see my two replies to Michael below.
Cover the dough and give it about 45 minutes rest on your counter, aka a period of bulk fermentation. When the time is nearly up, put a large pot such as a Dutch oven full of water on to boil and throw in 2 T brown sugar or some barley malt syrup. (Honey or maple syrup are fine, too.) Divide the dough into 13 units of about 113 grams (4 oz) each. Roll into strips and shape as bagels. There is no need to proof the bagels once shaped, but keep covered and/or mist so they don't dry out. Place on a sheet pan beside the pot of water. Process 6 or 7 at a time, however many will comfortably fit in your pan, moving them around in the water periodically for a minute or so. When ready, they float. Remove back to the sheet pan, and put the next batch on to boil.
While still damp, dip the boiled bagels in your preferred topping and place on a second baking sheet which has been lined with parchment and sprinkled with cornmeal. (If you have a hearth-style oven, the bagels may be placed on a peel or other loading device sprinkled with cornmeal and transferred to the oven to bake directly on the hearth. The technique with a wood-fired, brick oven is different again, one with which I'm not familiar.)
Bake out completely until a nice, golden brown, about 20 minutes at 460F. Reduce the temperature after the first 10 minutes, if your bagels are getting too dark. As mentioned above, I had all 13 bagels on a baker's half sheet, roughly 17" x 12", and they weren't quite baked through where they touched. I transferred them to two smaller sheet pans without parchment and gave them an additional 3 minutes. There was a lovely smell and a small bit of smoke when I opened the oven door. The bagels were perfect!