Flat top help

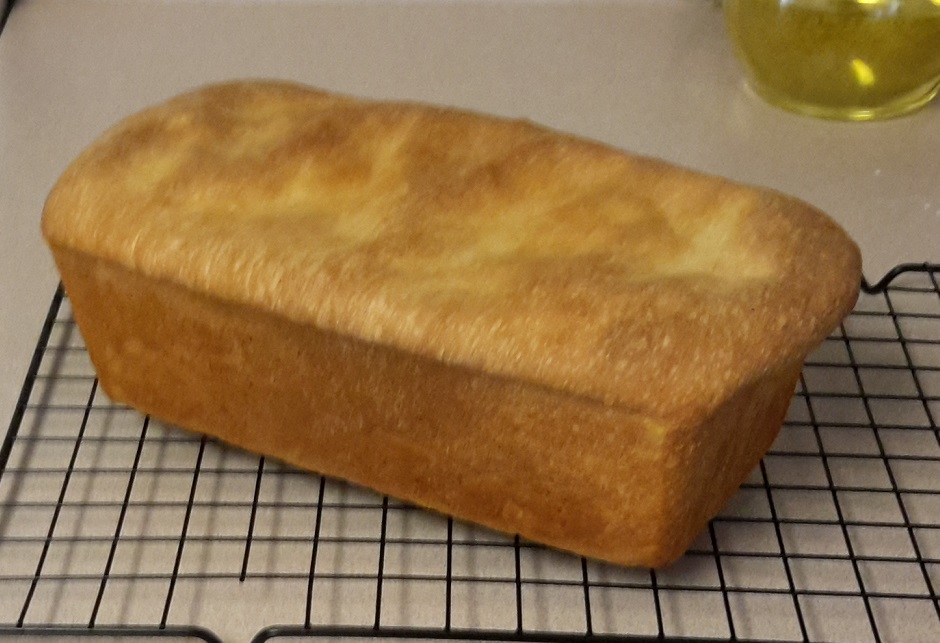
NuBie trying to learn bread making but usually end up with something like the attached pic. Tried different recipes from the web & books. Everything seems to go like the instructions but when I pull the loaf out of the oven - things seem to differ. This is sandwich bread. I have tried different recipes, bread flour, gen purpose flour, high in the oven, low in the oven, pre-heated oven, non pre-heated oven, few minutes of machine kneading, several minutes of kneading and 9 times out of 10 I get something like this. Some times only the middle (lengthwise) drops and the ends are normal looking, others like this. I don't believe everything on the internet, but all the vids I tried look like this when the person on the other end who knows what they are doing pulls something to be proud of out of the oven and I get this. It has to be something on my side of the bread pan that is wrong. The inside is fine, no large holes, and it tastes fine it just looks like it was dropped. Any ideas


How are you deciding when it has risen enough?
The first rise I do in an old pitcher with ruler markings on the side. All the recipes say double in size, its easy to know. The second rising in the pan I wait till it rises an inch above the pan wall.
...over proofed to me. Try catching but sooner. You say you fill the loaf pan and wait till it's risen about an inch above the rim but how much do you fill it and what flour are you using?
Better still, what's the recipe? How big is your loaf pan?
1 cup + 2tbsp water
1/3 cup sugar
2 1/4 tsp yeast
3/4 tsp salt
2 tbps non salt butter
1/3 cup dry milk
2 1/2 - 3 cups flour
9x5 pan
I just kicked off another batch and will stop first rise about 80%. I think I am on gen purpose flour this time. This time I added a bit more flour so it is not as sticky as before.
is in the final proofing. The bulk ferment is done when the dough is aerated, billowy and has a good matrix of bubbles.
I'm also thinking, after a quick conversion of your recipe, that perhaps your dough isn't filling the pan enough. I'm thinking you've got a 2lb loaf pan but your dough is closer to 1.5lb.
Here is a rough conversion:
Total = 720g - 780g
I was going to comment on the seemingly high amount of yeast but then again I don't do recipes like these and since you have quite a bit of sugar in there perhaps the yeast will need a boost. But if we assume your pan is for a 2lb loaf then it's falling short of about 120g of dough. Then you wait till it crests the top of the pan by then it's over proofed. So try filling it more.
Thanks for the info, I will try the next batch. I did a second test yesterday and snapped a few pics if it will help. It turned out better than some. I cut the first rise shorter then the previous.
Will continue to practice & learn
DrK, HERE is an article that may help with your proofing. Many bakers let their dough rise way too much. In order to obtain the much sought after oven spring, it is important to leave some gas (extra CO2) in the tank. The magic takes place in the oven, not during the final proofing.
The gist of the post above says that over proofing will not produce the results hoped for. Have faith in the oven spring...
I agree. I also believe the dough is "over proofed".
roger
Excellent. I will try again in a few days and cut it back even more.
Give the dough a poke with your finger and judge how it "recovers". That is the best way to tell if it risen enough. I agree that over proofing is most likely your problem.
I had the same issue basically and ask about it on this forum first thing after joining. I was using too little dough for the size of my pans. The answer I received on how to find the amount of dough is here http://www.thefreshloaf.com/node/59487/loaf-pan-size-and-oven-spring It solved my issue and I now get nice oven spring when the loaves are risen about 1 inch above the pan edge. When I did the measurement of water to fill my pans it was 1900 grams so I needed about 1000 grams of dough. If you don't have a scale you really need to get one. It will allow you to adjust your recipes accurately for different hydration rates and ingredients.
Thanks all,I tried doing the math for the pan size with as well as cutting the first rise short with not much difference from past tests. I did a test tonight (after I bought a commercial loaf this afternoon) with a pic below. This batch I cut the first rise at about 25% and used a recipe that used more flour than before. Previously the dough was a little sticky to the touch. This recipe wasn't sticky and nothing was left in the mixer bowl unlike previous recipes.
It is a trend of one, but will try again in a few days. Thanks again for the suggestions.
Super nice looking bread!
Thanks, just did a second loaf with the same recipe / technique and it turned out the same, so I am feeling better than I did with the last 10 thrown out for squirrels and other critters. Still learning but the homework is getting better.
So, is the answer that it's both the pan size and the over proofing?
I am not even close to being able to speak intelligently, but in my case I cut the first rise and changed recopies. Watching different vids I was leaving the dough way too wet and sticky. Now I add flour until it doesn't stick while kneading in the mixer. I have made 4 or 5 batches this way and they have all come out like the image above. I am still in learning mode though.
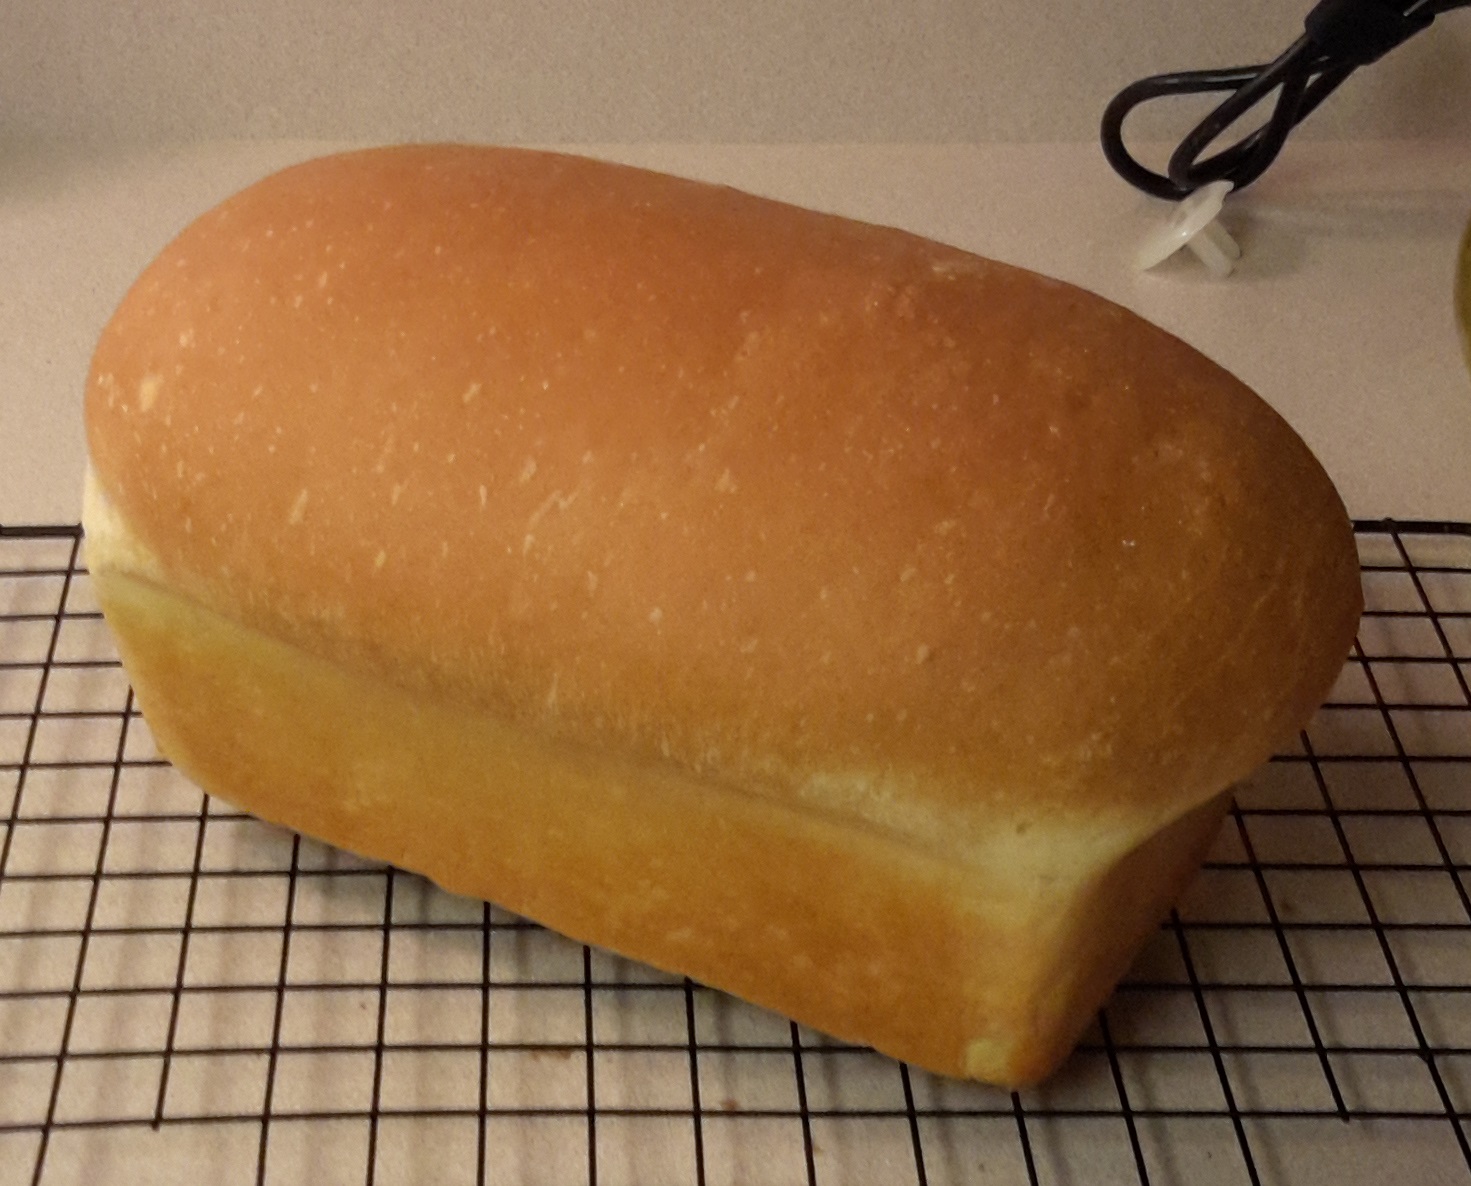
Thought i'd give an update for others starting out. I am not the quickest but I don't give up. The previous attempts sometimes sunk or the bottom of the loaf was super dense. Finally got to where I can consistently turn out great bread. Someone on youtube suggested a proofing box with hot water for steam and warmth. The recipes have all been similar, but the warmer steamier proofing seemed to get me to where I want. This is the fourth in a row that have been the softest bread, nearing Wonder Bread sponginess. The bottom of the bread is as light as the top. Single slice sandwiches bent in half don't break. I don't know about making it in the hot summer months, but other than that I can't imagine buying another loaf ever again.
Thanks again to all who took the time to help someone learn.
Dr.K, looks like your persistence paid off in buckets... This bread looks perfect. Please share your formula and method. Have you changed anything from THIS FORMULA?
I may have to give this one a try. My wife likes soft white bread and this looks like it would fit the bill perfectly.
Danny
I change everything when I find something I want to try that someone shows me. I wish I had the link for that vid because this isn't me knowing anything. I can follow instructions fairly well though. I will try to find and edit the post.
3 tsp yeast in 1 cup of warm water
I let it sit a few mins even though I know my yeast is good.
3 tablespoons of sugar
3 tablespoons of oil
1 1/2 teaspoon of salt
3 cups of flour
I have a Stand mixer and mix all that for a few minutes to see if it needs additional flour or water. Its not super sticky or dry. So far it hasn't.
Eventually knead for 10 total minutes.
I boil about a quart of water and put in a tupperware container that goes in the proofing box with the dough to steam & heat it. I do the standard double in size thing (about an hour) for first proof.
Remove it and press the air out of the dough like normal and put in bread loaf pan and back on the proofing box with more hot water until it rises above the pan. These have been a little more than an hour.
Then in the (not pre-heated: cold) oven 350 for 40 - 45 minutes.
Cool on rack.
Comments: I have used both active and instant yeast with the same outcome. I use King Arthur bread flour. Water here is not good enough for me drinking so I use bottled water for cooking and brewing. I have been through a couple jars of yeast trying different things with varying levels of success. Nothing so far has been like this and as consistent. I was afraid of posting and jinxing myself, but 4 out of 4 is a decent trend. The main difference is the humidity and warmer proofing. The temp in the box gets to around 90F from the hot water and I assume the humidity is very high. The walls and lid are coated with mist so I have the box on a slight angle so it doesn't drip on the dough. I don't do the butter on the crust when it comes out of the oven.
Thats it. Hope you can duplicate it
I am setting up a spreadsheet using Baker's Percentages. I think you forgot to put the amount of water used in your recipe.
Please let me know.
3 tsp yeast in 1 cup of warm water
I saw the 1 cup of water but mistakenly thought there was more. when the oil is considered as a liquid, the hydration comes to 77%.
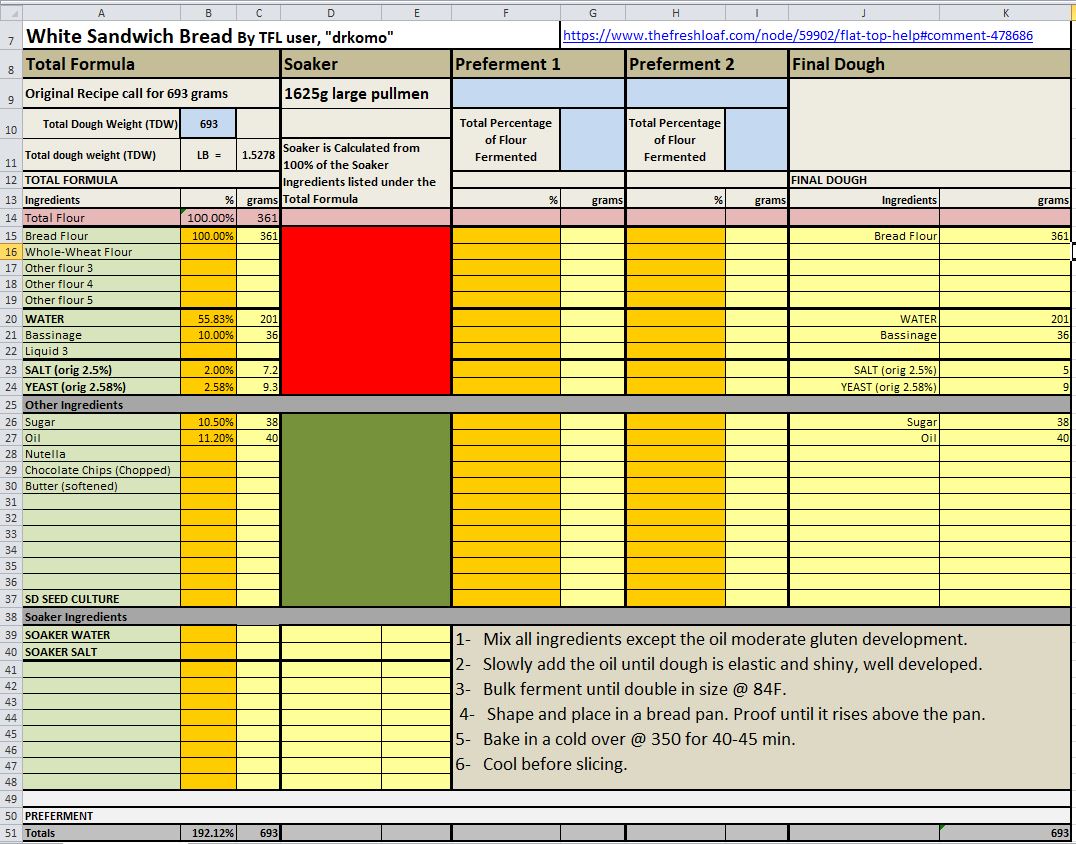
Here is the spreadsheet made from your recipe.

The hydration is broken down into 2 separate entries. This way I can slowly add the "bassinage" water and evaluate the dough as it is drizzled into the mix. This gives me the optin to make adjustments.
Danny
Looks nice. BTW I use Canola oil because its what I have and use for most things.
Enjoy
Here is my first attempt. The bread is very light and has a clean sandwich bread taste. Your formula and method was super easy to make and required very little time.
There was some good, some bad, and some ugly :-)
The good part. The bread rose super high. 693 grams of dough filled an entire large USA Pullman Pan to over topping! It was light as a feather and squeezably soft.
The ugly and the bad part. The sides of the loaf shrunk in drastically. There were also some large holes near the top of the slice near the crust. I am open to ideas and suggestions to improve this aspect of the bread. The formula and method is a keeper.
I think it looks good! Haven't read through the whole post so forgive me if it's been mentioned before...
For a sandwich loaf it's fine, even better, to de-gas more. No need to be light handed when it comes to shaping. Knocking back fully. For the sinking sides allow it to cool down more slowly in the oven with the door cracked open after the bake has finished. After 10-15 minutes takenit out and allow to fully cool.
Thanks, Abe. I have no experience with sandwich breads.
Next Time -
Benny, the bread rose extremely fast and got away from me.It probably did over proof quite a bit.
We don’t bake commercial yeasted breads very often so with 2.58% IDY it would move faster than we are used to.
Benny
A few things about DrKomo seemed unusual, but I stayed with his recipe. I was surprised how well it came out. I also thought the percentage of CY was high but went with his instructions.
I did reduce the salt to 2% from 2.5.
The pan is overfilled too. Rose way and above the top of the pan. Might simply be too lopsided and with the top cooling more quickly the sides sunk in. I'm guessing now.
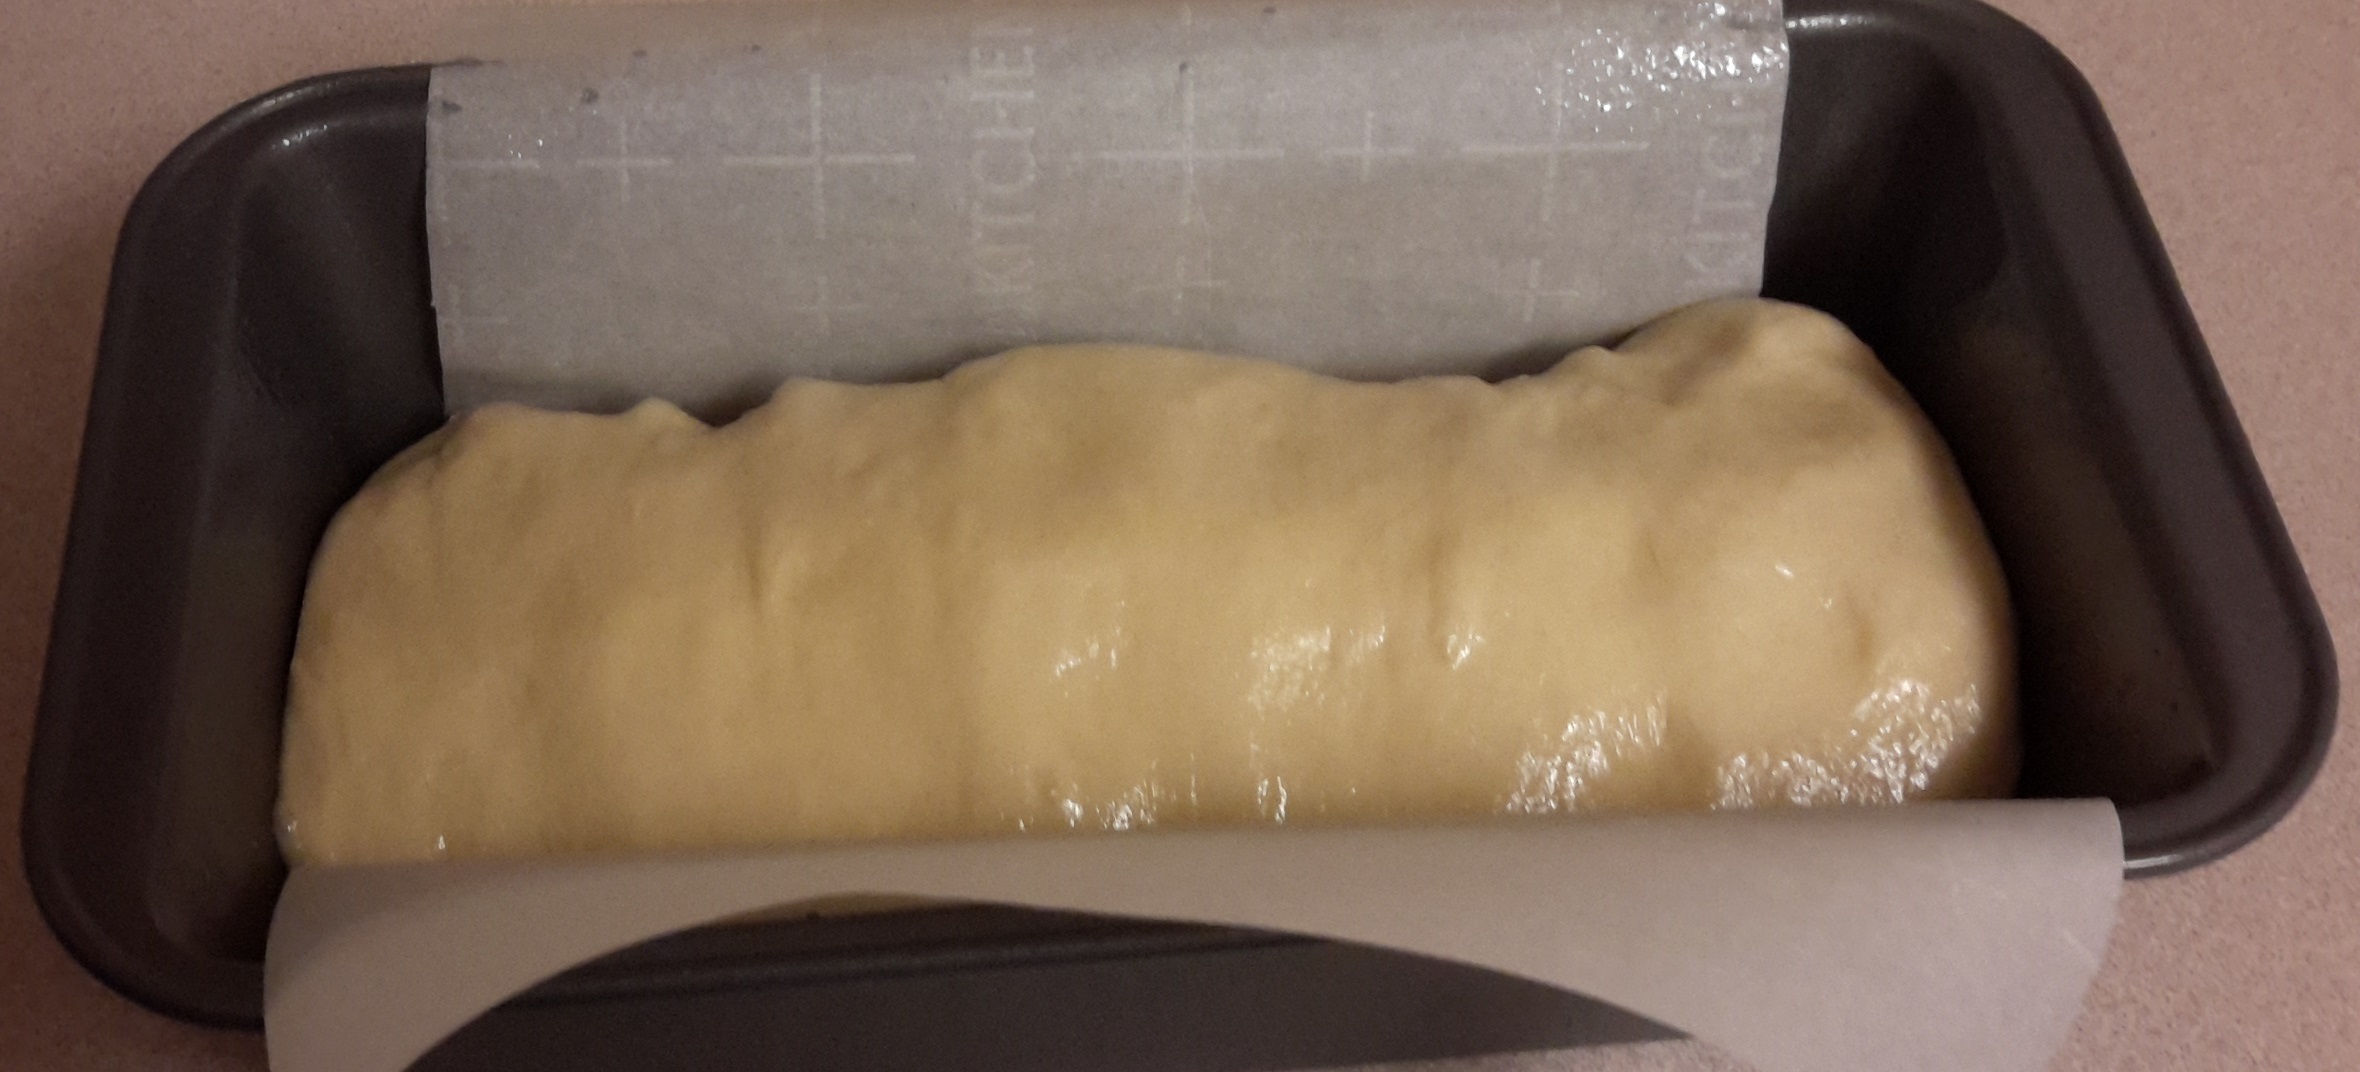
Abe, the dough rose so much that a 693g dough filled over 3/4 of a large USA Pullman. It’s dimensions are 13 x 4 x 4 inches (38cm x 10cm x 10cm). When the small dough was placed in the large pan, I never dreamed it would overflow the top and fill each end. The dough wasn’t long enough to reach each end of the pan.
what is the typical percentage of CY for sandwich bread?
When I think about it, I’m not sure it over proofed because the oven spring was astronomical!
Next time I think thorough degassing may help solve this problem.
As I'd think it would sink. De-gas more, fill the pan less and cool more slowly would be a good trial and error points. As for yeast I'm not as familiar than I am with sourdough starter. If it's too strong and it rose more than expected then perhaps cut back a little?
I also wonder if it is a bit overproofed Dan, what do you think? I think that the collapsing sides along with the large holes at the top make me think a bit overproofed. I agree with Abe leaving it in the oven for a bit with the oven door open can help but I think reducing final proof would also help.