The Fresh Loaf

A Community of Amateur Bakers and Artisan Bread Enthusiasts.

Blogs

Eli's picture
Eli

I have been making these yeast rolls for some time now. Usually for the holidays. I thought I would share. They are very good and light.


 Yeast Rolls

Ingredients:

494 Grams Flour (bread)

5     Grams yeast (IDY)

65   Grams Sugar

5     Grams Salt

50   Grams of Egg (beaten)

195 Grams Milk

49   Grams Shortening

49   Grams Water

* Optional - I add about 3 tablespoons of day old mashed potatoes.

   Sometimes I add Sesame seeds

Combine all dry ingredients except salt and add water. Mix and set aside 20 minutes. Beat together egg, shortening and salt adding milk and knead for 10 to 12 minutes. Dough will be tacky. Place in oiled bowl and set aside covered.

Allow bulk ferment till double.

 Remove and scale and shape into 1.75 to 2 ounce rolls. They will expand a great deal. Place on baking sheet and cover. (I do an overnight refrigeration) Then allow 1 to 2 hours for final proof. You may not get much rise but you will get it in the oven. Keep an eye on them and when you press one with your finger and it doesn't completely return they are ready.

Place in preheated oven 375 degrees and bake approximately 10-12 minutes. Remove and brush with butter.

Allow to cool. What is leftover can be frozen.

Yeast Rolls a1


www.elisfoods.wordpress.com


ejm's picture
ejm

Glezer bread

For a recent dinner featuring shrimps in Pernod, there was special request for the bread to be made WITHOUT using my wild yeast. So I fell back on one of our favourites from Maggie Glezer's book Artisan Baking Across America: Acme's Rustic Baguettes. On first reading, the recipe seems a little complicated with its double preferment but it is almost fool proof. And it's NOT sour. Not even remotely.

The bread was so successful and so good and so free of any sour taste that it is the primary reason for the fit of pique when I threw our wild yeast starter down the drain.

I feel so free!

Even though the shape isn't quite right, everything else about the bread was great. Some day I might actually shape the bread in baguettes but boules are SO much easier. The only thing that I haven't managed to get right is to keep the loaves from growing into each other as they rise.

Glezer bread

To learn more about our feast, please read here.

holds99's picture
holds99


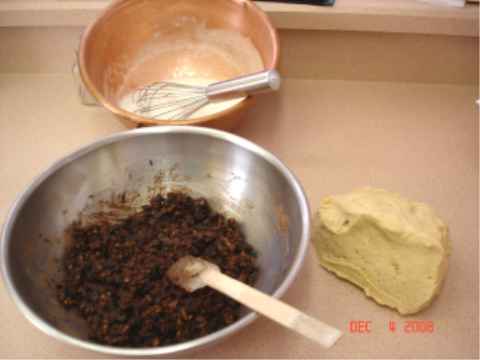
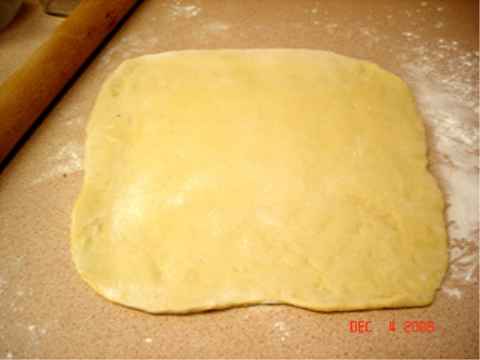
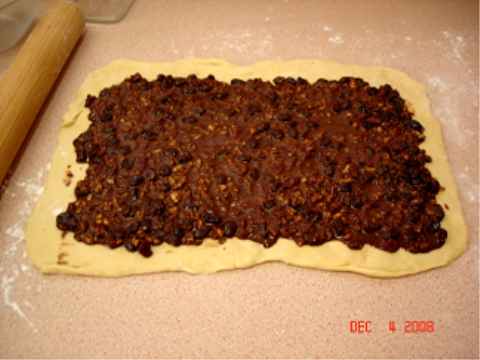
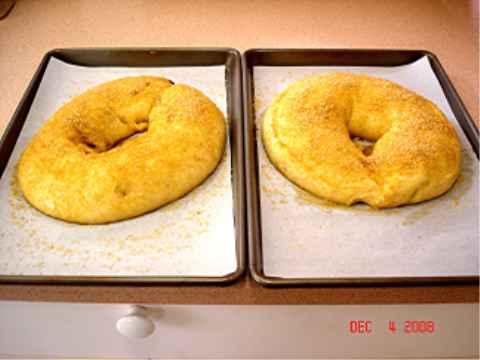
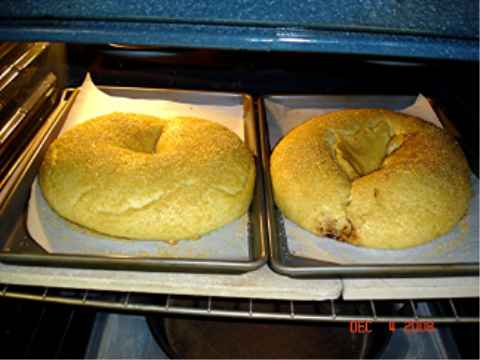
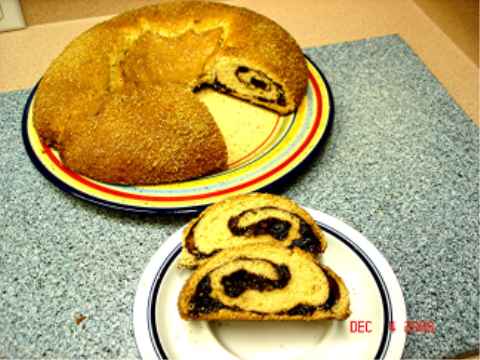
This is Michel Suas' recipe/formula for "Rotolo Di Natali" from his book "Advance Bread and Pastry".  In the summary at the beginning of the recipe Mr. Suas says: "This ring of dough is usually baked in Italy for Christmas celebrations.  The combination of soft enriched dough and crunchy filling creates an unusual texture, while the appealing presentation makes Rotolo Di Natali a festive centerpiece."

I tried to find the origin and story behind this lovely, deliciously filled sweet bread but was unable to do so.

However, years ago I was enrolled at the Dunwoody Institute's prestigious Professional Baking - Racker Certification Program.  That same year, through the generous endowment of the Lydia R. and Edgar P. Munnerlyn Charitable Trust, our graduating class was provided steerage tickets on the tramp freighter 'Honduran Gal", thus enabling the members of Dunwoody, class of '78, the opportunity to visit authentic artisan bakeries in Italy as part of Dunwoody's "Meet The Bakers" outreach program. 

The Dunwoody "Rackers" had been in Italy for a couple of weeks and our class trip was winding down.  It was my last evening in Italy and I was feeling a bit nostalgic about the time I had spent in this wonderful country.   The evening was balmy and as I was strolling through the downtown piazza I noticed an elderly man sitting alone on a bench reading his newspaper, the light blue smoke from his short black Pierogi cigar encircling his head, then drifting slowly away into the night air.  I decided to approach him, and after we exchanged greetings and made perfunctory small talk, I casually asked him where I could go on my last night in this beautiful city to find the true essence of Italy.  Slowly folding his newspaper, he glanced around, making certain we were not being observed, and that no one was within earshot of our conversation.  I couldn't help but notice the old man's eyes were misting a bit as he reached into his jacket pocket and pulled out an old and tattered, dog-eared color photo of a beautiful, golden crown shaped loaf of bread, the top liberally sprinkled with coarse sugar creating a golden crispy crust.  He proudly held up the photo for me to examine.  Grinning, I nodded approvingly and in my fluent Italian I said: "Momma mia, thatsa nice a loafa you gotta there ina you foto"'

Smiling broadly, the old man lightly kissed the photo and carefully tucked it back into his jacket pocket.  Then, he motioned me a bit closer and as he leaned forward, a faint smile crossed his lips.  The old man spoke very softly, measuring each word, the way Orson Welles had done in Citizen Kane when the camera, in the opening scene focused on his mouth, and his lips spoke the immortal word: "Rosebud".  The old man slowly stood up, placing one hand on my shoulder and leaning a bit closer to my ear, he softly whispered: "Rotolo Di Natali". 

Since that evening I have wondered about the true meaning of these words?  Then recently, after finding Michel Suas' recipe and baking this terrific sweet bread, I understand exactly what the old man meant that night in the piazza. 

OK, confession time.  There really wasn't any old man on the piazza bench that night in Italy.  I made it all up.  But seriously, this bread is a very nice European style holiday treat, filled with a mixture of nuts, sugar, cacao powder, raisins, rum and beaten egg whites. 

Howard


belle's picture
belle

Help...I am new to this wonderful community and hope you can help...I am in need of a great recipe for raisin walnut sourdough bread.  I have purchased a wonderful loaf from The Kneaded Bread bakery in Port Chester, NY and have made numerous attempts to make it on my own but nothing compares. 

thanks very much...

Linda

dmsnyder's picture
dmsnyder

Above are pictured three loaves of San Francisco Sourdough made from the recipe in Peter Reinhart's "Crust and Crumb." They each turned out with subtle differences that are instructive regarding the variables that affect the appearance of our loaves. I thought it might be useful to describe these differences and what produced them.

I'm not going to describe the formula or method, because these were according to the recipe and were identical for all 3 boules. They were proofed in identical coiled reed brotformen. The two loaves on the right were baked together. The one on the left was baked 45 minutes later, and was left in the refrigerator, where all had been cold retarded overnight, 45 minutes longer than the other two. As you can see, they were scored with the same checkerboard pattern. Both bakes started in a 500F oven. The temperature was lowered to 450F when the loaves had been loaded. They baked for 30 minutes then were left in the oven for another 10 minutes with the oven turned off and the door ajar.

What were the differences in my procedures, then?

For the first bake (the two loaves on the right): 5 minutes before loading the first loaf (the one in the middle). a handful of ice cubes were put in a pre-heated metal loaf pan on the lowest shelf. Then, I dumped the boule on a peel, scored it and loaded it. The oven door was closed. I scored the second loaf (the one on the far right) and loaded it. I then poured a cup of boiling water into a pre-heated cast iron skillet on the bottom shelf and closed the door. The loaf pan and the skillet were removed after 10 minutes.

For the second bake, the loaf on the far left was scored and spritzed with water, loaded and then covered with a stainless steel bowl. The bowl was removed after 10 minutes.

What were the differences in outcome?

Comparing the two loaves baked together, the first one loaded had better oven spring and better bloom. I think it got the benefit of a slightly higher initial oven temperature. The second loaf was loaded within 2-3 minutes of the first. I have seen this difference between 2 loaves loaded sequentially in this manner repeatedly. I think the differences are "real."

The third loaf and the first (the one on the far left and the middle one) had about the same oven spring and bloom. If anything, the loaf in the middle had more. They were both, of course, the "first" loaf loaded. However, the one baked under a bowl for 10 minutes had a much shinier crust due, I think, to dissolved and gelatinized starch on the surface.  The difference "in person" was more dramatic than what I see in the photo. This shininess is an effect I've seen only with breads baked covered. The longer the loaf is covered, the stronger the effect.

These differences may be of little significance. All three boules are quite satisfactory. But the differences do elucidate the effects of minor changes in temperature and humidification and might answer questions other have about how to achieve desired improvements in their breads.

FYI, we had part of the loaf on the left with dinner (Onion soup and Dungeness crab cakes with an Anderson Valley Sauvignon Blanc). The bread had a crunchy crust, typical chewy crumb and lovely complex soudough flavor. This is still a fabulous version of SF Sourdough.

Any comments about the observed differences would be welcome.

David

dmsnyder's picture
dmsnyder

Norm's onion rolls and kaiser rolls

Norm's Onion Rolls and Kaiser Rolls

March 3 should be a TFL holiday. That's the day in 2008 that Stan (elagins) asked Norm (nbicomputers) if he had a recipe for New York style onion rolls.  Norm did, and he posted the recipe the same day

I just know there are some here who have yet to bake these. No one's perfect. It's not the end of the world. On the other hand, it would be a terrible thing for the end of the world to happen, and you haven't gotten around to baking these rolls. You shouldn't be depriving yourself. You never know ...

It should be noted that the same dough that is used for onion rolls is also used for kaiser rolls (aka "hard rolls," "Vienna rolls," "bulkies"). The only differences are in the make up (how the rolls are formed), the proofing and the topping. Well, there is also a slight difference in the recommendation for steaming the oven.

I am posting Norm's recipe together with tips he contributed in response to various questions and problems others posted.

So, without further ado ...

 The Dough

(Makes nine 3-oz rolls)

  • High Gluten Flour 16 oz
  • Water                  8 oz
  • Yeast                  0.3 oz Fresh or 0.1 oz Instant
  • Salt                     0.25 oz
  • Sugar                  0.75 oz
  • Malt                    0.25 oz (diastatic malt powder or malt syrup. If you don't have either, just add an additional 0.25 oz of sugar.)
  • Eggs                   0.75 oz (a little less than 2 Tablespoons)
  • Oil                      0.75 oz (a little less than 2 Tablespoons 
  1. Combine flour, salt, sugar (And malt, if using malt powder. And crumbled fresh yeast, if using fresh yeast.)
  2. Pour water in a bowl. (Add instant yeast, if using it, and mix. Add malt syrup, if using, and mix it.)
  3. Mix egg and oil together.
  4. In a large mixing bowl, preferably the bowl of a stand mixer, pour in the flour mixture. Add the egg and oil mixture and combine. Last, add the water mixture and combine.
  5. Using the dough hook, knead on Speed 2 (for a KitchenAid mixer) or equivalent for 10-15 minutes, until the dough is very smooth and silky. (This is a very stiff dough, so your mixer may "walk." Keep an eye on it!) Depending on your flour, you may have to add a bit more water, but the dough should be rather dry. Not sticky or even tacky. It should clean the bowl sides and not adhere to the bowl bottom.
  6. Place the dough in a clean bowl and cover tightly. Let it ferment until doubled in volume. (About 90 minutes, depending on the room temperature.)
  7. Turn the dough onto a dry, un-floured work surface. Divide it into 2 to 4 oz pieces, depending on the size rolls you want to end up with. (For reference, a 3 oz piece will result in a 4 inch onion roll or a 3 inch kaiser roll.)
  8. Pre-shape each piece into a ball, cover with plastic wrap and/or a towel and let them rest for 10 minutes. (This is to relax the gluten, not to rise.)
  9. If making onion rolls, spread the topping on your work surface, a cookie sheet, a pie tin or whatever.
  10. Flatten each piece using a rolling pin and/or the palm of you hand. They should be 1/4-1/2 inch thick.
  11. Press each flattened piece firmly into the topping mixture, then place it topping side up on a baking pan lined with parchment paper which has been sprinkled with coarse cornmeal (polenta).
  12. Cover the baking sheet with plastic wrap and allow the rolls to fully proof. This may take 60-90 minutes. (Failure to allow the rolls to fully proof will result in more oven spring than is desirable. These rolls should not end up spherical, but rather flat, like a discus.)
  13. Pre-heat your oven to 450F and prepare to steam it using your method of choice.
  14. When the rolls are fully proofed, press a finger deeply into the center of each roll.
  15. Bake them for 5 minutes with steam. Then remove the steam source and continue baking until the rolls are well-browned - 10 to 15 minutes longer. (The tops may remain white if the onions were too wet or you had too much steam in your oven.) If desired, you can bake a bit longer to crisp up the tops.
  16. Remove the rolls from the oven and cool on a rack.

The Topping for Onion Rolls

(Makes enough for a double recipe)

  • Dehydrated onion flakes ¼ cup
  • Poppy seeds                  1 T
  • Salt                              ¼ tsp
  • Oil                                1 T
  1. Put the onion flakes in a bowl and pour boiling water over them.
  2. When the onion flakes are fully re-hydrated, pour off the excess water but save it for use in the dough or in your rye sour or other good use.
  3. Mix in the other ingredients and put aside.

If anyone has additional tips, please submit them. Collectively, we have quite a bit of experience with this recipe. I'm hoping to collect it all in one place.

Thanks. 

David


proth5's picture
proth5

Been falling behind on my posting.  During this long run to the solstice, even typing "Nice bread" is too much (and to so many, I say "Nice Bread!")

Here's where my energy has gone:

What I've been doing

The sparkly boxes without ribbons are caramels - over 2000 pieces hand cut and wrapped, the bags are home-made marshmallows, the boxes with ribbons are home grown and house made jams, jellies, pickles, and mustards, the tall shapes are herbed vinegars, and the stack of containers to the rear are full of a special family recipe cookie.  Of course there is the remains of last week's milling and baking.

The special cookies are known in our family only as "Grandma's Brown Cookies" and are one of those things that exist within a family context.  They are a strongly spiced molassas cookie and not to evryone's taste (you need to have been raised on them) they also require special small cookie cutters (passed down in the family) and have some measurements that require knowing which glass to use.  I like to think about that kind of thing in terms of our baking and cooking traditions.

So once I get this all shipped to the proper receipients, I can take a deep breath an lose myself in ABand P.....

Happy Baking!

SylviaH's picture
SylviaH

The bread has cooled enough to cut and Norm's Onion Rolls are everything everyone said they were..my P.R.Italian really tastes very good to...I will be making them both again and again!

dstroy's picture
dstroy

Our littlest one had a birthday party today - she's turning 4 on Tuesday.

She's had something of an obsession with Chinese Lion Dances ever since seeing celebrations at a Lunar New Year festivities at the dowtown gardens a couple of years ago, and this year, she requested that her cake be done in this theme.

Here is what I came up with:


His tail and ears were made of cookies. His horn was an ice cream cone cut in half.

There were candies at Winco called "Burnt Peanuts that were red and prickly and served quite well as pom poms!

This served as inspiration for the cake:

I started with a rather blocky stack of Funfetti bricks.


curly candles completed the festive disposition!

Pages

Subscribe to RSS - blogs