The Fresh Loaf

A Community of Amateur Bakers and Artisan Bread Enthusiasts.

chocolate

d_a_kelly's picture
d_a_kelly

Hi bakers everywhere!

I made this a few weeks ago but have only had the chance to post it now. I took the recipe from Cresci, by Massari and Zoia. In the book it's for a panettone but I thought I'd try to make it in the form of a colomba because it was around Easter and I still had a few colomba cases left to use :)

This is a very unusual panettone recipe in the all the flour goes into the first dough. The traditional method is to split the flour between the two stages. I'm not quite sure what the benefits of this are (allowing for more autolysis) but there are a few recipes in the book where this happens. I'm pretty certain that these "non-traditional" formulae are associated with Achille Zoia. I've been working on his panettone paradiso (another flour-all-in-one recipe) on-and-off now for over a month and I kid you not, I've only made it work once, despite about 15 attempts!! Fool that I am, the one time it worked I didn't take any photos, but the crumb was the softest and moistest of any panettone I've ever had, so I'm determined to persever. But back to the colomba...

The recipe calls for hazelnut paste and gianduia amara. I bought the hazelnut paste online (very expensive) because I don't have the equipment to make a truly smooth paste at home. The gianduia I made myself, using the following recipe (in grams). I took amara here to mean the use of dark chocolate rather than milk. I used Amedei toscano black - a really delicious, and Italian, chocolate.

hazelnut paste 50

dark chocolate 70% 20

cacao butter 6

icing sugar 50

melt the chocolate and cacao butter together and then blend in the icing sugar and paste. It's important to stir constantly and drop the temp as quickly as possible to 26C to prevent it from separating. I took this recipe from Valrhona's cooking with chocolate book.

I made the first impasto at about 10pm so that I could go to bed and rise the next day with it ready.

sugar 79

water 177

hazelnut paste 32

very strong flour 316

Italian sweet starter 63

butter 63

I left the flour, sugar and water to autolyse for half an hour and then added the other ingredients, working it until the dough was stringy.

The next morning it had tripled in volume (12 hours precisely) so I reworked it with the following:

sugar 47

honey 32

butter 47

gianduia (melted) 47

hazelnut paste 32

yolk 73

salt 2.5

vanilla quarter of a pod

water 9

milk chocolate 62

dark chocolate 47


take 991 of the  impasto and add chocolate pieces. For the milk choc I used Valrhona's Jivara, and a mix of Amedei toscano black and Valrhona's Manjari for the dark. 

My last attempt at forming a colomba hadn't been a success, so taking inspiration from thefreshloaf, I decided to fold and stretch it repeatedly until I had a nice tight ball. I let this rest for an hour and then repeated the process, before putting it into the shape. I was much happier with the shaping this time, the dough had a better, tighter skin on it.

I had just enough dough left over to make a "panettoncino" of about 85g. 

About 6 hours later (held at c. 30C) it was ready to go in the oven. I glazed it, covered it was sugar granules and almonds, and then dusted it was icing sugar.

My glaze this time was a little thicker than I've made it before - too thick I think, even though I followed my usual recipe. I should have added a tiny bit more egg white. It was just a tad too thick to be easily spreadable. In the oven then for 50 minutes at 170C. I didn't bother with steam because I was worried about the icing sugar. I'm not sure it made any difference.

Oven spring was enormous. The top photo doesn't really do it justice. I doesn't show just how much over the edge of the form it is. I slightly crushed it with my hand when I was turning it upside down (idiot!!!) but apart from a crack on the surface, it popped right back out when it was hanging during cooling. 

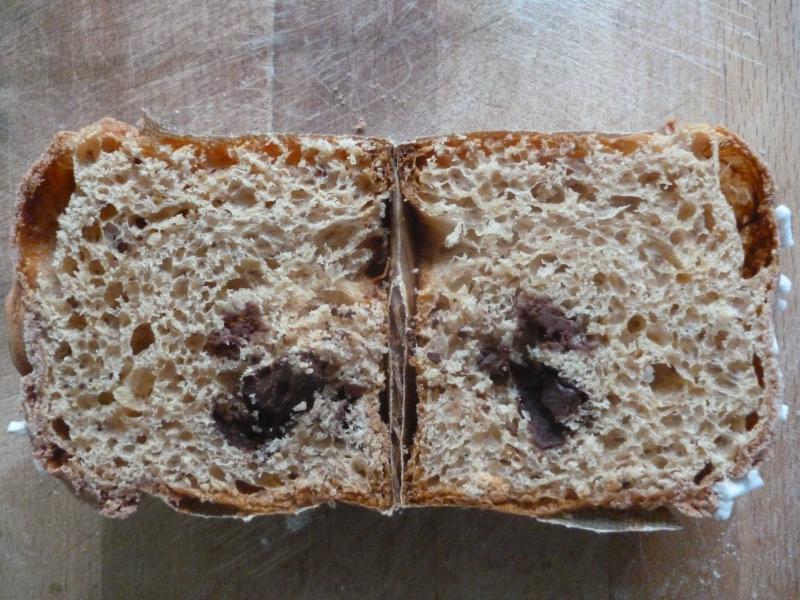
The colomba itself was a present, so the only crumb shot I have is from the panettoncino. I think there was just a little too much impasto in the pirottino... BakeryBits.co.uk markets them as 100g cases, but I think even 80g is too much if you are using them for a panettone. I think perhaps 70g might have been better. 

Well, my conclusions...

I tasted both the baby panettone and the colomba and I was very... disappointed!!! There was zero(!!) taste of hazelnut from it. Zero!!! The hazelnut paste I used was professional quality (it certainly had a professional price) but it didn't even leave a trace of flavour in the finished product. The photo in Cresci implies a deep brown crumb, but my crumb looks more beige. I didn't know what industrial strength paste Zoia must be using to achieve any flavour or colour on this one. The crumb itself, although very shreddy, as it should be, was also quite dry. The driest of all the panettone I've made so far. All I can say is thank God I used good quality chocoalte, because otherwise the entire thing would have been very uninteresting. 

It's a great shame, because I'd been looking at the recipe for ages, thinking it would be great. Where is the hazelnut flavour?!?!? Another thing I've noticed is the how much growth in the colomba is lost to sideways motion. The circular shape of the panettone form is very strong, so all the growth is directed upwards. The colomba seems structurally weaker, you can see how the sides have bulged out and become distored. 

I need a break from panettone making for the moment... the repeated disasters with the panettone paradiso have knocked my confidence terribly. Hopefully a break will allow me to... what? I'm not giving up on it though. I refuse to be beaten by a bit of flour, butter and egg!


David

mwilson's picture
mwilson

Thanks Luciana for posting this recipe.


Gotta love chocolate!

Recipe source: http://www.panperfocaccia.eu/forum/viewtopic.php?f=33&t=16418


Final dough moulded and later fully risen.

Primo Impasto:

  • 230g flour, I used very strong
  • 90g sugar
  • 120g egg yolks
  • 100g water
  • 80g butter
  • 100g natural yeast, refreshed three times prior

Secondo Impasto:

  • 50g flour
  • 20g egg yolks
  • 15g sugar
  • 60g butter
  • 2.5g salt
  • 60g cocoa paste (1/3 cocoa +1/3 butter + 1/3 sugar)
  • 130g candied orange cubes
  • 100g chocolate chips, I used 50g milk / 50g dark
  • zest of 1 lemon
  • zest of 1 orange
  • seeds of 1 vanilla pod
  • 15-20g water to adjust dough consistency


Up close before before being scored with a cross and cooling upside down after the bake.

After cooling completely, this panettone was wrapped and left to mature for 5 days before being cut into… The texture was the best I’ve had so far, very bready and very shreddy. For my taste this could have done with a little more salt even though I did raise it to 3 grams already.


Various photos of the crumb.

Close-ups

-Michael

kiki's picture
kiki

I baked W-chocolate campagne for valentine.

Cocoa campagne  with lots of big chunk of bitter chocolate, cranberry and orange peel.


I love the combination of chocolate and fruit....the multiplication  enrich the chocolate flavor!


best,

kiki

Juergen Krauss's picture
Juergen Krauss

Being a home baker, one of the most amazing things for me to achieve in my baking is consistency. As a home baker one gets rarely the opportunity to bake big batches, and the natural limits are oven capacity and proving space.

During the last four weeks I have been asked twice to bake for larger occasions, and I managed to churn out about 70 braided rolls on each occasion. Great fun, and also quite a learning curve in managing resources and dough handling.

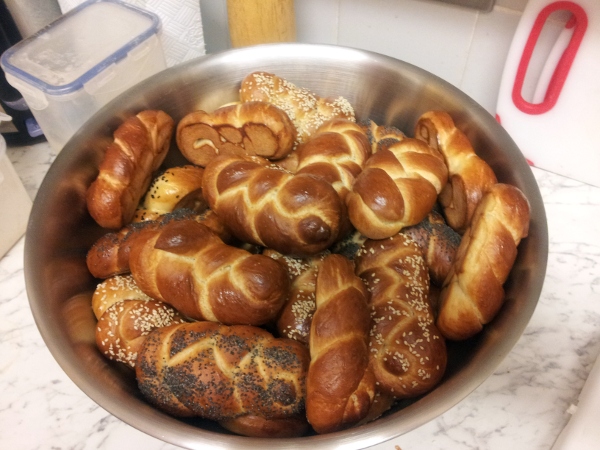
The first occasion was my mother-in-law's 80th birthday; I used the Rich Sourdough Barches recipe from “Inside The Jewish Bakery”, a great recipe. I made 70 rolls (60g each) in different shapes and with different toppings, and a 12 strand braid of 1200g, in 6 batches over 2 days (working fulltime on my job during the day). After the first two batches the oven window blew (while my wife made supper, I was still on the train), and a commuter friend offered spontaneously his kitchen, which I gladly occupied until 1.30 am that night and got all my baking done.

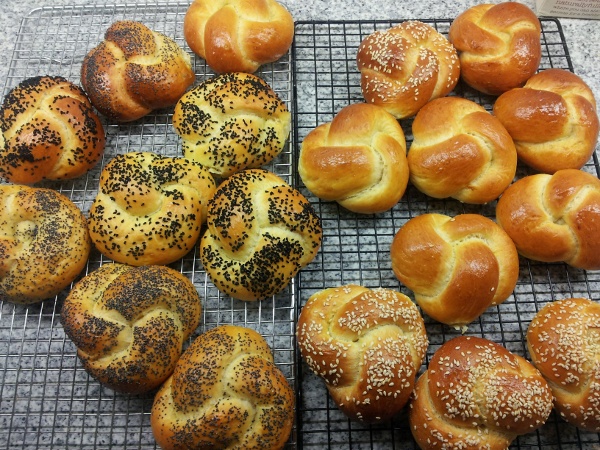
Here a photo of the rolls made that night:
 

The arrangement on one of the tables looked like this:
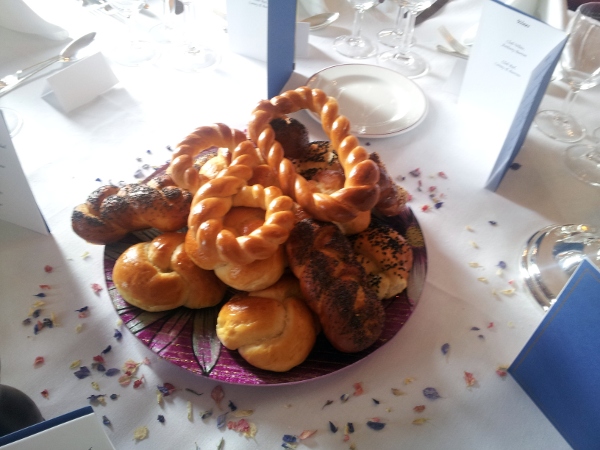
 

The second occasion was the winter fair at my son's school. The theme was “Fire And Ice”, and I have been gently volunteered to create “Fire n'Iced Buns”.

A couple of days before Bo Friberg's “The Professional Pastry Chef” had arrived, and I was keen to try out some recipes from this huge book.

I chose to base the buns on the Rich Cardamom Sweet Dough – various tests and tastings showed this to be an easy to handle and very tasty formula.

Curiously, although it is a yeasted dough, it omits a bulk ferment – it is meant to be rested for just 10 minutes after kneading (to relax the gluten).
I tested this, and made two more small batches, one proofed as I would (poking test), and one overnight in the fridge.
The original method and the chilled version were quite similar, but the “properly“ fermented version yielded buns that were quite dry.

I will give the percentages of the Cardamom Dough as I adapted them below.

I made the final buns with Cardamom Dough, my Chocolate Chilli Dough (adapted from the Cardamom Dough), and peppermint Icing. Half the Chocolate dough was without chilli.

Because I managed to scale shape 12 buns in about 10 minutes I baked 65 buns (40g each) in 6 batches, starting at 5.30am and finishing with the decoration at 9.00am.

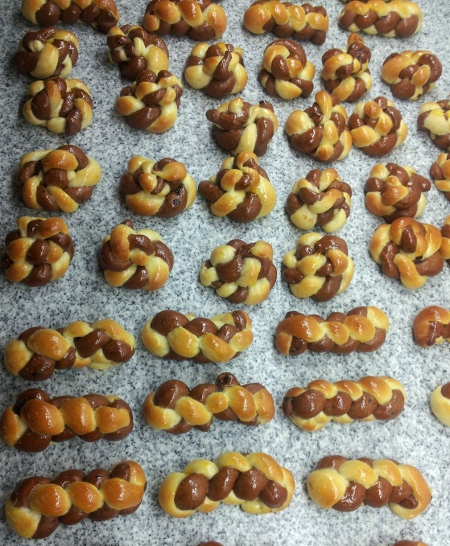
Here some photos of the "Fire n'Iced Buns":
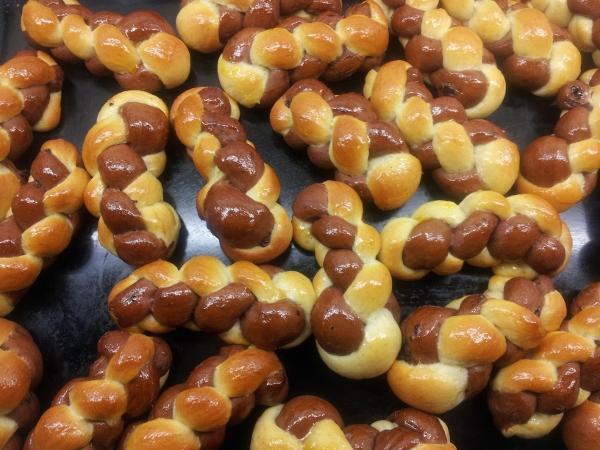


The buns above have been glazed with hot apricot jam, but haven't been iced yet. Unfortunately I haven't got any good pictures of the final product.

And here the formula:

IngredientChocolate Chilli DoughCardamom Dough
 %Weight%Weight
Bread flour100733.0100772.5
Cocoa Powder536.600.0
Cardamom1.057.717.7
Chilli Powder0.64.400.0
Ground Ginger0.181.300.0
Ground Cloves0.0930.700.0
Chocolate Chips (small)1073.300.0
Sugar14.92109.414.23109.9
Salt1.319.61.269.7
Yeast (instant)1.60911.81.5311.8
Butter7.5655.416.74129.3
Milk42.13308.840.17310.3
Egg20.19148.019.25148.7
Yield204.6421,500.0194.181,500.0

Method:

Melt the butter and set it aside to cool a bit.

Mix milk, yeast, egg and sugar.  Let it stand for about 15 minutes.

Add this mix to the solid ingredients and mix to incorporate.

Add the butter and knead until you have a smooth, soft dough that easily comes off the bowl or worktop.

The chocolate dough will be stiffer, but in the end both doughs will perform similarly.

Rest for 10 minutes to relax gluten, and then shape.

You can also put the dough into the fridge right away and use it later. (I kept it in the fridge overnight) 

 Excellent videos about shaping and braiding can be found on Youtube, e.g.

http://www.youtube.com/watch?v=PmxDKuGLWuE

http://www.youtube.com/watch?v=DUZEz4elX8E

Let the shaped buns rest until just not doubled in size. ( Try the "poke test" on the white dough, it should still be elastic)

Bake at 190C for about 10 minutes.

Happy Baking,

Juergen


gerhard's picture

No survivors

March 24, 2012 - 1:05pm -- gerhard
Forums: 

Was making white Easter Bunnies and had to throw the broken ones back into the melter and thought it made sort of a neat photo, it was taken with an iPhone and seems to have a green hue to it but the chocolate has more of an ivory colour..

Gerhard

dabrownman's picture
dabrownman

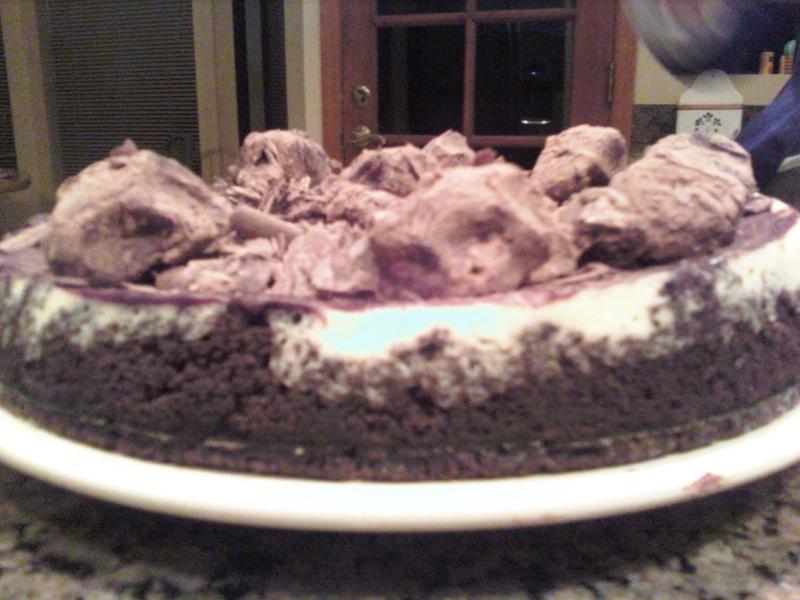
Today is my wife's birthday.  Who wouldn't want a chocolate crusted orange flavored cheese cake with an orange flavored; chocolate ganache, truffles and chocolate shavings for toppings?  Home made aranchello makes this a special birthday cake.

FoodFascist's picture
FoodFascist

Black Prince Cake 


Known in Russia as Black Prince, this is a cake made with lightly moist chocolate sponge layered with sauce that tastes a bit like toffee, and finely chopped or ground nuts. My version also includes sour cherries which makes it similar to Black Forest cake. Black Prince in the Wood if you like J

 Ingredients

For the sponge

  • 3 medium or 2 large eggs
  • 180 g sugar
  • 180 g sour cream
  • 120 g plain flour
  • 2 level teaspoons bicarbonate of soda
  • 50-70 g dark or bitter chocolate, grated; or, 2-3 tablespoons cocoa powder; or, a mixture of both
  • 50 g ground or finely chopped almonds, hazelnuts or walnuts

 For the sauce

  • 400 g tin sweetened condensed milk, boiled (see below for instructions)
  • 150 g butter
  • 100 g ground or finely chopped nuts
  • (Optional) 2-3 teaspoons brandy, cream liqueur or strong sweet wine

 Also

  • 1-2 handfuls sour cherries, fresh or frozen, stoned

For decoration

  • Some more ground/chopped nuts, and/or nut flakes
  • A few cherries, if desired
  • Butter-cream icing, if desired


Method

Sponge

Beat eggs and sugar together until pale and smooth. Switch your mixer to a low speed and add the sour cream in 3-4 increments (or more). Stir the bicarbonate of soda into the flour, fold into the egg mix. Add chocolate/cocoa. Lastly, fold in the nuts.

(NB Most common versions of the recipe don’t include nuts at this stage, but I find that they improve the structure. Made as is, with just 120 g flour, this cake had collapsed on me a couple of times. Adding a little nuts makes sure the cake keeps its shape, yet does not make the sponge denser in the way an equivalent amount of flour would.)

Transfer the batter into a greased cake tin. A springform tin is best, because you’ll be layering the cake in it afterwards. It’s important that the tin is no larger than 18 cm diameter because we want a tall cake. Don’t worry, the batter is too runny to bake to a volcano shape! Mine usually comes out with a perfectly flat top.

Bake at 180 C/350 F for approx. 30-40 min, or until a wooden stick inserted into the middle comes out dry.

Sauce

Boil the condensed milk. This will need to be done in advance.

Peel any labels off the tin and place it in a saucepan, on its side. Do not open or pierce the tin. Pour in enough water to cover the whole tin + an inch or so. Cover, put on a hob and heat until the water begins to boil. Then turn the heat right down and cook for 1 hr 30 min. Check that the water is bubbling slightly. Don’t worry the tin will not burst AS LONG AS you make sure the water doesn’t boil away.

Allow to cool completely before opening. When ready, boiled condensed milk has a dark caramel colour and a taste very similar to toffee.

Leave butter on the counter until it is room temperature. If you wish to speed up the process, cut into small chunks or slice. Cream the butter with a spoon or mixer on low speed. Add the cooled “toffee” and nuts and beat together until well combined.

Layering

Slice the sponge horizontally to make 3 equal size layers. If not using a springform tin, lay two sheets of parchment paper, crosswise, into the tin so you can later lift the cake out by pulling at the ends.

Lay the first piece of sponge into the tin. Place half of the cherries onto the sponge, holes down, so that the juices moisten the sponge rather than make puddles in the sauce. There’s no need to defrost frozen cherries, but if you have, pour the drained juice over the sponge. Spoon the sauce in between and over the cherries. Place the next layer of sponge on the top, then cherries and sauce. Finish with sponge and a layer of sauce, but reserve a couple tablespoons for later.

Refrigerate overnight.

Take out, carefully lift out of the tin onto a serving plate. Spread the remaining sauce over the sides.

Decorate as you wish, the easiest way to do it is to dust the top and sides with ground nuts. I used some cherries, almond flakes and butter-cream icing (creamed butter, icing sugar, cocoa powder), and dusted the sides with almond powder.

(Please be lenient on my decorating ability, this was only my third ever go with the icing bag!)

I also like this cake with pieces of prune instead of cherries.


loydb's picture
loydb

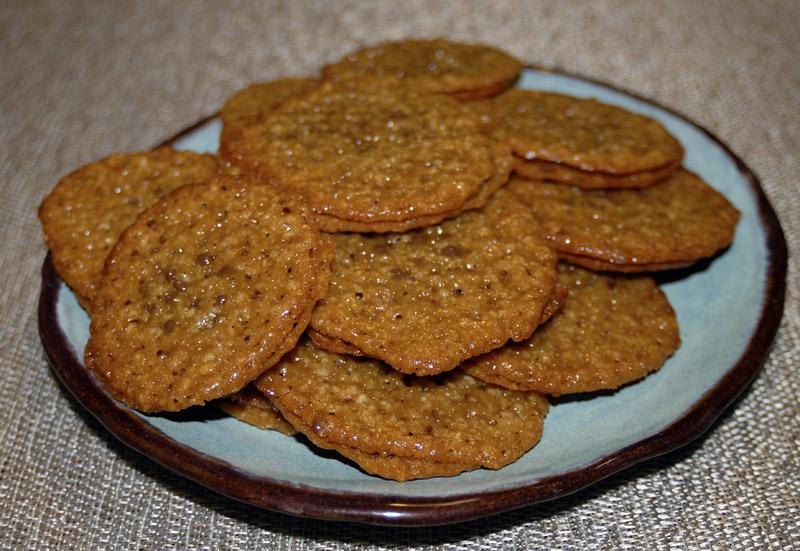
These were tasty, I enjoyed the chewy butterscotch and chocolate. I have to agree that I liked them just as much without any chocolate at all. I think if I were to do it again, I'd get some orange-infused bittersweet chocolate for them - my 66% bittersweet/33% milk choc. was too sweet IMO -- I liked the Mohn bars better.

Baking Notes:

  • Panning these up required every flat cooking surface I owned. Fortunately, it was really cold and windy outside, so I could put an (empty) fresh-out-of-the-oven sheet pan on the back porch, and it was cold within 3-4 minutes.
  • I ended up adding an extra half cup of flour to get the batter out of the 'runny' stage
  • Don't put them in a sealed container for the wife to take to school, or they end up adhering to one another...


loydb's picture
loydb

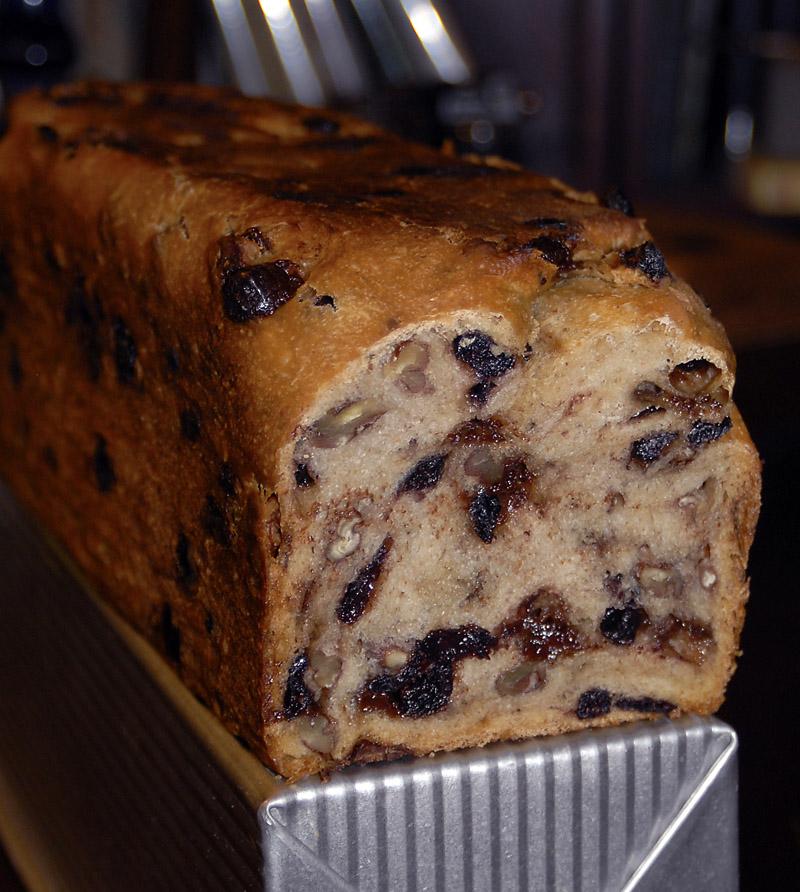
My last chocolate experiment was a bit (allright, a large bit) too sweet. This time, I eliminated the extra butter, brown sugar, and maple syrup, and went with 2 oz of bittersweet choc chips and 2 oz of milk choc chips. I added 5 oz of dried cherries and 4 oz of pecans. I also used 100% home-milled flour (mix of hard red and white wheat) and the sourdo.com Russian starter. After an initial 4 hour proof, I shaped and put in a pullman pan. Because my kitchen feels like a meat locker these days, I put the pullman pan in the microwave oven and put two cups boiling water in a sealed plastic container, then stuck it inside as well. It rose for 2 more hours, then I put the pullman pan into a cold oven, set it on 375 degrees F, and baked for 2 hours 15 minutes.

The sweetness is just about perfect for a breakfast/dessert bread. I think I'll add more cherries next time, but otherwise I'm pretty happy with it.


loydb's picture
loydb

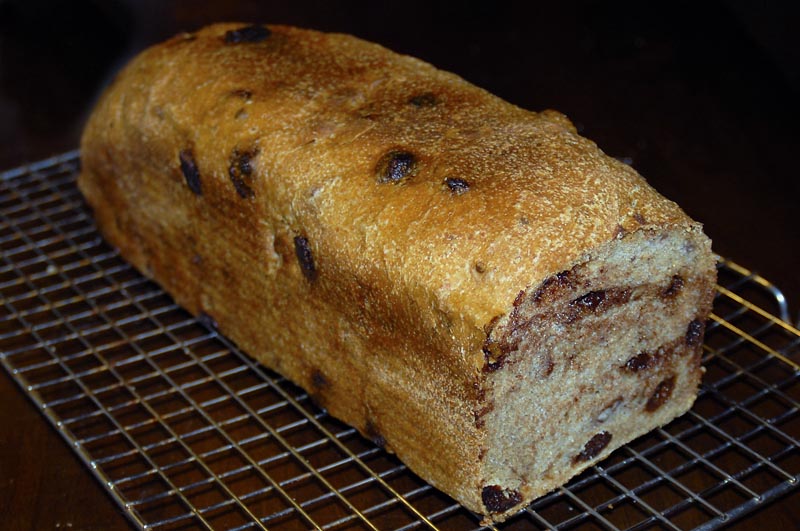
You know what's good? Chocolate chip blueberry pancakes with pecans. Don't want to make pancakes every morning? Try this.

I started with PR's BBA basic sourdough recipe, using a milled mixture of 50/50 hard red and hard white wheat with KA New England sourdough starter. I then added the following:

  • 5 oz dried blueberries
  • 4 oz pecans
  • 4 oz milk chocolate chips
  • 2 tablespoons softened butter
  • 1/4 cup dark brown sugar
  • 1/4 cup maple syrup (for god's sake, real maple, not that goo in a plastic jug. If you don't have real, use maple extract or leave it out.)

The pictured loaf used 6 oz of chips, which was too much. I've adjusted to 4 oz. I did a stretch and fold every 45 minutes for 3 hours, then left it alone to rise another two hours, then put in the fridge overnight to retard.

The next problem I faced was that I really didn't want chocolate melting into my baking stone. Solution? Pullman pan! After retarding the final dough overnight, I let it warm up for a couple of hours, then shaped it and put it in a 13" x 4.5" x 4.5" pullman pan and let it rise for three hours. It was about 3/4 up the pan, and unlikely to go much higher on its own. I put the lid on the pan and put it into a cold oven, set it to 375 degreesF, and went away for two hours. I pulled the lid back far enough to check the browning, and let it have another 20 minutes. YMMV.

It needs no butter or anything else, and has been our breakfast all week.


Pages

Subscribe to RSS - chocolate