The Fresh Loaf

A Community of Amateur Bakers and Artisan Bread Enthusiasts.

varda's blog

varda's picture
varda

I have been thinking a lot about dough strength lately because of the difficulty I've had baking with durum flour.    I saw a great article on dough strength referenced in an old TFL post.   It is in the SFBI Fall 2004 newsletter - link can be found here:  http://www.sfbi.com/newsletter.html It was quite an eye opener since so many different factors impact dough strength.    In trying to wrap my brain around this, I put together a handy one-page table.   Maybe others will find it useful as well.   I tried to summarize a lot of material, and may not have it all right, so have at it, but even more important read the original article! 

Factors that affect dough strength – Sourced from SFBI Newsletter Fall 2004

Factor

Strength / Elasticity

Weakness / Extensibility

Comments/Examples

Protein Quantity

High Protein

Low Protein


Protein Quality

High Quality

Low Quality

Durum has high protein but poor quality

Ash Content

Low

High

Whole wheat flour is more extendable, less elastic than white flour

Additives

Ascorbic Acid, Potassium Bromate, Malt


Maturation

Matured flour

Fresh flour


Water Quality

Hard water

Soft water


Hydration

Low hydration

High hydration


Added Ingredients


Added ingredients

Butter, nuts, berries, etc.

Autolyse

Autolyse

Autolyse

Autolyse strengthens gluten bonds, but also increases enzymatic activity which makes dough weaker

Mix Time

More mixing

Less mixing


Dough Temperature

Higher

Lower

This is an indirect effect – higher temp gives faster fermentation leads to stronger dough

Fermentation Time

More

Less

Acids from fermentation strengthen gluten bonds

Dough Mass

Higher

Lower

The more dough mass, the faster fermentation

Starter

Starter


Starter strengthens dough due to fermentation acids

Hydration of Preferment

Less 

More

Wet environment of preferment increases enzyme activity which makes dough more extensible

Preferment Quantity

More

Less

More preferment means more acid which strengthens dough

Preferment Maturity

More

Less

Mature preferments have higher acid content

Shaping

Tight

Loose

Baker can adjust based on dough strength

varda's picture
varda

I have been admiring Andy's breads made with Gilchester flour for some time now - in fact since he posted this, and later this, and most recently this.   But I felt inhibited from trying it, since I didn't see any reasonable way to obtain the flour.   Recently Andy suggested that I might try using Atta flour, perhaps sifted to remove some of the bran.   The idea was to simulate the high extraction, low quality gluten properties of the Gilchester flour.   In fact I now have two different types of Atta in my closet - a 100% whole durum that I have posted on several times, and a more refined durum with some wheat bran added in, that I recently found at a local Indian grocery store (thanks Lynnebiz) both under the Golden Temple label.   I decided that rather than sift, I would just try the refined durum with added bran.    I proceeded exactly according to the instructions here with a couple intentional changes.   First the Atta flour rather than the Gilchester flour.   Second King Arthur AP rather than Carr's Special CC flour.   And one unintentional.   I autolyzed with starter rather than without.   I am so used to doing that that I didn't even check the instructions until it was too late.   Other than that I did the three starter feedings the day before, and left on counter overnight.   I did the first mix (before adding salt) in my Kitchen Aid, but did the rest of the mixing by hand very gently.    I also felt that more stretch and folding was necessary, so I did one more than the one that Andy directed.   And I baked in my WFO for around an hour.   I had a very hard time getting the oven up to temperature today since it has been extremely wet out, and no sooner was it up to temp when it started dropping off.   So while initial temperature was around right (600degF) by thirty minutes in it had dropped to around 380.  But fortunately crust had browned already and loaf had expanded.  

This is quite a large loaf - over a foot in diameter.   I had to score with my long bread knife - this dough is pretty wet, and a short blade would have caught in the dough.   We had this for dinner tonight - one slice was enough to cut in half for a chicken salad sandwich.   The taste is very mild given the high percentage of durum - that wouldn't have been the case if I had used the whole durum - but with very pleasant flavor.    Here is the crumb:

Reasonably even, but with mouse holes, which I've gotten every time I've used this flour.  

So in sum, I wish I had some Gilchester flour for this, but I think Andy's formula adapts well to this version of Atta and I'm glad I tried it. 


varda's picture
varda

On Thursday we are invited to friends for a Rosh Hashanah dinner.   I asked what they wanted me to bring hoping they would say bread, but no ... dessert.   I'm not much of a dessert maker, but my year plus exposure to this site has begun to show me the possibilities.   I was well on my way to trying the Cherry Galette (or as Chef John puts it - Cherry Folditup) on Food Wishes.   Then I saw Floyd's grape foccacia and that got me to thinking.   Here's what I thought:

I started with Jim Lahey's Focaccia Dolce (page 144 of My Bread) but made many, many changes: 

Cherry Focaccia


KABF

150


Korean Flour

114


Water

132


Yeast

4


Salt

4


Sugar

50


Honey

12


Butter

30

2 T


Beaten egg

50

1 egg


Canned cherries

300


846


Mix flour (less 60g) water, yeast and autolyze for 30 minutes

Add flour, salt, sugar, honey, butter and egg


and mix for 5 minutes in stand mixer at medium speed

Stretch and fold in bowl after 20 minutes


Stretch and fold on counter after 20 minutes


brush off excess flour


Press into 1/2 inch thick disk


Transfer to lightly oiled baking sheet


Cover top with canned cherries in syrup


Proof for 1 hour 10 minutes


Bake at 400 on preheated stone for 15 minutes


Then decrease heat to 300 and bake for 30 minutes more

Until internal temperature reaches 205degF


 Now this was really delicious:

But my beta testers decided that the ratio of bread to topping is just too high:

Which got me to thinking that what this really needs is a filling - perhaps a sweet ricotta filling.   Does anyone know if one should, and if so how to make a filled focaccia?  Any other suggestions for how to make a tastier sweet for a sweet New Year?   Thank you!  -Varda

varda's picture
varda

Ever since I saw Lumos' post on her interpretation of Poilane's bread I have been meaning to make it.    But, but, but.... I don't have spelt.   I have to drive for spelt.   I already have 10 bags of flour on my shelves.   There's no room for my son's cereal.     Yesterday I looked at the formula.    Just a bit of spelt.   You could make it without spelt.    I decided to make it without spelt.  

Otherwise I stayed true to Lumos' formula if not method.   I had exactly one day this week where I could bake in my WFO and I didn't want to miss it, so no overnight retard.     And I prefer to stretch and fold on the counter if at all possible so I did that as well.   Even though the hydration of this is 75% which is higher than I have been doing lately, the dough was not particularly wet or sticky and handled very nicely. 

I was on a tight time budget, so I had to build up the fire as fast as I could to get everything going.   Fortunately my wood was dry thanks to my tarp and Eric's put the next load in the oven after baking trick.   and I got the oven up to temperature in just over an hour.    I tried Sylvia's throw flour on the hearth trick to see if I was going to burn the heck out of my bread and the flour burned slowly so I figured I was ok even though the temp read over 700degF.    My cuts opened, my crumb opened.   My starter seems to be fully recovered after its bout of vacation neglect. 

And I would have to say the resulting bread is around the tastiest I've ever made.     Maybe I always think that about my latest effort, but no I'm serious.   This is really delicious.   Thank you Lumos!

Modified formula:

Starter from 9/18

70%


Final

Starter

Total

Percent

KAAP

360

140

500

67%

Rye

90

7

97

13%

WW

150


150

20%

Wheatgerm

15


16

2%

Malt

10


10


Water

455

103

558

75%

Salt

13


13

1.7%

Starter

250


20%


1344


Method:  Mix all but salt.  Autolyze 30 minutes.   Add salt.   Mix in stand mixer for 5 minutes at medium speed.   Bulk ferment for 2.5 hours with 2 counter stretch and folds.   Cut into two and preshape.   Rest for 20 minutes.   Shape into batards.   Proof in couche for 2 hours.   Bake in WFO for 15 minutes with steam, 15 minutes without.  


varda's picture
varda

I'm a sucker for flour.   Yesterday I went to the local korean supermarket to see if they had less than whole grain durum and I came back with something else.   All I know about it is it's "premium flour," has 3g of protein per 30g serving, and can be used for making noodles. 

I didn't want to make noodles - I wanted to make bread.   And use my new flour.   I  restrained myself from having this mystery flour be the main event and instead limited it to 15% of flour to support my standby King Arthur AP (80%) and Rye (5%).  

The result is a nice mild naturally leavened boule.

I am somewhat disappointed that my scores didn't open more.  

I baked indoors with plenty of steam, but the dough was tacky throughout fermentation and my razor snagged while scoring.   So I'll attribute it to the fact that my starter has still not completely recovered from being abandoned for a few weeks and left to ride out the hurricane (or resultant power failure) alone.   I've been babying it as much as I can, but perhaps not enough.

Anyone know anything about this flour?   Have I just paid an unreasonable amount (ok not so much) to import regular old AP flour across an ocean and a continent?  

Update:   I used this flour in pizza dough last night - 335g KABF, 165g Korean Flour.   It was absolutely and by far the best pizza crust I've every made.   Not sure if this is of general interest since I doubt many people have access to this flour, but I just had to add it to the post. 

varda's picture
varda

Since I got back from vacation my starter has been on rest and recuperation.   We were lucky to miss the hurricane by being in another state, but it still came through here (downgraded to tropical storm) and killed the power for at least some period of time, which made my already neglected starter even unhappier.   I've been baking a lot since I got back and it's been just edible but improving with each bake.  Today, I had a well fed starter ready to go and looking happy, but I really wanted to bake outside to see if I could get a nice burst on the hot WFO floor to make up for my troubles.   It was close to raining and most of my wood was wet from a downpour last night, so things didn't look very promising, but I decided to do it anyhow.   I mixed up a mostly white dough with a touch of white rye and prayed for no rain, scrounging around for wood that wasn't soaked all the way through.    I just managed to get the oven up to temperature with the dry wood that I had, and got my bread baked before it started raining for real.   I've got to stop living on the edge like this :)

 The crumb opened up and I managed to get at least some opening of the scores by using a steam pan in the WFO for the first time.    

The new look comes from my Indian or whatever basket. 

And following Sylvia's example (if not cooking talent) I threw a pan of potatoes and onions into the oven after the bread baked, so as not to waste the heat.  

Formula:

 FinalStarterTotalPercent
KAAP45014259291%
White Rye50 508%
Rye 771%
Water35010145170%
Salt12 121.9%
Starter250  23%


Method:

Mix all but salt.   Autolyze for 50 minutes.   Add salt and mix for several minutes.    Bulk Ferment for 2 hours with 1 counter full stretch out until very thin.    Shape into boule and place upside down in basket.   Proof for 2 hours.   Bake in WFO (around 650F floor temperature) for 25 minutes.  Remove and cool. 

varda's picture
varda

Last night we returned from two weeks on vacation to an empty refrigerator and no bread whatsoever.   While traveling, I did not rush around looking at bakeries, sampling the fine local breads, searching for flour, or any other such thing.   The only homage to bread I inflicted on my family was a wee bit of shopping for baskets.   First I bought a basket which I had a vague notion I would proof bread in.   Yet as soon as I made my purchase, I realized that I would never, never pollute it with flour and wet dough and suchlike:

Which meant that I needed another basket for proofing.  This eventually manifested as:
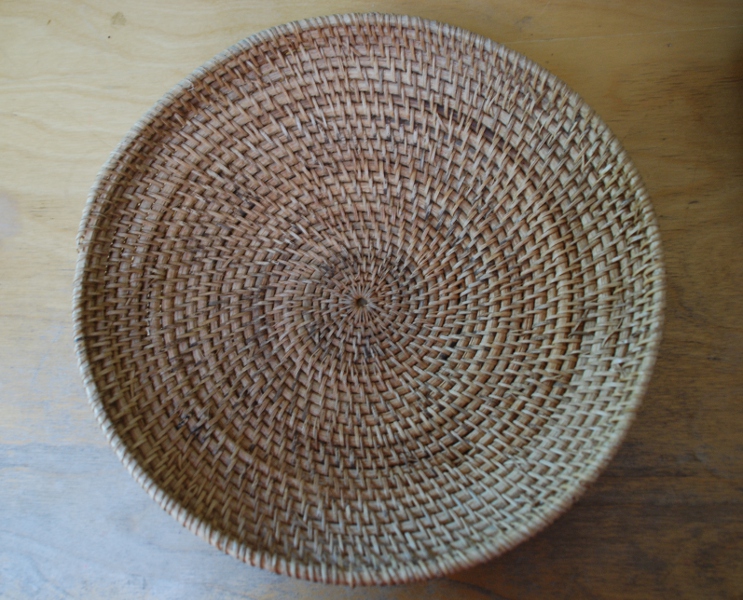
which when purchased I immediately started to question.   Yet basket and no bread means:

and

and finally a bit of bread to eat:

The bread was loosely based on Pan de Horiadaki, but I wasn't much in the mood for following directions after a long trip home.  So let's call it Pan Tipo de Horiadaki or Sorta Horiadaki.  Anyhow, it was nice to have bread in the house again.  And the basket isn't too messed up.

And incidentally - in neither of the two stores where I bought the baskets did the sales people know what they were - i.e., who made them, where they came from, etc.   In the second store they said their Indian crafts vendor showed up in the middle of the night and placed his merchandise in the store and only barked at them if they asked him any questions.   So, does anyone out there have any idea what type of baskets these are?   First bought in Estes Park, CO, second in Boulder. 

I'll close with a little Rocky Mountain splendor:

varda's picture
varda


Over the last few months I've been trying to bake bread with yeast water and found it challenging to say the least.   However the taste of these breads is so wonderful and the prospect of lovely open crumb so enticing that I keep coming back to it.   I have made a number of adaptations to keep the yeast water from consuming the dough before baking (from aggressive enzyme activity) that seem to be working.   At the same time, I've been trying to learn how to use my WFO.    For the first many bakes, I was plagued by pale doughy crust.   At first I attributed it to the tight seal on the oven door which wasn't allowing the crust to develop.    But tipping open the door for the last half of the bake didn't help.   Then I got an infrared thermometer, and finally realized that I wasn't getting high enough temperature in the oven to start with.    So the bread was baking at a low temp that wasn't high enough to finish the crust.   I insulated the top of the dome which had the highest heat loss, sharpened my fire building skills and went back to work.   Yesterday I was  successful beyond my wildest dreams.  Ok.   Not really.   I incinerated two loaves of whole wheat Pain au Levain that never did me any harm.   Too hot.   Way too hot.   It's one thing to have a good thermometer.   It's another thing to know how to use it.   Today, I made a number of adjustments and got only a too hot oven - rather than a way too hot oven.   And baked a yeast water loaf.   Since the oven was too hot (floor at around 650F) it expanded too fast for its own good and baked too rapidly.   But I did start to see a hint of the crumb I've been looking for.    Onward and upward. 

Yeast water loaf with oven in the background. 

Not like Akiko's yet, but I'm getting there (I hope.)

I prefer charred crust to the pale doughy stuff I've been getting but I'm still not the master of oven temp.

Updated with formula and method:

8/19/2011    
     
Yeast water9362%  
KABF150   
     
8/20/2011    
 FinalStarterTotalPercents
KAAP500 500 
KABF 150150 
Yeast water 9393 
Water362 36270%
Salt12 121.8%
Starter243  23%
percent yeast water   20%
   1117 

Night before mix yeast water and flour and leave on counter overnight (around 10 hours).   Next day mix all ingredients but salt and autolyze for 1 hour.   Add salt and mix for 4 minutes in stand mixer at medium speed.  Bulk fement for 2.5 hours with first stretch and fold in the bowl and second on the counter.   Shape into boule and place upside down in lined basket.   Proof around two hours until soft.   Slash and bake in WFO for 20 minutes at high heat (over 650F)  - crack door open after first 10 minutes.  Leave another 5 minutes in oven with door open to bring internal temperature up to 210F. 

A few points:  I used King Arthur Bread Flour in the starter to have enough gluten strength to counteract the high enzyme activity of the yeast water.  I also used a fairly low hydration starter (62%) for the same reason.   The dough was quite wet after the mix and required an aggressive in the bowl stretch and fold to develop.   That worked.   For the second stretch and fold I was able to stretch it out on the counter.   When I removed it from the basket it sort of flopped out in all directions.   However when it went into the oven it sprang up immediately - probably due to the high heat.  I did not use steam in the oven and perhaps if I had the cuts would have opened up better.  

varda's picture
varda

Recently I've been trying to bake a 100% Whole Durum loaf loosely following Franko's Altamura project.    After a couple of attempts, I backed off and baked 40%, 60% and 80% durum loaves, trying to get a feel for working with a high percentage of durum flour.   For the 40, 60. and 80% versions, I used my regular wheat starter so that at least I didn't have to worry about a whole grain starter on top of everything else.   I was reasonably happy with the 40% and 60% versions and felt that I could bake them happily at any time.   The 80% came out too dense - the really hard part is developing the dough without breaking the fragile gluten of the durum. 

Yesterday I decided to give it another shot at 100%.   I took my semolina seed starter and fed it up - then added durum in three more feedings - the third last night.   There was no way I was going to leave it on the counter overnight - anything could happen while I was asleep, so I popped it in the refrigerator right after feeding, and then took it out in the morning.   It only took 3.5 hours to ripen even cold from the refrigerator.    So I mixed everything up by hand and proceeded with trying to develop the dough.   Every half hour I rotated the bowl while using the fingers of my hand like a scoop to turn the edges into the middle, then pressed down with my palm.   This seemed to me  to be the happy medium between being gentle and yet still developing the dough.   After two hours and the 4th scoop and press I felt there was a sudden softening of the dough which up to that time had been fairly puffy.   I pressed it out into a thick disk and folded one edge on top of the other just past the middle and placed on a floured cloth, sprinkled the top with flour and covered with the end of the cloth.   Then proofed for a little over an hour.   Then baked as usual at 450F for 20 minutes with steam and 20 without, then 10 in the oven with the door cracked open and heat off.    It got more oven spring than I expected, and while not as light as the 40 or 60% versions, nor as light as Franko's (made with more baker skill and extra fancy durum rather than whole durum) I thought it was reasonably respectable.   Actually we had it for dinner with fish and sauted vegetables and it was definitely people food rather than fit for the coyotes.  

Formula:

Semolina Starter


65%

 Hydration


on 8/9/2011


1:30 PM

3:30 PM

7:45 PM

10:40 PM

      Total

           %

Seed

26


Durum


30

51

75

172

90%

Semolina

16

20


20

10%

Water

10

20

20

35

47

132

69%


324


  Final

    Starter


   Total

           %


Semolina


15


15


Durum

500

133


633


Water

340

102


442

68%


Salt

12


12

1.9%


Starter

250


23%


This has several deviations from proper Altamura:

1.   Higher percent prefermented flour because I'm just more comfortable with that

2.  Whole Atta durum - that's what I have

3.  No attempt to simulate WFO - I had enough balls in the air as it was

4.  Higher hydration - the 80% with  62% hydration was just dry, dry, dry - it did go out for the coyotes.

varda's picture
varda

Continuing toward my goal of baking a non-brick-like Altamura type loaf with 100% Atta whole durum flour, today I increased durum flour percentage to 60%.   My formula is exactly the same as my last attempt which used 40% durum flour  with the exception of the difference in flour, but I changed process and technique a bit.   Last time I did an overnight retard.   This was mainly a scheduling issue but of course had an impact on the bread.   This time, I did not retard overnight, but the dough did have a 1.5 hour refrigerator sojourn in the middle of bulk ferment again due to scheduling.   The technique change was that rather than doing 4 in the bowl stretch and folds, I did 4 in the bowl scoop and pats.   This means I rotated around the bowl several times using three fingers to gently scoop the dough on the edge of the bowl into the middle and then pat the dough twice (that is scoop, pat, pat, scoop, pat, pat, etc.)    Franko said in comments to his post  "From what I've learned so far, this flour needs to be coaxed into forming a good structure for trapping CO2" and by patting I was hoping to encourage such a structure without tearing the gluten strands.   This patting idea came from Akiko in her last baguette post.   I didn't understand it when I read about it in her post, and I still don't understand it, but I found this dough even more manageable and well behaved than the 40% version that I posted about a few days ago.


I am encouraged by the results and plan to continue on to 80% on my next attempt.

Pages

Subscribe to RSS - varda's blog