In the past 1.5 months, this is what I have been doing in the kitchen, once, or even two batches every week. I have occasionally made croissants before, however, this time I really want to get the techinques down. My idea of a perfect croissant: golden flaky high on the outside, crisp layers and honeycomb like crumb inside, and of course, buttery rich taste. Using European style butter (Plugra), in TX warm weather, with no professional equipment (no sheeter here!), it's a process that requires patience, thorough understanding for each step, a lot of attention to details, and insane amount of practice. I am nowhere near "perfect" yet, but heading in the right direction, here are some lessons learned in the process.
First, the following are resources that helped me a great deal, many thanks!
1)"Advanced Bread and Pastry". This book has a whole chapter on viennoiserie, the formula I am used is adapted from it. However, the formula and procedures require quite a bit of changes in a home kitchen.
2)Hamelman's formula from here. while I didn't use his ingredient ratios, but his procedure is much more suitable for a home kitchen, comparing to what's in AB&P.
3)Ralph from this thread. The whole thread is helpful, but Ralph's input was extra enlightening to me. I emailed him asking for the formula he uses in the shop. Since his posting was from over a year ago, I really didn't expect a reply, but he did write back! I really appreciate his insight and generosity.
4)Many enlightening posts from TFL, especially andy's post here.
Since I made many mistakes along the way, and learned a lot form each of them, I am writing them all down below. Warning, it's long. I mean looooooooong.
Poolish Croissant (Adapted from AB&P)
*I get about 12 standard sized croissants from each batch, with some small rolls from scraps.
- Poolish
AP flour (KAF AP), 160g
water, 160g
instant yeast, 1/8tsp
1. mix and ferment 12 to 16 hours.
- Final Dough
AP flour (KAF AP), 362g
milk, 135g
sugar, 67g
salt, 10g
osmotolerant instant yeast (SAF gold), 3.55g, 1tsp+1/8tsp
malt, 3.55g (I used a tsp of barley malt syrup)
butter, 22g, softened
poolish, all
roll-in butter, 287g
NOTE 1, there are two poolish croissant formulas from AB&P, one for hand rolling, one for sheeter. The sheeter one has less liquid and less rest time between folding and rolling, the hand rolling one has much more liquid and more rest time. I find drier dough would give a more well defined cleaner crumb structur, but it's harder to rol out; wetter dough would be easier to roll out, but the crumb would be more sticky and less layered. What I try to do is to adjust the liquid amount so that it's dry, but still possible to roll out without messing up the layers. In the end, this amoutn is closer to the sheeter formula (the hand rolling one is way too wet for me), but with a tad more liquid.
NOTE 2, the original formula uses bread flour. As Andy mentions in his post, contrary to conventional belief, croissants need a strong dough to rise well and create layer in the end. Since the formula was meant for machine rolling, it can afford to use BF, however, 10 years of marathon running gave me strong legs, not arms, I had to change it to AP flour, otherwise butter would melt and leak when I struggle with the strong dough. Note that Hamelman's formula I quoted above is meant for home bakers, and it uses AP; while Ralph's formula (which he emailed to me) uses BF, but it's meant for shop production. I have seen recipes that uses mostly, even all, cake flour. It never ends well. The final product is usally small and bread like, with less rise. The crumb structure is not layered. IMO, those recipes are sacraficing the crumb structure for the ease of handling
NOTE3, this is probably the most important lesson in terms of ingredients. The industry standard for rolling in butter is apparently 25% of the dough weight, which comes out to be about 45%of flour weight. Andy says it's about the same over the pond. However, I have found that in a home environment, when the rolling is less even and efficient, more rolling-in butter is needs for a well defined crumb. The less butter to use, the thinner the butter layers are, which means easier for the butter to melt into the dough or leak out. I have increased the roll-in butter ratio to 55% of the flour weight, about 30% of dough weight, which gives me much more consistent good results. I know many have said more butter would cause butter to leak out during final proof or baking - it's simply not true. Butter leakage during proofing is caused by proofing temp being too hight, and butter leakage during baking is caused by under-proofing, neither is related to the amount of roll-in butter. With 55% of roll-in butter, zero butter is leaked during proofing for me, minimal leaks during baking - sometimes none at all.
NOTE4, I use Plugra European style butter for most of my croissants. Have also used Kerry Gold occasionally. Both taste great. I would suggest to stick to a good European butter, different brand handls a bit differently. My Chinese baking friends can buy "butter sheets" which are 100% butter with high melting point. Those are much easier to handle, but I have not found any here in US, if anyone knows a resouce pelase let me know. In fact if anyone knows why we don't have such a thing here, I am curious to know as well. Those are made in New Zealand and Europe.
1. Mix everything but the rolling butter, knead until gluten starts to form. In my KA mixer, 3min at first speed, 3 min at 3rd speed. The dough is not very smooth, but not sticky. Pat flat and put in fridge for at least 2 hours, or overnight.
NOTE5, some recipes ask for a thorough kneaded dough, some ask for no kneading at all. I think the objective is to have a strong dough with well developed gluten structure AT THE END. All the rolling, folding, even relaxing in the fridge would strengthen gluten, so it's not a good idea to knead the dough too well in the beginning. It will make rolling near impossible (if you don't have a sheeter).
NOTE6, some recipe would ask for some bulk rise time at room temperature. I think it's not suitable for home bakers. Bulk fermentations strengthen the dough, which means one would need to play with knead time, and rolling technique to accomodate the added dough strength. Furthurmore, there are a lot of resting in my procedure because the dough would get too tight or too warm. With a bulk rise, I am risking over fermentating, which would cause the final proof and oven spring to be weak.
2. Cut the roll-in butter into pieces, put between two sheets of plastic or wax paper. Use a rolling pin to tap the butter until it's soft enough to roll, roll between the two sheets until it's a 7.5X7.5inch square. Put in fridge.
NOTE7, this is a good time to learn how your butter behave. How long does it take for it to get soft? How long until it's melty? That's the guideline for later.
3. Roll the dough out until it's double size of the butter sheet, 11X11inch in this case. Tap butter until it's roll-able, and the texture is similar to the dough. put the butter in the middle of the dough as following, fold up dough and seal the butter. Pay attention to corners and edges, you don't want spots where there's no butter.

4. Roll out into a 8X24inch rectangle, do your first fold as following:
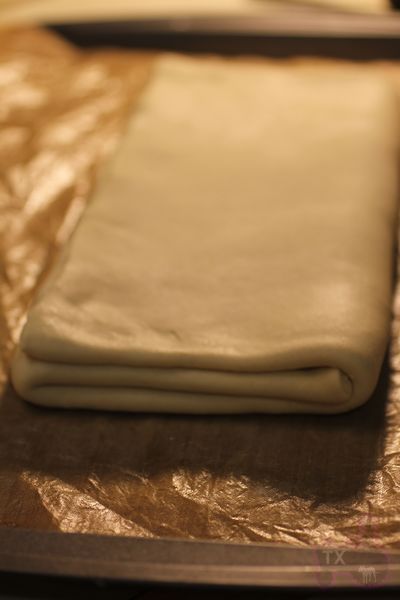
NOTE8, as Ralph emphasized in his posting: don't trap the dough! Before folding, cut the edge off to expose the layers before folding that side into the crease of the dough, that way there's no "extra trapped dough".
NOTE9, even though at this stage, it doesn't seem important to roll the dough out into specified sizes, but you will get better results if you do. The reason is simple: if your dough piece is smaller at this step, you will have to do more rolling in the later steps. Later steps would have more layers of butter, which means it will be harder to roll out evenly. Roll out the dough to the size now.
NOTE10, pay attention to corners and edges. Every imperfection would be magnified 27 times because you are folding 3 times.
5 Put in fridge and rest for 1 hour. Take out dough and repeat the rolling and folding 2 mroe times, which gives 3 folds in total.
NOTE11, I had the misconception that the more folds, the more layers, the flakier it will be. Wrong. With too many folds, butter layers would be thinner and thinner, and it will be more likely for the butter to melt and leak. Even with perfect rolling, too may layers would mean smaller honeycomb "holes" in the crumb. With no sheeter and TX weather, I find 3 folds sufficient, any more it's risky.
NOTE12, 1 hour is "MINIMAL" resting time. I often have rested longer since I was doing something else. There's no harm in resting a bit longer. During final fold, I sometimes have to rest it in the middle in order to roll out to the desired size. Sometimes when it's way too warm (the curse of TX, at one point I was rolling out croissant while hubby was eating watermelon in a tshirt), I would also rest in the middle to avoid butter melting. It's always better to be overly cautious. Allow you self more time than your expect.
6. Put in fridge and rest for at least 90min.Roll out to 9X36inch, 1/8inch thickness.
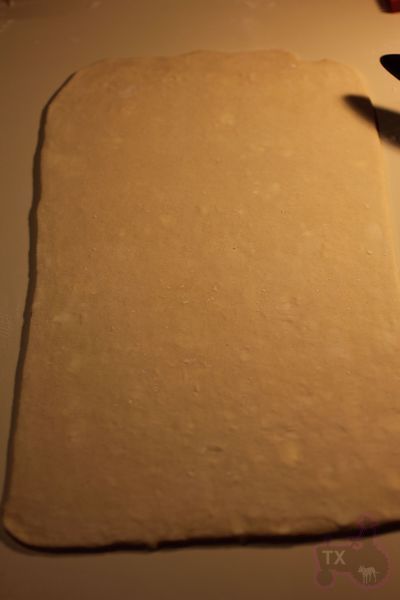
NOTE13, I don't have such a big counter space, niether do I have such a big fridge, so I cut the dough in half, which means I have 2 pieces, each one is 9X18inch.
NOTE14, Rest often. Rest when there's any indication of butter getting too warm, or the dough getting too elasticy. There's no harm in resting too much.
NOTE15, Use enough flour so the dough don't stick.
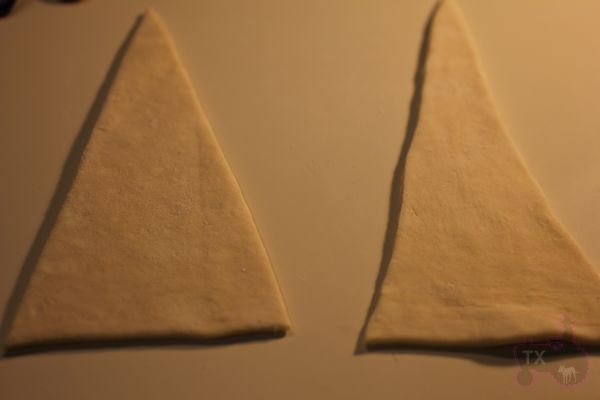
7. Cut into triangles, 4.5inch wide at the base, 9inches tall(the one on the left). Don't hesitate to cut off inperfect edges if you want a pefect crumb. Fridge and rest the triangle pieces, then strech them into 10inch high(the one on the right), this will creat more layers.
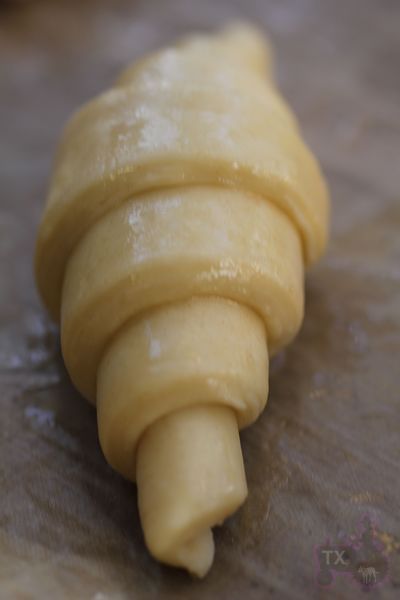
8. Roll up fairly tight, stretch out the tip with one hand when you roll the bottom with the other hand. You should get 3 rolls, and 7 little steps, wich the tip underneath.
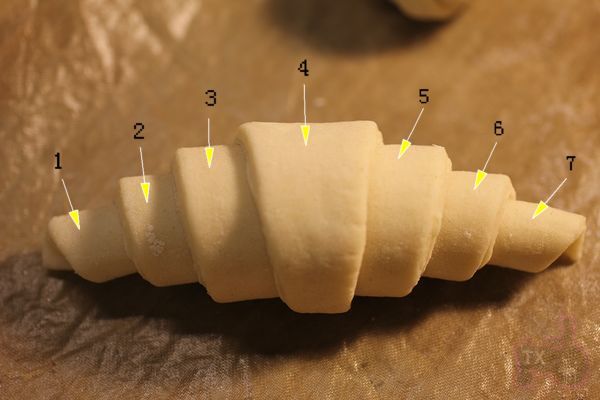
NOTE16, this is the straight shape, if you want a curved shape, you will need to cut a slit in the base before rolling, and roll to the outside as you start from the base. See Hamelman's formual link.
9. At this point, you can proof right away, fridge overnight and proof next day, or freeze (defrost overnight in fridge before proofing). Brush with egg wash (1 egg beaten with 1 TBSP of water), then proof @ about 80F until very soft and jiggly. About 3 hours for me. Brush another layer of egg wash after proofing.
NOTE17, don't proof warmer than 80F, the butter might leak otherwise.
NOTE18, don't under proof, otherwise butter will leak during baking. I have yet to overproof these. They have to be REALLY soft and jiggly. The layers will be very obvious at the end.
NOTE19, the egg wash before proofing would reduce the requirement on proofing humidity.
NOTE20, I have a madeshift proofing box made from foam box, a temperature sensor and control from pet shop, and a light bulb, works great.
10. Bake at 425F for 10min, 375 for 15min.

Honeycomb enough? Not really, but getting there.They should be more well defined, and the wall of each cell should be thinner.

For this one, I didn't cut off the imperfect edge before rolling up , which made the center too doughy.

I don't even know whether a "perfect" croissant can be achieved in a home kitchen, especially a warm TX home kitchen, but I will keep trying. In the mean time, my family, friends, and coworkers are loving me for feeding them such delicious breads.

Sending this to Yeastspotting.