The Fresh Loaf

A Community of Amateur Bakers and Artisan Bread Enthusiasts.

Recent Blog Entries

Srishti's picture
Srishti

Qahtan inspired me to make these...

I used Whole wheat pastry flour.

I think the ww pastry flour gave these a really nice flavour. They were yummy, can't wait to make these again :)

WW turnovers


breadnerd's picture
breadnerd

I made a half-serious resolution to bake in the outdoor oven at least once a month, and after a few weeks with subzero temperatures, and a weekend out of town, this was my last chance for February. We had a warm up all week, but it was only about 20 degrees at 8 am when I started the fire. We have a pretty good view of the oven from the house, so I was able to load it up with fuel and keep an eye on it from inside, so it's not too bad! The only problem was the warm temps created a very muddy yard, so between me and the dog coming in and out all day my house is not a pretty sight.


For this bake, I made three batches of bread: 2 ABAA recipes: the columbia sourdough, and Ponsford's ciabatta, with a levain-risen biga. I also made a couple of loaves of my favorite multigrain sandwich bread, my own recipe adapted from Reinhart's multigran extraordinaire. I mixed the columbia the night before, and as Mountaindog suggested in another thread let it rise about an hour before refrigerating it. I pulled it first thing in the morning, and let it warm up for 3 hours or so before shaping. The ciabatta biga calls for a minute amount of yeast, so I wasn't sure how much levain to substitute. The recipe's description is that the biga may not do much for hours, but will triple in volume in 24 hours, so I decided on a couple of tablespoonfuls of levain, and it perfomed just about right. I would probably use even less in summertime, or if my starter was exuberant.


All in all it was pretty uneventful, though I'm starting to realize that I need to let the fire burn down sooner, and/or allow extra time for the oven to cool off before baking. I keep finding myself with ready-to-go loaves and a 500+ oven, which is fine for some breads but a little too hot for others. Anyway my timing was such that it was consistenly 25 degrees or so hotter than I needed for each batch. I can leave the door open to speed up the cooling, but I worry about overdoing that too. I'm still learning, obviously. Here's some pics from the day:


Multigrain loaves in the oven with chcken curry--that turned out very well (made by my SO).


Some of the ciabattas got a wee bit dark. I've had a habit of taking them out a little too early, so I left them in longer--and overdid it the other way. Everything was quite dark actually, the flash makes them look just right though... :)


Ciabatta crumb: Not bad, but a little less holey than the non-levain version I made last time. The flavor is excellent though...


And finally, while finishing up with granola, it started snowing!! This wasn't expected to start until after midnight, but you know how that goes. I burned one batch of granola, and I blame blizzard conditions for my tardiness on checking on it!  We now have 8 inches of snow with more on the way--so I'm happy at home with wayyyy too much to eat.


mountaindog's picture
mountaindog

I posted this somewhere here a long time back, but thought I'd post again to make it easier to find. I'll try to remember to get some photos next time I make them before they get all eaten! I may try to make these into a sourdough recipe like JMonkey did here in order to use up excess starter...I'll report on that when I do, but for now, these just use baking powder.

This is a recipe I developed about 2 years ago that people seem to love. I make it with whole organic spelt flour as I like the nutty taste of spelt - an ancient form of wheat that has very little gluten, so it's not as good for rustic breads but great in quick breads. You can also use whole wheat flour equally well but may need to adjust amounts depending on humidity. I added the whole brown flaxseeds for roughage, texture, and hopefully some health benefits, although the most benefit is derived from raw ground flax.

What I like about this recipe is it does not contain dairy - which I am allergic to (although it does have eggs so it's not vegan). It is also a little less sweet by using dark brown sugar rather than white, and is not too spicy as I omit nutmeg or clove, opting for the combo of cinnamon and ginger instead. I also make this same basic recipe with bananas or frozen blueberries or chopped apple rather than pumpkin and all come out equally great. If you like a sweeter muffin, add more brown sugar. Obviously, this can be made in a loaf pan as well as in muffin tins, but adjust baking time and temp. accordingly:

Spelt Flaxseed Muffins


Ingredients (makes 12 large muffins or 24 small muffins): 

Wet:

4 Large Eggs

1 c. Vegetable Oil (Sunflower, Safflower, or Canola)

1 c. Dark Brown Sugar (maple syrup also tastes great as a sub but need a little more)

2 tsp. Vanilla

1 c. Whole Flax Seeds 

Fruit of choice:           

For Blueberry Muffins: 2 c. frozen or fresh blueberries           

For Pumpkin Muffins: 2 c. canned pureed 100% pumpkin           

For Banana Muffins: 3-5 overripe bananas, depending on size (I usually freeze them once they get too ripe so I always have some on hand)           

For Apple Muffins: 4 apples, cored, peeled, and chopped into small pieces 

Dry:

3 c. Whole Spelt Flour (or substitute mixture of 2.5 c. whole wheat and unbleached white flours, if no spelt available. Wheat flours are drier than spelt, so use less or mixture will be too stiff, resulting in dense, heavy, “hockey puck” muffins).

1.5 tbsp. Baking Powder

1 tsp. Salt

2 tsp. Ground Cinnamon

1 tsp. Ground Ginger 

Directions:

1) In a large bowl, beat the eggs, then mix in the remaining wet ingredients, then mix in your fruit of choice and the flaxseeds.

2) In a separate bowl, mix together all of the dry ingredients.

3) Pour the dry ingredients into the wet, and stir. If batter comes out too dry, depending on humidity levels, flour type, or fruit size, then add about 1/8 cup of water or fruit juice. Finished batter should be stiff enough to spoon into muffin tins without it dripping all over, but not so stiff that the batter forms peaks.

4) Grease 12 large muffin cups (or 24 small muffin cups) with canola oil-type cooking spray.

5) Divide the batter up into the cups with a ladle or large spoon and rubber spatula.

6) Bake at 350 degrees F for 40-50 minutes for large muffins, or around 30 minutes for small muffins. Tap on top for doneness -  they should be firm and crusty, not too soft or mushy.

7) When done, flip muffins out of pans onto cooling rack and let cool.

8) Use within a day or two, or refrigerate in plastic bags for up to 10 days or so. Freeze the rest for up to 6 months. Just reheat in a toaster oven and enjoy!

pelosofamily's picture
pelosofamily

Does anyone know where to buy bulk quantities of Instant Yeast

Floydm's picture
Floydm

[img_assist|nid=2068|title=Something I took in Victoria|desc=This is just an image I took while in Victoria. I'm testing whether image assist module works.|link=none|align=left|width=600|height=450]

Image assist is the new icon below the body. Click on it and it should let you upload an image.

Still a bit buggy, but hopefully it'll help some people with their image uploads.

JMonkey's picture
JMonkey

This weekend was a long weekend. Presidents' Day, we call it in the U.S., and presumably, it's a day on which we celebrate the birthdays of Washington and Lincoln. I don't know this for a fact, but I'm pretty sure both presidents ate sourdough bread at some point, given the scarcity and expense of baker's and brewer's yeast. So, in their honor, I baked sourdough. And apparently, the sourdough beasts were having a party as well -- perhaps it was my rigorous application of an 85 degree F final proof? In any case, the sourdough critters were mighty happy over the long weekend.


On Monday, I made a couple of loaves of Five Grain Whole-Wheat Sourdough Sandwich Bread. I've never had sourdough rise like this before. And, wow, is it sour. I'm not sure what got the lactobacteria so excited -- the butter? the rye chops? the oats? who knows? -- but it is delicious, if, like my wife and I, you like sour bread.

Here's how I made it:

Ingredients:

  • 430g starter (at 60% hydration)
  • 560 grams whole wheat flour
  • 465 grams water
  • 18 grams salt
  • 27 grams butter (roughly 2 Tbs)
  • 170 grams mixed grains (cracked wheat, ground flaxseed, rye chops, millet, steel-cut oats) soaked overnight in 250 grams hot water

How I made it

First, I dissolved (as much as possible) the starter into the water. I then added the flour and salt, and mixed it up until I had a dough. I gave it a good thorough kneading of about 450 strokes, and then added the butter, which I'd cut into pats. I spread half on the dough, folded it over and then repeated it. After another 100 strokes, the butter was mixed in, so I then used the same process to incorporate the grains.

I shaped the dough into a ball and let it ferment for about 4 hours at 68 degrees. It probably tripled in size. Next, I did a stretch and fold, let it rest for 15 minutes, divided it and shaped it into loaves. I then put it in my makeshift proofbox at about 85 degrees F for 2 hours, after which it was just about spilling over the side of the pan.

A slash down the center and then 55 minutes in a steamy 350 degree oven.


On Saturday, I made another loaf of desem bread MountainDog has a beautiful post on her success here. As you can see, though, by the time I got around to taking a picture, there wasn't much left (and, darn it, the best photo I have is blurry -- ah well). In any case, I made it this time at 80% hydration, and was pleased to see that I got an even lighter loaf. Next week, I'll shoot for 85%. For some reason, the crust was not as crispy as it had been last week. Still delicious though, and a good keeper. Two days later, it's still fresh, which is pretty amazing for a lean loaf.


I had some leftover starter, so I took a bit of it, and built it into a wet starter for sourdough muffins. I played around with the recipe a bit. For starters, I doubled it. I also (in the doubled recipe) upped the salt a bit to 3/4 tsp, used brown sugar instead of white sugar, added 1 tsp cinnamon, increased the bluberries to 1.5 cups and only used 1 tsp baking soda for all 12 muffins. They really popped in the oven but, sad to say, they were a bit bland. Next time, I think I'll up the blueberries to 2 cups, use butter instead of oil, and up the salt to 1 tsp. I think I'll also use less hard whole wheat flour and more soft whole wheat flour, and go ahead and acidify the whole thing overnight.

ehanner's picture
ehanner

I thought I would share my results trying mountaindog's version of Country French. I didn't have exactly the right malt as called for in the formula so I substituted dry powder and a little raw sugar for the sweetener. I didn't get the airy crumb through out but there was nice activity in my wet starter which I am nursing back to a healthier condition. It's hard to see in the image but the crust is very thin and nice and crunchy. My family doesn't care for a thick chewy crust so I was going for a baguette style crust. I baked this in my new Steam Maker Bread Baker unit (background) with 15 seconds of hot steam injected, covered for 10 minutes then 20 more minutes of dry heat. The crust is incredible! Thanks mountaindog for the inspiration. I think this will be my new daily bread. The depth of flavor is very nice. I have another batch behind this one for tomorrow that I swapped some of the AP flour for King Arthur 7 grain. The combination of caramelized grains gives this a great aroma and chew.

mountaindog's picture
mountaindog

After posting a forum question here on desem a few weeks back, I got some helpful hints from gt, JMonkey, pumpkinpapa, northwestsourdough, and maki (thanks all). I studied the recipes in The Laurel's Kitchen Bread Book and The Bread Builders, and improvised between them and what JMonkey posted here. I converted an existing vigorous batter starter to a stiff whole wheat one to make the desem starter, then fed it for the past 2 weeks more or less according to Laurel's method, burying it in fresh whole wheat flour, storing it in my cool 59F basement in between 1:1:2 daily feedings. After 2 weeks, the desem starter seemed nice and spongy, so I decided to give making a desem loaf a try this weekend.

Here is my little ball of desem just brought up from the basement ready to be expanded. It no longer needs to be buried in flour at this point, so as per Laurel, I keep it wrapped in 2 layers of clean linen inside an airtight container.

The inside of the ripe desem looks nice and spongy...

For this recipe, I used Allan Scott's weight ratios in The Bread Builders, just dividing his recipe by 6 for two smallish loaves rather than 12. I took about 230 g (8 oz) of my ripe desem, tripled it by adding 150 g water and 300 g flour, to give me 680 g (1.5 lbs) of expanded desem starter. I took 230 g (8 oz) of that and wrapped it up for storage as the starter, while the remaining 460 g (1 lb) was left at room temp. to ripen for 14 hours for making the final dough.

The just-fed desem starter ready to go back into the cellar:

Here is the final dough recipe I used (makes two smallish loaves):

453 g ( 16 oz) ripe desem starter

726 g (26 oz) organic whole wheat flour

631 g (22 oz) cool water

14.2 g (0.5 oz) sea salt

Dissolve the ripe desem starter (refreshed or expanded 14-16 hours before) into the water and mix well. In large mixing bowl, combine salt and flour, then add water/starter mix and knead with dough hook on stand mixer until blended. Continue to knead at speed 2 for 12 minutes. Dough will be softer than starter dough, but smooth and slightly tacky/sticky at the end of kneading. Place dough in covered bowl or container and let rise for 4 hours at 65-70F. Dough should have risen slightly, turn it out onto counter after 4 hours and divide in half, give each half a stretch and fold, and form into two tight boules. Place each boule in a floured banneton and cover with plastic to proof for 2.5 hours at 80-90F.

(Here is where I had a slight dilemma - I had to unexpectedly leave for the rest of the afternoon/evening just as I shaped my loaves to proof, so I put them in the frig overnight, took them out at 5:30AM the next morning, and let them warm up for a few hours until they rose enough and looked ready to bake - I did not want to over-ferment them since the recipe's final proofing time is rather short).

I preheated my oven to 500F and placed a lightly oiled 5 qt. Lodge cast-iron dutch oven inside to preheat as well. When the oven was ready, I flipped the firm dough out of the banneton and into the hot dutch oven, slashed the top, and covered it with the lid - no misting/steaming necessary. I baked it at 500F for 20 min. covered (it smelled great while baking...), then turned it down to 450F and baked it for another 20 minutes uncovered, after which it was nicely browned and the internal temp. measured 204F. So far things look pretty good:

I could hardly wait to cut into it to see if I had a brick or something worthwhile. It felt lighter than I expected when I placed it on the cooling rack. After 1.5 hours, I sliced in, and was very pleased with the result. Although I didn't get big holes, the crumb was not at all dense or heavy, instead it was very light. The crust was exceptional - very crispy on the outside, while the crumb was light, moist, and slightly chewy, with a nice flavor and no whole wheat bitterness.

A few more slices...it was delicious...

...crumb shot...

I am hooked - this bread was great, despite having my process interrupted and having to retard it overnight. I look forward to making it again, and hope that it will be even better as the desem starter matures over time. Maybe I'll even get bigger holes someday, but if not, this is still a delicious, light bread for a lean 100% whole wheat one. I am especially pleased with the results the Lodge dutch oven gave - the crispy crust and the high domed shape of the loaf - and no metallic taste, probably due to proper seasoning. I picked it up thinking I'd try a no-knead bread at some point, but have not got around to it yet - nice to know it is useful in this way as sort of a la cloche as well.

This is the flour I used for the desem - maybe someday I'll grind my own wheat berries to make fresh whole wheat flour like Allan Scott and Laurel Robertson do, but for now, I am pretty happy with King Arthur.

Floydm's picture
Floydm

My Sunday baking suffered a bit today because we spent the morning out at the Chinese Gardens watching the lion dance for the beginning of the lunar new year celebration.

I had a batch of my pooish bread in the fridge as well as some sourdough with 20% whole wheat. Since the poolish bread was on the damp side, I ended up dimpling it and shooting for something like a ciabatta. Inside, it looked about right.

The crust was wonderfully thin and crispy, but it didn't look like your typical ciabatta since there was no raw flour on the crust. Alas.

Many breads

The sourdough loaves I baked in pans. I also made some mini loaves of banana bread.

Anyone here ever tried making a yeasted banana bread? I thought about it today but though better of it. Actually, now I'm remembering that there is a sourdough banana bread on the site. I should try that next time.

Srishti's picture
Srishti

Hi all,

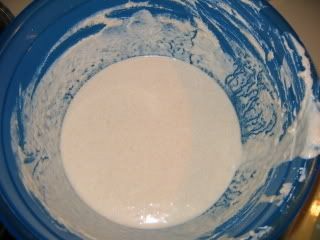
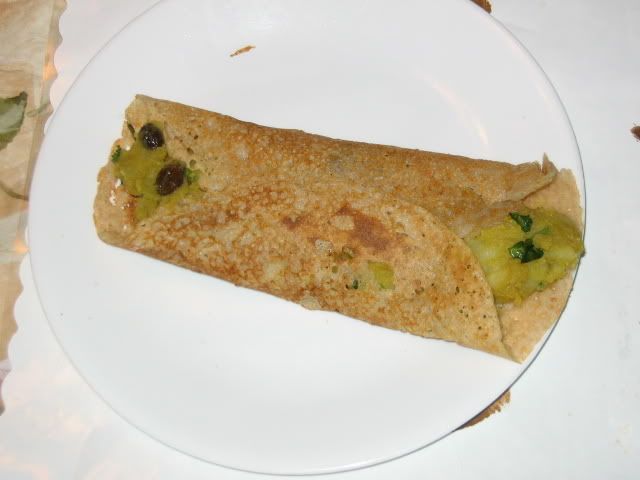
Today I made Dosas in a Non-Traditional way. If anyone is not familiar with these: They could be called Indian Crepes made with Rice.
The traditional way of making these is

(1) Soak rice and Urad dal overnight. (Urad Dal is a kind of split bean which can be found in an Indian Grocery Store).

(2) Grind these up in the morning (you can do this in a Food Processor if you don't want to go absolute traditional). This will give a nice paste.

(3) Now you let this get sour (kinda like sourdough). Put in the sun all day long, if the outside is warm), or put in some other warm corner of the house. Hopefully, by the end of the day you will have the batter sour and bubbling. If not wait longer :-(

(4) Add salt to it, and adjust the thickness of the paste. (I would say the thickness is in between that of a pancake and crepe batter).

(5) stir the batter briskly.

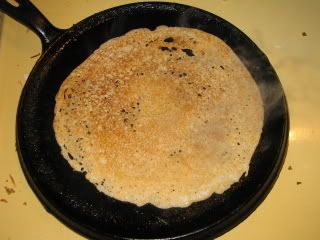
Then you cook them up on a hot skillet, in a slightly different manner than crepes.

(1) Grease the skillet with Ghee or any other cooking oil.

(2) Depending on how big your skillet is, pour some paste on the in the center (a metal measuring cup can be convinient), and with the flat base of the measuring cup start spreading it thin on the skillet. It takes some practice to get this right.

(3) The thinner the better.

(Though if you want you could probably make it thinner and cook it like crepes, I haven't tried that!)

(4) When it seems to be really crunchy and golden brown on the bottom flip it over and cook slightly on the other side.

Filling

These can be filled with a variety of filling, but the most common is a spicy potato mixture spiced with (of cource) Indian spices.

(If anyone interested I can post that.)

 /****************************************************************************/

OK, so what does it have to do with the SOURDOUGH us people talk about here on the Fresh Loaf????

So here it goes. I had some brown rice flour sitting on my shelf not getting used.... Also I didn't make any breads this week and since I needed to feed my starter, I was going to have some extra starter.

So here goes my modified SourDough Dosa Recipe:

(All the ingredient amounts are in approximation, so use your intuation).... ;)

Ingredients

About 1 1/2 cups stiff wholewheat sourdough starter. ( you could probably use less )

2 1/2 cups water. (but maybe less like 2 cups, as you can always add more water later to get the consistence right).

4 cups (brown) rice flour. (you could probably use white if you want)

salt (about 1 tbsp not too sure, you'll have to go by feel here)

Method

(1) break the starter up into smaller pieces (10-15 pieces).

(2) Add water and with your hands dissolve all the sourdough chunks in the water until it is a big slurry.

(3) Now, start adding rice flour to this. and mix up with a fork making sure all the clumps of flour get dissolved nicely.

(4) Let it sit in a warm place, for as long as it takes :)

(5) Add salt before cooking them. Also adjust the thickness of the paste. It should be thinner than pancake but thicker than crepes' batter.

(6) stir the batter briskly.
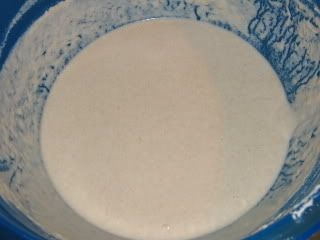
(7) Cook them according to the directions above in the traditional method.
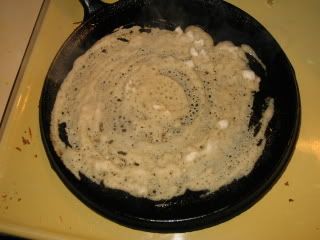
(8) Fill them up with your favourite filling or keep them plain.

(9) Eat them hot and crispy right off the skillet or they'll loose the crispyness fast.

NOTE:

(I started it late morning yesterday, but because of using so much starter it was progressing pretty fast. I actually started with 3 cups of rice flour, and  about by night it was super bubbly and I didn't want to cook them last night, so I added 1/2 cup more flour and refigerated it. I took it out of the fridge about noon today and since it was quite bubbly again, I added 1/2 cup more flour and cooked them after 1/2 an hour).

(We had these for lunch as well as for dinner :D, yum) They had a nice sour taste which stays in your mouth a long time after you eat them, but not super sour when actually eating them. Also I think, the potatoes balanced them out as well.

These are accompanied by coconut chutney and Sambhar (which is like a thin soupish dal/soup made of split beans).

Pages

Subscribe to Recent Blog Entries