
A photo guide to making sprouted grain pulp
Hi all—since folks seemed to enjoy my post on 100% sprouted grain pulp bread, I thought I’d share photos of the process and equipment, and some updates based on my most recent bake. The recipe used for the photos is the same one that I shared in the original post linked above.
First, my sprouting setup (along with the three grinding plates I use to make the pulp). I sprout my grain in a 2 gallon bucket covered with a piece of bare aluminum screen material held on with several bungee cords.

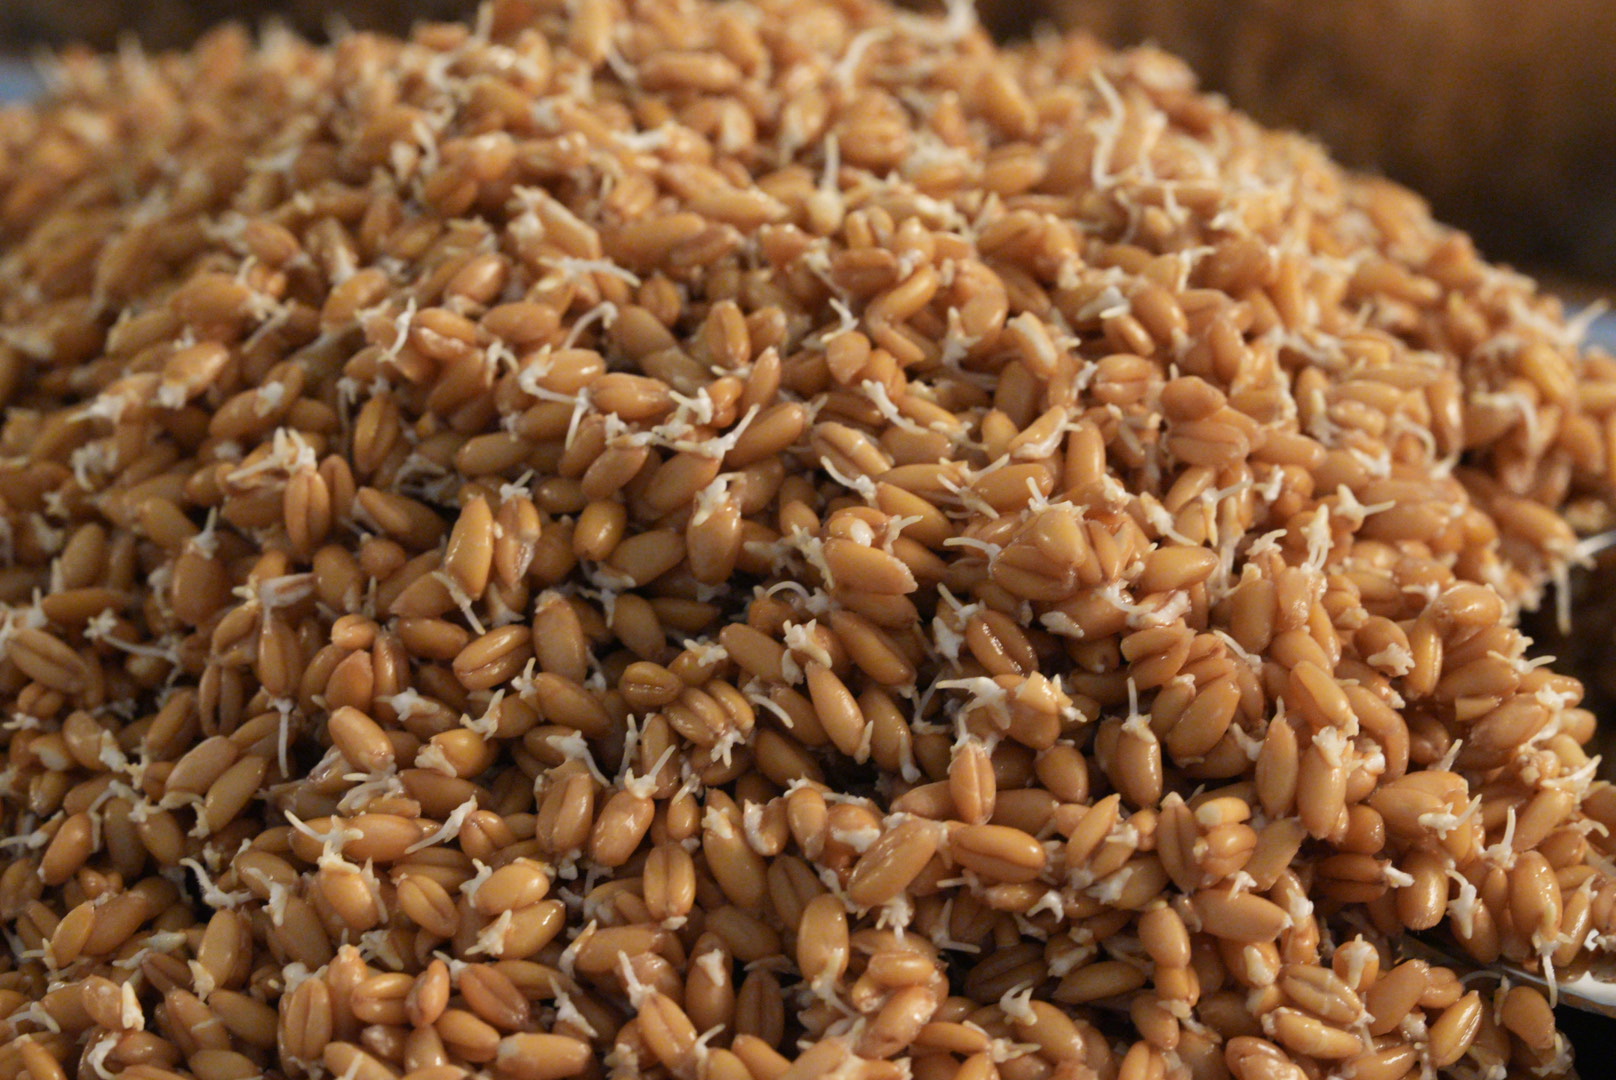
For this bake, I sprouted 500g of hard red spring wheat and 500g of spelt kernels. After accounting for loss in the pulping process (stuff tends to get stuck in the grinder crevices), this yields just enough pulp to make two 1kg loaves. I weighed the dried grain in the bucket, covered with about 6 inches of water, and let the grain soak from roughly 8pm one evening (Day 1) to 8am the next morning (Day 2). I drain the water through the screen, then rinse the soaked grain by filling the bucket up and pouring off the water again. I then place the bucket upside down on a wire rack on top of a rimmed backing sheet to promote airflow and catch any drips of water. I repeat the rinsing process on the evening of Day 2. On the morning of Day 3, the sprouts are ready to grind into a pulp.
You can see that the radicles have emerged from the seed coat, but the sprout is not yet as long as the grain itself. I understand that this is the optimal time to pulp the sprouts from a nutritional point of view.

For whatever reason, this particular batch of grain weighed 1.660kg, so I added 90g of water to bring it up to my 75% target hydration level. I feed the sprouted grain through three times—first through a coarse plate (10mm), then a fine plate (4.5mm), then finish on an extra fine plate (1/8 inch). The mash looks like this after the coarse plate:

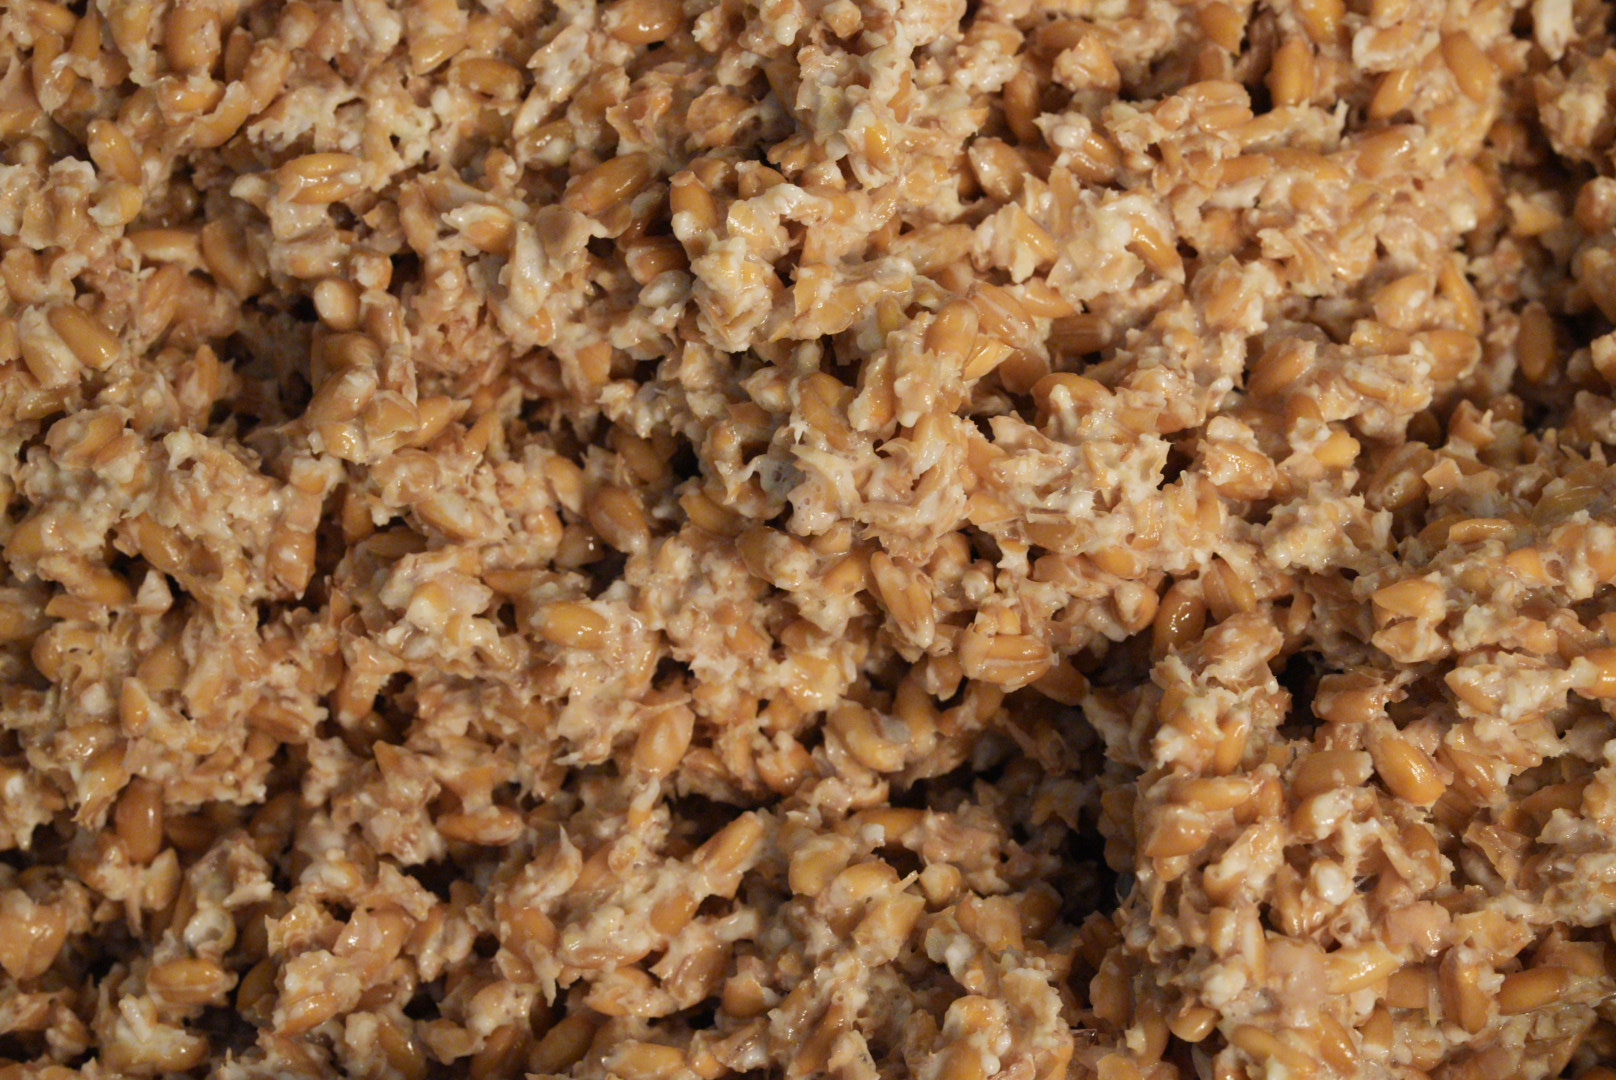
Note that there are a lot of still-intact kernels—this first pass was just to mash the grains slightly to improve passage through the fine plate. I’ve found that even with a 1.5 HP grinder it’s necessary to grind this pulp in three stages, or else the pulp will jam against the grinder plate. I also believe that the vigorous grinding process helps to begin developing gluten in the pulp. This is what the pulp looks like after the second plate:
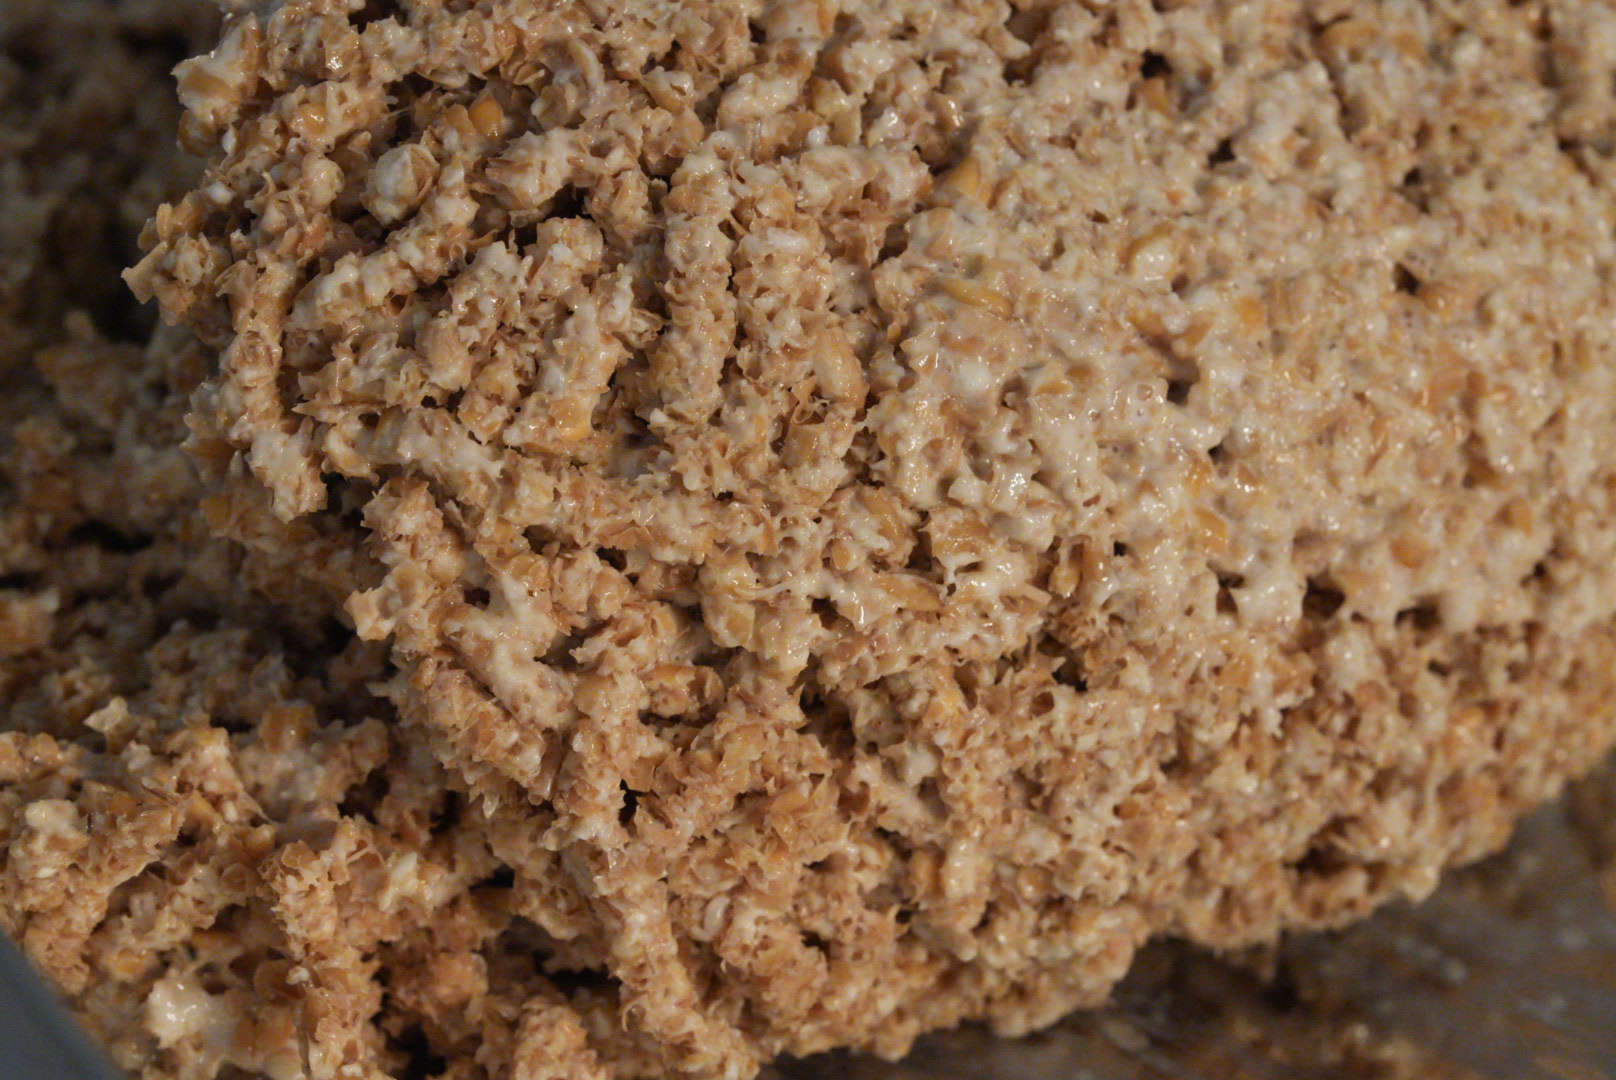
And this is what it looks like after the third and final pass:

You can see that the pulp has some structure now and holds its shape, as evidenced by the pulp “noodles” extruded through the extra fine plate. Squeezing a bit of the sticky pulp between two fingers reveals gluten formation:

For this particular batch of pulp, I started mixing the dough immediately (see recipe linked in the first paragraph of this post). This is what the dough looks like after the rough mix:

After resting and kneading, it looks like this:

At the next step, I divided the dough in half and formed each half into a tight ball:

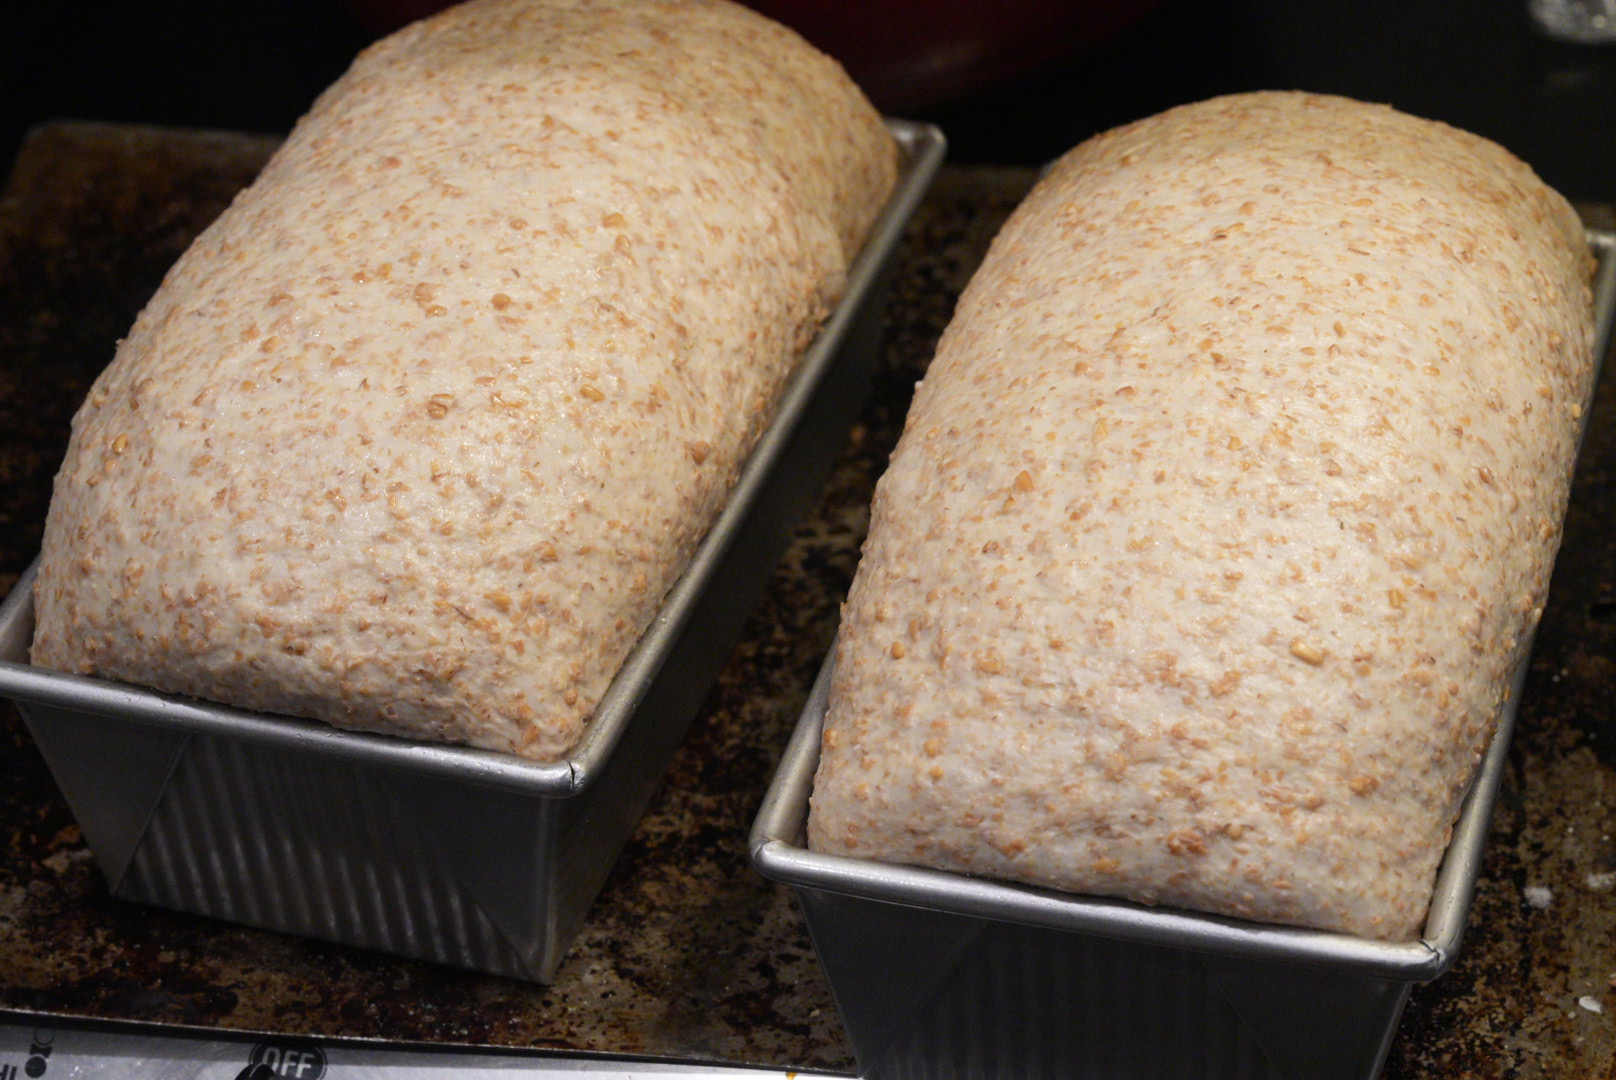
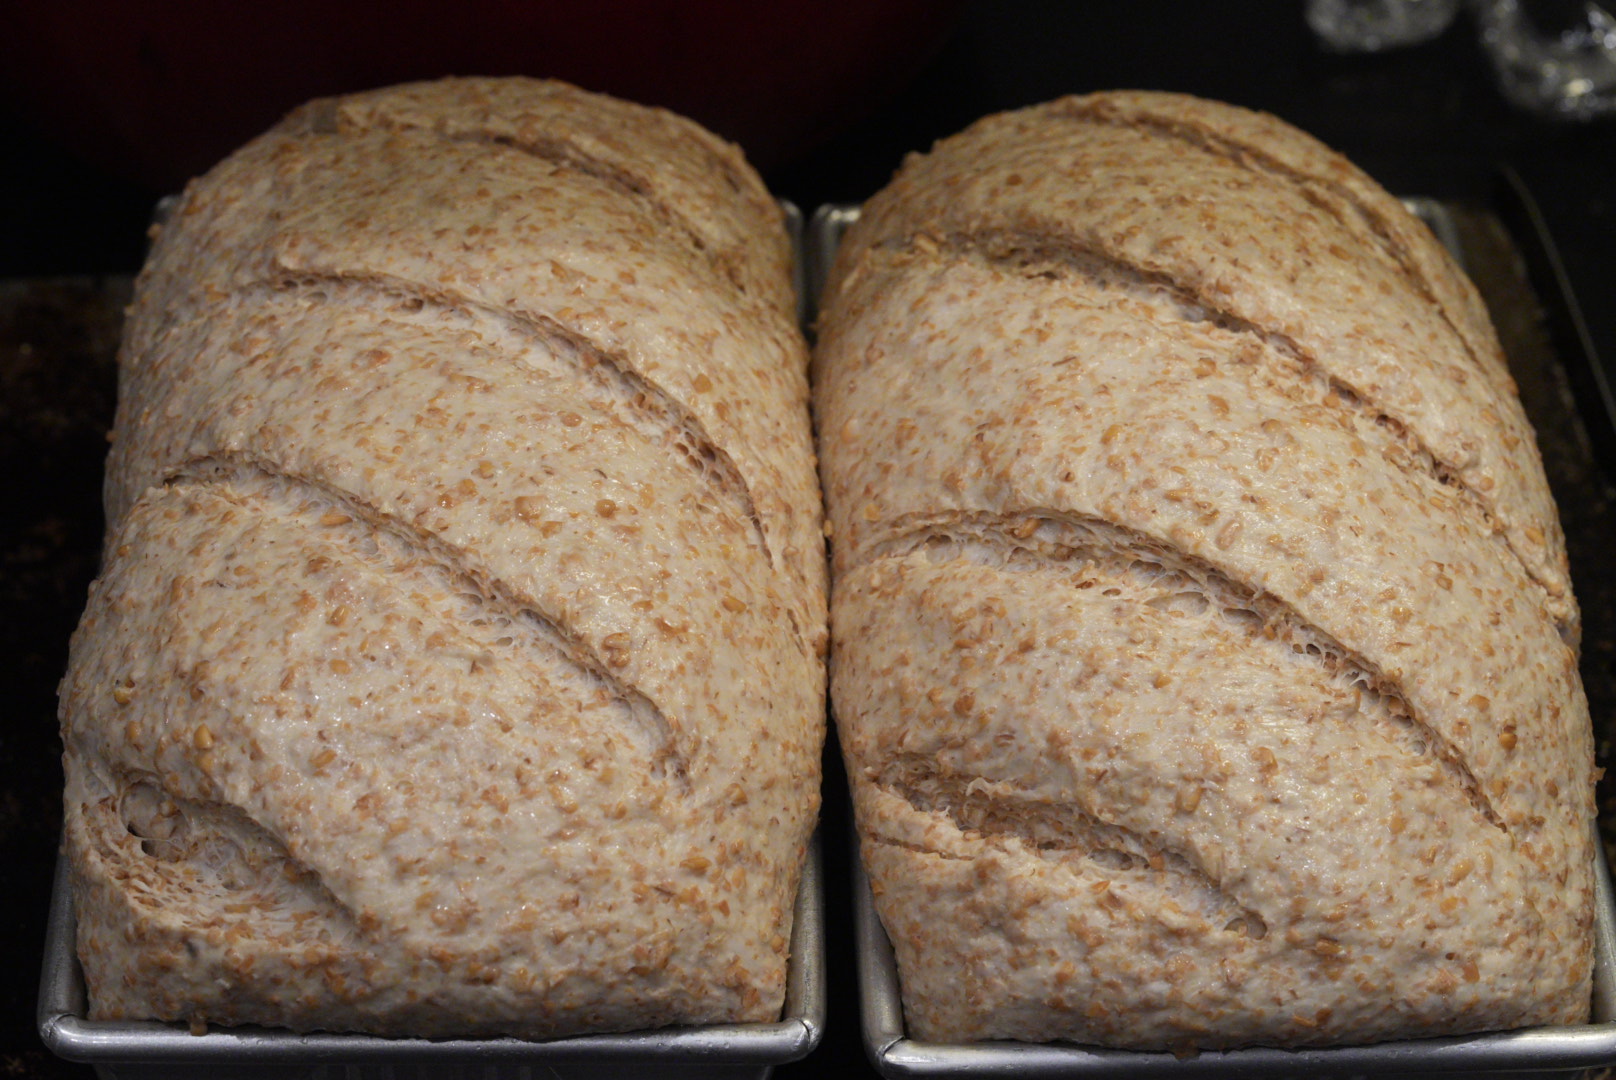
After the final rest, I formed into pan loaves. Note that they do not rise above the rim of the pan or fully fill the corners.

And after only 25 minutes of proofing…
WHOA!! What gives? It turns out that the active dry yeast I had used previously was a little past its prime (I mostly bake sourdough these days). I finished that jar off in the previous bake, and this batch of dough used a fresh jar. What a crazy vigorous rise! Per the poke test these loaves were underproofed, but I slashed them and put them in the oven anyway since I was afraid they’d start escaping the pans…
And after only 30 minutes in the oven…

Crazy… 🤯. Note the pans are placed directly on a 1/2 inch thick baking steel. After a rotation and another 40 minutes, I depanned the loaves and returned them to the turned-off oven to cool overnight with the oven door cracked open. The loaves temped at 210F.

And a cross section of the cooled loaf:
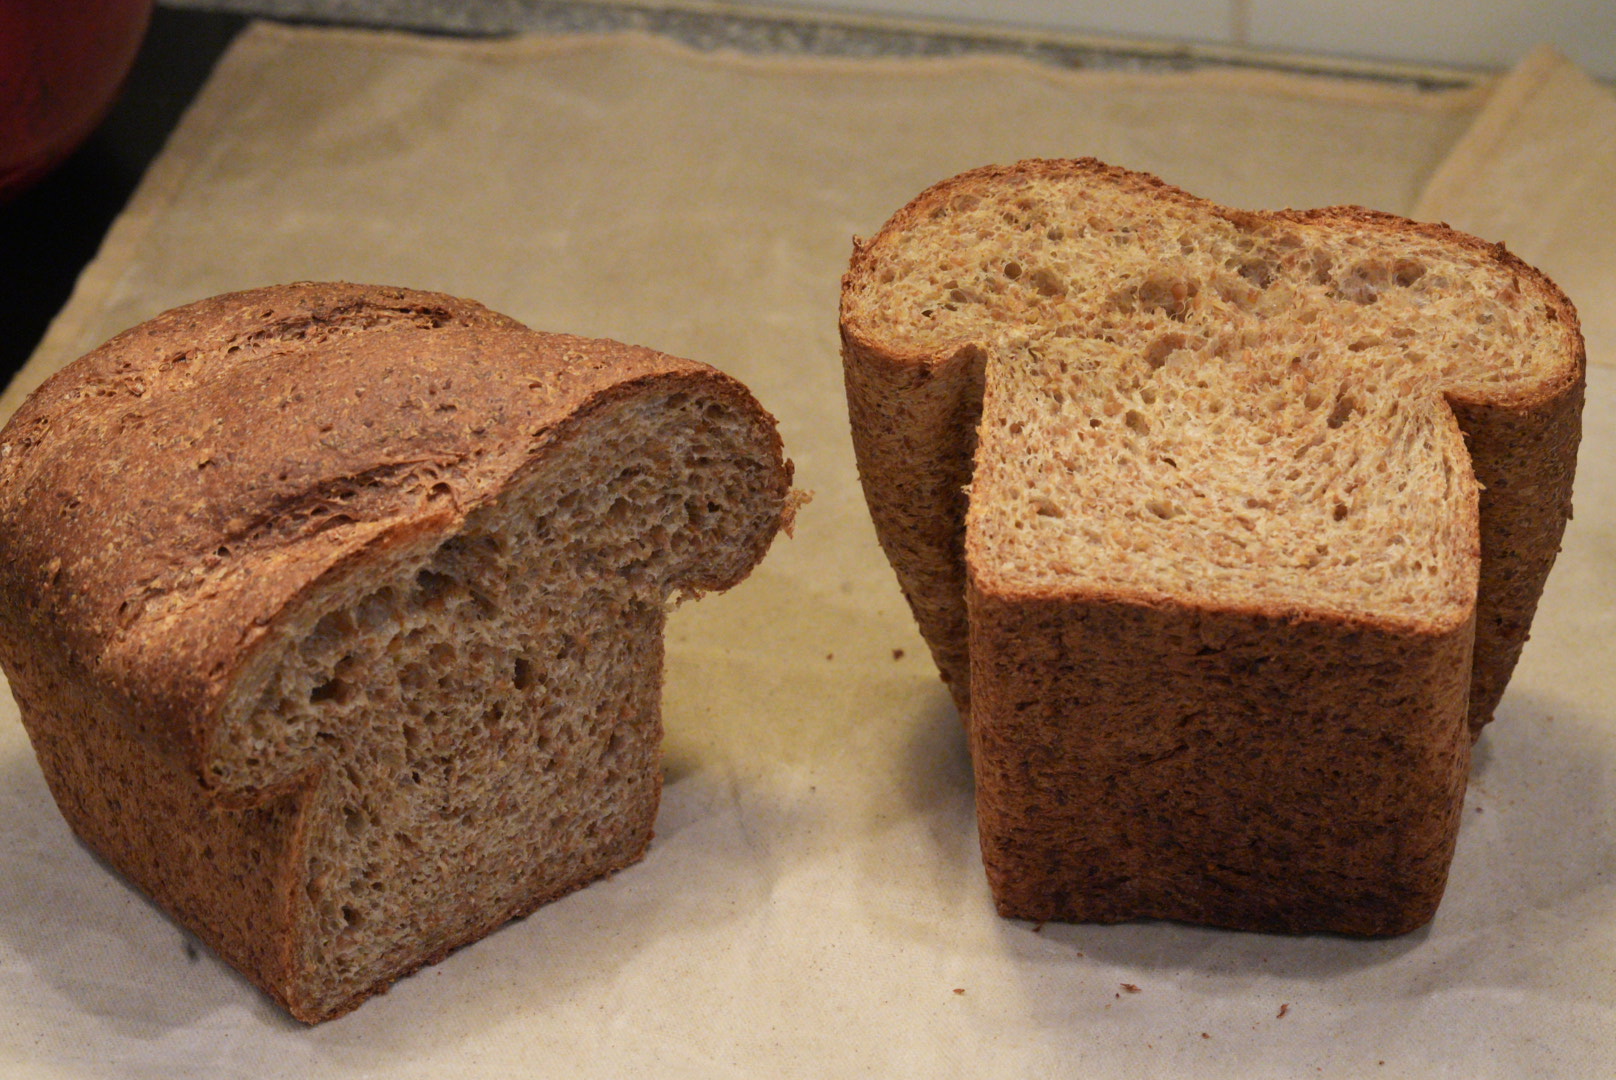
As you can see, the crumb is a little more open/airy than my previous loaf, and the muffin topping is a little out of control. The crust is wonderfully crispy though, and my taste testers described it as like a fresh crispy croissant. A little funny shaped, but a successful bake nonetheless.
I think for the next batch I will experiment with lowering the amount of yeast and shooting for a longer (or at least less vigorous) proof. After that, I will experiment with lowering the added vital wheat gluten. I’m puzzling more and more over Reinhart’s statement that pulp breads are weak and needed more yeast and supplemental gluten to turn out well. These loaves are as light and airy as any sandwich bread I’ve ever had, and I have a strong hunch that I can get good results with a more typical volume of yeast and much less (if not zero) added VWG.
And a bonus shot—I used the same grinding process to grind nixtamalized corn to make masa for tamales and corn tortillas. It’s very smooth and flavorful (especially compared to grocery store masa seca).


I think the muffin shape of your slices is great!
Thanks too for the recipe in your former post and the tip on another use of the Lem Big Bite.
I too tried grinding nixtamalized purple corn through a very tiny grinder and it was a lot of work!
Your yelllow corn masa has a nice texture and I am sure you are enjoying the fruits of your labor.
Thank you! Yes, I’ve been looking for every grinder application I can find to justify the purchase 😁