The Fresh Loaf

A Community of Amateur Bakers and Artisan Bread Enthusiasts.

Most bookmarked

WoodenSpoon's picture
WoodenSpoon

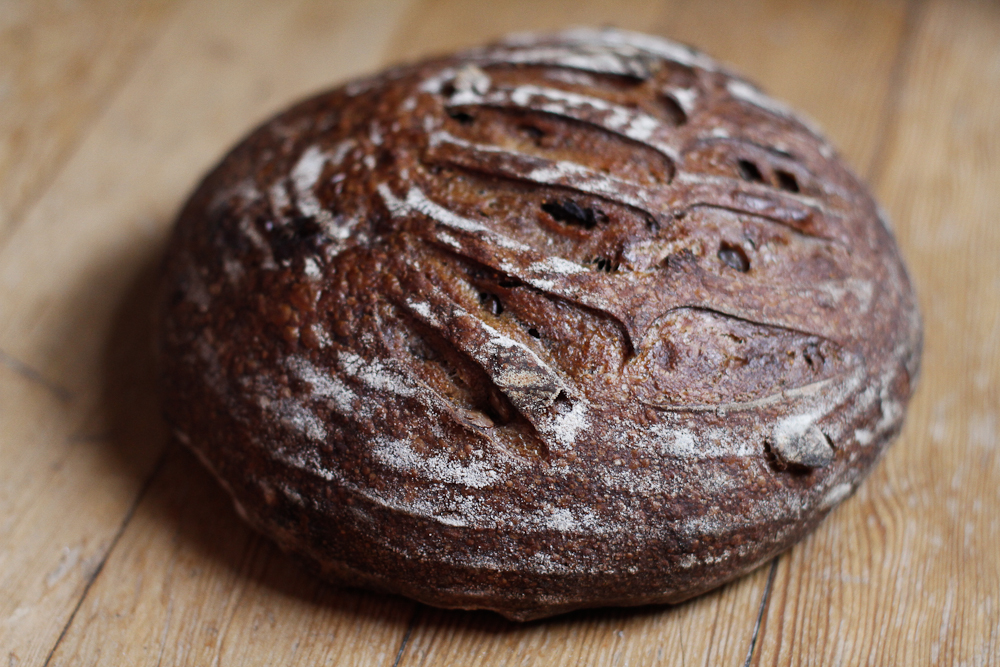
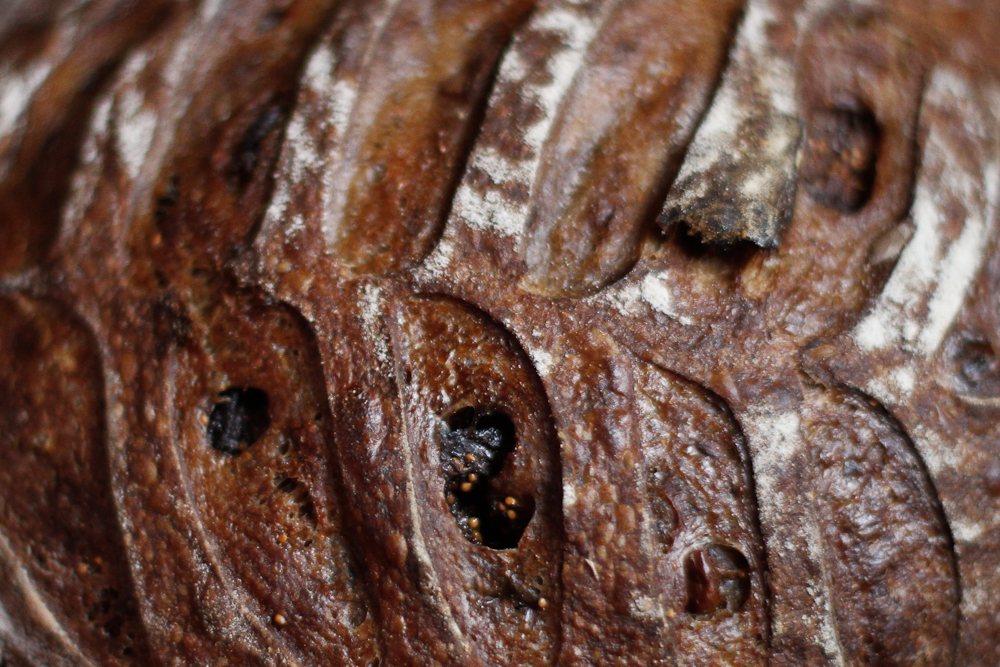
Kamut, wine soaked figs and toasted walnut levain


  • 120g 100% hydration levain (11%flour and 11%water)
  • 171g fresh milled kamut (31%)
  • 284g bread flour (50%)
  • 45g ap flour (8%)
  • 160g wine soaked figs (20% fig 9%wine)
  • 112g wine (20%)
  • 298g warm water (58%)
  • 100g toasted walnuts 18%
  • 12g salt (2%)


  • 1 hr autolyse
  • mix in levain & salt
  • slap and fold @ 5 minutes
  • slap and fold @ 10 minutes
  • fold in figs and nuts @ 1/2 hr
  • fold @ 1 hr
  • fold @ 1 1/2 hr
  • fold @ 2 hr
  • fold @ 2 1/2 hr
  • preshape/rest/shape @ 5 1/2 hr
  • retard @ 8 hr
  • bake @ 21 hr

I baked this on my stone, covered by a large mixing bowl at 500F for 25 minutes then uncovered at 460 for 45 minutes.

Lately I have started to shy away from loaves with ingredients whose flavors will over power the taste of the grains and fermentation, but my house has been so cold lately that coaxing out those subtle flavors has been a bit of a up hill battle, so I gritted my teeth and made a flavored loaf and I'm glad I did.

 This loaf is so good that I'm going to make it again, and I usually don't make things twice in a row as I really only bake on my weekends and over the course of a week I'v got a hundred new ideas that I want to try. But this will be an exception, the flavor was good enough that I think its worth taking a crack at upping the whole grains to a percentage I'd be more proud of.

If any of you take a shot at making this keep in mind that my house is very brisk, >60f so take that into account and possibly adjust yer levain percentage or fermentation times accordingly.

Final crumpet recipe

PlainPopcorn's picture
PlainPopcorn

Description

I wasn't happy with the flavour and texture of many crumpet recipes online so I decided to find something that did work for me. This is the crumpet recipe I wrote after many tests with other recipes. See my post here in the challenges forum http://www.thefreshloaf.com/node/43608/crumpet-inconsistencies-please-help

I think this recipe gives me constant good results and tastes good. But I do understand that it's subjective.

Many fresh loaf people gave me advice on the things I was struggling with so I couldn't have made this without them.

Thank you.

If I forgot something, made a mistake or when you have questions don't hesitate to ask.

Summary

Yield
crumpets
Prep time
Cooking time
Total time

Ingredients

1 t
Sugar
200 ml
Whole milk
2 t
dried yeast
150 g
Strong white flour
100 g
plain white flour
2 T
white vinegar (Use anywhere between 1 and 2.5 T of vinegar, I think 2 T works fine.)
1 pn
salt (Salt to taste, don't go above 3.5 ml.)
1 1⁄2 t
baking powder (Use anywhere between 1 and 2 teaspoons of baking powder, see additional notes.)
20 ml
water (after first rise, add approximately 20 ml. Batter should be thicker than pancake batter.)
1
oil (for greasing rings and pan or hotplate.)

Instructions

Mix sugar, milk, and boiling water(which together with the milk makes a lukewarm liquid) in a bowl or jug and stir in the yeast. Leave it in a warm place for 15 minutes.

Combine the flours in a mixing bowl. Stir in the liquid and mix vigorously until smooth. Now mix in the vinegar.

Cover with a damp towel and leave in a warm place for 1 hour and 45 minutes to 2 hours until nice and bubbly.

Now add in salt, 20 ml water (approx, see ingredients) and mix. If you are confident you have the right consistency you can now add in the baking powder (approx 1.5 tsps, see ingredients and additional notes). Mix well, cover with damp towel and rise for 45 minutes in a warm place.

My house tends to be too cold to properly rise anything in so I use my oven to rise dough and batter like this. With this batter I shoot for a 34 to 45 degree celsius rising temp in the oven.

When your batter is nice and bubbly (like really fluffy and bubbly) you can start frying/baking them either on a hotplate (I recommend this) or just in a pan. When using a hotplate it usually takes 5 minutes to preheat (so plan ahead, it takes 5 minutes to grease the rings and 5 minutes to heat the hotplate and the rings) and the temperature should ideally be somewhere between 165 and 200 degree celsius. When using a regular pan on the stove aim for a medium low heat. Just try what works best and be prepared to sacrifice the first crumpet.

So grease your cooking surface and the rings, place greased rings on cooking surface and start preheating the hotplate or the pan. When the pan/hotplate and rings are nice and hot, ladle in the batter so it reaches about 1.75 ~2 cm high. Watch as holes start to form and the top starts to dry up. Once the top is set you can choose to de-ring and flip them or to give them a golden brown colour with the use of the oven grill (heat from above only, door open). The bottom should be golden brown or a bit darker, chestnut brown is too dark.

You can eat them warm from the pan/hotplate or from under the grill. But if you decide to keep em (as you probably will since this recipe makes 12) you can keep them for a day or two and pop them in the toaster when you're ready to have them. They also freeze wonderfully, take them out of the freezer and let them sit for an hour and then toast them in the toaster. I tried microwaving a frozen one for 30 seconds followed by putting them in the toaster. It worked.

If by chance the crumb is a teensy weensy bit too wet when eaten right after cooking them, they are better the second day after putting them in the toaster. Or let them cool and toast them the same day, perhaps that helps as well.

Notes

On baking powder amounts and composition; the baking powder I use is from dr Oetker. It contains Disodium Diphosphate and Sodium Hydrogen Carbonate (the last one is also known as bicarbonate of soda). I don't know if the ingredients of the baking powder make any difference but I thought about including this info just in case.

If you use the full amount (2 tsps) you will get a very bubbly batter that results in large and deep holes in the crumpets which is what I was looking for. You can taste the baking powder in the baked crumpets at this amount if you have a sharp sense of taste, but it's not necessarily a bad taste. Definitely a hundred times better than the taste of baking soda which is often used in crumpet recipes. But this is subjective. I would not be surprised if there were people who did not mind the taste of baking soda but who detested the taste of baking powder.

I calculated the amount of baking powder by using a conversion rates I found on the internet that lets you convert baking soda to baking powder that also takes into account other (acidic) ingredients.

If you do choose to use less than the maximum amount of baking powder you do sacrifice some of the bubbliness but you can always try to make up for it a bit by keeping the covered batter in a 40~45 degree celcius oven during the second rise. Just try to get as much big bubbles in the batter and you should be fine.

Trouble shooting;

-no holes on top? either the batter is too thin (so the holes will fill up again), the crumpet too high, the batter too thick (so holes never appear in the first place) or the temperature too low.

-top won't set? either the batter is too thin, the crumpet too high or the temperature too low.

-batter won't rise during second rise? put it in a warmer place, maybe you forgot the baking powder?

-the crumpets are stuck to the rings when I want to de-ring them? Ideally the crumpets shrink away from the rings if the surface and the rings are hot enough and if you used enough oil to grease them. But sometimes they stick anyway. Just use a knife to free them, or toothpick if you don't want to scratch the rings.

-the inside is uncooked/soggy/pastelike but everything else seems fine? the inside of a crumpet should be somewhere between a pancake and a fresh ciabatta when it comes to the wetness of the crumb. It should not feel pastelike, and if it is it's probably because the batter was too thin. This can happen if your flour sucks up less water than other flours of the same kind. Just remember that the batter should be thicker than pancake batter.

Doc.Dough's picture
Doc.Dough

The sources of sour

I have recently been running a series of experiments to tease out the relative significance of various factors that contribute to the sourness of sourdough bread.

In the "everybody knows" category is the notion that whole grain breads can be more sour than a 100% white flour formulas, but the relative importance of specific mechanisms by which the sourness is developed is not well documented.

There is a limit to how much acid you can develop in a 100% white flour starter irrespective of how long you let it run before use. This limit is determined by the LAB population and their acid production rate. I have found no references that either differentiate between (or correlate) population growth rate (inverse of doubling time) and acid production rate. While the chemistry of acid production is common to reproduction, it is not clear that the LAB stop producing acid when they stop reproducing. The fact that growth stops at a pH of around 3.8 while there is ample evidence that additional acid is produced down to a pH of below 3.6 feeds a suspicion that at some point there is a decoupling of reproduction from metabolism and the concomitant acid production.

I set as an objective the development of a sourdough loaf that appears visually to be all white flour yet has a reliably reproducible high acidity.

Hamelman has a number of variations on sourdough with some amount of whole grain flour in each. In some, his levain is made from 100% white flour and in others some fraction of the whole grain flour is incorporated into the levain with the remainder incorporated into the final dough. As part of this exercise I began to wonder if there would be value in putting all of the whole grain flour into the levain in an attempt to drive up the LAB population in the final levain (i.e., do not focus on the acid contribution of the levain, but rather focus on how many LAB get added to the final dough). The thought was that a higher numerical density of LAB in the final dough could produce more acid during bulk fermentation and proofing (when the pH is well above 3.8) than they could produce under the limiting conditions of the levain build (relatively small quantity and the development of a low pH well before maturation of the levain). If by adding all of the whole grain flour to the levain could hold the pH up long enough for the LAB to double one more time before they stopped reproducing (relative to an all white levain) then the final dough would have potentially twice as much acid (subject to the other resource and rate limiting conditions of the bulk fermentation and proof).

The results seem to confirm the conjecture but also raise another issue. While including 15% of the total flour as white whole wheat and putting it in the levain makes the bread indistinguishable from an all white loaf in color, it does add acidity to the flavor profile. Yet a much more noticable difference in flavor emerges when this bread is retarded. My speculation is that the relative metabolic rate advantage of the LAB compared to the yeast during retardation (either at 50°F or 42°F) is the source of the additional acid. Some samples of this formulation have produced crumb pH below 4.0 and TTA values of above 12 (ml of 0.1N NaOH to titrate 15g of macerated crumb in 100 ml of distilled water to a final pH of 6.6). Without any whole grain flour or retardation the TTA is 8.70 to 8.85, while with the substitution of 15% of the flour with white whole wheat the TTA climbs to ~9.5 for no retard and to above 11.0 when the dough is retarded in excess of 6 hrs. The sample size for these tests is not yet large enough to determine the significance of the difference, and there are other factors that are not yet firmly under control (e.g., the time/temperature profile for levain growth), but the direction of future tests seems clear.

The next step is to more tightly control the levain, increase the sample size, and add another test case where the whole grain flour is added to the final dough mix and none is included in the levain (with and without retardation).

Since the test matrix is getting too large to explore completely, I will have to make a decision about what cases to emphasize and which cases to defer.

I would be interested in comments from anybody who has managed to read this far without falling asleep about which cases seem most interesting or worth the trouble and any insights as to why some cases might be eliminated.

emkay's picture
emkay

Naturally leavened no knead bread

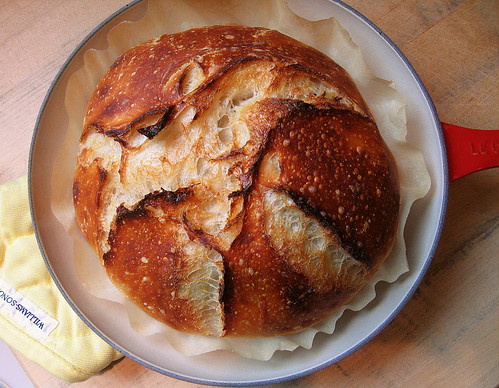
The no knead bread has been all the rage since Bittman wrote about Lahey's method in the NY Times. I've always wanted to try it out, but just never got around to it. I had about 50 grams of sourdough starter leftover after feeding. It had only been about 15 hours since it had been fed (at 1:3:3), so instead of discarding it I used it to experiment with a naturally leavened no knead bread.

I used only all-purpose flour and no whole grain flours because my all-purpose is less costly than my whole grains. If the resulting bread turned out poorly then I would be less sad about tossing it out. I knew I needed something fairly wet so the following are the baker's percentages I decided to use: 100% flour, 80% water, 2% salt, 10% levain. The overall hydration including the 100% hydration levain was 80.9%.

Naturally Leavened No Knead Bread

500 grams AP flour

400 grams water

10 grams salt

50 grams levain (aka my leftover starter)

Final dough: 960 grams

  • I put all the ingredients in a bowl and mixed it into a shaggy mess. No kneading, no stretching, no folding, and no slapping.

NK_levain_aug17_dough

  • I covered the bowl and let it ferment undisturbed at room temperature (about 71F) for 9 hours, and then I put in the refrigerator (about 38F) for 72 hours. 
  • I took the cold dough from the refrigerator and shaped it into a loose boule.
  • I proofed the boule at room temperature (about 71F) for 3 hours. 
  • I did not slash nor did I score it.
  • I baked it seam side up in a cast iron pot at 450F for 40 minutes (20 minutes with the lid on and 20 min without the lid). 

NK_levain_aug17_1

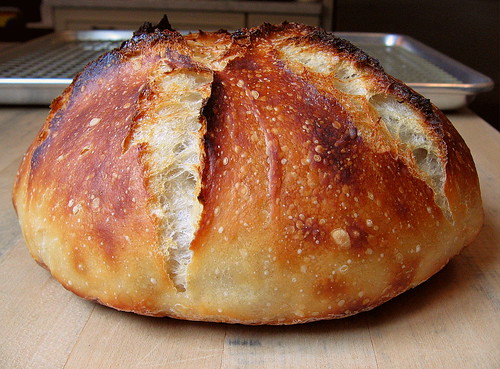
The crust was thin and crisp and covered in blisters.

NK_levain_aug17_3

The crumb was really moist and almost custardy. There was a nice pleasant chew to it too.

NK_levain_aug17_crumb1

NK_levain_aug17_crumb2

In hindsight the 72 hours in the refrigerator could have been disastrous, but luckily my dough was not overfermented. I think the 72 hours in the refrigerator really made a positive impact in the flavor department. The bread was tangy and sour like the SF sourdough that I remember eating as a child and it was nothing like the one-dimensional vinegary flavors that plague today's Boudin bread. Overall I think it was a very sucessful experiment and one that I will be repeating again and again.

:) Mary

Isand66's picture
Isand66

Ian's Oat Porridge Bread

Last week I made the Oat Porridge Bread from Tartine 3 and I loved it.  I wanted to take that basic idea and convert it to my normal procedures using a larger amount of per-fermented flour and a bulk retarding of the dough in the refrigerator.

Well I have to say it was a great success.  I find this method much easier and I think the final bread actually has a more complex flavor with the same creamy moist crumb.  I highly recommend that you try this as I know you will like it and like it a lot!

I used my standard refreshed AP starter at 66% this time instead of adding some whole wheat to the starter, mainly for convenience sake.  I also added some wheat germ which was suggested in the original formula.

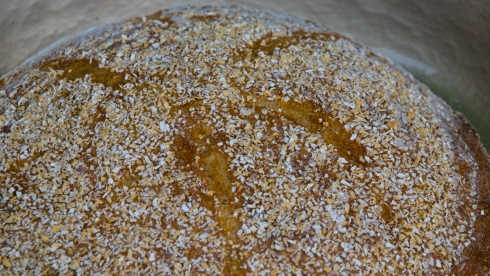
Closeup1

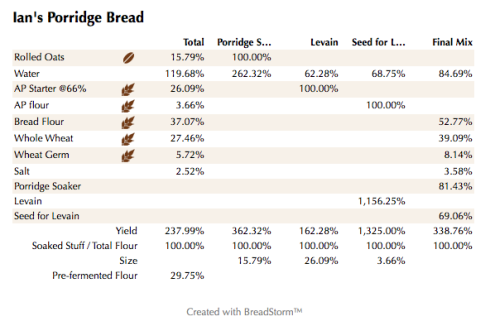
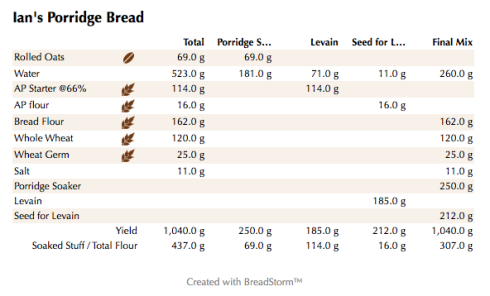
Ian's Porridge Bread (%)

Ian's Porridge Bread (weights)


Here are the Zip files for the above BreadStorm files.


Levain Directions

Mix all the levain ingredients together  for about 1 minute and cover with plastic wrap.  Let it sit at room temperature for around 7-8 hours or until the starter has doubled.  I used my proofer set at 83 degrees and it took about 4 hours.

Oat Porridge Directions

Add about 3/4's of the water called for the porridge to the rolled oats in a small pot set to low and stir constantly until all the water is absorbed.  Add the remainder of the water and keep stirring until you have a nice creamy and soft porridge.  Remove from the heat and let it come to room temperature before adding to the dough.  I put mine in the refrigerator and let it cool quicker.

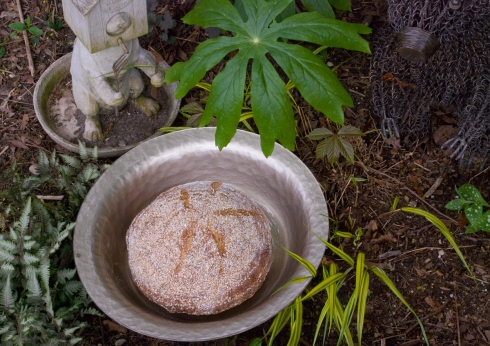
WideShot

 Main Dough Procedure

Mix the flours and wheat germ with the main dough and the water for about 1 minute.  Let the rough dough sit for about 20 minutes to an hour.  Next add the levain, cooled porridge and salt and mix on low for 4 minutes and speed #2 for another 2 minutes or by hand for about 6 minutes.   You should end up with a cohesive dough that is slightly tacky but very manageable.  Remove the dough from your bowl and place it in a lightly oiled bowl or work surface and do several stretch and folds.  Let it rest covered for 10-15 minutes and then do another stretch and fold.  Let it rest another 10-15 minutes and do one additional stretch and fold.  After a total of 2 hours place your covered bowl in the refrigerator and let it rest for 12 to 24 hours.  (Since I used my proofer I only let the dough sit out for 1.5 hours before refrigerating).  Note: this is a pretty wet dough so you may need to do a couple of additional stretch and folds.

When you are ready to bake remove the bowl from the refrigerator and let it set out at room temperature still covered for 1.5 to 2 hours.  Remove the dough and shape as desired.

The dough will take 1.5 to 2 hours depending on your room temperature and will only rise about 1/3 it's size at most.  Let the dough dictate when it is read to bake not the clock.

Around 45 minutes before ready to bake, pre-heat your oven to 550 degrees F. and prepare it for steam.  I have a heavy-duty baking pan on the bottom rack of my oven with 1 baking stone on above the pan and one on the top shelf.  I pour 1 cup of boiling water in the pan right after I place the dough in the oven.

Right before you are ready to put them in the oven, score as desired and then add 1 cup of boiling water to your steam pan or follow your own steam procedure.

After 5 minute lower the temperature to 450 degrees.  Bake for 35-50 minutes until the crust is nice and brown and the internal temperature of the bread is 205 degrees.

Take the bread out of the oven when done and let it cool on a bakers rack before for at least 2 hours before eating.

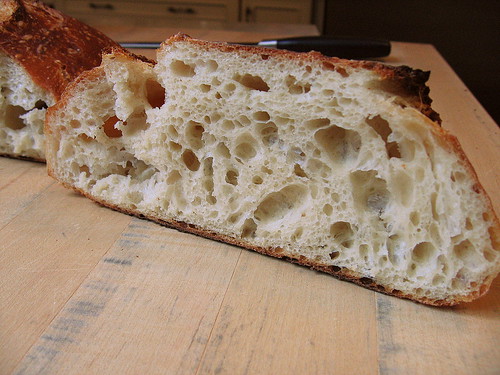
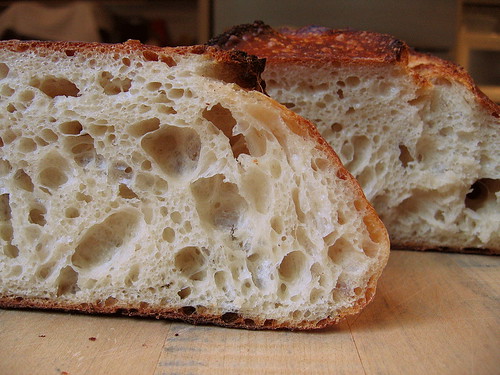
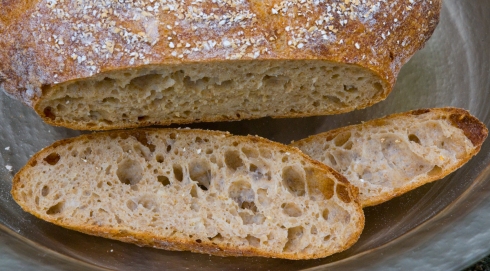
Crumb1

Bear

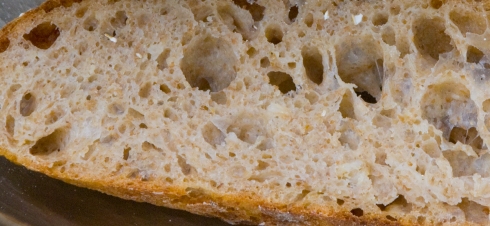
Crumbclose


mcs's picture
mcs

Baguette Video

Hey everyone,This week I had an order for some baguettes and I thought it would be cool to shoot a video while making them so customers (and bakers too of course) could see some of the process.  It's more of a demo rather than an instructional video, but if you pay close enough attention, you can pick up a few tips.  I hope you enjoy it!

-Mark

Baguettes


Antilope's picture
Antilope

Old Baking Books Free at Openlibrary.org

There are many old baking books in e-formats at the Openlibrary.org
Here are some interesting ones I found that you can read online
or downloaded for free in various formats such as PDF, EPUB, MOBI, etc.


Ryzon Baking Powder Baking Book 1916 - with color illustrations
http://openlibrary.org/works/OL1472910W/Ryzon_baking_book


GOLD MEDAL FLOUR COOK BOOK Published 1910
http://openlibrary.org/works/OL7870393W/GOLD_MEDAL_FLOUR_COOK_BOOK


Book of American Baking 1910 - Bakery Volume Recipes from Trade Publication
http://openlibrary.org/works/OL16455754W/Book_of_American_baking


A Treatise on Flour, Yeast, Fermentation, and Baking 1914 - Bakery Volume Recipes from The Fleischmann Co.
http://openlibrary.org/works/OL13849610W/A_treatise_on_flour_yeast_fermentation_and_baking_together_with_recipes_for_bread_and_cakes


The_Fleischmann_Treasurey_Of_Yeast_Baking_ (1962)
http://archive.org/details/The_Fleischmann_Treasurey_Of_Yeast_Baking_


Grocers' manual: 1888 containing recipes, formulas and instructions for the manufacture of baking powders, flavoring extracts, essences, condiments, etc.
http://openlibrary.org/works/OL15373341W/Grocers'_manual_containing_recipes_formulas_and_instructions_for_the_manufacture_of_baking_powders_f


The modern baker, confectioner and caterer 1907
http://openlibrary.org/books/ia:modernbakerconfe05kirkuoft/The_modern_baker_confectioner_and_caterer_a_practical_and_scientific_work_for_the_baking_an...


Baker's bread 1913 - Bakery Volume Recipes
http://openlibrary.org/books/OL6558710M/Bakers'_bread.


A treatise on bread, and bread-making 1837
http://openlibrary.org/books/OL13447596M/A_treatise_on_bread_and_bread-making.


Modern Practical Baking 1921
http://openlibrary.org/works/OL210964W/Modern_practical_baking


Vienna bread 1909
http://openlibrary.org/works/OL16333912W/Vienna_bread


New England breakfast breads, luncheon and tea biscuits 1891
http://openlibrary.org/books/OL7223020M/New_England_breakfast_breads_luncheon_and_tea_biscuits

Abelbreadgallery's picture
Abelbreadgallery

100% whole wheat bread with rye sourdough

Ingredients:

- 100 grams of active rye sourdough

- 500 gr of whole wheat flour (organic Stone Ground Whole Wheat Flour, if it's possible)

- 10 gr salt

- 320 ml water


Mix all the ingredients and let them rest 20 minutes. Knead the dough for 10 minutes or until it's smooth and elastic. Use your favorite method. Let it rest 3 hours. You can strecht and fold two times during this period. You can make one piece of 930 grams or two pieces off 465 grams. Shape a ball or a batard, trying not to degas the dough very much. Let it rest one hour more. Bake about 55-60 minutes if you make one piece of 930 grams or 35-40 if you make two pieces of 465 grams. The temperature at the beginning should be about 230C and you should create some steam into the oven. The temperature at the end of the baking process should be about 180C, without steam.

In this case, I baked this bread with dutch oven, 30 minutes with the lid on and 25 minutes without lid.

More info: http://breadgallery.wordpress.com/2013/07/19/hogaza-100-trigo-integral-100-whole-wheat-bread/

hanseata's picture
hanseata

Bauernbrötchen - Rustic Rolls with Old Dough

Gerd Kellner, aka Ketex, is not only an accomplished baker, but, also, writes one of Germany's best bread baking blogs. A book with his recipes: "Rustikale Brote aus deutschen Landen" is available as e-book at Amazon.

When I saw his post on Bauernbrötchen, I wasn't only attracted by the attractive look of these rustic rolls, but, also, intrigued by his use of old dough as leaven.

"Old dough" in bakers' lingo means a piece of dough, cut off before shaping the bread, and kept in the refrigerator for later use. After I learned how to make a wild yeast starter, and bake my first bread from a French cookbook, I had always saved a portion of the dough for my next loaf.

Advancing from a series of weapon grade, dense and chewy "bricks" to more edible breads, this method had worked very well for me, until I branched out and started baking other types of bread than just my everyday German Feinbrot.
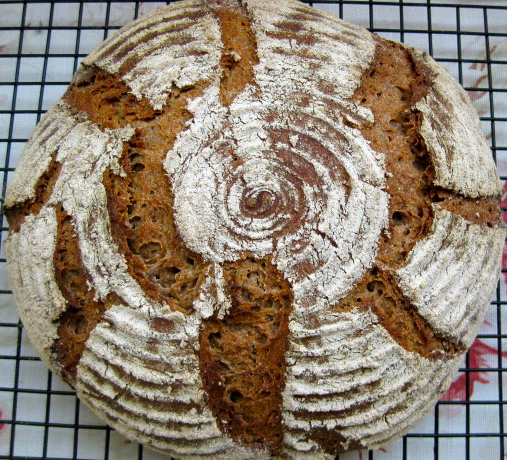
German Feinbrot - originally made with old dough

The old dough was replaced by a whole wheat mother starter, and all but forgotten as a viable rising agent.

With Ketex' beautiful Bauernbrötchen in mind, I reserved a piece of dough from a yeast bread I made, and put it for later use in my basement refrigerator - and then promptly forgot all about it!

About 3 months later, when I was looking for something in the depth of the fridge, I came upon the little container, and remembered what it was.

 Though I was rather suspicious about how this might affect the taste, my distrust was unfounded, the rolls, though not looking as nice as Gerd's, rose well and tasted surprisingly good. And I had a new, interesting formula to work with.

I opened it gingerly, expecting nothing good after all the time, and the old dough, indeed, looked, shall we say, "antique", and didn't smell very nice, either. At least there was no mold on it!
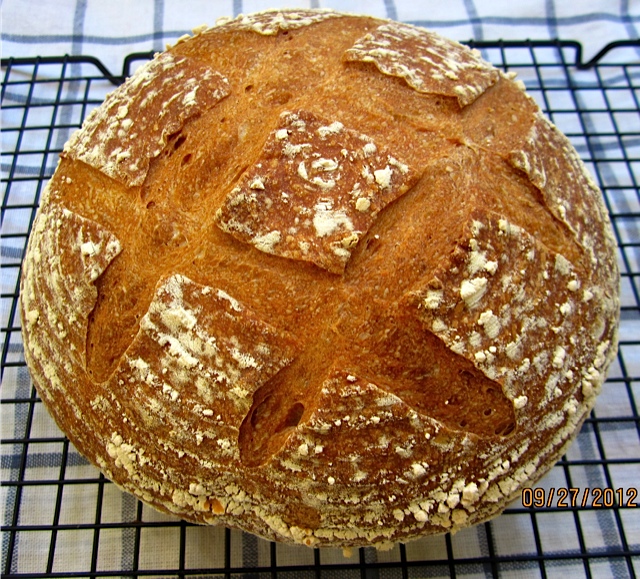
Rose Hip Levain - made from accidentally fermenting jam

Always curious, and open for experiments before I throw something in the trash, I just wanted to see whether there was any life left in the mummified relic, and proceeded with the recipe.

For my second bake I did just the opposite: my old dough had slumbered only for 3 days in the fridge. With my first batch of Bauernbrötchen, I had followed Ketex recipe to the t, using a poolish as preferment and adding the piece of preserved dough later to the final mixture.

"Old dough" - refreshed and ready to go!

I didn't quite see the rationale for an additional poolish, especially since the dough was to be retarded in the refrigerator overnight. Why not, instead, feeding the old dough up front, and let it act the part of the poolish?

And, since the percentage of rye flour in the dough was not so high that a change would influence the crumb, I used whole rye instead of medium rye (easy to come by in Germany, but, alas, not readily available in the US.)

Rather than kneading the dough for 15 minutes, and folding it only once, I followed Peter Reinhart's procedure in "Artisan Bread Every Day" (my default S&F) with a brief mix, an autolyse, and 4 stretches and folds over a period of 40 minutes.

Measuring spoon for very small amounts

Ketex adds a tad of yeast to his dough. For these very small amounts (that, nevertheless, make the rising time more predictable) you need a special scale, able to accurately weigh a few grams or ounces.  Mine looks like a big spoon, and is easy to use (about $15 at Amazon)

The second batch, without the poolish, performed just the same, but tasted a bit heartier with the whole rye. I had to adjust the baking temperature and time, but every oven is different, and you have to adapt to this, anyway.

We found these crusty rustic rolls great for open faced sandwiches, and they, toast well, tool. You can easily freeze them, therefore it's worth it to make a double batch.

But don't forget to save a piece of the dough: for your next Bauernbrötchen!
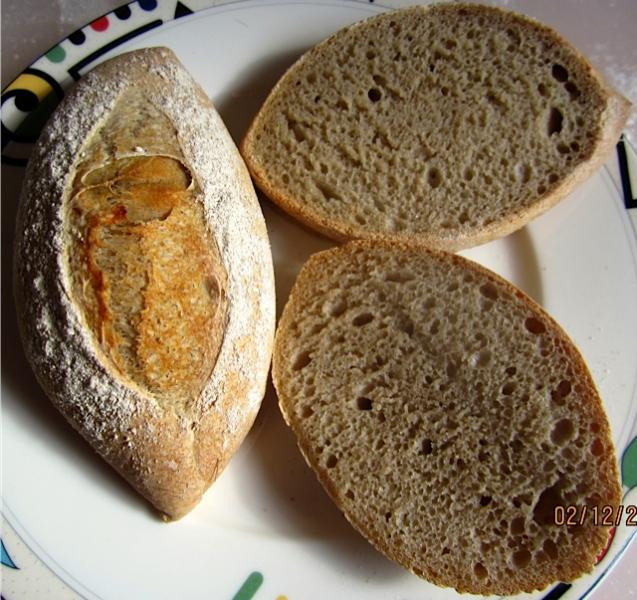
My first batch of Bauernbrötchen - made with truly "antique" dough!


BAUERNBRÖTCHEN WITH OLD DOUGH  (adapted from Gerhard Kellner/Ketex) 

OLD DOUGH
100 g/3.5 oz old dough
    5 g/1 tbsp whole rye flour
  42 g/3 tbsp water

FINAL DOUGH
147 g/5.2 oz refreshed old dough (all)
400 g/14.1 oz bread flour
  45 g/1.6 oz whole rye flour
258 g/9.1 oz water
    8 g/0.3 oz olive oil
  10 g/0.4 oz salt
 1.8 g/0.06 oz instant yeast (or 5 g fresh yeast)
 3.5 g/1 1/2 tsp barley malt
 rye flour for sprinkling


Rejuvenated old dough

DAY 1:
In the morning, feed old dough with rye flour and water. Cover, and leave at room temperature until lively and bubbly (like poolish.)

In the evening, mix final dough ingredients at low speed (or with wooden spoon) until all flour is hydrated, 1 - 2 minutes. Let dough rest 5 minutes. Then knead at medium-low speed (or by hand) for 2 minutes, adjusting with a little more water or flour if necessary (dough should be a bit sticky.) Continue kneading for another 4 minutes. Dough should be still more sticky than tacky.

Ready for S & F on oiled work surface

Transfer dough to lightly oiled or wet work surface. With oiled or wet hands, pull and stretch it into a rough square. Fold dough from top and bottom in thirds, like a business letter. Then do the same from both sides. Gather dough together in a ball, and place it, seamside down, in a lightly oiled bowl. Cover, and let it rest for 10 minutes.

Repeat this stretching and folding 3 more times, at 10 minute intervals. After the last fold, reserve 100 g/3.5 oz of the dough (for the next "old dough".) Refrigerate reserved piece (container with lid.) (Ketex recommends using it within 10 days, but it keeps longer.

Place remaining dough also in an oiled container with lid, and refrigerate it overnight.

I find these kinds of containers very practical for overnight retardation

DAY 2:
(Since these are small pieces, you can shape them cold.)

Divide dough into 8 pieces (à 100 g/3.5 oz) and shape them into balls. Let them relax for 20 minutes, then roll them into strands with pointed ends. 

The dough pieces are first pre-shaped into rolls

Place rolls in a couche, seam side up. Sprinkle with rye flour. Cover, and let proof for 1 - 2 hours. (Preheat oven 45 minutes before baking.)

Preheat oven to 500ºF, including steam pan. 

Bauernbrötchen are proofing on a couche

Place rolls, seam side down, on perforated or parchment lined baking sheet, sprinkle them with whole rye flour, and score lengthwise.

Bake Bauernbrötchen for 20 - 26 minutes at 450ºF, steaming with a cup of boiling water. (Rotate the baking sheet 180 degrees after half the baking time, and remove the steam pan). They should be golden brown, and register at least 200ºF.

Submitted to YeastSpotting

Submitted to Panissimo:  Bread & Companatico

                                          Indovina chi viene a cena                                             


hkooreman's picture
hkooreman

How to store Italian starter (lievito naturale) in water

I have been working tirelessly to develop an Italian firm starter.  So far, it seems to be going well.  My question is how does one store an Italian starter in water and what are the benefits of doing so?  I saw a video done by Iginio Massari that showed him cutting up his starter and washing it in water into which he had placed a heaping spoon of sugar.  I am not sure what the benefit of this process is either.  Any thoughts or experience with this process would be appreciated.

Pages