The Fresh Loaf

A Community of Amateur Bakers and Artisan Bread Enthusiasts.

Most bookmarked

mcs's picture
mcs

more shaping practice

Hey TFLers,
This is a short no-frills video re-visiting some of the parts of shaping that I feel are important.  In the beginning I demonstrate slowly using a damp dishcloth, then I use the same technique with a few different doughs.  Lastly, I use a slight modification on the technique to form a couple of boules.  Enjoy. 

-Mark

http://TheBackHomeBakery.com


hanseata's picture
hanseata

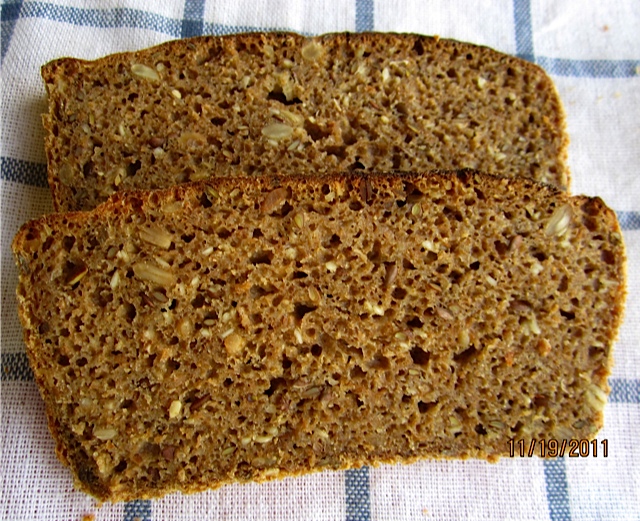
Friesisches Schwarzbrot - Friesian Rye

STARTER:

100 g rye meal

  26 g whole wheat or rye mother starter

200 g water, lukewarm


INTERMEDIATE DOUGH:

     all starter

100 g rye meal

100 g whole wheat flour

150 g water, lukewarm


FINAL DOUGH:

     all intermediate dough

100 g whole wheat flour

    6 g salt

  10 g honey

    8 g molasses

  25 g flaxseeds

  25 g sesame seeds

  25 g sunflower seeds, toasted

  50 g water, lukewarm (or more, as needed)

sunflower seeds for topping


DAY 1

Using a large spoon, stir together all starter ingredients in a bowl. Leave at room temperature, covered with plastic wrap for 4 - 6 hours (or overnight). When the starter has fully developed, use it or refrigerate (take out 2 hrs. before using).

DAY 2

In the morning, using a large spoon (or stand mixer with paddle attachment), mix together all ingredients for intermediate dough until well combined. Cover and ferment at room temperature.

In the evening, using a large spoon (or stand mixer with paddle attachment), mix together all ingredients for final dough, adding lukewarm water until dough has consistency of cake batter. Fill dough (up to 3/4) in lightly oiled medium sandwich loaf pan (9"), smooth with wet rubber spatula, sprinkle with sunflower seeds, cover and refrigerate overnight.

 DAY 3

Remove dough from refrigerator 2 hrs. before using.

Preheat oven to 475 F (with steam pan). Bake bread at 450 F (steaming with 1 cup boiling water) for 15 minutes, remove steam pan, reduce temperature to 375 F and continue baking for another 15 min.. Rotate 180 degrees, and continue baking  for another 20 - 30 minutes (internal temperature 200 F). Mist with water while hot, and let cool on wire rack.

Updated 9/23/13


DonD's picture
DonD

My version of Eric Kayser's Pain aux Cereales

Background:

David Lebovitz, the celebrated American food blogger based in Paris has raved about Eric Kayser's Pain aux Cereales on numerous occasions, even proclaiming it to be perhaps the Best Bread in the World. A lot of bread aficianados from all over the world have made the pilgrimage to Paris to sample it and have posted photos as well as detailed description of this particular bread on the internet.

  Kayser's Pain aux Cereales from Lebovitz's Blog

I have the Eric Kayser's '100% Pain' bread book and the recipe for his Pain aux Cereales is included. However the photos, the ingredients and the formulation listed do not match the descriptions of the bread sold in his stores. After all, his bread empire is built on the originality and quality of his products, so who can blame him for not divulging all his secrets?

A couple days ago, I decided to formulate my own interpretation of Kayser's Pain aux Cereales based on my compilation of information gathered on the internet and relying loosely on the recipe in his book.

Formulation:

Flour Mix:

- 250 Gms KA Organic Artisan Select AP Flour

- 250 Gms La Milanaise T90 High Extraction Flour

Liquid Levain Build:

- 25 Gms ripe Liquid Levain (100% hydration)

- 50 Gms Flour Mix

- 50 Gms Spring Water

Seed Mix:

- 2 Tbs Golden Flax Seeds

- 2 Tbs Brown Flax Seeds

- 2 Tbs Yellow Sesame Seeds

- 2 Tbs Millet Seeds

- 2 Tbs Poppy Seeds

Final Dough Mix:

- 450 Gms Flour Mix

- 325 Gms Spring Water

- 125 Gms Liquid Levain Build

- 1/4 tsp Instant Yeast

- 10 Gms Grey Atlantic Sea Salt

- 1/3 of Seed Mix (toasted in a non-stick pan)

Procedures:

1- Prepare Final Levain Build and let ferment at room temperature until triple in volume.

2- Mix Flour and Water and autolyse for 30 mins.

3- Add Levain, Yeast and Salt and knead in mixer w/ dough hook on low speed for 4 mins.

4- Add the 1/3 toasted seed mix and incorporate into dough with dough hook for 30 secs.

5- Partially ferment dough at room temperature for 2 1/2 hours with stretch and fold in the bowl every 30 mins.

6- Retard dough in refrigerator for 18-24 hrs.

7- Divide dough into 2, preshape into ball and let rest 1 hr. Shape into batard and proof on couche for 1 hr.

8- Transfer loaves to peel, lightly mist with a vaporizer and sprinkle with remaining untoasted seed mix.

9- Score and bake at 440 degrees F with steam for 12 mins and 20 more mins at 390 degrees F on convection without steam.


I kept the dough hydration higher than normal at about 77% to compensate for the seeds absorbing some of the moisture from the dough during fermentation. The dough was very responsive with just the right amount of elasticity and extensibility. I got good oven spring, the cuts opened up nicely and the crust was thin and crackly and had beautiful caramelization. The roasted seeds on the crust were colorful and fragrant and glistened from their oil.

The crumb was cream colored, translucent, soft and slightly chewy and speckled with crunchy seeds. The flavor was complex from the interplay of the nuttiness of the seeds and the slight tang of the levain.


Was it the Best Bread in the World? I would not say so but a darn good bread nonetheless.

Happy Baking!

Don


ananda's picture
ananda

Crumpets and Muffins

A while ago Debra Wink asked for information on English Muffins.

I attach details below, mostly from a Practical Class with my Foundation Degree students from last academic year.

The attached video is from very early days, and was prepared entirely by the students.   You can hear me advising other students in the background; that's how I know I wasn't directly involved.

Recipe specifications are attached [many thanks to my baking mentor and tutor during my time studying for my bakery qualifications for letting me have a commercial recipe specification to use], and I will dig out some photos and attach manufacturing instructions below.

Here goes:


CRUMPETS


Material

Formula [% of flour]

Recipe [grammes]

Strong Flour

100

500

Salt

2

10

Yeast

6

30

Water

110

550

TOTAL

218

1090

Bicarbonate of Soda

0.3

1.5

Cold Water

28

140

TOTAL

246.3

1231.5


Yields 20

Set plate to Mk4. and pre-heat.   The temperature of the hot-plate should be just below 200*C


Method:


  • Sieve together the flour and salt.
  • Dissolve the yeast in tempered water [30°C]
  • Combine these 2 in a mixer and beat on first speed for 2 minutes to form a batter
  • Beat on second speed for 6 minutes
  • Cover the batter and keep warm for 1 hour bulk fermentation
  • Dissolve the bicarb in the cold water and mix this solution well through the batter.
  • Use immediately, piping the mix into lightly-greased hoops, ready-placed onto the prepared griddle surface.   Hot-plate should be clean and un-greased


English Muffins


Material

Formula [% of flour]

Recipe [grammes]

1. Sponge


Strong Flour

50

750

Water

30

450

Yeast

0.5

7.5

TOTAL

80.5

1207.5

2. Final Dough


Sponge

80.5

1207.5

Strong Flour

50

750

Salt

2

30

Milk Powder

8

120

Yeast

8

120

Butter

10

150

Water

30

450

TOTAL

188.5

2827.5

makes 40 muffins @ 65g

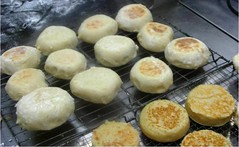
This is based on Rose Levy Barenbaum's recipe if I'm not mistaken; one of my Foundation Degree students was very keen to learn how to make these, so we did the developmental work together, and he had a go at making them; quite successfully I believe.

We made the sponge on an overnight basis.   This would mean the sponge would be cool, so final dough water would need to be tempered accordingly to achieve a DDT of around 30*C.   I would refer you to Walter T. Banfield's text "Manna; A Comprehensive Treatise on Bread Manufacture." London: Maclaren. 1947, which states one essential to success as warming the flour.   Elizabeth David's English Bread and Yeast Cookery has some useful comments made over the years on English muffins too.

It is strange how we ended up basing our recipe on the work of a modern day American author, rather than on the works discussed above.   I am pretty sure it is because we wanted to use a pre-ferment to make these, and all the recipes I came across used bulk fermentation.   From my own studying time 6 years ago, working for my bakery quals, we definitely made these with a ferment.   Given that my FdA students were working on complex fermentation methods, I specifically asked for English Muffins made using an Overnight sponge.   this is what we came up with.

The dough should be soft, although hydration in the formula does not look alarmingly high.   But, given you have plate-work, be wary of the dough being too soft; if this is the case, you will end up with crumpets, as shown in the first recipe.   These are made from a batter which is piped onto the griddle: see video.

It is just a case of combining the sponge with all other ingredients and mixing to form a soft, warmish, and well-developed dough.   I am aware American flours generally have a higher level of hydration, but please note the flour I used in this formula is strong, and one of the best commercial specs available over here.   It is milled from 100% Strong Canadian Wheat.

Debra Wink indicated wanting to experiment with Wholegrain.   I am sure this would work well, although I have only ever come across these goods made with all-white flour.   The essence of the product is to have a soft and chewy "breadcake" like texture, where the dough rises substantially on the plate thanks to conduction.   That is why we wanted to use a pre-ferment rather than a bulk-fermented straight dough.   So, wholegrain flour: yes with the following provisos:   the wholemeal would need to be strong, and finely milled.   A brown flour, say of 85% extract would be excellent.   Do not go above 50% brown flour in the flour "grist".   The water content will need to be adjusted upwards to take account of extra absorption from the bran.   Obviously, the formula can be adapted to use milk rather than the water/milk powder combination.

The dough should have a resting time of upto 30 minutes, then scale and divide, and mould each piece round.   Dust the bench with rice cones, flatten slightly and rest the dough pieces on the rice dust, covered, for 45 minutes to an hour.   Cook in batches on the griddle; they should take about 10 minutes, being flipped over half way through cooking.   The gritty rice cones on the outside of the muffin are a wonderful contrast to the soft and chewy centre.   The dough should rise slowly on the griddle as the muffin cooks; that was why we sought to use a pre-ferment in the formula.


Here's the video:


Best wishes

Andy


dmsnyder's picture
dmsnyder

Gérard Rubaud Pain au Levain


Shiao-Ping's beautiful miches, based on MC's interviews with Gérard Rubaud, inspired me to attempt Rubaud's pain au levain myself.


Rubaud's bread is made with 3 very firm levain builds, the final being incorporated in his final dough. He uses a flour mix with 70% AP flour and the remaining 30% a mix of whole wheat, spelt and rye flours. Remarkably, he grinds the flours to feed his levain fresh for each build, and he uses the same flour proportions for each levain build as used in his final dough. Not having a grain mill, I used store-bought flours. I measured out each flour for each build. If I make this bread again, I would make one batch of mixed flour for all the builds and the final dough. This would save time and also be more precise, given the very small amounts of flour in the levain builds.

Note that MC's interviews also indicate Rubaud salts his levain builds at 1% of the flour weight, in order to control their speed of ripening. I did not do this.

My formula is taken from Shiao-Ping's calculations which were taken from MC's interviews. I divided her quantities in half and, rather than a miche, made two smaller (480 gm) bâtards. Rubaud mixes his dough by machine. Shiao-Ping mixed her dough entirely by hand. I started my mixing in a stand mixer, but continued developing the gluten by hand, as described below.


First build


Ingredient

Amount (gms)

Ripe levain (stiff)

3

AP flour

5

Whole wheat flour

1

Spelt flour

0.5

Rye flour

0.5

Water

4

Total

14


Second build


Ingredient

Amount (gms)

Ripe levain (stiff)

14

AP flour

10.5

Whole wheat flour

2.5

Spelt flour

1.5

Rye flour

0.5

Water

8

Total

37


Third build


Ingredient

Amount (gms)

Ripe levain (stiff)

37

AP flour

35

Whole wheat flour

9

Spelt flour

4.5

Rye flour

1.5

Water

28

Total

115

Notes for levain builds

  1. The first levain was made with my usual firm sourdough starter which I feed 1:3:4 (starter:water:flour) with a flour mix of 70% AP, 20% Whole wheat and 10% Whole rye flours.

  2. To mix each build, dissolve the firm starter in the water in a small bowl. (I use a small dough whisk.), then add the flours and mix thoroughly into a ball.

  3. The first build was fermented for 10 hours, the second and third for about 8 hours each. This was in a cool kitchen, so your times my vary with the activity of your starter and the ambient temperature.


Final dough


Ingredient

Amount (gms)

Ripe levain (stiff)

115

AP flour

322

Whole wheat flour

82.5

Spelt flour

41.5

Rye flour

14

Water

377

Salt

10

Total

962


Method

  1. Mix the flours and the water. Cover and let it sit to autolyse for 20-60 minutes.

  2. Divide the starter into about 6 pieces and add them to the autolyse. Sprinkle the salt over all and mix thoroughly.

  3. In a stand mixer, mix with the dough hook on Speed 2 for about 10 minutes. There should be some gluten development, but the dough will be very gloppy. It will not clean the sides of the bowl.

  4. Transfer the dough to an oiled bowl. Cover the bowl tightly.

  5. After 20 minutes, stretch and fold in the bowl for 30 strokes. Cover the bowl tightly.

  6. Repeat Step 5. twice more.

  7. Transfer the dough to the board and stretch it to a large rectangle and fold it like an envelope. Replace it in the bowl and cover.

  8. After 45 minutes, transfer the dough to a floured board and do another stretch and fold.

  9. After another 45 minutes, transfer the dough to the board and divide it into two equal pieces.

  10. Pre-shape each piece into a round and let them rest, covered, for 15 minutes.

  11. Shape each piece into a bâtard.

  12. Proof en couche until expanded by 50-75%.

  13. One hour before baking, pre-heat the oven to 500ºF with a baking stone and steaming apparatus in place.

  14. When the loaves are ready to bake, pre-steam the oven.

  15. Transfer the loaves to a peel. Score them, and then transfer them to the baking stone.

  16. Steam the oven again. Turn down the oven to 450ºF.

  17. Bake for about 30 minutes, until the internal temperature of the loaves is at least 205ºF, the bottom gives a hollow sound when thumped and the crust is nicely browned.

  18. Transfer the loaves to a cooling rack.

  19. Cool completely before slicing.


Although I got good gluten development, the dough remained very loose. This was expected, given its high degree of hydration. However, I did not expect how the loaves stuck to the “well-floured” couch and transfer peel. The loaves deflated significantly in the process of transferring them to the Super Peel ™. The latter handled the loaves beautifully in transferring to the stone. No additional sticking.

There was very good oven spring, and the cuts on the loaf which didn't stick to the transfer peel as much opened up reasonably well, suggesting that the loaves were not as over-proofed as their deflation on transferring had suggested.

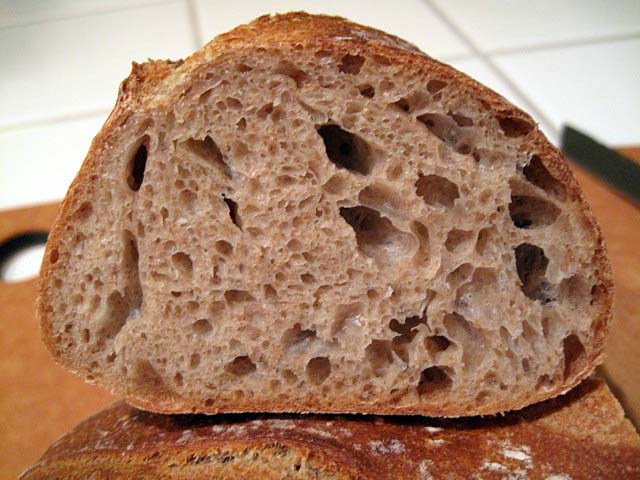
By time the bread had cooled, the crust was chewy with just a bit of crunch. (I did not follow my customary practice of drying the loaves in the cooling oven for a few minutes after they are fully baked.) The crumb was very well aerated. It had an aroma that seemed whole-wheaty, yet different. The flavor was excellent – complex and wheaty with some sweetness and more sourdough tang than I expected.


Wonderful bread. I want to make it again, but next time I'll flour the couche more heavily.

David


Shiao-Ping's picture
Shiao-Ping

Delayed Fermentation Method - Pain a l'Ancienne

I went to my favourite neighbourhood coffee shop a few days ago to enjoy a cup of flat white.  The lady owner there has a bit of an alternative flair about her and I enjoy the free air that she exudes to her place.  She really knows her stuff because the sourdough she serves for snacks is one of the best in town.  She told me her supplier is "Leavain Bakery" in Brisbane.   I thought I might go and visit Leavain Bakery sometime so I Googled it when I got home.  Wow - I had no idea!  Leavain Bakery supplies to some of the best restaurants in Brisbane!  I though, Shiao-Ping, well done!  I am so privileged to have the same sourdough in this little café as those that would be enjoyed by patrons to some of the best restaurants in town.  One of the restaurants is Philip Johnson's E'cco Bistro.   The New Zealand chef in Brisbane, Philip Johnson, has some of the best dessert recipes I've ever seen, something to die for. 

As I was reading up on Leavain Bakery on the net, it was brought to my attention that John Downes, the man behind the Australian sourdough movement in the late 70's has a cook book out.  As I was buying the book on the Australian Sourdough Companion website, an user, Johnny's beautiful crumb shot caught my attention.  His Ciabatta Integrale (a wholemeal ciabatta with multi-grains) involves a procedure which is most unusual to me.  I would like to summarize it below, if I may:

  1. The night of Day 1:  refresh the starter (in 2 feedings over 24 hours)
  2. The night of Day 2:  combine all ingredients (except salt) and autolyse 20 minutes, then add salt, mix by hand for 1 or 2 minutes, then straight into the refrigerator overnight
  3. The morning of Day 3: take dough out and fold once, return to the refrigerator
  4. The night of Day 3:  take the dough out again and over the next 4 - 5 hours stretch & fold the dough once every hour; shape and place the dough in a banneton, proof for one hour, then into the refrigerator again overnight
  5. The morning of Day 4: Bake!

I find Johnny's procedure very "elegant"- the least effort that allows you to arrive at the best possible result.  The essence seems to be in his minimalist approach and its beauty is that it is great for a person who has a busy work life.  I have since found that SourDom, another experienced baker of Sourdough Companion, talked about this flexible schedule at length in his Sourdough Timetables article.  But (and this is a big BUT), I did not understand what made this timetable work for sourdough bread; I mean, what was happening behind the scene; ie, what was happening to the natural yeasts in the refrigerator?

I went to Peter Reinhart's The Bread Baker's Apprentice.  Under page 191 of Pain a l'Ancienne, it says:

The unique delayed-fermentation method, which depends on ice-cold water, releases flavors trapped in flour....  The final product has ... character that is distinct from breads made with exactly the same ingredients but fermented by the standard method.... 

The cold mixing and fermentation cycles delay the activation of the yeast until after the amylase enzymes have begun their work of breaking out sugar from the starch.  When the dough is brought to room temperature and the yeast wakes up and begins feasting, it feeds on sugars that weren't there the day before.

Peter Reinhart adds,

... this delayed-fermentation method... evokes the fullness of flavor from the wheat beyond any other fermentation method I've encountered.  As a bonus, and despite all the intimidation science, this is actually one of the easiest doughs ... to make." 

How beautiful is that! 

Without further ado, let me go straight to my bread.  My Pain a l'Ancienne is an adaptation of Peter Reinhart's formula, as well as that of Johnny's Ciabatta Integrale.  Thank you Johnny, and thank you Peter.


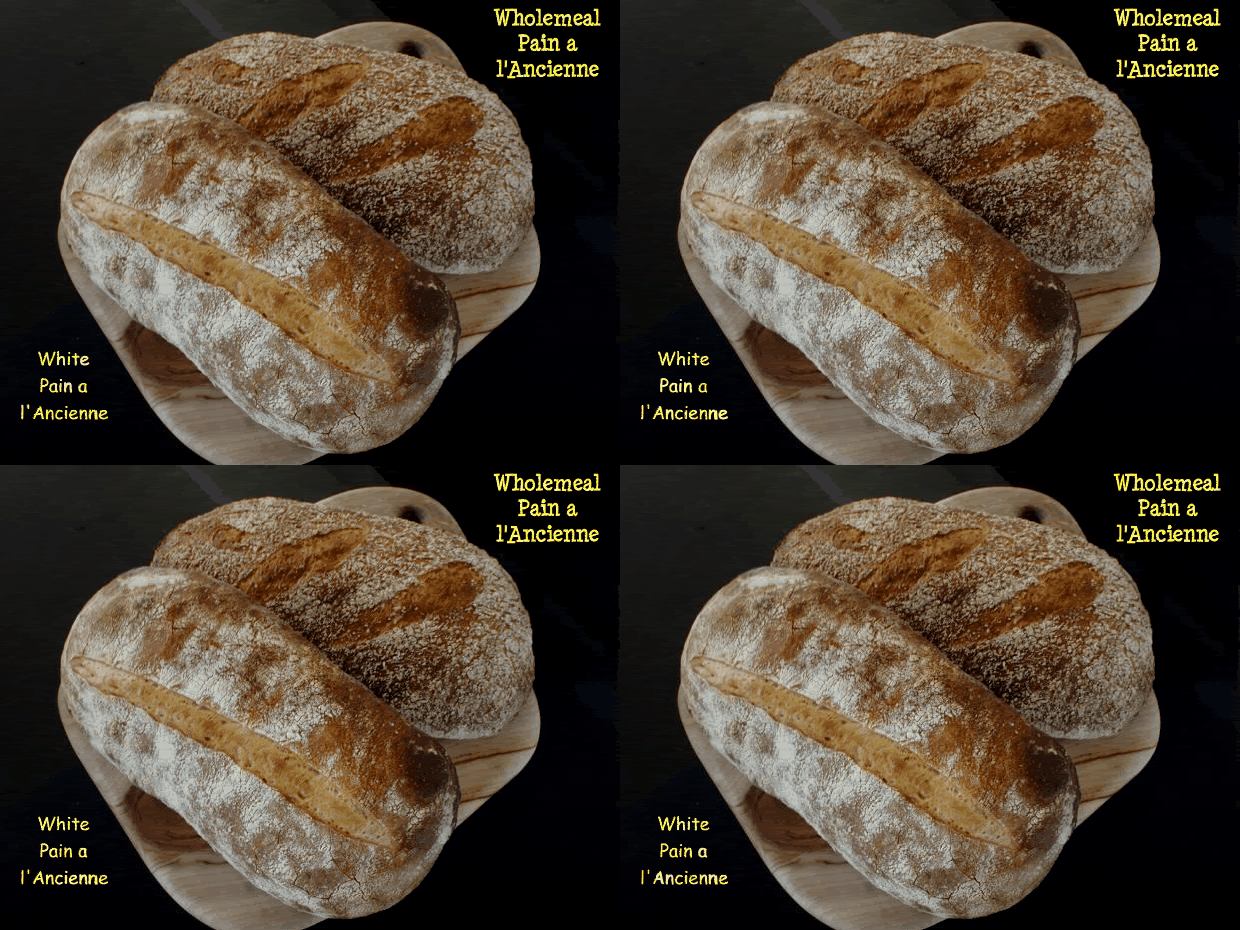
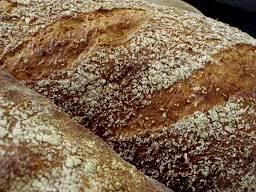
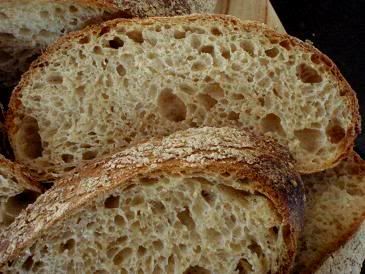
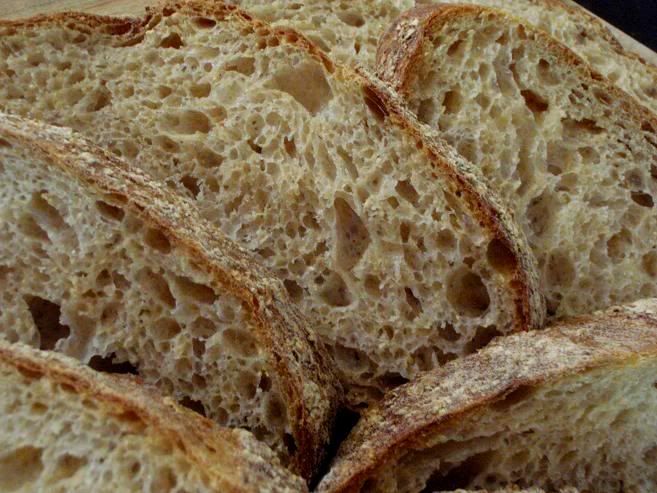
My formula for Wholemeal Pain a l'Ancienne

  • 182 g starter @ 75% hydration (5% rye)
  • 475 g Wholemeal flour (13.1% protein)
  • 414 g ice water
  • 11 g salt

Total dough weight 1.08 kg; overall hydration 85% 


My formula for White Pain a l'Ancienne

  • 182 g starter @ 75% hydration (5% rye)
  • 455 g Unbleached bread flour (11.9% protein)
  • 358 g ice water
  • 11 g salt

Total dough weight 1.01 kg; overall hydration 78% 


I recommend anyone to read SourDom's Sourdough Timetables.   While SourDom's intention is to give home bakers flexibility in scheduling, the delayed fermentation achieved means that the home baker has everything to gain in terms of crumb flavor.  Try it and wish you happy baking!


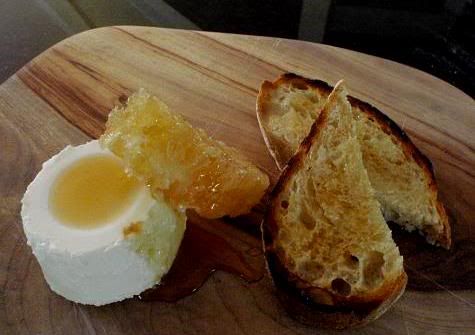
                                  Grilled Pain a l'Ancienne with buffalo ricotta by Australia's Paesanella

                                Cheese Manufacturers, drizzled with honey and garnished with honeycomb


Shiao-Ping

Note 1:  My Google translator tells me Pain a l'Ancienne means "old bread." According to jackal10 of eGullet Society for Culinary Arts and Letters, "A l'Ancienne" is a technique where the dough is mixed cold, and then retarded. The long cold period allows a long period for enzymatic breakdown of the starch into fermentable sugars but because of the cold there is little yeast activity, so that when the dough is later warmed up the yeast has more food available than would otherwise be the case. With slack dough it can give a highly aerated open structure."  

Note 2:  Johnny did not use ice cold water; however, his retardation schedule would mean that he would have achieved the same benefits.  Peter Reinhart's formula calls for one night retardation only.  

dmsnyder's picture
dmsnyder

Pumpernickel Bread from George Greenstein's "Secrets of a Jewish Baker"


George Greenstein's “Secrets of a Jewish Baker” is a wonderful source for traditional New York-style Jewish baked goods. It has been criticized for giving ingredients in volume measurements only, though. I have previously provided Greenstein's formula for Jewish Sour Rye with ingredient weights, but I realized today that I had never done this for another of my favorite Greenstein breads – Pumpernickel. So, here is Greenstein's pumpernickel formula converted to weights.

This is Jewish pumpernickel. It is moist and chewy. It is not the dry, dense German-style pumpernickel. I make it generally as long loaves, as pictured. However, you can also make it as round loaves, in which case you should "dock" the loaves by making 6-10 holes in the top with a skewer or ice pick, rather than scoring them across with 3 slashes. You can also make this bread in loaf pans, in which case I would score them with a single slash along the center of the long axis.
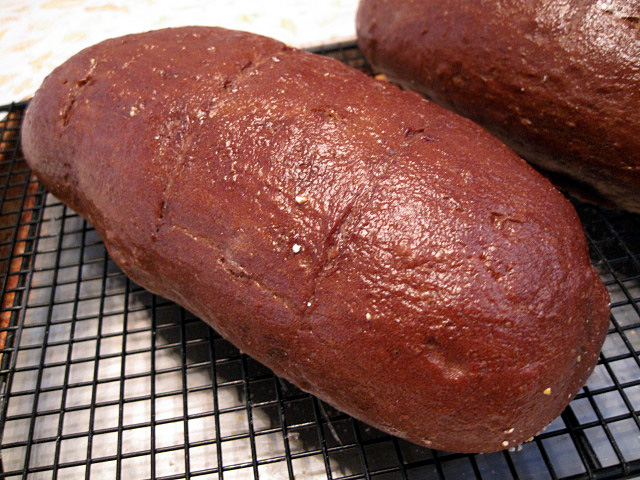
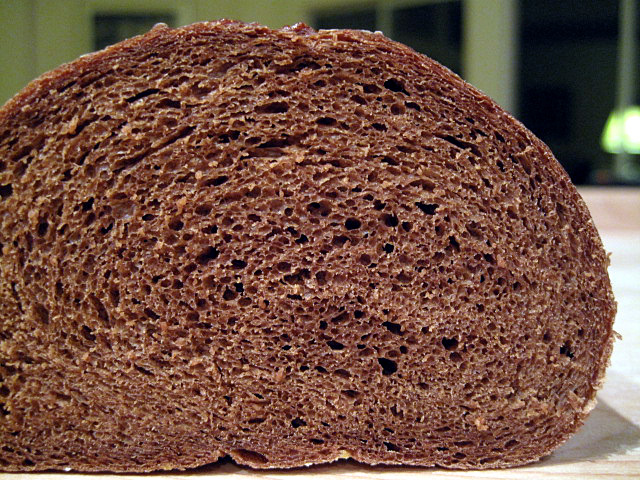
The recipe that follows is taken from Secrets of a Jewish Baker, by George Greenstein. The ingredient amounts are both those Greenstein specifies and the ingredient weights I actually used. The procedures are adapted from Greenstein's.

Ingredients

Volume (per Greenstein)

Amount (per dmsnyder)

Warm water

1 cup

240 gms

Yeast

1 pkg active dry

7.5 gms instant

Rye sour

1 cup

250 gms

Altus (optional)

1 cup

1 cup

Pumpernickel color

4 tablespoons

1 tablespoon caramel color

Common (First Clear) flour

2 ½ to 3 ½ cups

350-400 gms

Pumpernickel flour

1 cup

115 gms

Salt

1 tablespoon

8 gms

Caraway seeds (optional)

1 tablespoon

Not used

Cornstarch solution

(see below)


Notes on ingredients:

1. Rye sour: This is a rye sourdough starter. You can make it from scratch. You also can easily convert a wheat flour sourdough starter to a rye sour by feeding a small amount of your existing starter with rye flour and refreshing it a couple of times.

2. Altus: This is “old” rye bread cut into small pieces, soaked in water until saturated and wrung out. It was originally a way for bakers to re-use bread they hadn’t sold. "Waste not. Want not." However, it does make for a more tender and flavorful bread and has become traditional. It is optional. I keep hunks of leftover rye bread in a plastic bag in my freezer to use as altus.

3. Pumpernickel color: This is really optional but is necessary to give the "black" color expected of pumpernickel. It also gives the bread a subtle bitter undertone without which it just doesn't taste "right." You can use 1 tablespoon of powdered caramel color, instant espresso cof

fee or cocoa powder. I use powdered caramel coloring from King Arthur’s Baker’s Catalogue.

4. Pumpernickel flour: This is whole grain, coarsely ground rye flour. You can use dark rye flour, but it won’t be quite the same. I get pumpernickel flour from King Arthur’s Baker’s Catalogue. Like other whole grains, it will spoil in time. I keep it in my freezer in a 1 gallon Ziploc bag.


5. Common flour: This is also known as first clear flour. Its definition gets into esoteric grain milling stuff, but it is necessary for authentic Jewish rye breads, including pumpernickel. It also makes wonderful sourdough breads as a substitute for bread flour or a mix of white and whole wheat flours. I get First Clear flour from King Arthur’s Baker’s Catalogue.


6. Cornstarch solution: Mix 1 ½ tablespoons of cornstarch in 1/4 cup cold water. Pour this into 1 cup of gently boiling water in a sauce pan, whisking constantly. Boil until slightly thickened. Set aside. It can be kept refrigerated for a few days in a sealed jar or covered bowl.


7. Caraway seeds: I don’t use them in pumpernickel, myself. You can add other things to pumpernickel, though, such as flax seeds (soaked overnight), sunflower seeds, raisins, minced onion.


Procedures


Mixing (by hand. See Note below for mixing with a stand mixer.)


In a large bowl, sprinkle the yeast over the warm water to soften; stir to dissolve. (If using instant yeast, mix it with the flour, don’t dissolve it. Add the water to the rye sour and mix.) Add the rye sour, altus (if desired), pumpernickel color, pumpernickel flour, 2 ½ cups of common flour, and salt. Mix thoroughly until the dough pulls away from the sides of the bowl.


Turn out the dough onto a floured work surface and knead, adding small amounts of flour as needed. Make the dough a bit stiffer than normal, since this dough softens as it is kneaded. Knead the dough until it feels smooth and silky (5-8 minutes).


Note: I mix in a KitchenAid mixer. I put all the ingredients in the bowl and, using the paddle, mix well at Speed 1. Scrape the dough off the paddle and replace it with the dough hook. Knead at Speed 2 for about 8-10 minutes. If you do not use altus, the dough should form a ball on the hook and clean the sides of the bowl. With altus, even when an additional 50 gms of flour is added, the dough does not clean the bowl. I then hand knead until the dough is smooth and silky.


Fermenting


Shape the dough into a ball, place in a large oiled bowl, and turn to coat. Cover and let rise until doubled in size.


Shaping & Proofing


Punch out all the air, cut in half and shape into rounds, and let rest for 10 minutes.


Shape into round loaves, long loaves or pan loaves. If baking free form, place the two loaves on a baking sheet sprinkled with coarse cornmeal. (Or on parchment paper if baking on a stone, which I prefer.) Cover and proof until doubled in size. (About 90 minutes, or more depending on room temperature). Brush with cornstarch solution. Score the loaves across if long dock them if round. If using caraway, sprinkle seeds on the top of the loaves.


Baking


Bake with steam in a preheated 375F oven until tapping the bottom of the loaf produces a hollow sound (30-45 minutes). The internal temperature should be at least 190F. If the crust seems soft, bake 5-10 minutes more. (The crust should be very firm when you take the loaves out of the oven. It will soften as the bread cools.)


Note: I use a pizza stone for baking free form loaves. I heat it at least 1 hour before baking. I produce steam by preheating a cast iron skillet filled with lava rocks in the oven along with the stone and, right after putting my loaves in, pouring 1 cup of boiling water into the skillet. Be careful you don’t scald yourself with the steam!


Cooling


After baking, place on a rack to cool and brush again with the cornstarch solution. Let cool thoroughly before slicing and eating.


This type of pumpernickel is one of the breads we always had in the house when I was a child. I usually ate it un-toasted, spread with cream cheese. My grandmother ate it spread with sourcream. I think this pumpernickel is especially good with smoked fish or herring, and it is my favorite bread to eat with scrambled eggs.


Unfortunately, my wife isn't as fond of pumpernickel as I am, so I also made one of her favorites – the Cinnamon-Raisin-Walnut Bread from BBA.

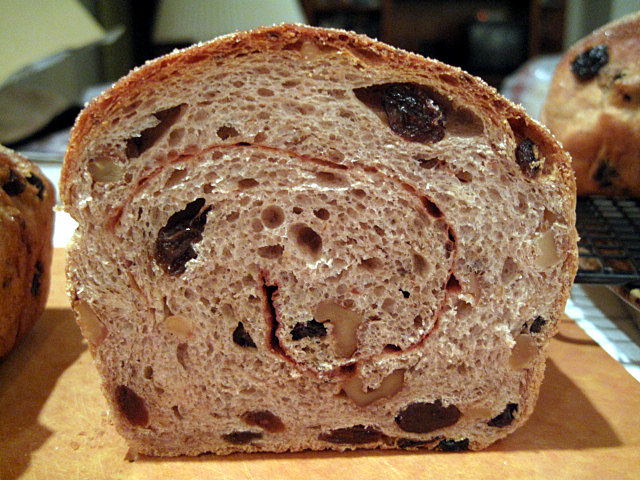


David


Submitted to Yeastspotting 


bassopotamus's picture
bassopotamus

Selling at farmer's markets

I apologize in advance if this is the wrong forum, but it didn't seem to fit anywhere else.


I have been baking fairly seriously at home for about 6 months, and my wife really wants to start selling at the local farmers markets. I am a little skeptical of the idea but wanted to at least do some background on the matter.


The big challenge, as I see it, is that I haven't really baked in quantity before and we don't have commercial grade equipment. Average sized home oven (with quite good temp control at least), kitchen aid pro 600 mixer, which I'm pretty sure is not up to many baking in quantity tasks. That said, I think we can get around the mixing issues by at least starting with no knead (but for a few stretch and fold) recipies which wouldn't overtax the mixer. Since it only involves about 2 minutes of mixing per batch, I kind of figure the two of us could assembly line it. I've got a great sourdough and good baguette/boule recipe. If we were to turn a profit, I'd probably sink money back into either an Electrolux DLX or maybe a used 5qt hobart.  The bigger concern is the oven. It will do about 2 boules per rack, but I have not yet tried baking on both racks at once (I think it would be OK for this) but will need to try it later this week.If we could do 4 boules at a time, I can see baking about 50 loaves in around 6 hours which wouldn't be awful.


SO, a series of questions


1. WHat is the best way to store loaves, and what is a reasonable hold time. I see baking a bunch friday evening and selling saturday morning.

2. It seems desireable to get flour prices down. I use king arthur at home, which right now is 4 bucks for 5 lbs at the local grocery, or about a buck a loaf. Other material costs are negligable (water is more or less free, I got a ton of yeast at sams, my starter is going like a champ). Unfortunately, our Sam's does not sell any bread flour at all. Not sure if there are other ways to get bread flour in quantity easily.

3. I am figuring, supply wise, I need several more large rising containers, plastic bags, and twist ties for selling the bread, maybe some kind of homemade logo to establish a bit of a "brand". Am I missing anything here

4. Would baking stones be an advantage here? I currently have been baking on an old air bake cookie sheet and getting great results, but I'm wondering if more mass in the oven would be desireable.

5. What kind of quantity would be a sensible amount to sell? I'm thinking 20-30 loaves for starts to see where that goes, but I don't have any idea. We have a series of farmer's markets around here, and they are pretty well attended, but I don't know what the market looks like. I'm also not sure what fees are involved with getting space (I've got calls out). Seems like this and ingredients would be the main costs.

6. What about pricing? As it stands now, a loaf has about a buck of ingredients in it. The packaging (based on sources I've seen) works out to negligable per loaf, other main cost would be the cost of the space and a little bump on the electricity. I'm thinking I would probably need to sell pound loaves at around 4 bucks a pop for this to make any sense, but am not sure what the market would bear. I know a pound loaf of quasi artisan bread at Target and the local grocery goes for about 4 bucks, so that doesn't seem unreasonable. Don't need to get rich, but don't want to work for free either.

7. What else am I missing here?


Thanks in advance

justin


Janedo's picture
Janedo

French and American flour/ The 123 formula

Hi all! I've been one busy person what with the holidays, kids, etc. But now life is settling into a more calm and regular rhythm. So, I'm BACK!

Over the holidays, Steve from Breadcetera, and I did a flour swap (yes, it cost a fortune!). We sent each other dried samples of our starter and flour. I sent him some organic stone-ground T55 and T65 and he sent me some KA AP and bread flour. Not so much because he himself uses that particular flour, but he figured it would give me an idea of the type of flour many people bake with.

I was VERY excited to try the All-Purpose flour for two reasons. I wanted to see how it felt, how it worked and what it tasted like but also I wanted to test Flo's 123 formula because many people seemed to have trouble with it.

So, here are the results:

I did up a dough of 150g starter (100% hydration), 300g water and 450g KA AP and 9g salt.

There is obviously more or different gluten in the flour. It takes AGES to get developed. With the T55 or 65, you literally only need to knead a few minutes to get a good dough formed, but with the KA AP, at initial mixing (in a Kenwood) it was rough and together, then went gloppy and then got extremely elastic (TOO elastic). It took quite a while to mix. So, this leads me to believe that for those who found the dough too wet may have hand kneaded and found it gloppy, but it would take ages to knead by hand to get the right consistancy. With French flours, the dough is wetter than with American flour which is the opposite of what people believe. I think it just the kneading time. More flour would have made a dough that would be much too firm (to my liking).

When it was finally risen and baked, I took it out of the oven and to my surprise, it was SHINY and smooth crusted. It looked plastic. Now, I did everything exactly as I always do, no changes, no more steam than usual. It was really weird. Then, with my husband next to me, we smelled it. We looked at each other and said, It doesn't smell like anything! OK, then we left it to cool and cut it. I handed pieces to my family in different rooms. My son said, it doesn't taste like anything. I went to my daughter who smiled and said, "It's good!... but it doesn't have any taste". The overall concesus was that it really didn't taste like anything at all.

So, I got thinking, and I understand a lot of things now. I understand why preferments are so important and retarding and adding rye, etc. If you bake with KA AP as your basic artisan bread flour, well, it really needs help!

In France, the non organic flours that bakers use can lack in taste but it's still a lot tastier than the KA AP. So, the French organic flour is pure bread heaven.When a loaf comes out of the oven, it smells so incredible, a blend between deep wheaty aroma and the slight tangy, yet earthy sourdough. I did  up some Mike Avery's version of The Three Rivers bread that I spoke about on my blog for a cheese fondue and even though there is no sourdough, just poolish and retarding, it could have been mistaken for a sourdough, it smelled so incredible.

I guess I'm being French chauvinistic, but ever since I joined this group and have shared and learned so much from you, the huge question that has lingered for me has been all about American flour, how it reacts and tastes. I'm sure there are some better flours out there. Many speak of some organic brands, Guisto's and some other mills. I know it's more expensive, but if you're looking for something tastier, it's a good idea to try some of them. Oh, and remember, French wheat is soft, not hard. I think that makes a big difference.

So, I invite discussion and ideas or questions. I'm all ears.

Jane


Commercial Yeast

The three most common types of commercial yeast are:

Fresh yeast:
Truth be told, fresh yeast, which is also known as cake yeast, is hard for home bakers to find these days. They are sold as little “cakes” that must be kept refrigerated, and they go bad after a few days. Many professional bakeries, however, still use fresh yeast, and so many bread formulas are written with fresh yeast in mind. Typically, breads that rise for 1.5 to 2 hours in bulk and 1 to 1.5 hours shaped call for fresh yeast at 2% of total flour weight.

Many recipes use much, much less yeast than that, however, and they ferment for much longer, which gives the bread more flavor.

Active dry yeast: This is the kind of yeast that you’re most likely to find in your grocery store. Typically, you’ll want to use about 1 to 2 tsp per loaf and, if the formula calls for fresh yeast, you’ll need to measure out 40% of that weight to convert to active dry.

Active dry yeast needs to be “proofed” before using, which means it needs to be dissolved in about ¼ to ½ cup of lukewarm water (about 90 degrees F or so).

Instant yeast:
This is what many amateur bakers prefer to use. In grocery stores you'll often find it labels "Rapid Rise Yeast" or "Bread Machine Yeast."  It looks like active dry yeast, but it retains many more living yeasts in each grain. As a result, there’s no need to proof it – just add the yeast directly to the dry ingredients. If the formula calls for fresh yeast, measure out 1/3 of that weight for instant yeast. If the recipe calls for active dry yeast, cut the measurement by about 25 percent.

Pages