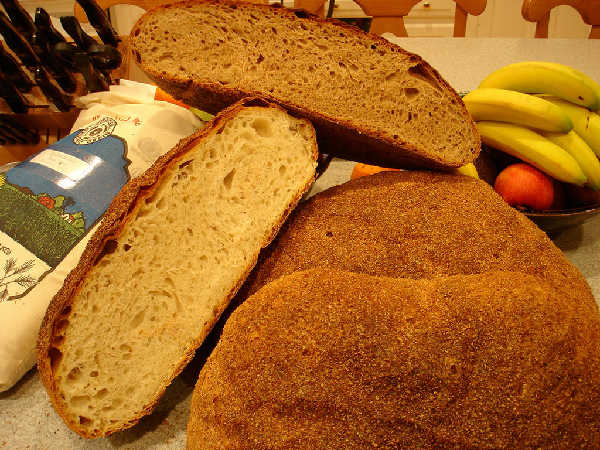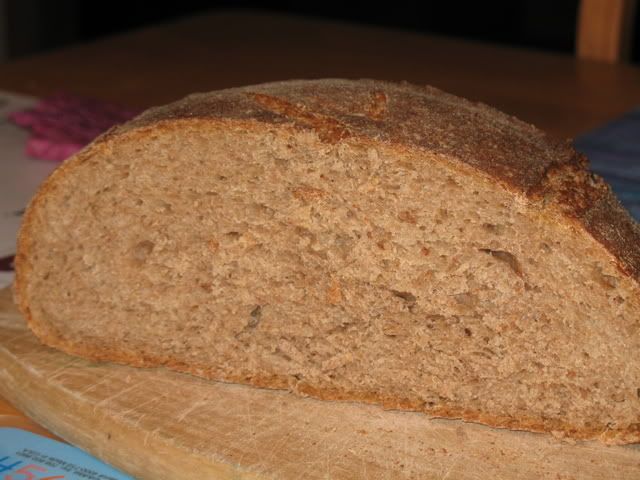
Daniel Leader's Local Breads has a fascinating story of his visit to Genzano, where he saw them make large, almost charred looking, bran dusted breads raised with a biga naturale, an Italian firm sourdough levain. I enjoyed hearing about his visit with Sergio, while they mixed, raised, and loaded 64 very large loaves into a wood-fired oven. Now that I have a brick oven in my back yard, I thought I'd give a try at making these loaves in the size he says he observed at the bakery he visited. He says they created approximately 8 pound loaves that were loaded eight at a time into an eight foot long by one foot wide by about 4 inches tall box with divisions in it for eight loaves. Thanks to Zolablue for doing this recipe as shown in Leader's book and writing about it in her blog, which provided inspiration as well as lots of information and photos.
I've included some photos of the process and spreadsheets for the high extraction flour loaf in html and xls format and for the white flour loaf in html and xls format.
I only did two loaves of 8 pounds each, which I proofed in a 26 inch by 17 inch by 4 inch roasting pan, and then baked in my brick oven, which is a dome 37 inches in diameter - enough room for two of these loaves. The dough is very wet and is kneaded in a mixer at increasing speed for over 20 minutes or more to fully develop the gluten. The dough is hard to handle, as it is very soft, sticky, and puffy.
There are two styles of this bread, one with a high protein white flour and one with a high extraction flour. I used Heartland Mills Strong Bread Flour for the white flour loaf and Heartland Mills Golden Buffalo for the high extraction flour.
Levain
- 15g of 90% hydration white flour starter (12g for the high extraction loaf, as it rises a little faster)
- 392g flour (use the appropriate flour for each loaf, as described above)
- 273g water
The levain was mixed the night before and allowed to rise overnight at room temperature. The amounts are such that by mixing the white flour levain at about 10PM and the high extraction flour levain at 11:30PM, the white flour levain would be ready at 9:00AM the next day and the high extraction levain would be ready at 10:00PM the next day, allowing me to mix them successively in the morning with my DLX mixer such that both loaves would be ready to bake at the same time later on the next day. The high extraction flour rises more quickly than the white flour, so it is being mixed later to account for that difference.
Dough
- All the levain
- 1.6 Kg flour (use the appropriate flour for each loaf as described above)
- 1240 g water with the white flour loaf, 1420g flour with the high extraction flour loaf
- 5 g instant yeast
- 40 g salt
According to Leader, the dough is mixed for a long time at high speed. I used a DLX mixer, first at a low speed to mix the ingredients for about 10 minutes, then at medium speed for about 8 minutes, then at high speed for another 4 minutes.
The dough is supposed to be very soft and wet. I had to add a little flour to the white flour loaf, as it was so wet, it wouldn't come together, even after 20 minutes of kneading. I had to add some water early in the mixing of the high extraction flour loaf, as it was clearly too stiff to begin with. Eventually, they were both fairly wet and gloppy, but with reasonable gluten development. I ended up folding the white flour dough a couple of times and the high extraction flour once. It seemed necessary to get some additional gluten development later on.
The inoculation for this recipe is 20% fermented flour to total flour weight, which is a little lower than the recipe in Local Breads (30% fermented flour). The idea was to let it rise a little longer to get more sourdough flavor in the dough. I've had better results starting at inoculations below about 25% with my starter in any event. For the same reasons, the amount of instant yeast was reduced to only 5 grams in 2Kg of total flour. My plan was to let the dough rise for about 3.5 hours in bulk fermentation and about another 2.5 hours in final proof. However, it went faster, as I forgot how warm the dough would be and how long it would stay warm due to the long machine kneading and the large volume of the dough. The dough rose almost too quickly, even with the lower inoculation and amount of instant yeast. I would consider reducing the yeast even further in a subsequent attempt, to match the timing I wanted for the sourdough fermentation with less need to punch down the dough.
Bulk Fermentation
Each dough was placed in a rising bucket. The white flour dough was folded twice, at one hour intervals. The high extraction flour dough was folded once two hours after mixing.
Final Proof
The loaves were placed seam side up in a large roasting pan measuring 26x17x4 inches. A piece of wooden board was placed between the loaves and separate couches were placed on each side of the board to facilitate lifting each large piece of dough out onto the peel. The couches were dusted with KA white wheat bran, which worked beautifully as a "teflon" dusting. After about 2 hours and 15 minutes, the loaves seemed ready. To place them on the peel they were lifted in the couche and basically "dumped" onto the parchment lined and bran dusted peel unceremoniously. They spread out beyond the edges of my 16 inch peel, so I had to quickly but gently fold the edges underneath to get the loaves to fit on the peel, which didn't sound completely inconsistent with the description Leader gave of the process followed in the Italian bakery he visited. He said the loaves were very soft and gloppy, were handled minimally, and quickly moved from one spot to another. I'm sure it was far more graceful than what I ended up doing on my first shot, but it did seem to work. The basic advice here is plow ahead, don't look back, don't waste time worrying about the shape or the tightness of it. This is a rustic loaf, after all.
Bake
The oven hearth floor was raised to about 525F and then the flame was put out, the oven door sealed, so the temperature inside could equilibrate and drop over the course of the last hour of the final proof. The loaves were dumped on the peel, adjusted minimally in shape as needed, and transferred into the oven in quick succession. The oven and loaves were sprayed with a fine mist to generate steam, and the oven door was sealed with a wooden door covered with damp towels.
The kitchen oven equivalent would be to preheat to about 450F with baking stone, and use a skillet with water or other steaming method, and drop temperature to 400F immediately shortly after putting the loaves in the oven.
The loaves were rotated after about 20 minutes, and the steam was removed from the oven by replacing the towel covered door with a metal door positioned to allow some air flow out the chimney.
The total bake time was 1 hour and 20 minutes, but the oven door was open and the outside air was fairly cold today, so the hearth temperature was only about 400F and the air temperature about 350F for the last 20 minutes. The idea was to make sure the loaf was fully baked inside, since they are large, wet loaves. The internal temperature was about 207F at the end. In retrospect the oven could have been a little hotter, as they didn't get quite as charred as was intended.
Results
The loaves have a nice color but aren't quite as dark as Zolablue's loaves. My sense of the right temperature for different situations with the new brick oven is still developing. The crumb is just what I like for both loaves, moist with irregular hole structure and a mild but distinct sourdough flavor. The white flour loaf, which may have been made a little too wet, had fewer large pockets and less crust separation than expected, given the excess hydration. As a high extraction flour miche, the high extraction flour Genzano loaf may become a standard, although the Thom Leonard Country French made with Golden Buffalo is similar and also a wonderful miche.


 Electric Grater

 Walnut Flour


