
Char Siu Bao
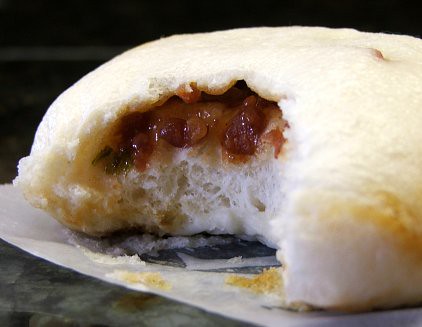
When my husband was little his mother, who is from Taiwan, would take him along on her shopping expeditions to Chinatown in his hometown of Chicago. As a treat, she would buy him char siu bao, or Chinese BBQ pork steamed buns. I believe food can create memories, and passing a Chinese bakery one day a few years ago we saw some of these pale buns in the case and he was five again, shopping with his mom and munching on buns. Of course, we bought some and boy were they good!
Like anything, if I like it I want to make it, and my husband was all for that! I tried a couple of different recipes for the bun dough and while they were ok, none were as good as what we had at that little bakery. So, I quit making them because, frankly, who wants to eat sub-par buns?
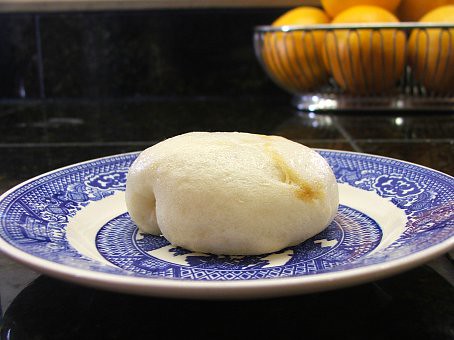
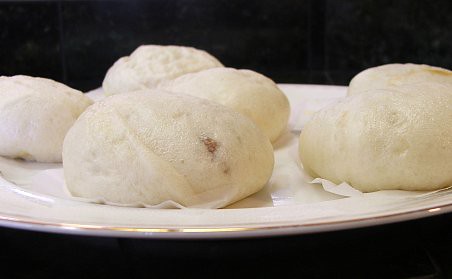
Well, that changed quite by accident. Last week I was browsing my favorite food blogs when I found a recipe on the most excellent, and very tasty, She Simmers for Plain Chinese Steamed Buns. The pictures Leela posted showed pale, fluffy buns that I could not resist.
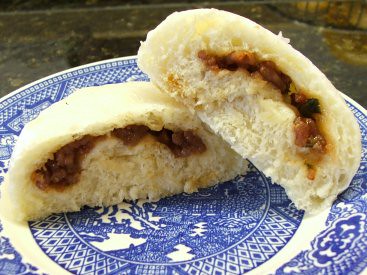
Bright and early Sunday morning I made the dough then packed it up, along with some pork filling, to my in-law's house a couple of hours away. During the drive the dough rose, and once we got there it sat for another hour, giving it four total hours to ferment. When I turned it out I was afraid I had over fermented but it was just lovely! The dough was smooth, supple, and very easy to work with. The buns were easy to form with the pork filling inside, and after a good proof, they steamed up to fluffy awesomeness!
Char Siu Bao, or Chinese BBQ Pork Steamed Buns Yield 12
Pork Filling:
1 lb. ground pork
2 tablespoons vegetable oil
1 clove garlic, minced
1 green onion, chopped
1/2 cup Char Sui sauce (available in the Asian section of most supermarkets)
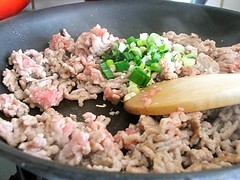
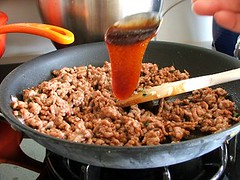
Brown the pork in the vegetable oil until the meat begins to color. Add the garlic and green onion and cook until the meat is cooked through.
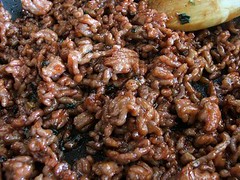
Add the Char Siu sauce and cook for five minutes, or until the sauce has caramelized slightly.
Allow to cool to room temperature.
Steamed Bun Dough adapted from She Simmers
Sponge:
1/3 cup water, heated to 100F
1/3 cup all-purpose flour
1 tablespoon active dry yeast
1 tablespoon sugar
Dough:
1 cup all-purpose flour
3/4 cup cake flour
2 teaspoons baking powder, divided
1 teaspoon kosher salt
1 tablespoon sugar
1 tablespoon lard, melted and cooled slightly
1/2 cup water, heated to 90F
Mix the ingredients for the sponge in a mixing bowl, or the bowl of a stand mixer, with a spatula until uniform. Cover and allow to ferment until the top of the dough is covered in bubbles that are beginning to break.
Add the all-purpose flour, cake flour, 1 teaspoon of the baking powder, salt, sugar, lard and water. Mix for 2 minutes on low, then check the hydration. It should be slightly sticky, but not wet. If it is too wet add additional all-purpose flour by the tablespoon until the dough is no longer wet. Mix on medium for 5 minutes. The dough should form a ball on the dough hook and just cling to the bottom of the mixer.
If mixing by hand, mix in the water and knead in the bowl until the dough forms a rough ball. Turn out on a board dusted with flour and knead until the dough is smooth, about ten minutes. Dust the board with additional four as needed to prevent sticking, but do not add too much.
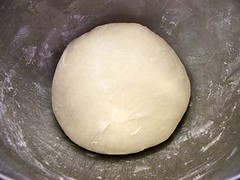
Cover the dough in the mixing bowl and allow to ferment for four hours. It will rise and smell very yeasty.
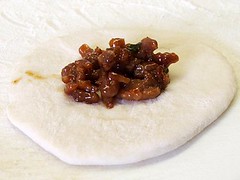
Turn the dough out into a flour dusted board and press out the largest air bubbles. Gently knead in the second teaspoon of baking powder. Divide the dough into 12 equal pieces and, one at a time, press into a circle. The dough should be thinner at the edges and plump in the center.
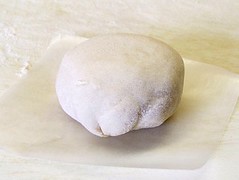
Spoon one tablespoon of the prepared pork filling into the center of the dough. Gather up the edges and press to seal. Place the bun seam side down on a square of wax paper.
Allow buns to proof on the counter, covered, for 1 hour.
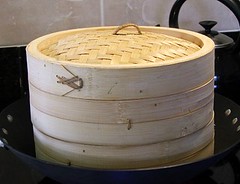
Prepare a steamer, I use a bamboo steamer set on a wok, with gently boiling water.
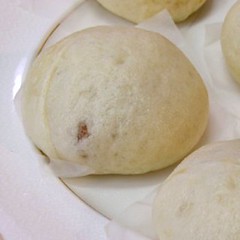
Once the buns have proofed gently place them, at least 1 inch apart, in the basket of your steamer. Cover and allow to steam for ten minutes. Do not let the water boil too vigorously.
After ten minutes carefully remove the lid, making sure not to drip water on the buns, and remove to a plate. Cover with a towel until ready to eat. Steam the remaining buns.
Peel the paper off the buns and serve warm.
Poted at www.evilshenanigans.com - 3/11/2009


Comments
I'm going to make them tomorrow. Thanks for this posting.
--Pamela
I hope you enjoy them. Rest assured, they are Chinese Mother-in-law tested and approved! ;) (I'm pretty sure she won't mind me sharing that)
All your posts are so beautifully done..the recipes are wonderful! Oh Yes, The one kitchen gadget I don't have...the steamer..I'll have to get one ; )
Sylvia
I love my bamboo steamer. Along with buns, I use it for steamed dumblings, small steamed custards, steamed rice cake, and steamed fish. They are not expensive and available at most kitchen supply stores. Thank you, once again!
Funny, but I had just posted a question about steamers (in baking gear category). Tell me gothicgirl, do you put a cloth under the cover. My main complaint with my steamer is that the water goes down into the food being steamed and the shape is ruined.
Do your siopaos (we call them siopao) get a shiny skin after steaming?
I don't use a towel with my bamboo steamer because the wood seems to prevent dripping back down on the food. I don't know if it is soaking in or just the texture of the bamboo weave prevents it, but it does. Also, I learned that if you steam at a moderate boil you get less of the drip down.
Yes, the skin does get nice and glossy after steaming. Yum!
thanks for your answer. yes, i agree, yum yum. i also make rice cakes with my steamer but i use a cloth.
maybe the bamboo is the answer and the key is to aim for moderate boil, not a rolling boil! thanks.
gothicgirl, the steamed buns you made look so appetizing that I am with Pamela, thinking how I am to make them tomorrow.
I love the pics you've posted, very nicely presented and though I am certain the food tastes fantastic, the images is what's making me want to try them myself.
Fantastic display, and looking forward to seeing more of your dough fares.
Gosia
P.S. Plain steamed buns are very popular in Eastern European cuisines - Polish, Czech, Slovak - we mainly serve them with roasted pork and gravy.
I am glad you enjoyed my post! My photos are getting better because I have made an effort to compose them, make sure they have proper lighting, and so on. I have a lot to learn yet.
I hope that you enjoy them if you make them. I imagine plain steamed buns would be lovely with gravy and roasted pork. Mmmmmm. :)
Wow, they do look good. Thank you so much. I have always wanted to try making those because my husband loves Chinese BBQ pork buns. I don't have a bamboo steamer, maybe that's something we need to invest into. The buns I had made in the past turned yellow and the texture was not fluffy Think I didn't let it rise long enough. Also, I didn't use baking powder... so that's the trick! Once we get the bamboo steamer I will give these a try. They look mighty delicious. I am sure my husband will be thrilled.
The baking powder makes a BIG difference in the buns. It contributes to the shiny skin and gives them a little boost in the fluff department. I have made them in a regular steamer and they were fine, but bamboo works much better for me, and I find it easier to work with. I hope you enjoy them!
Hello gothicgirl,
Would you believe I made your buns last night and they turned out gorgeous. I did the kneading by hand and the dough was just so well-behaved; in fact it became so pliable only after 5 minutes manual kneading. it felt good to the hand. then the most nerve wracking part was the steaming as I was afraid to get them all wet and damp, but no! I put foil liners which I cut just to be slighty larger than the buns, filled the steamer with 4 buns, covered with a cloth and followed your instructions about simmering (instead of boiling). Beautiful!
You had the right mix of ingredients (I liked the fact that it has cake and pastry flour too). Of course, I slightly modified the recipe because we make them too in my country. Where it says half a cup of water, I replaced it with milk, where it says 1 tbsp of yeast, I used 1-1/2 tsp. Instead of 4 hours rising time, I cut it back to 2. After filling the buns, I allowed another hour of rising time.
The filling was shredded pork chops which I cooked in vinegar and soy sauce, bay leaves. Added potatoes and peas/carrots for color.
Thanks so much. Your instructions were crystal clear. Pity I don't have a camera yet but I'm determined to get one soon. As for the bread machine, I think I prefer kneading manually. I can recite my mantras when I knead by hand. Again, thanks for sharing. You're tops!
I am very happy it worked out for you, and your filling sounds delish! Could you post the recipe for the filling? I would love to try it!
Hello gothic girl,
Thanks for your reply. As requested here's the recipe for the filling. In fact I'll give you two variations:
Filling A:
2 pork chops
onions and garlic
canola oil (for frying)
soy sauce
vinegar
peas and carrots (canned is fine)
frozen potatoes (the diced/cubed version. They come in bags in the frozen sections of supermarkets)
bay leaves (2 small or 1 large)
sugar (to balance out the soy sauce and vinegar combination)
Fry the pork chops in soy sauce and vinegar. (the combination of soy sauce and vinegar contributes to the "adobo" flavor, very common in Philippines). When they turn brown, take them out of the skillet and slice them into small pieces (better shredded in fact). When that's done, put them back into the skillet and fry them (to make sure they're 100% cooked). Add your frozen cubed/diced potatoes, and then your peas and carrots. Add the peas and carrots only when they're almost done as too much swooshing around of the pork chops could crush them). The soy sauce and vinegar will evaporate at certain times of your cooking but you can always adjust by adding water and sugar. The idea however is not to get them too wet because you'll ruin your buns. Adjust the taste with sugar (as soy sauce and vinegar are very powerful). In the beginning, use only about 1/3 cup vinegar and 1/3 cup soy sauce. Cool, and then refrigerate for a few hours (giving time for the flavors to seep in).
Filling B:
ground beef
onions and garlic
peas and carrots
potatoes
raisins
oil
tomato sauce (you can even use ketchup)
salt/pepper
Saute your onions and garlic for about 2 minutes. Put the ground beef and make sure it's all brown and well-cooked. Put your potatoes and tomato sauce (don't pour the entire can - do this gradually - the idea being of course not to end up with a wet mixture). Put the raisins last and sprinkle your salt and pepper to taste. Remember that the tomato sauce is already salty so be sparing with your salt and pepper. Let cool.
This recipe is similar to arroz a la cubana (cuban dish) which we have with rice, fried plaintains and a fried egg.
If you have any questions, let me know. I didn't go into detail because you're a pro, I see. Just be careful with filling A that it doesn't get too salty (mine ended up too salty).
Your buns were beautiful though. The baking powder made a big difference.
Both of those sound outstanding!! Thank you for posting them!!!
Thank you all for your wonderful ideas and inspiration - I am truly inspired - and happy to be able to share the wonderful world of the internet! Imagine what our forefathers would think - being able to communicate on a daily basis with people all over the world - on subjects that bond us together.
Blessings and happy cooking,
Anna
Blessings in return! I am just glad to offer something of interest. :)
I still haven't gotten my bamboo steamer but I decided to steam some Chinese buns anyway. I modified your recipes for the dough and the fillings to suit my family's taste. We loved them. The only downside was the time that required to make them. I got up nice and early to prepare the fillings and the dough. The buns were not ready to go in the steamer until 1 p.m.
My veggie steamer is not very big so can only steam 5 buns at a time. These pictures were from the last of the 3 batches. The buns were a bit flatter than the first 2 batches but the taste was still very good.
Steamer in action:
Last five buns:
Fillings: Freshly ground pork with jicama, Shiitake mushrooms, onion, green onion, and chopped Chinese sausage.
Al
I finally bought a wok and some bamboo steamers yesterday. Couldn't wait to try them out so bought some pork shoulder to make char siu at home. The meat turned out great and I proceeded to use the bamboo steamers to steam a dozen of buns. The buns were great only the color was sort of yellow-ish. Not sure why. Here are the pictures:
Al
Hi Al
Your pork buns look delicious.
You might find Andrea Nguyen's comments on the topic of white bao interesting:
http://www.asiandumplingtips.com/2009/12/how-to-make-steamed-chinese-bao-white.html
Also, her bao article and recipes which were published in the LA Times, you'll find the link on this page:
http://www.asiandumplingtips.com/2009/10/the-trick-to-making-bao-los-angeles-times.html
Cheers, Robyn
Funny, I just happened to read the same article before going to bed last night. Unfortunately, we don't have that type(s) of special flour in this part of Canada. Our Chinatown is pathetically small but I will go visit the Chinese grocery store to see if they carry any special flour next time. I believe Hong Kong flour is ultra bleached; that's why the steamed buns in Hong Kong are super white. It's a scary thought though because super white = chemicals.
I have also read about baking soda in steamed buns. My recipe calls for small amount of baking soda; not sure if 1/8 tsp will make the buns yellow; a lot of it definitely is not a good thing. Maybe I will skip the baking soda next time to see if it will make any difference. Thanks again!
Al