As promised. Here are my Cantonese mooncakes. There are many styles of mooncakes in China depending on the region but Cantonese mooncakes (廣式月餅) are my favorite. It is the "special mooncake" here in our country and the style of mooncake most commonly seen in the west. They are only available once a year and in Chinatown only. I'm a bit of a traditionalist when it comes to mooncakes. My absolute favorite is a classic lotus paste with double salted duck egg yolk but I'll be happier if I can find triple or even quadruple ones. I know, they can be one of those puke inducing combinations for those who are not accustomed to it but it is really good especially if they are well made. I guess, I'm the opposite of the younger generations, mooncakes and fruit cakes are my favorite "cakes" (I don't know why mooncakes are called cake since they resemble a pastry more closely but the character 餅 is almost always translated as cake in English ); just considered rotating presents this day. With mooncakes, it's the modern interpretation of flavors that puts me off! Snow skin (Durian) mooncakes?! Nah! I don't like them! As they say, "to each his own" just like how I hate Durian and how my dad keeps and lets them ripen under his bed to eat them with bliss! But we both love mooncakes! If not for the $$$ and calories, we could easily finish 2 regular mooncakes for each of us but we can't and we won't do that!

[on the left is a mini five kernel mooncake (五仁) and on the right is lotus double egg yolk (雙蛋黃蓮蓉)]
The thin soft and chewy crust is imprinted with different decorative patterns and has a glossy dark finish. From their looks alone, they already look daunting to make; add to that a list of weird ingredients (e.g. golden syrup, alkaline water) and they will seem impossible to be made at home but I'm not the one to be easily deterred. From the day I tasted this, I am dreaming to make it at home one day. So after some research, I realized it's not that difficult and I've seen many home bakers replicate them with ease that even look identical to those sold in stores so what seems like a Chinese pastry shop top secret is within anyone's reach. After a lot of planning (I tell you it requires a lot of planning if you want it to be 100% homemade! If you want to make it like a scientist, here is a great guide that even includes a recipe for homemade golden syrup, a substitute for lye water, and an intriguing sesame filling), I decided to give it a shot last week and here are the results.
They are not as pretty as the store bought but tastes exactly the same as the "good" ones. With mooncakes there's a big difference between "good" and "pretty". We always buy our mooncakes from a humble bakery in Chinatown because they're fresher and tastier; we never get those in fancy boxes that sell for a lot higher price but end up sitting in the shelf for months! What do you expect? Lots of preservatives that doesn't do any good in slowing the decline of quality and leads to bad chemical scent and aftertaste!

Mooncakes are easy to make if you HAVE a SCALE and an oven. Mooncakes are all about accuracy and ratio; from the ratio of the golden syrup to alkaline water in the dough to the ratio of the filling to dough; it also demands exact baking time and temperatures. I know I can have difficulties about those issues but since I am a passionate (okay; obsessed, hard headed, gritty) baker, I already have a theory on how I can execute it without a scale and an oven; and when I'm this confident, I know 90% of the time it will turn out well. Seeing the process common in all baked mooncakes, I think this will be the easiest one to duplicate in my clay pot.
Making mooncakes starts with salting the eggs. A month ago, we had a huge amount of eggs from our chickens and I turned some of them into salted eggs for this project. I experimented for this batch of salted eggs and separated 6 eggs to try a new salting process I learned from the internet. For the bulk of the eggs, I used the normal method of a boiled salt water solution and submerged the eggs in there for a month and those are what I used for last week's flaky mooncakes. For this eggs, they are just dipped in wine then covered in salt. When done,you keep the inside a plastic bag or a jar then forget about it for one month. This method is easier because you don't need to boil or measure anything. They are done curing when the yolk holds a spherical shape when cracked on a bowl or plate. I was so happy with the results that I made a video to document it, they just look like those I saw from the internet! I do not have anyone to help me so one hand-phone, one hand-egg and shoot!
I separated the yolks from the whites and rinsed them under running water then marinated them in wine for 20 minutes and steamed them for 5 minutes. Most recipes say throw away the whites but I hate wastage and they are from the precious eggs of our chickens so I kept them until I find a use for them. Luckily I found a use for them when I read a recipe for Cantonese meatloaf. This is a tip! Do not discard the salty whites, use them for something that calls for eggs or egg whites for a binder then reduce or omit the salt. Very simple but genius! We used them for spring rolls meat mixture and saved some for a flavorful seal for the wrappers.

Cantonese mooncakes are made with a sugar syrup (糖醬) made from sugar, water and an acid that's been aged before using. It is the most crucial ingredient for mooncakes and everything depends on it. From my research it is an invert sugar syrup so it can be replaced by honey or corn syrup but I decided to make my golden syrup because its 4X cheaper and 4X more fun to make than either of the two. Again, it needs precise measurements and temperatures to be made right. I didn't believe it! Mooncakes were made a long time ago and I don't think they have ovens and thermometers at that time. I just threw in some sugar and water and some local lime slices and boiled for around 45 minutes until the consistency is like the one I see in videos. They say if you cooked it too thick, you can add water and cook again to the right consistency and when you added too much water, you just need to cook it longer; that's why I'm confident with not measuring anything.
Here is my golden syrup. I made it last October 12, 2015 and forgot about it until I brined our chickens' eggs. It's more than six months old now and they say the older it is, the better. If you're in a hurry it can be used as early as 2 weeks so make when your eggs already spent 2 weeks in the brine. It used to be almost full but I don't know why it has diminished by a lot! Maybe my parents have mistaken it for honey (It has a really good flavor) to put on their morning toast! That's one of the disadvantages of being a late riser! You do not know what happens in the morning!

Different recipes have different ratios of oil to syrup to alkaline water and I didn't follow any of them. Alkaline water (鹼水
/ gan sui / jian shui / kansui / lihiya) is very cheap and readily available here but I chose not to use it because I am only making a small batch of mooncakes so the amount I need will be very small too and the only available size in the market is a 500 ml so I omitted it to avoid wastage. I just measured my syrup and oil relatively to each other (it's close to 2:1 syrup to oil but I'm not sure) then added flour until a smooth soft dough formed and let it rest for 3 hours. Recipes usually says to use a low protein or cake flour but I only have all-purpose flour so that's what I used.
The oil-syrup mixture and the mooncake dough. 
Here are the fillings. Steamed salted and yolks and red bean paste; many have said even Chinese people that I make the best red bean paste. I just don't know if they're telling the truth. :D If I could only get dried lotus seeds here in my area, I would definitely invest my time in making lotus seed paste because it's my favorite none can be found so I settled with my second favorite, red beans.

Here is the mooncake wrapping station. You need to portion it out first. I was able to make 4 with these amount of ingredients. Because I didn't measure precisely, I had some left over dough.
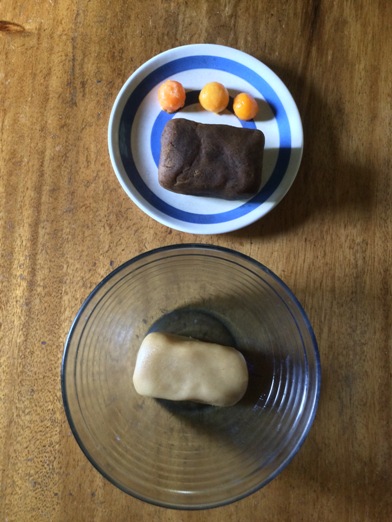
Next thing to do is to wrap the egg yolk with the bean paste. This is my favorite part. I really think the bright orange yolk sitting on top of the dark bean paste is absolutely gorgeous!

Then you need to wrap it with the dough. A thin crust is preferred and the ratio of dough to filling needs to be exact because if not ii will not fill the mold properly; a 3:7 or 2:8 dough to filling ratio are commonly used. I don't know what ratio I used obviously, I just get a small piece of dough relative to the amount of filling.
Here is the yolk, dough and bean paste portioned. I decreased the amount of dough after taking the photo since I find it's too much for the amount of filling.
I used a common method of Chinese bakers to spread the dough without a rolling pin. Just flatten the dough into a flat but somehow still thick disc and work you way towards the top. Here's how it looks.
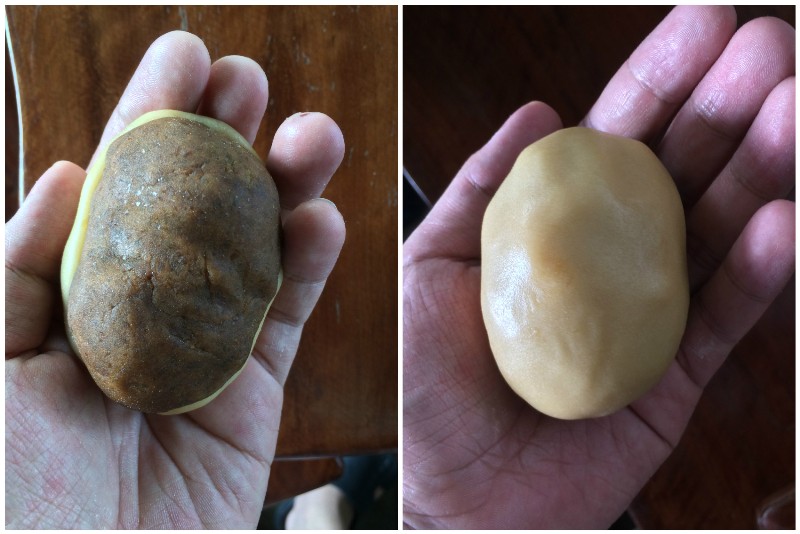
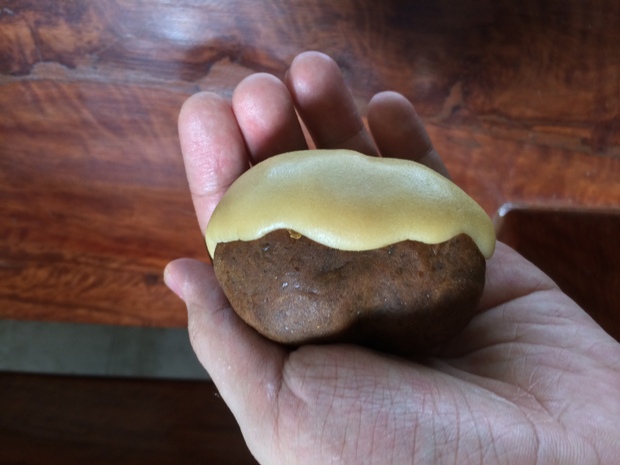
At first it will look like it is mission impossible to wrap but after some time and patience, you'll be even surprised that you've done it!
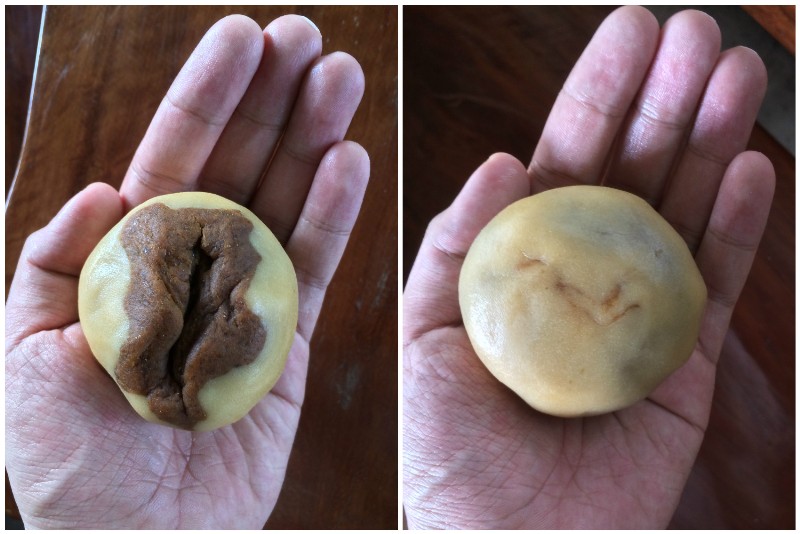
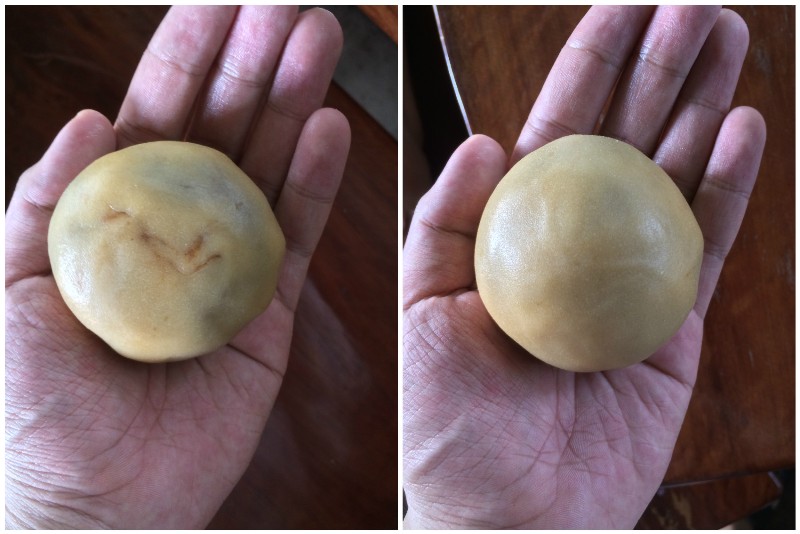
The photo on the right is not the top, it's the seam. You can see some lines of bean paste. I still need more practice but perhaps with a rolling pin, I could go even thinner next time. Here is a comparison of the seam and the top.
They are then pressed into my mini llneras "seam-side up" and are ready for baking. Mooncakes always undergo a two-part baking process. They are baked first for a while to set the pattern then taken out and cooled. They are then glazed with egg wash and baked until brown and shiny. This is an advantage for me and this is what I did. I baked them for 20 minutes in my clay pot using conduction from the llanera to brown and cook the "top" of the moocake evenly. I flipped it out then I let it cool and glazed them with egg wash. I baked them for 10 minutes more this time "seam-side down" to cook the other side and brown the "top". See how it worked for me? Even cooking because both sided faced the heat source at the bottom and the egg wash is not the lone work horse for browning the top.
I had to patch one of them, it caught my spoon while I was moving them!
Here they are when they finished baking, 2 of them cracked but I don't know why. The photo of the pretty ones were corrupted. They're not that pretty yet because they need to go to the return oil process (回油) to be darker and shiny which takes about 2-3 days at room temperature, it's when the oil from the fillings and crust distributes all over the cake. Fresh from the clay pot, they were extremely crispy and almost rock hard after cooling down.
 AFTER 3 DAYS... (三天後)
Look at them! They're so pretty and shiny!

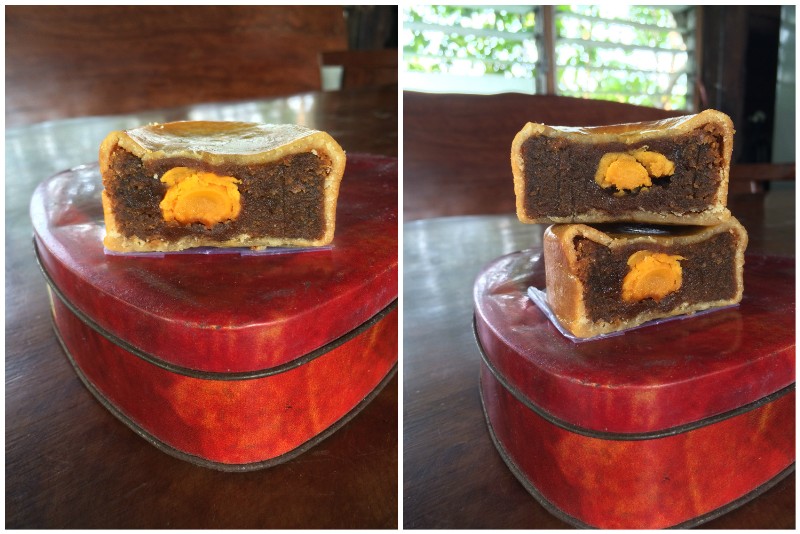
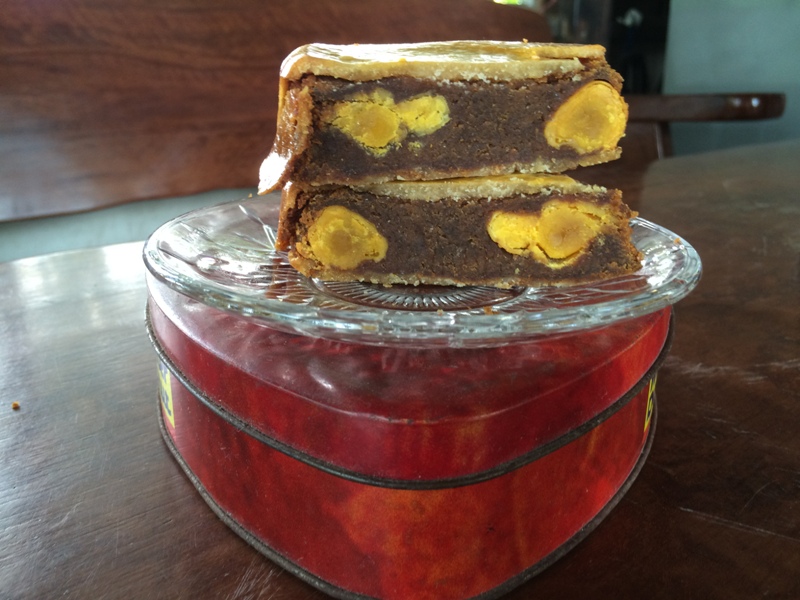
I was so happy again that I made a video to document this success! I hope you can watch this (better in HD) because there are so much more subtleties in appearance I can't capture in the photos.
With the left over crust dough, I made a mooncake cookie or more commonly called piggy cookie because it's often shaped into cute little piggies. Another popular shape is a fish and this is my desperate attempt to shape it like a fish. It's impossible to be eaten on the first day, you should let it soften for a few days or it could be a potential tooth breaker
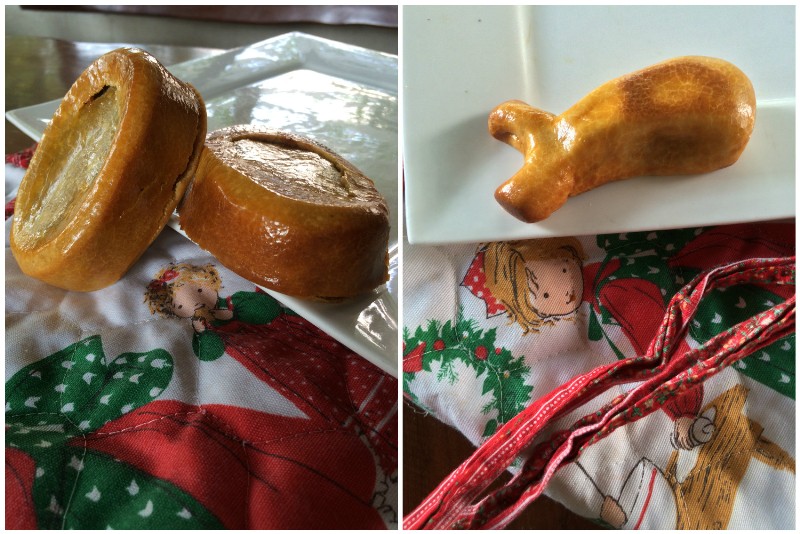
I enjoyed devouring this little fishie (Sorry if the photos are cruel! :P). It's soft and chewy and probably not appealing to the current generation because of its simplicity but is really good, the dominant taste is the golden syrup; the softer it becomes the better.
From: Top Left, Clockwise.
Actually I was planning to include just a photo or two of the cracked ones and fill this post with pictures of the pretty ones to celebrate but an incident happened. We, even mom and dad are so excited to see and taste the results of this first try and we patiently waited for 3 days. So when I took one out they said "WOW! If not for the shape they really look like what we used to buy! Can we taste it now?!" I said Yes, i'll just take some pictures. I was just randomly taking pictures of it on a plate when my friend from college whom I haven't had any communication for over a year suddenly called so we chatted to catch up and I forgot my mooncake on the table.
Okay, after an hour of chatting and updating I came back to the table:
Me: Mom, where is the mooncake?
Mom: We ate it!
Me: What? I still need to take pictures for documentation! And mom! Here are the ugly ones! These should have been the ones you have eaten!
Dad: We know you will give us the pretty ones anyway... so we ate them....
Me: Yes dad, but AFTER the "photo shoot"!
Mom: They're not perfect but still pretty and you put all your love in them too just like the others so their equally beautiful.
Me: >>SILENCE<<
Even with these simple conversations they're full of life lessons my parents want to impart on me.
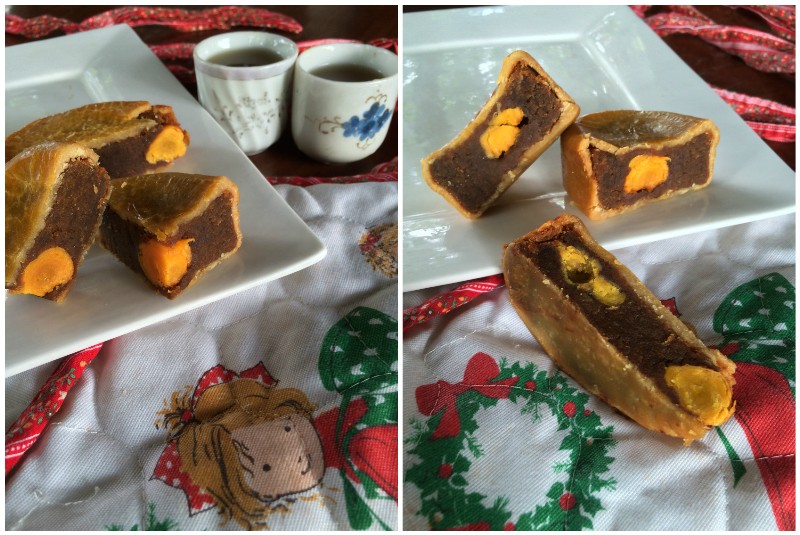
These are the only pictures I salvaged of the prettiest mooncake.
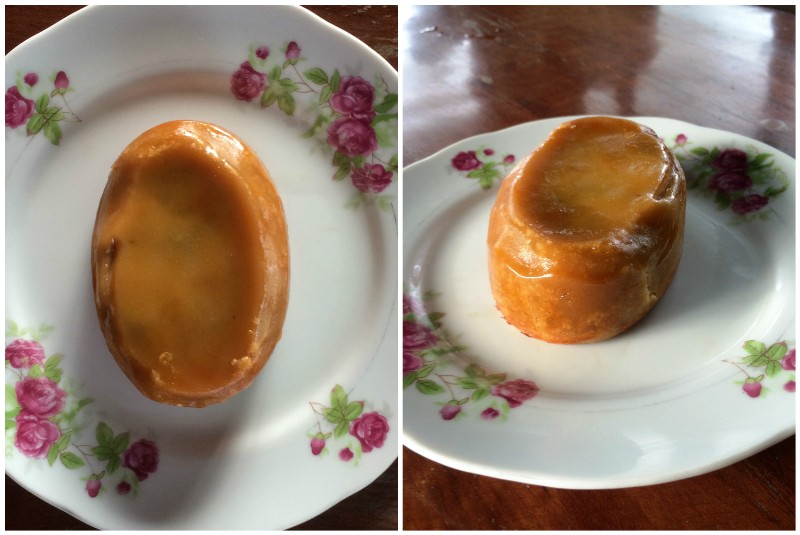

Anyhow, what goes better with mooncakes than tea? Normally, I would reach out for my jasmine tea but for this one with rich and bold flavors I prefer some black tea. Cut into wedges and serve with some tea!
Thank you for your patience reading through this long post! I'm just so happy because I did something that is all about precision and accuracy really well using my clay pot and unconventional techniques! Of course, lots of improvement to be done but really good for the first try! See you on my next mooncake journey!
Thank you very much! Job 谢谢您们/多謝! 周可
 ---------------------------------------------------------------------------------------------------------------------------------------------------------------
First brood after the plague. They just hatched yesterday. We hope they will all live to be adults and multiply too!

