The Fresh Loaf

A Community of Amateur Bakers and Artisan Bread Enthusiasts.

PalwithnoovenP's blog

PalwithnoovenP's picture
PalwithnoovenP

I did not have any plans to post this but as a record of by baking journey, I decided to post it today.

I found some candied peel last month in my favorite baking supplies store that's about to go bad (well, actually more of about to decline in quality) in 5 days which was on sale 50% off. It was expensive with it's regular price I thought, and now I can buy this without burning a hole in my pocket for me to taste it and use it in recipes. I immediately grabbed 2 bags then I thought it was the perfect time for me to try making panettone since I already have an established starter. I also grabbed some golden raisins and paid all of them at the counter. Half of the peels went to the fruit cake that I posted last time and half went into this.


It's my dream to bake a panettone though almost everyone thinks it is a humongous challenge to make but one day I have gathered enough courage to try my hand at it. Everything was going well; my starter more than triples in 4 hours, the first dough nicely tripled until it was time to add the enrichment. Panettone is something best done in a mixer but I'm stubborn so I still went even if I only have my hands. I was surprised with how soupy it was, because it's been a long time I have handled doughs like this in addition to stress and lack of sleep I was rattled and added a ton of flour to the dough. When I finished incorporating it, it was so dry and stiff and the dough almost doubled in mass; things you don't want for a rich but light as air bread. From that point on, I know this was bound to fail but I still continued hoping for something edible. I don't want to waste those sugar, eggs and butter; I'm going all or nothing here!


I dumped all the raisins and the candied peel into the dough and kneaded them in. After a 2 hour rest I shaped them into 2 boules (I only planned to make 1 but the dough almost doubled because of the added flour) and proofed one in the tin overnight at room temperature. The other boule was retarded for several days before it was baked because I can't squeeze it in my tight schedule due to prior commitments (and maybe also due to a little frustration). To add salt to the wound, the first one stuck in the tin so i had to pry it out and it was torn into pieces so we just ate it and no pictures. I was more careful with the second one so it had some photos, I put parchment paper in the tin so no sticking. I slashed it after proofing overnight at room temperature and baked it in my clay pot for 30 minutes with live fire and another 30 minutes over embers and this is what I got.


Oven spring leaves much to be desired. You can also tell it by the way the cut expanded. I did not flip it so the top was a little pale but the bottom was not burnt and is a little thick and crispy with the top soft and a bit moist. The crumb was dry and dense but studded by the raisins and candied peel.

Although it looks nothing like panettone and might even offend some PPP (People Passionate for Panettone), I still do not consider it a total failure. Only the texture suffered but the taste was superb. No tang at all, sweet, rich and buttery with the taste of the raisins and the candied peel shining through. It is very seldom that we taste something as great as this. My dad is very picky about his food but this one received no complaints from him. In fact it was the inspiration why I made the fruitcakes, the same flavor profile that my dad loves. We just found out that it wast the combination butter, eggs, raisins and candied peel that make fruitcakes taste fruitcakes and so delicious so I made  a batch for his birthday last month.

The texture was perfect to turn it into french toast but it did not see the light of the next day anymore for its milk and egg bath because it was gone in a flash! It was that good.


We're celebrating our 120th Independence Day today so here is a photo of me wearing our traditional formal wear. This was taken as souvenir photo when we passed the licensure exam. I'm still looking for what to wear for our oath taking. (Each teacher is a trustee of the cultural and educational heritage of the nation.)

Happy Independence Day to all my countrymen! Maligayang Araw ng Kalayaan!


I hope you enjoyed this post! Happy baking everyone!

PalwithnoovenP's picture
PalwithnoovenP


These are my first baguettes, ever! I am so glad with how they turned out especially that they were not baked in an oven. I feel that it is a real accomplishment in my baking; I thought baguettes were impossible to bake in my clay pot, but I just defied that today. Perhaps the only impossible clay pot bakes are breads that cannot be flipped like a pizza but if it can be flipped, I can handle it! :)


These are Vietnamese baguettes, ones used for banh mi which means these have rice flour in the dough. It is not confirmed if it is true or not but I saw baguettes with rice flour in TFL and experienced its effect in bread doughs in the past so I added a bit here too. They differ from classic French baguettes in that they have a lighter, airier, fluffier crumb with a thinner more crackly crust. A banh mi place opened here a couple of years ago and I was amazed with its taste, it was a harmony of contrasting flavors and textures. I don't know if their baguettes were from Vietnam but it had those characteristics. My favorite was the grilled pork banh mi. Within a few years that I have not visited, I just found out that they were closed but I miss banh mi so much that I decided to try make my own. Fillings are easy to make however the bread was not.
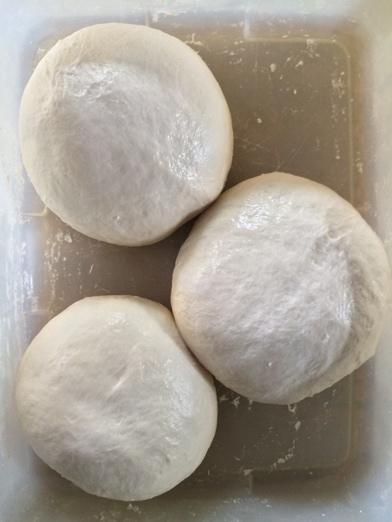


Banh mi dough is highly standardized in Vietnam so no one actually knows what goes in the dough. I consulted various sources and proceeded to make my own dough. I used some AP flour, rice flour, water, sugar, salt and a BF-fed levain. Most recipes I found added ascorbic acid to the dough but I omitted it and just relied on the lactic and acetic acids produced by my starter. To provide additional lift to the dough, I added a bit of baking powder. I poured water until I got a gloopy mess then kneaded it until I got a strong windowpane, it roughly took 30 minutes. The dough was pretty strong at the end. Bulk fermentation took 4 hours until more than doubled. I divided it into 3 and preshaped them into tight boules then they went to the fridge immediately.


The next day I shaped them quite differently from how you shape French baguettes. I flattened the boules into a sort of rectangular shaped with one end wider than the other then you roll tightly into a cylinder then taper the ends by applying more pressure as you roll it outward. Although the dough is so wet, it was not so sticky to shape.
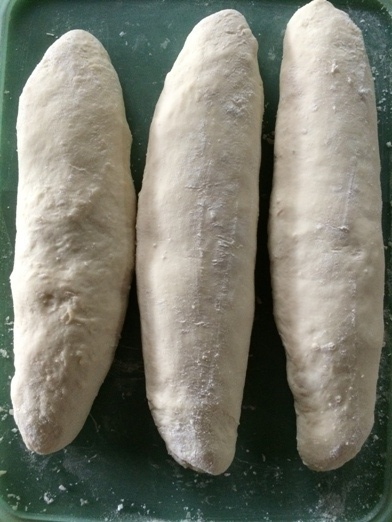


I proofed them for 1 hour. They doubled so quickly.  I am not that confident in scoring dough so I mustered enough courage then scored confidently. In Vietnam, they only do a single long slash. I also tried the classic scoring. I struggled with making a straight single long slash and it did not open up so well. I think I did better with the classic one because it was easier because the blade has to travel shorter. I baked them in my clay pot over heated pebbles and had I shaped them any longer, they will not fit in my pot anymore! Average length was 8 inches or 20 centimeters.
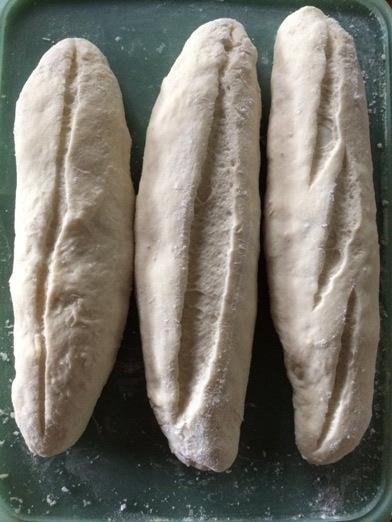


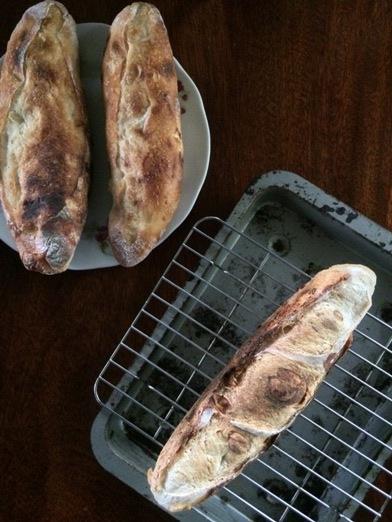
Here are the baked baguettes.

The crust was super crispy when they came out of the clay pot.


Is that an ear? I'm not sure what an ear is. Please enlighten me.
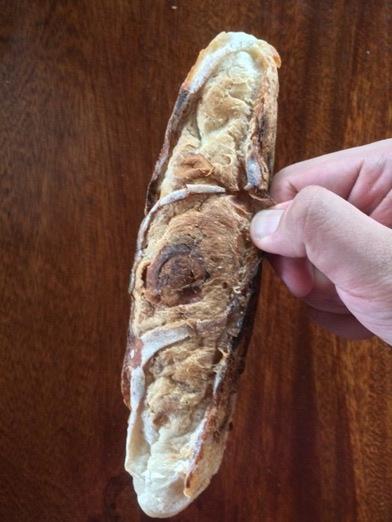


I should have changed hand positions to pick the loaf up in a better angle.
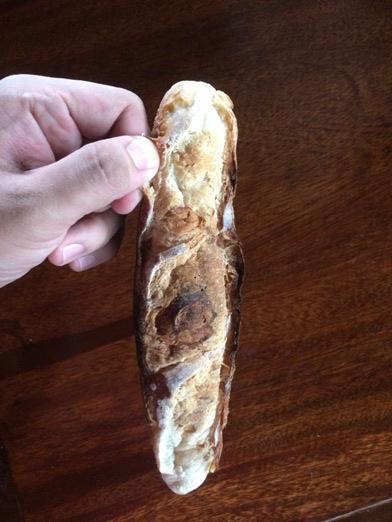


Crumb shots. The crumb was very soft and light with the slightest bit of chew and fluffy and tight typical of its kind. Mine were just moister and a little more stretchier than a banh mi baguette crumb.
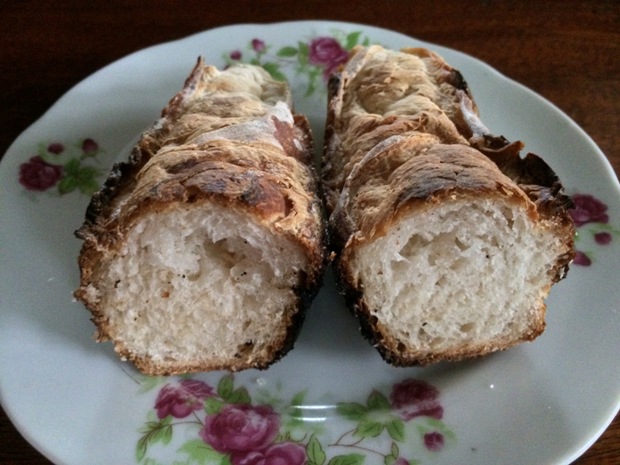

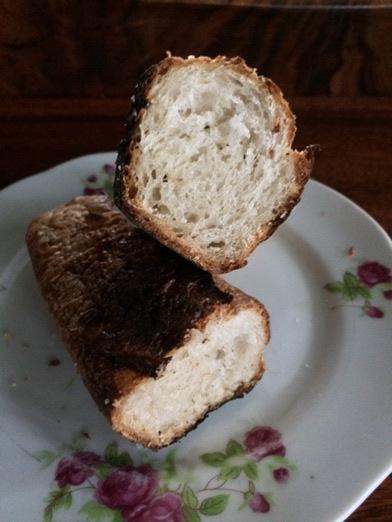


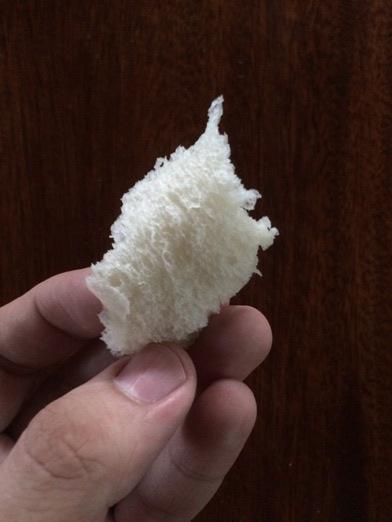
I can pull out the crumb easily like this.


Ready to be filled with various fillings.
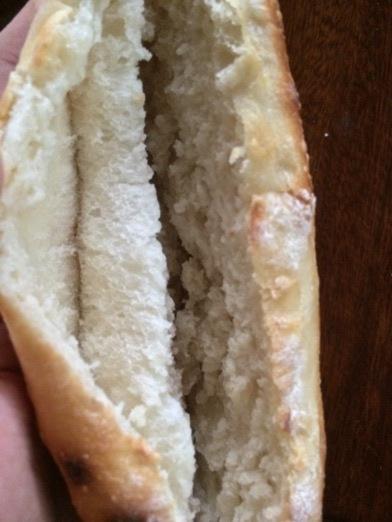


Although I tried to achieve a Vietnamese baguette, the results are actually in between a Vietnamese and a French baguette. The crumb is lighter, tighter, softer, airier and fluffier than a traditional French baguette but the crust was not as thin, delicate, crisp and crackly as a Vietnamese baguette. I think I have made a new baguette, can they be called Philippine baguettes or more accurately Pal baguettes or baguettes à la Pal?

The crust became soft after cooling which was easily remedied by a brief toasting prior to filling (that's what they do in Vietnam too, right? but over charcoal) probably because the baguettes were small and can't be baked long enough to drive out the moisture for that long lasting crispiness. Should I make a drier dough or bake them longer over gentler heat. I am happy with the crumb though. I prefer the look of the classic baguette with multiple cuts, I think it was way prettier!

The taste was complex. Sweet with a little tang and a clean wheat flavor with dark caramelized notes from the bold bake. They were a bit light on their own which means they lend themselves extremely well to sandwiches. Honestly, they were much more flavorful than the baguettes used in the now closed banh mi place that I used to visit here.

Now I understand why some folks here chase baguette perfection. It's so much fun and fulfilling even with failures. I can't wait to make a French baguette or really, I can't wait to make another baguette of any kind though I know 24 inch ones are just another dream for me because of the limited size of my clay pot. I still can't believe that these baguettes came out of my clay pot!

I chose to make a simple banh mi this time which is not a very popular variation. Thankfully Helen from Helen's recipes brought it to light! 

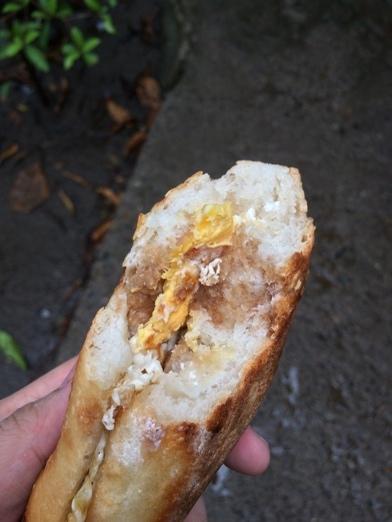
Good Bread + Good Egg = Bliss
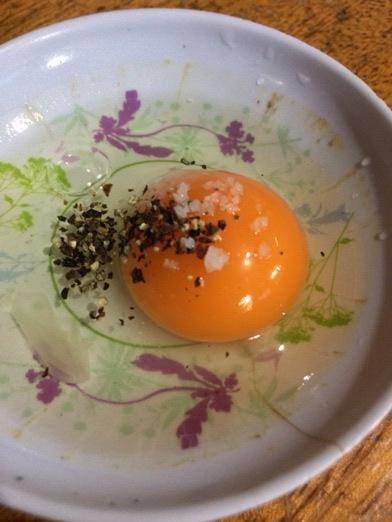


Fry it sunny-side up then drizzle it with Maggi! We also have an affinity with Maggi sauce. Rice and just it is a lunch, an egg is just a bonus!


It's a nice snack when you wander off-road. The combination of the light and crispy bread, the rich eggs and the savory Maggi sauce is just so satisfying! I was also surprised with how filling it was, it sustained me for 3 hours!


It's my birthday and I just received the best birthday gift. I just verified my licensure exam rating and it was unexpectedly very high. I just prayed to pass with a 75.00 rating but God made me achieve more than that. It was just 2.20 points short from making it to the top 10 passers of the hardest licensure exam here! 


As a techer with a major in social science, I might ask you sometimes a question or two about history, culture or food. :) It's fun to know other people and cultures through food. I once made an Ethiopian student taking his PhD in my university smile. He was alone and I ask him if he was a French teacher and he said a no, a FIRM NO! Then I asked him where is he from and he said Ethiopia, so I said "Wow! Do you make and eat injera here?" and he flashed a huge smile. Then I said again "I know you you sometimes make it as a plate and you eat it with doro wat." he smiled again this time much bigger. He said he never thought that someone outside his country will know something about their culture. I even studied simple Amharic (Ethiopia's official language which is so difficult for me) greetings and greeted him whenever I saw him and with that we became friends during his stay in the university. Well, I only learnt about injera here so thanks a lot TFL!

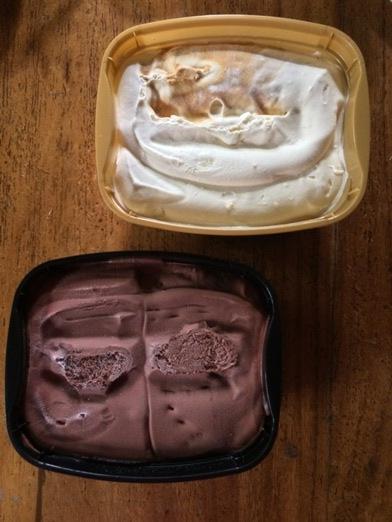
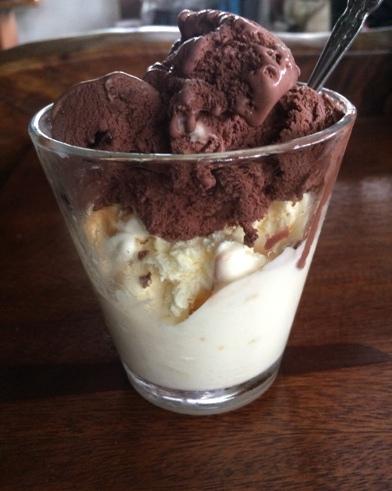
Feeling more than contented, we just bought some KFC which is my favorite fried chicken of course with some rice and lots of gravy (I hope you don't find it strange, I think it's only here where it is done!) and some ice cream (again with strange flavours!) for a simple celebration.


It was what I ate too during the 12 grueling hours of the exam.


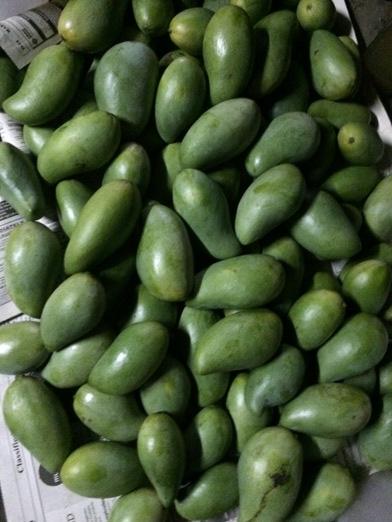
And some mangoes just harvested today!


God blessed me with another year in my life and I am very thankful for it along with all the blessings that I have received this year. Thank you TFLers! I hope you enjoyed this post as much as I did!

PalwithnoovenP's picture
PalwithnoovenP

There are 2 reasons why I am celebrating!

First is, it's my dad's 72nd birthday and second is...

The one who is typing this post that you are currently reading is NOW a PROFESSIONAL LICENSED TEACHER!!!

Yay! I really did not expect this. Various sources state that the Licensure Exam for Teachers is the most difficult licensure exam in our country. Yes, more difficult than exams for physicians, lawyers, architects and engineers! In fact it has the lowest passing rate about 10-20% for elementary and 20-46% for secondary level. Very far from the 60++% for physicians. It is not because the students are not good but because the exam is extremely difficult; it has the widest coverage based on the professional qualities of a teacher and almost all items are situational with all options having equal probability so each requires careful analysis. The moment  I left the examination room, I really conditioned myself that I will not pass because I had to rely most of the time on my gut feeling and maybe only close to 10% of the items were taught in school. But I prayed and prayed and the Almighty with His greatness and goodness granted me my license. I really don't know how to translate this but walang pagsidlan ang galak ko!  All of the hardships and sacrifices of mine and my parents are so worth it. They paid off. My dream is now in my hands.

I'm really sorry if this post is getting too long but I'm just extremely happy and overwhelmed and still can't believe that I can now legally practice the profession.


So I made the fruit cake a week ago as a surprise for my dad. I know it is not commonly eaten this time but its really one of the cakes that we adore, in fact maybe more than chocolate cake and we make sure to buy at least one once it is available in store. Some fruitcakes use honey and taste more delicate but I grew up with the darker bolder kind made with molasses so that's what I made, hence their dark color. I made them into smaller cakes instead of a single big cake because, a full fruitcake requires so much in preparing the tin so it will not burn in the long bake. If it has a high risk of burning in a standard oven, what more in the clay pot over a wood fire! I have no plans to burn all of that expensive fruit.


This fruitcake is a simple one: golden and dark raisins and candied orange and lemon peel soaked in dark rum for 3 days and sunflower seeds. I know some folks age their fruit in liquor for a year but that's the only time I have, still better than no soaking at all. I used sunflower seeds because they're cheaper and taste a little like walnuts to me and I don't have to chop them to disperse them evenly in the cakes. If I had the money and they were available, I would also put candied cherries, candied pineapple, pecans, and walnuts.

As simple as the fruit mix may seem, these cakes are loaded with fruit! I almost the thought that I did not have enough cake batter to hold them! It has 600+g of fruits and seeds for just over a cup of flour! As little as they may look, they are quite heavy and dense and took a full hour to bake.


This is them hanging out in their "oven".

I made 2 batches: one with only the fruits and one with spices namely cinnamon, nutmeg, and cloves, I didn't put ground ginger in fear of my fruitcakes tasting like pumpkin pie. I also took one from each batch, poke holes all over them and fed them with alcohol to at least age for a week. I aged them in the fridge because I live in a hot climate and it is still summer now.

Here is how they look like on the second day.


And after a week, I don't know if it's the light but they seem darker.


Here are some of them up close. The tops are shiny which we never seem to observe in commercial fruitcakes.

One from the plain batch.


One from the spiced batch.


The plain fruitcake that's fed with alcohol.


The spiced one fed with dark rum. It's the heftiest of the batch!

To me, it just looks like a mini version of a classic British fruitcake with just a shiny top. They taste perfect. I think it really need a lot of candied peel because to us, it is what makes fruitcake taste like fruit cake. Perfectly sweet with the molasses really coming through. The unfed ones were not as moist as we like. For the flavor: the plain ones were good but they can't match the fragrance of the spiced ones. The combination of fruit and spices are sublime. So our favorite and the one I'm going to do if I will make fruitcakes again is the spiced one that's fed with dark rum. It tastes just like the ones we buy even though it has an incomplete cast of fruits and maybe even better because I made it, there's more fruit to it than cake.


It really did not cross my mind that I will bake and even age fruitcakes someday or I will pass the Licensure Exam for Teachers and be a professional teacher. I'm really just happy for me and my parents. That's all folks, have a great day!

PalwithnoovenP's picture
PalwithnoovenP

I do not have much time now to post and have fun in this wonderful community as before because of my classes and training so I am shaking up the format of my posts. :) Before, they are super wordy but now I will keep them short and sweet with maybe just a few pictures.

Xuixo (also spelled chuchos but I think xuixos looks way cooler!) is a vienoisserie from Spain. They are made with a yeast-risen dough which may be laminated or not that is filled with crema catalana, rolled into a croissant or baton shape, deep-fried then rolled in sugar. I just learnt them from Gemma Stafford in one of her travel series in Spain and as she said, the xuixo just might be the ancestor of the cronut.

I made some for mothers' day and my mom's birthday but I did not have time to post it or even take photos. They were so delicious that I made another batch.


The dough was raised with my starter which is lightning fast these days. Already doubled in 2 hours and more than tripled in less than 4 hours. If my bread made from it do not have the tang, I would think that I'm baking with commercial yeast! I laminated it with butter with a single and a double turn.


The dough already laminated. I used a vanilla custard for the filling. I shaped them into batons because it is much easier and I overfilled them but I still managed to seal them properly.


I fried them them until golden on low flame then rolled them in sugar. I did not have fine or caster sugar but it worked just fine. I accidentally poked a hole on one of them while frying so it leaked and the custard burnt on the surface. Although deep-fried, they were not greasy at all with all of the components in great harmony.


I honestly like the neat look of those not rolled in sugar but of course it lacks the extra sweetness and crunch.


Soft, light, flaky, crispy but has the body to hold that rich and overflowing custard. ¡Delicioso!

PalwithnoovenP's picture
PalwithnoovenP

Majority of the heavy work and projects for the mid of the semester were done, I just have to compile them in a portfolio so now I can relax and prepare for exams and do some heavier baking/cooking. Still, I can't function well during hectic times without making bread so for a forced "bake", I made a simple bread: steamed buns; can be cooked indoors in under 20 minutes. I made this about 2 weeks ago when our professors were mad giving projects after projects, just before going to class.


This is different from the normal mantou; aside from being sweeter, they were also lighter with a less bready texture and  instead of a smooth top, it is cracked that's why they're also called as smiling or laughing buns. It is really their appearance that make them pretty and eye-catching. It is consider huge smile is a hallmark of a well-made bun. This phenomenon is due to the use of a second (chemical) leavening agent. If you are a traditionalist, you would hunt down the elusive ammonium bicarbonate to make them "smile". But as much as I want to try the real thing, it's impossible to find it here. Well, I am always open to making changes for recipes to work out for me so I just substituted it with double acting baking powder and it worked fine. I think the key to smiling is in the technique in shaping the buns.


The dough was made with AP and sourdough instead of yeast, water, white sugar, salt and baking powder with a little bit of canola oil. Bulk ferment took 6 hours then I rolled it into a tight cylinder then immediately to the fridge. Next day divide into 4 pieces by twisting and ripping each off the cylinder. Without any proofing, I steamed it over high heat for 20 minutes then you will see them smiling and laughing at you which a really proud moment.

I think I should have made them smaller because the three of them were not able to support their own weight and collapsed and smiled at their sides which is not as stunning. Luckily, one was grinning.  Texture was light but with a slight cake-like denseness. I can't detect any tang probably offset by the sugar. Overall, very delicious even plain. I'm wondering if they will still smile if I fill them. They only way to find out is to make them. See you all on my next adventure. Thanks!

PalwithnoovenP's picture
PalwithnoovenP

Ian's techniques with my antics.

It's been ages since I last tried potato in bread. But since Ian always puts it into his bread, I was inspired to make a potato bread this time. I boiled it until very tender then mashed it including the skin like what he does. Saves trouble from peeling and has added benefits too.


I found some cheap cream cheese the other day so I immediately grabbed it. I have also been wanting to try cream cheese in bread (because Ian raves about the texture and moistness it gives to breads) for a long time but I can't because it is so expensive here. The flavor has has zero difference with the expensive brand that I know! I think l see a repeat with my breads and more cheesecakes down the road.


This is again an uncharted territory for me so a lot of mishaps for this bread but it still turned out very good. First, I forgot to take into account the water of the potato and the cream cheese. It was like kneading soup, I had to rescue it with the addition of a lot of flour throwing my "mental ratios" way way off. By the end, I managed to come up with a dough and kneaded it until some sort of a windowpane.


After a one hour ferment, I found the dough lacking strength and spreading too much so I gave it a stretch and fold; the improvement in strength was very obvious. I gave it another 2 sets of S&F's, one hour apart. Bulk fermentation took 4 hours at 34°C. What started as soup ended up as a very strong and silky dough. My starter was also pretty strong, the dough doubles after each S&F.


I divided them into 4 and shaped them into boules. Because of so much activity of the dough, I refrigerated it immediately otherwise it will overproof. I think I am gaining experience of how to read the dough. The next day I cooked them using the "guo kui" method.


Then there's another problem; because of the added flour, I ended up with more dough that my pot can handle. The dough was proofed right but were very bubbly, delicate, and sticky. At the skillet, they expanded unexpectedly huge and almost stuck to each other, very difficult to deal with. Now I know why guo kui has a very low hydration. I made a decision to bake only 3 of them and keep the last one that is on the brink of overproofing in the freezer. They continued expanding in the clay pot and stuck to each other and the pebbles, I had to pry them from things they touch that's why they have this mangled appearance but I find them beautifully rustic. Baking time took 30 minutes for each batch. The last one I baked was not affected negatively and we think it is the prettiest.


Flavor is wonderfully tangy with a buttery cream cheese and potato aroma. It was quite neutral for sweet or savory combos. We ate it with peanut butter and I think it is a nice base dough for filled buns. It was a combination of a crispy caramelized crust and a very soft moist crumb. Heavenly! It is our favorite bread to date. My past enriched breads were soft but this one is just on a whole other level of softness and moistness. I don't know if it was the potato or cream cheese or both who was/were responsible for that. Ian was so right about the texture! Thanks to all bakers who experimented with cream cheese in dough but biggest thanks to Ian for always bringing it to light!


PalwithnoovenP's picture
PalwithnoovenP

I've been very busy with university life recently but I'm glad I was able to squeeze in this bake, it relieved all of the stress that I've been experiencing for the past few weeks.

Most think that the Chinese eat rice but it's only true in the south. In the north, wheat is the staple and people consume in the form of noodles and bread with steamed buns as the most common bread. Sourdough is also the traditional levening but from what I've read, sour bread do not fit Chinese tastes so an alkali is added to the dough to neutralize the acid and provide extra leavening. In Guandong which is in the south the popular dim sum steamed bun is sweet, soft and fluffy, very different from the northern mantou which is almost always unsweetened, dense with a very toothsome texture because it functions as a staple food just like European rustic breads. Chinese "baked" breads have fascinated me unlike in Europe where most if not all baking are made in a wood-fired oven, Chinese breads utilize a vast array of "primitive" (most folks today consider it that way) baking technology (a lot of makeshift equipment) that I find inventive and ingenious.


Guo Kui is an umbrella of various breads popular in the north and the Chinese Northwest; different breads in terms of look, size and cooking method but under one name. Most of my Chinese friends are northerners specifically from Xi'an in Shaanxi province and they recognize and have fond memories of this bread. I made an approximation of this bread from their description (which is of course an awesome language practice opportunity) and some internet research. It is dense and chewy, crusty and crispy, with a charred spotted appearance sometimes with a decorative imprint. It is like that because it is commonly paired with juicy fillings otherwise it will disintegrate. The most striking change I made is using sourdough which not that popular anymore in China.


I fermented the dough for 5 hours then divided them into 4 rounds then a 1 hour proof at room temperature then into the fridge overnight. The next day, I flattened them a bit then made several cuts on their sides using a cleaver then pressed them with my "decorative" stamp. I cooked them on a skillet 1 minute on each side then they went into my preheated claypot on top of the pebbles then baked for a further 10 minutes, 5 minutes on each side.


They were very fragrant from the clay pot, having a wheaty tangy smell with a wonderful smoky aroma. Flavor is wheaty, sweet with a nice tang. It dense but soft and just a little chewy, the crust was delightfully crisp and caramelized. Man, those pebbles give my breads a distinct flavor and aroma that you can't find anywhere else! I was boiling them yesterday to remove any gunk that may have accumulated over time and after boiling they smelt smoky and reminiscent of pineapples and raisins. Those are what they give to my breads and even hours after baking breads, they still smell like that and just greet my nose with an appetizing aroma. I think this is my new favorite method for baking rustic breads now; minimal burnt spots. I was also happy that the imprint showed through the bake. We really liked the bread just the way it is and I think it is perfect for heavy fillings. I'm excited to tweak it further like making it more sour or experimenting with different sweet and savory fillings.

.

What is better to pair with this delicious bread? Homemade egg noodles! With fried sauce! I made them today as well before baking the bread. I really feel like I am in Northern China. I was already a bit emotional and overwhelmed while eating them that I forgot take a picture of them together. :) The noodles were soft and delicate and the sauce packs a punch even though there is no meat in there. A perfect match with the guo kui for a filling meal.


PalwithnoovenP's picture
PalwithnoovenP

Sourdough: sweet or sour, I like it but each have its own place where it shines and complements whatever it was paired with. A pairing that is greater than the sum of its parts; the bread and its pair become exponentially more delicious that if one was to eat each one separately and alone. I was focused for a long time in baking mild sourdoughs because my parents do not like sour breads and I haven't met anyone with a greater or at least the same "Sour Threshold" as mine. My sourest loaf for them is still mild for me and for my favorite combination a super sour bread is the order for the best experience.

Recently, I was inspired by Lechem with a post on A lesson in bringing out the tang but I took it to the extreme with my wild style. There are a lot of techniques for getting a more sour bread like manipulating time and temperature and altering the flour and liquid makeup of the bread including Uncle Dab's bran levain and bran water as liquid in the levain originally done and explored by Doc.Dough but finding whole grains in my area is still a hit and miss for me so all of the tang of this bread was coaxed from all white flour. I decided to preferment a greater quantity of flour as said by Hamelman and ferment it cold and slow. 

I also took a page from Abel's book; that is the super levain which is super enlightening since that prefermented flour considered an insane amount by conventional knowledge appears to have no ill effects on the dough. I bake with a lot of uncommon ingredients especially for those who grew up in the bread baking world but sometimes my purist side as a baker comes through occasionally wanting to make bread using only flour, water, yeast and salt. I don't want this bread to be one dimensional sour but have a complex taste with the tang taking center stage. I also want the tang profile to be 2/5 acetic acid and 3/5 lactic acid or a 40/60 acetic-lactic acid ratio. Here's what I did based on different sources and my own experiences.


My starter has been retarded for 3 months already but no matter how long it stays there; once I feed it, it loses its tang. My tangiest loaf used a levain built in 2 stages 12 hours each; tangy for sure but I want a bit more so from that I modified the process a bit. 66% of the flour was prefermented in 3 builds with each build almost doubling the amount of flour and the final build retarded in the fridge for 3 full days, I mean 72 hours. In my case, instead of doing a single "big build" with the same amount of prefermented flour that will make my starter lose more of its potential tang, I think the secret is to let the final acid build-up get to the maximum in each build for getting that sour flavor to the maximum too.


Here is the levain after 3 days in the fridge. I used bread flour from the very beginning since it is better for long and in this case very long fermentation. It was very firm before fermentation but its now sticky with a wonderful whole structure. The smell was very sour enough to trigger a sensation at the back of my mouth. I used it directly from the fridge since things come to room temperature here quite fast. 

Given the sticky nature of the huge amount of prefermented flour and some gluten degrading, I used very little water for the final dough just enough to let it come together as a dough with the additional bread flour. I made a 30 minute autolyse at room temperature before adding the salt. I decided to go the dabrownman and alfanso route and gave the dough 300 slap and folds (with one hand since the dough is small enough) then 3 sets of stretch and folds 20 minutes apart. In fear of overfermentation, I refrigerated the dough after the second stretch and fold (after 40 minutes at room temp.) the complete the final one when dough is cold.


I gave it a preshape at night then into the fridge again until the following morning for the final shaping and proofing.


I shaped it directly from the fridge and to keep it from spreading because I was afraid of the vigorous microbial and enzymatic activities, I proofed it in a container taller than it is wide. Because of being overly careful about the fermentation time I made a huge mistake!


When I pressed it after 2 hours at room temp. I felt it was very soft and giving in without much resistance. I immediately fired up the clay pot and when it was ready and I turned the dough onto a banana leaf, boy it was way underproofed! It quickly springs back when pressed, not wanting to waste the fire, I slashed the dough and proceeded to bake it anyway.


The smell was very sour and vinegary before baking. Never have I encountered such thing with all of my sourdoughs. I baked it for a long time so long that I cannot remember. I also used embers for the most part because the pebbles packs a lot of heat.


Crust evenly browned with a few very boldly baked spots and full of blisters.


Crumb definitely underproofed to me but not underfermented. :)


My conlusions:

1. This bread can take slightly more water for an even softer crumb and better handling qualities.

2.  I can afford a little more fermentation time both during bulk and the final proof with no ill effects. I was surprised how strong the dough felt given the activities in the dough.

3. I can still up the prefermented flour.


In case you want to try this method. Here is a timeline of what I did:

66% of the flour was prefermented. Divide this amount into 12. (I am not very good in math so I will not write in simplest form to avoid confusion). You can do this at any hydration (this is closer to 62-65%) you wish and make your own adjustments especially with the timings.

23:45 W- Refreshment Build- Inoculate 1/12 of the flour with a teaspoon of stock starter. Knead with enough water to achieve a firm consistency.
11:45 Th- Intermediate Build- All of the refreshment build plus 3/12 of the flour and enough water to yield a firm dough.
23:45 Th- Souring Build- All of the intermediate build plus the remaining (8/12) flour and enough water to make a firm dough.
08:00 F- Retard the final build for 72 hours.
08:00 M- Add the remaining (34% of total) flour and remaining water. Autolyse for 30 minutes.
08:30 M-  Add the salt (perhaps it can take as high as 2.5%) and mix it in. Give 300 slap and folds.
09:00 M- Stretch and fold at 20 minute intervals.
09:40 M- Refrigerate final dough.
10:00 M- Give final stretch and fold and refrigerate again.
20:00 M- Preshape and refrigerate again.
10:00 T- Final shaping and proof for 2 hours in a cloth lined container dusted with cornstarch.
12:00 T- Turn onto a banana leaf, bake then cool completely before slicing.


Crust was crunchy but became a bit chewy after cooling. Crumb was soft like it was made with AP even though made with BF and was underfproofed. Very fragrant of banana leaves with a deeply caramelized aroma and notes of vinegar. Taste was complex, wheaty but with no perceived sweetness. The tang really came through; very very tangy with the desired tang profile of 40/60 acetic-lactic taste. It brushes the lower limits of mouth puckering when eaten alone. This is a bread that is not for everyone but only for sour bread lovers but this bread was also not meant to be eaten alone; it was made to highlight the taste of specific food items: peanut butter for me. I was so glad with how this one turned out. Had this bread been proofed right, the results would be even more outstanding. It's nice to know that I can manipulate the flavors of sourdough. I'm curious on how this one would taste with whole grains in it and what modifiers shall I add to the name of this bread because it will be even tangier.

My parents who do not like sour breads (in fact, they did not like this when they first tasted this but..) agreed with the peanut butter magic! The sourness of the bread complements the sweetness and slight saltiness of the peanut butter (Our first time also to try crunchy peanut butter. Where was this gem for many years?! Even better than the smooth one.) extremely well elevating the taste of each other to whole new levels for a sublime experience.

Toasted with a thick schmear of peanut butter.


PalwithnoovenP's picture
PalwithnoovenP

Due to long class hours, my lunch of rice and a viand cannot sustain me until dinner or until I get home. Halfway through the class after lunch, I am already starting to feel drained and lethargic and starting lose focus. Since bagels are a recent favorite and I know how satisfying and filling they are, I baked some to serve as an afternoon snack to fuel me and give some badly needed energy. :)

I used the same bagel dough as my New Year's Eve bagels (bread flour, water, starter, salt, sugar, honey) with only one change: I increased the sugar to more than double because I like the taste better and for more fuel.


Bulk rise took 4 hours at 27°C. I shortened it to 4 hours as opposed 6 hours because the dough became too extensible and very sticky to handle the last time. I know now that my starter is not a real fan of raising high-sugar doughs. The rise was slow and the dough barely doubled, it only grew to about 1.5x its size.


I cut the dough into 3 ropes instead of 6 for bigger more satisfying bagels and for the convenience of only having to bake a single batch of delicious bagels. I prefer to shape them by looping the ropes around my hand and rolling hard on the work surface rather than poking a hole into a ball of dough then widening it; I like the rustic look it gives the bagels and is also faster to execute. They underwent a 1 hour proof then into the fridge overnight.


I boiled them the next day for 1 minute on each side but they took an extra minute to come to the surface so a total of 3 minutes of boiling time. They are almost the same size as the pot in which I'm boiling them.


Onto a kitchen towel they went to remove excess moisture and here is how they look.


They were baked in my clay pot over heated pebbles for 15 minutes, then flipped and baked for another 15 minutes. Because of their size, 30 minutes total baking time with live fire all the time. I love the pebbles, they provide even high heat to minimize burning. A single burnt spot is almost inevitable but it's a humongous leap of improvement from my previous bakes if you have seen them before. In case you wanna see, here is how they look before flipping.


I cooled them for an hour before slicing and freezing. I take one before I go to my class and toast it and slather it with anything for my snack.


Ready for school. I put some cheese in it this time. You can see my lunch of rice and siu mai that day too. Honestly I still felt a little hungry that day but not as hungry as I used to be, thanks to the bagel!


The crust was very crispy and crumb was very chewy but soft. The aroma was very sweet and fragrant and very appetizing. Sweet and wheaty with almost no tang. Delicious on its own or with spreads.


They were really big, this was the smallest of the three. Look how massive it is!

PalwithnoovenP's picture
PalwithnoovenP

My first bake of 2018. I'm glad I squeezed in a bake despite my busy schedule. I find it more therapeutic than ever! :) Last time, I baked bagels and I really loved them because they were so satisfying to eat. Due to the boiling process it gets before being baked, they really have a unique texture. I thought it will be similar to laugenbrot with a thick chewy crust but I was wrong. Its thin and crispy crust is also our favorite to date but my parents find the crumb too chewy for them so I thought of why not soften the crumb a little bit and maintain that unique crust.

I originally planned to use my bagel dough and just add a little butter and a little more water to soften the crumb a little but I made some more improvisations along the way. I had 2 leftover egg yolks from another recipe so I added that to the dough so I won't have to store it anymore. :) I added more sugar because our favorite yeasted sandwich loaf is a bit sweet and because the egg yolks are added fat and richness I halved the amount of butter I scooped for the dough.


A high sugar dough seems to be an uncharted territory for Zhou Clementine, my starter. She was a bit slow in raising the dough. Bulk fermentation took 4 hours but the dough only grew to 1.5 times instead of doubling. I folded the dough into a neat rectangle and put it into a sort of rectangular container then into the fridge after a further 2 hours at room temperature. The dough did not grew much in the fridge as shown in the picture.

German square brotchen have always fascinated me through the years, I find their shape simply adorable. :) I love square-shaped breads including donut plant's square jelly donut in NYC although I still haven't had the chance to try it. I have only done a square fried bread but never a square "baked" bread so that's what I did here. Since it is not shaped, proofing times might be different so I followed Karin's (Hanseata) schedule here for similar rolls.


The dough was simply tipped onto a cutting board; edges trimmed; and cut into 4 pieces. I braided the trimmed edges as to not waste anything and fashioned it into a roll. I proofed them for an hour because they came straight form the fridge.

Here they are after proofing. The photo does not show much of a difference but if you look closely you can see shallower and softer lines as opposed to deep defined hard line before proofing, they also have increased a bit in height.


I think they do not need any proofing at all. They are already so soft and stretchy and bit sticky by the end and I mangled them a bit during the boiling process. Next time I will boil them right away after cutting and they will have a much better shape and spring. They look a bit small but they doubled during boiling and doubled again during baking so they increased in size by a total of 4 times.


I think that pre-gelatinizing crust during the boiling process that is the key to the bagel crust that we really love so I also boiled these rolls 1 minute on each side to achieve the same results. The wetter enriched dough did not disintegrate in the water as opposed to common knowledge explaining why bagel dough is supposed to be dry. I think its drier dough is for the chewy texture. They look a bit sad and ugly after boiling but they were transformed by the dry heat of the clay pot.


They were baked over heated pebbles in the clay pot for 10 minutes then flipped and baked again for another 10 minutes; 20 minutes in total with live fire.


Only one got a bit burnt but I do not know why all look like they have burnt spots but they were just very boldly bake areas and do not look black in real life.


They were very fragrant coming out of the pot with a tangy smell and a touch of smoke and an extra buttery aroma. The crust was very crispy with a delicate feel to it and the crumb was soft with a very slight chew. The taste was complex; buttery, slightly sugary sweet with the barest hint of tang. Very good on its own or with fillings, so far we only had cheese in the house so that's what we used. Out of excitement we cut them while still hot so the crumb was still a bit wet and has not set-up completely. My parents really loved them because they don't have to fight them with their jaws but still has that lovely crisp crust like the last time.


Finally, I am loving the new way to upload pictures here on TFL. It's so much easier! Again, thanks Floyd!

Some more random photos of the rolls including the braided one. :) Now that I know that boiling is the secret for the crust that we like, I will now manipulate the crumb to make it lighter of heavier depending on our preference. I'm excited for future experiments for "boiled" rolls! I hope you enjoyed this post. Thank you and Happy Baking!


Pages

Subscribe to RSS - PalwithnoovenP's blog