The Fresh Loaf

A Community of Amateur Bakers and Artisan Bread Enthusiasts.

gothicgirl's blog

gothicgirl's picture
gothicgirl

Posted on www.evilshenanigans.com - 4/3/2009

Today is my birthday!!  I won't tell you how old I am ... that would just depress me.  But, I will tell you what does not depress me ...

Dark Chocolate Mocha Cupcakes 

Cupcakes! 

Especially when they are in fun red liners from acupcakery.com!!  Red is my absolute favorite color, and the liners stayed nice and bright after baking.  I love that!

So, to celebrate my birthday I made a batch of cupcakes to share with you.  Of course, you are not here to eat them ... I guess that means I will have to eat all these dark, moist, lucious, mocha cupcakes for you.  Oh, how I suffer!Dark Chocolate Mocha Cupcakes 

These have a nice hit of coffee which is the perfect compliment to the Dutch-processed cocoa powder.  So, in honor of me, make a batch of these cupcakes.  Consider it my gift to you.   I'm off to celebrate! 

Dark Chocolate Mocha Cupcakes   Yield 12

3/4 cup all-purpose flour
1 teaspoon baking powder
1/4 teaspoon baking soda
1/4 teaspoon salt
3/4 cup sugar
1/3 cup Dutch-processed cocoa powder
4 tablespoons butter, melted
1/3 cup buttermilk
1 large egg, beaten with
1 egg white
1 teaspoon vanilla
3 tablespoons strong coffee (I used three tablespoons hot water with 1 tablespoon instant coffee)

Heat the oven to 350 F and line a 12-cup cupcake/muffin tin with liners. 

Dark Chocolate Mocha Cupcakes - Dry Ingredients 

Sift the flour, baking powder, baking soda, cocoa powder, sugar, and salt.   Mix well.

Dark Chocolate Mocha Cupcakes - Wet Over Dry Dark Chocolate Mocha Cupcakes - Batter

Make a well in the center of the dry ingredients and add the melted butter, buttermilk, eggs, vanilla, and coffee.  Blend until there are only a few small lumps left.

Dark Chocolate Mocha Cupcakes - Ready to Bake 

Scoop into lined cupcake tins and bake for 20 minutes, or until the centers spring back when lightly pressed.

Dark Chocolate Mocha Cupcakes - Cooling 

Cool for three minutes in the pan before removing the cupcakes to a wire rack to cool completely.

Dark Chocolate Mocha Cupcakes 

Frost as desired.

Dark Chocolate Mocha Cupcakes

gothicgirl's picture
gothicgirl

Posted at www.evilshenanigans.com on 4/1/2009

It's April Fool's Day ... but I am not fooling around when I tell you that this pound cake is about the best I have ever had. 

Toasted Coconut Pound Cake

I had half a bag of coconut sitting in my pantry since I made my Carrot Coconut Cupcakes and I didn't know what to do with it.  For a while I considered making coconut candy, but I was not in the candy making mood.  As much as I enjoy candy, I prefer eating it to making it.  So, it was back to the drawing board.

 Lime Curd

Now, I should say that the last few days here in my part of Texas have been warm.  The trees are turning green and the grass has transformed from straw brown to vibrant emerald.  I have been feeling decidedly 'Spring-ie' and I decided I wanted something that sort of said, "Hey Spring!  How you doin'?" 

I also had a glut of limes that I needed to use, and lime curd seemed just the thing to make.  Well, If you have curd you need something to spread it on, and I love lime and lemon curd on pound cake.  Why not, I thought, make a coconut pound cake? 

 Toasted Coconut Pound Cake with Lime Curd

So, I did, and it was really, really tasty.  The toasted flavor of the coconut added another layer of flavor to the buttery cake.  It also added a lovely texture to the cake.  There was the fluffy part, the nutty crusty part, and now this chewy, sort of crispy part.   It was, for me, the perfect way to welcome Spring!

Lime Curd    Yield 1 cup

2 oz sugar
1 teaspoon lime zest
2 oz lime juice
2 egg yolks
4 tablespoons unsalted butter

DSCF1789Sugar Rubbed with Lime Zest

Rub the lime zest into the sugar until it is fragrant and the sugar is tinted pale green.  Pour into a heavy bottom pot.

Juiced Limes

Juice the limes and add the juice to the pot with the sugar.  Stir in the egg yolks and cook over medium heat until thick.  Stir in the butter and cook until melted.

Pour through a strainer into a heat proof bowl and cover with plastic wrap.  Make sure to press the film down on the curd to avoid a skin.

Lime Curd

Chill for two hours.

While the curd chills, make the cake.

Toasted Coconut Pound Cake Fixins'

Toasted Coconut Pound Cake   Yield 12 servings

1 cup coconut
1 cup sugar
1/2 cup butter
3 eggs
1 teaspoon vanilla
1/2 cup sour cream
1 1/4 cup all-purpose flour
1/4 teaspoon baking powder
1/4 teaspoon baking soda
1/4 teaspoon salt

Heat the oven to 325 F and grease a 10″ loaf pan very well.

Allow your butter, eggs and sour cream to come to room temperature.

Toasted Coconut

Toast the coconut for 10 minutes, or until brown and fragrant.  Set aside to cool.

In a mixer with a paddle attachment, cream the butter and sugar on medium high speed for five minutes. 

Scrape the sides of the bowl down and add the eggs, one at a time, blending for one minute after each addition and scraping down before adding the next.

Add the vanilla and blend to combine.

Sift the dry ingredients and add them, along with the sour cream, in three alternating installments, starting and ending with the dry ingredients.  Do not over-mix.

Toasted Coconut Pound Cake  - Ready to Bake

Fold the toasted coconut in gently and pour into the prepared loaf pan.

Bake for 60 minutes, or until the center of the cake springs back when lightly pressed in the center.  You may need to tent the cake with foil to avoid over browning.  Do not over-bake.

Toasted Coconut Pound Cake - Fresh from the OvenToasted Coconut Pound Cake - Cooling

Cool in the pan for 20 minutes before turning out onto a rack to cool completely.

  DSCF1834 copy 

Slice and eat as is or ....

Toasted Coconut Pound Cake with Lime Curd  

Spread a tablespoon of the lime curd over the cake, and while we are at it some softly whipped cream.

Your taste buds will thank you. 

gothicgirl's picture
gothicgirl

Posted on www.evilshenanigans.com - 3/25/2009

When I was in England last Fall I fell in love.

Back Bacon  

Not with a person, or even the land or the culture, however fantastic they all are.  No, I fell in love with the bacon.  In England they serve, almost exclusively, back bacon.  If you have never had this kind of bacon before it is a  glorious mix of lean meat, similar to Canadian Bacon, with a streaky tail, similar to our bacon in the US.  It is nothing short of a miracle, and I am so unhappy that the only way I can get this bacon in Texas is by ordering it from British expat food shops at a premium price.

Fresh from the Oven 

Of course, my love knows no bounds and what are a few dollars compared to the comfort of a well cooked, meaty rasher of bacon?   So, I have a few packs stored in my freezer awaiting their weekend to be fried and eaten, and while I have enjoyed this singular way of eating back bacon, I secretly craved something different.  

Bacon Cheddar Bread 

Last year I received The Bacon Cookbook by James Villas.  As the name implies, this book is about cooking with bacon and it even has a section with bacon desserts (which, of the ones I have tried, are quite good!).  I found myself flipping through this book one Saturday when I found his recipe for English Bacon and Cheddar Bread.  This recipe used back bacon, which is fried and chopped, mixed in the bread itself.  Of course, I had to make it.

I did modify the recipe slightly by mixing the all-purpose flour with some whole wheat graham flour for a hearty texture and nutty flavor.  I also replaced some of the regular milk with buttermilk because (shameful as it is) I ran out of regular milk!  Oops.

 Bacon Cheddar Bread Sliced

While the bread baked the house smelled like bacon mixed with Irish soda bread.   When sliced it had a tight knit crumb studded with bacon and streaked with cheddar cheese.   The flavor had the right mixture of tangy cheese and salty bacon.

Bacon Cheddar Bread Crumb

You can, of course, make this with out back bacon.  Just use 6oz of Canadian bacon and 2 oz of regular streaky bacon chopped and fried together in a pan.  That should replicate the back bacon fairly well.

You really must try this!

Bacon Bread Fixins' 

Bacon Cheddar Cheese Bread   Yield 1 - 10″ loaf
Adapted from The Bacon Cookbook

1/2 pound back bacon (or 6oz Canadian bacon and 2 oz thick cut streaky bacon)
2 cups all-purpose flour
1/2 whole wheat graham flour
1 1/2 teaspoon baking powder
1 teaspoon kosher salt
1 cup coarse grated extra-sharp cheddar cheese
1/4 cup lard
2 tablespoons sugar
2 large eggs, beaten
1/2 cup whole milk
3/4 cup buttermilk
1 teaspoon Worcestershire sauce

Heat the oven to 350 F and spray a 10″ loaf pan with non-stick cooking spray.

Back Bacon - Cooked Chopped Back Bacon

Cook the bacon in a skillet until crisp.  Drain on paper towels then chop into small pieces.  Set aside.

Cheese and Dry Ingredients Cheese and Dry Ingredients mixed

In a large bowl combine the flours, salt, baking powder, and sugar.   Add the lard and, with your hands, mix it into the four until it looks like coarse sand.  Add the cheese and toss to combine.

Wet Ingredients CHopped Bacon and Bread Dough

In another bowl mix the eggs, milk, buttermilk, and Worcestershire sauce.   Pour the wet over the dry and mix until the dry ingredients are almost incorporated.  Add the bacon and fold in, making sure to scrape the sides and bottom of the bowl.  Do not overmix.

Bread - Ready to Bake 

Pour the batter into the prepared pan and bake for 45 to 50 minutes, or until the top of the bread is lightly brown and a thin knife inserted into the center of the bread comes out clean.

Fresh from the Oven   

Cool in the pan for 10 minutes, then turn out on a wire rack to cool. 

Bacon Cheddar Bread  

Serve slightly warm, with Irish butter if you can find it.  (I recommend Kerrygold).

Bacon Cheddar Bread Buttered

gothicgirl's picture
gothicgirl

Published on www.evilshenanigans.com - 3/23/09

A few nights ago my husband and I had the opportunity to have dinner with a very old friend.  We had not seen him in a very long time and during our time apart he had gotten married to a lovely doctor who brought to the marriage her beautiful daughter.  A year and a half ago they had an adorable daughter of their own.  His family is beautiful.  He is very lucky!

Chocolate Glazed Chocolate Tart Fixins

He invited us to meet his new family and, of course, we agreed.  I asked what I could bring for dessert, as that is kind of my thing, and he said anything chocolate.  SCORE!  So, for the girls I made a batch of Cream Filled Cupcakes, and for the adults I made a Chocolate Glazed Chocolate Tart.

Chocolate Glazed Chocolate Tart

This tart is incredibly easy to make, it looks spectacular, tastes like chocolate heaven, and as our friend's wife commented it would be the perfect canvas for experimenting with different flavors.  We all agreed raspberry, orange, and mint would be lovely.  I also think some ground toasted hazelnuts in the filling would be nice for flavor and texture.

I did make a few changes to the original recipe.  I could not find the chocolate graham crackers, which I have seen before but not this visit to the store, so I used chocolate wafer cookies.  Because they grind up finer than graham crackers I used more crumbs but I did not increase the butter.  It did not need it.  I also reduced the sugar because chocolate wafer cookies are quite sweet on their own.

If you have someone you want to treat may I recommend this tart?   It is divine!

Chocolate Glazed Chocolate Tart    Serves 10

For the crust:
1 1/2 cups ground chocolate cookies
5 tablespoons unsalted butter, melted
2 tablespoons sugar

For the filling:
1 1/4 cups heavy cream
9 ounces bittersweet (no more than 65%) chocolate, chopped
2 large eggs
1 teaspoon pure vanilla extract
1/4 teaspoon salt

For the glaze:
2 tablespoon heavy cream
1 3/4 ounces bittersweet chocolate, finely chopped
1 teaspoon light corn syrup
1 tablespoon warm water

Chocolate Cookie Crust

Begin by mixing the cookie crumbs, butter, and sugar well and press it into a 9-inch round fluted tart pan.  Press the filling up the sides of the pan.  If you have a tart pan with 1″ sides only press it up 3/4 of the way.  (My tart pan has short sides, so I carried it to the top)

Bake at 350F for 10 minutes.  Allow to cool while you prepare the filling.

Chopped Chocolate

Heat the cream in a heavy pot over medium heat until it bubbles around the edges.  Pour it over the chopped chocolate and allow to sit for three minutes, then stir until it is well mixed and all the chocolate is melted.

Mixed Eggs and VanillaChocolate Tart Filling

In a small bowl mix the egg and vanilla.  Pour it into the melted chocolate and mix well.

Filling in the Tart Shell

Pour it into the prepared curst.

Tart - Ready to Bake

Gently tap the tart to break any air bubbles.

Tart - Fresh from the Oven

Place on a sheet pan and bake the tart for 20 minutes, or until the edges are just set and the center is still slightly wobbly.  Allow to cool for an hour.

As it cools make the glaze.

Heat the cream until it simmers and pour over the chocolate.  Stir to melt, then add the corn syrup and water.  Mix well.  Pour over the cooled tart, and gently tilt the tart to spread the glaze to the edges.  Let set for an hour at room temp before serving.

Chocolate Glazed Chocolate Tart


gothicgirl's picture
gothicgirl

My starter, let's call him Ol' Yeasty, is a week old and I decided to make a loaf of bread to celebrate!

He has been quite active, and despite his youth and inexperience, I decided to let him have a go.  We made a simple boule, Ol' Yeasty and I.

Not the best oven-spring, not the best crumb, but it was a wonderful first effort for the young fellow, and there was a decided sour note to the bread.  I do like that!

I am looking forward to my next try. 

gothicgirl's picture
gothicgirl

I had a craving for carrot cake the other day.  It was one of those cravings you try to ignore, but in the end you submit because, like it or not, you did not try all that hard to avoid it in the first place.

Carrot Coconut Cupcake

Submitting to my desire also gave me the opportunity to play around with a recipe.  I always enjoy that!  I did not just want carrot cake, I wanted carrot cupcakes, and I did not just want carrot, I wanted carrot coconut.  I do not bake with coconut often because my husband, and main test subject, dislikes the texture of it.  Did I say dislikes?  I mean loathes. 

Regardless of the likes of my husband my mind was set on carrot coconut, so on the way home from work I picked up a few things and set to work.

Carrot Coconut Cupcake 

The original recipe for the carrot cake is my father's.  It is an excellent, moist, and very dense carrot cake, but I knew with all the eggs and oil it would make a very poor cupcake.  Besides, I hate getting a cupcake with a greasy liner!  Yuck!

So, I made some modifications, such as reducing the eggs, replacing some of the oil with applesauce, and adding some buttermilk to thin the batter and to add a slightly tangy note to the cakes.   Adding the coconut helped add moisture along with the grated carrots, so in the moistness department I figured I was good.

Carrot Coconut Cupcake 

The original cake calls for 1 teaspoon of baking soda for a 9″x13″ cake which is quite dense.  I wanted fluffy cupcakes that would dome proudly inside the liners so I added an additional 1/4 teaspoon of baking powder.

My modifications resulted in tender, moist, flavorful cupcakes with a slightly chewy texture from the shredded coconut.  Even my husband, who avoids coconut like the plague, said they were pretty tasty ... coconut aside. 

Carrot Coconut Cupcake Fixins' 

Carrot Coconut Cupcake   Yield 24

1 cup sugar
2 eggs
3 tablespoons vegetable oil
1/4 cup applesauce
1/4 cup buttermilk
1 teaspoon vanilla
1 teaspoon cinnamon
1/4 teaspoon allspice
1 cup flour
1/4 teaspoon salt
1 teaspoon baking soda
1/4 teaspoon baking powder
1 cup shredded carrots
1 cup shredded coconut

Heat the oven to 350F and line your cupcake pans with paper liners.

Sugar, Eggs, Applesauce, Buttermilk, Oil, and Vanilla

In a large bowl combine the sugar, eggs, oil, applesauce, buttermilk, and vanilla.  Blend until smooth and well incorporated.

In a smaller bowl sift the dry ingredients, then pour the dry onto the wet and whisk until the dry ingredients just moisten.

Folding in the Carrots and Coconut

Add the shredded carrots and coconut and fold gently, making sure to scrape the sides and bottom of the bowl.

Fill the cupcake liners 1/3 of the way full.  Bake for 25 - 30 minutes, or until the center of the cupcake springs back when lightly pressed. 

Carrot Coconut Cupcake Fresh from the Oven 

Allow the cupcakes to cool in the pan for three minutes, then turn onto a wire rack to cool the rest of the way.

Carrot Coconut Cupcake 

I frosted my cupcakes with a simple cream cheese frosting. 

Cream Cheese Frosting   Enough to decorate 24 cupcakes

1 stick unsalted butter, softened
1 - 8 oz bar of cream cheese, softened
2 teaspoons vanilla
2 1/2 cups powdered sugar

Blend the butter and cream cheese on medium speed until well mixed, about five minutes.  Add the vanilla and blend to combine.

Add the powdered sugar and blend on low until the powdered sugar is moist, then blend on high for thirty seconds to remove any lumps.

Carrot Coconut Cupcake

Store frosted cupcakes in the refrigerator. 

Enjoy! 

Posted on www.evilshenanigans.com - 3/17/2009

gothicgirl's picture
gothicgirl

www.evilshenanigans.com

Have you ever craved something, let's say a cookie, and could not find a recipe that looked like it would be any good?


That is the predicimate I found myself in when I came up with this recipe.  I was fresh off my Lime Bars and I had lime on the brain, but I wanted a cookie.  Something subtle, sweet, and creamy with a hint of lime tang.  So I searched the internet, looked in various baking books, but I could not find a recipe that met my specifications. 

White Chocolate Lime Cookies Fixins, Pt. 1

What is an ingenious baker to do?  Why, make up her own cookies, of course!  I fully expected my first try at this recipe to be a failure.  Most of the time my first go at any recipe requires a fair bit or tweaking, but this time was different.  I would not add one single tweak.  They were crisp at the edges, chewy in the center, creamy from the white chocolate chips, and had a subtle underlying note of lime.  Visually, they were really pretty with golden edges, pale centers, and just the right amount of puff.  In short, perfect!

White Chocolate Lime Cookies Fixins, Pt. 2  

I had my husband and co-workers taste test these for me, lest I be blinded by 'mother's love' for my cookies.  My husband had four cookies, strictly for quality control purposes he assured me, and declared they were really good and I should not change them.  My co-workers did not say much because they all went for seconds with cookie still in their mouths.  There were a couple of moans.   I took that as a good sign!


White Chocolate Lime Cookies 

So, break out the zester and bake a batch of these refreshing cookies!!

  White Chocolate Lime Cookies   Yield 5 dozen cookies

1 cup unsalted butter, softened
3/4 cup sugar
3/4 cup light brown sugar
2 eggs
1 teaspoon vanilla
1 teaspoon lime juice
1 tablespoon lime zest
2 1/2 cups all-purpose flour
1 teaspoon baking soda
1/4 teaspoon baking powder
1/4 teaspoon salt
1 - 12 oz bag white chocolate chips

Preheat oven to 350 degrees and line two sheet pans with parchment paper.

In a large mixing bowl or stand mixer, sugar and butter until combined but not fluffy.

Add eggs one at a time, then add vanilla, lime juice and lime zest.  Mix to combine. 

Whisk together flours, baking soda, baking powder, and salt.

White Chocolate Lime Cookie Dough

Mix into creamed mixture until just combined.  Fold in the white chocolate chips.

White Chocolate Lime Cookie Dough 

Shape the dough into 1″ balls, and place 2 inches apart on the baking sheet.  Bake for 10 minutes, or until the edges are golden and the centers just set.

White Chocolate Lime Cookies - Cooling  

Allow to sit on the pan for three minutes before moving to wire racks.

White Chocolate Lime Cookies


Posted on www.evilshenanigans.com - 3/15/2009

gothicgirl's picture
gothicgirl

When I was growing up in South Texas we had this neighbor who would, on Saturday afternoons, make her tortillas for the week.  Believe me, I made friends with her children so I could make myself available for tortilla day.  I think she enjoyed my enthusiasm and always had a few extra tortillas for me to take home. 

They were sublime!  My family would fight over them, and no matter how many she sent home with me they were always gone before dinner.  My mom asked for the recipe, yet no matter how my mother pleaded, or bartered with her own secret recipes, she refused to give up her recipe.

Eventually we moved to North Texas and that ended my weekly tortilla gorge.  It seemed I was destined to eat rubbery store-bought substitutes for the rest of my life.  I survived on them until a few years ago when I was reminded, quite by accident at a local Tex-Mex place, of our neighbor and her delicious tortillas.   I watched as the woman behind the counter rolled and cooked beautiful tortillas and I thought, why couldn't I do that too?

I had quite a bit of culinary know-how, and I had the internet which would surely hold the key to delicious tortillas, right?

You would be surprised!

I tested a number of recipes for tortillas with all manner of ingredients.  Some had vegetable oil, others butter, and some had vegetable shortening.  They used a variety of flours from regular all-purpose to bread flour to even cake flour.  Some used milk, others water.  None of them turned out the way I wanted. 

I discovered pretty early that all-purpose was the flour to use.  It developed a moderate amount of gluten so the tortillas were chewy but not tough.  The liquid I had the most success with was milk.  Water works fine, but the cooked tortillas are not as soft as when you use milk.  As for fat, that was more tricky.  Butter burned too easily and the vegetable oil gave the tortillas an odd texture.  Vegetable shortening left the tortillas with an almost fishy smell, which happens when the shortening gets too hot.

I despaired that I would never find what I was looking for when, while looking at the shortening shelf at the grocery store, I remembered one thing from the Saturday's at my neighbors.  Manteca!!  That is lard to be specific.  So, with my tub of lard in hand, I went back to the kitchen and tried one of the more successful recipes with the lard and ... EUREKA!  I had it.

Now, this is the point where I am supposed to be sorry that I like lard, that I know it is supposed to be evil, and gross, and made from animals.  I'm not.  No, I am PROUD to say I cook with lard.  Using lard I can make tortillas that make people beg.   Some have offered me cash to make them a batch.  I'm not kidding.  Lard adds a depth of flavor with out any funky aftertaste.  It has a high smoke point so it does not scorch, and it lasts for a really long time in the pantry.  It is also versatile.   I use it combined with butter in my pie crusts.  But that is an entry for another day.   

Flour Tortillas   Makes 12

2 cups all-purpose flour
1/4 cup lard, or vegetable shortening
1/2 teaspoon salt
1/2 teaspoon baking powder
3/4 cup warm milk, or water

Combine the dry ingredients in a bowl.  Transfer to the bowl of a stand mixer.

Add the lard and mix until it is well combined and the mixture looks grainy.

Add the warm milk and mix until a smooth ball of dough forms, about 5 minutes.

Divide the dough into 12 equal pieces and roll the pieces into balls. 

Cover and let rest 30 minutes.

Once rested, roll the balls of dough into 6″ to 7″ tortillas. 

Cook on a griddle, or in a heavy pan, over medium heat until golden brown and puffy.

Transfer to a plate and cover with a towel while the rest cook.

Enjoy!  Or, allow them to cool and store them in a plastic bag in the fridge.  They last for five days ... if you can keep from eating them hot off the griddle.

Posted on www.evilshenanigans.com - 2/18/2009

gothicgirl's picture
gothicgirl

For the most part, I have had a lot of luck with bread recipes.  If it does not work out the way I want on the first try I begin the tweaking process.  It is not always fast but I get there in the end.  I say for the most part because I have had one bread nemesis.  One bread that, no matter how I tried, would never work out the way I wanted.  

That bread was the delicious Indian flat bread called naan.

Naan Fixins

Naan is my nemesis no longer.  Now I have a recipe for naan that is tender, chewy, crispy, and soft all at once, and is terrific stuffed with curry.  The recipe is adapted from one found here.  

Along with a good recipe I have a good cooking method.  Naan is made, traditionally, in a tandoor oven which produces an insane amount of heat.  If you want naan that has the right texture, the soft inside with the chewy exterior, you have to find a way to replicate a tandoor at home.  I tried the grill with average results.  I tried the stove, in a similar way that I cooked my tortillas, but it was not hot enough.  

I make pizza at home from time to time and have two very well seasoned pizza stones.  On the internet I had read that some bakers use their pizza stones, in a smoking hot oven, to achieve a tender interior with a crisp exterior.   It sounded promising, so I tried it.  I heated the oven to 500 F with my pizza stone on the lowest rack of the oven.  I let it heat for thirty minutes and then added one rolled out piece of naan.  It was as close as I will ever get to perfect, and it is pretty darn close!

Naan Dough Divided

Another thing I discovered is that you need to have patience.  Don't rush the naan.  Give the dough a two hour ferment, then after they dough is divided give it the full half hour proof on the bench before rolling.  Letting the dough develop will give you the taste and texture you want.

Naan 

Naan   Yield 12 naan

3 1/2 cups all-purpose flour
1 tsp salt
1/2 tsp dry active yeast
1 1/2 cup milk, heated to 110F
1 tsp sugar
ghee to taste

Activate the yeast in the warm milk with the sugar added.

Combine the flour and salt.  Once the yeast is active, combine the yeast mixture with the flour mixture.  Mix in a stand mixer on medium speed for 5 minutes, or knead by hand until the dough is smooth and elastic.

Allow to rest for two hours, covered with a towel or plastic.

Naan DoughNaan Dough Divided

After the dough has rested turn it out onto a floured surface and divide into 12 equal pieces and round them into balls.  Cover with a towel and allow to rest for 30 minutes.

While the dough rests heat your oven to 500 F and place a pizza stone, or cast iron skillet, on the bottom rack of the oven.

Naan Rolled Out

Once fully rested roll out the dough until it is about 6″ to 7″ wide.  It should be fairly thin.

Naan on the StoneNaan Baked

Moisten your hands with water, gently pass the dough between your hands to moisten gently, then lay on the hot pizza stone.  Close the oven and bake for 2 1/2 to 3 minutes, or until puffed and beginning to get brown spots.

Remove from the oven, brush lightly with ghee (or melted butter) and cover with a cloth.  You may need to press the naan to release the air inside.

Serve warm.

Posted at www.evilshenanigans.com - 2/27/2009

gothicgirl's picture
gothicgirl

 BBQ Pork Steam Bun 

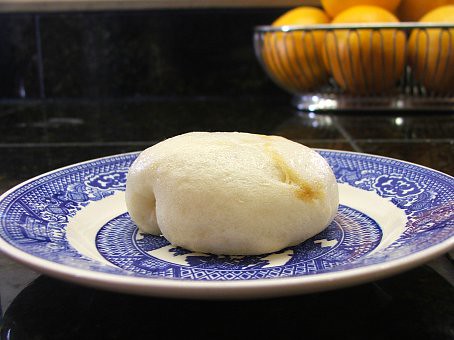
When my husband was little his mother, who is from Taiwan, would take him along on her shopping expeditions to Chinatown in his hometown of Chicago.  As a treat, she would buy him char siu bao, or Chinese BBQ pork steamed buns.  I believe food can create memories, and passing a Chinese bakery one day a few years ago we saw some of these pale buns in the case and he was five again, shopping with his mom and munching on buns.   Of course, we bought some and boy were they good!
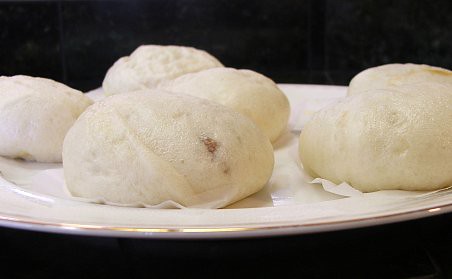
BBQ Pork Steam Buns 

Like anything, if I like it I want to make it, and my husband was all for that!  I tried a couple of different recipes for the bun dough and while they were ok, none were as good as what we had at that little bakery.  So, I quit making them because, frankly, who wants to eat sub-par buns?

Well, that changed quite by accident.  Last week I was browsing my favorite food blogs when I found a recipe on the most excellent, and very tasty, She Simmers  for Plain Chinese Steamed Buns.  The pictures Leela posted showed pale, fluffy buns that I could not resist. 
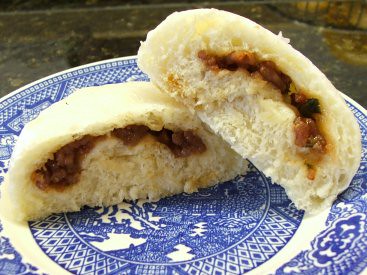
BBQ Pork Steam Buns 

Bright and early Sunday morning I made the dough then packed it up, along with some pork filling, to my in-law's house a couple of hours away.  During the drive the dough rose, and once we got there it sat for another hour, giving it four total hours to ferment.  When I turned it out I was afraid I had over fermented but it was just lovely!  The dough was smooth, supple, and very easy to work with.  The buns were easy to form with the pork filling inside, and after a good proof, they steamed up to fluffy awesomeness!

Char Siu Bao, or Chinese BBQ Pork Steamed Buns    Yield 12

Pork Filling:
1 lb. ground pork
2 tablespoons vegetable oil
1 clove garlic, minced
1 green onion, chopped
1/2 cup Char Sui sauce (available in the Asian section of most supermarkets)
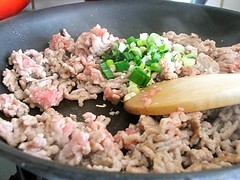
BBQ Pork Filling 

Brown the pork in the vegetable oil until the meat begins to color.  Add the garlic and green onion and cook until the meat is cooked through.
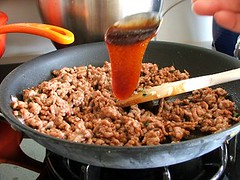
BBQ Pork Filling  

Add the Char Siu sauce and cook for five minutes, or until the sauce has caramelized slightly.
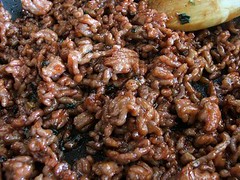
BBQ Pork Filling 

Allow to cool to room temperature.

Steamed Bun Dough    adapted from She Simmers

Sponge:
1/3 cup water, heated to 100F
1/3 cup all-purpose flour
1 tablespoon active dry yeast
1 tablespoon sugar

Dough:
1 cup all-purpose flour
3/4 cup cake flour
2 teaspoons baking powder, divided
1 teaspoon kosher salt
1 tablespoon sugar
1 tablespoon lard, melted and cooled slightly
1/2 cup water, heated to 90F

Mix the ingredients for the sponge in a mixing bowl, or the bowl of a stand mixer, with a spatula until uniform.  Cover and allow to ferment until the top of the dough is covered in bubbles that are beginning to break.

Add the all-purpose flour, cake flour, 1 teaspoon of the baking powder, salt, sugar, lard and water.  Mix for 2 minutes on low, then check the hydration.  It should be slightly sticky, but not wet.  If it is too wet add additional all-purpose flour by the tablespoon until the dough is no longer wet.  Mix on medium for 5 minutes.   The dough should form a ball on the dough hook and just cling to the bottom of the mixer. 

If mixing by hand, mix in the water and knead in the bowl until the dough forms a rough ball.  Turn out on a board dusted with flour and knead until the dough is smooth, about ten minutes.  Dust the board with additional four as needed to prevent sticking, but do not add too much.
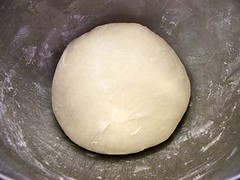
Steam Bun Dough 

Cover the dough in the mixing bowl and allow to ferment for four hours.   It will rise and smell very yeasty.

Turn the dough out into a flour dusted board and press out the largest air bubbles.  Gently knead in the second teaspoon of baking powder.  Divide the dough into 12 equal pieces and, one at a time, press into a circle.  The dough should be thinner at the edges and plump in the center.
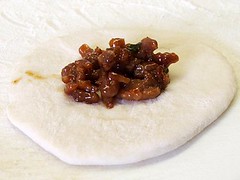
BBQ Pork Steam Bun - Ready to Seal BBQ Pork Steam Bun - Ready to Steam

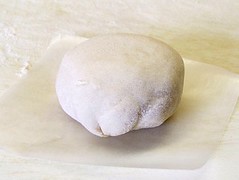
Spoon one tablespoon of the prepared pork filling into the center of the dough.  Gather up the edges and press to seal.  Place the bun seam side down on a square of wax paper.

Allow buns to proof on the counter, covered, for 1 hour.
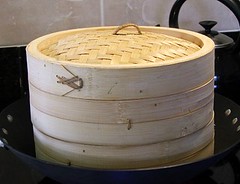
Bamboo Steamer 

Prepare a steamer, I use a bamboo steamer set on a wok, with gently boiling water. 

Once the buns have proofed gently place them, at least 1 inch apart, in the basket of your steamer.  Cover and allow to steam for ten minutes.  Do not let the water boil too vigorously. 
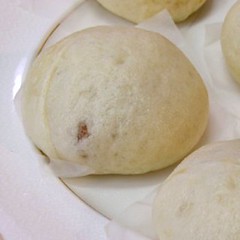
BBQ Pork Steam Bun  

After ten minutes carefully remove the lid, making sure not to drip water on the buns, and remove to a plate.  Cover with a towel until ready to eat.  Steam the remaining buns.
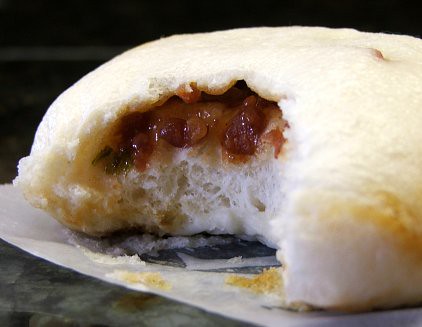
 

Peel the paper off the buns and serve warm.

Poted at www.evilshenanigans.com - 3/11/2009

Pages

Subscribe to RSS - gothicgirl's blog