The Fresh Loaf

A Community of Amateur Bakers and Artisan Bread Enthusiasts.

Recent Blog Entries

CalBeachBaker's picture
CalBeachBaker

Today's bake: EINKORN BROT

Source: Created by the Bialys and Farmers Market Breads Class - BBGA

Note:

Discussion:

This is my first attempt baking this bread and found the dough to be somewhat sticky and loose.

I milled at the finest setting some Einkorn Wheat Berries-100% Extract and used some cracked Einkorn Wheat Berries.

This bread's soft, moist crumb has a mild buttermilk/dairy taste with a soft, creamy texture and the crust a pleasing toasty/nut like flavor enhanced by the toasted sesame seeds.

This bread would pair nicely with most mild flavored foods or just toasted as a snack.

Make again? - Yes

Changes/Recommendations: None

Ratings


Benito's picture
Benito

Being back in Toronto I have access to ingredients that I couldn’t find in Fort Lauderdale Florida.  Yesterday I went to Chinatown and picked up some purple sweet potatoes and some BBQ Pork.  I’ve been wanting to try making fully sourdough (not hybrid with IDY) Baozi for a while, the last attempt at it didn’t go well.  Given the expense of buying BBQ Pork these needed to be successful and they were.  

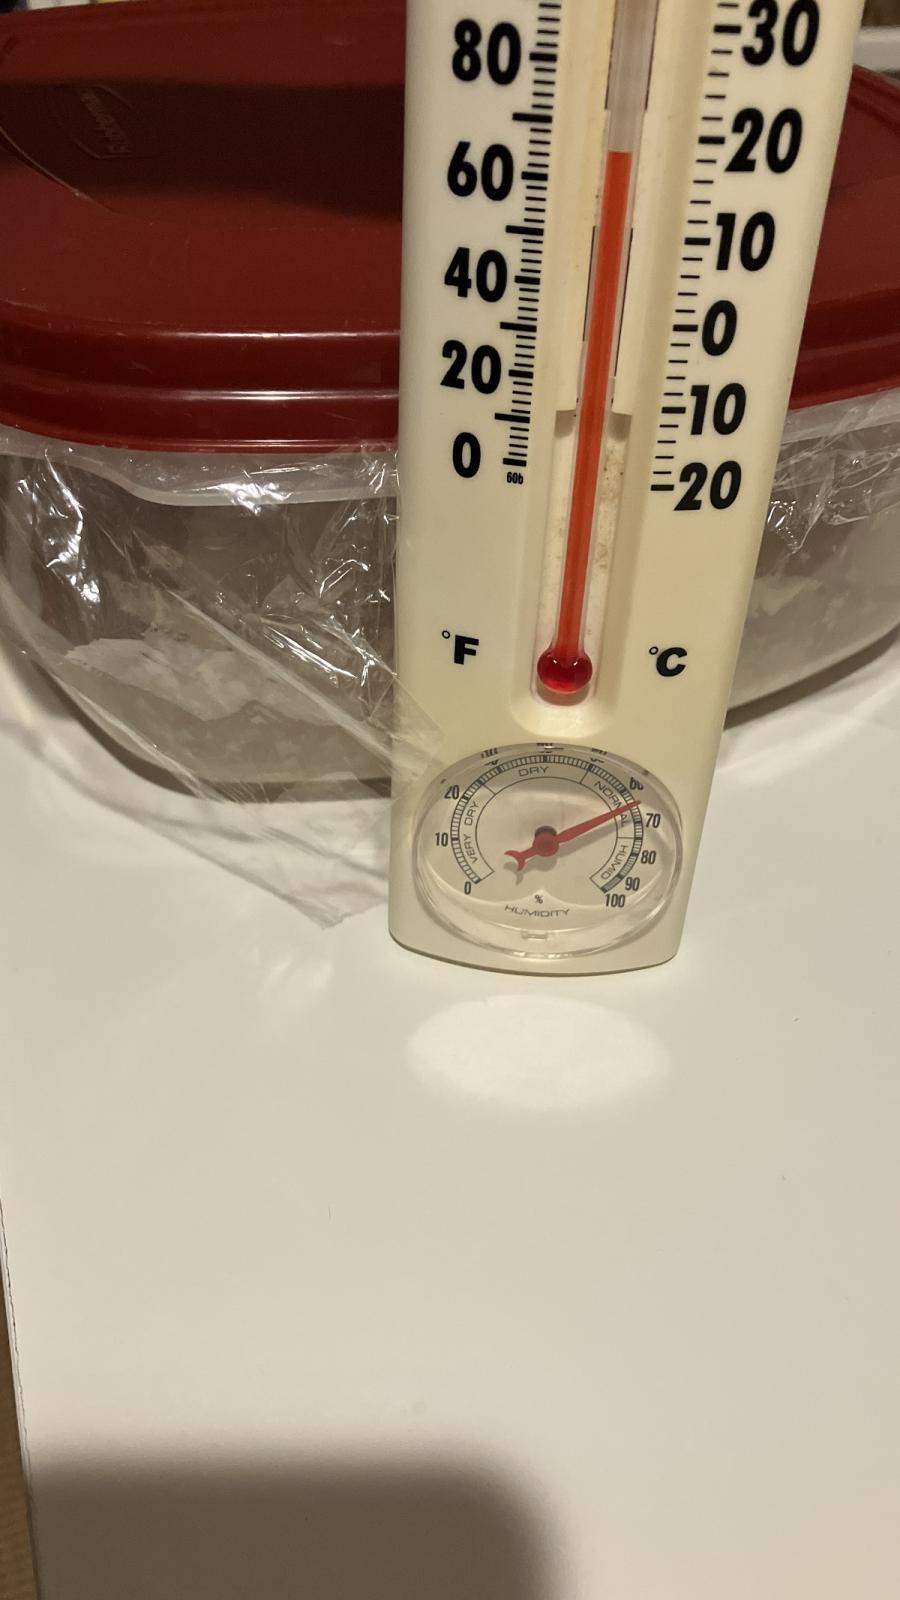
The dough is quite stiff as is customary with these steamed buns so mixing my hand and kneading on the countertop are the way to go.  The dough comes together very quickly.  Because there is baking powder in these, the pH data is interesting.  Not surprisingly they start out with a high pH of 5.62 and at the time of steaming only dropped to 4.86.  Even the delta of only 0.76 is very low.  Some of that is definitely the baking powder but I also used a stiff sweet starter as well.  This kind of bread shouldn’t have a sour tang and these definitely did not.  In the future, I would increase the dough per baozi to 60-65 so I can get more filling into each.  As well, I would increase the final proof even more, these were steamed at 112% of rise for the second batch, I’d say I can go up incrementally to 120-125% next time as the dough performed well.

I did not use the optional IDY in this bake.

For 12 Baozi 

Make the Filling 


Filling Ingredients

  • 4 tablespoons chicken stock
  • 2 tablespoons hoisin sauce
  • 1 tablespoon oyster sauce
  • 1 tablespoon sugar
  • 1 tablespoon Shaoxing wine (or dry sherry)
  • 1 clove garlic , grated
  • 1/8 teaspoon five spice powder
  • 2 tablespoons cornstarch
  • 1 heaping cup (180 g / 6.5 oz) homemade char siu , diced (or store-bought char siu) 1.5 cups is better 
  • While the dough is resting, combine all the filling ingredients in a small pot except for the diced char siu. Mix until the cornstarch is dissolved fully.
  • Bring the mixture to a boil and cook until thickened, so you can draw a line on the bottom of the pot with a spatula, about 1 minute. Take the pot off the heat and let the mixture cool off. Once cooled, add the diced char siu and mix until it is evenly distributed.


Overnight Levain

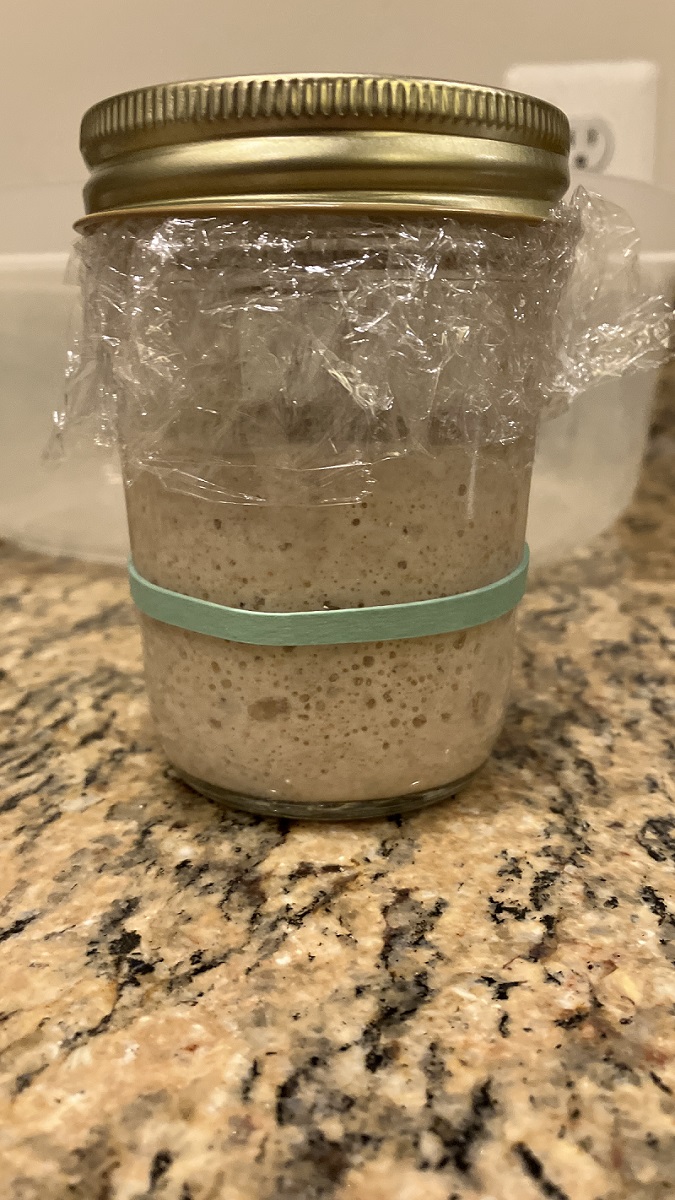
In a large jar, combine all purpose flour, water, ripe sourdough starter, and sugar. Cover the jar loosely and let the levain ripen overnight at warm room temperature (I keep mine around 76°F to 78°F).


Tangzhong

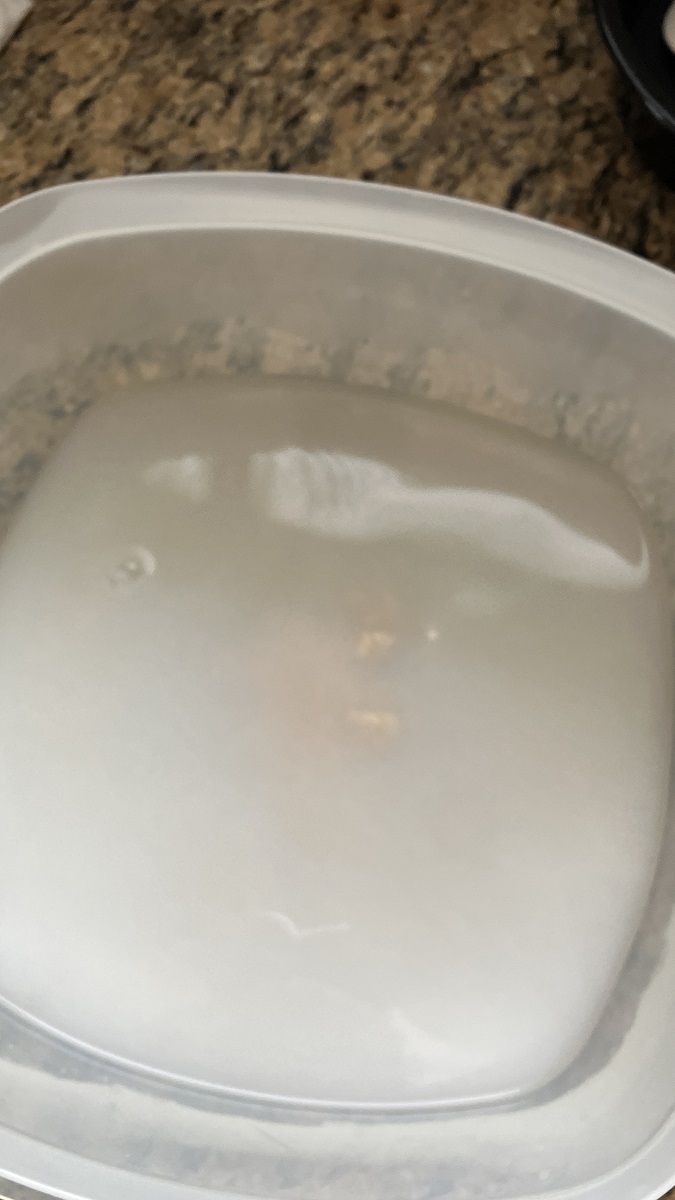
In a sauce pan set on med heat with about 1.5 cm of water, place the bowl of your stand mixer creating a Bain Marie, whisk the milk and flour until blended. Then cook for several minutes until thickened, stirring regularly with a spoon or heat-resistant spatula. Let cool.


In The Morning

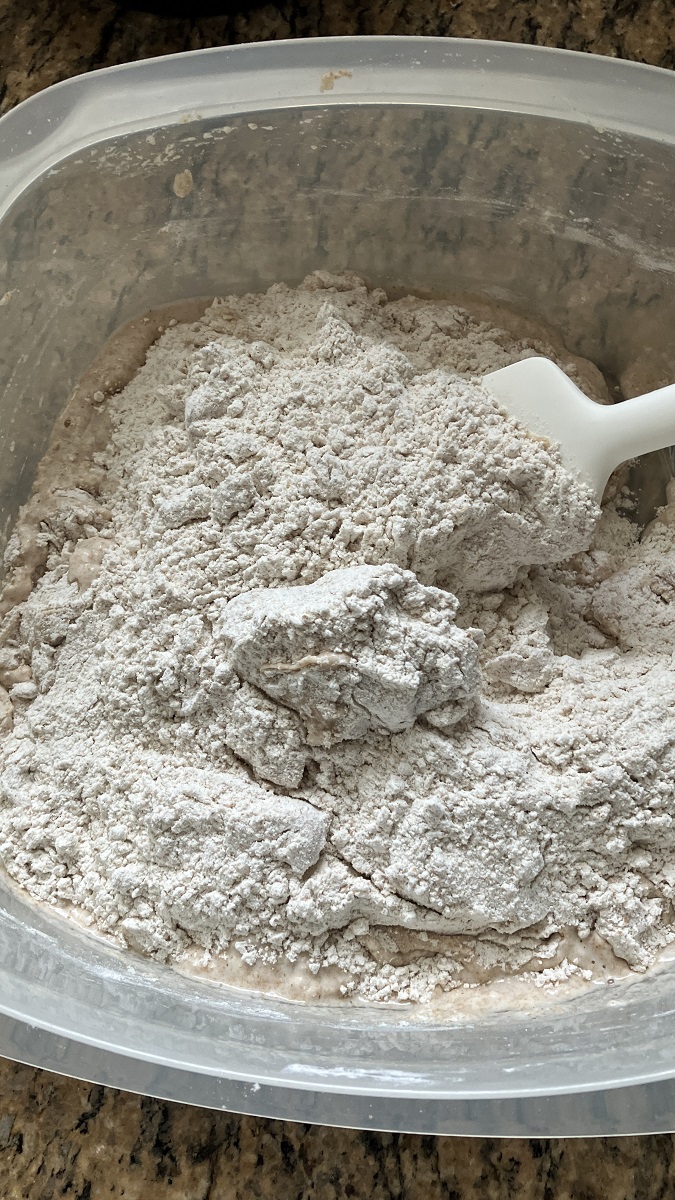
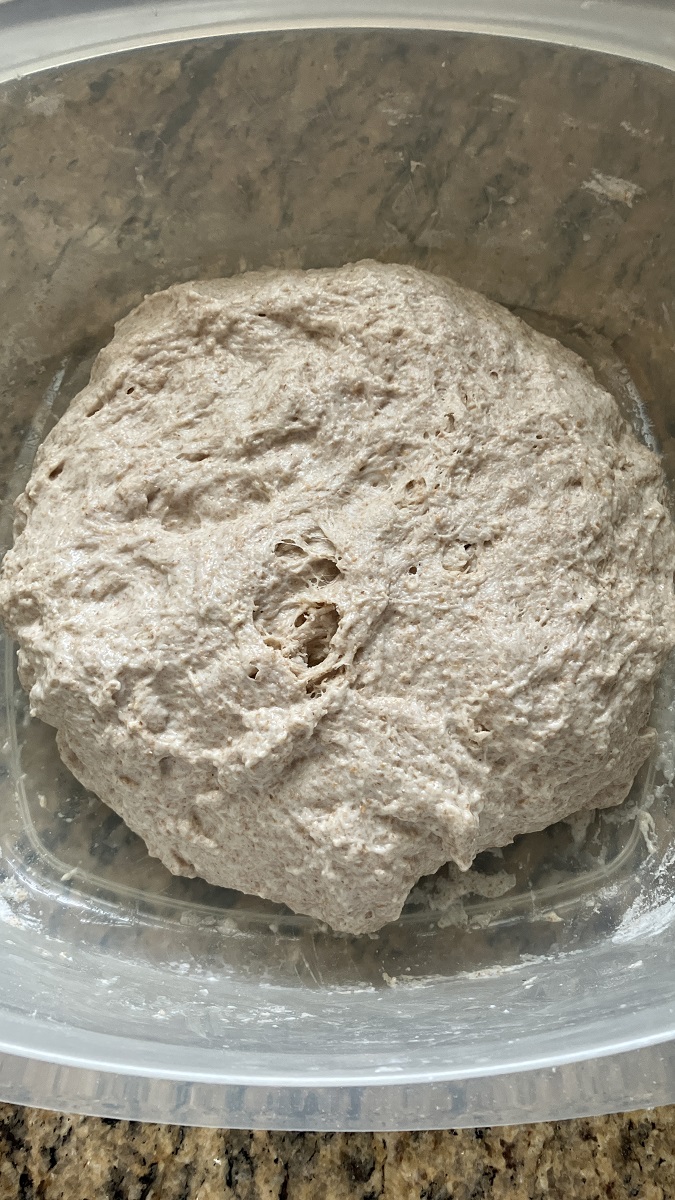
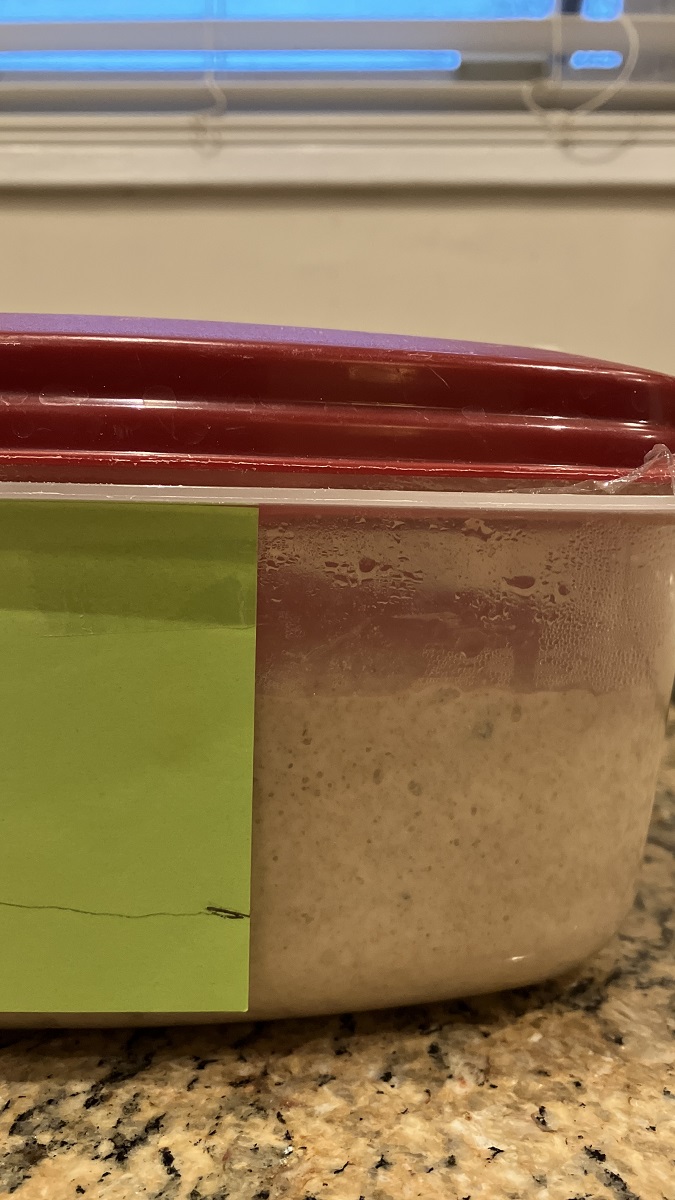
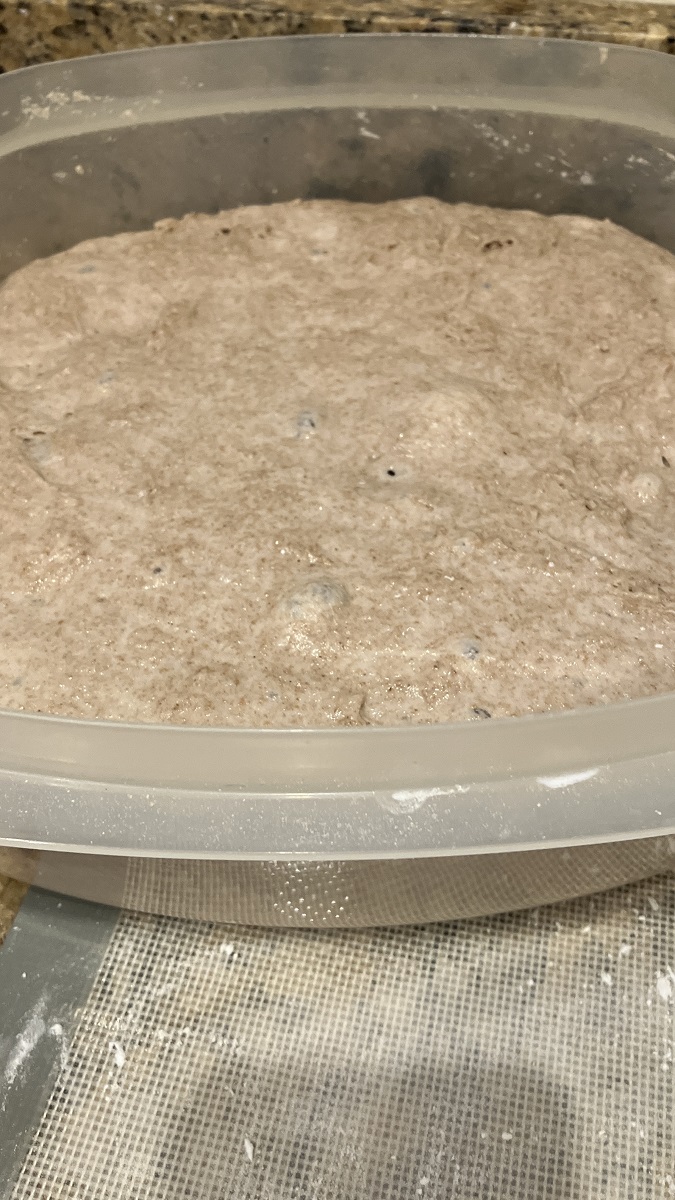
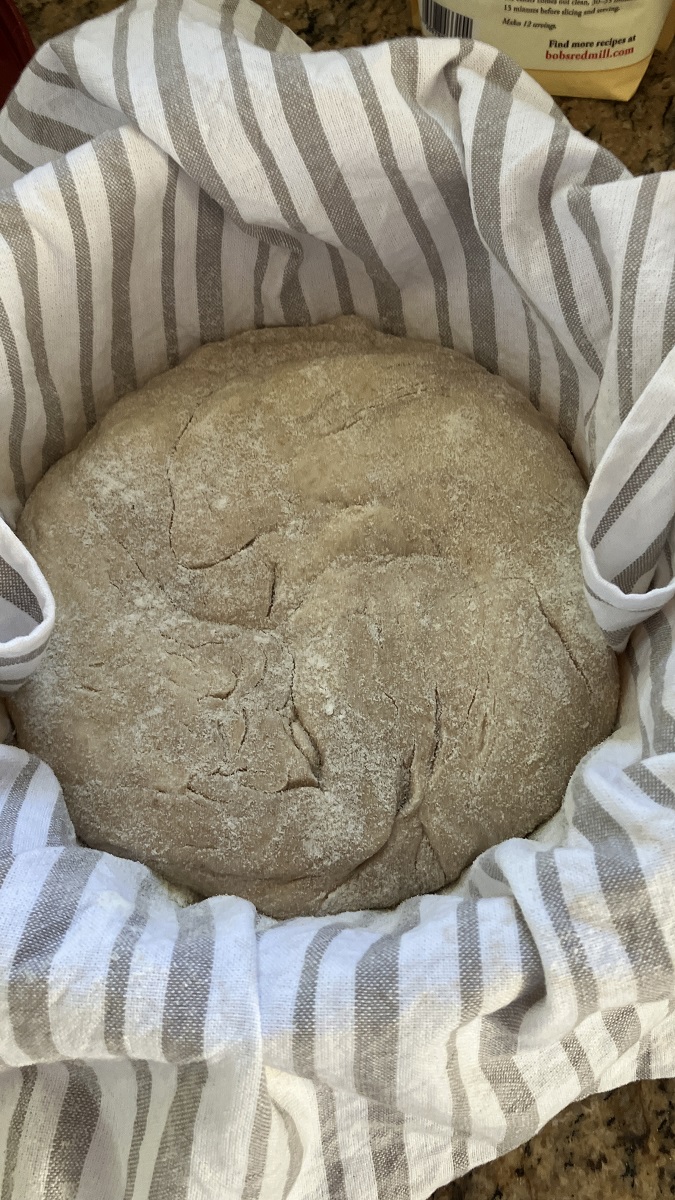
In a mixing bowl, add the Tangzhong, water, milk, sugar and salt, mix to dissolve.  Add the stiff sweet levain and using a silicone spatula, cut the levain into small pieces.  Add the baking powder, cornstarch, oil and flour.  Mix to form a shaggy dough.  Allow to rest for 10 mins.  On your countertop knead the dough until good gluten development, this is a very stiff dough so I prefer to knead it manually to spare my mixer.  Spread about half of the mashed sweet potato on top of the flatten dough, fold and then repeat with the remaining mashed potato.  Knead the dough on the countertop until the mashed potatoes are well distributed.  Remove some dough for aliquot jar to follow rise.  Shape into a boule and rest in a covered bowl at 82°F until the dough has increased by 40%.


Prepare twelve 4” parchment squares.


Remove the dough to the counter and divide into 12 equal portions shaping each into a tight boule.  Allow to rest for 10 mins.  Roll out the dough into a 5” circle thickest at the center rolling towards the center of the circle. Flour the back of the dough circle then place about 45 g of bbq pork filling in the center.  Form into a bun pleating the dough together at the top.   Place on a 4-inch square of parchment paper.


Cover the filled bao with a damp cloth and place in a warm place and allow them to ferment until they pass the poke test.  Using an aliquot jar they should reach about 100% rise.


Prepare your steamer setup and bring water to a boil.  Working in batches if necessary, arrange buns in the bamboo steamer spacing 2” apart.  Once the water is boiling turn the heat down to medium.  Steam over boiling water for 10 minutes.  Turn off the heat and leave the buns in the covered steamer for 5 more minutes to prevent collapsing.  (I left them in the steamer and on the same stove element turned off). Do not lift the lid of the steamer, doing so will cause a sudden drop in temperature that can cause the buns to collapse or wrinkle or dent.  Remove the buns from the steamer and allow them to cool for 5 minutes before serving.  


Buns can be kept in an airtight container (a resealable bag works great) at room temperature for up to 4 days or in the freezer for up to 3 months. Room temperature buns can be reheated in the microwave for 15 to 20 seconds or steamed for about 2 minutes, until soft and warmed through. Reheat frozen buns by steaming until soft and warmed through, 10 to 15 minutes.


For those interested, the aliquot jar shown in the photos is made by Billie Olive and it is well designed and easy to use.  I have always found using one helpful when adjusting my bakes when repeating a bread and wanting to increase or decrease the degree of fermentation.  


I am doing a giveaway with Billie Olive for one of these aliquot jars on Instagram this weekend.  If you’re interested head over to Instagram and follow me bread_md and you’ll be able to enter the free giveaway for the aliquot jar.  I will be posting the giveaway tomorrow and it will only be open for a short while.

Here’s the link to my Instagram giveaway.


My index of bakes.

pain_de_remesy's picture
pain_de_remesy

A nutritious and delicious bread based on the writings of Christian Rémésy. In the same vein as respectus panis but Rémésy deserves a bread named after him given his outsized influence in the research area of bread nutrition. This bread is typically very dense (which is healthier because lower glycemic load. See:Parameters controlling the glycaemic response to breads.)

For the loaf shown, 800 grams flour, 60% strong white bread flour, with the remainder whole wheat flour. Spelt can also be incorporated as part of the whole wheat fraction, Einkorn as part of the white fraction. This combination of flours should approximate Type 80 flour. Seeds can be added to the flour and incorporated for the fermentation.

66% hydration

1-3% sourdough starter (start with 1% and experiment)

1% salt

Incorporate and do a very short hand mix and knead.

Ferment for at least 20 hours at between 15 and 20 C.

Shape and proof a bit if needed, then bake.

A few more details: In cooler temps I typically warm the water to about 40C and then add the starter to that, mix and swirl around, then let sit a bit. Then add salt to this mixture. The salt helps to regulate the fermentation. The flours should be mixed together then added to the wet mixture. Once incorporated, use a hand for the short knead.

It may be towards 20 or more hours before you see the dough double-ish in volume.


 update, a recent seeded loaf baked in a loaf pan:

With pumpkin seeds and dates:


 With rye flour (18%)

Benito's picture
Benito

I was disappointed in my last set of baguettes so had to bake another set.  With this set, I was using this new AP flour again and based on the last set decided to go with 76% hydration and do hand mixing so I could better assess how the dough felt.  I also didn’t do any cold retard because the dough in the last set really resisted stretching as it was still a bit cold during shaping.

I have only two baguettes to show this time, one of the shaped and fully proofed baguettes slipped off the transfer board and hit the edge of the countertop and stretched out of shape degassing.  I didn’t bother to bake it.  This dough didn’t resist stretching and in fact I barely had to so any stretching during shaping.  In fact, they ended up a bit too long for the cookie tray that I use to support the couche and the pointy ends ended up sticking to the cookie tray and I had to wrestle them off.  Despite this I am quite happy with this bake.

Another thing I have been exploring is whether more gluten development can allow longer fermentation and still retain the grigne/ears of the baguettes.  I’ve increased the slap and folds up to 260 this time and I really pushed final proofing to a total rise of 50% far greater than what was my standard when I first became adept with baguettes.  Back then I tried to get the baguettes in the oven by 30% rise so 50% is a much more.  The ears were retained and the crumb looked decent.  I think I can push a bit more to 55% with this flour and this degree of gluten development.

gavinc's picture
gavinc

Sourdough with 10% Lupin Flour – test bake 1.

Date baked: 23rd April 2023.

First, a thank you to Debra Wink and Derek Hughes for their valuable advice.

This is a sourdough with 10% lupin flour. Lupin flour does not have any gluten, so experimentation is advised starting at a low per cent. The flour has a yellow colour and has high nutritional value.

I mixed a 1500-gram dough by hand for good gluten development @ 70% hydration. Bulk fermentation took 2 ½ hours with two folds at 50-minute intervals. The dough was shaped into two 750-gram batards and proofed in bannetons for 2 hours @ 24 degrees C. The dough felt light to the touch and scored each longitudinally.

Baked for 43 minutes free-form on stone. 238C for first 15 minutes with steam; 215C for 28 minutes. The oven spring was good and produced a nice ear. The loaves were visually appealing with a golden crust. The weight against volume indicated a light loaf.

The crumb showed a good irregular pattern with a cell structure that was not gummy. While a little tighter than my normal sourdough, was still very acceptable. The crumb colour was a light yellow consistent with the amount of lupin flour.

The taste had a nice nutty flavour that was slightly sweet with a lingering finish and pleasant mouthfeel. My wife commented that it had a wonderful nutty flavour nicer than my normal wheat version.

I will bake this again and will certainly go into the baking rotation.

Benito's picture
Benito

I still have some rhubarb from a friend’s farm from last year frozen in my freezer.  We are hosting a dinner party for neighbours tonight so wanted to bake a pie with a pate brisée pastry crust using the rhubarb.  I couldn’t source any sour cherries so decided to try a spiced peach rhubarb filling for the first time.  I recently purchased a Fat Daddio’s pie dish.  I have always used glass pie dishes because I could see the crust and tell if it was fully baked.  The problem though is that the glass doesn’t heat as quickly as I’d like even with the pie baking on the baking steel on the lowest rack.  This metal pie plate should transfer the heat sooner to the crust so hopefully these juicy filling pies will have a crisp and non soggy bottom.  Another benefit of this pie plate is that it is a bit deeper so more fruit filling is a good thing in my book.

You will need to have a double batch of your favorite pate brisée pastry recipe for this pie.  You can find the one I use in my index here.

Peach Rhubarb Filling

  • 2 1/2 cups sliced rhubarb (about 1/4 in. thick)
  • 2 1/2 cups peaches (peeled and sliced)
  • 1/4 cup brown sugar
  • 1 cup granulated sugar
  • 1/4 cup cornstarch
  • 1 1/2 tsp cinnamon
  • 1/8 tsp allspice 
  • 1/4 tsp salt
  • 3/4 tsp vanilla


Put frozen fruits in the dutch oven to defrost with ½ cup of granulated sugar to help macerate.


Later add the other ½ cup of granulated sugar to the ¼ cup of cornstarch to loosen the cornstarch and remove the clumps.  Then add the ¼ cup brown sugar and all the spices and salt to the liquid from the fruit. 


Will partially cook to thicken a little bit.  Brought up to 155°F so a bit thickened but not fully thick.  Tested the liquid by removing some and microwaving it and it does fully thicken well.


Once the bottom pastry is rolled out and transferred to the pie plate cover and place in fridge for at least 30 mins and up to 3 hours allowing the butter to firm up and the gluten to relax before adding the filling and topping with the top pastry.


When ready to bake pre-heat oven to 425°F baking at this temperature for 30 mins on the lowest rack on a baking stone or steel.  Watch the edge and protect it from over browning.  


After 20 mins shielded the edge and continued to bake at 425°F for another 10 or so mins then shielded the whole pie with a cookie tray and decreased temperature to 350°F and baked until the bottom crust was nicely browned another 60 mins or so. 

My index of bakes.

Benito's picture
Benito

I am definitely out of practice shaping baguettes.  Looking at my index I see it has been almost exactly 6 months, much too long.  Based on the three baguettes I baked you can see the improvement with the shaping from the first to the third.  Another variable is that I couldn’t find my preferred flour that I have been using for baguettes so had to use a flour I haven’t used for baguettes before.

This bake I wanted to further test the idea that with more gluten development I could final proof further.  In the past with little gluten development I found the sweet spot for proofing at time of bake was a 30% rise in total.  This allowed me to get an open crumb and decent ears.  This time I actually used my Ankarsrum Assistent for dough development and a couple of folds.  The dough went into cold retard when the aliquot jar showed a rise of only 20%.  The following morning the dough was pre-shaped, shaped and allowed to rise to 45%, so much much more than what I used to do.  Based on the third shaped baguette I’d say that my theory works.  I’ll need to try to get another bake this week of baguettes to get the rust out and confirm my findings.  The one baguette which looks like a snake that swallowed a small animal probably had a large trapped air bubble I’m guessing, anyhow suboptimal to say the least.

Overnight Levain build ferment 75°F 10-12 hours.

In the morning, to your mixing bowl add 353 g water and diastatic malt 5.8 g to dissolve, then add 527 g AP flour to combine.  Briefly mix in your stand mixer until there is no dry flour, then autolyze for 15-20 mins.  


Add the bassinage water to the stiff levain, mix to loosen.  Sprinkle salt on the dough.  Then spread levain on the dough.  Mix until the dough has at least moderate gluten development.  This was very quick in the Ankarsrum Assistent.  Release the dough to the countertop and do a few folds to smooth out the dough.


Bulk Fermentation 82*F until aliquot jar shows 20% rise.

Do folds every 20 mins doing 2 or 3 folds stopping when the dough is showing good strength.  Place in 3°C fridge overnight.


Divide and pre-shape rest for 15 mins.

Shape en couche with final proof until aliquot jar shows 45% rise then (optional) cold retard shaped baguettes en couche for at least 15 minutes for easier scoring. 


Pre-heat oven 500*F after 30 mins add Silvia towel in pan with boiling water.

Transfer baguettes from couche to peel on parchment

Score each baguette and transfer to oven, bake on steel.

Bake with steam pouring 1 cup of boiling water to cast iron skillet dropping temperature to 480*F. 


The baguettes are baked with steam for 13 mins.  The steam equipment is removed venting the oven of steam.  Transfer the baguettes from the baking steel to next rack completing baking directly on a rack to minimize the browning of the bottom crust.  The oven is dropped to 450ºF but convection is turned on and the baguettes bake for 10 mins rotating them halfway.  The baguettes are rotated again if needed and baked for another 3 mins to achieve a rich colour crust.

My index of bakes.

plevee's picture
plevee

 Very slightly gummy even though I baked it to 107F. The crust hasn't flown and it is absolutely delicious. Soakers were black sesame, flax, cracked rye and added toasted sunflower seeds.

Patsy

albacore's picture
albacore

I recently bought some French Foricher T65 flour whilst shopping for some other flours.

I hadn't got a particular recipe in mind when I bought it, but then it became obvious that the first thing to try was an authentic "pain au levain".

I became rather interested in the original method for making pain au levain which dates from 1778 (or earlier) as detailed in Parmentier's "Le parfait boulanger, ou Traité complet sur la fabrication et le commerce du pain (Éd.1778)". The method is known as "travail sur trois levains", or work on three levains.

Basically it's a way of building up a levain in 3 stages and is similar in concept to the German Detmolder  Dreistufenführung method for rye bread.

Anyway, I digress! The first thing I needed was a starter. Although I already had one, it seemed appropriate to make a proper French one - ie French flour, low hydration. A book from M. Calvel provided a suitable method, as detailed in this table:

I shrank the quantities down as detailed here and had a working starter in about 3 days. An interesting starter - 50% hydration and salted from the start (to reduce proteolysis).

So I went to on to make the pain au levain; sadly it wasn't that good! - rather bland and with a tight crumb.

I know it's heresy to say it, but I've decided I don't actually like T65 flour very much! It makes a sticky dough and I think it's too weak for sourdough use - best results I've had are with a poolish. Maybe it's just the brand I've used (though it's well respected....).

On the other hand, I've ended up with a great starter! - it has become my main starter and gives great rise and good flavour. Previously I could see my loaves spreading when I put them in the oven, but not now.

I usually do 3 levain builds - 4pm (1/1/0.5 25C), 10pm (1/6/3 25C) and a "booster" at 8am the morning after (1/1/0.5 29C), all salted at 1%. I do the builds with strong Manitoba flour to minimise gluten degradation.

I use the levain at about 33% of main flour with a minimal autolyse of about 10 minutes.

Not much to see in a starter (apart from those overflowing jar photos....), but here is mine when I'm taking a bit out to use - peeling back the crust (a bit like a bound lievito madre):

Only 30g in that jar - my normal weekly refresh.

And here's a loaf I made recently with this starter:

Lance


plevee's picture
plevee

From Maurizio Leo's The Perfect Loaf. Baked this morning - will slice tomorrow to see if I've avoided the dreaded flying crust

Pages

Subscribe to Recent Blog Entries